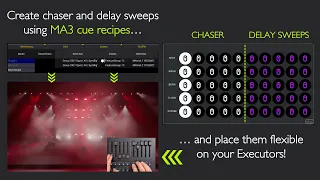
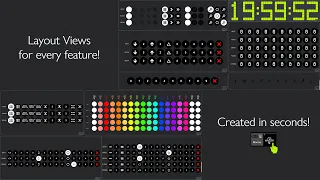
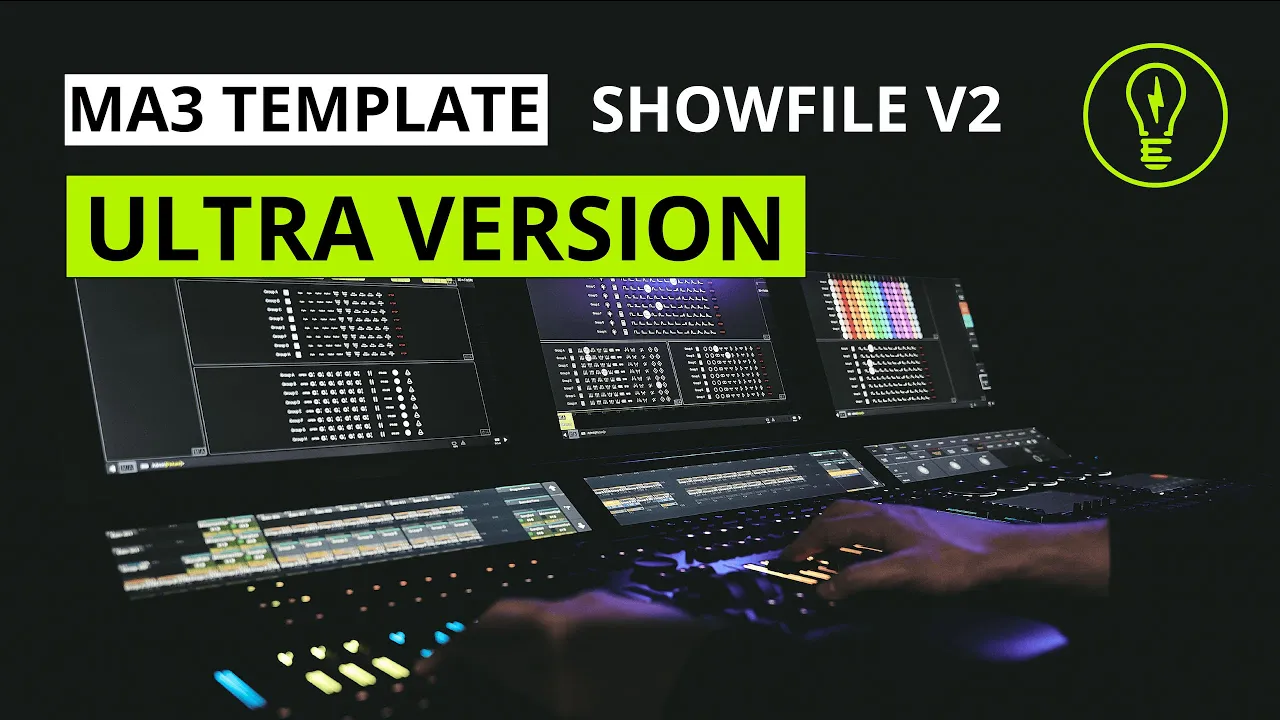
welcome ma3 community in this video we present the allnew ultra version of our ma3 template show file wi2 this includes a lot of powerful new tools like our virtual pre-select layouts which allow you to enter a special virtual mode for all the layouts in the show file where you can then pick new content and fire it whenever you're ready and along with that we have integrated the entire new page per song and time code section to allow you to structure your content along different songs for pages and sequences easily and also handle time code and
to make it even better we have built new store macros which allow you to store the Basking content from the show file into sequences keeping all the recipes alive so let us directly start with our new virtual pre-select layouts as you have seen some seconds ago there's now the possibility to switch into a virtual mode where all layouts get a red background color this red color always indicates that you're currently in the virtual mode and selections that are done in here will not directly affect your life output to work with the virtual pre-select layouts we
have a tool set of five different elements for you the first one is our take button take will always take the entire virtual content to your life content and consequently to your life output to give you an example here I will select a white color for all of my fixture groups and afterwards hit the take button and as you can see the color switches to White the cool thing here is that it will always make use of the fade time that is set in the show file so for example if I set this fade time
to zero and switch back to Red this will be a hard switch without a big fade time so let's continue our journey with the second button which is our combine feature the combined feature comes in really handy if you're basically satisfied with your life look but want to make only small changes so for example uh currently we have a lot of things going on in our virtual pre-select layouts and the first thing we want to do is to clear them therefore you can hit the X icon so button number five after this is done we
uh think about the changes we want to make so the first thing we want to do for example is to put our spots on white give them maybe uh a tight zoom and that's basically it if I would now use the take button it would just put the spots of group a to white with a tight Zoom but the light output would be at zero for all of your groups and there would be no other color so to prevent this there's the combine feature if we hit combine we will see that only the color will
change and the zoom level so let's try this out there you go you got your spots as beams in white if you now want to work on this look further button number three and button number four comes in place button number four is a capture button it will basically do the opposite of the take button so it will put your life output to your virtual layouts let's try this out I will hit it and afterwards you will find the same settings in your virtual pre-select layouts now I can modify them for example we will put
all our fixtures uh let's do uh a deep purple and uh leave our spots on white and after this is done I can use button number three which is a swap and it will basically do the same of button number one and four at the same time so your virtual layouts will become the live ones and the live ones will become the virtual ones so basically you can just quickly hop between two different looks which live in your life and virtual layouts after you know this section down below let us focus on the upper section
which we call impact looks and which is even more powerful because what you can do here is you can store the content from your live or virtual pre-select layouts into slots to work with those looks you get another set of six buttons up here they have the same functionality like the buttons down below but they will always work in combination with the look that is currently selected and always refer depending on the icon style to your life or virtual layouts if they have this little red Corner they will always capture take or combine a look
to or from your virtual layout and if they are just with this black style they will always refer to the life layout as an example we will now store two different looks the first look that we want to store is the look from our live output and we will just modify it slightly to an entire blue look before we store it then we select the storage slot that we want to use I have already labeled this one blue and I will show you later how this can be done after the slot is selected simply hit
the capture button up here as you want to capture this look from your life layout as a second look we will capture the look from our virtual layout put this to an entirely red look select the slot hit this capture button down below here because we want to capture it from our virtual layout and that's it you're ready and done and can now recall this uh looks whenever you want to show this real quick quick I will move back to my life uh layouts put all my fixtures to a white color and maybe set also
another positions here after this is done simply select the look you want hit the take button and you will get this look back on stage taking back a look from a storage slot to your life output is probably the common understanding of a playback system but it gets even more powerful if you take those look to the virtual layouts because you can then edit them further blind for example if you know that you have a look which is a good starting point but not 100% the look you want so think of a situation where your
blue look is a close call so I will just select it and take it to my virtual pre-select layouts and for uh my situation right now I need this one to be in yellow and I want all my spots to have a very tight beam after I have modified this now I could for sure directly take this look to life using the take button down below or I could maybe just save it for my intro show later on and use the capture button with this little uh red corner so now it's in there and I
can simply play it back to my life layout and switch back to red and so on so I think you got the basic principle before we close the section of virtual pre-select layouts and impact looks let me give you another three tips related to this topic the first one is that you can easily assign those buttons also to your Hardware layout therefore I have prepared a new view with my X keys to do so use the standard assigned workflow of ma3 so enter the assign keyword by for example hitting on assign key then select the
button that you want to assign and afterwards just click the executor or X key of your choice in that way you can basically assign everything to your X keys for example you take the combine the Swap and capture or let's do also the clear here and for sure it makes sense to get a quick access on the switch between life and virtual layouts but maybe it makes also sense for you to get a quick access on a slot to select this real quick and fire it back directly to your life layout nearby as mentioned some
minutes ago there's a way to label those slots easily and this can be done with our new label macro this lives in the macro pool of your show file you can for example find it here starting on pool item 501 for this video I have uh simply put my macro pool up here to get a quick access on them working with this label macro is really easy simply hit it enter your uh new name let's do a YouTube for this uh test purpose hit please or uh the enter key on your keyboard and afterwards just
click a layout element for example this slot and as you can see you will get this label right there the cool thing about the label macro is that it can label everything that lives in a layout view so you can also use this for your override section here let's try this out we do a YouTube 2 for example hit please and replace maybe our drum position and as you can see it labels also the override section you can also label other things in the show file uh with this tool maybe if you want to make
a small note for one FX that looks quite good in your opinion as you might have noticed there is a second macro in this area called dabel and I think this is quite self-explaining hit it hit a label and it is gone that's it if you don't feel like hitting a storage slot first to select the look and then hitting a second button to take this look to life we have another solution for you therefore move over to the macro pool of your show file and you will find starting with pool item 421 direct fire
macros those will directly take a look to life without the need to hit another button so you could also assign them to your Hardware layout to get a real quick access on all your different looks tip number three that I want to give you is related to our new Tri State concept which we have introduced for intensity control and also other elements for example like our new strob control section up here to show this more in detail I have prepared another VI which includes our sequence sheet and a larger scale version of our iFix and
intensity control layout in the previous version of our show file we had only two states for intensity control the white state which indicated that there's a sequence actively playing back uh dimmer on values for your corresponding fixture group and the black icon which indicated that there's no playback at all so the sequence is off now we have this uh third state in the middle which we call Active off and if we simply select uh a sequence using the select command uh and look at this closely in our sequence sheet then we can see that what
we do by clicking on this icon here is basically hopping between dimmer on and dimmer off but both with active playbacks from this sequence to off it entirely we have to use the off command uh for example using an off key and hitting it then you will get the entirely black icon back again and the sequence is off during the operation of the show file there's basically no need to get back to this state but the state of active off is relevant for the work with virtual pre-select layouts as an example we set intensity to
on again for our spot group a then we move to our virtual pre-select layouts and think about a scenario where we want to use the combine function to set the intensity of Group B to on and group a to off therefore it is not important that you set B on and a to the active off State just keeping it on the uh inactive off State won't change anything if you use the combined function if I hit it now we will get the result we wanted so wash of Group B are active spots of group a
are inactive with this little hint on the active off state in the show file we want to close the section of virtual pre-select layouts and impact looks for this video and move on to the brand new page per song and time code section therefore first we will have a look at a console to give you a brief overview on all the functions what you will get with the new page pong and time code tools is basically an intelligently built view to manage your song along with some macros to handle playback and organize and structure all
of your songs and their corresponding content some some tools are preconfigured on your pages to quickly hop between previous and next song activate and deactivate time code another view just showing the time code view um to allow you to easily store things uh on your timeline and a bunch of uh additional store macros which are there to take your basking content from the show file into sequences keeping the recipes uh alive so that you can easily work with the content creatively from your basking part and use it for page per song or time code shows
before we jump into it please note that you might get the best experience when using a light console or a similar setup so a setup for example with two screens and also some Hardware elements the reason for that is quite simple you will probably need quick access both on this page per song view maybe an additional timeline to record things on your time code and also those special stor acros so if you're not using a setup like this please be familiar with arranging views and also assigning macros to some Hardware Keys okay so let's jump
into it and start with our page pong view therefore I will navigate to display number two of my onpc system the reason is that I want to show you that you can find those views the time code and Page per song view which is the magical one of those two directly here assigned to your View Bar if you move to display one so maybe in the scenario that you're working on a laptop or having an onpc system with just one screen you have to scroll down in your View Bar and you will find the same
views also here starting with uh pool item 11 so here you will also find the time code and Page per song view at the very top of this view you will find the main song macros they can be used to navigate between the different songs so if I hit song two I will jump to the corresponding page and also select the corresponding time code item along with that the show file will also navigate you to a certain sequence range in here if you watch closely we are now at pool item 9021 here and if I
hit song three we chump to sequence pool item number 9,041 so you will always get a range of 20 sequences to put in your content related to a certain song The macros in this second row here are also there for navigation the first three of them will allow you to navigate between your different song ranges and the last one will always bring you back to the currently selected song the macro next to it will basically do the same thing as it calls this macro number 255 and updates your view but in addition it will also
select a corresponding selected page and also call this view actively to your screen too if you're not happy with that because you may be working with just one screen or you want it on screen one simply change this behavior in this macro by default we have also configured this macro to live on your X key you will find it here return to PBS the next line of macros gives you some Global control of all will of all your sequences and all your time codes for all of your songs at the same time go all will
basically do the inverse thing but as going all your sequences doesn't make sense it does not go your sequences it does simply go your time codes and also do a top command on them which means that they are at their starting point of their timeline let's skip this Auto of enabled macro and first look at our update song names macro this is there to give you the chance to easily name Pages uh and time codes according to your song title therefore simply addit the title of the main song Macro for example let's do a test
here and maybe uh YouTube song there after you have set the song names simply hit it and you will get pages and time code elements named in the same way macro number five allows you you to set a time code offset between your different songs this is cool to ensure that you get another level of security in terms of playback due to different positions on your timeline after hitting the macro you can enter your value uh in minutes and I will do 15 minutes as this is quite a reasonable value here in my experience after
confirming this you can check the different time codes uh using the edit setting command just hit an edit key twice then we will see that song one starts at zero Song 2 starts now at 15 minutes song 3 starts at 30 minutes and so on you might have noticed in the background that there are some further macros but they have a different color and this simply indicates that they are always related to a specific song So in green you will find global control macros in Gray you will find macros that relate to the current song
so now we are still at song 3 and they will just keep their naming with S3 for song 3 and if I move on you will get the same macros for your song four those two macros here will basically do the exact same thing like the global off and go macros but only related to song five previous and next allow you to uh jump to the next or previous song and clear will clear the entire song this includes sequences also playbacks assigned to the page and uh other arrangements that are made so you will get
an entirely empty song with our initial setup so for example those basic macros off and go previous and next and the main sequence also assigned to the first executor of that page in combination with next and previous also Auto off will get relevant Auto off enabled means that you will automatically off sequences uh of the s you're jumping from when using next or previous if you hit this macro it will change its labeling and tell you that it's not disabled or enabled let's do a quick example here therefore I will quickly store a sequence uh
in the range of song six and go it after the sequence is active I will use my next uh macro to navigate to song 7 and then we can simply hop back and as you can see the sequence in here was deactivated on the last four macros down here there's not much to say these are just a simple way of setting the time code slot for your song at this point of the video please note that this video does not claim to be a full tutorial on how to time code your show this would take
way longer to explain and you need the basics and fundamentals of ma3 and time coding if you want to use this tool effectively we are offering you a tool but we cannot handle support in basic questions on how to time code and so on but for sure we will show how it basically works and I think you should be able to figure it out as there are many YouTube videos out there showing how to time code before we come to the fun part and store some looks from our basking content uh to the song Pages
using the store macros let me give you another important advice the navigation system in the view is based on lure plugins in the background of the show file this means that you cannot fully configure this view freely you can try for example to delete some elements in here and bring in some new ones let's do for example this and then simply Store The View as usual to the PPS view slot or view button right there as you will see right here the navigation is still alive but we do not guarantee this Behavior especially if you
delete a lot of elements in here and try to entirely redesign this view to show you all the powerful store tools I have created a new view where we have our playbacks so our uh executor section uh of the current page as a sequence sheet and those stor macros along with our X Keys the first thing we want to do is build a new look uh using our basking layout therefore I used the macro on my X key to jump back to the buking page and buking View and then quickly build a new look let's
do a look in full blue maybe with those elements our ions and let's do another group of moving lights with a fan out position so this one we don't need that and that's it we want to use this look as a starting point after this is done we jump back to our view with the star macros and our playbacks for song one so we're currently at the page for song one with those store macros I have now some options to capture this newly created basking look the first option capture all will basically capture the entire
basking look to a sequence or a executor that is selected after clicking this macro so let's try this so I clicked the capture all macro and directly afterwards a sequence or an executor of my choice capture all will always use the next free Que in a sequence to store your look so I hit it and after that we will find all the content from our basing layer out in a magical way in this q1 let us directly store another look into that sequence to show you some functionalities of those different store macros therefore I move
back to my show layout and uh I want to now start the exact same look but containing a red color instead of blue then we switch back and we use this capture all macro again hit it and afterwards the same executor in theory this is fine but if you want to use sequences in a meaningful way uh using that tracking feature it's not a good idea to store all those dimmer values and so on again into this Q2 because they are already existing in q1 and therefore capture div comes in place so let's try to
capture the feature therefore we will move back to our show layout switch again back to our blue look and uh afterwards hit capture div and our executor of this sequence after that you will find a Q3 in here which contains only the blue color values so only the content between your last start basking look and the current basking look so simply think of it like starting an empty new record using capture all and then afterwards being able to capture only the difference and the changes that have been made between using the capture all and the
capture div macro okay so I think it's time for testing this new sequence here to do so I will first deactivate the entire buing sequences in the show file therefore we can use this macro after this is done I hit the execute to go and as you see the blue sequence or our blue look is back and we can jump through it to red and afterwards to Blue again so we have successfully stored the content from different sequences of our basking layout into one and that's pretty cool because you can now use all the Basking
content as a creative starting point to make this tool even more versatile the entire content is stored into recipes which is indicated by this little yellow icon here to check those recipes simply move over to the mask uh and allow uh show steps and show recipes after that you can check the recipes of those uh single Q parts so you will find in qod number one of Q3 uh the selection group one or group a add its feature group color preset blue so basically each and every Q part does one thing putting one group to
a special value for example a color value a Dimo value or a fan so position value after we have understood the basic principle of capturing busing looks to sequences let's focus on those other macros here start diff will not directly store anything it will set a new Baseline when hitting it for your capture diff macros that means after hitting it capture diff will refer to the changes that are made in your basking layout after hitting this macro and not after storing a last look so let me give you an example therefore we switch to our
show layout and uh set all our fixtures to a pink color then we head back again to our store macros hit start diff and then do some changes for example we want to set our spot group a but only spot group a to White and we want to store this now so we head back use capture if to only St the difference hit uh the executor and after that you will find the Q4 in here containing only the white color of spot group a but not the rest of it so not our pink colors so
we have successfully start only the difference of our basing content after hitting the start diff macro to show you this a bit better let's off our basing content and uh go to cure 4 as you can see our fixtures of group a are at White and the rest Still Remains on blue from Q3 the meas down below here will basically do the exact same thing so either capture your entire look or only the difference but they will do it to the next free sequence of your song selection if you remember there's always a sequence pulled
ready for each song So if I would now use one of those macros we would start storing this to a new sequence in this area or in this sequence range so starting with the Mt sequence 902 so let's try this out before we can start a new look to this next free sequence for sure we need a new uh content in our basking layout and to show this to you I will use the off PPS macro this will deactivate all sequences coming from your page pong areas so this is Handy to just get a good
overview on what's actually coming from your buking layout and not getting messed up with content that is played back from maybe a start and active sequence in here then we switch to the show layout create a new look quickly so let's do a look in purple maybe like this um yeah should be fine for the moment and uh then head back and use the capture all next sequence macro and as expected we St this content to sequence 90002 and we also directly assigned this sequence to the next three execute computer of this current song page
and we think this feature comes in really handy especially when assigning it for example to one of your Hardware keys so an X key for example and uh then just staying in the show layout and storing looks real quick for example for different uh stages in your song so we switch for example to an orange hit the macro get directly our next sequence on our page executor uh we switch to Green maybe activate another fixture group DEA activate uh this fixture Group B hit it again and get our next sequence with this content so you
can be really really fast on creating new sequences containing new looks okay so let's continue our journey uh through those store macros down here as they are quite self-explaining I will not do an example here but just quickly describe them capture div will as expected uh capture the differences so like the capture div macro up here to your next free sequence and capture div next q will do the exact same thing but use the next free Q in the sequence that was used last you might have wondered why we have not stored any FX contents
so far into those sequences no worries it works basically the same thing and you can also easily store FX into sequences but there are some points that you should keep in mind when doing this so let's check this out okay so we move to our show layout um select maybe a chaser for group a maybe a movement for our group b like this and for Group D we also use this uh intensity fix after that we head back to our store macros and store the entire look to a new executor then we do our off
basking to deactivate all basking content and test the new sequence and as you see it works perfectly and and you got all your fics back also using the playbacks from this sequence to do a quick check on this we use our select key to uh look into the sequence using the sequence sheet and here we will now also find those relative values for intensity and positions so the dynamic values for our FX but there are two logical restrictions when storing uh FX to sequences the first one is that you will lose FX sizes because FX
sizes are based on uh temp faders with higher priority sequences in it that just limit the effect size and this cannot be sted into a single Q at the moment in the world of ma3 the second limitation is that you will lose the speed levels of your FX the reason for that is simple you have two speed Masters running in the chaile one for movement FX and the other one Our Song speed master for intensity and color effects they are used in the correspond sequences of the Basking part in the show file so if you
now store a new sequence this link is broken to compensate for the FX size issue we recommend storing FX content as a separate sequence and then playing it back using a temp fader to control the size of the fix if we for example want to create just a slight movement maybe for this first blue entry look of our main song sequence then we can simply move over to the show layout and select the effects that we want so we do a circular movement on spot group a and we do um pan movement on our spot
group E then we head back use the capture all macro and hit a new empty executor after that we can use uh the off basking macro and use our assign key to change the behavior of the sequence to Temp fat then we can raise this fader up slightly to get only a small movement so A reduced FX size on this uh circle and a pan effect that we've just created and that's our basic recommendation for the work with reduced or limited FX sizes in this uh context now let's focus on the second issue so the
broken link to our speed levels to show you our workaround I will build an entirely new simple look I will use my uh Titan tubes in the background and maybe put this uh Chaser on them then I will uh rise up my speed level until this iFix is quite fast we will then also store this uh FX to a new sequence so like that and if we now off our basking content and activate the sequence we will see that the FX looks the same but it is way slower to compensate for that in a reliable
way we have created the capture song Speed macro this macro allows you to easily store the current value of your song speed master as a command into a que to make use of it simply hit the macro and directly uh afterwards your target sequence it will then store this command into the first queue or an active queue uh if there is an active queue in that sequence we will then you select and check this uh sequence or the command in here there you go you will find this command in your q1 of your FX sequence
that sets the FX Master to the value that we've set initially in our buing part so by doing that we have captured the speed of Our Song speed master into this Q number one and don't get confused by our slow FX running still on our output this is still FX that is played back from our sequence but there is no speed master set in the sequence and that is why it is that slow and we have to change that therefore we navigate to the settings and set our speed master of the segments to song Speed
and there we go we get our fast FX back due to this command I will always get back the correct FX speed even if I modify the song Speed maybe for a different song or some basking part Parts on my show and after hitting the go of the sequence it will return to my St speed level before we close this little FX breakout session in the video let me give you another important advice regarding color fix due to our show file structure and its color fix which use release values it is not possible to store
color fix into one sequence you always need a base sequence containing your main look and the base color and then a second sequence for your FX in our way of thinking and programming this is not a big issue because it is basically a good idea to store fix separately anyway so also for example in terms of iFix sizes and so on and in the end you will probably always have something like a main Q list for a song where you will have the Bas look including a color as a quick example I will use my
main Q list of song number one as a starting point so this blue look and we'll now build a color fix around it I want to do a red color fix with this blue base look and I want to do it for my spot group E I quickly switch to uh my cfix layout and apply a color fix for example like that we head back use the capture all select a executor of our choice and that's it after offering my basking content I can play back this color FX using this newly created sequence and that's
how it works so simply use a bass look with your base color and then create a color FX using the FX form and the corresponding FX color finally I would like to give you an important tip regarding intensity levels in the show file when working with the Basking part of it you can use those playback Masters to control the intensity of the individual fixture groups the issue here is that it's not possible to use those Playbook Master levels when storing sequences to compensate for that I have to adapt it manually in this sequence there are
some ways of doing it for example you could change the recipe in here but you could also simply move to the group that you want to change for example group E in my case reduce your um dimma value let's bring it down to maybe 18 or 20% simply hop back and store this into the q1 and I will use store for that click on it and say merge and that's basically it after this you're good to go and uh you can clear the programmer and the sequence is now adapted with this new level of intensity
after we have completed our song page so set up all the sequences and maybe also added some extra bumps in here we could theoretically start time coding our show I will do a real quick example on this just to show the basic principle but as mentioned uh in the previous part of the video this video does not claim to be a full time code tutorial the first thing I want to do is to check my time code settings and therefore move over to my page prong uh manager View and I will uh for this demo
purpose set my time code settings to internal I don't want to use external time code slot here I just want to use the internal timeline of my song one after this is done we can uh head back then we need some kind of timeline view I could use this one if I have uh real Hardware keys on my desk and to show this a bit better to you I've just created a second view where I still have my playback section up here so there's my timeline view uh for my song one so the selected one
to be able to record things into your time code enter the setup and hit the record button and there you go time code is running or at least your timeline in here is running and you can start working on your show so I will start with my blue intro look then maybe add my uh red color FX also add our super fast uh red color Chaser which includes also the colors for my other fixtures because we used a capture all on this and then maybe I will uh ramp up my temp fader with those movement
ofx for example like that to get a movement in here and that's basically it you successfully time coded a show so all of your actions should be captured in here correctly in your timeline it's now a bit uh small but I think you got a basic principle and you can see all of your sequences in here together with the corresponding actions so for example the movement of your temp fader to check it out Simply hop back in your timeline and maybe off all active sequences in advance and hit the play button after that you can
enjoy the show so first we should get our blue entry look back we can scroll up and see when it's happening right there now we will get the red color fix as an add-on then we will switch to our crazy fast red chaser with all lights in red and then we will here if we reach this section see how our temp fater will rise up bringing in the movement for our spot group E and there we go we get our movement and that's BAS basically it here I can give you another tip you can also
use our macros of song one and Go song one to play around with this time code off will deactivate it and go as it is an internal time code that we've set for time code one will top and also run so start uh the time code in here if you would select an external time code Source this wouldn't be the case then it would be just active listening for time code signals coming from the external slots but as it is an internal uh timeline that we've selected for time code one the go so a go
command on this time code one will directly run it and that is it you have basically seen all the new main features of our all new Ultra version of our ma3 template show file wi2 but before we close the video I want to show you some general enhancements that can be found in our latest version of the show file that will soon be available for all three versions so light Pro and Ultra the first general enhancement is our label tool which comes in place when labeling slots and overrides I've shown this some minutes ago in
the video when working with our impact looks the second enhancement is that we have further developed our bump area it is now called QA area for quick assign area we will do some other things here in the future even more powerful but for the moment we have introduced a MK section for for each of your fixture groups and here you will find a FX block sequence iFix pfx and cfx size control elements so sequences that can be used as a temp fader to reduce your ifx pfx or cfx size only for a single fixture group
Please be aware of that the FX block sequence will not work directly you have to set up a special group first simply store your fixtures in the group called FX block it is there for each and every fixture category the reason for an extra group here is quite simple we found it really helpful to have an easy opportunity to block thefx only for some certain fixtures on an event for example think about a scenario where you have a big rig of fixtures and you need some of them maybe for ambient or background Lighting in the
beginning of the party but when the party kicks in and gets messy you want to use the entire rig with your FX and there you go you could simply use the X block with some special fixtures in here at the beginning and as last new feature in this update I want to show you our autogenerated groups after setting up your simri group a and after running your reach and groups you will get those new autogenerated groups up there the idea behind those groups is just to give you some extra stuff for programming or even is
I think quite self-explaining left and right is intelligently built on the width of your selection grid so depending on the width on your XL AIS and up and down does the exact same thing so it splits your selection grid into two parts uh along your yxes and that is it regarding all the new features of our Ultra version and the corresponding General new update as a last step I want to switch to our website and show you some elements here first if you are convinced after watching the video and you think the ultra version is
the right tool for you and you already own a show file you can scroll down and use our upgrade page here you will find several options to upgrade for example you can upgrade from light to Pro from light to Ultra Pro to ultra and from V1 to V2 Ultra this is a special one so if you bought initially our V1 show file you have to use this if you want to access Ultra simply enter your all the ID in one of those fields hit the upgrade button and you will get a special stall link which
leads you to a store where you can buy the corresponding show file version only for the price difference if you're not own a show file yet you can head back to ma3 developments and check for our products by clicking on this uh text here you will directly get to the product page of our brand new template show file wi2 when you will see this video this button here is ready and should look like this simply hit it and you can get the ultra version directly and if you scroll down here a little bit on this
product page you will find a list of our uh YouTube videos that are related to the show file so make sure to watch those videos before using the show file or at least check out those keywords in here when looking for some specific help for sure we will also put this Ultra version release video in here and as a next video we are planning a tutorial on how to work with really comp complex fixture types if you have any special wishes in terms of fixture types for this next tutorial for example you want to see
in color strike Ms or Aura xip let us know and simply post your thoughts in our YouTube comments for this video here and that really brings us to the end of this video so thanks for watching and your support of our Chi project [Music]