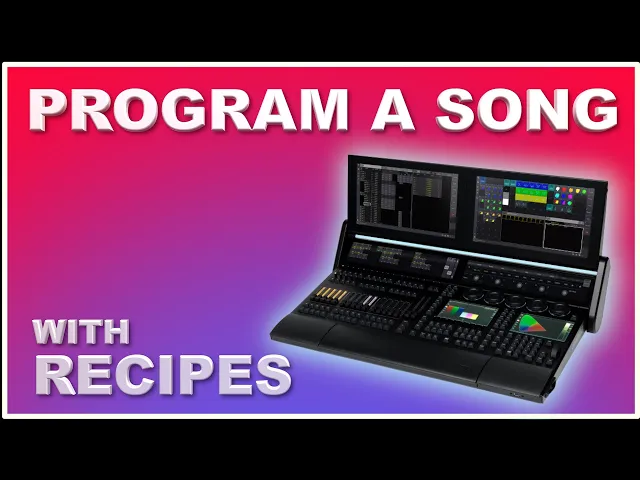
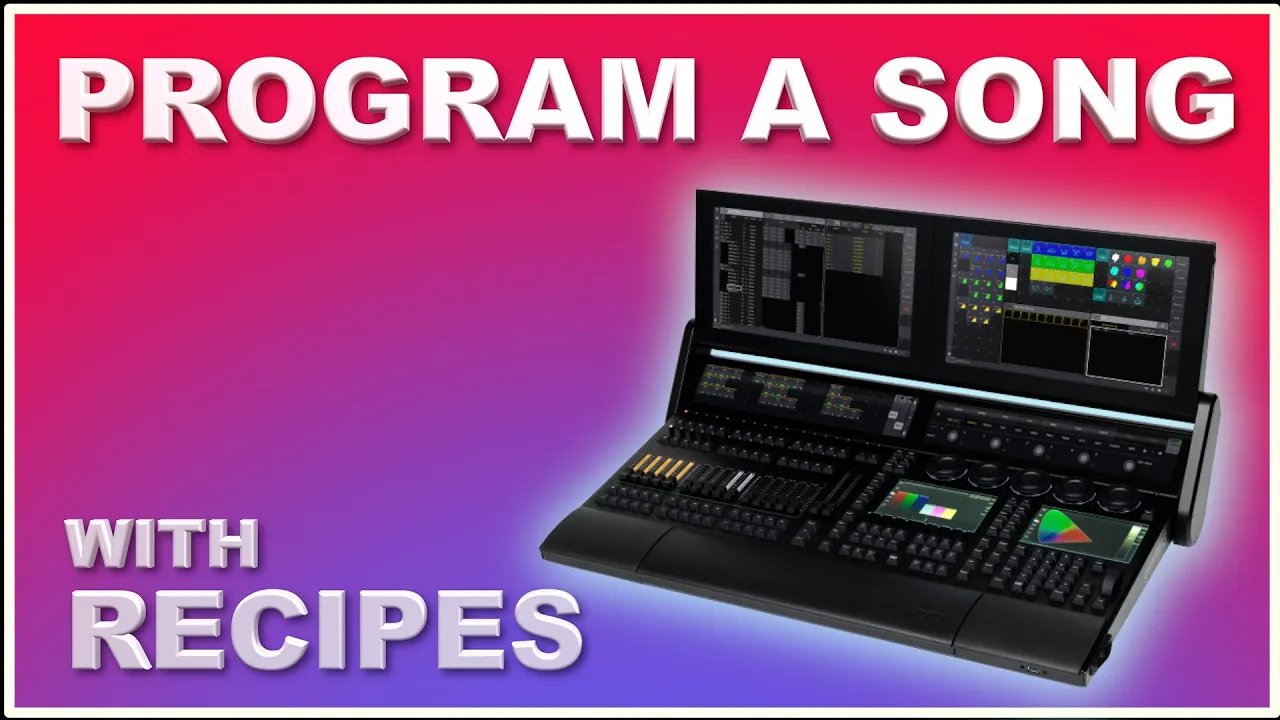
Hi, and welcome to Event Lighting! If it's your first time here, my name is Tue, and I do tutorials on grandMA3. Today, we're going to look at recipes once again on the channel.
We've definitely covered this before, but I think it's an essential part of the grandMA3 platform, so that's why we're going to have a look at it one more time. Today, we're going to build a song using only recipes, and let's just get right into it. As you can see here on my screen, I have made a sequence with a few cues—12 cues with a standard cue.
We go into the song, we go into a verse, a chorus, a verse, a break, a guitar solo, another chorus, a large ending, an end break, and we go back to our standard cue. So, let's just start building our recipes. Right now on my sequence sheet, I can’t see my recipe programmer or my recipe workflow.
So, if I go up to the MA logo up here, I go into "mask," and I go down to "show recipes," you will see it pop up here in this region. This is my standard cue. Every time I change my cue here, you will see the change down here in the recipe section.
So, if we start with the standard cue and say we need to build some sort of look, I can go in here in my selection. I can right-click with my mouse, or I can add a new recipe and right-click with my mouse as well. If you're on a console, you simply just push your finger and hold it there; it's going to pop up with this popup right here.
The first selection here is where you choose your group. A recipe only works if you have a group with some fixtures in it, and you need a preset to point the group to. So, a recipe is basically a reference between a group and a preset.
Let's just start building it. The first thing we want to do is to turn off some of our lights on stage; we can say our auras here—this is my side light on stage. You'll see that in a second.
I go into dimmer, and I pair it up with my dimmer percentage, which is 100, and you can see over here in the 3D view that they turn on, and they're pointing straight up in the air. So, we need to give it a position as well. What we can do here is copy and paste this line, which makes it a little bit easier.
Then you don’t have to choose the group again; the only thing you need to change is the preset. So, if I say Control C and Control V, you now have all the auras again pointing at the same preset, but we want to change this one to position. We go down here to "side light" or "sidelys" in Danish, and as soon as I do that, you can see they point down to the band right here.
So, I want to add zoom information as well because they are standard zoom right now. I want to add a narrow zoom, so I copy the line again, right-click, and go into beam, then see if I can find—sorry, I go into my focus and zoom and select narrow. Now you can see they are all zoomed in.
We need to give it a color as well, so we once again copy this and paste it, and we go down to our color here, selecting CTO. You can see now they are looking nice. So, that's my side light.
Now, I usually add an empty line here to separate everything, and then we start over here. We say all our roxxes; we turn those guys on at 100%. You can see they now turn on.
We need to give them a color as well, so we just give them a color of maybe blue. Now, all the roxxes are on, and the colors are blue. So, what else do we need to do?
In this case, we add another empty recipe line and move down to our CLFs here on the backdrop. You can't see that right now, but I do actually have some CLFs here in the background. So, if I put the dimmer at 100%, they turn on, and I copy this line and make them blue like the rest of it.
If we find the blue preset right here, you can see they're blue now. So, all our roxxes are blue, and all our CLFs are blue. I do have some extra CLFs I use for the sideline, so we just copy this one; we can actually copy both of them, and we can simply just put in another target here and say "Anders," who is our guitarist over here.
We copy these two again and add "Rud" here. So now they are both on, and they are in blue, but maybe we don't want them in blue. Let's say we take this one and this one, right-click, and give them a color of CTO.
You can see that with a Control click, I can actually select more than one recipe line and change them, which makes it a lot easier to work with. So, let's see. That's it here.
We need to cover what's in the roof as well, so if we go in here and right-click, we find all our house washes here, and we turn them on at full. You can see they now turn on—that's cool! We need to give them a position as well, so we copy the line again, go into position number one, and you can see they're now in position.
We want those guys to be blue as well, so we copy the line again, go into color, and we go into. . .
Blue, and now they are ready as well. We need to set up our spots as well. They are in the roof right now, so what we could do is just copy all these guys here like this, and we just paste it in right here.
We just change the group to our house spots; you can see they turn on as well. We don't need them in blue, and we don't need them to point down on position number one. So, what we could do here is just go into color and give them a color of white.
For position, we could put them somewhere up in the roof like this, and maybe we could add a gobo to it. Now, we don't want to do that, but we could add a gobo here if we wanted to as well. So, that's basically our main look here.
The thing about our main look is that I use the main look at the start of every song and at the ending of every song. So, I would have to do this over and over again to be able to reach the same state in my entire programming. But instead of doing that, I could do something different, and that is to create an all preset down here.
You can see I've opened my preset pool number two, my all preset pool number two. If you don't know how to do that, I can just show you. I have an empty space here; I can just push this one, go into presets, and choose my all preset or all pool number two.
So, that's it here. If I go in and I take all this stuff here, which is my main look, and I need to repeat this again and again, what I can do now is just copy all this stuff, go into this one, turn it into a recipe, and then paste everything in here. Now, I created a preset down here that is identical to what I just built up here.
So, what I can do now is just basically delete everything up here, which we just built like this, and I'll show you an easy way to recreate it. We used our auras for this guy here, sorry, our CLFs. We used our CLFs for that one, we used—oops, we copied this one—we used the backdrop, we created an empty space here, we used our auras here, another empty space, we used our house spots, another empty one, and we used our house washes over here.
So, what we can do now is just take everything here. Let's just take these three here and this one, this one, and this one, and point it to all preset number one. You can see everything is recreated over here.
We need to add the Roxx's as well like this; we copy this one, and we add all the Roxx's here, and we point it to the same all preset, and now they are on as well. So, everything should be on. We even have the backdrop over here; you can see we recreated the entire look but with less work.
So, now we need to label this to Standard Q—oops, like this—and you can see now it's our standard cue over here. So, if we need to add any changes, if we say we need to add a gobo to our standard cue, we could do that. We could simply just go in and edit our settings here.
We could find our spot fixtures; we could just say we need all our house spots, we could add a gobo number two for instance, and you can see now we have a gobo up here as well. But what we don't need is that all our house spots are on in the first cue; we don't want that. So, we just take this line up here and we simply say delete, and now they just turned off.
So, now we have a reference between our standard cue here down to our standard cue preset down here, so if we need to change something, we can easily do that. So, let's clear this and say this is our standard cue. Let's see, we need to start our song, and as you can see here, everything is in our standard cue.
If I press the next cue, everything disappears. So, let's just go to the next cue; we need to go through this one—there we go. Now, we not only need to add the changes, because the values track from cue to cue, of course, like any other grandMA3 console.
So, let's say, what do we want to do here? We need to make something another color. Let's take all our house washes; let's make the color red like this.
Let's copy this one—oops, we need to add a new recipe line here, and we need to copy this. We just need some space between them. We choose all our Roxx's; they are now red as well.
So, maybe this is cue number two, and let's say we need all our spots to change position or maybe turn on. We can turn them on like this; now they're on, and we need to make them move down into position number one. Let's do that, and they move down.
So, if we clear this like this and we go back, you can see this is our standard cue. We go into cue number two, and they move down, but they do it fairly quickly, and we don't want that. We could change the fade times up here; we could simply give it a fade time of two.
Let's go back and let's move down. You can see they come down in two seconds. We could also do something different; let's just keep the timing here at two and see the position.
We need them to turn on a little bit faster, and we need to move them down very slowly. So, let's say we fade from when we turn them on. This is the dimmer preset here; let's turn them on.
In one second, like this, and let's give the position maybe 8 seconds to move down. Let's do it like this: if we go back now, this should turn on pretty fast and should move down very slowly. So, let's try to go this.
You can see they turn on and they move down very slowly and very nicely. It's very, very easy to see what you've done; it's very easy to change only one recipe line if you want to do some changes. If you want to fade something, like split timing or something like this, you can see it's very, very easy to do with recipes.
You can see it's very, very easy to see what you have done; it's basically not necessary to use your tracking sheet anymore because everything is laid out in front of you. All the changes are laid out, and even if you want to do part cues, if you are doing theater, you can still do part cues and have different recipes in different parts of your cue as well. We're not going to do that here.
So now we started our song. Everything faded down into the band, and we could start working on the verse. So, let's just say we need some movement to start.
Let's say we need to start a phaser of some sort; we need to pan maybe the spots on stage. I can select my spots, I can go into the values here, and I can go into my phaser effects. Here, I have all kinds of different phasers, and you can import all these phasers.
You can build your own; you can see I built some on my own here, and the other ones are just imported straight from the console. So if I go into pan like this and I go into the cue, they should start panning, and you can see they just pan all together. So we need to fix that somehow.
Let's give it a phase. We can do that right in here. Let's give it a phase from, sorry, from 0 to 360.
Like this, you can see they now start doing a phase like we would expect. Let's say we need to have a wing of 2, and we need to invert the pan. You can see that's already selected, and we need to mirror the movement.
So now we've created a symmetrical pan effect—very, very easy—from our standard effect, the standard phaser effect. We could even go in and shuffle it if we wanted to give it a shuffle of 5,000. You can see it's now shuffled, so that's a very easy way to do it.
I have it on a speed master over here, so I can simply just turn the speed all the way down if I wanted to. All the phasers are connected to a speed master; I have connected all the movement to one speed master, all the dimmer things to another speed master, and all the color changes to a third speed master. So you can easily change that during your programming.
So let's say this is our verse. Maybe we need to add something more. Let's say we need all our washes; we need to put some sort of dimmer effects on that one.
So we go into our phaser effects here, and we go into intensity medium. Maybe, and you can see they start flashing. We can manipulate it if we want to.
We can go in and say we need it to phase up to 360 like this. You can see they start right away. Maybe we want to adjust the speed as well, so maybe we just say the speed needs to be 50.
Let's see what that does. That's a speed of 50. Maybe that's a bit too slow.
Let's put it up to 80 like this. Let's change this one to 80 as well. So now we have an effect running here in our verse.
So we just finished our verse. This is what we like. Let's just go into the next cue like this and start building from here.
So what do we need to do? Let's say we need to stop the movement and maybe change the position of the spots. So we choose all our spots; we go into our phasers in here, and I have a stomp for the position.
It's going to stomp in a weird location because it's an absolute stomp. I just want to make certain that everything stops, so what I need to do is set the preset where I wanted it to end up. Let's just say I wanted to end up in the roof where we started.
So that is stopped. We add new recipe lines here, and we choose our house washes. We need to go into the phaser here, and we need to stomp the dimmer, and now it's stomped.
Maybe we need to change the position as well, so let's put it into position audience. Nah, we need to go into position. We just stay in position number one and two.
Yeah, that's cool. So now we stopped everything. Now we need something else to start happening.
Let's add our roxxes here like this, and let's see if we can find a funny phaser for those guys. We have a white and red, and we have a 10K and red here. That should do it.
You can see it starts moving here, or starts flashing. I need to phase it from 0 to 360. You can see they now go across from side to side.
And let's just give these guys a wing of two as well. Like this, you can see now it is symmetrical. Let's say we need to add a speed thing to this one.
We need to make it a little bit faster. Let's put it up to maybe 80. That helps, yeah.
Yeah, maybe put it up to 100. Now it starts moving. Let's put this one to 100 as well.
Yeah, and let's say we need to do a circle up. Here it's kind of boring. They're just stopping up here, so let's just say we put it into the roof; we copy this one and we add a phaser effect here.
We go in and find a circle template. They start moving from that position, moving in a circle as a relative position, and let's say we need to also phase these guys 360. You can see it starts working.
Now let's also give this one a wing of two, and let's just say we need it to mirror like this. So now we've made a nice effect, or a nice phase where everything starts moving up in the chorus. This could be our chorus cue, and we need to stop everything here and go back to verse.
So what we can do is start by going into this with these two guys here from our verse. I'm in the verse cue here, copy this, and maybe paste it in here like this. Now we need to go back and have a look.
Right now, we don't have any cue-only functionality in the recipe programming as of version 1. 9. 7.
0. I'm hoping that's going to be part of the recipe workflow at a later update, but right now we have to see what we've done. You can see all the spots are panning and all the washes are just flashing like this.
So if we go into the next one, we need to stomp our circle up here. If we go into this one and we copy this one—oops, something's wrong here. I take the house spots and we need to stomp the position.
We need to put it into our position number one and we need to start panning. You can see it did that right now. If we go back into our verse up here, you can see we need the roxx's to be static.
So let's go back here, go into recipe, and another recipe line. Choose our roxx's and we simply need to stomp. I think we need to stomp the dimmer and the color because this phaser affects both of them, so we stomp dimmer, copy this one, and stomp the color as well.
Now you can see it goes back to blue because the stomp is an absolute one, so we need to go back and give it a color of red like this. Now we almost recreated all of it. Do we need to stomp the—no, I think we are actually here now.
Everything is moving like it's supposed to. Yeah, the state is the same. So now we need to create some sort of break where everything maybe starts flashing in white and stuff like this.
So let's say we need to start by selecting all of the fixtures and put them into white. We start by taking all our washes; we put these guys into white and we make sure we go into the cue. Let's say we need to stomp the phaser, stomp the dimmer.
What else do we need to do? We need to take our roxx's and do the same thing. We need to put these guys into another color—let's put them into 10,000 Kelvin.
We need to maybe do something about the spots. We could take the gobo out like this; we could ask it to stop moving. Let's say we stomp the position and we give it the position we wanted to end up in, which could be position number one.
So everything is now stopped, it's white, and we need to do something about—let's just say we need everything to start flashing. What we can do is simply just go in here, take our house spots, go into our phaser, and go into our snap-on. Maybe that's kind of a boring phaser again.
What do we have here? Somewhere intensity medium? Maybe, yeah, that's nice.
Let's say we want to manipulate that with a phase to 360; they start doing like this. Maybe this is fine. We need all the fixtures to do that.
So what we can do, instead of recreating everything, we can simply just cut—sorry, copy and paste this one twice. We can select our washes; they should start doing that. We can select all our roxx's to do that as well.
So this is how easy it is; we just built the phaser effect or the reference. Once we manipulated it the way we wanted it, then we just copied it and chose different groups to put into it. So this could be our break, and now we need to go into our guitar solo.
I think for the guitar solo, we need to go—stop everything here and need to go back to the color we wanted. Now we need to put some fixtures onto the guitarist. Let's just say we need all our roxx again.
We can copy this; we can put in our spots. We need this empty line here. We don't have to use the empty line; I just think it's easier to figure out what you've done like this.
We put this one into our phaser here and we say stomp dimmer and do the same thing here. I could have just copied everything here, but I didn't like this. Now we need to go into the cue and you can see everything is stomped.
So let's take the roxx's, give it a color of red; let's take the house spots. Actually, we don't need to do that with the house spots. Let's just say—oops, oops, oops—like this.
Let's do the house washes as well; we copy this and give it a color of, let's just say, red again, like this. We could take all the house spots and move them somewhere else; just put them into the roof up here. And let's say we need to put some spot or some light on our guitarist.
Add a new recipe line here. And I actually created a group. I'll show you over here—our guitarist, his name is Anders.
I have a selection of three fixtures here, and I have a position over here, and that's the only thing you need because you can take the color information from somewhere else. So let's go back to our recipes, and we choose our solo group here, and we choose our position, which is the same thing. You can see they move here now, and we can just copy this one, paste it in, and give it a different color.
Let's just put it into white, and you can see the guitarist is now highlighted with three fixtures. The cool thing about the recipes is you can just use two fixtures or three fixtures; you can just change the content of the group, update the position, and then it will work throughout your entire show. That is really, really cool and really, really simple to do.
So let's say we now have a guitar solo just pointing at him. We need to go back to our chorus, and we could go up here. We can just copy everything like this, go into our chorus, and just paste it in and see where that brings us.
You can see they now start doing the same thing again from our chorus, and of course, you can see the group up here has gone back to its original position, which is kind of the intention. The only thing we need to do is put it back into red, and we can just do that with the entire group; we don't have to do that with only the fixtures pointing at him. So let's just put these guys back into red like this, and now I think we are back into our chorus.
Look, if we go up to this one up here, it looks almost the same. Do we need to add maybe a gobo down here? Yeah, we need to add a gobo to our spots, like this one.
Let's go to gobo number two, and I think we almost have the same look. Now, let's say go to cue 4. Yeah, almost the same thing.
Go to 8. Cool! So that is our first few cues.
Let's go into our large ending here, and I think this is just some of the moving lights starting to flash again; stuff is starting to move around. So let's say we need our spots to change position to audience, which is like this. Let's go into the cue; you can see they move down.
Maybe they need to speed up the movement here. Let's add this one, let's go in and start the circle here again. You can see it now resets because it's tracking this information.
Now let's phase it to 360. Let's do the same thing with wings of 2, and let's just mirror the position here and speed it up. We can do that here; we speed it up to maybe 50.
Maybe that's a little too fast. Maybe 50 is fine. Let’s do 50 in this one as well; that could be part of the ending.
Let's take the gobo out in this cue, like this. What else do we need to do? We could say we need our wash to do the same thing.
If we open this up, we can see the circle template. We just copy this line, make an empty line here, we paste it in here, and we choose a different group—our house washes. You can see they start moving as well, and just above that, let's put it into our audience position as well, like this.
They're doing exactly the same thing just by copying the line, which I think is just really, really amazing. We could shuffle it a little bit if we don't want it to do exactly the same thing; let's shuffle it to 5,000 H. Maybe that helped a little bit on it.
Not really, never mind. Let's say we need to go into some sort of flashing thing and change to white. We take the washes again, we go into color, we put it into white, and we could copy this again.
We could add a phaser of some sort. We can say intensity medium; they start flashing once again. We can go into the recipe line and start phasing it to 360; this might be cool.
This is our large ending. Let's say we need to do something about our roxx’s as well. We put the roxx here, and we need to—what do we need to do?
We need to change color into our 10K here. We need to add some sort of phaser to it. Let's say, what do we have here?
We have the same intensity—medium. Let's manipulate that as well into 0 to 360 like this. Maybe we want to shuffle it, see if that does something for us.
Actually, it didn't because we didn't do any wings of anything. Let's just take a wing of 2 here; this is fine. So, this is our large ending, and now we need an end break here, which I think is just everything going into the audience and just standing still.
So once again, we could actually go into here, and we could copy one of each here. Then it's just going to be easier to build the next one. So we just paste this guy in here, and we go into the cue.
Let's see where we are; go into the cue here. Oops, we need to go up here. So let's say, what do we need to do?
We need to stop all the flashing here. Let's stomp the dimmer. Now everything is stomped.
What else do we need to do? We could stomp the position as well, like this, and we need to add a position to this one. Once again, it is a relative—sorry, an absolute stomp.
Let's just add an empty line here and here. So we need to do the same thing with. .
. House washes, so let's just say we stomped the dimmer. Let's just copy this one here and go down here, paste it in, and just change the group to our washes.
They do the same thing; all the Roxx's have stomped. Everything is okay, so what do we need to do now? That's our end break.
We need to go back to our standard cue, so what we can do here is just select our, let's say, our Roxx's. We copy the line here, we add this one, we add this one, and let's put this one into our house wash. Let's put this one into our spots, and let's point it to our all preset, our standard cue, like this and like this.
If we go into the cue, you can see we are almost back to the state we want. The only thing we need to do is turn our house spots off. We can do this by.
. . they should actually be off now, which they are not.
Let's just put the dimmer on here and put it at zero. So now we are basically back to our standard cue with only a few lines here because we used the preset down here, which is a recipe preset. We have all this information in it, and we just pointed whichever fixtures we needed to change into this recipe preset.
I only need to point one line into the preset, and it will take everything that is interesting for this fixture. So this is very, very easy. Then we are done, and we could go to the next page.
But let's just go back and see what we have done. Let's play with some timing; maybe we have our first cue. We are almost ready to go into cue number two.
What did we do here? We gave it a fade time, and we did some individual timing down here to make it go more simply and more slowly into the cue. Our verse.
. . let's go in here; it starts immediately.
Let's give that one a fade time. Sorry, a fade time as well. Let's go back and see how that looks.
It looks a little bit better. It comes up; maybe we need to change the timing of the washes. We need to snap them on, so if we go into our verse here and we go into our washes here, you can see right now they don't have a fade time because they're taking the two seconds from up here, so let's just set this one to.
. . can we set it to zero?
Yeah, we can. If we go back, let's see if it's finished. You can see they start immediately, but everything else fades.
Let's go into our chorus; you can see that also happens very, very quickly. So let's give that. .
. we want it to happen quickly. We just need the spots maybe to move a little bit slower, so we give that a fade time of two as well.
We go back, we come from here, and we needed to finish moving down here. If we press play here, you can see it happens more slowly; it doesn't happen instantly like on the other one. But that's a very, very easy way of controlling it.
That's because it's zero to two; we changed it from two to two, so two seconds now on the movement. Let's just go back and run the cue again. Let's just finish it moving down.
Now this is in our cue; we press go. You can see they move slower into the position instead of just instantly jumping there. Let's go into the verse; you can see once again it happens very slowly.
Let's just give it maybe a two-second fade here. We have a break, and we need that to be very instant, and we need to go back to the guitar solo like this, which is okay. Let's say we need the movement to be slower on the spots here.
We take the preset, we fade it on maybe five seconds, just to try it. Like this, we go back, like this, it stops immediately, and then it moves up in five seconds, which is cool. Then we go into our chorus, and once again, it just snaps into the chorus.
Let's see what happened. We come from here, and we needed to maybe fade the position as well, if we can. Let's say we find the roof position here; we find the fade.
Let's just do it over five seconds as well, just because we can. Like this, we go back, like this, we have it right here. Now we go into our large ending, and everything starts flashing.
I think the timing has to be zero here; that's fine. And we go into our end break, which is also cool to have very instant. Then we go back to our standard cue, and we basically need that to happen over, let's say, five seconds, without any movement on the spots.
So let's see what happens. You can see the spots put in a gobo, and they start moving up, so we need to delay that more than five seconds. So let's say we come from this and we need to delay the movement.
We don't want it to start moving before it's all the way off. And if we go into the standard cue here, we can see we have it going into the standard cue. So we need to delay the transition into the standard cue by more than five seconds.
This ensures that everything is turned all the way off before it starts moving. So let's delay our transition into the standard cue; let's just say 5. 1 seconds.
We need to make sure it's finished. Let's do it with the in and out. Let's go into the cue; you can see they start moving, which is fine.
The spots turn off, and now they are moving. So this is basically how easy it is to build a song using recipes. And the cool thing is, when you go back here and you.
. . Need to change something?
We used our house spots here, we used our house washes, we used our roxx’s. We used our auras sidelight. Here, you can put anything into these groups; you can just change the content of the group, and everything will be working as long as they are represented in the presets we have used.
So, I hope you enjoyed this video, and if you did, give it a like—it's going to mean a lot to me and YouTube, and it's going to spread it out to more people. If you're not subscribed to the Event Lighting Channel, be sure to do so and click the little bell icon so you get a notification every time I upload a new video. I hope to see you next time, and until I do, I hope you have some happy grandMA3 programming moments at home, and I'll see you in the next video.
Bye-bye!