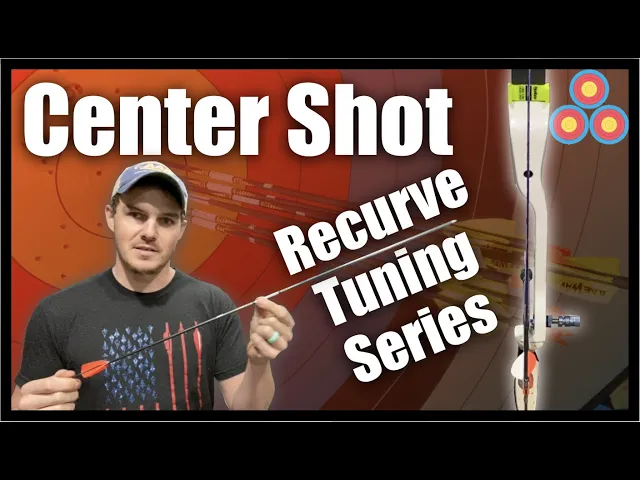
you're watching the Jake Kaminski YouTube channel so now that our limo lineman is set correctly next we're gonna talk about center shot this is gonna be a bit of controversy / contention only because there's always questions of where do I set my center shot how far out do I set my center shot during this section of Center shot it's basically you're just eyeballing it later on in our method that I'm gonna be showing you the walk back method shoot shows you your exact dynamic center shot and allows you to adjust your bow to push the
arrow and push specifically the nodes of the arrow in a straight manner towards the target and that means meaning in line with each other not misaligned because that's the whole point of Center shot is adjusting the nodes to be in alignment together before we go any farther with talking about the center shot I want to show you how to find the node in your arrows so there is two spots on your arrows that do not move as the arrow is flexing you know in the archers paradox as its flying downrange so I'm gonna show you
how to find it on the front and the back and then we'll discuss why that's important when we're talking about center shot what happens is there's a front and a rear node that stay still in space relative to the arrow flexing and bending as it's oscillating going downrange so this is the front node this is the back node and the arrow itself as its flexing and high-speed cameras it flexes like this so there's two spots front and back like this that are the nodes which do not move in space the whole point of center shot
is to align the front node in the back node to be in line with the target so when the arrow is being pushed forward so the two spots of the arrow that do not move being pushed forward are following each other instead to create the most aerodynamically efficient arrow as possible if it is not perfectly aligned to the target like this with a small cross-section obviously it's flexing so it's a bit bigger cross-section but if it's misaligned it's a bigger cross-section and it's going to want to plane one direction or the other the way that
I find my Center shot is you want to hold the arrow somewhere in the front near the point I know an x10 the node is going to be somewhere in this area so I'm gonna hold it right about there and then I pinch it with two fingers and then you hit the center of your arrow on something like your arm your leg or whatever and then you want to just kind of let the arrow hang and can either continue to vibrate or not and then I'll show you how that works with the node so essentially
watch I will hold on to it I will hit the arrow and then I'm gonna let it swing and I can still feel the arrow vibrating and it finally stopped vibrating so I'm really really close to the node already but if I move away from the node and I hit the arrow it stops vibrating already still but not vibrating anymore go back too far no vibration at all I'll show you a slow-mo hopefully here to show you once I'm on the node I'll hit it and then we'll watch the fletchings flutter or vibrate back and
forth so let me find the node again and you can just keep slightly moving until your arrow continues to vibrate for a long period of time so I'm really close to the note there so I'm gonna do a high speed video and hopefully we'll be able to see we found the front node now we're gonna I'm going to show you how to find the back node the second section I wouldn't necessarily 100% recommend to try because if you do it incorrectly and enough times you risk potentially damaging your arrow I believe especially if you're using
an aluminum arrow so once you find your front node you should mark it so here's my front node right here and then what you need to do is you want to put to this part of the arrow on a surface like a tabletop I'm gonna use a boat press and I'm gonna put it on that surface and then I'm gonna pluck downward from the center of the arrow and eventually I'll find a spot that is not moving while the arrow is still vibrating and that will be the rear note okay I'm on my front note
still now I'm gonna use the edge of something to put the backside of the arrow somewhere around here I want to hold firmly on the arrow here and also push down on the table down on the table with this with only using this connection and then I'm gonna pull down in the middle and let it go and hear a vibrate that means I'm not on the note further away from where the note is vibrates more okay if I find the note right about there no right there that's my rear note so now I'm gonna try
to do a high-speed video slo-mo and show you the whole arrow flexing as I'm still holding two points on the arrow as this YouTube channel progresses I'll be talking about arrow setup and arrow length in can in conjunction with the notes when when you should be paying attention to it and optimally where it should be in relation to the contact point on the bow that'll be during an arrow building series or an arrow selection series something in that matter so if you are interested in those things and want to be notified there's not only this
tuning series there's also a forum series and will be I'll be doing a whole bunch of other videos on this channel as well so if you hit that subscribe button in the notification value get notified when those videos are updated not every time we'll be posting on social media to let everybody know that there's a new video out so if you're really interested please hit that notification bell so knowing what we know about the nodes and how they are found in the arrow now you can imagine why it's critical for those two nodes to be
aligned in a straight line that the boat will push the arrow in on that plane and not often deflect it so with parallel shaft Aeros I have found every single time that I do a walk back and every single person that I've ever walked had a walk back tune with or had reported back to me I have always had them have their Center shot or the arrow set directly down the center of the string having a center shot straight down the center anything with a barreled shaft is set outside of Center so the whole point
of setting Center shot again is to have the nodes aligned towards the target in a straight line and not just at brace height but more critically while we're at full draw because that's where the arrow is being pushed from while we're at full draw not at brace height so the whole idea is if you take an X 10 which is barrel so what does what does barrel mean barrel means it's thicker in the middle than it is on the ends so at brace height the arrow itself is resting somewhere around here on the plunger which
dictates your center shot and so this part of the arrow is thicker because it's close to the center then when you're at full draw it's way out here so it is much thicker in the center area than the ends so if I take a micrometer I can measure how thick the arrow is difference so I'm gonna zero my micrometer and I'm gonna see right there is where the arrow is resting when I'm at full draw and we'll just say it's 213 thousandths of an inch at this point right here now I know that the arrow
contacts a plunger somewhere around here just based on where my my clicker location is so if I put it right here it's a hundred and ninety six thousandths of an inch down here so one hundred and ninety one hundred ninety three verse what did I say 213 so you can see about 20 thousands of an inch give or take difference there so while we're at brace height our Center shot should be out from the the riser because of the thicker part of the arrow here now if you were to pull it back because they air
out tapers and gets thinner it should come into a line as you pull back so at Bray site it's out and at full draw it's straight obviously I'm exaggerating that but that's the whole idea as to why we set our center shot outside of Center but only with barreled shafts I know old school rule of thumb is outside of Center I don't know why that is you know I think now with we've got modern plungers that have Springs and all that stuff but back in the day they didn't have Springs they set it with a
rock solid system to push against there wasn't there wasn't a spring until not very recently but somewhat recently again a barreled shaft outside a centre parallel shaft down the centre now if you think about it we haven't really gotten into this yet with knocking point but if at Bray site we're setting our centre shot outside of centre don't you think we should also set our arrow slightly above the centre of the plunger at Bray site as well because as we pull back it will drop down to the center of the plunger based on the thickness
change throughout the arrow so many people will set their plunger at brace height in the centre of the arrow because they'd like that I don't really care about that because I use the rest as an adjustment for fun fine-tuning but optimally yeah the arrow should be in the centre of the plunger but as you pull back the arrow tapers so it's gonna drop more and be on the lower side of the plunger at full draw compared to Bray site so just a quick tip there so now that we know what we're looking for with centre
shot and we've already learned how to adjust it in a previous episode I'm gonna set up this arrow this is just a regular x7 basically this is my wife's bow here I'm gonna set her center shot up to be using these arrows here and it's gonna go down the center so I'm gonna show you how to do down the center with these arrows and then I'll put an x10 on and show you what I like and what I know is really really close for me with my ex tens it'll be different for you and you
can really only find that after you do walk tuning to actually find out your dynamic center shot so a quick tip because it is pretty hard to see where the string is in relation to the arrow especially when you have a dark background but if you have something white like this is just a whiteboard and you use that as a background I'll show you once I take pictures to show you what the center shot looks like you can clearly see it because the white background really highlights the string and the arrow also at this point
because we are already have our limbs aligned to the riser to the center of the riser you can put your V bars back on and rest it on a chair and continue the rest of your setup like that if you've been struggling with a bow vise or leaning it on the table Plus now the limbs are aligned to each other so really you only need one bihter block as a row as I'm trying to do this you can see how as I get it aligned the arrow really disappears behind the string so sometimes it helps
just to stand off to the side and then come back in and then Rivera fie that you're straight so in the picture it's still it whereas with a hand and me standing here I can barely stand still and see what my actual center shot is so that's why I always use my phone to snap a picture so I've got the center shot set correctly with these aluminum arrows and now I'm going to show you a picture here of what I look for with an X 10 as you can see the point is just barely outside
of Center it's not the entire point to the left of the string it's just barely a little bit to the left now again that's very specific to me that's something that I just know what I'm looking for and that's where my walk back dynamic center shot ends up being you'll find that over time but for me that's that's where I'm at see there in a picture it's very hard to see the arrow shaft to the left but if I'm doing it with this video you can see this little bit of movement you can see that
it's just just a touch to the left of the string and that's all that you need for Center shot to be outside a site that covers the basics of center shot for the majority of this step what we're talking about in just rough center shot we will find our dynamics when I explained to you how to do a walk back tune and kind of some of the things to look for within bear shaft tuning to also check in check your Center shot as well but just so you know you know a little bit more background
I guess on this subject because of the confusion that I'm going to cause or the you know the responses are going to say no I set my center shot outside a center with parallel shaft and I mean that's fine I'm just trying to share what I've done and what I've seen in the past and it doesn't matter if it's with the next ten or an AC e I have saw my Center shot need to dynamically be outside of Center same thing when I'm using parallel shaft arrows whether it be an X 7 like a 23
12 with 250 grain points or 200 grain points my Center shots right down the center when I do a walk back when I do a 2112 or like a 2014 so I can shoot hundred grain or 65 or whatever those standard nib green points are and those arrows do not break down the spine I still need a parallel either I still need a center shot straight down the center with carbon arrows I've tried like victory vApps before a long time in the past same thing parallel shaft down the center the Carbon Express arrow same thing
down the center and Fat Boys down the center everything down the center and like I said everybody that I've actually taken through my method of tuning after we get a rough tune a rough center shot and all that stuff and then go do a walk back it really just always ends up with parallel shaft down the center a big common issue that a lot of people ask about when they're bare shaft tuning and the only reason I'm gonna address this now is it has to do a center shot is the nodes can be misaligned when
you have a problem similar to something like this where you have all of your flex shaft sticking in the target straight at a 30 meter Bale or whatever you're doing your blank Bell I mean you're tuning at and then the so all the flex shaft send straight and then the bare shafts will stick in just crooked just off just a little bit they'll be in the group or brew milk you know relatively very close to being perfectly tuned but they'll be off and generally what I see is that the nodes are misaligned and the arrow
is just kind of planing in air like this as its flying down by the target I see that in commonly especially with indoors and in at 20 yards because a lot of people will just do their bare shaft tuning at 20 yards however I always do all my bare shaft tuning at 30 meters even with big fat aluminum arrows because I just find that 20 yards is not far enough distance away to actually see what the arrow is doing you end up getting a false reading and we'll cover that here shortly on the barre shaft
tuning and how to basically do bare shaft tuning but that generally covers the center shot selection how to find your nodes and what is center shot and what are my recommendations thanks for watching be sure to subscribe and hit that notification bell so you get notified every time a new video is uploaded for seminar and book code info head to Jay Kaminski comm or click on the link below and yeah I appreciate you guys watching if you would please share this video and really help get the word back out that I am back out there
thanks again take care