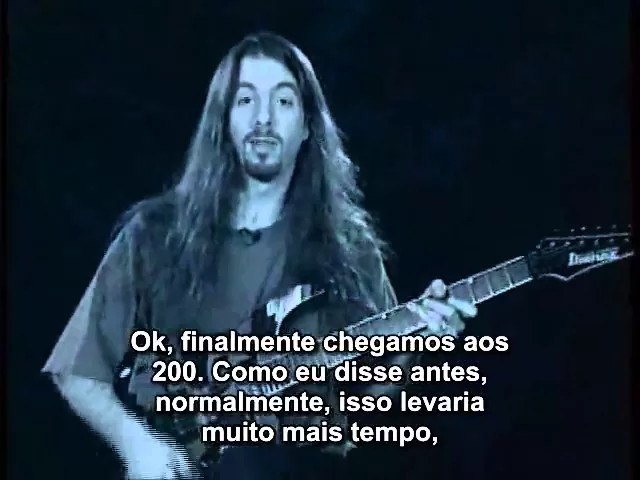
You hi my name is John Petrucci welcome to my video I'm going to be discussing and demonstrating various concepts ideas and approaches that help develop my style and sound and hopefully you'll walk away with some insight on practicing songwriting and developing your overall skills of the player but before we start let's make sure we're you tuned here is my open a string get that in tune with Your a string and then tune the rest of the guitar to that I'll see you when you're done you okay I'd like to begin with some warm-up exercises and
we're going to start with a couple that don't involve the guitar at all so put your guitar aside for a second and what we're going to do here is we're going to stretch the muscles that basically are involved when you're Playing guitar and I really think this is essential to having a productive practice session or gig it's also essential to not hurting yourself and cramping up and it's very similar to what an athlete would do before they went in to play a game or do some exercising okay the first one begins with stretching the back
and shoulders and arms and guitar players tend to slouch when we practice so these are really important I'm going to start with Stretching your arm across your chest oh my arm just cracked and yours might also but you can feel it basically right through your back and your shoulder and your arm and you should hold these stretches for about 10 seconds each and then do the same thing with the other arm then after that you can pull your elbow up over your head like this and you can feel that stretch right through here and in
through your back and then once you do that you can repeat these Exercises as many times as possible you can move on to your wrists and we're going to start with stretching this part of the wrist by pulling your hand gently towards you don't pull too hard you don't want to hurt yourself just feel it sort of warmly burn through here hold that for 10 seconds and then do the opposite this way and you can feel that burn through here don't pull too hard and don't crack your knuckles you're just trying to stretch the wrist
the Last stretch is your thumb and what you're going to do is gently pull your thumb towards your arm this way and you can feel the muscle stretch throughout here and then repeat the same procedure with the other hand and you can do this as many times as you feel unnecessary and should hold each stretch once again for 10 seconds each now let's move on to massages okay basically when we massage the muscle we're stimulating blood flow and this Type of thing you can do in between exercises or during a practice session I even do
this during a gig so let me show you the areas that might be sore or cramped up basically starts with your shoulder muscles the front of your shoulder up in here and use a pretty strong amount of pressure you can use either your thumb or the heel of your hand or your fingertips and then the outside of your forearm this tends to cramp up a lot and then your hand and Once again you can use your thumb and you can massage through your palm by using pretty strong pressure and it can also individually do your
fingers like this going all the way to the tips and this is great once again in between exercises it really helps to keep your hands limber and loose and there are other simple things you can do but just like rubbing one hand with the next and what not and these type of exercises between the stretching and massaging Should get you prepared to actually play the instrument and the great thing about these is that you don't have to be playing this could be you as you're walking into a session or if you have a couple of
minutes before you go onstage or whatever and it should help you have a more productive practice or gig and also prevent injury which is very important you okay now I'd like to demonstrate some Warm-up exercises is applied to the guitar so pick up your guitars again and basically what I'm going to show you is a few exercises concentrating on the stretching and independence of the left hand and a few exercises concentrating on the freedom and accuracy of the right hand and then we'll combine the two remember the goal here is not to develop mega speed
but really just to warm up your hands and get them comfortable so later on we can accomplish some bigger Tasks so first let's work on the first left hand exercise I suggest that you start this exercise higher up on the neck because once we get into some stretches it's going to be a little bit difficult as you go down low where the frets are bigger and basically your right hand isn't really that important right now I was playing the notes separately you can play them as chords if you'd like you can play them without a
pick it really doesn't Matter we're concentrating on the left hand make sure that the notes ring out clearly because what we're really working on is the stretching and independence of your left hand also use a pretty strong pressure now what's happening here is that I'm playing on four adjacent strings with a basic chord shape it sounds pretty ugly in fact most of these chord shapes sound ugly so turn your volume down when you're practicing and then we're taking the two inside Fingers two and three and we're reversing them like this then we're taking you two
outside fingers one and four and reversing them and then taking the two inside fingers and putting them back to their starting position the next step is to just move up the cord shape to the next string group so between the a and the B string and repeat the same motion and then move up to the last string group between the low E and the g string and repeat the same Four cords again you okay what I just played is the continuation of the first warm-up exercise basically when you're through you're going to have a sequence
of stretches that continue down the neck so this is considered part 2 and what I did is I started in our original position which was between the low E and the G and we were in the 10th position and I stretched the first finger down a half Step and kept the rest where they were and did the same sequence of finger moves so in other words then reversing the two middle fingers then the two outer and then the two middle again and just continued up to the next string group and then to the final string
group again alright that was part three of the exercise and at the end of part two we ended up with this position between the first string groups now what you're Going to do is put your fingers back in order and while leaving your third and fourth where they are stretched your second down a half step so we have this shape and once again continue with the moves all the way up the string groups now for the final part okay that was the final part and if you haven't guessed already what we did is we moved
a third finger down a half step while keeping the pinky where it was so we had this shape this time the Stretches between your third and fourth finger and continue with the pattern until we got up to the first set of strings again and then all you do is you bring your pinky down a half step which brings you to the exact same shape that you started with but your half step lower because we started originally in the tenth position now we're in the ninth position and that's the first warm-up exercise okay the second warm-up
exercise for Your left hand is basically a variation of the one that we just finished you can start in a tenth position again with the same setup and we're going to do the same moves except this time we're going to do some different stretches with the left hand and by the way you don't have to arpeggiate the notes you can just strum the chords if you'd like okay this stretch was different in that instead of moving one finger down a half step we move the first finger down a Half step and the fourth finger up
a half step so we have a double stretch between the third and the fourth and the first and the second and then we did the same exact moves okay now we'll do the final variation on this exercise and this involves yet a larger stretch here's how it goes all right what we did here on the final variation is instead of just having a stretch between the first and second and the third and fourth we have a half step stretch now Between every finger so you do that by moving your first finger down yet another half
step and then your second finger down a half step as well remember when doing these exercises to make sure that the notes ring clearly and see just how far down the neck you can go by moving downward by half steps now for all you crazy guitarists out there there is one more variation that involves some super stretches remember don't hurt yourself As you can see I started out in a lower position which made the final stretch a lot more difficult let me break it down for you now with this exercise instead of having all your
fingers on adjacent strings we start with the two middle fingers two and three on the two middle strings D and G and your first and fourth fingers on the low and high E strings and then you just continue with the same moves that we've been doing throughout the moves from here should Look familiar we move the first finger down a half step and the fourth finger up a half step and then the first finger down one more half step and the second finger down another half step creating a full step between each finger for the
ultimate stretch what I usually do is I play these exercises in sequence one after the next without stopping I start on the twelfth or tenth fret and work my way down chromatically until I can't stretch anymore now let's turn our Attention to right hand exercises and you give your left hand to rest the next exercise concentrates on the flow and precision of the right hand and has many variations so let me demonstrate it in its basic form you as you just heard that exercise involved notes that were being arpeggiated intervallic lee so let's talk about
the left hand shapes that I was going through it's based off of a major Barre Chord form with an added third except you're playing the notes separately and then we just sort of intervallic lis disperse those notes now that Barre chord is moved up through a progression that doesn't make too much sense but at least makes the exercise a little bit more interesting goes a major C major emajor C sharp major G major B major and F sharp major all right now let me show you the pattern That we're doing throughout the cord or arpeggio
we're starting on the root or skipping a string and going to the next note in the arpeggio then you're going to the second note of the arpeggio in this case which is e skipping a string again then to the third note of the arpeggio the fourth so we have remember to pick down up down up down up down up to D sin you start on the added third which is C sharp on the E string and skip down to the g string then up to the B and skip down to the D up to the
G skip to the a up to the D string and skip to the E remember once again to keep your right hand picking consistent down-up down-up down-up down-up don't let that falter at all so here's what it sounds like when you combine the two and then from there just go through the sequence of chords that I outlined earlier and you have the entire exercise okay now that you know the initial Exercise all the variations involve the right hand and we're going to concentrate on our picking first of all instead of starting with a down stroke
and using down up down up down up do the same exercise starting on an upstroke and consistently playing up down up down up down throughout the entire exercise that's going to look like this it might be a little bit more difficult at first but the reason we're doing this is so in any situation you'll be able to Pick you're not always going to have the comfort of starting on your favorite stroke whether it's down or up you should be able to sort of get through anything that comes your way now the other variations involve playing
more than one time on each note we're going to start with playing twice on each note then three times on each note and then finally four times on each note not only that but starting each sequence with a Down and then with an up so let Me demonstrate through the one chord what these will look like on your right hand we'll start with the doubles starting on a Down then double starting with an up then three times starting with it down three times starting with an up four times starting with down and finally four times
starting with an upstroke alright what you're going to do is play each one of those variations through the entire chord sequence just Remember to keep the notes very even and also to keep that consistent alternate picking especially when you're playing triplets going from one string to the next because there's an odd amount of notes per string really really watch that you are keeping a consistent down-up down-up now let me demonstrate what it would sound like playing two notes per string through the entire sequence just so you can have an example I basically have technique broken
down To four categories one is scalar or linear examples two is arpeggiated examples three is left hand or legato playing and four is sweet picking and what I do is I have files in a file cabinet and I collect information from videos and books and lessons and whatever and I file them according to topic if it's an arpeggio thing that I learned from magazine I rip it out and stick it into the arpeggio section and then when it comes time to practice Instead of saying oh there's millions of things how am I going to practice
all this stuff basically I make a master list of what's in all those files that list changes from day to day constantly add to it and you sit down and you basically customize a practice session so let's say you have about two hours to practice I personally have four categories so I'd pick one item from each one of those categories and practice that item for a half hour Move on to the next practice a four half-hour and then by the time I'm done after two hours I've covered the entire topic of okay now that we
concentrated on the left hand and the right hand individually let me show you a few exercises that are equally effective for both hands okay this exercise starts with your first finger on the low E string on the first fret in the first position skips Over the a string goes with your second finger on the D string and the note e and then your third finger on the g string on the note B flat and your fourth finger on the high E string on the note a flat and your right hand is picking once again down
up down up now the next step is to simply flip your hand sort of like a mirror image so your first finger is now on the high E and your fourth finger is on the low E and start from the high E and go down to low E with the picking down up down up and combine the two what I did after that is I a scented chromatically and you should take this all the way up to the 12th fret and then descend using a similar but slightly different pattern here's how it goes okay all
I did there is instead of starting on the first finger and a sending one two three four we started on the pinky on the high E and descended four three two one Once again picking alternately and then we reversed that image like a mirror and started on the fourth finger once again on the low E all right since this exercise involves alternate picking through string skips make sure that your right hand picking is very accurate and that you keep your pic close to the strings so you don't hit the string that you're actually skipping it's
called efficiency of motion now you should also practice the Same exact exercise starting an upstroke as well to make sure that you're ambidextrous that was a slight variation on the exercise that we just did instead of playing the notes in order one two three four I'm playing 1 3 4 2 1 3 4 2 and the notes and skips are exactly the same make sure you keep the picking alternate let me show you now the descending version alright that was another slight variation this time on the descending Pattern instead of playing four three two one
you play 4 2 1 3 4 2 1 3 and continue that pattern down the neck chromatically remember to keep your picking alternate the entire time and that will wrap up our warm-up exercises I usually play these type of exercises for I guess about 10 to 20 minutes before actually tackling some more difficult practicing or a gig or whatever and it usually helps to get both hands acclimated to The guitar especially when you're cold so have fun and make sure you warm up in order to realize our creative visions it's essential that we develop the
craft of our instrument which leads us to the area of technique I'm going to show you a whole bunch of different exercises that concentrate on developing speed and accuracy now for me the most effective tool for developing these areas is the metronome whether that metronome ax is a simple click or a drum machine or Sequencer isn't important the important thing is that there's a steady and even pulse now practicing and playing to metronome will help you to play accurately at any speed and also show you how to subdivide the beat any which way that you
want now the first exercise involves a very familiar looking shape it's based off of an a major scale in the fourth position two octaves so let me show you that fingering first this exercise involves planning to a Steady pulse in other words the speed or tempo of the click is not going to change but how we subdivide that click is going to change first we'll start with playing one note per beat which is coordinates now I have a metronome setting of sixty-six beats per minute which is really slow but by the time we're done you're
going to be playing a lot of notes per beat so it's important that we start slow remember also to keep it consistent down up down up down up Picking pattern the entire time here is chord notes to the metronome gray or now when you're playing this remember it might seem easy but really concentrate getting even spacing between all those notes it's actually more difficult when you have a lot of space in between the clicks now let me demonstrate eighth notes to the metronome this would be two notes per beat three four and now triplets which
is three notes to the beat three for the next division is Sixteenth notes four notes per beat gray four now we're getting a bit faster the next division is six notes per beat or sixteenth note triplets you and the last group is 32nd notes or eighth notes per beat and this is going to be quite faster than what we started but remember the pulse didn't change at all just the division of that pulse three or Okay now that you're familiar with playing to a metronome and subdividing the beats I'd like to show you how to
increase your speed and what we're going to do here is we're going to develop accuracy at high speeds the basic concept is you start with a slow tempo in the metronome play the exercise or example as many times until you've mastered it at that tempo and increase the metronome about eight beats per minute and then play the exercise over And over at that tempo increase it and so on until you get to your desired tempo I'm going to demonstrate this with an exercise that uses chromatics four fingers in a row and they're played as sixteenth
notes to the metronome let me show you the exercise first then I'll show you how to develop the speed as I mentioned this exercise is based off of a sixteenth note pattern which means you're going to be playing four notes per beat besides concentrating on Getting those notes to fall evenly over each click you should also accent every four notes in other words every time the click comes down accent with a harder pick stroke so your group of four would sound like this etc etc and what this is going to enable you to do is
when you get faster and faster that accent will be your reference point in other words at a slow tempo your accent might just sound like etc and you'll be able to know where you are but at a faster tempo When the notes are whizzing by your accent might be in other words and that's how you know exactly where you are when you're playing a fast tempos so what I'm going to do here is I'm going to show you how I would take this exercise and develop it speed wise now the first thing you have to
do is you have to get a gol tempo let's say our goal tempo for today is 200 beats per minute now normally I would start this pretty low in the metronome maybe about 100 or so and it would take me quite a while to get to 200 but for the videos purpose I'll start at about 120 and I'll increase it in larger increments than I would normally do just to save some time and what's going to happen is by the time I get to 200 hopefully not only should it be wound but it should also
be clean another thing to keep in mind is your technique that you're using when you're playing slow should be the same technique that you use when you're Playing fast in other words when you're playing slow your programming in your technique so when you play fast be consistent in your hand position and also in your left hand position right and left okay here we go okay so we finally reached 200 now like I said before normally that would take a lot longer because I'd go in increments of 8 now if you find at any point along
that development that you just don't Have it's not coming together it's not clean like I'm going up to 200 if 176 I felt like I was pushing it it's a good idea to back the metronome down go to a slower speed so I was at 200 let's say that was difficult I'll go back down to about 170 try to get comfortable to air first and then go back up to 200 and see how it feels on a similar note if you reach this desired speed that you're going to and You still want to push the
envelope a little further what you can do is let's say you want to hit 208 now go past 208 go to like 216 and just kill yourself and then go back to 208 and that tempo will feel a lot easier let's attempt that that was very difficult let's go back down to 208 see if it's any easier now okay so it's pretty much there so you get the idea about pushing the envelope and then going back just remember make Sure that you clean and accurate and remember to accent the notes as well okay now I'd
like to demonstrate the same technique building speed and accuracy but this time with a sixteenth note triplet pattern you're going to play six notes per beat and it's based off of a three note per string pattern in E minor so here it goes one two three four okay then you would follow the same steps to get to your goal tempo let's say your goal tempo in This case is about 126 let's hear what it sounds like at that tempo one two three four my first band experience technically was actually the first time I even picked
up a guitar when I started again when I was 12 and these friends of mine actually our ex keyboard player everybody would join everybody would gather at his house cuz he had a piano and I remember they were playing and some young playing hey hey my my and they signed me the little Down Ben and Ben that was my partner sat there getting there and I guess that was kind of a bad experience another good way to develop speed is to work on what I call fragments or segments that is if you have a long
exercise or passage it's really difficult to play instead of trying to swallow the whole thing take bites work on small sections and develop that section and then connect them one by one until you have the big picture this way You can concentrate on one little thing at a time as opposed to tons of notes now I have several examples of what I call scale fragments and their little patterns that you just play over and over and over and over and eventually I'll show you how to develop these into long scale sequences that you can use
in soloing and whatnot so let's start by going through the different scale fragments Oh Good all the examples I just played we're in the key of g-major you can play these anywhere on the neck between any two strings it doesn't really matter you can practice them chromatically meaning if you were playing this one perhaps play it four times in each position and then move up a half-step or you can pick a key and play them diatonically in other words conform your fingers to the notes and the key You can practice these scale fragments with the
metronome as we discussed or there's a couple of other ways to develop speed first way involves playing the exercise over and over and over but starting in a slow tempo and gradually increasing the speed and then bringing it back down to a slow tempo so you're almost like revving you're almost revving you're playing and as you do this as you play faster you can also vary the degree of dynamics that you Pick with you can pick harder or softer it's a really good way to develop a speed here's an example another way of developing speed
is by playing the exercise over and over and over but this time playing consistently at a slow to moderate tempo and then sort of blasting out a fast tempo only a couple of times so in other words you're jogging for a while then you're going to sprint for a second and go back to jogging this is a way to build stamina As well as speed sounds like this now a fun thing to do when you're working on all these exercises since they're pretty similar some of them are using sixteenth notes and some are sixteenth note
triplets is to sort of interact in other words mix them together like you might have one it sounds like which is what I've been playing for the last couple of seconds and there was another one that went there's also another one that went try Combining some of these exercises randomly and use your imagination might sound something like this each one of these fragments could now be used in a longer sequence of notes perhaps a run through a scale of what net so let me show you how a few of these can be developed one two
three four you should recognize the first part of that as the three note per string fragment that we did before except I transposed it to the key of a and played It through an E major scale and the sequence consisted of playing that same pattern starting from each string and then using the descending pattern to do the same thing you could play these patterns through the scales you can change positions you can play and repeat the sequence in any position as many times as you want just kind of mix it up and that makes for
a good run in a solo if you're trying to build some tension I'll demonstrate that a little bit later Let's move on to another long sequence of notes that's based off of another fragment and here's a descending version of that okay once again hopefully you recognize the little fragments that originated these little runts and descending while it's fresh in our mind came from that and sound like this and a sending was pretty much the same thing except starting on the first finger it also has a little Bit of the triplet in there but we're just
arranging the note so that it works out to be a sixteenth note pattern here's another example using a fragment that includes string skipping now with this one instead of moving up the neck playing three notes per string I stayed in the same position because it facilitates skipping strings without having to do any position changes so instead of having to go something awkward like that we're staying in the Same position so the scale shape I'm doing as a repeated E but we don't really hear that repeated E because we're skipping strings here's the pattern slow you
let's just do one more sixteenth note pattern through a scale once again using one of the fragments that we learned earlier here it is slow see if you can recognize the fragments in this one Okay now that we have all the scaler technique under our hands let me show you how this can be applied to improvising I'm going to solo over progression and D minor basically using D Dorian and D minor scales and I'm going to throw in a couple of these sixteenth note runs and you can see the way it interacts with melodies and
whatnot and once you get a taste of this maybe you can try it in your own solos You when I first started playing I probably had some of the same typical influences that kids my age had it's like Black Sabbath Zeppelin and the WHO and iron made and then I started to get more drawn towards the guitar players as I played more I was drawn to players that really had unique style because really into Rush and Alex Lifeson and Steve Howe with yes Randy Rhoads and then I finally discovered Steve Morrison my Life changed I
heard the bash the first time and I was just like this is unreal got every drugs album and started getting into Steve and the drags and Al Di Meola and Helen Holdsworth had a similar experience here in Stevie Ray Vaughan for the first time like just blown away one of the more difficult techniques for most guitarists is using alternate picking through our pedos now this has been something that's been difficult for Me for a while and it's actually making me kind of mad so I analyzed what the problem was and I came up with an
interesting little fact first of all the problem always seemed to arise when I was encountering what I call inside the string picking that to me is really difficult because it seems like your pick is kind of trapped in between these two strings as opposed to playing on the outside of the strings like this where it feels like you have a bit more Freedom of motion to experiment and see if this is a problem for you I suggest playing two notes on adjacent strings let's say a on the g string and D on the B string
and first try picking them starting with a down stroke and then when an upstroke and let's see how that feels try to various tempos see how fast you can get it now do the same thing but start on an upstroke and go up down up down you're Going to encounter that inside of the string picking phenomena let's try that now my right hand immediately starts to tense up as soon as I encounter that inside of the string technique and I think it's because I feel like I'm sort of trapped and I have no range of
motion this is usually a problem for most guitar players some guys have this taken care of and I'll have to shoot them all but anyway how do you practice this how do you get around this well very simply You just practice the motion that you're having a problem with now this could be very boring if you sit there doing that for any period of time that's going to make it effective so what I've done is I've come up with a little attitude that practices and concentrates on the inside of the string picking and by the
way if you ever have something that you're trying to work on and you need to develop it come up with some little progression or a Tudor song it makes it A lot more interesting so let me demonstrate it for you now slow and then I'll play it up the tempo now I'm going to demonstrate this up to speed with the metronome make sure that the pick strokes are even and that you maintain in this case down-up down-up down-up because we're starting on a higher string and going to a lower string which once again makes us
encounter this inside of the string technique so here we go Now that exercise specifically narrows down the problem and concentrates only on that problem but the thing is you're going to encounter this picking hang-up through an arpeggio in other words some part of their pgo will have you'll have no problem playing in other parts you might have this inside of the string thing let me demonstrate on a major arpeggio if I play G major in the seventh position I have down up down up now the initial down up isn't a Problem either is the next
down but it's when you go to the D on the g string you have the inside of the string picking down up so in order to play that quickly you're going to have to overcome that little problem right there so once again instead of practicing that same arpeggio over and over I came up with another little a tude that incorporates major and minor arpeggios and that picking hang up is kind of Snuck in the middle of the arpeggio so it's not just only concentrating on that but it's incorporating it into a larger picture here it
is slow now I've added an extra challenge to this one because not only are we working on the picking hang-up but we're skipping strings while doing that hang-up let me show you where that happens right over here between the D and it's octave between the D and the C between the D And the B you're playing up down up down and also trying not to hit the B string while you're at it here it is up to tempo I first picked up the guitar when I was 12 and I didn't take any formal lessons I
took music theory my last two years in high school so I had two years of that and I went to Berkeley right out of high school a couple of times I had some scattered lessons before Berkeley it took a few lessons to try to prepare Myself and I remember going to group classes with a friend of mine but I never really took any formal continuous lessons by the time I went to Berkeley I had been working on technique and chops and stuff like that and I had a couple years of classical music theory so when
I came into Berkeley all the things like arranging and sight singing and harmony and a jazz perspective I had no clue so I remember taking the placement just getting in like level one of everything And starting from scratch and I think that the most I learned there was in harmony and about chord structure and progressions and and also how to continue to learn because that was one of the things that I kind of picked up on is that there's such a resource out there whether you go into school or not I mean it's great to
go to school because you have the discipline of going every day but there's just so many resources out there and the students That really applied themselves whether it was to the library the listening rooms or attending recitals they really excelled and the ones that just kind of sat there I thought it was all going to come to them eventually weren't there now I'd like to concentrate on left hand strength what we're going to do is we're going to work on some scale fragments once again but instead of picking them we'll play them legato in other
words will use all hammer-ons And pull-offs and basically I'm going to show you a couple of different patterns and then I'll show you how to practice them so let's start with the legato patterns okay this is how we're going to practice these you're going to play each pattern to a watch this time for a minute each if you feel like you need more you can do each for two minutes or three if you'd like the idea is to not stop do one exercise into the next a minute each And you can play them at varying
speeds just make sure that the notes are clean and that you're using complete legato technique now with the last couple notice I did pick except I only picked when I was ascending from the D string to the G happened right over here so in this case it was on the C sharp that's the only other time you're going to pick also when you practice these you don't have to stay in the positions that I just showed you can practice them on Any string you could stretch your fingers out you can play them in any position
in any key diatonically or chromatically let me demonstrate a little bit remember one minute each without stopping No that's the idea okay once you get those all practiced I suggest that you do our little massage thing that we talked about in the beginning and also stretch your wrists because it's time to take Those fragments and put them into expanded sequences through scale so using very little picking once again this is called legato here's the first exercise okay basically what I did is I took one of the fragments the one that went like this and also
another one that went like this and combined them a sending through an a major scale descending we shifted up to the next position in the key and work their way Back down the scale let me play the to scale positions by themselves just so you know what they sound like straight through and you could practice that sequence between any two positions in any key or even using nonsense patterns just shifting up by half steps maybe something like this now let's hear the original pattern up to speed here's one more legato example this one is in
the key of E minor and it Shifts positions quite a number of times so practice it slowly and make sure that you get those position shifts clean and clear this also involves some right hand tapping here it is slow let's break this down into segments so you can practice each section and then put it all together it's basically a sending and three octaves and the pattern repeats here it is that's starting on F sharp and ending on E and then starting an F sharp an octave Higher the exact same thing and then one octave higher
starting on the B string so this is a perfect example of practicing segments and then connecting all of them to get the whole run because you might just want to practice each octave at a time then put it together when you get to the top you're tapping the G on the high E string and it's basically a double tap and then you're tapping a and then back down to G so you Could practice that small fragment a few times and get that on you fingers and descending we have another three octave pattern so you can
practice each one of them as a fragment just master that octave and then put them all together now I'm going to play the whole thing ascending and descending up to tempo when we first started the ban we were all 17 and 18 years old so the last album that we just put out I mean it's Like almost 10 years later so I think we've all matured as songwriters and you know we listen to the old demos and whatnot and there's bootlegs are those demos and stuff and it's just like oh my god what were we
thinking you know so stuff the music and writing is definitely evolved to wrap up the topic of technique I'd like to introduce a different style of picking other than alternate it's called sweep picking and some of you may be Familiar with this technique some of you may not be but in either case I'd like to offer you my exercises and things like that that basically isolate the technique and then you can expand and apply it to things that you might already know now I usually apply sweep picking to arpeggios and not really to scale or
examples and I also use it in a way where it's sort of a weapon or a tool to execute a fast flurry of notes let me show you a couple of exercises That work on the technique all right there's two things to keep in mind when working on this exercise one of them is to separate the note to the left hand in other words you're not playing chords but you're separating the notes and playing arpeggios and also with the right hand you want to separate the notes as well the words don't strum them all together
but push down on the pick so it knocks into the next string sort of falling from string to string you Don't want to make separate motions like this you want to push the pick down down down down and then up up up up pushing against the strings now you can actually mute the strings and work on just the right hand you don't want it to sound like this you want the separation the left hand pattern is very similar to some of the warm-up exercises we were doing involves forefinger mirror type shapes starts one two three
four then reverse and go 1 2 3 4 again Starting on the high e move up a half step and play 4 3 2 1 from the D to the E string do the mirror image and play 4 3 2 1 from the e to the D here it is again and then simply move it up continuing in half steps you can also play this on different string groups if you want okay just as a fun variation you can take this technique and just mutate the note to the left hand and I came up with
once again another etude using this Sweeping technique it goes like this here it is played to the metronome at 176 a sixteenth notes up to speed to break the sound we're using the exact same pattern as the exercise in other words for notes a sending and four notes descending and then doing the same thing starting on the pinky except I just changed the notes we start on E and we're playing a power chord E and then the fifth B and then we're doubling that a and B and for the reverse we're Playing an a diminished
7th chord starting an f-sharp and descending to a f-sharp E flat C and a then we're going down a minor 3rd and we're doing an F sharp diminished 7th so we have F sharp a C natural and E flat which is actually the same thing as an a diminished 7th another inversion and for the reverse we're playing a D flat power chord which is D flat and the fifth a flat but we're starting on the a flat and descending and to finish it up we're doing the Original exercise which ends up on e-flat a half
step away to start over again here's one more sweet picking exercise this one's applied to arpeggios let me demonstrate it for you slowly this pattern is based off a major arpeggio so let's go through the different arpeggios and the chords that they come from first one is d coming from this chord fingering with an added Fifth a second one is f-sharp based off of an f-sharp Barre chord with an added third the next one is E major based off of this chord form once again with an added fifth and the last one is a major
based off of this Barre chord with an added third starting with D the picking goes down down down down down when you get to the a that's when you're going to reverse and play an upstroke and pull off to the f-sharp and then the rest of the Arpeggio is descending using all up strokes remember to separate the notes you're not playing a chord when you get to the next arpeggio f-sharp you're still continuing with and up in fact you can almost consider it the third of the D arpeggio so you're kind of finishing up the
D arpeggio because after that we're going to repeat the f-sharp and start with a Down stroke and outline the f-sharp major arpeggio down down down down down down and then up on the a Sharp pull off to the f-sharp and continue all consecutive up strokes to finish off the arpeggio so from the D to the f-sharp sounds like this then we're going to move up to G sharp which is the third of e and basically we're going to follow the same exact pattern so starting with it down reverse at the top where the fifth is
do a pull off and come back down using all ups repeat the third of the chord which Is G sharp and then move up a half-step and play the a major arpeggio the same way and that's it here it is up to tempo the majority of our writing processes together as a band some body usually has a progression or groove or an idea and they bring that in and basically we just jam on it we set the tape recorder and just kind of go for it and add those jams some solid ideas start to happen
we start working on arrangements and before you know we have a song you write lyrics Yourself yes I write lyrics and I'm really really interested in lyric and melody and how that contributes to the song the real importance of the lyrics and the melody and the vocalists the cool thing is that all of us were basically influenced by the same bands and they have a lot of them happen to be progressive like Rush and yes the drags and Genesis and even Zappa's music so we all got together at Berklee it just kind of naturally came
out this this type of Music in our times and and even even you know using the harmony harmony that was a little bit more experimental or creative and whatnot and it was just kind of a natural direction for us all we've been focusing in a lot of developing techniques for sewing and chop building let's switch gears now and concentrate on building your chord vocabulary what we're going to do is we're going to take the ever-faithful power chord By adding certain notes of these chords we're going to mutate them and we're going to add some colors
and drama into basic chord progressions so let's first make sure everybody knows what the power chord is basically it's a two note chord consisting of root and fifth for example a B power chord would consists of B and the fifth f-sharp now you could expand and you can double the B or you can put the fifth in the base which makes the chord sound even Heavier so the F sharp will be below the B this is really effective and one other type that's not really a typical power cord but it's a progressive power cord you
take the root v and you add the ninth on top sounds like this to explore this topic a little bit further you have to understand two things first of all which notes can be added to the power chords and second of all how those notes affect the name of The chord and also the function of the chord in the progression first of all we have the root and fifth well you see as an example if we add an e or a third to that we have a C major chord if we add an E flat
to that which is a minor third we have a C minor chord if we add a second or ninth to that we have what's called the suspended second chord in this case it would be a D if we add a fourth to that we have what's called a suspended fourth in this case The fourth would be all of those chords added one note to the power cord and drastically change the sound now let's go through some chords that add two notes if we add the major 3rd and the major 7th we have a major 7th
chord so you'd have the power chord the major 3rd E and a major 7th B if we add the minor third and a flat seventh we have a minor seventh chord in this case it would be an E flat and a B flat add it to the power chord if we add A major third and a flat seven we have what's called a dominant seventh chord in this case E's a major third B flat is a flat seventh add to the power chord and now there are a couple of chords which I call add nine
chords what they are major and minor chords so we're going to have a major minor to added and on top of that the ninth as well a major add nine would add a major third E and a nine D a minor add nine would add the flat third E flat and the ninth D now let's talk about how xi added to the power chord changes the name will keep the major third and will add an 11th and we end up with a major add xi here's the power chord here's the major 3rd here's the 11th
don't worry we won't be playing these fingerings and the final chord is a minor 11 chord where we add three notes the minor third the flat seven and also the eleventh which once again is F and Just to make this easier for now we'll put the fifth in the base now what this new information allows us to do is to take a simple chord progression that you wrote maybe you have a great melody going and develop the sound of the chords to add some spice let's say the chord progression we have is all power chords
a F to G very very typical by adding some of these intervals and creating these more interesting chords perhaps we can make it sound a little Bit more interesting or we can take it in a more dramatic direction so I'll turn the a into an A minor at nine I'll turn the F into an F sus 2 and maybe the g2a juice us too so what started at is that sounds like that's the basic picture now unfortunately when you're trying to play this stuff loud and heavy it's going to sound pretty bad because of the
dissonance of the intervals I know you'd Want to hear this but I'll demonstrate some of them don't sound that bad but once we start getting to Levenson sevenths believe me it's horrible people will cringe so here's where orchestration comes into play what we're going to do is we're going to divide the part up into two separate parts and you can do this when you're recording or you can do it in a band if you have a bass and guitar you could divide the parts up or if you have two guitar plays or Guitar and keyboards
the concept is one guy plays the power chord or the root and the fifth and the other guy plays the ad attention sometimes it's not either one note sometimes it's two sometimes it's three so I have a couple of examples that demonstrate how in our case open strings added two power chords will create some interesting sound so let's go through the different chords we can create and then we'll make a little song at it The first power cord was in a we added a second to it and it created an a suspended second second power
cord was a B we added a fourth to it and we created uh suspended fourth the third power cord was a C we added a major third in a major seven and turns into a C major seven the next power cord was a c-sharp we added a be in an e and created a c-sharp minor seventh the next power chord was a D with v and the bass we added on a major third and An 11 and created a major at 11 chord the next chord was a see we added on a D and an
E and we created a major at 9 the next chord was an A we added on a C and a B which is a minor 3rd and a 9th and we created a minor add 9 chord next chord was a G we added on an A and we created another suspended second G sus 2 and the court after that had F sharp by itself in the bass and we added on the D and a and an E so what we have created is a major chord With an added 9th but the third is in the
base next chord was an f-sharp we added on an a a B and E and we created an F sharp minor 11 chord quarter - that was an F we added on a G and we created an FSS - after that we had an E and first we made an e suspended fourth by adding on the fourth a and then we made an E major by adding on the third G sharp so we had the next chord was an f-sharp we added On an a sharp of being an e and we came up with an
F sharp 7 at 11 the court after that was an A we added on a B and a C sharp to create a major add 9 and the second-to-last chord was a B and we added on a D sharp and an E to create a major with an added 11th and we end the whole thing up on a c-sharp minor 7 okay so I'd like to demonstrate with the sequencer what this sounds like with the two parts divided up so I'll play with a Heavy sound the power chords and the sequencer will play the picking
part that I demonstrated before and instead of having an ugly mess trying to play it all together with Distortion we have a nice collaboration of the two parts and this is great when you're recording because you can add a lot of fidelity you can have a great heavy sound underneath and then with an acoustic or a super clean guitar you can do the picking or that could be piano or Whatever it adds a lot of dimension to your writing so let's see what that sounds like you as you can see our power corner has come
a pretty long way we started with some really basic nonsense and we came up with some pretty cool sounding chords now granted the progression that I created for that exercise really does it make too much sense so let me show you a little song that incorporates a lot of Those chords and is more like a piece of music I mean you can use it for background to a vocal part or could be backing up a soul or whatnot but it uses basic power chords that I'll be playing and the sequencer will be playing the second
guitar part and check it out and we've created a very vast and dense soundscape by using this technique we're taking up a lot of space so it's important that you really listen to what the other players in your band are doing For instance let's say this type of interaction that we just went through was going on between bass and keyboards it might not be necessary for you to play up moving part along with that you might want to choose a soaring melody or some lush chords in the background the point I'm trying to make is
that you should really listen for space when you're writing listen for register and listen to what the other people are playing this way you contribute what's Right for the song as opposed to just worry about your own little part remember the song comes first yes it is this this is my full-blown live setup and I guess we should start with the guitars these are the guitars I have on the road they're all custom Ibanez guitars made of basswood and as you can see the paint jobs on four of them are really similar and these paint
jobs are by Dan Lawrence who does some custom work for Ibanez and basically I Have two seven strings this one is sort of a prototype and this is a main one that I use and three six strings on the road there's string gauges nine through forty six and the low B on this seven string is a 56 and there diario strings and the pickups are DiMarzio as you can see there each guitar is the same setup just two humbuckers and they're all direct mounted into the body there's no middle pickup at all and the knot
placement is so that my hands don't sort Of knock into anything like on a strat you might have problem with your pinky or whatnot and these pickups were custom designed by Steve blue chair for DiMarzio and basically one of the interesting things about these as you can see on all the other guitars is there's a one 3-way toggle switch and the cool thing is that in the middle position you have the center two coils on but they're still hum cancelling gives a really sweet sort of scooped Sound for clean passages particularly and the frets are
6100 and it's a rosewood fretboard this is my live setup this rack was custom designed by Mark Snyder and basically you got for Mesa Boogie cabinets or Celestion vintage 30 speakers in those cabinets and what's going on here is I have an amp switcher and the amp switcher is switching between three different preamps to try axises and a Boogie mark to c+ everything that's in the rack Like the crybaby and noise gate and the volume pedal and the parameter pedals are all hooked up through this multi pin system that goes to the pedal board which
I'll show you in a second and it makes setup very easy and also the rack has a data dump its analysis data disc that allows me to save or reload any of my midi programs for the PCM 70 or the TC Electronics 20 to 90 or even the Mesa Boogie triaxis so once again on the road is really important to have backup and Make sure that nothing goes wrong and it's also very well shielded all the grounds are isolated from the chassis so you have no buzzes or once again it's really important from venue to
venue with a different sort of RF and electricity that goes on in these stages I use these picks these are jim dunlop jazz 3s for all the electric playing and then for acoustic I use these Dunlap point seventy one millimeter picks which are a little bit lighter and I play the Acoustic this is an Ibanez acoustic and it's better for strumming and whatnot the lighter picks and the way it's set up over here on the stand and Abel's me to go from electric to acoustic very quickly during the show just kind of come up to
it and play a song okay this is the pedalboard that I use live and this was custom designed by Mark Snyder once again as you can see here's the other end of the multi pin That's coming in and basically it adds all your connections for the tuner and the Mesa Boogie abacus pedal board parameter pedal volume pedal and a wah pedal and that includes all the AC just one cable right to the rack into the pedal board and this is how I change my patches basically each patch is designed so all your effects and am
switching whatnot happens just with the press of one button the cool thing about this rig is that it's very versatile so not only Do I have different patches for different sounds let me demonstrate you have a clean sound setting different types of clean sound settings like some of some cool delays and then we have some basic heavy rhythm sounds some other rhythm sounds with different courses and whatnot and also a couple cool lead sounds one of the cool aspects about this pedal Board is the real-time control over the parameters in other words I can control
the parameters of the triaxis to shape the sound as I'm playing or I can control the effects parameters to maybe add some more delay or take the layout or reverbs or whatnot you're playing a faster line you don't want as much around it so you just ease off the pedals as mutton us as much delay on it so you have full control over what you're playing well they have it we Covered a lot of ground in this video and there's a lot of information to swallow just take your time and go through section by section
and really try to get the most out of it the best is to apply what you learn as well I hope this has been inspiring and that you can use some of these ideas and approaches in your own playing and writing and I had a great time doing this video I hope to see you on tour bye bye