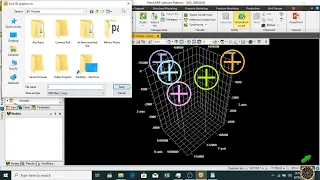
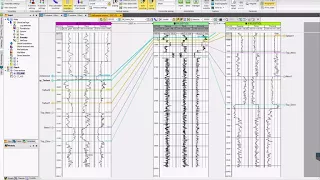
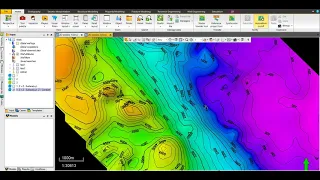
this is the first video about patrol patchouli is actually a quite popular software for rid of our modeling and simulations so it's a software that's used very widely in the oil and gas industry it's it's almost the de-facto software for preparing races of our models that's going to be used for the marine simulation software's like Eclipse the purchase oft word self is also in quite large and quite capable software it allows you to integrate both seismic data and where data and any kind of other data into a unified environment so you can work and environment
you work and examine the correlations between different kinds of data and it greatly reduces the time and effort together dinner and to organize data so it's a unified platform for examining many different country um the the version that I'm using here is patrol 2014 the latest version where I am actually recording this video it's probably 2016 I think right but the version that I have access to that's installed on my office desktop is an is the 2014 version so it might be a little bit outdated but the interface looks quite a similar to the 2016
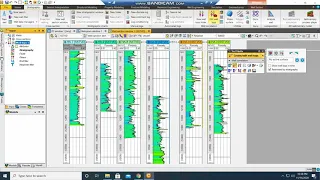
1 so the 2014 version has interface that's kind of a similar to the it adopts the unified interface for many different kinds of Windows applications so if you look at the interface of patrol it actually adopts the same kind of a interface design as furthermore Microsoft Office it's got those different tabs and underneath those different tabs you have the so-called ribbon and every weapon is basically just a collection of patterns or collection of capabilities and then on this side of the on this side of the window you have a few tabs for important cases templates
and then you have another window with models results in workflows so all those windows are going to be useful when we actually work on realistic applications and is in this gray area which is pretty much empty for now is actually the true main graphically known so later on when we start to look at different kinds of thena we're going to display those data in this part of the in this part of mundo so and then there's a quick access bar on top of the application so some of the buttons that's used quite often are put
into the quick access more so for example we have redo and undo buttons here right and this quick access bar is actually configurable so if you click on it click on this triangle you can choose which button count going and you can also remove existing buttons and then if you look at so this is actually the menu this is actually the menu the menu bar so we have a file menu if you click on it it's gonna extend and then give you all the menu items that's related to a file and their home button the
home menu button Stratego Fe seismic interpretation structure Mullen and in fact this is a menu bar all those items that's listed in the mean in this meaning depends upon your perspective so patrol has a way for organizing all those different kind of capability capabilities in terms of perspectives so here it's a here you can choose perspective and the default perspective is cosmyk2 simulation and this perspective allows you to actually goes through a certain sequence of steps or sequence of walkthroughs so that you can prepare a model from seismic data to go to a complete model
that allows you to run through through fluting noises depending upon your particular rule being a certain project you can choose a different perspective for again way if you would like to also do this or more in production you can choose that kind of an RNP perspective and depending upon the perspective that you have selected this menu bar the items on the minibar is going to change hey this is our MP perspective suppose geology and geophysics perspective again all those menu items the content in the menu bar are gonna change but let's still go back to
Salzburg ammunition right s to s hum so before we actually start to load up some data to look at some some realistic there let's let's let's let's let's click on the file button and as a it's gonna show me sort of the collection of items for you have a system right and then inside of the system item I'm gonna see system settings and these system settings Artemis gonna law allow me to configure the behavior of this software this patru software and for many of those menu items if you rather click on it you have an
option that's called add to quick access toolbar so if you choose this option then this particular button is going to go to the quick access toolbar and if you have some many items that you are going to use there often you can actually use this option to put it into the quick access quick access toolbar to save you some time now let's let's look at the content inside of the system settings so if you click on system settings you're going to see this dialog box and this dialog box her son some tabs underneath it and
for now most of the items are going to most of the options are going to look foreign to us right because we haven't actually started using it yet but one of the things that you can sort of pay attention to is this question mark on the right side of every line almost right and this question mark if you hover your mouse over it you're gonna see insurer explanation about what is what this item is about so these question marks are actually quite useful especially where you just started to use video software those question marks gives
you some quick answers about what this thing is out what what the particular line is about and on this particular dialog box we have two things that might be useful why is called rename know the directly mouse so basically this option allows us to change the name of a particular fire a particular folder that's gonna be displayed in those explorers with me through a slow double-click so if we want to change that founding of a particular item in this input pane or in those models all those names we can change names through a slow double-click
and if you do not be able that you can still rename a node or rename a file but you have to sort of right-click and then choose settings or double click that particular item and then there is going to be a settings dialog box that's gonna allow you to mininum a particular file or file folder right so this might be useful to to click to check and then there is another one called as disable spring animation and this disabled spinning animation might be useful for beginners because in this particular graphic region after we have open
is we know we know the the three main object are gonna automatically spin if you actually put a movement use your mouse to put a movement on that object that's cannot work it's gonna have an inertia it's gonna automatically spin I if that's the behavior that you don't like you might want to disable spin right so but I will actually sort of keep it and then once they have finished configuring this this between dialog box you can switch to other tabs for your masonic this part of the option might be useful when we start to
examine seismic data right especially when we try to sort of converter this segue file format to this zgy file format right the UI is the pichu's internal format and it's a it's a more efficient format and other things are not so useful right now so let's just skip it and then let's if you click on apply there all the settings that you have changed are gonna take effect but this dialog box is still gonna be there so you're gonna still see the dialog box but if you click OK then this title box is going to
disappear and the changes that you have applied he's going to take effect and that settings that's the settings for for the full software system settings and then before before before we actually just do anything or load up some data we must create a new project so let's create a new project again click on the file menu item and then choose new project oh because I have an open project already so so so it's asking me if I want to same journalism so this way I can actually open a new project this is a new project
now and then before we load any data let's still go to the files menu item and then go to the project to setup and then you have project settings so these are the settings for the project that you are working on it's not for the software it's for the project for the simulation project for the modeling project then you are actually working so let's select that and then we're going to see another dialog box settings when you project again we're gonna see lots of tabs lots of tabs that's some tabs but let's look at the
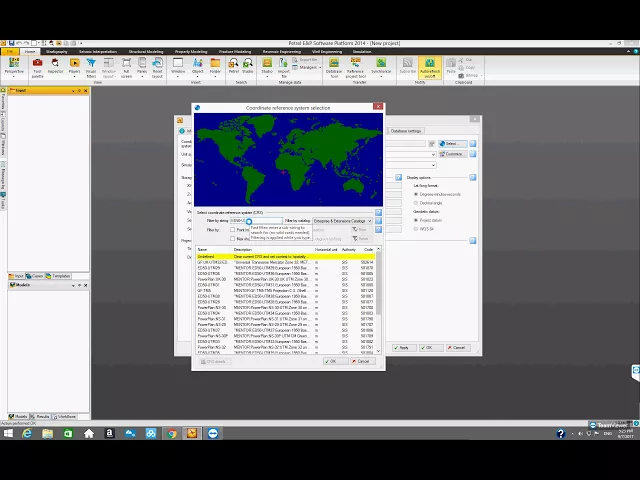
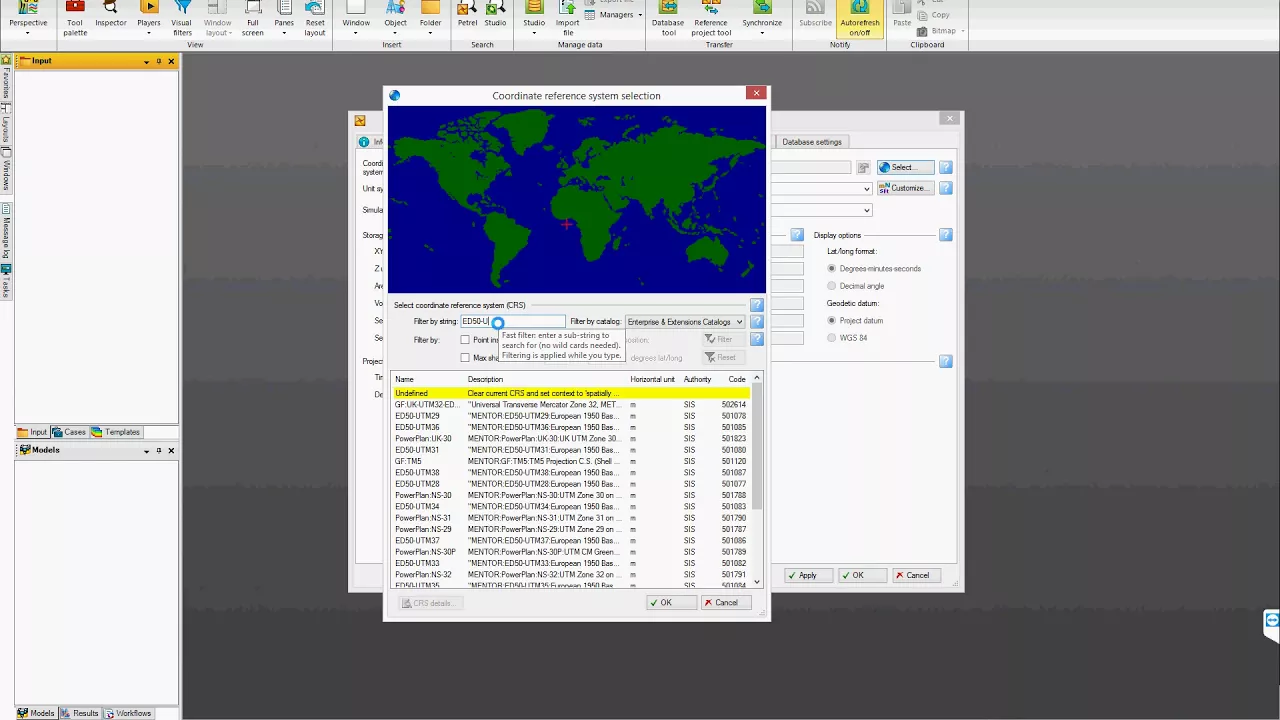
coordinates in the units tab this tab and as this tab is going to allow us to specify a coordinate system right and the name for now the coordinate system calling a reference system is undefined so let's select one by clicking on the select button so for our sort of test the deal is it for our demonstration there is it we're gonna have we're gonna use a corny assistant that's Cory d50 Beauty m31 so what I'm typing is the super filter by strings box I'm typing into this pretty buggy and as I type the list underneath
it is gonna shoot an and I'm gonna see as fewer items right because I'm actually selecting them so so after I finish timing it I got I got the one I want so if I click on this particular item there's gonna be a box displayed on the top it shows you this coordinate system is applicable to this particular region that's in Europe and the game our dataset we're going to look at is actually in the North Sea so it falls into this white box and then after you have finished selecting it let's click on OK
and this dialog box is going to disappear and then we are going to see our selected coding system here and then there's a metric system what exactly do we want to use for unit system right and the default is a metric the de Fora metric allows us is gonna use meters so the XY unit horizontal coordinate system is gonna be in the meters and then vertical coordinates is also going to be in meters area unit is meter square volume unit is meter cube but if you click on this arrow today it's gonna allow you to
choose so so if you choose a field and then XY unit is gonna be meters but the Z unit is gonna be feet and then they area he's gonna be free to see square feet and then volume unit is gonna be cubic feet right and then if you choose a field the UTM field UTM then the vertical access is your feet but XY is your medium and these the kind of units can be adjusted can be adjusted by clicking on the customize so it's asking me if I want to apply the CRS coordinate system that
I just selected to everything so I just choose yes and I think it's gonna allow me to select the measurement right suppose I want to change the area but I think I can't select the unit for the area for example I want to use ache right ask me if I want to apply this selection to everything I select okay then I ran close and now my area unit is going to be ache right customize if I want to change the volume these units were wooden right for limo in the oil industry one of the widely
used wooden unit is B Bo one bbo is one Barrow one Barrow is about 42 or 42 gallons in the US right so if I do that then the volume unit is going to be Bo so let me stitching it back so meter square all right yeah I change it back yes yes I did it Jenny back such a about to meet a few [Music] right if you have done your configurations now again you can just close it but but I forgot to show you something else maybe it's still going to be useful in the
misc you also have Miska settings one and Miska setting is to write in Miska settings the one you have autosave if you choose click on autosave every 15 minutes then there's gonna be a dialog box jumps out every 15 minutes asking you if you want to save your work on some people found it annoying so they turn it off right but if you found it useful you can sort of click on and then there's the silent no to save right but silent autosave is kind of dangerous because sometimes you just you're just experimenting with a
particular workflow or experimenting with something new oh you have made a mistake actually so so you don't really want save the work for those so suddenly sort of incorrect I walk through that kind of thing but something is just gonna save everything it's not gonna ask you if you want to say or not so sorry notice they could be just dangerous you might want to sort of check it off and then autosave every 15 minutes this one might be useful but some people found it annoying and their misc sitting to which is the global surface
view tourism theory is basically one way for you actually select different objects in your window you have to sort of specify some kind of polygon right for your selection so so this particular option is gonna allow you to select if you want to select the stuff that's inside of your polygon or do you want to select the stuff that's outside of your polygon right so when we have to deal with filters this this particular particular setting might be useful and we have to sort of remember to come to this particular dialogue about stool to see
market and that's the Nets full project that's full projects and now let's try to load up some data let's try to look look at some data so the first thing I'm going to do is to actually insert a waiver window so if I sort of go to this folder dialog and then click on it right there I'm gonna see new whale food and this one fear photo is actually quite important right because every project only allows you to insert one well who folder so as not as you as soon as you click on it you're
gonna see a photo here in the input here and then if you go back to look at the folder the new whale folder becomes gray you cannot create more where voters anymore so every project only allows you to actually create a one whales food and then let's let's let's try to import some dealer let's try to impose I'm dealing with we can right-click on the food your name and then we're gonna have a context menu and then we can choose import on selection now it's gonna open up a dialog box allows me to choose files
so on my computer I have some files that's gonna allow me to demonstrate the entire process and and those files are located in fooder that's actually on my desktop so if I go to my desktop so if I go to my desktop that stacks top right and then good my I have a photo here corporal and then I have patchouli Medina and then demo input and then I'm gonna have wheels footer that sings out of it and all those data all those files are actually just the ASCII parts there are just the text to have
a tip no more text files you can actually open it to using a notepad and then the files of type the first thing we're going to try to import is will hit the information for wheel heads so for wheel heads we have to sort of make sure that we set up to the right data format so we'll hit SOPA to actually has an item that's called whale heads and formatting startup star we just click on that and as soon as we have selected the files of type then we're gonna see more files paper right and
then we have a file that's called will header you can select as this particular file and now we can just click on open and then it's gonna give me this particular log box which allows me to specify the format of that particular file and in fact it's actually quite long right it's actually quite long so from the bottom of the bottom of the dialog box you're gonna see some some content basically the first estudia lines rings X particular files that I just opened right these are the first 30 lines of that particular file and then
this lying one line to this line one : I work too : these things are added by Patrol the actual file content doesn't actually include those line numbers those things are added by Patrol so the file come here only has the stuff that's sort of behind in this line on behind the coordinates basically and then you can examine the different columns so the first coin is a well named the second column he is ex corde which is basically the coordinate in the X Direction X Direction is supposed to be the easting if you have selected
your CRS the coordinate system if it's a UTM coordinate system so X Corps is supposed to be the so-called easting and it's supposed to be in meters and then y coordinate is supposed to be nosing and also in meters topped FC is something that's not really useful and then bottom depth bottom depth is gonna be useful right and KB means Kelly bushing Kelly bushing is the data it's a vertical data it's a real vertical reference their reference point and they have single these are so-called wave symbols so for oil whales they have different numbers to
denote different kinds of oil by so so so this is actually categorically even though it looks like a number but it's actually categorical and some numbers you cannot denote oils whales that's producing oil and some symbols are going to denote the whales that's actually having lots of natural gas and then different singles different numbers actually represent different signals later on and we have to look at the graphical representation it's going to show you that different symbols are going to have DIF different numbers here are gonna different kinds of real singles so all you have to
do is to actually mayor put the different columns you can the people file tool this part of the table so the first column is gonna be named and it's gonna have a type of text right that's a will name so we're gonna accept that so this part doesn't have to be changed but the second column is not eww eww means unified will identifier it's a unique identifier for every oil and let's let's change that if we click on this thing then second allows to chair to choose from we're going to choose surface X all right
that's the second cool so physics it's continuous right and then the third quarter means supposed to be the y-coordinates it's not Sofia sex anymore it's such a wire right so what it's also a continuous now where it's a real number and then the third column top depth is useless so let's try to change that it's a it's a 1 2 3 4 1 2 3 4 the fourth core it's not the circum if it's useless let's actually change it to use it right and then let's give it some name it's called top tips right for
now the type is unknown but it doesn't really matter and then the fifth column the fixed column is supposed with bottom depth bottom dips so if you click on it that you has a special name vert it's called total depth stuff for the lips and then it's also in meters and then the next one is the KB that's the theorem that's the dealin value it's a whale dealing very should be that like that so if you have used a earlier version of / - before they used to have an option that's called offset but now
it looks like it has disappeared their offset option has disappeared it has been replaced by the more the better name core will did a very well and then that's the sixth column right it's a world data value theorem value that's the vertical reference point and then you have single right that's a wheel single we'll see more an option that's cool we'll see more like well simmer and then from 8:00 to 11:00 all of the columns are just they do not exist so we have to select it go down the shift-key cracked on the 8th :
the head of the column and then click on it in evidence : the head of the 11th school and then we'll click on this button delete the column in the table so now we have like just a sale on columns and so where datum name is KB pushing and then um and another thing that we need to change is number of header lines to change the one the really is because you have this line here this line is in the file that are you actually reading and this line doesn't is not really data it's actually
the head of each column it's actually a name for each of the column and so this line is actually not that not really the data it's that it's a hitter we have to tell patrol that the number of header lines isn't one and then we can just click on ok and then it's a it's telling us that it's giving us some kind of some kind of information about what the data about the data that we're actually importing and it's also telling us that the coordinate system that were actually using so if the data that you
are you pulling is not really defined in this particular coordinate system you have to click on other you the CRS and I choose the CRS that's used for defining the data that you are importing but for now our data is supposed to be in the same coordinate system so if they are not and you specify a different SCRs then Patchouli's capable of actually unifying everything into a unified the project is ers it's going to do the automatic collisions of course and then some range of data right x y&z the Ranger there and then let's just
click on OK and now we're going to have all the different wheels so all those different wheels have people single that's in front of it right and all those even a singles I actually derived from the single number that's the last column of that particular file that we are we have just imported right so different number actually corresponds to different a single and for oil people those difference in mode after you have specific meanings so for example the producing more taurah means partial over and then this is a oil and then this is a partial
case I think if I'm not mistaken you can find a list of those well symbols on the web they have tables they have tables to tell you the exact meaning of each of the single and for now we don't really see all those wheels that we have just imported right so in order to actually see those whales we have to open a graphical window so if you are underneath the homes tab then there is a button that's called windows and click on it it's gonna allow us to open different windows right each window has its
own purposes and if we are not under the homes tab well we have other tabs then we don't have that button but we still have the windows button on a quick access bar and then you can click on that right let's open the sweetie window and as soon as we have opened at the sweetie you know we are going to see this kind of gray rectangular boxes in front of the wheels in front of all those whales and for now all those of gray boxes are empty right but suppose if we click on it if
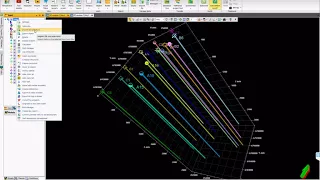
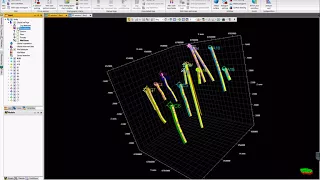
we click on this whales fuller day it's going to display all the whales in this particular graph and now I can see all the with all the different whales and each of the wheel actually has a each of the different will actually has a different a single on top and there has a will name on top and so inside this particular graphic you know I can use my mouse to to do operations only on those objects so if you look at the shape of the cursor it now looks like a small hand so the shape
of the cruiser is gonna tell you which mood the mouse is actually at for now so so so for now it's seeing the viewing mode if it looks like a small hand it means that it's in the viewing mode in the viewing mode you can sort of rotate the left button if you hold down the left button of your mouse then it's gonna allow you to route it and then if you actually use the middle button hold down the middle button it's gonna allow you to pin you can shift of objects pair grandpa's right and
if you have a wheel on your mouse if you route it the middle button will then it's gonna allow you to zoom right and sometimes lots of objects are kind of spread out throughout the entire region any your view cannot actually see all of them I if that's the case you have a big eye here that's good view oh that's right on top of the graphical you know if you couldn't connect it's gonna bring every object into the view so you can see everything all right and then this button consumer access or display item if
you click on it it's gonna allow you to put an axis on those objects right so you now can have some sort of cooling in system X & Y alone in Houston right and then on this side of the out of the window you have a you have an arrow which actually has two colors green means up really means down and the direction of the arrow is nose so it's likely more like a compass this right and sometimes you have to examine objects from upside down and if that's the case this red arrow is telling
you that you are looking at instead of looking down right just in case you do you already yeah and if you don't like this kind of black background which is actually quite good for eyes if you are have to if you have to look at this cool rock of your own huh then you have this button it's called toggle background then you're going to convert the background into red in the white what let me still convert it back into a black so can seasons community and for now the display of the will the display of
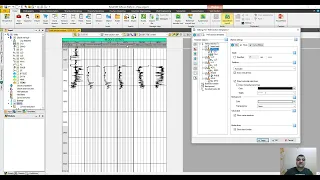
the wheel is not really ideal because it's kind of hard to see the will name and also it's hard to see the singles and the will path is more more I got very Singh long it's not really good-looking so let's let's let's try to change its display configurations so in order to do that all we have to do is do sort of right click on wheels and then choose setting settings and then it's gonna allow us to adjust the different configurations so so again it's got a lot of different tabs right but the tabs that
are well gonna be interested in for now is called style this style tab has multiple smaller tabs underneath it right so it's the young Voltaire and then start hip start also has path singles track that kind of thing right so for now pass the shoe is clicked so we're gonna be able to see the past right but now the pipe with is like to thing it's it's only ten let's change we're like 100 and then line hype is gonna be a pipe but you have a choice if you wanna just display them as solid lines
but usually people just use pipe and you don't have to sort of close this particular window to take to make changes you can just click on apply and then you're gonna see all the all the all the paths are gonna be become a seeker right so that's one of the things that I want to change and the second thing that I want to change it is to click on the singles here okay the singles tab is also underneath the style tab so for now for now the full-size is only 75 right but we can actually
adjust the font size we can change it for you ever to like 300 and then the singles eyes for now it's also too small 50 that's let's change it like a water and sorry right and then if you want to take a look at the factor you can just click on apply and then there might be bitter right it looks like everything is clear and then if you are satisfied with the effect one can just uh click on OK to close this dialog box right now we can see everything and another thing that we might
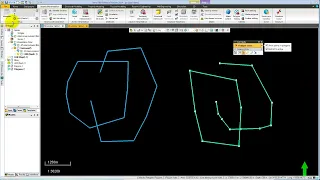
have wanna do is to actually open another 2d man no no so this is the 3d we know so everything is displayed like a three-dimensional object right but suppose we just wanna examine the the horizontal distribution of those different oils right if that's the case we can open like to do manual 2d window you so now there's nothing inside of this 2d we know yet because all the boxes in front of the data will data agree we don't actually to selectively anything yet suppose we still have the wheels be able to see the wheels but
again we want to see 18 a 15 right so how do we actually bring all the rest of the whales into the view click on the big guy so now we can see all the whales but and how they are actually distributed space and then if you want to add access to it but ordaining wears on the vertical axis and if we want to change the background which might give you a better deal and then in this two-dimensional window the operation of the mouse is slightly different so if you hold down the left key it's
gonna zoom it's gonna zoom and if you hold down the middle key today it's gonna also gonna pin right in a sweetie when you know the left button is actually for rotating right the middle button is also for painting and if you want to zoom you can also use the wheel in the middle button and that's that's seeing the 2d mansion of you how the wheels are gonna look like