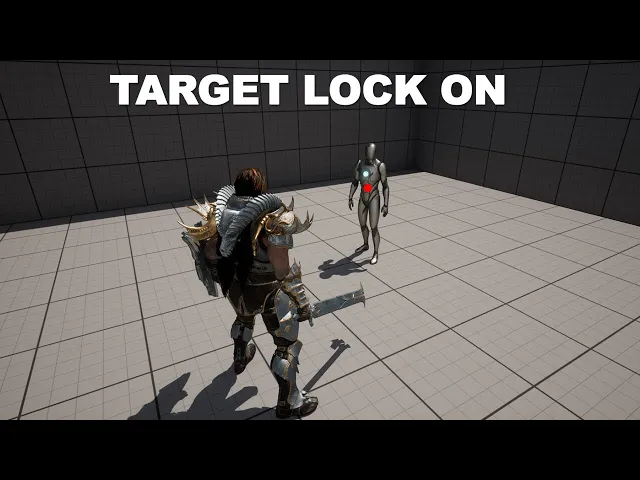
hello in this video we are going to create a dynamic lock-on targeting system this is an extract from the first section in my melee combat system course you can get the full course by clicking on the link in the description of this video hello to get started you're going to want to make sure that you've installed the epics games launcher you can get it by going to Unreal engine. com and clicking the download button in the top right corner once you've downloaded it and opened it it should look something like this you want to go to the library section and just install the latest version of Android engine so that's Unreal Engine version 5. 1 right now once you've installed it you should be able to click this launch button and clicking this should open up the unreal project browser you want to go to games and select the third person template and we're just going to call this our melee combat system click create and it should open up a project that looks like this in this course we're going to be creating a combat system from scratch although we're not going to be using the character that comes with this default third person template we're going to use one from the marketplace although it's free to download so there are no worries to download and use this character if you open up the epic games launcher again here we can download and add a bunch of assets to our project we want to go to search and look for paragon and you want to scroll down and look for the Paragon Greystone asset double click and just make sure to download this right now this asset is only available from honor engine 4.
19 to honor engine 5. 0 so we can't actually install it to our honor engine 5. 1 project so what I want you to do is actually create another project although make sure it's in Android engine version 5.
so here you can select Unreal Engine 5. if you don't have under Engine 5 you can download that from the library section just launched it it should open up the unreal project browser this time select games then select blank and just call this asset transfer so what we're going to do is basically install the Paragon asset to this project and then we'll transfer it to the Unreal Engine 5. 1 project hopefully in the future the Paragon assets are updated to Unreal Engine 5.
1 that way we can just directly transfer them into the latest version although for now we're going to have to do it with this method and find the pack on Greystone asset click the enter project and just add this to the asset transfer project that we just made once the asset has finished downloading to your project go over to the content drawer and you should see a folder called Paragon Greystone just select it and right click and select migrate then click ok but make sure everything is selected by default everything should be selected then we'll click ok it will ask us where we want to transfer this asset to we want to select the Unreal Engine project solder so inside of this folder we'll contain a list of every single Android engine project that you've made I called my project the melee combat system if you just find whatever you called your honor engine 5. 1 project double click and open it up and set the content folder then select select folder and this will transfer all of the assets from this project to that project we can now just close this as we don't need it anymore and then inside of our Android 5. 1 project there should be a folder called Paragon Greystone which should have the Paragon Greystone asset so we're going to use this character to create a combat system because he comes with a bunch of animations which are helpful for creating a good and effective combat system before I end this lecture there's one more thing I want to do if I just go to the mesh folder the default Paragon asset comes with a character who is holding a sword and a shield in this course we're going to be creating a system where the character can swap their sword and their Shield so to do this I've edited the model of this character to come without the sword and shield that way we can place and add our own Shields later on attached in the course project files of this course there will be a photo called hero just make sure to download it and just select and drag this hero fbx into the matches folder when you're dragging it in for the skeleton make sure it's the Greystone skeleton that is the character that we've just transferred because this asset uses the great Zone skeleton and then if you just scroll down for material just select this and select do not create material because we already imported all the materials when we transferred this asset then click import all and this will import a hero mesh which is not holding a sword and shield that way when we set up and code our combat character later we'll make it so we can customize the sword and shield if they want to do that we can just save this and that is all for this introduction lecture hello in this next lecture we're going to be replacing the default third person character with the character that we imported last time to get started if you go to window and select content browser and select content browser 1 this will just make it so the quadrant browser is permanently here on our screen we're going to be referencing the content browser quite a lot so it's pretty helpful to have this here once you've done this go to the Paragon Grayson folder enter the characters folder enter the heroes folder enter the grease theme folder we're going to be creating an animation blueprint and an animation blend space for our character this will allow us to control the animations that our character does to get started if you right click and go animation and for legacy and select blend space 1D select the Greystone skeleton and just call this the hero blend space 1D next if you double click and open this up go to the asset browser tab here in the right and look for idle and we want this one just drag and select this animation and place this where it says zero here so when our character has a speed of zero we're going to make them play the idle animation next if we look for jog forward in the asset browser so it's spelled a bit weirdly here so it's about jog underscore FWD so we want this one the jog forward animation just select it and drag it at Point 100.
now if I press the control button on my mouse it will pop up this little green preview so when our character is at a speed of 100 we'll make them play The Running Animation and when our character is at a speed of zero we'll make them play the idle animation next we can save and close this right click and go animation and select animation blueprint select the Greystone skeleton and just call this the hero animation blueprint double click and open this up and right click and look for State machine and connect from this little person icon to here so whatever is inside of this new state machine will control the final animation that my character does if we double click and head inside here go to the asset browser and we're going to look for the hero blend space that we just made drag this somewhere in here and connect from entry into here then if we double click we want to right click on this value and promote it to a variable and call the speed and this will control whether my character does the idle or the Running Animation so we need to write some code which will determine what speed our player character is currently moving at in order to do that if we go to the event graph and we want to look for this try get Pawn owner this will allow us to reference whatever is using this animation blueprint we want to drag off this return Bradley and look for is valid this will just make sure that we can actually reference whatever is using this animation blueprint and if that is true then we want to drag off this try get Pawn owner and look for get velocity so we'll get the velocity of whatever is using this animation blueprint and from here we're going to drag off here and look for Vector length and this will tell us the speed that our character is moving at so if I just dragging my speed variable and look for set speed and connect from here into here and from is valid into here then click compile uh if I just close this and we just want to find the default character third person animation blueprint so I think it's in the third person folder the blueprint folder and the BP third person character go to the viewport and we just want to select this mannequin and for the skeletal mesh asset we're going to look for the hero that we imported earlier and for the animation class we want to look for the hero animation blueprint and just go compile and save and if I just close this and go play now when I start my game I'm gonna be this character if I'm not moving it'll play the idle animation and if say I press the W button then it'll start to play The Running Animation there's one more thing we're going to do and that is make it so this character has some jumping animations because right now they kind of don't and it looks a bit weird so to do this if we go back to our hero animation blueprint if we just go to the hero blend space 1D and if you just click this new state machine it will take us out of the plan space we're gonna basically make it so our player character can transition into some germic animations if the player character decides to jump so here in the asset browser if you look for a jump and we want the jump land we want the jump full and we want the jump to start we want to connect from hero blend space 1D to jumpstart we're going to connect from jump start to jump four and we want to connect from jump four to jump land and we're going to collect from jump land to the hero blend space 1D I'm just going to select this and rename this the idle slash run so it's a bit clearer so this jumpstart basically contains an animation of our play character jumping up in the air if I just click this little arrow here this basically represents the condition that my player character has to reach in order to transition into this animation if you just right click on this and promote it to a variable and call this is falling then if I just click this new state machine to go back if my player character is falling we're going to make them play the jump star animation then in order to play the jump falling animation so this is going to be the animation that my player character played when they're falling through the air if we just double click in hand side here we're going to wait for our jump start animation to finish playing so in order to do that we can just right click in here and look for time remaining and we want this one time remaining jump start if this value is ever less than 0. 1 we will allow our character to transition into the jump falling animation so this basically means when there's less than 0. 1 seconds remaining of our jump start animation will allow our player character to transition into the jump full animation in order to enter the jump land animation we're going to make sure that our player character is not falling in the air anymore so in order to do this if we drag on the is falling variable look for get is falling I just drag up here and look for not Boolean so as long as this variable is not true we will allow our character to enter the jump Landing animation and in order to go back for more job learning animation to our idle run animation we will wait for our jump planning animation to finish playing so if we right click and look for time remaining and we want this one jump land and if we just struggle here and a four less than for the value we want to put 0.
1 and connect this into here so now our player character will be able to jump if I just click compile and then I click this is falling gravel and a player character will do that jump start animation then they'll be entering this jump for Loop when my player character is no longer falling they'll enter the jump land and then transition into their idle run animation so the final thing we need to do is tell the game when our player character is falling if we go back to the event graph what we can do is just drag off this try get Pawn owner and look for get movement component and from here this will allow us to know if our player character is ever falling so if we just struggle for it and F4 is falling and then drag or is following variable that we made earlier and the fourth set is falling and connect from here into here and from here into here so if our player character is have a full link in the air it will automatically set the sprayable to be true so if I go compile save and close this and now I can play when I jump my character will be falling and then it'll play the jump up animation and when my play character lands it'll play the jump planned animation so with this we have quickly replaced the default third person character with the character that we imported earlier hello in this video we're going to create an enemy lock on system to get started inside of the content folder if you just right click and go create a new folder and call this lock on then if we head inside here right click and go blueprint and select blueprint interface call this the lock on interface we're basically going to make any actor that we want to lock onto have this lock on interface the next thing we're going to do is create a simple enemy character that the player can lock onto so if we just right click go blueprint class select a pawn and just call this dummy enemy underscore BP then if we head inside here and go add and look for a skeletal mesh and for the time being let's just select the default Unreal Engine 5 mannequin so skm underscore many then if you go to class settings we're going to go to interfaces and go add and we want to add the lockcon interface that we just made we can compile and save and close this the next thing we're going to do is make it so that when the player presses the tab button we're going to lock on to any enemy character that's within our radius so if we just drag in the dummy enemy character then go over to the third person folder go over to the input folder and go over to the actions folder we need to create an action for whenever our player character wants to lock onto something so if we just right click and go input and select input action and call this the Ia underscore lock on then if we go back outside of this folder and go to the IMC underscore default we want to create a new mapping and we just want to set the Ia lock on that we just made and I'm going to make it so that when the player presses the tab on it's going to trigger the Ia lock-on action event so here where you see this keyboard icon if you just click here and look for the tab button and just select it we can save and close this the next thing we'll do is make it so inside of our player character when we press the tab on if there's an enemy which is within our range we will automatically lock onto it so if I go to the blueprint order and open up the third person character inside of here find some free space and just right click and look for add custom event and call this engage lock so we're going to call this custom event whenever we want to lock onto something now the first thing we're going to do is just drag off here and look for multi sphere trace for objects so this one and where we want this to start if we just right click and let's forget actor location connect this into the start and into that end and for the radius of this this is going to kind of be like a circle so make this 750. and for the object types that we're looking for if we just go to the dummy enemy underscore blueprint select the skeletal mesh and let's just give this guy a pawn Collision then if we go back to our BP third person character track off object types and look for make array and we just want to select Pawn so we're going to be looking for anything which has a pawn Collision we then just want to track off this R hit results and look for for each Loop and connect from here into here so the way this for each Loop node will work is it will run for however many objects that it hits inside of our multi sphere trace for objects so if this hits for example five different actors it's going to run this five times what we want to do is just drag off this array element and look for break hit result click this little expand icon what we want to do is make sure that the actors that we're hitting have the lock-on interface if they don't then we don't want to lock onto them so if we just drag off here actor and look for it does implement interface and for the interface we're going to look for the lock on interface that we just made and if we just drag up here and look for a branch and connect from Loop body and to here so if on actor that we hit does have the lock con interface then we're going to keep track of that so the way we're going to do that is by using some variables so if we create a new variable and just call this lock on targets for the variable type if you look for an actor and just select this one actor object reference and just click here and change this to be an array so it can hold multiple elements next if we drag in the lock on Target so connect for get lock on targets we can drag off here and look for ADD and we're basically going to add any actor that we've hit and has the lock-on interface to this array so I'll drag from Hit actor into here and from True into here the next thing I need you to do is create a new variable and call this distance this will make sense a bit later on change this to be a single type and change this to be a float we then want to drag this in and look for set distance and for now make the default value of this 1 million you'll see why we do this in a second then if we just drag up here we're gonna look for four each Loop for the array element we just want to drag in our lock on targets so we'll be running this for how many lock-on targets that we potentially have what we're going to do is find the lock on Target Which is closest towards the player character and will make him lock onto that specific Target so in order to do that if we just right click and look for get actor location then we can just drag off this return value and look for distance vector so this will compare the distance of two vectors for the second Vector we want to get the array element and it will get actor location and connect this into here and we want to check to see if the distance between these two vectors is less than or equal to the distance variable that we made earlier so if we look for get distance and connect this into here drag off here and look for brunch and connect from Loop body into here so if this is true then what we're going to do is drag in our distance variable look for set distance and connect this into here and connect from True into here then if we create a new variable and just call this target actor and change this to be an active variable and we want this one actor object reference then if we just drag this in and look for set Target actor and connect from Target actor into the array element here so the idea here is before we lock on to any enemy we set this distance variable to be 1 million then we're going to run this for each Loop so let's for example say we have three different enemies this is going to run three different times the first time this runs what we're going to do is get our atoms location and the enemies location and check to see that the distance here is less than our distance variable so by default because we make this distance variable one million this first array element is going to automatically become our Target then we set that as the new distance that we need to be so if for example let's say this runs for the second time if the distance between our actor and the second target is not less than or equal to the new distance that we've set then this will not become our lock on Target so this system will make it so that our Target actor will be the actor Which is closest towards the player character after we've done this we just want to drag off this completed and look for is valid and we want this one with a question mark and what we're checking to see is that our Target actor is valid and has been set if that is true then we're going to tell our game to lock on to this Target and the way we're going to do that is if we create a new variable and call it lock on engaged question mark and for the variable type change this to be a Boolean and we just want to drag off here and set it to be true and connect from is valid into here then if we just right click and look for get player controller drag off here and look for set ignore look input so we want this one this second one set ignore look input and connect from lock on engaged to here this will basically make it so we can't move the camera with our Mouse and we're going to want that when we're locked onto our Target the next thing we want to do is create another new variable and call this should rotate so when we're locked onto a Target we're going to make sure that our player character and Camera slowly rotate so it's facing towards the Target that we're locked onto so if we just drag this in and look for set should rotate and make sure it's checked the next thing we want to do is drag in our character movement and drag off here and of course set Orient rotation to movement and just make sure this is unchecked this will make it so our character will not rotate when they move with the wsd keys and then we just want to drag off here and therefore set use controller desired rotation and make sure this is checked then if you just click compile the next thing you want to do is in some free space just right click and look for event tick and event tick if he should rotate variable is true so if we look for get should rotate we're going to drag off here and look for branch connect this into here then we're going to drag in our Target actor look for get Target actor right click on this and look for convert to validated get then if we just right click and look for get player controller and just drag off this return value and look for set control rotation and we're basically going to make it so that on event Tech if we should rotate and we have a valid Target we'll make our player character basically face towards them so if we just drag off this new rotation and look for find look at rotation where we want this to start is if we just right click and forget actor location and connect this into start and where we want this to end if we just drag in the Target actor get it and then drag off here and look for get actor location and connect this into here and this will make it so that we'll get our players location and our Target actors location and it'll basically make it so we face towards them so we're now ready to test this system out in some free space if you right click and look for Block on and look for this enhanced action event IA lock-on so when we press this tab button it's gonna fire off this trigger node and it's also going to fire off this started node we're just going to use the one of this started node as it will fire once so when we press the tap on we're going to check to see if our lock-on is engaged so if we just drag in this variable and forget lock on drag off here and the thought branch connect from started into here and if we press the tab on and our lock-on is not engaged then we're going to engage our lock-on so if we drag off here and look for engage lock this will engage our lock and one more thing if you just change the draw debug to be fourth generation so you can see the size of it in the game now if we go compile save and we close this and go play when I press the tab on it's going to lock on to the character that is close to me and as you can see my player character will move and face towards them the next thing we're going to do is make it so that we can disable our lock on so in order to do this if we in some free space just right click and look for add custom event and call this disengage lock on and when we disengage our lock on what we're going to do is just drag in our lock on targets but for get lock on targets and drag off here and at 44 each Loop and we'll basically going to remove all of the lock-on targets inside of our array so if you drag in our lock on targets get it and just drag off here and look forward to remove item and connect from array element into here and loop body into here this will clear all of our lock-on targets after we do this we're going to tell the game that we no longer have a Target actor so if we just drag in our Target actor and set it that'll just tell the game that we no longer have it then we're going to tell the game that we should no longer rotate so if we just drag and I should rotate set it and just make sure it's unchecked then to save time what we can do is just copy all of the nodes that we made here earlier and paste them at the bottom and connect from here into here for the lock on engage just leave this unchecked and instead of having set ignore look input just delete this drag off here and that will reset ignore look input and this will make it so that we can move the camera with our mouse cursor again you can delete this and we just want to check this Orient rotation to movement and uncheck this use controller desired rotation so our player character is back at their default rotation settings and now if I press the lock on button and my lock-on is engaged then we'll call the disk engage lock on and now we can go compile save and test this out select play if I press the tab on I'm locked on if I press the tab on again then I'm no longer locked on and can move around again nice so with this we have created a simple lock on system hello in this next part of the video we're gonna make it so that if our player character is locked onto our Target and they ever are a certain distance away from the locked on target the lock-on will automatically break because right now it kind of Builds on forever and is a bit silly so in order to create this system if we open up our third person character again and go to the bit where we confirm whether we've locked onto our Target after we do all of this we're just going to drag off here and look for set timer by function name for the function name call this break lock on and for the time make this 0. 15 seconds and just make sure to check this looping box next if you go over to functions and go create a new function and just make sure to call this function the break lock-on so you can just copy this select this new function right click and you can go rename and then you can just paste the name of this because it needs to be spelled exactly the same otherwise it won't work then if you head inside of this brake lock on what we're going to do is drag in our Target actor get it then right click and just convert this to a validated get so only if our Target is valid we will run the break lock-on event so what we're going to do is right click and get our actors location so if we look for get actor location then we're just going to drag in our Target actor so this will be the actor that we've locked onto and we'll also just get this actors location and then we'll just drag off this return value and look for distance vector and if the distance between my player character and my target actor is you have a greater than or equal to a value of let's say a thousand then we will automatically disengage our lock-on so I'll look for branch connect from is valid to here and then off of true if I just drag off and look for this engage lock on we can compile and then if you go back to the event graph whenever we disengage our lock-on in order to stop our function from running because once we run this function it will run every 0.
15 seconds forever in order to make it stop if we just right click on this return value promote it to a variable and call this the break lock on reference then if we go over to our disengage lock after we do all of this we're going to drag in our brake lock on reference get it and just drag off here and look for clear and validate timer by handle and this will automatically stop our brake lock on function from running every 0. 15 seconds so now we can test this all out if I go compile close this and go play if they are locked onto its enemy if I say move more than a thousand units away from this enemy the lock-on should automatically break so you can see the lock on broke and I can kind of move around again so with that we have kind of polished up our lock-on system a bit hello in this video I wanted to make a quick change if I go play When I Look onto an enemy and I'm switching targets it can be a bit Snappy so in order to make it a bit more smoother if we open up the third person character select the camera boom and in details if you look for lag and just check this enable camera rotation lag and this will kind of make it a bit smoother when our camera is rotating we can play around with this camera rotation lag speed the higher we make this the less laggy it's going to be and the lower we make this the more laggy it's gonna be I found the default value of 10 works pretty well so you can just leave out that or play around with it but now if I could play and I press tab we can see the camera is a bit smoother when we're switching targets hello in this lecture we're gonna make it so that when we lock onto an enemy Target our player character will play the correct Locomotion right now when we're locked onto a Target and I move backwards it kind of still plays the move forward animation and it looks a bit weird we'll also make it so that if the player moves towards the left or the right it'll play moving right or moving the left animations so to get started creating this system go to the Paragon Graystone folder and go to where we created the hero blend space what we're going to do is create another blend space for when our player character is in combat to do this if we just right click and go animation Anzac blend space select the Greystone skeleton and just call this the combat blend space then if we double click and open this up go to the asset details Tab and if we go to the horizontal axis just give this a name of Direction and give this a minimum value of minus 180 and a max value of 180. then if you go to the vertical axis give this a name of speed and leave the minimum value as 0 and the max value are 100 so depending on our player character's speed and direction will depend on the animation that we're going to play in this blend space in the asset browser if we just look for the jog underscore forward animation so it's about a bit weirdly it's about jog underscore FWD just drag and place this at the point here if we just select this point we want to make sure the direction is zero and the speed is 100.
so when our player character has a directional zero and a speed of 100 we'll play this animation then if we look for the drug backwards animation I spell a bit weirdly as well so it's jog underscore bwd we're going to place this at the point here and the point here just make sure if we just select these points it is at 180 here and a speed of 100. and it is at a speed of minus 180 here and a speed of 100 then if we look for the job left animation first track and select this and place this around here so it's gone a bit red because if I just select this point it's kind of the bit beneath these points so it kind of makes this go red in order to fix this if we just select this and make sure the direction is minus 90 and the speed is 100 that'll make the red line go away then if we look for a job right and we just want to place this around here and make sure that the speed is 100 and the direction is 90.