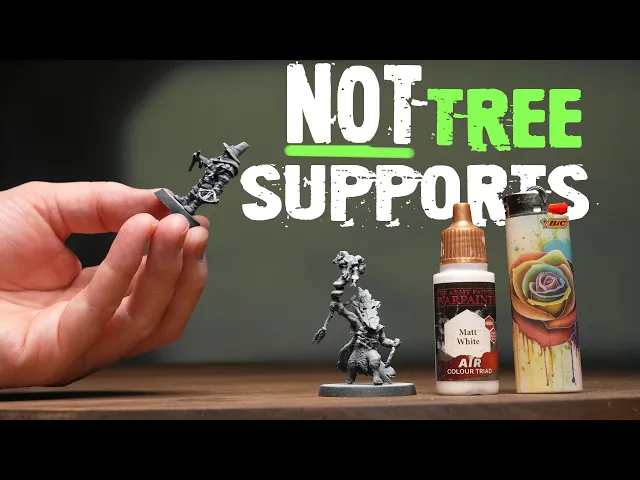
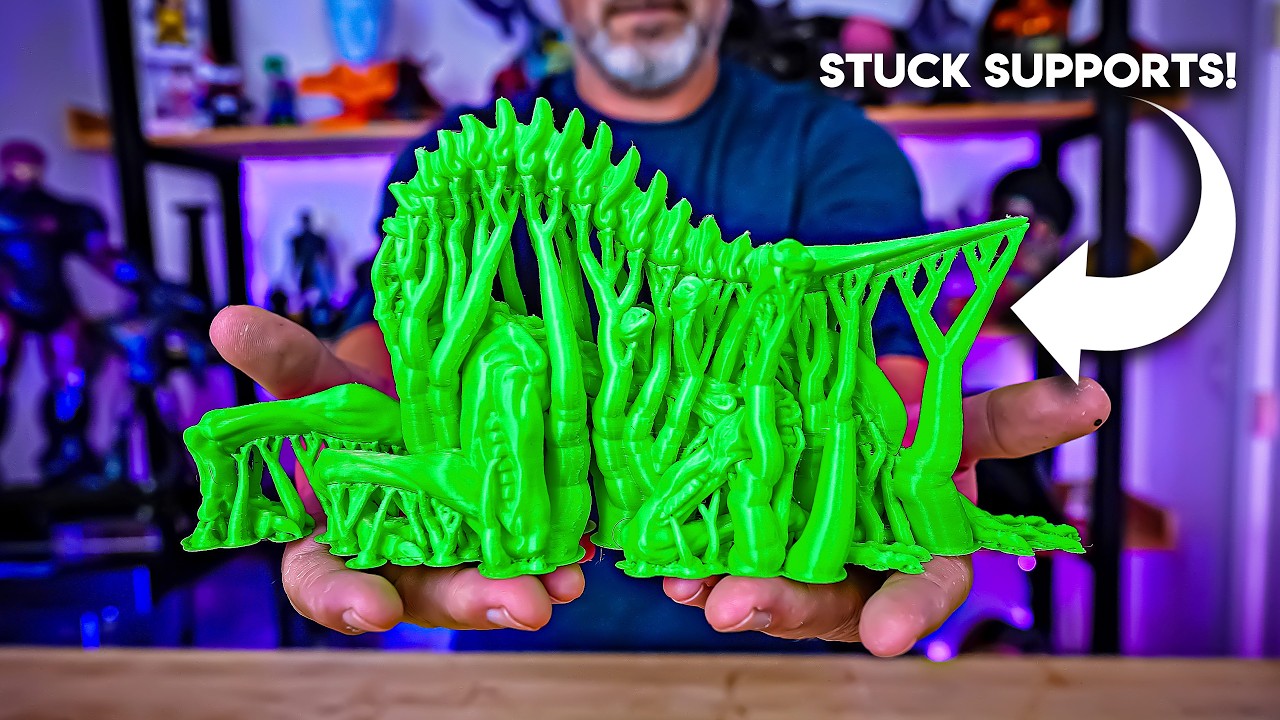
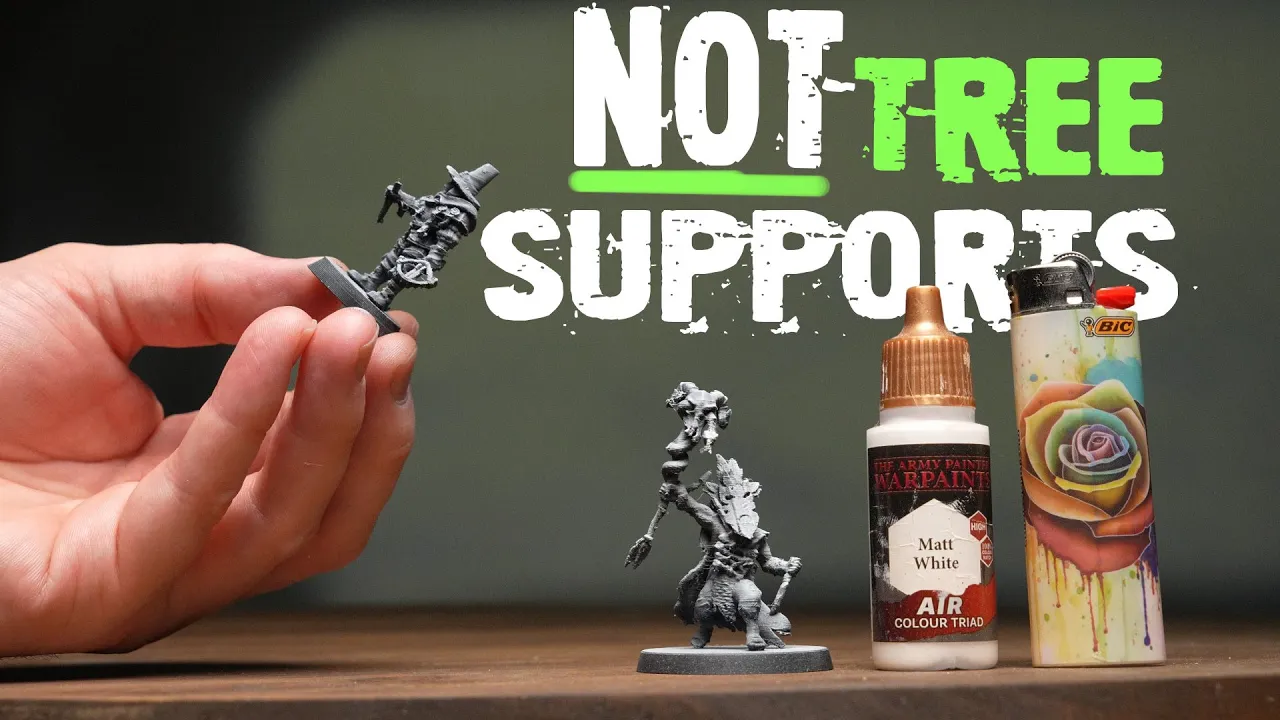
fdm printing Miniatures has come a long way but in my opinion the biggest thing still holding it back is automatic supports tree supports have been a very welcome innovation in the fdm space in recent years and in tandem with many other small tweaks and features we can now finally print very small and detailed things easily and reliably however these supports are often really difficult to remove they can sometimes make it hard to tell where they even end and the model begins they often leave a bad surface finish where they were contacting and they can just
in general end up taking a really long time to methodically go through and carefully remove but even with a lot of patience you're still likely to end up with a broken bit or two so when tius from Arbiter Miniatures reached out to me via email to let me know about a little project he's been working on called advanced fdm showing off results like this well L to say he immediately captured my attention and advanced fdm has jumped right to the top of my do that right this instant list so advanced fdm in a nutshell is
basically a marriage of thoughtful design that minimizes the overhangs and Islands reducing the overall requirement for supports but also and drum roll resin supports so this is really what piqued my interest here because I have a pretty long history at this point with resin supports I started the miniator project which is a rating system for 3D principal Miniatures prese supported files and how good or bad they are I made some money doing pres supports myself professionally for a little while and I've even taught many others how to support models successfully themselves as well so I
like to think I know my way around these little sticks pretty well at this point and to see them here on models intended to be printed on fdm machines and apparently with great results well that's just too interesting to not look into so stick around we're going to really be pushing the limits of fdm printing here in this one building upon what TS has started here with his Advanced fdm and we're going to be getting results like this here with Miniatures not even designed for fdm printing in mind like look at those fingers look at
them look at mine look at these hey real quick do me a favor would you just double check that you're subscribed down there and why not turn on notifications while you're at it as well I've not done a great job at asking for help with that and it really would go a long way in helping this channel stay off flat so the first model from Arbiter Miniatures that I decided to print up is the Hellgate cultist now Arbiter Miniatures has a few recommendations and I'm going to leave a link to his video down below which
I'm going to recommend you check out as well if you're interested in this and this model by the way the Hellgate cultist is completely free so you can go download this one too and print along there's really two key recommendations that jump out to me that I'm going to be following just to start things off the first of which is we're going to be using a bamboo Labs A1 printer and the second is we're going to be using the fat dragon games print profiles so these are also free and I'll leave a link down below
to where you can get those too so I downloaded and installed the fat dragon games profile myself that was really easy dragged the Hellgate cultist into the bamboo Studio slicer selected the new print profile sliced it and sent it oh and we are also of course using A2 mm nozzle with the A1 printer we're also using bamboo lab matte pla green for this one and the print in total took about 6 hours and wow these results are incredibly impressive the print turned out great and the supports almost peel away as easily as res and supports
but I think I rushed in uh there was some damage at the bottom of the cape but overall just incredible dude the model has thoughtfully been cut up and supported in multiple parts and that's really one of the big strengths here of this approach that TS has taken because through thoughtful design clever splitting and then careful supporting you can get a result like this I'm just I'm blown away and I'm very excited to continue down this rabbit hole and so off the back of that first initial success I then went and downloaded the Dragon Kin
the other Advanced fdm mini by arbit of Miniatures this one is a paid one but he provided it for me to try out brought it into the slicer and prepared it for printing this one was going to take a little bit longer at about 10 hours but that was okay I ran it overnight but unfortunately this one was not successful it looks like both of the hands of the miniature failed spectacularly as well as the head it's funny the similarities to resin here now if you look closely at the supports you can see that they've
printed fine for the most part all the way up to their very tips at which point it looks like the models have just become disconnected and then failed to print now TS actually recommends that you use a very specific filament for these Miniatures in addition to the bamboo lab A1 with the point2 nozzle and the fat dragons profile and that is sunlu pla meta which if I understand right is a very high flow PLA and it's very well suited to Miniatures so let's give that a go I've had a spool here running overnight in my
filament dryer this one's by ibos I like it a lot so I got that loaded up and I resliced those failed bits so the arms and the head and I sent it and look at that we got a successful print this time I took a lot more care when removing the supports and used some Snips and it was maybe a bit stringier than I'd hoped but otherwise these parts do look pretty good and so here's how that mini turned out when all the parts were put together not a bad result at all and such a
cool and dynamic pose too I really love this one but just out of curiosity I wanted to try the bamboo Lab Mat pla again because I like how not stringy that stuff is and I think it has a really nice surface finish for these small detailed parts and the Keen ey among you will have noticed that I also had a spool of this stuff drying as well in the eyebow this is a light gray matte PLA and so I loaded that into printer and tried running the exact same print again and amazingly it failed in
the exact same way as the bamboo lab matte green pla from before so that's interesting I guess for now we're going to stick to the sunlu meta but we'll come back to other pla shortly in the meantime the next thing I really wanted to try was I wanted to know what would happen if we take a model that had been PR supported for resin with no intention of being printed in fdm at all and tried slicing and printing that so I did exactly that I grabbed some presup models from this month's once in a six
side member collection I'll talk more about that in a little bit if you want to get these as well and and a bunch of other cool minis to help support this channel we've got here a crazy skeleton by Army and 3D and a witch hunter by infernal Miniatures now I did have little hope going into this that it would even work at all and so it was a really great surprise to see that in fact these both fully printed however they were stringy as probably because those support stems are just so plentiful and so thin
as well so it's just it's a perfect storm for stringing now they weren't too difficult to remove from the models and because they were so thin and delicate I could even sort of just like crush them away really easily unfortunately though I did break off both of the skeletons feet and the surface finish doesn't look nearly as nice as those previous minis so it's time I think to do some investigating and the first thing I wanted to do was inspect the files to see if I could gleam any insights there uh but sadly there were
no Lys files included with the Arbiter Miniatures this would have been really handy to sort of see the different settings that were used so I did the next best thing I could and I measured the actual printed supports that I had on hand using some calipers and it looks like they're right around 1.9 mm thick so that's good to know however something I can't really figure out here with the calipers is how large or small rather those contact points are at the very ends of the supports this is much harder to determine without having the
Lys files but we do have Lys files for the armian 3D and infernal Miniatures minis whose supports as I was removing them I noticed felt very similarly attached as Arbiters were so maybe these will be a great starting point and my lights died I got to figure out why my light died hello come back so after spending some time inspecting these files it looks like for our support tips we're going to be somewhere in the .25 to3 mm range so let's configure ourselves a new support profile here and try just doing some manual supports ourselves
now I am using the ly Pro pro version here to date I've still not encountered any other application that is anywhere close to how good this program is at manual support placement specifically I actually hate ly as a slicer I think it's a blurted piece of crap but for its manual support tools nothing else comes close and unfortunately it is a subscription to get some of the more useful features here so I just have to let you know about that before we go any further I know it sucks leave a comment if you think they
should have a lifetime license I know for me personally I'd pay for one in a heartbeat cuz I hate subscriptions so much like just let me own it please anyway so to support this miniature my thinking here is to treat this in the same way that we would treat any miniature that we're supporting for resin printing with one major difference in that we're going to ignore basically all the tiny little islands and just focus on ensuring that the key areas and overhangs are supported ideally you know every model would be sculpted with this printing style
in mind to minimize all those tiny little Islands but whatever let's just see how we get on I begun by applying my heavies in as few spots as possible as I know these are the ones I'm definitely going to want to go in first and clip away after that print is finished I also wherever possible here tried to override L's angling of those support stems to make them vertical my thinking here is that it's just going to be easier for the mechanics with fdm printing to not have to divert from a straight up and down
structure suddenly to an angled one I then switched over to my mediums and started adding some reinforcement finally switching into the light supports just using them to try and add a little bit more reinforcement in a few areas and support some of those smaller Islands trying my best not to overcrowd the model here and then once that was done I exported the STL with the supports brought it into the slicer and scent it and wow okay that's pretty good it's not perfect but we got closer here on our first try than I thought we would
have the axe clearly has failed in a couple of spots like at the very bottom and at the top and if we turn it around you can see the cape as well got all kinds of messed up but otherwise it's mostly there and it's looking pretty decent the supports also came away pretty easily although I did forget to clip the one on the foot and so did rip a leg off in the process let's make some revisions and look at that we got a fully successful print here but man is it stringy these supports also
came away nicely and everything printed so I think we're on the right track here so I then switched back to the bamboo lab matte PLA and catastrophic failure godamn I really want this filament to work and I'm determined to do so so I jumped back into ly and increased all of the support tips size by 150% sent it again and new insight gleamed it's failed again and upon looking closely at why it's failed it looks like the supports are actually snapping really early on like here and here they've just broken right off so let's try
thickening those stems up too and maybe we'll just add a couple more supports just to be safe and ladies and gentlemen we did it look at this many there is a couple of spots where those supports wanted to fail again but they appear to have recovered and pulled through and you know what removing these was just as easy as before I just took it slow and nipped Away carefully at the key areas and then it just released and look at the quality of this guy and it should be noted that this is basically a worst
case scenario for an fdm mini everything here is extremely thin and delicate but it's all intact it's all here with a pretty good surface finish too here he is next to the sunl meta one from before and while the sunl one is definitely better in some ways like the overhangs in general I like the finish a lot nicer on the matte pla given that huge reduction in stringing and I can guarantee you if I tried to print this model with tree supports there's no way in hell we'd get a result this good in fact I'm
pretty sure it would have broken into 50 pieces if I tried so okay now that we've got this working let's tackle a mini that should be a bit easier this is the witch hunter from infernal Miniatures and I've also got a marine here this is a fire forged by daaka dastore and I'm going to use the exact same support settings from before get everything anchored in place reinforced and then exported to stls sliced up and sent to the printer but before I do that please allow me to just tell you where you can get all
these files uh and also help keep this channel going in the process it would mean a great deal to me if you could check out the links down below for buy me a coffee or patreon or even YouTube membership consider becoming a member on either of these three platforms whichever is the least amount of friction for you you'll really be doing me a massive solid and helping to keep this channel going and and more importantly grow and do more cool things here and in return for your financial support I've got a ton of cool models
here for you including these Miniatures that I'm about to print up here and these Miniatures are a limited time reward for the month of February 2025 so do hurry and get these while you can I do find that little bit of fomo does definitely help uh the business side of things here and so in total this month we have models from Arcane whiskers armyan 3D artifices mini daer daer store m3d seon infernal miniatures Leia safe Lucas with a C Mid and stone Forge but not only will you get all of these models if you come
sign up today you're also going to get everything that's in the once in a six side welcome pack and those models are not time restricted they're always going to be available and there's just heaps of cool stuff in there you're also going to get to join our wonderful Discord and then once you're in there you can get excellent print support you can also get involved in our wonderful uh print and paint events that we do every single month here and so I thank you very much for your support and before we get back to the
video I'd just quickly like to let you know about a few active campaigns from a couple of these artists that you might want to know about so from armian 3D we've got the crazy skeleton collection which is live on my mini Factory Frontiers right now and this is a very wonderful collection of just the cutest little crazy skeleton sculpts I'm a big fan of these I think you will be too there's also Millennium Wars Volume 2 forgeborn and blasted ones by dakad Daka store coming soon on Kickstarter so if you're a fan of Space Marines
I think you're really going to like this one so come get signed up so you can get notified when this one goes live and finally also on Kickstarter from infernal Miniatures is the Inquisition religious zealots mega pack so you fans of fantasy I think you're really going to dig these sculpts they are just they're they're so characterful I love them especially the knights look how cool they are so all right big thanks to all these artists big thanks to everyone who can throw their support behind this channel hope you enjoy the Miniatures now let's get
back to the video because none of these Miniatures were multi part this was a little bit tricky some supports did have to be tucked in awkwardly but fingers crossed we don't have too much trouble removing these again this is where how the model is actually sculpted and then cut up comes into play in a big way for printing in fdm but in any case here's our results and they're pretty clean not a complete success unfortunately but not bad either for a first attempt on these two dudes using the bamboo lab pla the thicker sticks is
definitely helping overcome that snapping issue and I'm loving how easy these supports Come Away with just a little bit of nipping the Marine turned out the best although his tunic did fail a little bit and the cables on his weapon unfortunately didn't survive but otherwise pretty damn clean the Witch Hunter was a little bit worse off unfortunately neither of the weapons succeeded but again everything else looks great it's a shame that this pla fails so easily because the sunlu is just too stringy for me personally so maybe let's let's try another one this is creality
hyper PLA and my theory is here that because this is like a highpe speed pla it should also be high flow so maybe it'll work well for Miniatures and holy this might be the best one yet there's like no stringing at all and at first glance it looks like everything's there including the witch Hunter's weapons like is crossbow look at that thing the supports again it looks like Snapped in one or two places but did manage to recover and I noticed as well that removing these supports was a little bit tougher than the matte pla
so maybe this creality stuff Falls somewhere between the sunlu and the bamboo lab in terms of its like flow and durability but anyway look at this the Marine's cables on his gun did fail again so I'm pretty sure I just need to add a couple of extra supports there but otherwise both of these dudes turned out fantastic I think this might be my favorite Miniatures pla yet now to close this video out I'm going to take everything that I've learned here so far and and really push this process to the limits and I have a
couple more models here that I think are perfect for the task the first is a Berserker demon by mid but this one actually shouldn't be too bad overall it's broken up into multiple parts and that should really make things pretty straightforward here at least so far as adding the supports goes but there's just no way around this Demon's left hand those little fingers will be a challenge to print for sure and the spikes on the Pummel of the sword as well will not be easy either this next one though this is the Venom Shaman by
Stone Forge and this guy right here is going to be just an absolute nightmare to print in fdm like check out the snake head hanging out at the top of his staff there and it little itty bitty snake tongue flicking the air the staff as well how it starts at that very fine point with those leaves and that's the case no matter how I Orient this thing because this one isn't multi-art at all and even more delicate here is all those tattered Rags that the shaman is wearing with all the little frayed edges I don't
think you could ask for a more anti fdm mini but in any case I did my best here to get both of these fully supported and just look at these results I took my time and was very careful to remove these supports but at no point did it really feel like challenging because it's so easy to tell what is support and what's model and so if you just take your time and you just clip away at those support tips they just come away and reveal the model and if if you've spent a lot of time
removing tree supports from Little Miniatures like this I think you're really going to appreciate how much of an improvement this is to the overall experience and just look at the results like everything is there every single one of those little Jagged edges around the cloak the little itty bitty snake tongue its tail with the rattle everything and it looks incredible and these models sure they're still fdm printed so if you hold them up really close to your face you can tell they fdm printed but at arms length they look amazing especially the Sharma the details
on this guy are so small you'd be forgiven for thinking it's resin printed unless you look at it really closely now I've also been testing out another printer here this is The Flash Forge Adventurer 5m Pro and I've been using it with their 0.25 mm nozzle and I decided to see if I could copy over the fat dragon games print profile and see if I could get similar results and I printed all of the same Miniatures here and while they've not come out quite as good as the bamboo lab ones they're bloody close and I
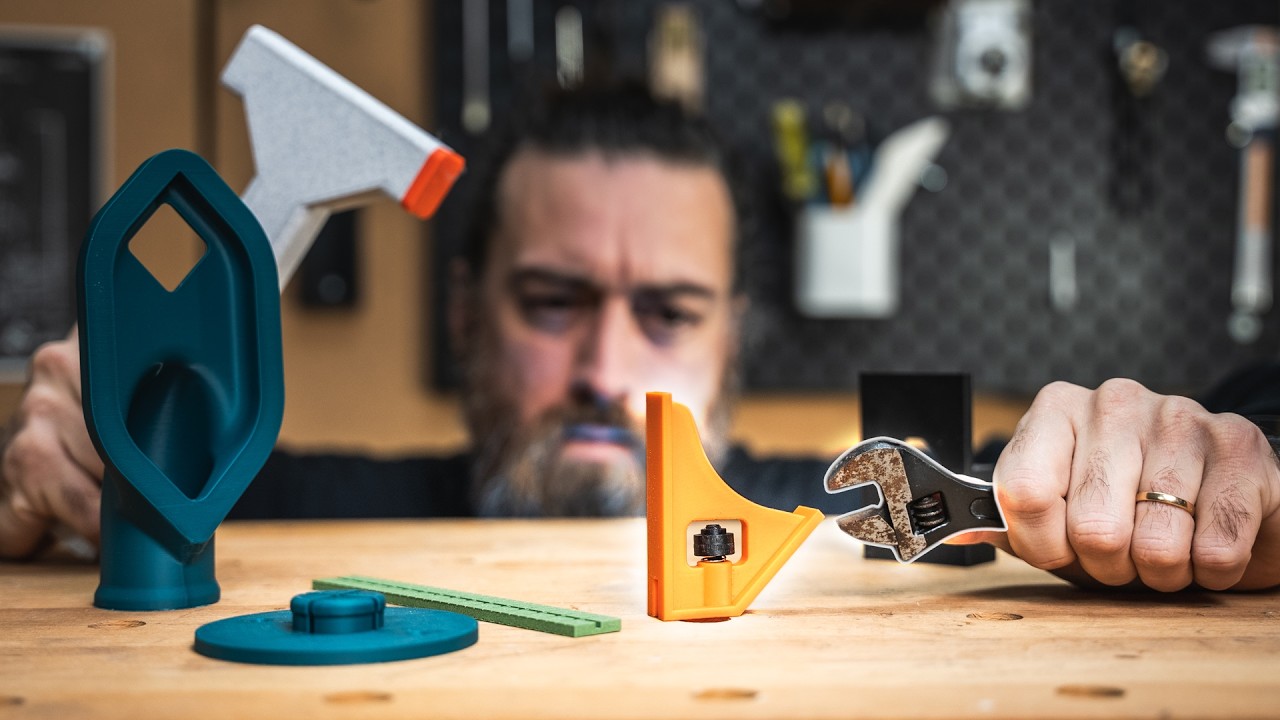
think this is really encouraging and should mean that similar results hopefully are going to be possible across a wide range of these modern printers and also just in case you're not grasping like how small these minis are and just how tiny their fine details really are here's some familiar items for reference I find it's easy when watching videos to sort of lose that sense of scale so I hope that helps put into perspective here just how insane these results are so yeah I am thoroughly impressed with what we've been able to achieve here today so
what did we learn well the biggest differences between these supports when it comes to resin versus fdm is that resin Miniatures will have far more supports but they will be a lot smaller fdm supports the fewer you can get away with using the better and it really doesn't hurt to go large if you go too large on resin they become extremely difficult to remove which is just not the case at all here with f M the more elastic your pla is as well the better so basically I think all of the fast pla are going
to be good choices and the more brittle plas are likely to fail at the supports however you can overcome that by just beefing up those sticks and I haven't found any downside at all here to using the thicker sticks so I think it would actually make a lot of sense to just default to them regardless of whatever pla you intend on using and if you do have to add lots of supports and that ends up obscuring visibility of the model somewhat it's still going to be really obvious what is support and what isn't so you
should still be a lot less likely to accidentally damage the model when removing them if you are going to be using a lot of supports though it is likely going to have a lot more potential for stringing so for those jobs you probably wouldn't want to use the sunlu meta pla for example filament drying seems to make no difference at all the meta pla was still stringy as hell and the matte pla still a bit brittle and that's both after a deep thorough drying so don't feel the need to run out and buy one of
these I'm not yet convinced that they're useful for pla at least not yet based off of these limited tests here here are all the support settings I landed on feel free to use these as a jumping off point for your own Miniatures and materials and tweak them in experiment as you see fit I feel confident that these settings are going to work across a wide range of plas so long as the models have actually been supported appropriately and on the topic of supports here are some more pointers for you if you have no choice but
to start a support on the model like here on this guy's boot just use the heavy support even if you only need a light one on the other end or if you do use a light support just make sure you come back in here and adjust that starting contact point to be more substantial because you don't want it breaking off here mid print and the scarring is going to be extremely minimal after you snip it off so don't worry about using the larger size here if you clip the main support bodies into one another like
overlap them this definitely helps add a lot of strength and makes the supports less likely to break on their way up but this technique here where you don't send a support all the way to ground and instead angle it into a neighboring support this seems to produce poor results and increases chances of failure which I think reinforces the idea here that you want these things to be as vertical as much as you can possibly get away with this whole process is really no different than supporting for resin treat your big Islands first for example consider
the whole leg an island and Brace it accordingly with Heavies and then go back and reinforce it with mediums and if there's any little tiny Islands left over you can then go in and hit those with your lights also try and keep your sticks vertical as best you can sometimes you do have to lean them but if you can avoid it I think it helps a lot here to keep them as strong as possible during Printing and that is all if you're looking for more knowledge on presup Miniatures go check out this video first and
then once your brain has been primed with those fundamentals you can head on over to this other one to get the nitty-gritty details with lots of examples so that's going to do it for this video thank you Ty for reaching out and and uh sending me down this Rabbit Hole this has been really cool I hope this information proves useful to you guys I hope you uh can level up your fdm printed Miniatures game and just experience in general I think this is a much better experience than the automatic tree supports I guess the big
trade-off though is you do have to learn how to do these manual supports and it does take a bit of patience and a bit of time also I can't recommend enough that you are set up ergonomic at your computer when you do this cuz there's a lot of potential for repetitive strain injury lots of clicking lots of keyboard shortcuts don't forget patreon buy me a coffee YouTube lots of models all right see you next time