hello guys beauty This is the first episode of our series of the automatic Critical Orange Punch in this series I will be showing you the whole evolutionary process of our automatic plant from its germination until the final drying process of its flowers ok And everything I will be doing it either with chains or feeding it like fertilizer Okay, if you don't have the money to buy a mineral fertilizer I'll be teaching you how to make your own organic too, okay ? giving you some ideas here ok I'm going to make a specific video about it but here it's just going to be some ideas just for you to take a look here he if you arrived now you don't understand anything what's going on here welcome to the cultivator channel here me I give you tips to improve the performance of your plants but for you to stay on top of it you need to subscribe to the channel and activate the notification bell as soon as I post you will be the first to receive it before you ask Where is the vase where is the substrate come on I have n't germinated the seed yet because before you germinate the seed you first need to organize certain things . exhaust hood you will have to be working fine everything right you have to do the temperature and humidity test how is it going to stay there for about two or three days for you to follow up ok for example in case the temperature gets too high or too low you will have to know what to do here I will also be giving tips in relation to this, in relation to humidity, we also need to control it, so in case you germinate your seed and the ridiculous one starts to come out and you still don't fixed it from here one thing I'll tell you there's no way you can go back or you run to put your people already inside the substrate right in your soil or you'll lose your seed okay so you can no longer start making the things in a hurry and lose your seed, especially if it's automatic, which is expensive, right ?
In case you also want to start this process there, which is really cool, let's go, if you don't have the money to buy certain things, I 'll be giving you an idea of how you can replace, for example, the grow this video here won't be specifically for you on how you can make a homemade group but I'm going to give you some ideas okay let's go the first thing we need to worry about is our structure ok where our structure should be our structure should be in a place that is airy guys it's no use you put your grow, whether assembled or homemade, in a stuffy place, for example in the basement of your house or else in a closed room that does not have air circulation, it will not be cool, suddenly your plant can grow there and develop a little bit but it won't be a more suitable one no you don't know your yield will not be the maximum possible so for you to have a healthy growth you need the air is renewing there ok guys so first thing you have to do is choose where to its structure will be independent if it is made of wood if it is made of iron if it is a refrigerator it doesn't matter, ok you'll have to find a place there where the wind can run interesting beauty for those who don't know guys I started planting inside mine wardrobe Okay, it was just a wardrobe, a small LED and a fan Okay, but the fan was close to the door, which is where the air came in and the air came out, so I could pull the air from that fan that was blown over there to the group. the closet of course that way I couldn't close my closet 100% otherwise the wind wouldn't get in and the a wouldn't circulate, so I kind of lost the protection against pests in my grow, I already touch on this subject . so, analyze your house well, see where you can place your grow room, you must have it.
be close in an airy place Okay if you don't have money to buy a grow you can be doing it inside your wardrobe inside your closet or you can simply be building it Take some wood and make a box there the size you think is necessary inside your group it can be assembled or made of wood You will need an air inlet and air outlet ok I'm showing you here let's go how I did it here here is the following guys here is a pipe knee ok let me see if I can show it here it's a pipe ok I painted it black and I put a screen ok these screens the screen I'm using is those things that I put inside the clothes to do a delicate wash you know in the washing machine and it's like if it was a tiny mosquito net, okay guys here, look, you see a very thin screen. I even use it to dry the flowers with this material here that I made . it's very important if you manage to control it in your perfect grow So let's go to the main part of the structure it needs to have an air intake so here I have two year entries if three I'm going to leave that one open also that one there.
it's got a little screen, okay guys So here we have three inputs from the main door, it's not worth it, it won't count because it's going to be closed ok, so we have here one, two, three inputs already passive What do you mean passive passive that doesn't need an exhaust fan is pulling the air in alright guys, you don't need it, so passive, that's it, that's it, let's say like this, off mode beauty air outlet air outlet here in the group I have three too but I'm going to use only one which is up there we have here the first one that's deactivated the second one which is disabled and I'm going to use the third one with the extractor Let me see if I can see the third one with the extractor, so if you have an extractor I highly recommend that you put it for the air outlet and not for the inlet, because that's it the extractor hood will be able to work much better on the air outlet part, beauty to be able to pull the air that will enter passively without forcing anything and will take the air out, beauty because if you have a single extractor hood and put it there, it will be very hot air up here with an exhaust fan here, not with an exhaust fan, it manages to remove the hot air that goes up, the hot air stays on top and the cold air goes down, the hot air will be able to come out, okay, so put an exhaust fan up there Oh but not me I have the extractor hood that I can make expensive if you don't have an extractor hood then you'll have to leave your Grosso half-open, let's say, no problem but you'll just have to keep an eye on the pests Ok so that's why that I put kind of like I put it here, it's already natural for him, it's already a fine screen, but you can put a screen there in your grow too, okay if you have a Musketeer, some kind of fine net that doesn't pass mosquitoes and such to you a very thin screen you will be improving there in relation to that, the pests Alright so for the people who are going to do the grow there in the cupboard under the sink or else in closed places like that too, let's put the wardrobe it will close there such as the air inlet outlet you will have to put it I recommend you put a screen, okay guys Put a screen that will not get pests because if the pest gets in there bro to remove it you can damage your plant a lot and if it is automatic so it has a very short lifetime So if the pest gets in there and let's say, finish with it until it recovers, its productivity time has passed, you know, you can lose a lot of income in that, okay, so its structure it it has to have an air inlet and outlet and you have to protect it from pests if possible it's in mine I didn't have this idea of putting the screen in there even I didn't even have the conditions but thank God everything worked out I managed to flow the cultivation ran up to the In the end, yes, I had pests, but I managed to remove them with some techniques that I 'm going to pass here, okay, so let's do your grow, whether it's assembled or homemade, it needs to be in an airy place, okay, guys, it has to have an air inlet and outlet. another detail too grow it will need to block the light, both the light that goes out and especially the light that comes in, because if I close the grow the light will be much more intense inside, because there is this material here that reflects Beauty if you don't have it there in the your house in your homemade group this material here I'll be leaving the link there in the description for you, you see some blankets that you can be sticking there that reflects Okay, but if your material is white, it's like, the fridge is white, you won't need it because the white one also reflects you can see that these bars look like lit leds Alright so the white one reflects well Ok so let's go there why do you have to seal your grow because mainly the outside light cannot enter ok let's say so let's assume that you put there 18 hours of light and 6 hours of dark, right? But considering that in those 6 hours of dark, no light can enter if possible, okay guys, you're going to be messing with the plant's yield if you put any light there when she has to stay in the dark you could be disturbing her ok so that's why I highly recommend you to be able to seal your group whether it's homemade or mounted and that's why I put these 90 PVC pipes here degrees pointed down, yeah, because, for example, if it was dark inside and it 's on outside, the light from here wouldn't go in there because it's making a curve, it'll say that I painted it black too, okay?
The bad thing is that I painted it black which is shiny but the ideal is a matte black ok but anyway the idea worked and it's there ok so if possible don't let the air in sorry don't let the light in ok guys if you can seal it great or if you can't seal the your grow let's assume that your grow is in the room try to make your room as dark as possible OK now let's go to the second item which is lighting the lighting cannot be too close to your plant ok guys so watch out for the guys who are there If you want to set up a PC grow that you're even wanting to put your grow under the sink or I don't know in a shoe rack, okay? What's the idea? Leave your light at least 30 cm above your plant.
then planting there on the Super PC grow but you will not be able to put, for example, a 50 watt panel like this inside a Grosso pc otherwise you will roast your plant then you will already have to mess with those led lamps that I I'll be showing you here in the photo, okay, there's even a description there. If you want to buy it on Amazon, you'll have to work with low-power LEDs . the bigger the space, the bigger the plant can grow ok, so you'll have to size these lamps So guys In short, if you intend to grow in very, very small spaces like a PC grow, you won't be able to use, for example, a reasonably powerful LED panel 100 watts for a thick PC I don't think even a panel will fit in there But let's assume you put a powerful light in there, there will come a time when the plant will grow and Mano, it will roast it will die, you know, so stay tuned look at it guys if you are going to mount it on the PC grow in a small fridge be aware of the distance from the light and its power ok right away You won't need this here but what is this here this here is a timer okay guys it's just a timer it will give me the luxury of not turning the light on and off when I need it, that is, it will stay in automatic mode for example at 6 am it will turn on and when it is midnight it will turn off on its own, only I configure it here ok then no necessarily you need to have this at the beginning of my cultivation in the closet I didn't have it here so every day I'm sorry every day 6 am I got up I turned on the light and every night at midnight I went there and turned off the light ok if you had it here it will be a hand on the wheel ok guys but not necessarily you need to have this here ok this here it stays connected directly to the leds ok because if you have an exhaust fan or fan they will have to stay on 24 hours Ok ok now we will for temperature and humidity come on there we have our humidity and temperature meter in which the unit is very high here ok but when i put the vase in there together with the substrate turning on the lights it will reduce quite beautifully because it is interesting that you have this here you you will have control over how your plant's state of health is going to be beauty guys for example in the beginning If you let us say the humidity very low down there it will not develop beautifully Or if for example at the time that your budges that your flowers they are already up there in the very big Apex, you won't be able to be very humble, you can't give them mold.
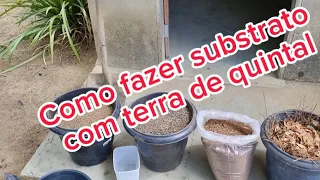
So you need that one there to be able to control it . I'm going to leave it in the description, okay, but look at this right away, you don't need it to start an indoor cultivation, I'm just telling you that it's interesting that you have beauty, it's interesting that you have it, but if you don't have it, you can cultivate it just the same because I got it OK now let's go to air circulation circulation is already important guys because like that We human beings need to breathe there's always something new because if we keep breathing even we're going to die and the plant is the same remember that back in the beginning In the video I told you not to put the structure of your grow in a very closed place so that's why because the plant needs to be renewing I mean it needs new air it's always breathing always breathing for those who don't know the plant breathes too Alright just in case If you can't afford to buy an extractor hood to exchange the air, you can also use the fan, okay guys, fan Of course, it won't have the same efficiency as an extractor fan, but it will work there to at least move the air OK, but so from the main your room your bathroom wherever it is it will have to have a gap there so that new air can enter Beauty the fan it will only make the air fluctuate even more ok guys so if you can do that do it and another Not to mention that the air circulation also interferes with the temperature and not the humidity okay guys so everything has to be flowing Okay now let's go to the toilet the pot I'm going to use guys it's going to be the plastic one over there It has 10 liters okay it's going to stay very compact here, guys, it'll even get here, look, more or less, these two air intakes, okay, but there won't be a problem because the purpose of these two air intakes is not to throw the air too hard, okay, just get in later, sorry later, I'll go having to break your head to put one Let's say a mini fan here to blow there on the plants because as I showed you in the previous video I explained the wind it does weight training on the plant ok so The more the plant moves the more it understands that it has to stretch its roots more to penetrate the soil, soon as it enters its stem it gets thicker when its stem gets thicker and harder and more robust it grows more beautiful guys so the wind is interesting ok later on I'm going to put a mini fan there, so that's all that's missing in my grow Okay, if you have a cooler with those little squares or even a mini fan or even a big fan blowing into your grow in my first grow, that's how it worked, it will work anyway ok guys so check the size of the vase you have Ok the bigger the vase the more your plant will develop ok now let's go to the substrate that we are going to use but what is substrate substrate is like a land as if it were the soil Okay, but there's a difference, guys, the soil and the substrate that we 're going to use in this cultivation here I even sat on the bed, don't mind my socks, let's go, here 's the thing, the substrate that I'm going to use will be coconut powder light coconut oil perlite allow and that's all but why am I not going to use it because I'm not going to use earthworm humus or Terra Preta these lands there because the soil I'm going to use is inert guys that's the soil I'm going to use it's unheard of but what do you mean inert means that I'm going to have to add nutrients because that soil over there that substrate over there I can make a combination with it even in the my first cultivation I used that soil over there, I mean that mark there, together with earthworm men, it worked. But if you can improve it and make the soil more aerated .
the size of the bag, so this here will help when the root breathes, because I said that both the plant and the root have to breathe. it will stretch and your plant will grow much more ok so it is interesting for us to use a substrate combination that is aerated and light a land that is very compact, you know those lands that are mud bro, it will not work, only your plant will not develop as it should be, okay, it can even grow but try to do better, okay, try to find a land that is more aerated, okay then make a combination you can use this earth here it is together with a little bit of earthworm humus you can see that this earth she already has there o one earthworm even has bovine manure OK but if you don't have it you can make a light mix put it 10 to 15% of a worm you can mix it with coconut powder as well and you can also mix it with perlite ok guys let it help it to break down and retain some nutrients too ok like other benefits ok ok let me take this bag out of here so I'm going to be using a soil the soil not inert substrate okay it's going to be these two combinations here I'm going to use half and half okay so since we have a 10 liter vase there I 'm going to use 5 liters of coconut powder and 5 liters of perlite ok Possibly I'll be making a video there on how I'll be preparing the best of my soil okay guys because I'll have to do a flash which is flush the flush will be cleaning the soil because what happens I don't know the origin of this can of coconut here, despite having it here, specifying some things here, it doesn't have all the information I need, okay, so just to be sure, I'm going to wash it, okay, I'll be putting it inside the vase. I'll be throwing water I don't know about 40 liters of water there very slowly just to release it and then I'll put the fertilizer now We've arrived at the fertilizer part as I'm using the soil that is inert that it doesn't have nutrients That's when it comes in our fertilizer, okay guys, the fertilizer that I'm going to be using will be this combo here, look, it's going to be both, let me zoom in here for you from the flower more expensive this fertilizer it's very good it's a hand on the wheel why which is handy because first you won't need to measure the PH of your soil you won't need to measure the PH of the water you're going to water you won't need to measure the electrical conductivity of your soil Believe me if you want you will need to do it like this if you want to have a high yield but in this specific case, talk more, it already manages, let's say, to balance all the PH of the water in the rule, right, that you will put it in the water of the ruler as soon as it goes to the ground, it can do it regulate the pH of the soil and the electrical conductivity of the soil as well, then, bro This is really good, you won't need to buy those electrical conductivity PH meters just for this joke, he'll spend about R$ 150 of product.
not that over there You just put a few drops in the water , it 's in the manual explaining the ideal amount . I don't have the money to buy fertilizer, guys, I'll be teaching you how to make your own organic fertilizer. You just have to pay attention to the proportion you put in and analyze the plant well.
I'm even going to have to make a video about it.