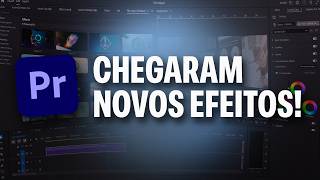
Since the latest Premiere update, we got some awesome new effects to play around with. Today, you're learning everything about them in Adobe Premiere Pro. Now, there are two ways to access these new effects.
Of course, you'll find them back in the effect controls, or you can use the film impact dashboard. You can open that up by going to the window menu, then extensions, and there you have it. If you don't see it, simply update Premiere Pro, and you'll have it all for free.
The first effect I want to show you is Wonderlow. You'll find it back in the effects library and you can then drag it to your clip instantly. This makes the lights in your clips look more prominent and soft.
Beautiful. Now, with your clip selected, head over to the effect controls. And in here, you can adjust the effect completely to your liking.
The intensity will make it more intense, obviously. And with the highlights only property, you can adjust how much of the highlights will actually be brightened up. If you decrease it, it will basically make a bigger lighting selection.
So bigger areas on your video will be affected by all these controls. I usually decrease the size a little and most of the time I don't touch the other controls unless I want to give it a certain tint or ambient. Let's say I want to change the tint to pink or something.
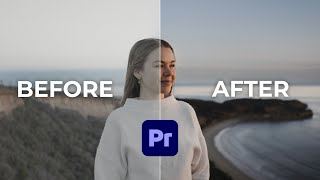
Then nothing happens. But as soon as you increase the colorized property, it will add a subtle tint to your glow. Look at that beautiful before and after result.
So much better. This also works on clips like these, by the way. Absolutely beautiful.
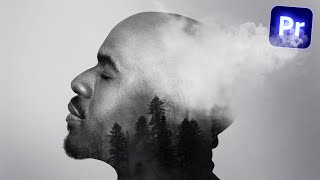
The next effect I want to show you is volutric rays. This one is wonderful. Look at this beautiful clip of a church window.
Well, if I apply the volutric rays to it, it will look beautiful from the bat, but you can do so much more with it. First of all, spend a few minutes playing around and learning these properties. They are amazing.
Second, try the surprise me button. Every time you click, you'll get a random seed, and you can basically keep clicking until you find something you like. This has saved me a lot.
Now, I know you, the editor that you are, you don't have enough time to shoot every clip yourself. Yeah, I have the exact same issue. That's why I use Story Blocks for Premiere Pro and After Effects.
All you got to do is type in a keyword and boom, look at these beautiful cinematic shots, all made by real artists. They're not AI generated like on most stock libraries nowadays. Unlimited downloads of diverse and highquality media for one predictable subscription cost.
Story Blocks has everything you need in one place. 4K and HD video, templates, music, and sound effects. It's like an unlimited source of content that gives you freedom to test, experiment, and create more effective videos.
You can choose a monthly or annual plan. No hidden fees or extra costs. Now, this is important to know.
The stock library is constantly being refreshed with new content that feels authentic. Again, it's created by real artists, not by AI. Anything you download is 100% royalty-free, pre-licicensed, and ready to use.
No need to worry about copyright strikes, legal claims, anything like that. Oh, and you can get three extra months for free when you sign up for the annual plan. This offer is ending very soon, by the way.
So, go to starbloxs. com/premierbasics or just click the link down below. Next, brand new effect, focus blur.
This one is cool to create a tilt shift effect. A tilt shift effect can make the real world look like a miniature model. Let's try it out on this traffic clip.
First, find the focus blur effect and drag it to your video. Now, this doesn't really do anything yet, so let's go to the effect controls. In here, you'll see these settings.
First, let's change the focus type to tilt shift. There you go. Next, play around with the height to make the top and bottom edges more blurry.
And then, all you got to do is tweak the position of the blur. This is like using your focus ring on your camera. Play around with other stuff like the softness and blur amount.
And look at that. Now these scars look like they're on your desk. The next effect is the long shadow effect.
This one basically replaces drop shadow. It's it's amazing. So let's say I want to add some shadow to my text here.
Look for the long shadow effect and drag it to your layer. This already looks awesome. Now in the effect controls, you'll have some cool settings.
To adjust the softness, increase the alpha fall-off. Then right underneath, you'll find the opacity property. This works and looks better than drop shadow.
But now let me reset this effect because you can do something else with it. As you can see, you also have the length and angle property. This is just amazing.
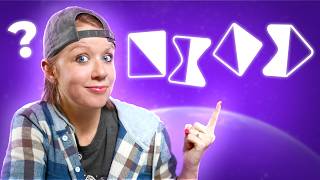
It kind of looks 3D now. Oh, and of course, you can also animate the length property to create some cool stuff like this. The next effect are the animators.
If you want some quick animations on a logo, for example, but don't want the hassle, just go to the animation tab, find one you like, and click on apply. Now, this looks good. So, if you're happy, you're done here.
However, these animations are applied as transitions, which means that you can adjust the speed of the animation by dragging it shorter or longer. If you want, you can even go to the effect controls and play around with the settings of the animation. Instead of creating the animation yourself, you can now simply tell it how you want it.
You can mess with the animation curves and really customize it to your liking. Now, definitely play around with these new film impact effects. They are very cool.
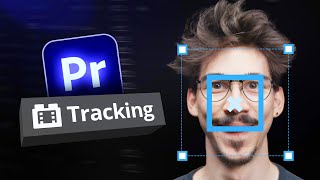
Now, Premiere Pro also added something called a magic mask, and you can learn everything about that right here in the next video on my left. Thank you guys so much for watching.