this is a video in clinical medicine from the New England Journal of Medicine the ability to obtain peripheral intravenous access is an essential skill for all physicians although considered one of the simplest invasive procedures mastering this potentially life-saving intervention requires refined skills and experience cannulating a vein particularly a small one can be challenging the purpose of this video is to demonstrate how to access peripheral veins using an intravenous catheter peripheral intravenous catheterization is required in a broad range of clinical applications including intravenous drug administration for intravenous hydration transfusions of blood or blood components during surgery
during emergency care and in other situations in which direct access to the bloodstream is needed relative contraindications to inserting a peripheral catheter in a specific site may include infection phlebitis sclerosed veins previous intravenous infiltration burns or traumatic injury proximal to the insertion site arteriovenous fistula in an extremity and surgical procedures affecting an extremity other situations may preclude obtaining peripheral intravenous access for instance extreme dehydration or shock may render cannulating collapse peripheral veins impossible some patients may lack suitable peripheral veins because of prior chemotherapy or intravenous substance abuse when access to peripheral veins is impossible and
in other situations in which accessing peripheral veins may take too long insertion of a central venous or intraosseous catheter or peripheral venous cut-down may be required a detailed understanding of the venous system of the upper and lower extremities will facilitate successful cannulation the upper extremities have two primary venous systems the cephalic vein traveling on the radial side of the forearm and the basilic vein originating from the ulnar side of the forearm although venous anatomy may vary considerably from patient to patient these two systems generally remain distinct other than communicating at the antecubital fossa and the
wrist however be careful to avoid inadvertently cannulating the brachial artery which usually lies just medial to the median cubital vein the same applies for the radial and ulnar arteries at the level of the wrist use careful palpation to identify arterial pulsations to minimize the possibility of this complication the venous system of the lower extremities consists of the greater and lesser saphenous veins the greater saphenous vein originates from the medial side of the dorsal venous arch of the foot passes just in front of the medial malleolus and follows the medial border of the tibia to the
knee the lesser saphenous vein originates at the lateral side of the dorsal venous arch passes behind the lateral malleolus and pierces the muscle fascia of the gastrocnemius muscle choosing a site for intravenous cannulation depends on many factors including the intended use of the catheter accessibility of the vein relative to the position of the patient the patient's age and comfort and the urgency of the situation in general upper extremity veins are preferred as they are more durable and are associated with fewer complications as compared with lower extremity veins the preferred cannulation sites are the veins of
the forearm particularly the metacarpal veins on the dorsal aspect of the hand the median antebrachial vein the cephalic vein and the basilic vein the median cubital vein which crosses the antecubital fossa is frequently cannulated in acute situations as it accommodates large bore catheters and may be easier to cannulate when upper extremity veins are inaccessible the dorsal veins of the foot or the saphenous veins of the lower extremity may be used cannulation of lower extremity veins is associated with a higher incidence of thrombosis and embolism as compared with upper extremity veins this risk is lower in
children and infants therefore the veins of the legs and feet are an acceptable alternative when cannulation of the upper extremities has failed other alternative intravenous cannulation sites include scalp veins used in neonates and young infants and the external jugular vein gather the equipment and have it ready at the bedside before beginning the procedure you will need gloves eye protection a non latex tourniquet chlorhexidine based antiseptic solution sterile 2x2 gauze a saline flush a transparent occlusive dressing and tape and appropriately sized catheter ranging from 14 to 24 gauge an intravenous fluid bag with tubing and a
sharps container a local or topical anesthetic may be required if the catheter is 20 gauge or greater there are many catheters varying in style length and safety mechanisms the two most common types of catheters are the over the needle catheter and the winged butterfly catheter the butterfly catheter comes with attached tubing whereas the over the needle catheter does not for both catheters the steel inner needle is removed leaving only the plastic cannula in the vein different safety mechanisms have been developed to minimize the possibility of inadvertent needle sticks some catheters are equipped with a spring
activated retractable needle others have a protective clip that covers the needle as it is withdrawn from the plastic cannula needles should always be discarded appropriately in a sharps container the size of the catheter selected will depend on the clinical situation the smallest effective catheter should be used because small catheters allow for less resistance to blood flow around the cannula and are associated with fewer complications large catheters such as 14 and 16 gauge are used in acute situations for fluid resuscitation for example in managing hypovolemia in a trauma patient or in a patient with severe dehydration
other factors that may influence the size of the catheter used include age related vessel size the need for pressurized boluses for administration of contrast or medication and the viscosity of the fluid to be infused explain the procedure to the patient and address any specific questions or concerns discuss potential complications such as bleeding bruising and infection you must follow standard precautions when placing a peripheral venous catheter this includes washing hands wearing gloves and using eye protection because of the risk of blood splatter when the selected site is in an upper extremity the patient should be placed
in the supine position with the arm supported a comfortable position for the practitioner and proper lighting are important for successful intravenous cannulation tie the tourniquet with a half knot eight to ten centimeters above the targeted insertion site place the tourniquet flat against the skin and bring the tourniquet ends together overlapping one another stretch the ends of the tourniquet and with one finger tuck the top tail beneath the bottom directing the end away from the puncture site when evaluating a vein for cannulation inspect and palpate the available veins gently tilt the extremity or adjust the angle
of the light to reveal better the contours of the vessel to palpate a vein place one or two fingertips over the selected vein and gently apply pressure release the pressure to watch and feel the refilling rebound of the vein an ideal vein feels round firm flexible and full once you have selected the vein clean the site with a chlorhexidine based antiseptic solution using a back and forth motion allow the area to dry completely do not repel pate the area if a larger gauge catheter is used the site may be anesthetized with a local injection topical
cream or ethylene glycol cryo anesthesia to prepare the catheter inspect the metal needle and plastic cannula for any damage or contaminants both should be smooth spin the hub of the plastic cannula to verify that it moves easily off the metal needle do not move the tip of the cannula over the bevel of the metal needle as this could damage the end of the cannula superficial veins are displaced easily and need to be stabilised use your non-dominant hand to apply traction to the skin distal to the venipuncture site if the catheter is placed in the dorsum
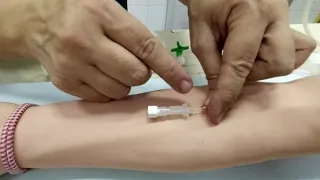
of the hand grasp the patient's hand with your non-dominant hand fingers beneath the palm pull downward to flex the wrist and use your thumb to keep the skin taut if a forearm vein is selected use your non-dominant hand to encircle the patient's arm place your thumb on the skin distal to the venipuncture site and pull down regardless of the venipuncture site always maintain a firm grip on the patient's hand throughout the procedure with your dominant hand insert the metal needle bevel up at a five to thirty degree angle through the skin and into the vein
the angle used to approach the vein is dependent on the depth of the vein a lesser angle is required for superficial veins do not insert the catheter too deeply as this risks penetrating the far wall of the vein when the catheter enters the vein lumen watch for the initial flashback of blood which will slowly fill the catheter chamber once the metal needle and plastic cannula are in the lumen lower the catheter so that it is almost parallel to the skin hold the end of the catheter with the thumb and index finger of your dominant hand
maintain tension on the vein and the skin stabilize the needle and carefully advance the catheter into the vein when the catheter has entered the vein lumen completely remove the tourniquet to prevent blood loss from the open plastic cannula hub when the metal needle is removed place direct pressure over the vein proximal to the end of the catheter and place a gauze pad beneath the cannula hub remove the metal needle from the plastic cannula and place it in the sharps container never attempt to reinsert the metal needle into the plastic cannula doing so may shear off
the plastic cannula releasing it into the bloodstream resulting in a possible embolus make sure that the tourniquet has been released and confirm that the cannula is paitent by flushing it with normal saline the volume use depends on the size of the vein and the gauge of the catheter check that there is no swelling redness leakage or discomfort around the insertion site attach the intravenous fluid tubing to the cannula and start the fluid infusion ideally you should secure the cannula with a trance parent occlusive dressing placed over the cannula hub confirmed that the hub of the
cannula is clearly visible through the dressing to facilitate monitoring after securing the cannula with tape loop the intravenous tubing and secure it away from the insertion site looping the tubing may prevent accidental displacement of the cannula decrease cannula manipulation and lower the risk of venous contamination or irritation it is recommended that you write the date of insertion on the dressing to facilitate determining how long the cannula has been in place to reduce the risk of infection continue to review the indications for peripheral intravenous catheterization and remove the cannula as soon as possible when a vein
is difficult to see or to identify on palpation several methods can be used to increase its dilatation these include lowering the arm below heart level gently tapping on the vein instructing the patient to open and close his or her fist repeatedly and applying a warm compress to the selected site for three to five minutes to increase vaso dilatation transillumination or ultrasound may also be used to help locate a vein these have been shown to improve the success rate of the procedure and to reduce the amount of time needed to perform it blood might flash back
into the chamber if the tip of the needle has entered the lumen but the cannula has not yet entered the vessel lumen itself this problem can be avoided by reducing the angle of the catheter and advancing the needle a few more millimeters into the vein a valve within the vein may prevent advancement of an inserted catheter if this occurs hold the cannula hub in place remove the tourniquet and connect the intravenous tubing to the cannula running fluid into the vein may open the valve and allow the cannula to be completely inserted occasionally it is possible
to advance the catheter when it is outside the vein or when the catheter has perforated the veins opposite wall either of these situations can cause pain and swelling at the insertion site because the intravenous fluids are administered into subcutaneous tissue when this occurs the cannula should be withdrawn completely and another cannula should be placed at an alternative site when a cannulation attempt is unsuccessful the subsequent attempt should be performed in a vein proximal to the initial puncture site the most common complications arriving from intravenous cannulation are pain bruising bacterial infection extravasation possibly leading to necrosis
phlebitis thrombosis embolism and nerve damage proper sterile technique and the selection of an appropriately sized catheter should help to avoid these complications ensure proper and adequate fluid administration or flush the site with saline to prevent the more serious complications of thrombosis and embolism an attempt should also be made to prevent IV fluid bags from becoming empty which may cause cannula obstruction from blood clots or the infusion of air if fluid extravasation or thrombosis occurs remove the cannula immediately and place a new line if needed the chances of successful peripheral intravenous cannulation increase with meticulous attention
to proper technique the use of proper equipment familiarity with anatomy and a knowledge of a variety of approaches to accessing peripheral veins you