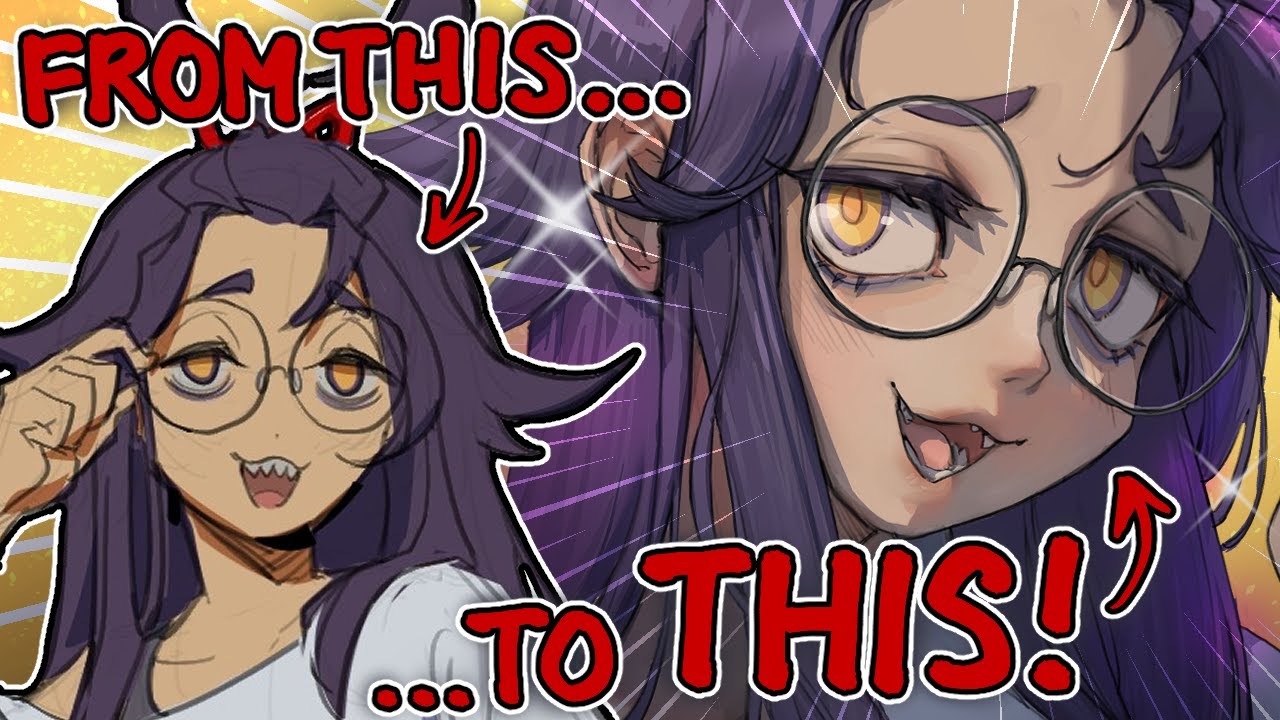
if you love drawing characters like I do you know how important learning Anatomy is but unless you're very resourceful and dedicated it can be pretty dang hard to learn there's just a lot so often the problem is you just won't know where to start how to go about learning anatomy and this is where this carefully crafted 7-Day study guide comes into play in this new episode of YouTube arts school I'll take your hands through it all going over the whole thing with you day by day to make sure you go from Anatomy baby to Anatomy
connoisseur within a single week wow oh quickly started all right classes in session pay attention over the last week I've been putting together this study guide that we're going to go over right now and I'm excited to share it with you I've thought it on me to countless students over the last decade so this is my best attempt to condense this very elaborate Topic in a seven day study schedule or a study guide to deliver maximum results maximum art gains learning Anatomy is awesome it makes drawing characters so much easier so much more fun obviously
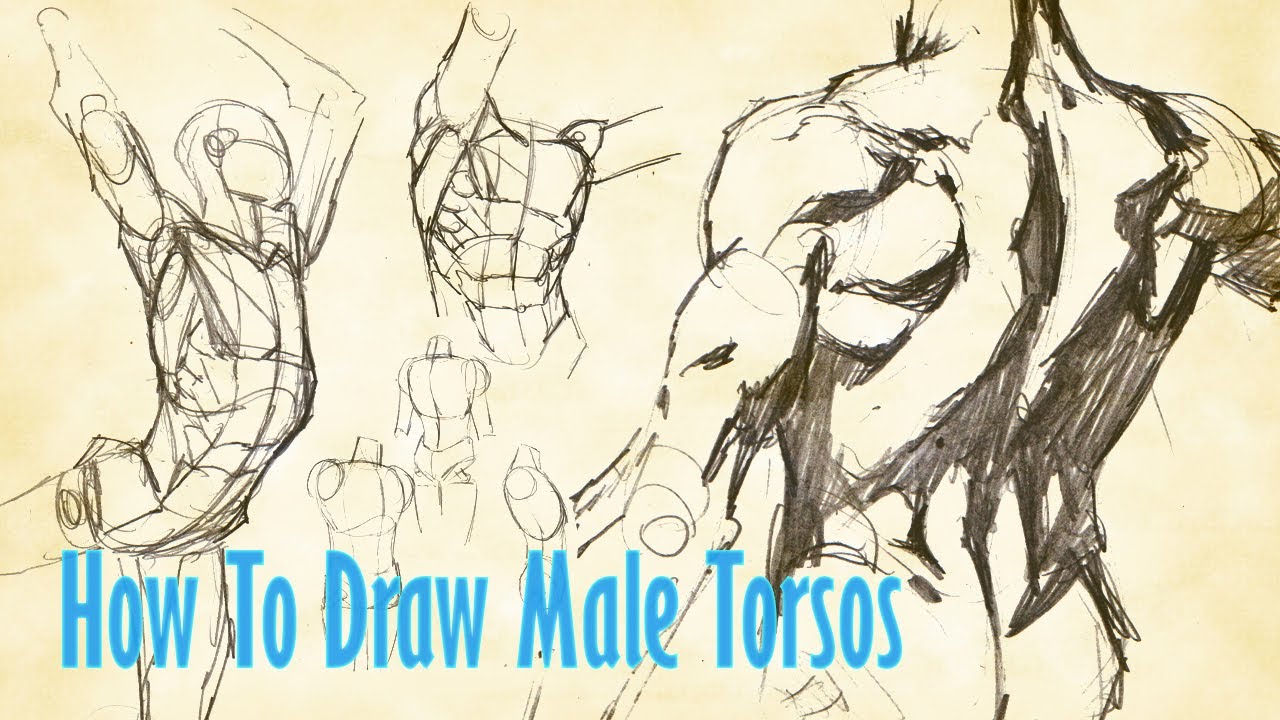
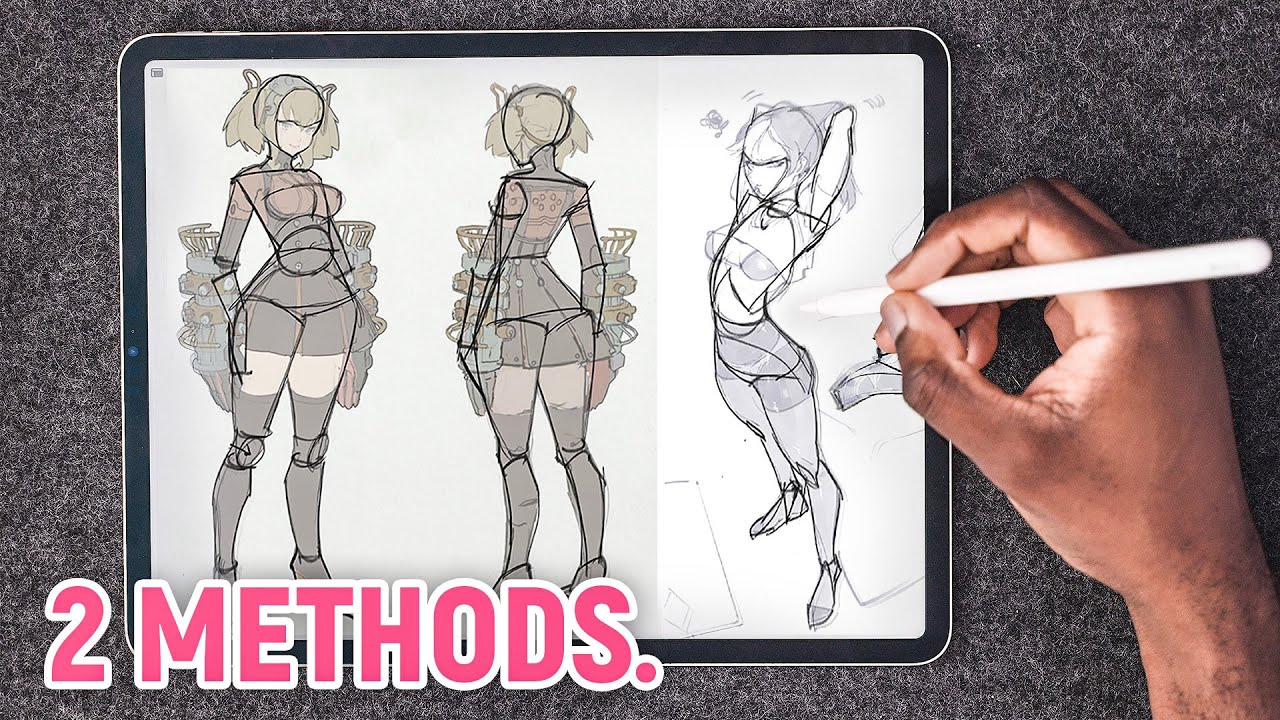
though you can't master anatomy in only seven days that's just not gonna happen there's too much to learn but the structure of this schedule should lay out everything that you should focus on in order like an enjoyable step-by-step process that you'll be able to apply whenever you're trying to learn a specific body part so whether it's the limbs the Torso the pelvis area whatever so for the sake of this video I'll focus on one of those areas let's say the arms and so the idea is to isolate a part of the body and tackle it
using this process spending roughly an hour a day or more every single day of the week for a whole week so let's get right into it after you've paid the class fee of either one like or one sub and so we begin with day number one so here the whole point will be to identify the problem or problems plural with your anatomy in our case here you might just be saying that you want to get better at drawing arms but more likely than not you already know more than you think it's just not a complete
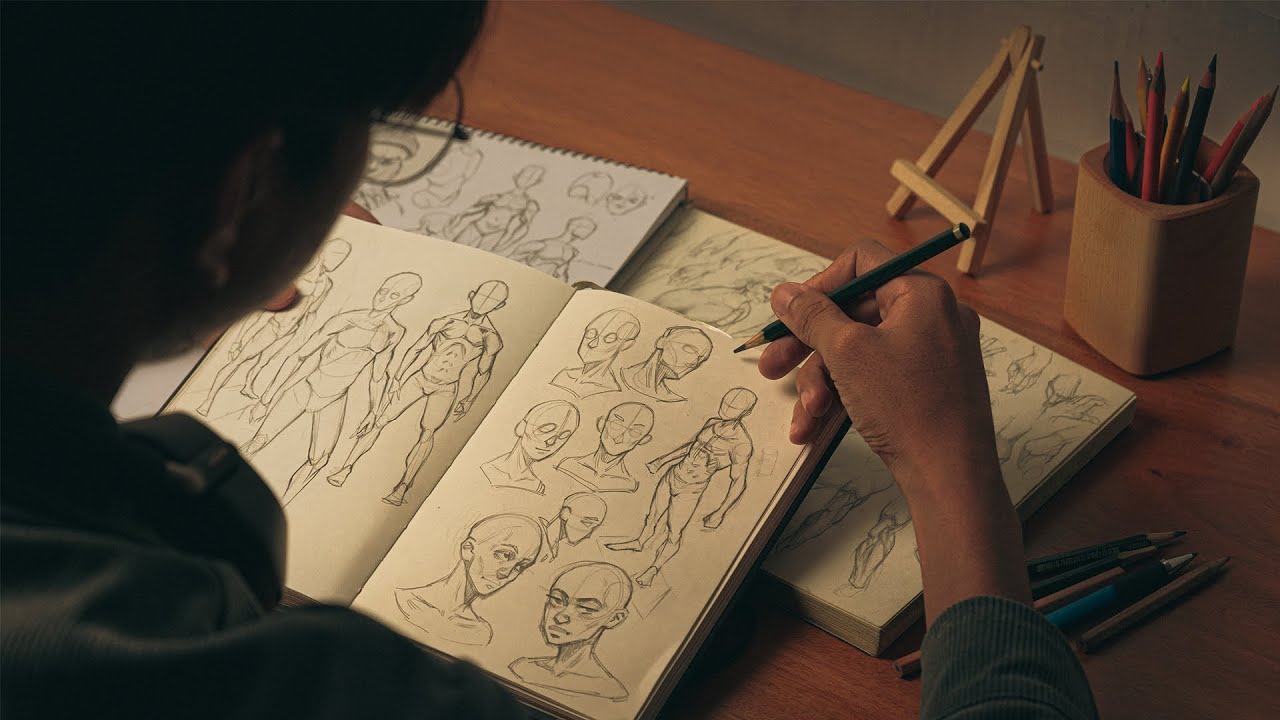
understanding you like missing a couple of pieces and uh well the absolute best way to gain a better understanding of your weak points is to try and draw the arm or a particular body part that you're working on but drawing it from imagination that's going to be the exercise for day one so draw the body part from a few angles you know as best as you can this will also serve as a comparison when you reach the ends of the week so do your best but no stress with that said I do recommend drawing the
body part in like four to five different angles to get a good understanding of your understanding or lack thereof knowing what we know and what we don't know is super important to get started and also I recommend doing these sketches these exercises in like a sketch pad maybe something like filling one page a day for every single day so now moving on to the second day we're still not gonna get too technical the mission will be to find a bunch of photo references and do a number of two to five minute sketches as best as
you can relying on the references so try to find references where the models have you know some muscle definition a great source of photo reference packs that I personally recommend that I use all the time is qbrush there's a ton of stuff on there I'll have a link down in the video description if you want to check it out those are affiliate links by the way so I get a small portion of the profits uh if you do click it just to help the channel you know but yeah you'll want mostly models in idle poses
like where the body part is not for shortened without much perspective basically I don't recommend looking into real Anatomy just yet just try to draw what you see on day two even if some of the stuff that you see doesn't necessarily make a whole lot of yet and I'd say a good amount of practice to make this worthwhile would be a page full of those sketches about like 15 to 20 of them that's day two and as you know if you've been a subscriber for a while every week I try my best to give is
much content as much value for free here on YouTube like this study schedule here but the short video format means that I can only cover like a tiny portion of the whole topic and Anatomy is a massive topic that I spend hours upon hours covering in my art program so if you're hungry for more you should definitely check it out with the link down in the video description it's a complete art education equivalent to what you would find at University but for a tiny fraction of the price and it's arguably a lot better too I
mean check out those recent reviews and something else that I don't mention too often but a vast majority of the larger game studios actually use article to train their employees that's pretty cool so it's definitely not only for beginner artists and hey on top of that it just happens to be on sale to celebrate reaching 17 000 students until the end of the month only there's still a couple of days left so don't miss out and if you already got it I love you thank you alright with my plug over let's move on to day
number three this time we'll start by hunting for more photo references but not just any kind we want shredded models for this exercise now you can search for bodybuilder photos or fitness models you should find it a lot pretty easily and what we're going to do with these is uh well draw over them tracing over the photos and highlighting the various muscles and visible bones if any that's you know with different colors maybe so actually write down their names you know like all the muscle the muscle groups and the bones that you already know make
sure that you identify them and those that you don't know make sure that you identify them as such as well with a question mark maybe so once you've done that for a few angles at least in like the front and the back separate as a second exercise draw what you see because day three consists of two steps tracing first and then drawing from reference and then for the Second Step this time take your time instead of working on quick sketches you know work on like five to ten minute sketches or longer if you need to
including as much Anatomy detail as you can observe from your shredded references and now we move on to day number four and uh let's switch things up a bit we're gonna go back on the hunt for references but this time we'll be doing artist studies so find some references uh from artists it references you know that show the anatomy obviously and artists that you like but preferably professional artists working for Studios you just want to make sure that it's as less likely as possible you know that the art has some glaring mistakes glaring Anatomy mistakes
to it when the art is peer reviewed in the context of a studio it's usually a little safer to use not that non-professional Arts can't be accurate but how would you know so anyways the exercise for day 4 will be to do studies based off of those drawings 10 or so drawings for the body part that you're studying should be pretty good the style can be realistic it can be stylized you know whatever you prefer have fun with it and then you'll be ready for day five now you should already have a much better understanding
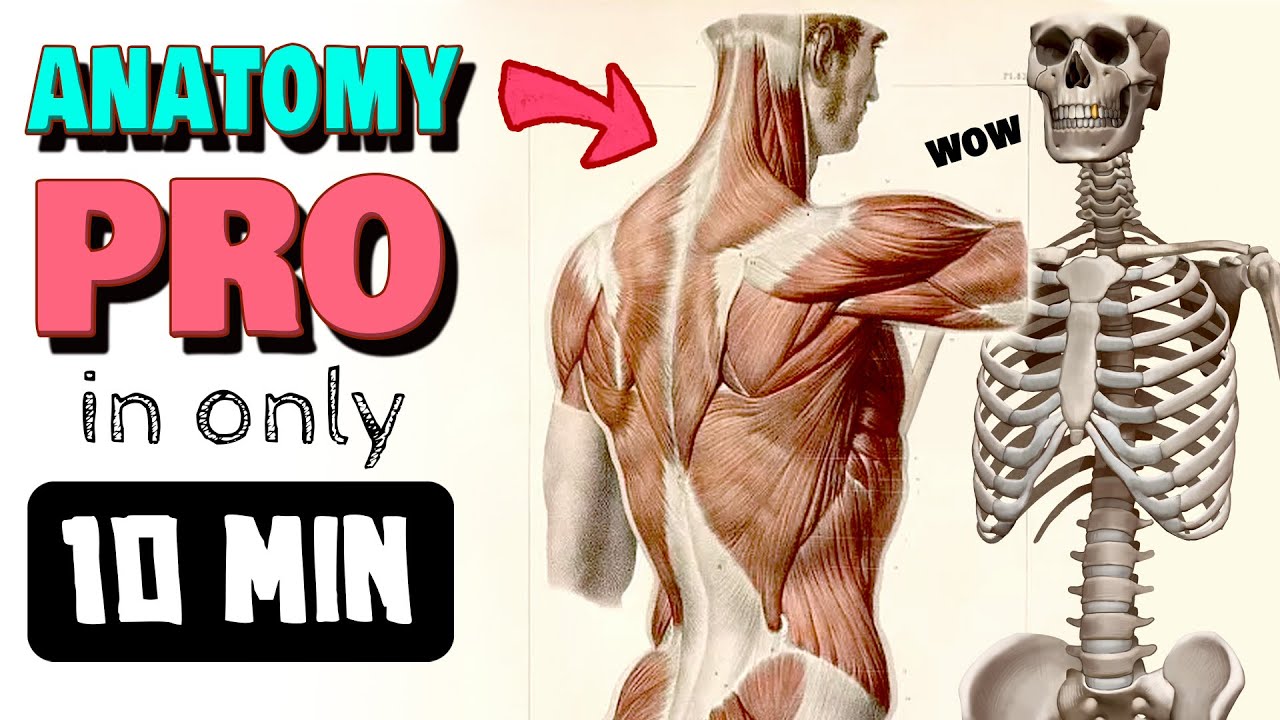
of the body part that you've been studying by now but day five is really where a lot of the mental questions that you've accumulated over the last couple of days should get answered we'll be focusing on identifying all of the surface bones and muscles now all of the big muscles at least like if the muscles are too small to have like an effect or much of an effect on the you know the silhouette of your characters then you can Bunch them up in groups of muscles instead but yeah it's time to whip out your anatomy
chart or your Anatomy models and let's figure out all of those muscles that you could name a couple of days ago for the arm for example we have the Delta it the triceps in the back the biceps and the fronts the brachialis sandwiched in between and then I like to call those two long muscles the break your radialis group but it's really just made out of the brachial radialis and the extensor carpi radialis longus that's a mouthful but moving down to the forearm when I teach I usually bundle all of the extensor muscles together initially
to keep things simpler you know those are the smaller forearm muscles that help the hand open essentially extending the fingers and I do the same thing for the flexor muscles those on the inside of the forearms helping the fingers Flex so feel free to identify all of the individual muscles if you prefer you know get into it if you want to but I recommend sticking to the surface muscle since you know those matter most for us artists and this takes us to day six and we're almost done the exercise this time will be to draw
the body part using the style of your choice whether that's using a lot of details or very little just make sure that you keep in mind you know everything that you've learned so far and don't hesitate to pull up a reference if you need to you're actually going to draw the body part from different angles just like we did on day one but with all all of the additional information that we now have the best way to do this is to imagine that you're drawing the body part as it's like rotating in the air so
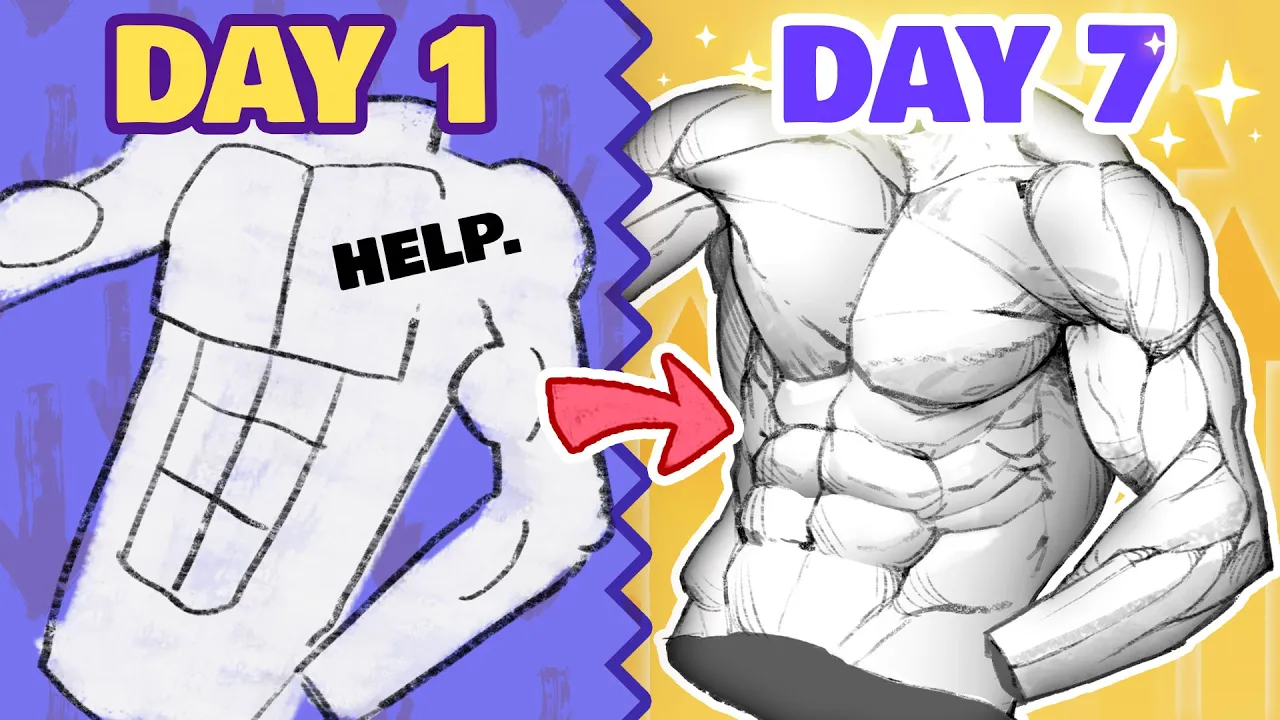
like the front the front three quarter View the side the back three quarter and the back so like four to five angles again it should be a really solid way to really imprint all of that information in your long-term memory and now finally day seven it's testing the idea will be to redo your initial drawings from day one but including everything that you've learned since using no reference this time still feel free to use your day one drawings as kind of a reference a starting point but the focus should be on using everything that you've
learned in the past six days from memory only you might still have some things that you're not sure about but I guarantee you'll surprise yourself by just how much you've actually improved in just a couple of days and that's it you've done it congratulations and that's gonna be it for the Swiss class as I said in the beginning beginning I recommend that you do this process for every body part that you need help with I planned everything to help you learn and retain as much information as possible so the order here matters the pacing matters
if you want to do more if you can do more every day do more of each of those exercises rather than trying to cram everything in like a couple of days instead or even a single day that's not gonna help much and let me know how it goes and by the way you can tag your process if you post on social media using the hashtag that I created for this learn anatomy in seven days I just created this so that we all have a place to look at everybody's submissions see each other's progress and I
just think it makes this a lot more motivating a lot more fun to see what others are doing too now feel free to do this digitally or traditionally makes no difference but if you're doing it digitally though you can use my custom brush back that I offer for free with the link in the video description the brush that I use for today's drawings is included as well it's the best oh and quickly make sure that you check out my art program before the end of the [Music] foreign [Music]