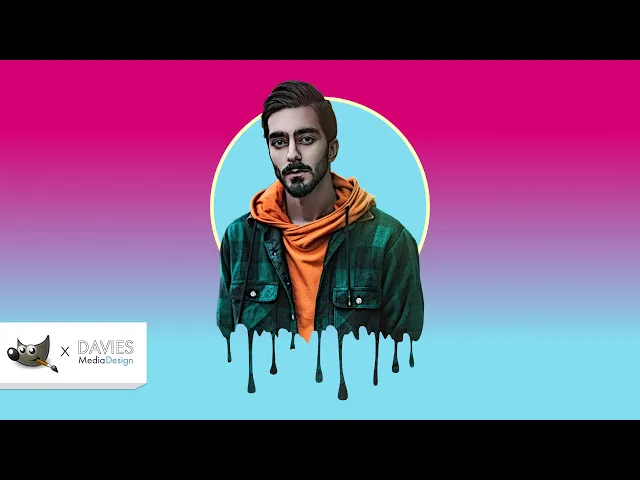
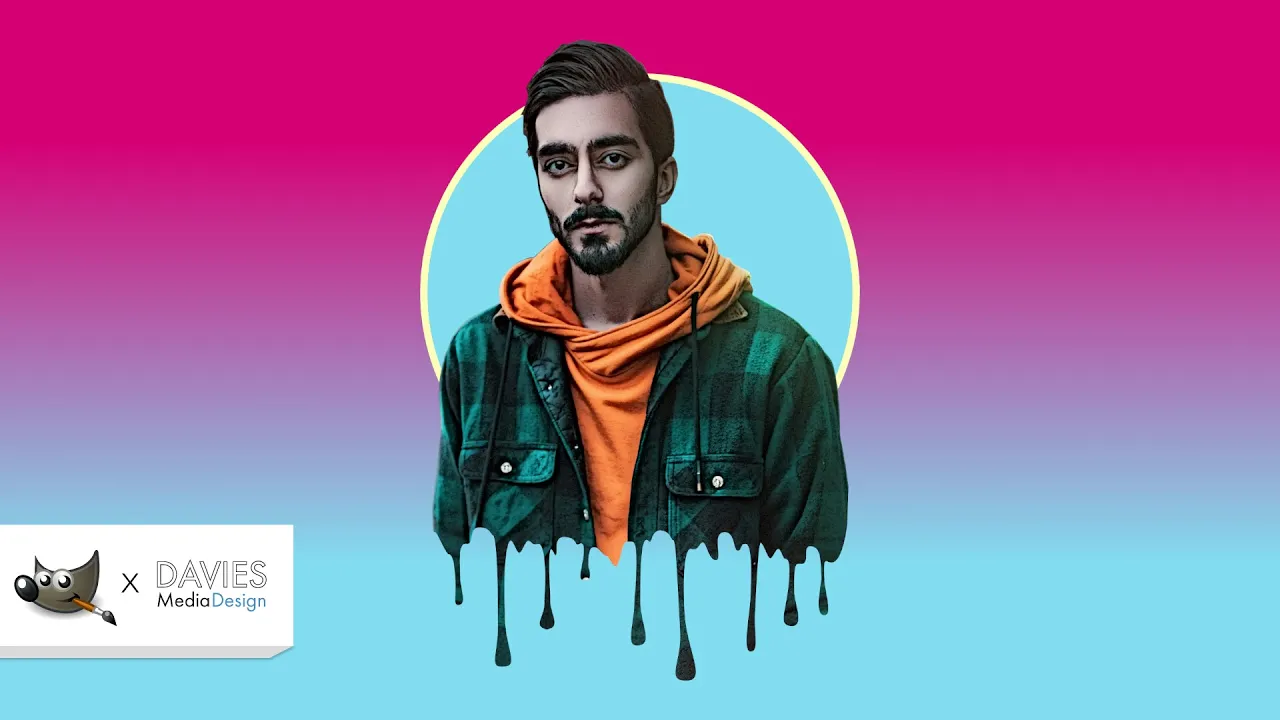
Hello and welcome to yet another tutorial by Davies Media Design, my name is Michael Davies, and in today's tutorial I'll be showing you how to create a drip portrait effect using GIMP. I'll be using GIMP version 2. 10.
20 which is the latest version of GIMP at the time of this tutorial. Before I get into that, check out my website at DaviesMediaDesign. com.
As always I have tons of GIMP and Inkscape tutorials on here, my GIMP Book of Layers, and free software help articles so definitely check that out. You can enroll in my GIMP 2. 10 Masterclass: From Beginner to Pro Photo Editing on Udemy.
You can enroll in any of my Skillshare classes by visiting GIMPSchool. com, and you can get more with a premium membership to Davies Media Design. I'll include a link to this as well as all the relevant links from this tutorial in the description of the video.
I'll be using this free stock photo for today's tutorial. Just click the arrow next to free download, and I went with the medium option. Here is the final result we'll be working on today.
As you can see we've removed the background and we've taken this portrait photo, added some drip effect to the bottom, and then created a nice background behind here as well. This is a pretty easy effect to create, so let's dive right in here. I'm going to start by opening up the original photo - so go to File, in my case "Open Recent.
" For you guys go to File>Open, and here is the original photo. It's going to ask me to convert this to gimp's native built-in sRGB color space, so I'll hit "convert. " Here is the original photo, and what I did is I grabbed the paths tool.
I used this tool to outline the entire subject, and the paths tool, in my opinion, is going to take a bit more time but it'll give you a much more precise background removal. So you're going to want to outline all of the areas of the portrait you want to keep. Once I have outlined my subject I'll click "Selection from path" to convert that path to a selection area, and then i'll hit ctrl+i to invert that selection.
Finally I'll come over to my layers tab, right click on the image layer, and go to "Add alpha channel. " I'll hit the delete key and that will get rid of my background. Here is the final photo with the background removed.
So the next step is we need to create a new composition where we want to put together the drip effect. So to do that I'll go to File>New, and I'm going to change this to 1080, hit the tab key, by 1920. And under the advanced options I'm just going to fill this with white for now and click ok.
So here's our composition. I'll come over here to our photo with the background removed, and I'm going to click and drag this tab over here to the blank composition. And I'm going to drag my mouse on top of this and release.
And I'm going to come over here and change the name of this layer to "Portrait" just by double-clicking on that name. Next what I'll do is hit shift+r on my keyboard, that's going to bring up my rotate tool. In my case I need to change the transform mode to "layer" under the tool options, and now I'm just going to click and drag my mouse and rotate this until the body of the subject here is relatively straight, like so.
Then I'll come over and click "rotate. " Next I want to create the actual drip effect. So I did create a path ahead of time, and you guys can download this path on my website.
I'll show you real quick how I created this custom drip effect, and I'll also show you how to import the path for those of you who are downloading the path from my website. So if you wanted to create your own custom drip effect you could start by dragging a guide from the top - so from the rulers - and place it approximately where you want the dripping effect to occur. Then come over and grab your paths tool, hold ctrl, zoom in and you're going to click at the far left side of your subject and then click on the far right side of the subject.
So by having this guide it creates a very easy way of having a straight line. Next what you're going to do is hold the ctrl key, and that's going to bring up this little plus icon above the little pointer for your path tool - so that will only display when you're hovered over the path itself - and what you're going to do is click to create nodes. I recommend creating three nodes for every drip effect that you want to do, and then you're going to click and drag the middle node down.
And then you're going to come over here and do it again. So just create nodes and drag one of those nodes down, and you're just going to do this until you get the final dripping effect going across the entire path. I do have a tutorial on how to create a dripping text effect, I recommend you check that out for an in-depth look at how to create a drip effect using a path.
But what I'll do is come over here to my paths tab, and here's the path I just created right here. So I'm going to delete this path, then I'm going to right click and go to "Import path," and here under "Recently used" for me, we're going to have the drip-path. svg file.
For you guys you might want to navigate in your "Places" section here on your computer where you saved the drip path that you downloaded. But it will be an SVG file. So I'll double-click on this to open it, and now when I unhide this path you can see here was the final path I created.
So obviously this is in the wrong section right now. What I'll do to relocate this is come over here, click and hold on this tool group for my transform tools - you could just use the shortcut key shift+t and that's going to grab the unified transform tool. I'll change the transform mode to "path," and then I'm going to click on that path, and first I'm going to hover my mouse over the bottom right corner to bring up the scale tool.
And I'm just going to click and drag this to scale it up a bit. Then I'm going to hover my mouse in the center of this, and you'll see my mouse pointer has the little move tool icon that allows me to move this into place. And I'm going to use my mouse wheel to scroll down.
So I'm just going to continue to use the scale tool until this fits across the entire subject, and I'll also use the move tool to move this back up a bit. So I'm just going to position this in a place where it covers everything that I wanted to cover. So what you want is for the path to wrap around the entire person, so you want it to go around his entire head and shoulders and everything and then you want it to start to intersect at some point with his arms on either side.
Once you have that in place, hit "transform. " So now our drip effect is in place, and let me grab my move tool, and I'm going to just move this guide out of the way that I created a second ago. Hold ctrl, zoom out a bit.
Once your drip path is in place, now we need to convert this to a layer mask that way we can hide everything outside the drip effect. So what I'll do is come over here to my paths tab and I'm going to come down here and click to convert this path to a selection. So for those of you who drew your own path you will have to complete this step.
So convert your custom path to a selection area, then I'll come over to the layers tab and on our portrait layer I'm going to right click and go to "add layer mask," and I'm going to choose "Selection" under "Initialize layer mask to:" and click "add. " There you'll see everything outside of that path has been hidden. So I'll hit ctrl+shift+a to deselect that, and now I can come back over to the paths tab and hide that path - we don't need it anymore.
So here you can see we have this cool drip effect, and I'll come back to the layers panel. Next what I'll do is hide this background layer, and I'm going to go to Layer>New from visible. That's just going to give us some more flexibility working with our drip portrait.
So I can hide the original there and unhide the background layer. And next, while we're on this layer, we're going to go to Layer>Crop to Content. That'll crop the layer size down just to the drip portrait, and then I'll come over to the move tool group and just choose the alignment tool.
I'm going to change "Align relative to image" and click on this layer. So you should see these little icons in the corner, then I'll come over and I'm just going to center align this to the composition. Next we're going to tweak the portrait photo a bit because right now I think it's a little on the dark side.
And I'll start by going to Colors>Levels, and we can just quickly adjust the levels here. Let's start by brightening this up a bit, and we can darken it slightly to add some contrast and then work on the midtones here. I'll click ok, and I'm also going to go to Colors>Curves, and I'm just going to quickly adjust the curves of this.
That looks pretty good, so I'll click ok. Now I'll add a bit of a cartoon effect to this just to make it look a bit cooler. So I'm going to hit the forward slash key "/" on my keyboard, that's going to bring up the Search Actions box here.
If you're not sure what the forward slash key is go to Help>Search and Run a Command. Here's the forward slash key, that'll bring up this box. Then I'll type in "Cartoon" and just double-click on this Cartoon GEGL filter.
So hold control, zoom in. You can see what it's doing here. I'm going to increase the mask radius.
. . and you may also need to decrease the percent black or maybe even increase it.
. . Alright, once you've played around with the settings a bit and you've found the look you like, just come over here and click ok.
So now we have a cool cartoon looking effect. Now we'll finish this up by adding a bit more of a dynamic background to this. So hold ctrl, zoom out with my mouse wheel.
For starters, I want to add a circle behind here. So I'll come over here underneath the visible layer and create a new layer, and I'll just name this "circle," hit the enter key. I'll grab my ellipse select tool and I'm just going to hold ctrl and shift as I drag out to create a perfect circle, and release.
And click and drag this to reposition it. If you want this to be in the exact center you can go to Image>Guides>New guide by percent. And we'll go with a vertical guide at 50% and click ok.
And now I'm just going to drag this until the little crosshair at the center of this is centered up with our guide. Now I want to fill this in, so I'll hit shift+b on my keyboard to grab the bucket fill tool. And you can see I already have this blue color selected.
You guys can copy the HTML notation of this, and I'll click ok. So I'll fill that in with that light blue. Next what I did is I created a stroke around the edge of this circle, and for that I just went to the paths tab, I converted the path to a stroke using this "selection to path" icon.
I'll hit ctrl+shift+a to deselect that. And then we'll come over here to the layers tab and just click to create a new layer, and I'll name this "circle outline," hit the enter key. Come back to the paths tab, and we're just going to stroke that circle path.
I went with 15 as my line width, and I'm also going to come over here to my foreground color and change this to this light yellow color and click ok, and then click "stroke. " Finally I added a gradient to the background. So I'll come back to the layers, come over here to the background layer - let's change this yellow color back to blue and click ok - and I'll come over here to the bucket fill tool, change this to the gradient tool, and I'm going to change the shape of this to linear.
And I'll change the colors to go to "Foreground to background. " You can go with RGB or HSV or another option there, and now I'm just going to click and drag this while I hold the ctrl key. Hit the enter key to apply that gradient.
Let's hit the m key to grab the move tool, move that guide out of the way, and there's our drip portrait. Alright so that's it for this tutorial, hopefully you liked it. If you did you can check out my YouTube channel at youtube.
com/DaviesMediaDesign. Don't forget to subscribe and click the bell icon to be notified each time I have a brand new tutorial. You can also check out any of the links to my resources in the description of the video, but thanks for watching and I'll see you next time.