my name is josh mcmullen i'm an architect here at glidefast and with me is tone tran tom hello everyone i'm tone tran atc at glide fast and i'll be going over the development process of this wonderful project today today's agenda we're going to be looking at goals and objectives talking about you know what brought this solution to the customer why we did it giving an overview of how we implemented it the challenges we face and then at the end tone will give a live demo of the solution that we implemented really goals and objectives why
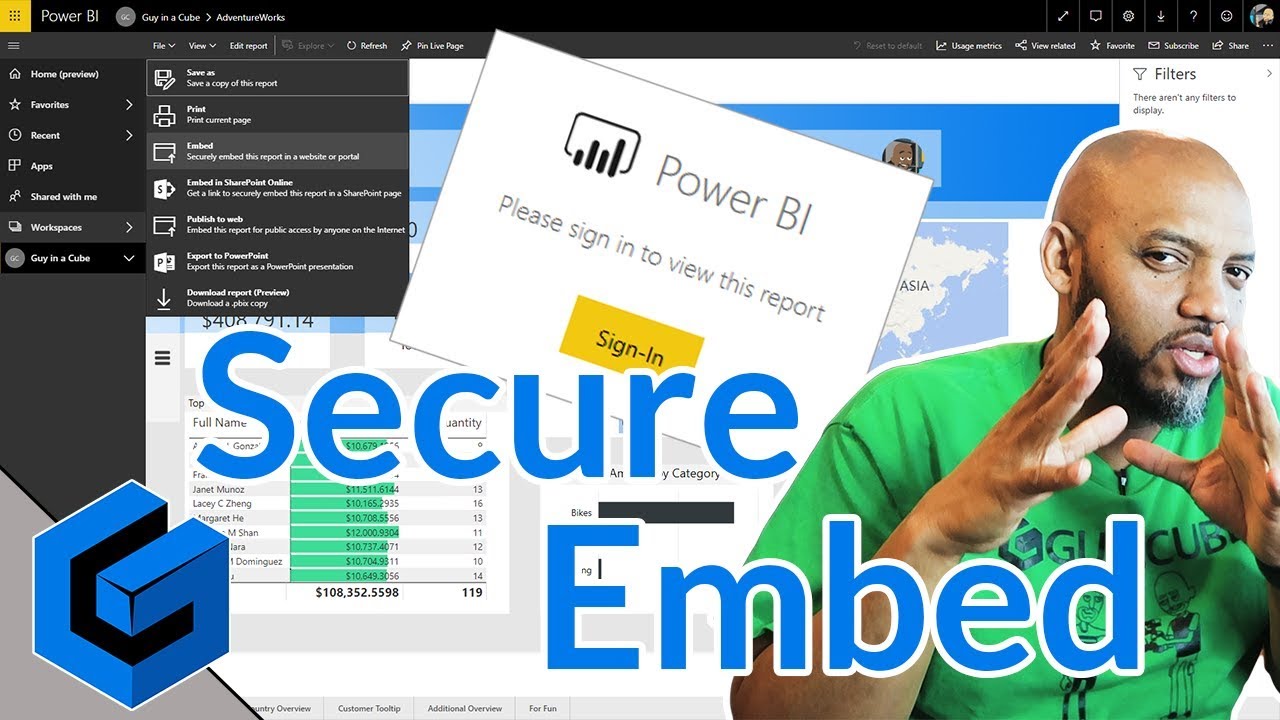
did we want to embed power bi into service portal so this was a csm contract and this customer had their clients buy into them as part of the buy-in they received reports from the company that showed their roi so they could see that the customer was utilizing the product in a method that was returning back what they bought from them it was actually a really good use case for csm the ability to show roi is something that can easily help build your customer base so in doing this they wanted all of the aggregated data they
had put into power bi to be displayed into the csm portal in servicenow so there were two types of reports that we would be running there would be the row level security rls reports which were reports that were shared across multiple customers that what would happen is as the user pulled up the page it would pass in data to that report and filter it down to just the data they are allowed to see and non-rls reports which are the reports associated to specific clients so we're going to walk through how we set up the oauth
and credentialing the power bi rest api and using surface mouse flow designer integration hub to perform the rest api calls the prerequisites as we go through this of course we're going to need you know a service principle account that can access power bi so this account there are two methodologies when going through power bi their service principle which you can think of as an individual user account that has access to read and write versus the admin account when we were going through this the customer had only ever implemented any integrations with power bi utilizing admin
so one of our big challenges was getting them to set us up as a service principle so that way we didn't need to see everything we were only seeing what we needed to see so with a service principle we have to ensure proper permissions and access have been granted such that that principal could see what it needed to we need to set up workspaces so in power bi you can set up individualized areas where you put these reports and those are called workspaces they have a unique identifier of a workspace id and when doing all
of this we have to pull that workspace id in such that the service principle knows where to of course they will need to build and store the reports and then setting up rls that is held in power bi so over there they will set up basically a table just like we set up acls so they can set up rls where it takes a user says you can read this data and what we would do then is pass in that user information to their system it would filter the report and pass it all back to us
and then we have a link here to the power bi documentation and then the implementation plan establish connection pass the necessary data using the report data obtained embed it and then install the plugin so realistically it sounds easy it was not this is one of those projects that we churn for weeks trying to understand microsoft's api documentation and what calls need to make there would be four documents that all say different things all trying to accomplish the same goal so there's a lot of back and forth back and forth and understanding how power bi actually
works so when we go through these individual steps you'll see we have to make three calls just to get a single report out we use system oauth flow designer integration hub and service portal so at this point i'm going to hand it over to keto alrighty so to first begin we obviously had to establish a connection between servicenow and power bi's microsoft analytics services and to begin with that we had to create an oauth record through the application registry module and first and foremost we just had to locate that module open it up and create
a new record upon creating a new record you want to select the option of connecting to a third-party oauth provider and then from there all you have to really do is input in the client id and client secret which should be provided to you from the azure ad app from the prereqs as well as the tenant id which you will input in into the token url based on the url you're seeing in the slide right now and then afterwards go ahead and just set the default grant type to client credentials and this oauth application registry
is to help us pass in our calls through a basic authorization header and that's why we're sending in the credentials or setting the send credentials as basic authorization header everything else should be as default next slide aside from that within the application registry record there is a field called oauth util script and so what we want to do is go go and locate the actual original oauth util script since it's an out-of-box script and we want to pretty much override this script to to also include a header that points our pre-process access token to the
resource that power bi uses to to run their res api calls and so we went into the oauth util script and created a copy of it using insert and stay and we just titled it oauth util power bi and then within the preprocess access token function we just override it by adding in a line that simply just puts a key value pair of resource as key and then value as the power bi res api resource url and once we go ahead and save that and point the new script into the application registry record you'll notice
here all the red squares are fields that we had to fill in manually the rest were all set by default and so here client id client secret and then the new api script that we insert and stay as well as a default grant type token url and send credentials and notice on the right hand side here there is an oauth entity profile that automatically gets created which is essentially just the name of your application registry plus default underscore profile this will be useful later on when we're creating an actual connection when using integration hub so
now that we've created an application registry we now need to establish a connection a real connection between power bi and servicenow and that's through integration hub and since we're using integration hub we need to use the connection and credential aliases module so first we need to go to that module create a new record simply by just naming that record that's the first step as you can see here we just titled it power bi cca which is connection and credential alias afterwards within that record at the very bottom there is a connections related list essentially you
just have to create a new connections and within that connection just name it whatever you like we named it power bi connection under that is a field called credential essentially you just want to create a new oauth credential to to connect for to connect to the rest api so you would want to hit the magnifying glass which will open up a new window where you can also create a new credential record and when it asks for what type of credential record you want you want to select the oauth 2.0 credentials record and you just have
to name the record afterwards once you name the record you'll notice that there is an oauth entity profile that you need to select and that's essentially that profile that we just mentioned from earlier where you just type in the name of your application registry and an auto suggestion will be pointed out where it's the name of your registry plus the term default underscore profile go ahead and select that first option and submit and when you submit you'll notice that your connection alias has been set and then for the connection url you just have to put
in api.powerbi.com v 1.0 myorg and then your credential obviously was set from earlier as well so once the connection and alias has been established we can finally go ahead and begin the rest calls for our rest calls we decided to create a custom action that makes two rest calls one is a get and another is a a post not sure why they're not both gets but that's just how the apis work so the first get will help us obtain the embed url which we will later pass on into a custom iframe to display the report
and then the post gives us an access token which we will use to actually allow us to display the report from the embed url so the first step is to create a custom action and we just went to title list for example power bi report data pool and then create two inputs that are mandatory because these are the two inputs we need to pass into both rest calls the first one is group id which is which is another word for workspace id that should be established from the prereqs from earlier and then the report id
is whichever report we need so the first step is to make the first get call and so we need to set the connection alias which we established from earlier and then set the resource path to groups slash and then whatever the group id is slash reports and then slash whatever the report id is and then make making sure that you set your http method to get and next slide after you make your get call you should be returned with a json response as seen below where you will you will receive a data set id an
id of the report the name of the report web url and embed url so we will later store the embed url and also depending on what type of report you're pulling if it's a non-rls report it's not needed but if it's if it's an rls report we will also need to store the data set id but using the json parser we're able to just store every object that's that's returned back to us and store it as a data pill so the next step is another rest step so this one is the post and this one
allows us to generate that access token to give us the ability to display the reports so again it's very it's a very similar setup it's the same connection aliens from earlier and then the resource path is pretty much the same as well with the addition of slash generate token at the end and then your http method should be post and then make sure that you also set a header key value pair of content type to application forward slash json and that's to ensure that our rest call is in the json format and then going back
to what i was discussing earlier if if we're using rls report we need to also pass in the data set id into the request body otherwise there are no additional inputs except for passing in the input of access level is view that makes sure that the reports we're pulling in cannot be modified from service now by accident they should just be read only and based on the service principle that we set up it automatically should already be read only but that's just for just to be safe and then for rls reports you need to add
into the request body a username the report id the data set id which is from the get call as well and the roles which will allow whoever is accessing the report the proper data that they're supposed to see so this first image shows what the setup will look like if it's a non-rls report it's very straightforward but this one the rls report the only difference is the request body where now you're we're also including an identity which is whoever the user is that's accessing the report and upon that is the data set id which is
the data that the report will be accessing as long as well as the role which helps filter down what data the user is supposed to see for our example for today we will be displaying a non-rls report and the next step in our custom action is to parse the response from our second rest call which responds back with just a token a token id and an expiration date time we will mainly focus on using the token to help with the displaying of our power bi report so finally once you have set up these four steps
your final step is to create an output we've created two outputs which is the embed url obtained from the first rest step and the embed token which is obtained from the second best step once we go ahead and complete this action you for our demo sake we are using the code snippet generated from the custom action to be used later on for displaying and calling the power bi rest api from the portal however in our demo we will actually be showing a custom flow a custom subflow that uses this custom action and from the subflow
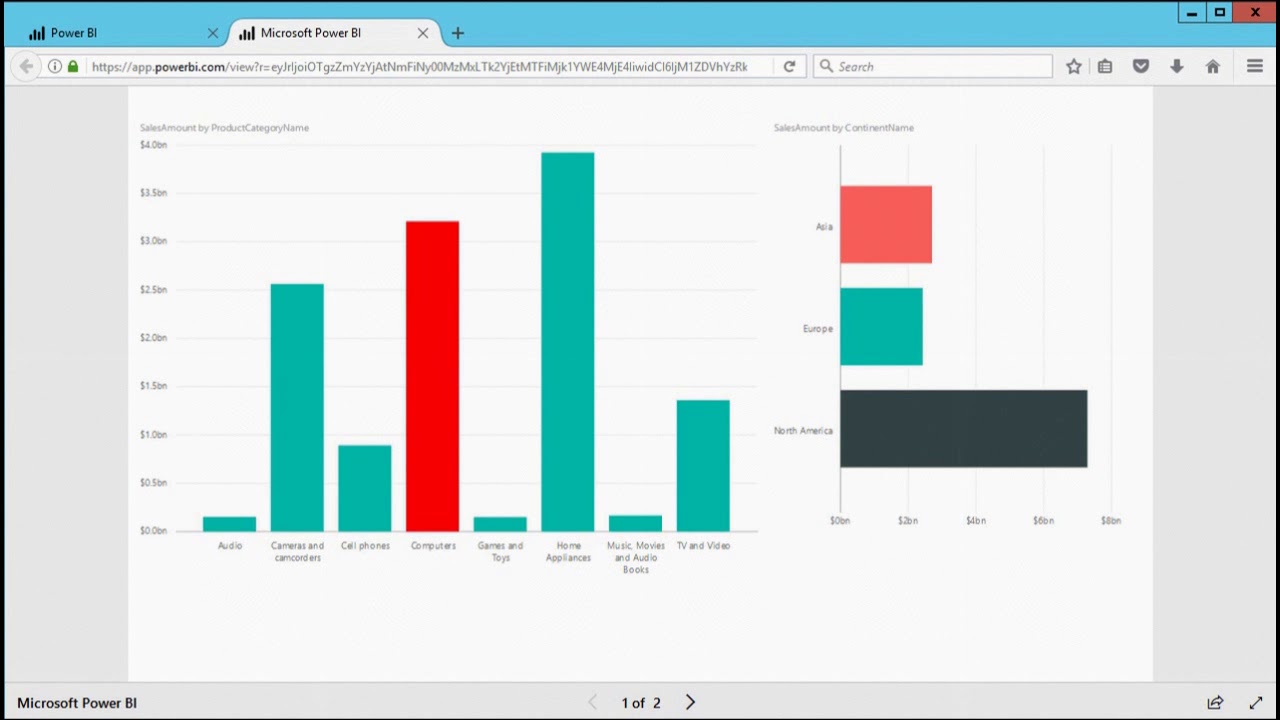
we were actually using the snippet from there and we can show you that later on in the demo all righties so this will be the part where we will be displaying the power bi reports so i'll go ahead and send that back to josh so as part of this since we are embedding these in service portal we had to kind of come up with the solution of how do we make these calls and how do we get the data when we need it part of the you know big issue was we can't just make daily
calls to get all this information store it locally in a table and display it when needed these all had to be just in time calls so as a user goes to open a report all of this happens all the flows that tone just walk through get called instantly in the portal when they click the button for show the report due to rls we have to check their security over and over again and even on non-rls if they refresh the report we need it live right there so to do that power bi has special code that
we is required to make it work so we had to include a new js include in our portal which is the power bi centric code in doing that it basically will give the widget that we are using in portal the ability to make the calls to power bi and re-display the report in portal so to create a new js include you go to your theme and service portal you scroll down to the bottom there should be a related list called js includes and you're going to create a new one in there you can put this
url in microsoft github i o and this will allow you to make this power bi centric calls so in here you can see we are doing an embed report so this is our html template one of the big things that we're running into is loading times you know since this is doing live calls right then and there we had to put in some loading stops to make sure that we weren't just sitting there and spinning on the page so we did a couple tricks in there to make it load the entire page then go back
and make the calls so we can get a nice little loading screen for the user it's a better experience for them and as you can see the html is very just blank the one thing that really matters is the id of report container this report container is what power bi will find and will then repurpose to put the report into we also implemented security such that if you are not associated to the report on our side because our reports are stored in relationship to the individual accounts we would stop before we even try and make
the call this was to add better security just in case there was a mess up on the other side we wanted to have a second level just so we're not accidentally unblinding data for other clients especially if someone shares a url of a report that they weren't supposed to share this will stop that so this is where we embed the report utilizing the code snippet the tone just showed so we just grabbed that code snippet we reformat it just make it a little cleaner to read easier to understand and then we pass that into the
server script of the widget so let's go to the next slide here's just how we put it in there so you can see we're doing a quick check of if they're allowed to see this report we validate our security and then if we are allowed to see it we get the report parameter of id this we will show in a second of is an asset we store these reports as assets associated to the accounts in a contract and so then when you click on a report it looks up the asset record grabs the report id
out of it passes all of that into our sub flows and then makes the calls to get all of our items to pass back into the client script and then parse it into the html so using code samples from the power bi playground the sample has been modified to just basically we're just api calls can be delayed so we just gotta wait for it so here's our client script so you can see here very high level we're doing a timeout this is to allow the page to load so that we don't get a blank screen
with a tiny little bitty loading in the top left so we let the entire page load and then we go back to make our calls so once we're done loading we get all of our config here you can see this is where we get all of our data back from those flows we put it in there we tell it our power bi information which you can see here this power bi dot embed this is utilizing that special power bi code that comes from the js include we give it the report container which is the same
id as the div that is in our html as well as the config we defined from making our rest calls this will allow power bi to go look up that div by id and reload it with the report so in here we set our container that's holding the report to be fluid just so it gets the full width and full page this realistically in portal drag a container on there put our widget in there set the container to fluid so that it gets full with and as you can see here whenever we navigate to our
page you can see here in our url this is our report id parameter that we were using and this like i said is an asset record that stores our individual report configuration that can then be pulled out and then display the report directly into the portal so before we hop into demo is there any high-level questions about how all of this works all right and so as a note for tom this next section of demo is from a client instance so we'll have to pause the recording so that we can demo this out [Music] you