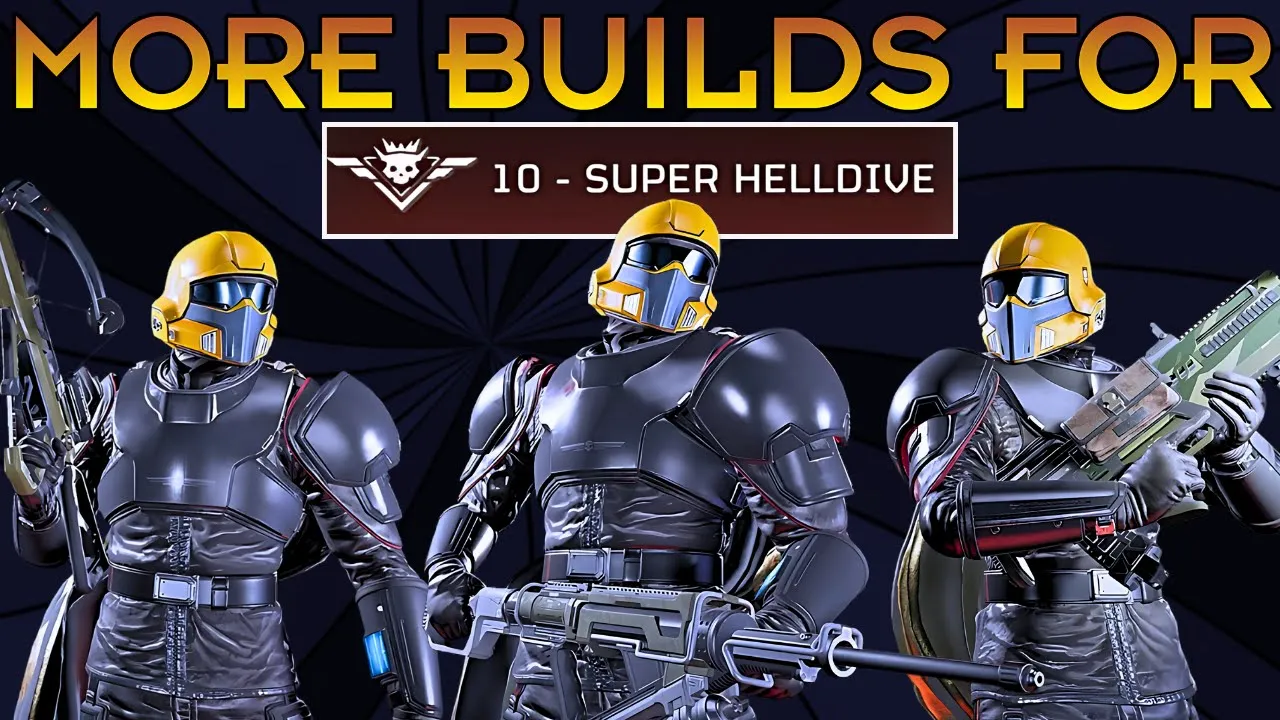
hello everyone hope you're having a great day some time ago I made a video about my favorite build for super hell dive and a lot of you seem to like it since then there's been some major changes in additions to the game including some balance patches and new war bonds so I decided to revisit this topic and update it for the current patch like that other video the aim with these Loadout suggestions are to capture viability and variety with all these options available in the hell divers Arsenal I believe there are multiple ways spreading manage
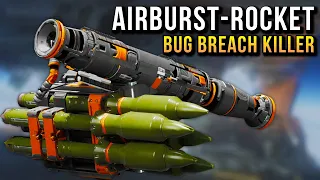
democracy so here are some of the loadouts I like to use that has promised both success and a fun and engaging experience so let's start with the bugs let's kick things off with something fun the air burst launcher has since the time of its release been the subject of a lot of ridicule you know time and time again with good reason too the reload time was too long damage is too low proximity trigger is very finicky but they all ended up fixing that reload time got Shor from 7 to 5 seconds and if you reload
cancel this can be around three and a half to 4 seconds the little bomblets that come outside of the airburst Rockets share the same IDE as five grenades which buffed and this indirectly buff the air burst launcher and they also fix corpses setting off the air bst's proximity trigger so was this enough to make it viable and I would say yes I think the air burst is now an efficient mob clearing tool with the potential to be very good and reliable anti-tank and before I break down the play stop with this let's just get to
the rest of the build here going to be pairing this with a 500 kg to sist with anti-tank over the gas assist with traff clear and a 120 barrage to help out with both as for your load out since the air bur is not made for very close range encounters you're going to need something for when hunters and warriors around you I think the Blitzer and Slugger are great options I like to take the grenade pistol as secondary to help with bug nness clears and is rounded all out with thermites for easier heavy takedowns a
quick note about thermites explosion damage for this has been increased from 100 to a very reasonable 2,000 and has become the staple throwable Across The Gnome Galaxy at this moment so you will be seeing it pop up a lot of times in this video for Loadout suggestions lastly for armor I like to take medium Sero with isted the play stop for this build is you're going to take the role of helping your team car at clusters of enemies from medium range you should be eyeing bug breaches and respond to them the moment they happen gas
strike despite it being changed to more of a confusion status effect on enemies at the cost of its damage over time it's still a great tool when plugging up breaches this combined with your air burst will be making quick work of whatever comes out at a hole when going up against an enemy like a charger you should be aiming for right underneath them the impact of the rocket itself is nothing what you want to happens for the air to detonate underneath and basically all the cluster bombs will go off from below this will effectively killing
the charger in one shot the same goes for an Impaler interesting enough it's a lot easier to instakill them when they are still armored up as the curve they have for a face makes it easier to contain all the bomb LS from the air burst should a charger or Impaler get too close that's what the thermites are for and when a group of bugs like Hunters jump on you you just switch to your primary and respond to them the only issue I'd save for this build are ball Titans with they're tall frame you can hit
them with the airbrush shell but the bomb lets distribute in a way or it doesn't make a lot of effective contact this is where the 500 kg comes in since the last video I made about loadouts the 500 kg has seen some nice Buffs making it easier to clear out bug nest and take down Heavies like bans should you come across a very heavy target-rich environment the oral 120 is your go-to this could be substituted for something else such as an Orit rail Cannon for the guaranteed takedown or even an oral apom you feel that
your team lacks mob clear with this build you should have a focus on clearing out just all the chaff with a bit of anti-tank and objective clear for structures like spores bear and Sher nness Servo assistant helps you maintain your safe firing distance with the air burst and still lets you get your strats out on spots where they can make the most impact for me this is builds a lot of fun and it's nice to see kill streaks Mount up to almost 20 after firing just one shot with the air burst it felt really nice
and should you ever dive into a mission where nursing Spears or B Spears are more likely to spawn I encourage you to try this build out as your exploding death can chain reaction to another and it is the thing of beauty to witness another tip I have is to visit pois frequently with the lesson reload time it feels very freeing to be able to shoot this whenever you want and because I'm constantly fting this thing I also find myself almost always with an empty backpack I like to stay stocked up I taking the ammo packs
on the field and keep myself loaded without hogging the resupply from my tomb the Tesla Tower like the air burst was something I didn't quite see myself recommending to others for a build especially on Max difficulty but it has quite the blow up in short it has had its cool down and lifetime adjusted given increased stagger a stacking stun effect but the biggest buff it got was that the charge time was heavily decreased from 3 seconds to only one and basically it's like a lightning machine gun now the Tesla Tower always had damage it was
never an argument about it doing a little DPS it was that it died too quickly but being able to fire 66% faster and having a moderate St effect lets it dispatch nearby enemies so much quicker and at least stun loock the ones it can't outright with one shot despite this it still has has threats Chargers can still steamroll right through one and if the tower isn't shooting at it to stun it then it's pretty much a goner here's where the arc thrower can come in like the tower this support weapon got its fair share of
Buffs its range was increased by more than 50% it has more durable damage was given additional lightning jumps and it also shares that same stacking effect that the tower has this is really useful because you can cover your Tower easily by locking down Chargers that are dead set for it beyond that Arrow does what Arrow does just turns a line of bugs into straight Mist the crowd control and area lock down with just these two strateg alone feel unparalleled given that the Tesla Tower is a fairly short cool down too you can almost always guarantee
this combo for any bug breach ball tians I will say are the one thing that will make it hard for your Tower to stay up and here comes the 110 pods and the orbital rail Cannon one 10 pods have small explosive AOE and they can possibly onot a B time if it hits a dead center in its face the orbital rail Canon is guarante to kill one the reason for taking these instead of something like a 500 kg or an or Precision is that you can throw this right next to your Tower and it will
still live most of the time as for your load out I'm really liking the halt shotgun for this this comes from the truth and force of war bond and the shotgun is the first primary to feature programmable ammo the Flesh and ammo helps when you get jumped from multiple directions and the arrow just won't be able to cut it and the stun rounds can also help out your Tower if there too many enemies and you can even use this to send a charger if you hit it on a soft backside grenade pistol I like to
take so I won't be completely useless when clearing a bug nest and thermites are just for those impers and bow Titans and you think that with two Arc based strategems Arc resistant armor is good but with the range increase of your Arc thrower you wouldn't really need to be getting close to your Tower and you can just support it safely from a distance for this I opted for medium engineering armor even though I won't really be benefiting from The Recoil reduction the additional thermites do come in clutch as play style similar to the air burst
Loadout you're going to be looking to not get into the thick of things AA control and MOB C are your focus your Tower will be doing more than 50% of the work so it's very important stays alive when a bug breach happens I suggest you throw your Tower off to the side cuz hell divers SE breach throw strategy if you throw your Tower right on top of the breach someone's going to throw a 500 Kg on it a barrage an eagle air strike or just all three right on top of it and then your Tower
will just be turned to bits and pieces so throw it to the side and just Spam your Ark thrower if you see a charger just keep it St locked with your thrower and if you find a ball Titan just resort to your additional strategem or your thermites and what sucks is that ball Titans will will almost always be automatically aggro to your Tazza Tower and one volley of puke is enough to take it out still even when your Tower is down the arc thrower is nonetheless just a great support weapon overall and the tower has
such low cool down it'll be back up anyways fairly soon so if you've never done a dive without a backpack or support weapon I encourage you to try it out there is something truly Fring of being reinforced and knowing you don't have to run back to that MOS pit of bugs that you just died to so you can get your stuff back my take on this is Eagles because Eagles will take up all your straty slots to be honest any combination of eagles will work but this is what I normally take when I run this
build as I feel that it covers all my options you have these for Mob clear these for Heavies and these are for nesson structures if there is an eagle to always have I have to say 500 kg since the changes it's received it has become such a staple in a lot of my loadouts and what makes having four Eagles better than four centries or four orbitals is personally I think the up time and the frequency eag can be used more often and the moment you throw one you just keep moving and prep for the next
one right away as for the load out honestly just take whatever you're comfortable with keep in mind you don't have support weapon or a backpack so your ability to be effective with your base load out is important footwork aim Resource Management it's about all you are confident in your abilities or just can make the DI feel a lot more difficult personally this is what I take I take the HT because it has good offensive and utility options grenade pistol so I consist my team with Nest clearing and thermites pretty much just for all all the
Heavies because being quick on your feet is so important here I like to take light armor and I either go for Med kit for more stems or engineering for more thermites when it comes to gam play just call on the appropriate Eagle per situation you can't have more than one eagle out at a time so if you see something like a patrol a strafing run or an air strike with advice if you see a lone b Titan maybe a couple 110 pods if you see a b Titan surrounded by maybe another heavy and some other
groups of bugs then a 500 kg could be the way to go I do want to say that you should be trying to check out as as many points of interest as you can grenade pistol also helps with opening those storage containers where hopefully you'll be able to find a support weapon you can keep with you and no cost at all to your strateg and Slots having a backpacked slot could even be helpful for your teammate who takes something like a recoiless or a spear and you can Team reload them when the support weapon comes
off cool down the last tip I want to share about is timing after you've used all but one of your Eagle air strikes you probably should opt for the rearm if you have the advanced crew training ship module upgrade the rearm time will redu by even further 10% if you still have an eagle charge open but you don't always have to rearm the moment you only have one active charge left I would say the best time is right after above breach is over the moment the dust settles even if you have three or four charges
left rearm because by the time the next bug breach is going to happen again your rearm should be done and you'll be fully locked and loaded for this next engagement so out of all the changes from the last previous balance patches I have to say the adjustments to the guard dog is what made me the happiest I've always always loved it and first it's not even a liberator guard dog anymore it's a liberator penetrator guard dog now Hive guards are shaking as we speak it's ammo also increase from 30 to 45 allowing for more shots
to be fired before it performs its lengthy reload quazar Cannon is there to quickly dispatch with any Chargers B Titans as well that take out Sher nest and Spore Spears from afar eagal 500 kgs for removing groups of enemies or instant deleting bug nest and orble Nal is just the instant response to a breach sing out almost all the Light Armored chaft leaving the Heavies for you and the cannon as for a Loadout I opted for a crossbow a senator and you guessed it thermites you really can't pass up on these things the crossbow has
had an explosive radius and damage increase making not only a good tool for closing bug holes but also a great tool for taking out groups of clustered enemies and you also only need about a clip worth of explosive bolts to an expose paylor's forehead to completely take it out which is something you definitely want to note with the crossbow not being the best for close range encounters I didn't go for the grenade pistol but inste the senator it has some increased armor penetration it helps out taking out armor units like char and bow Titans and
you can also switch this out for something else like a redeemer or a verdict for some more reliable up close bug clear I like to take Center because I'm just really used to it and prefer it over the other secondaries lastly you have thermites but you can also switch us out for something like gas grenades and Destro it on top of enemies or even on top of yourself if you get sworn by a bunch of bugs as it gives you the time to escape and get to a safe distance I like this build a lot
because you can basically do everything take out light enemies heavy enemies structures and close bug nness even heavy and mega ones with relative ease your cross crossb isn't ideal for streakers and your Center only has about six shots but your guard dog will able to knock them out of the sky like playay pigeons if there was a weakness to this build I have to say maybe stalkers but if you keep your eyes peeled and do constant 360° checks you'll be fine your guard dog can't detect them when you're cloaked and if they are to be
right on top of you the crossbow is the last thing you want to have out I feel that the build is good enough that you can taper off to another nearby objective while your team does something else like evacuate citizens or launch ICBM two very lengthy processes that keep them locked to the area if it's something like upload data or even the heaviness on the side the Firepower of your strategy with the assistance of the guardog is enough to help you maneuver that situation greatly into your favor like the eagle build from before I have
to say the effectiveness of this build relies a lot on your aim and movement whereas the air burst and the tower build from earlier has really setling your feet in place and keeping a distance I find myself with this build being a lot into the thick of things waving through bugs seeking out objectives and taking down Heavies if you do unfortunately happen to die and get reinforced on the other side of the map far from your support weapon and your guard dog the combination of a crossbow Senter and thermites are still well-rounded enough to provide
light heavy and objective clearance options for you and your team if you want aside from the oral pal you can also substitute this for one of the EXO suits both the emancipator and Patriot are excellent on the buck front and if you get reinforced far from your gear and they are both still on Long Cool Downs calling down a walker can make up for the time until you have them back up again and that's it for the builds I have for the the bugs now let's explore some options on the atat front so I'm bringing
up the air burst and the Tesla Tower and now the bistic shield and you're probably thinking what has the ballistic shield received since the last video and it has received zero meaningful updates over the last couple months but I said it in some of my other videos I'll say it again for the most part I think the ballistic Shield's okay it needs to be able to block melee attacks but beyond that a real important part of what makes it good is what you combine with it for the load out we taking cross cites the crossbow
with its increased explosive radius and explosive damage is a useful tool for clearing small cluster groups of bots such as patrols but they're also really good at taking out these really annoying rocket Striders especially since the weapon can stagger them the senator as I mentioned before was buffed to have heavy penetrating armor with some increased damage so now you can actually use this to kill a Hulk and actually have it to help out with taking out units like a gunship for support weapon I took a quer cannon this is because I want to have as
much uptime as I can with the ballistic shield so I take a one handed primary then I only use a quer cannon when I see something such as a tank cannon turret or fabricator one small thing to note if you didn't know yet Fabricators were changed to have HP and you can use anti-tank weapons such as quer can to now eliminate them just by shooting at it at any Direction no longer will you need to just throw a grenade or something explosive hit a vent so this makes sniping fortresses are taking down those easy strateg
and Jammers a lot more simple with this build setup with the shield you have some level of Defense decent anti-tank and mob clear these next two strats can be really anything else but I like to take the Eagle straping Run and the 120 orbital for a hybrid of both anent tank and outpost clearing straing runs are great for clearing Fabricators and patrols that you're lined up with and a 120 can be used the moment a B drop gets called in to maximize the damage output for this build I like to either take medium Scout or
servos assant armor some tips I have one is I would advise against adsing with your ballistic shield NE the crossbow or the CER have a laser sight and trust me eyeballing these shots unless you're absolutely cracked is very difficult to do I like to rely on a third person reticle for aiming and for the most part it's done what I needed it to do the second tip I have is to maximize your Shield usage even though let's say you take out your quazar Cannon and The Shield's on your back The Shield is still active and
can block incoming fire if you're running away from enemies I like to take the quazer cannon out so that the shield is placed onto my back and I do that and I run away from enemies and all the shots will hit the shield instead of me also know that the shield is really good only against enemy bullets explosive like rocket that Ator Rockets or whatever they jam-pack into a strider's Rockets will still ragd doll you and take you off of your feet so try to prioritize them before you look at something like a heavy Devastator
I find this build is best played from medium range distance and with your squad though the quazer cannon is helpful for sniping out objective from afar when it's off cool down also with it being an energy weapon you will get more benefit from using this build when there's an extreme coal modifier because the cool down on your quer Canon will be a lot lower with introduction at the S pistol from the chemical agent War Bond support play styles are actually a lot more possible with it we are taking the supply pack to our teammates repl
our Cannon over the gas strike and Eagle smoke there are a lot of ways to go about this achieving a combat medic type build such as replacing your gas strike with a shield relay but this one work the best for me quer Cannon is a solid Choice since it doesn't consume ammo it's practically infinite anti-tank and could be used to take out high value targets if needed Supply pack like I mentioned before can be used to babysit your teammates who are either stem happy or using backpack ammo such as Spears or record this rifle the
gastra new negative status effect can be really useful for disrupting groups of enemies and the shell that comes in is really useful also for destroying things such as detector Towers if you're in the pinch Shield generator should you take it had its AOE and lifetime adjusted it's still a good tool for keeping your teammates safe especially when performing something like a stationary reload or using a strat like an HMG placement lastly Eagle smokes and they hop out in a lot of ways whether you're approaching objective reaching from an engagement hiding whoever is doing the terminal
inputs and as the last resort you can even use this to destroy Fabricators as for your load out as mentioned you take the stim pistol which since its release has also been adjusted to have higher muzzle velocity and Tighter spread I like the p with the gas grenade which I feel like is an even better stun grenade and a purifier which also has received its Fair chair of Buffs I like taking purifier because it's Max charge damage and explosive radius is good for taking out groups of lightly armored Bots and applying stagger to those L
Ty enemies such as Rocket Striders and Devastators when it comes to gameplay you want to make sure you stay close to your team the reason I have a combat medic build on the bot front but not the bug front because gameplay on the bot side is a lot slower teammates are usually going to be sitting against cover rather than running around like they do on the termined side this gives you the chance to reach them and resupply or stem them armor in my builds are usually recommendations but for this build this is not a suggestion
this is mandatory take something with the medkit armor passive the additional stem effects that come from the armor are also transferred to be the stem pistol to your teammates on top of that if your team has the experimental infusion booster active your stem pistol rounds also apply the extra color saturation to your teammates per hit along with all the other stuff like increased movement speed more shakiness and damage reduction when playing close to my squad I like to keep an eye out for higher priority enemies and the amount of resources my teammates have gas stri
is great throw on either patrols and Bot drops giving your team The Edge as most of those enemies effect they'll be running in circles Eagle smoke will be used for denying Lon sight from enemies making it easier to approach Outpost or cut them off if you're trying to retreat even though it also technically blocks off your line of sight you can use pings to kind of quote unquote see them through the smoke as well as use visuals such as the bright red light of the Hulk visor to take them out through the fog lastly gas
grenade in my opinion very underrated especially on the bot side this is basically the confusion effect from Pokemon compacted into a canister when used enemies will start to attack wildly around them this with the fire power that the Bots have makes Friendly Fire a great thing because your enemies are doing it to each other don't be afraid to throw this even on top of yourself or teammates if it's a very sticky situation the damage for tick on gas has has been lowered greatly so you can just stem whatever small damage they receive and the trade-off
of the status effect on enemies is so much more greater than the damage lost or that's how I feel lastly you probably don't want to bring this build if your teammates are using things like a shield generator backpack s pistol shots don't go through Ali Shield so this makes a harpy to stem them from afar it probably also doesn't help if they're taking quazer cannons or ar throwers because they won't get a lot of value out of your resupply since your support weapons practically consume no ammo don't get me wrong though the bill will still
be viable which will definitely feel a lot more impact if they to take something else like an autoc Cannon or a recoiless plus it's really nice to resupply someone and have them throw that in-game thank you your way and I I have to say if you're looking for some meaningful online interactions with randoms this is the way to go people love support type players and and I had game so smooth with this build where we'll all just stay together as a squad and basically no one died until I did it was still a fun game
now I'm not really much of a self player and this build is probably the closest I'm getting to it most of the time in any game if there's a go out option I'm going for it but I won't deny the value that comes from evading enemy detection so you can get into objectives AMR is a solid allrounder for eliminating high value targets from the distance hulks mini turrets Cannon turrets tanks gunship if the rail gun had a scope I take that instead but until then AMR is still a solid choice plus you can even use
it to open stor containers jump pack is full Mobility navigating in the map using the joger through the land to avoid Pats and cheat out objectives like forrum Jammers or tomaton real cannons one t rocket pods would you can use to take out turrets or tanks that you don't have the angle on with your AMR and they can also help take out Fabricators and even hulks if you're in the pinch one 20 orbitals are for detected Towers either on the Fortress or on their own and if there should ever be a Bop but let's say
a factory Strider this can be your go-to you could also switch this out for the 380 but I like the 120 better because of the lower CD and that's why I prefer it as for your load out I like to take the adjudicator or any other medium penetrating assault rifle aater and thermites lastly I like to take medium Scout armor to reduce enemy visible ability and to sneak through objectives as for gameplay you can just call in your stuff and then Branch off normally I like to hunt down side objectives before regrouping with my teammates
things such as Sam sides stratum Jammers gunship facilities come to mind and that's what I usually prioritize when hunting these objectives solo be sure to prone and Crouch often to reduce enemy visibility and honestly if you're going to take a fight one of two things can happen one the ball drop gets called on you if you're able to complete the side objective or whatever it is you're doing go for it then bail if not I suggest getting away and trying again after the enemies have despawned if your team gets a bot drop called on them
then you can basically run a muuk you got the green light to do whatever you want because by the time they've cleared all those enemies and have finished drawing all that aggro you can probably do two side objectives or even one of the mission sub objectives if you do have to die out there most likely you will not be reinforced on top of your gear but that's okay your base load out should be enough to help you out before your stuff comes back off cool down when you're on your own I suggest you play Slow
identify threats eliminate them from afar use strateg to take out enemies you don't have quite the angle on such as your one pod for tanks and turrets and when it's all clear just go ahead and move in use your jump pack to get the high Vantage points identify your path before making your move when all the side objectives are cleared I like to regroup with my team and then transfer to a mid to longwind support from there I just ping out threats taking out hulks rocket Striders while my team does what they do if they
are the ones drawing all the enemy aggro I can sneak into clear objectives or Fabricators so there's a lot you can really do here and I really enjoy using this build when I'm looking for a bit of but not entirely a solo experi experience I'm also not the best at slower Pace gameplay so this build has also been pretty much just some practice for me I've always enjoyed the laser can on the bot front having a shoulder mounted beam of pure energy just feels great and over the past couple updates it has gone some improvements
pretty much all the lasers benefited from now having zero recoil they just straight up removed it the burning effect that applies now sets enemies on fire faster and like before you can use it to pretty much damage all enemies from hulks to factory Striders with a laser cannon I like to take a strafing run walking barrage and a relay you could swap out the relay for a backpack but that's just my preference I also like to take the scythe and the dagger with thermites with my load out you can also use G Spades for this
as well I either also take Servo assistant or INF flinching armor for this build Servo is great for throwing a straping runs and walking bares further out and INF flinching is to maintain your Beam without suffering so much from Aim punch should you get hit as for play style I'm looking to provide mid-range support for my teammates when it comes to factory sh specifically I always aim for the machine guns on chin as a laser can is really good at beaming those away with those guns out you can just fry it fact try directly at
its eye if you get close to it strafing run helps with base clearing and walking barage is useful for prepping objectives and outpost before your team walks into to complete it scythe and Dagger are great weapons in your Loadout to have it also work well with the theme of the build and thermites are for when a hole gets up close and personal gas grenades should you take it are also great for disrupting of Patrol or throwing it on top of a bot drop when enemies are all kind of clustered up together by the time they
hit the ground Shield relay is the confidence boost you need to stand still and let your beam go all the way without fear of being shot at it's frequent up time and your teammates also benefiting from it you can get a lot of value out of using the shield what's really nice about this build is that you don't use ammo at all with three laser weapons you can just cycle between all the ratio once start to overheat this means more ammo packs on the ground and more resupplies available for your teammates here's the thing though
if you're in a pinch just let the weapon overheat and swap the ice bear in mind that the laser cannon reload is stationary but should you need to keep the heat on just reload and keep burning them you only even need one single ammo pack off the ground to replenish your reserve another NE thing about your laser weapons is that even though the laser cannon has a 200 M range your scyth and Dagger has a 1,000 M range you can burn Bots even kill hulks from afar without even triggering their aggro it's almost like you're
assassinating them on a microwave also like mentioned in the other quazer Cannon builds before I suggest taking this on planet with the extreme coal modifier as you're able to get more use out of your laser weapons before they begin to overheat that's it for my tomaton focus builds but we're not done yet I also have some load outs that I think can work on both fronts so if you think I forgot about the recoiless don't worry it's very hard to the recordist has sat under the shadow of the spear the quazar eats and other anti-tech
options for far too long now it just feels like the Undisputed king of making the big threats go away they did add programmable ammo to it to help with mob clear but I'll be honest I only ever use the anine tank rounds and I almost never Ed a high explosive beyond that it's got just such a raw damage boost that makes it a near one shot machine you can even one shot a factory ster if you nail it right out its eye socket The Recoil list is so good that your remaining three strats can be
chaff clear and you'll be okay still I like to take maybe one other antich stry one chaft clear and then one utility what I have here are what I like to use as I feel that provides a well-rounded list of options depending on the situation when it comes to the recoils it's always good to aim for the head Chargers and hulks can be killed from pretty much in any direction but the B TI and the factory shrider takes some aim hitting any part of a drop ship will taking down killing any of the Bots that
are on board so you're pretty much just a walking samite the recois is such a good antich option that it trivializes high difficulties and this is so apparent in the evacuate high value assets mission on the bug front no charger ball TI or Impaler will make it past 10 steps with a team full of recoiless users and man on the box side any drop ship will be lucky to even have their troops L on the ground your squad will turn that area into a no fly zone so fast it's like another Premier triangle and I'll
be honest you can even strip away the other three strats replace it with just sentries and you'll still be sitting pretty so if you're ever looking to just take a load off you know you just had a hard day and you want some casual super hell dive recoil this is your choice most of the time you will be playing with your team at mid-range you just be aware of where the resupply is called and try to maximize it usage as much as you can since you'll be using the recallers a lot since hey spawn frequently
on higher difficulties I like to check POI for spare ammo packs and don't forget that you can cancel the reload animation early and get your shots off quicker ask for your weapons and load out on the bug front I like to take an AR or something like a Blitzer for when I get jumped on by enemies along with a grenade pistol and thermites for Bots I like to take the DCS to One Tap Devastator heads as centor Plan B so I run out of DCs rounds and you guys did thermites I saw someone us just
build once in my game tried it out for myself and I never looked back if your team is ever lacking an anti-tank you can become Mr or Mrs anti-tank jump pack wiard Canon eat and Commando all blue and all for you and your team the place out here is very simple you take your jump pack and cler Canon and you blast anything bigger than a high guard Devastator you can just let loose on literally everything else even a rocket Strider or an alpha Commander you always call on your eat and Commando the moments off cool
down and with them being such low cool Downs you can even weaponize the hell pod to kill heavy units like Chargers and pilers Bug holes hulks Fabricators even bow Titans you'll be constantly switching out from your qu Canon to another anti-tech option once you run out of the ammo for the consumables just pick up your qu Cannon again and rinse and repeat I'll be honest a lot of the times not every support weapon you call in will be used but they will always be available on the ground for you and your teammates the jump pack
helps you get better angle throws with dist strateg and also help you reach your teammates quicker to provide them with the express and tank options I have a lot of fun with this build I like seeing teammates pick it off from the hell pot and use it themselves similar to the combat medic build you can get a lot of fun and sweet interactions with randoms and all you need to do is share with them your big guns and although it is best played with teammates you can also just sort of run off on your own
and clear objectives you do have three explosive anti-tank support weapons so enemy Nest pooc side obje all yours for the picking especially with the mobility that comes from the jump pack it's really fun at the end of the mission to open your map and see all support weapons scatter around from the entire dive ask for your load out you can take whatever is comfortable for you this is what I took for Bots using the DCS for longrange engagements with my rifle and my launchers this is what I took for bugs favoring a more up close
and personal play style and getting really aggressive with my launchers and the hell Poots they come in on something to note on both of these low outs is that I'm using the loyalist which is the mini purifier that came from the truth enforcer war bond this is a nice secondary to have as it provides nice AOE damage and stagger for a secondary that's pretty much it for the hybrid builds I have been trying a lot of other load out options and builds as using the HMG and placement on bugs using zero anti-tank full orbital four
centuries they work but not all the time and they also aren't in a place where I call them fun yet I still think after some other iterations I can get to the point where I feel comfortable recommending them to you guys I do stand by the builds I've listed here though and I feel that they capture a nice set of variety with strategems I know I mentioned thite a lot but it's just so good given the current state of the game I am hoping some balance changes happen in the future where things get switched up
again as Theory crafting these builds and trying them out either on stream or in videos are just really fun some other stuff I want to note is that I'm aware that the flamethrower was reverted to where it was before escalation of Freedom it just feels really hard to use it effectively cuz when a bug breach happen I move up close I try to burn some bugs then my teammates are throwing down oral a Pals 500 kgs and I just need to sit back and wait I only get to eat the scraps in terms of the
newer Str GS the dog breath Rover is decent and I'm still trying to find a good build to go with it but I would not recommend the sterilizer at its current state because at this moment it's not a support weapon this is a job but yeah that's it for the video I appreciate you guys watching till the end if you want to see me play live I stream this game frequently on Twitch be sure to follow me there there's a yo Liberator Out Boys Liberator out lastly be sure to join the Discord Channel a lot
of my viewers and I talk about the game sharing ideas and theorizing about all sorts of things links to both in the video description and if you like what you heard like what you see be sure to like And subscribe thanks again for watching and have a nice day