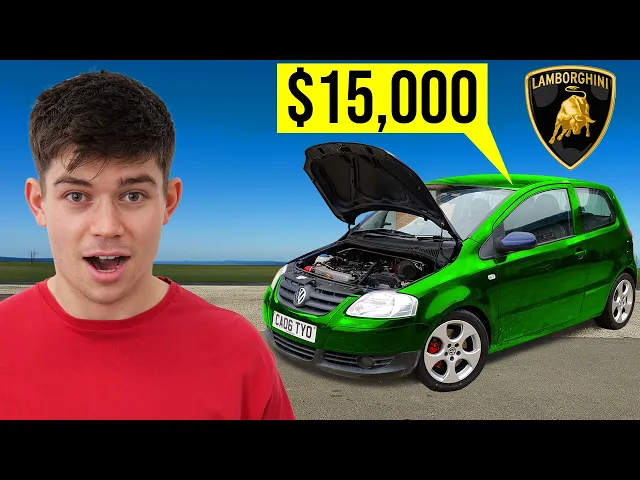
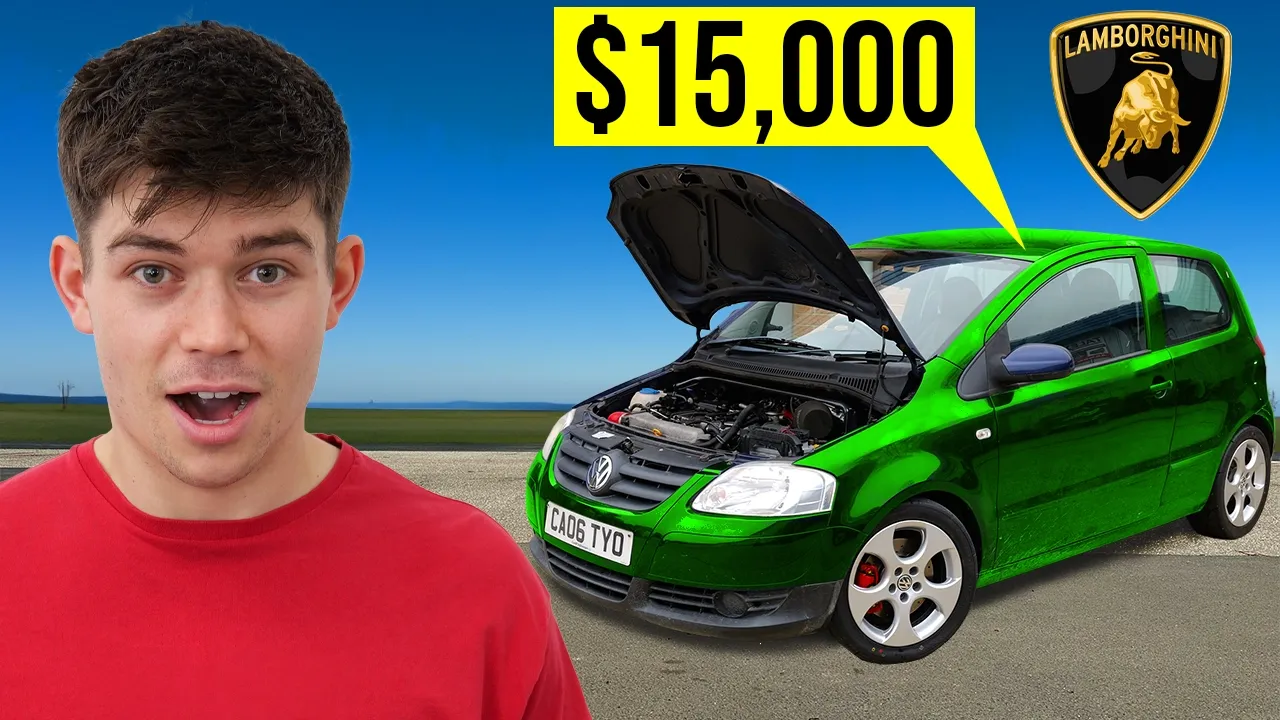
this is my 2006 Volkswagen [Music] Fox this car has already gone through a crazy transformation from a boring 1.4 L economy car to this 1.8 L GTI engine swapped Frankenstein car with a load of different modifications over the past few weeks I've been a man on a mission a mission to transform one of the slowest most basic and cheapest Volkswagens you can buy the Volkswagen Fox into what I think a real fox GTI would have looked like if Volkswagen had ever made one now the car has already had its horrendously underpowered 1.4 engine swapped out
for this 1.8 Turbo gti1 that was previously removed out of our Dona Polo it's and on top of that in the previous video we installed a load of GTI spec handling modifications to help our little fox handle its new found power that has made a huge difference but in this video for the next installment of progress on this car we are taking inspiration from a slightly different company to [Music] Volkswagen Lamborghini a brand known for many things but something I love is how they paint their cars with some of the brightest most in yourface colors
you can possibly imagine so naturally I thought what a great idea it would be to paint our unassuming little Volkswagen Fox with a real Lamborghini color but these colors are really expensive and notoriously difficult to paint so this might be easier said than done so before we transform the fox into a Lamborghini there is a lot of prep work we need to get on with before we can actually get the car in the booth stuff like sanding Scotch brighting priming all of this stuff needs to be done before we get the car painted so let's
get started now a lot of you might be wondering how I'm going to attempt to paint this car when I have zero Body Shop experience and the answer to that is I'm recruiting my good friend who a lot of you might remember from when we painted the Honda Jazz lav has been painting cars for around 20 years and not only is he supplying all of the specialist equipment that we actually need to do this properly but he's also bringing with him all of the real Body Shop skills that I definitely don't [Music] have so it's
difficult to know where even to start with a paint job it is such a massive task there are loads of little jobs that need doing in this preparation process but luckily we have two people on the job so I'm going to start with stripping stuff down whilst lav starts with a bit of filler work so before getting started we made sure to protect the Jazz by putting this plastic over it this is going to make sure that any paint or dust doesn't get on the Jazz's fresh paint work this we're treating this car like it's
a 250 GTI so after getting the fox in the middle of the workshop we could get started a heat gun surely a heat gun will make this easier if you can do that I'll be very impressed we'll have the professional oh okay there's no way you're doing the F though you had start with the X that's the X has more corners than the F the F has got loads of Corners do you want to do the o yeah I'll do the O I can definitely do the O it's definitely moving so it's not far off
coming off oh yeah actually see look the real professionals don't ping it across the workshop the real professionals you're meant to Ping it now our little Volkswagen Fox is absolutely covered in small dents so LA's first job is to sand down the dented areas with the da mix up the filler with the hardener and apply this mixture to those dented surfaces this will make sure that when we do come to paint the fox these dents won't be showing and the body workor will look brand new start to like a loose and whilst he was doing
this I could get on with the relatively simple task of taking stuff off the car now this attachment on the end of the drill is called a toffee wheel and I'm using it here to remove all of the residual glue from these plastic trim [Music] pieces so once laugh had finished applying the filler to the boot he then had to wait for it to dry so he could give me a hand with some of the strip down I think it's just a pry I don't know I don't want to break it yeah what was it
there's a clip all right okay so oh okay right I see Ah that's how it works well I should be able to now pull him off nice cool one door [Applause] card nice so now the filler was dry lav could get out his sanding block and start working his magic on video this does look really easy but sanding down filler is a job which requires a heck of a lot of skill and experience because you're not just smoothing the surface down you also need to actually shape the filler to match the lines and the angles
of the body work [Music] meanwhile I could continue with the strip [Music] down and as I kept stripping stuff off the car I eventually found the previous owner's solution to a broken window regulator OEM would delete yeah there put OEM wood that's why the window doesn't work yeah I think well oh is that why the window doesn't work yeah regulator's gone and the previous owner decided that this was a good fix yeah that's the minest fix you come across not new regulator just plank of plank of [Music] wood so with our OEM plank of wood
removed I kept on stripping the car whilst lav continued to do the rest of the filler work which was making our dented areas look better by the [Music] minute and just like with the boot after the filler was dry on this side lav could go over it with the sanding block and he also went over all of the surfaces with the da also please make sure to click that subscribe button if you haven't already 72% of you watching the channel are currently unsubscribed so if you do enjoy these videos and you want to see more
or if you just want to support smash that subscribe button so progress update we have stripped uh some headlights the bumper um the Scuttle panels off and lav has done some great work here getting all of the filler done and he's also daed the the surfaces that haven't been filled as well just to sort of get it sounded down and the back of the car tail lights are out and back has been filled and we are yet to do this side of the car so we've still got a lot of stuff to do but um
we are making some good [Music] progress so for the next few hours we kept doing more of the same there were a few final little bits that I had to remove off the car and there were plenty more dents for lav to fix and a lot more body work that need it's sounding down [Music] [Applause] [Music] so that is our pre-prep done as you can see the car has been somewhat stripped it's been sanded down with the da and all of our dents have been filled in by lav and as you can see they are
looking great now we can move on to step two which is getting some dease on the car and then we need to put something called highb Build primer over all of our areas of filler the reason why we need to firstly degrease the car is because our next step involves painting on that special primer and we of course do not want that primer to react to any unwanted oils or chemicals that might still be on the surfaces when we apply it so putting on this Degreaser all over the body work will make sure that doesn't
happen so as for applying the highb Build primer before we can start we firstly got to mask off all of the other areas of the body that haven't had any filler work [Music] so after getting all of the masking done lav could then begin applying the highb [Music] primer now the reason why this step is so important is because the filler that lav applied earlier isn't smooth smooth enough filler is technically porous and it has loads of little microscopic holes in it so this layer of highboard primer will help fill in all of those little
imperfections in the filler so that after we sand it down later on it will be a perfect surface to paint [Music] on after going over everywhere once lav then had to do a second [Music] Co so after the was dry lab's next task was to go over all of those Prime surfaces with his sanding blocks but before starting he made sure to apply a light dusting of black aerosol paint to all of those primered sections and the purpose of this is to just make sure that when it comes to sanding down the primer it is
a bit easier to see where you've [Music] been now when it comes to actually sanding down the highb primer it has the same pitfalls as sanding down the filler it's a very easy job to mess up so for example if you accidentally dig in the edge of the sanding block or put pressure in the wrong areas it can completely ruin the surface so this again is a job that's better left for lav right so we can now move on to the next step of the prep as you can see job my yeah my least favorite
job La has already started it it is scotch brighting all of the surfaces down um with some water so it's quite a long process it is very tiring after a while but let's do [Applause] it so Scotch brighting is a job which requires a little bit of effort and elbow grease but lav assured me that you pretty much cannot get scotching wrong it is as simple as it looks you just need to scrub the surface and by doing this it will make sure to help with our paint ad when we come to apply the paint
later on and we were at this for quite a while because there was just so much to do we had to remove the doors to get those properly [Music] scotched we also had to scrub down the inside of the boot the door shuts and even places you won't see like behind the rear bumper and behind the tail lights so once all of the scotch brighting was finished we could then move on to prepping up the bumpers lav do you see all this dirt in the bumper yeah it's horrendous can't believe someone would leave it in
there that's awful should we clean it or should we leave it no leave it I think we should leave it leave it for the next person it will make everybody really angry if we leave it double it pass it on or double and pass it [Music] on so as for getting the bumpers prepped up the first thing to do was to go over all of the surfaces with the [Music] da and on the front bumper that lav was working on he used a little bit of this red filler to help fill in all of the
imperfections caused by Stone chips and after finishing up all of the work with the da we then had to go back to good old scotching and there were still some final little bits that we had to Scotch bright like the door handles and the petrol filler [Applause] [Music] cap so the prep work on the fox is now almost done we are nearly there we've done the scotch brighting all the filler work the highboard primer we've taken off all of the little bits like the wing mirrors and prep those up the filler cap now there is
one big job that we still need to do before this car can get in the booth and that is to remove this engine because like the Jazz we are not half assing this we are going to paint the whole engine bait as well so to do that we need to prep up the engine bay and take the engine out so let's do ite Li so to remove the engine the first thing I got on with was taking off the subframe [Applause] [Music] [Applause] that was very loose crazy but maybe we could be a thing I'll
give it one sh make it I also had to remove the front section of the [Applause] [Music] exhaust so the next step was to take everything off the front bits like the intercooler boost piping the radiator and the Crash [Music] bar I could then quickly remove our cross brace followed by the air filter and the battery and then I needed to disconnect the fuel lines and the VAC Lin [Music] next I had to disconnect some electrical connections at the front of the engine and then the final things to disconnect were the gear selector [Music] cables
followed by the clutch slave cylinder once all of that was done we could get the pallet underneath the car undo the engine mounts and drop the engine out of the engine [Music] bay so that is one engine out of one fox I feel like I'm am getting dangerously efficient at doing that now that literally took me an hour which was pretty fast so um but now that is done we can move on to prepping up the engine bay so just like the rest of the Bodywork the engine bay is going to need a heck of
a lot of scotch brighting but firstly there a few things we've got to remove this includes stuff like the windscreen wiper motor the sort of false bulkhead and the whole body wiring loom but you quench my thirst you're the only burn so after giving the engine bay a little vacuum clean lav and I could then get on with the scotching and we also had to Scotch up the side of the Bonnet keep going your don't change [Music] baby right so that is the fox completely prepped up it looks unrecognizable from what it looked like at
the beginning of this video but this is just what you've got to do if you want to do a proper paint job so we are now ready to get the car on the back of a recovery truck take it to the paint booth and get that Lamborghini color painted [Music] on we have arrived it is a beautiful sunny day here in England um the fox is now obviously really wet cuz it's just been through all the rain so we're going to have to dry it off when we get in um but we have now arrived
here at the paint booth but yeah this is going to be really [Music] cool hello hello so before we could start we firstly had to dry off the car because it was very wet from the rain and once it was dry enough we could get the car in the [Music] booth so the car's now in the biggest paint booth on planet Earth this place is huge um but we now need to take the doors off take the boot off and get everything masked up we've got a load of different processes we need to do before
we can actually get the paint on so let's get [Music] started this gun is a lot more angrier than my Milwaukee it's a lot angrier it's yellow though I know it's not nice look at the light good light but it's yellow it's not red and it doesn't have a thunderbolt on the side so Milwaukee you can let me know in the comments whether you're team DeWalt or Milwaukee but before we could start the final stages of the prep we firstly had to hang up a few body [Music] panels the next job for LA to do
was masking up all of the areas that we didn't want to paint so that's stuff like the Windows parts of the bumpers practically everything we didn't want to get paint [Music] on meanwhile I could go over the car and do a bit of [Music] degasing whilst doing some of the masking for the engine bay lav actually uses tin foil because it holds its shape and he finds it's a much better solution over just using tape and paper the next things for lav to mask up was the glass and the big holes where the doors and
the boot usually [Music] sit he also had to mask up the [Music] wheels and then finally he could get these last little pieces set up as well so as you can see absolutely everything on all of the the different panels have been masked up properly by lav all the glass for example on the boot and the grills and the Plastics on the bumper everything has been masked up properly and now that's done we can move on to a three-step process that we need to do before we can get paint on the surface and that is
degreasing tacking and anti [Music] staticing so because we are nearly at the point where we are going to start painting the car we need to make sure that absolutely every every single surface is completely grease free because if any oils or chemicals or grease finds its way onto a surface that we're going to paint it will completely ruin the paint job as for the next step tacking it's basically where you run this tack cloth and an airline all over the surfaces that you're trying to paint now the tack cloth has this special ability to attract
dust to it meaning it will take dust off the surfaces that you're trying to paint so basically this is just a fancy process to remove dust [Music] and as for the anti staticing essentially you use this antistatic gun which fires ionized compressed air which neutralizes any static charge so doing this reduces the chance that any dust or other particles will be attracted to our body panels so now that that three-step process is done lav can finally start painting all of our parts and body panels and of course our first layer to go on is our
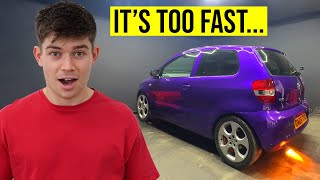
primer [Music] so now the primer layer has been applied it is finally time to start painting on our color now you all know I have chosen a real Lamborghini color but what color specifically have I chosen well I've gone for this it's called Viola parf this color is absolutely gorgeous it's a bright metallic purple paint with a pearlescent effect and to actually get this color on your brand new Lamborghini if you were to buy one costs $115,000 on top of the price of the car so this color is really special even for a Lamborghini so
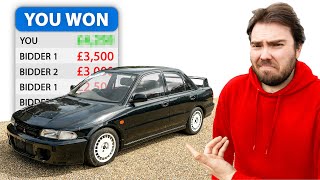
the fact we are putting this on a 700 quid Volkswagen Fox is quite funny [Music] well I have to say it is looking insane in there but what is also mental to think about is that thousands of cars every year get in the paint booth like this and get repainted because they've been in an accident and they've experienced some damage so to check if a car has that history you should always run a car vertical check now on the fox's report we can see the car's got three green ticks which is generally a good sign
we can also see how many owners that the cars had and the History Section which shows how many mots we [Music] failed however if we take a look at this Aston Martin DB 9's report we can see it's got two green lights but the dreaded Amber warning light for damage sometimes on car vertical if you scroll down you can also see pictures of the damage that the car sustained so this ason Martin looks like to me it's been in a fire because it has burning everywhere this is definitely a car that I would stay clear
of and I wouldn't have known that if this car had been put back on the roads if I didn't run a car vertical check so it's definitely something useful to do so if you guys want to do that make sure to click the link in the description of this video and use the code Jack 20 at the checkout because you will receive 20% 20% discount on a car vertical report which is some nice money off so once lav had got on the first coat of our beautiful Viola paraa paint he then had to do a
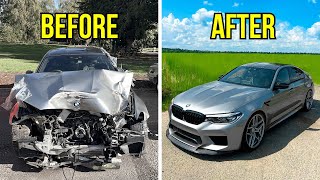
few more [Music] coats and once all of that was done lab had to go around everything again to do a layer of clear coat so we have now finally finished the paint workor it's just finished baking in the oven let's have a look at how good this looks you cannot tell me that is not like the most beautiful paint workor this is a real Lamborghini color on Volkswagen Fox Parts I I bet that hasn't been done before look at the bumper I genuinely cannot wait to get all this stuff like fitting on the car just
look at that it's like a it's got like this like Flippy little slightly pearlescent sort of thing going on this looks really really cool I I'm really liking this color I think this color is cooler than the Jazz than the Jazz's paint job it look at the engine ba look at it this looks so good so all of the people who no doubt wanted this car red must you've got to admit that this purple is absolutely banging and I think it works with the silver Wheels I think it works with the red brakes I was
sort of a little bit like is it going to work with those two things but I think it does now that we're actually looking at it and this purple just pops like genuinely no color I've ever seen it's got the sickest flip in the light this is going to look so cool when it's all back together so let's get everything packed up get the car back to the unit and get all this car back together [Music] so that is one fox back here at the unit and you might notice that we've had to put on
the front bumper uh the doors the rear bumper and the boots for transport so that's all on and it is looking pretty cool but there are still a few things missing that I want to get on the car before we finish this video off because I want to see sort of what that final product going to look like so we've got the tail lights here we've got the fuel filler cap uh Wing mirrors headlights I want to get all of that on and then we can just sort of take a look at what this car
looks like when it's done um there are still going to be a few things missing which we can address in the next video but yeah let's get all that fitted [Music] [Music] so once all of that was fitted we could finally take a look at our end product hey yeah let's see how you do Under Pressure I've been waned this forever I've been in the field with whatever they throw at me brush it off pick myself up moving on it a better okay hey yeah ain't no errors baby it's a new error I wake up
early feeling the so there we have it the Volkswagen Fox now has a proper Viola parf Lamborghini purple paint job and I think it is looking really cool as I said earlier I know a lot of you would would have wanted it a more classical GTI red but I just think this purple looks so good and on top of that La has done such a good job it is literally a mirror finish on that surface it looks so so cool um now we still have a few things to get on the car like the Scuttle
panel uh the indicator needs to go in we need to put the the door locks in um we need to put the number plates on a VW badge here the weird screen wiper on the back there's lots of little things we still need to do but it is really getting there now um now a lot of you might be thinking why have I not put the engine back in and there's a very good reason for that which you'll find out in a future video but if you did go on to enjoy this video make sure
sure smash that like button click that subscribe button if you haven't already and I'll catch you in the next one