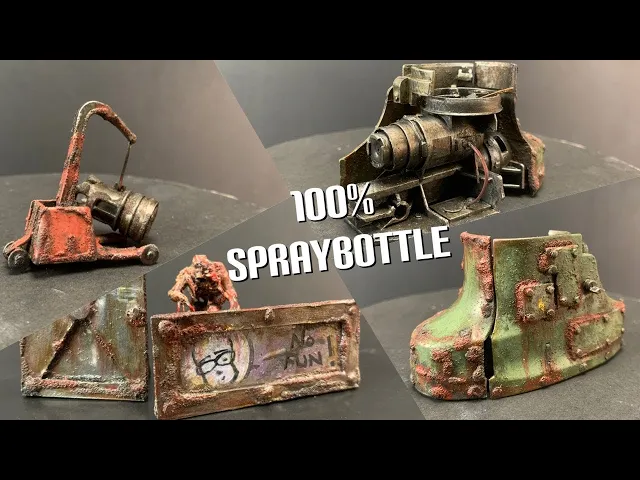
how does it go gut challenge accepted with an accent now that is some wonderful irony it's irony on a base level but i like it my name is welcome to dog brother workshop oh look what the cat dragged in miniature hobbyist is joining the battle 20 buck says he's going to try and melt the spray bottle better get cracking look it's a goose [Music] is that it that's it [Music] we are going to warm up the plastic whenever you're working with something that can possibly make toxic fumes remember to ventilate wear a mask your body
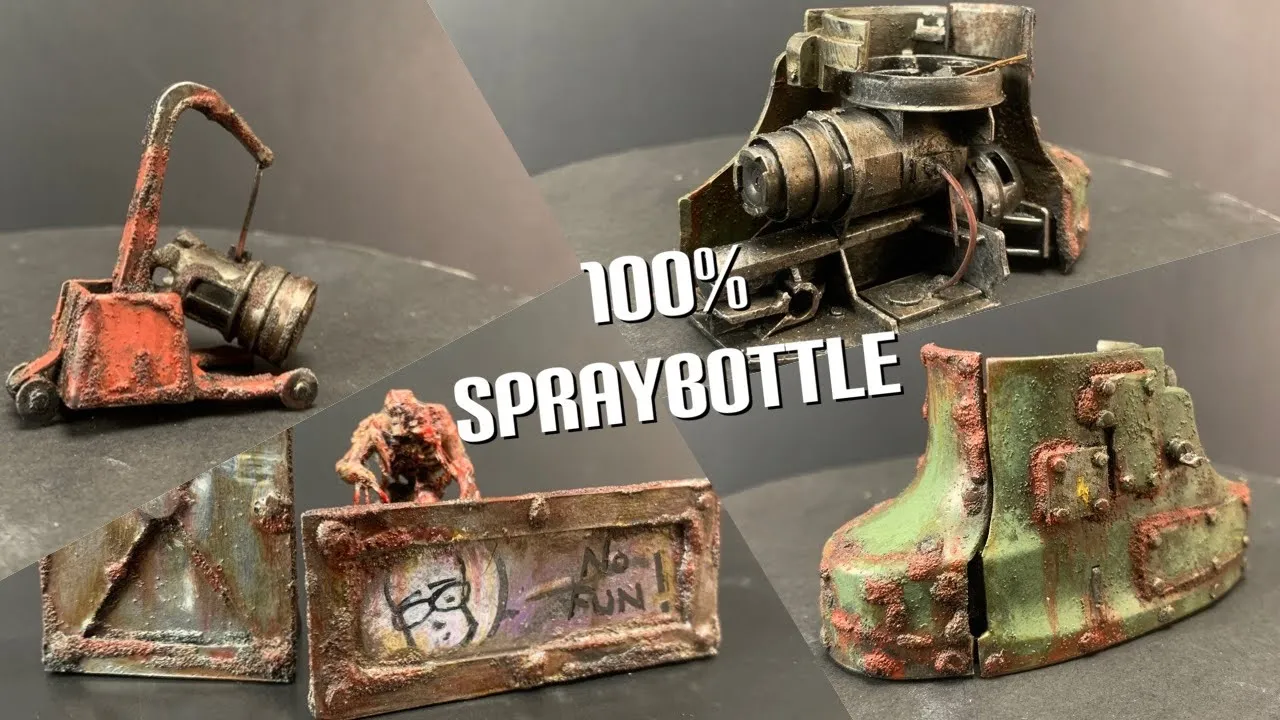
is your temple [Music] [Music] [Music] foreign [Music] with the building phase over it's time to lay down a bunch of painting if you have any questions regarding builds or tips or tricks just shoot them in the comments section below we're gonna start with a black primer base coat to which we apply a layer of metal this is the same for all the projects and then i had the brilliant idea of incorporating the logos of the three channels on the walls and i started off great laying down some base colors some backgrounds on the small walls
building up the face for the bill making stuff logo and with a simple black marker i drew on the logo for a miniature hobbyist which i was fairly content with however the bill making stuff one isn't going as planned i'm not that great of an artist plus i am struggling for time at this moment the video is going up tomorrow and i'm still painting nothing new you can see me use a gradient from black to white in retrospect it's not going too bad however i lost my mojo i was struggling to get some coverage on
the details of the wall so i decided to paint everything silver again with only one coat you could still see the base coat coming through the metal layer this gave me an idea so i grabbed a wet brush removed some of the metal paints so i can get some highlights going on this gave the logos a much more rather an old look which i think works great with the theme we have going on and this is the result my logo was messed up so i just wrote down a fun plus one internet points if you
can get the reference time to start cracking on the engine same primer same base coats and then it's time for a whole load of weathering i used the exact same paints that i did in the previous project mine is the verdigris because we don't have bronze i started with a sepia and iox earthshade wash to bring out some details and to color the metals in a brown yellowish type of color i also added a bunch of vallejo smoke the oily effect to the appropriate places we want this engine to look dirty and old however i
didn't apply any rust to the engine just to get a contrast going on between the outer shell the last step for the engine itself was a dry brush with the same metal color that i used as the base coat to bring out the details oh yeah totally forgot check out the little hammer at the top this was cut from the thicker part of the bottom of the plastic bottle we couldn't use anything else so we worked with what we had i wanted some color for the outer shell i used olive green as a base coat
simply stippled on all over the metal exposing some of the parts check out my awesome paint palette affiliate link to my amazon store in the description below after stippling on the base color i mixed in a bit of light gray to the olive green stippled all over again within the color that i laid down first did some metal highlights here and there to break up all the green and then it was time to lay down a bunch of rust for the outer shell of the engine i started with a medium rust color which is already
kind of red looking however it's going to tone down quite a bit after drying time also did a bit of a streaking effect only natural that the rust is going to run down through all the weather after the medium it's time for a bit of light rust which is much more orange in color just sparingly here and there where the rust is thickest it's important to to add quite a bit of different colors to make the rust seem natural after all the rust it was time to go back in with the sepia for some neat
little streaking effects last little detail i took some painters tape cut out a little electrical sign used some light yellow a bit of more weathering to tie everything nicely together and that's it for the engine part [Music] nothing new painting wise for the hoist jack same primer same base coat but this time i used a cavalry red for the main color and because the voice jack is already red in itself instead of going reddish colors for the rest i went for more brown yellow type colors to get a little bit of contrast going on to
not make everything the same and that's basically it for the hoist jack i have a bunch of cool little pieces of scattered terrain ready to add to the battlefield all made out of one spray bottle the times we live in go check out bills and john's channel in short it looks freaking awesome if you like what you're seeing please like subscribe you know what to do check out the links if you want to support and i see you soon for a new project here on dark matter workshop another collaboration with berserker works stay tuned yeah
bye