Why exactly do you need a travel router? You can absolutely go stay in a hotel room, connect to that hotel's wifi and surf the internet like everyone else. But if you really wanna dial in both convenience and security in your temporary home away from home, you should pack a travel router.
In this video, I'm gonna be working with the GL. iNet Barrel AX. This tiny travel router is jam packed with features designed to play nicely with your travel needs.
I'm gonna explain why you should be traveling with one of these devices, but I'm also gonna show you the complete setup of the device step by step. We've got a lot to cover, so let's get to it. Travel routers are an excellent way to increase network security while on the road.
But what about at home? All of your gadgets, those smart lights and cameras, personal devices, are they truly secure? Are they tucked away in their own secure VLAN, away from prying eyes?
Network security is one of the many things that Rogue Support can assist you with. Picture this, you've got a network issue. With Rogue Support, you just open up a ticket.
What happens next? Well, you get bids from top notch tech wizards, hand picked by me for their stellar skills and outstanding customer service. And the best part, you don't pay a penny until your problem is resolved.
So contact Rogue Support on the web today at rogue. support and give yourself the peace of mind that a secure and smoothly running home network can bring. You won't be disappointed.
I bought the Barrel AX a couple of months ago. This is not a sponsored video, by the way. I did pay for this with my own money.
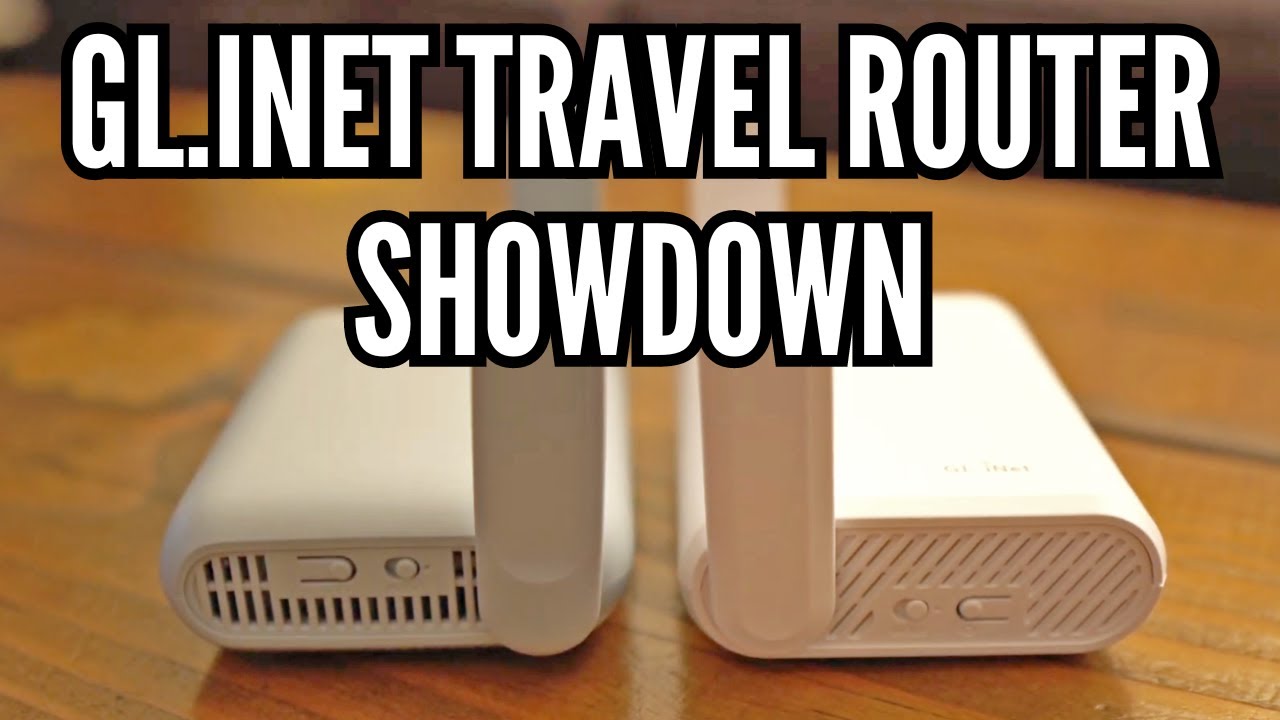
But when I saw they came out with a Wi-Fi 6 version of the travel router that I had been using for years, the GL. iNet Slate, I had to make the upgrade. GL.
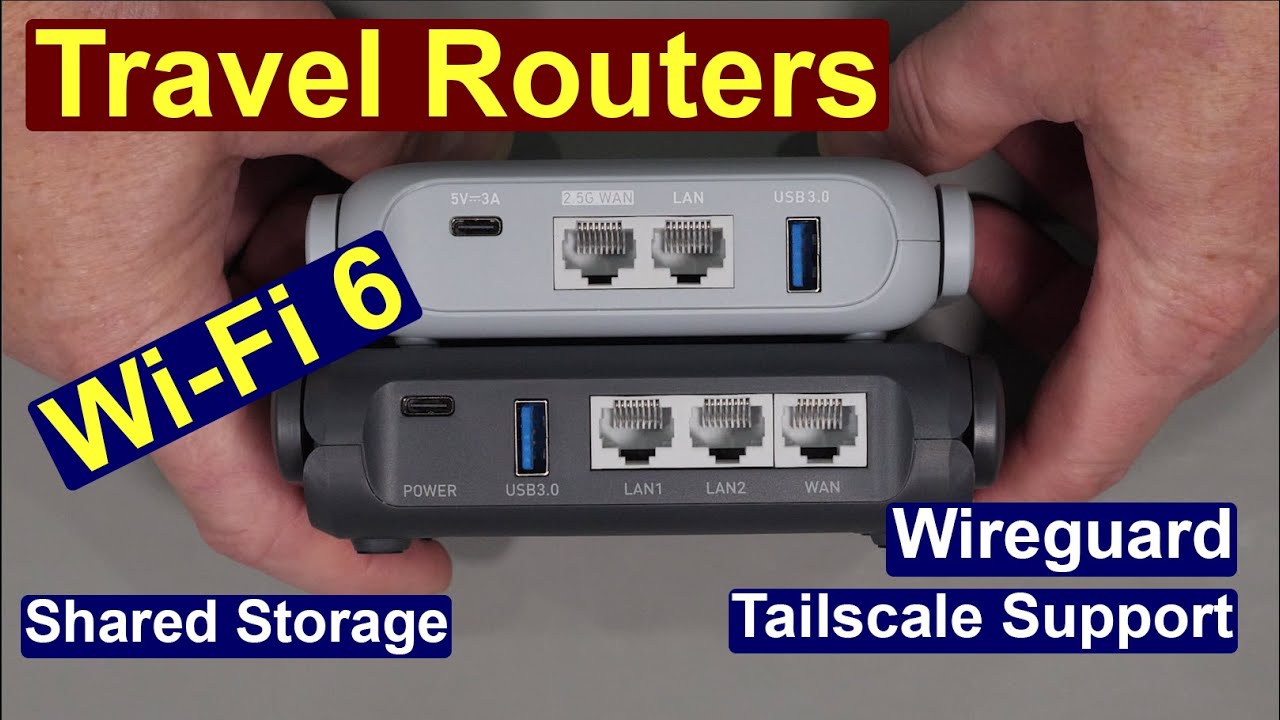
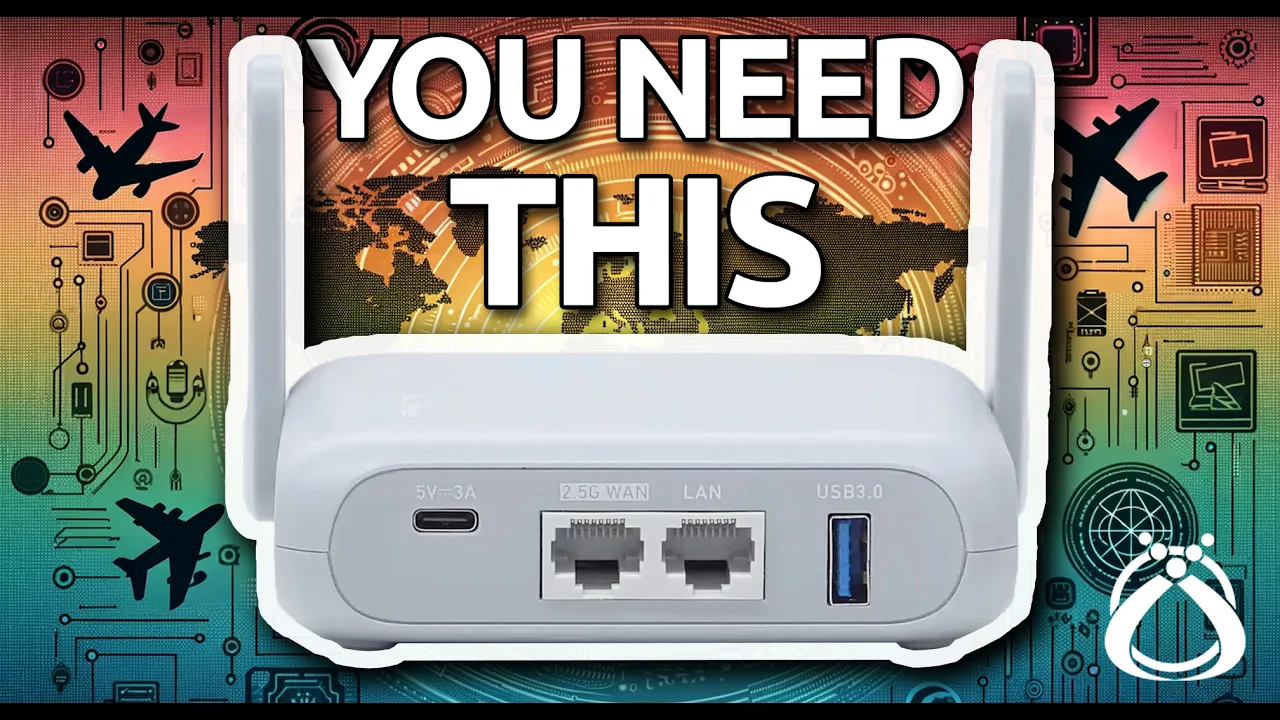
iNet has Wi-Fi 6 on two of their travel router models. They're pretty similar in specs and functionality, but the Slate AX features one gigabit WAN port and two gigabit LAN ports. Whereas this one, the Barrel AX has a single gigabit LAN port, but a 2.
5 gigabit WAN port. So you lose the extra LAN port, but the WAN port is multi gigabit. These travel routers are based on OpenWRT and they have so many features built in, such as AdGuard home, USB 3 for connecting network storage devices, plus both VPN client and server functionality.
They're also extremely flexible in their WAN options. You can use ethernet. You can connect as a wireless repeater, such as when you're staying at a hotel.
You can even use an LTE modem or tether through your smartphone using the built-in USB port. All of that for around 120 bucks MSRP. And I actually often see these on sale for less than a hundred bucks.
I've put the link to the Barrel AX that I bought down in the description below. So why then do you even need a travel router? Well, there are a bunch of reasons, but to me it really comes down to convenience and security.
In terms of convenience, I often travel with a family of four, right? I personally have my iPhone, my tablet, my laptop, my kids and my wife also have their own devices. Plus I usually bring along like a Roku stick so that I don't have to log into all of our streaming services through the hotel's television.
All of those devices are pre-configured to connect to the Barrel AX's wireless SSID. So now I don't have to go around to every single device that we brought and log into the hotel's captive portal everywhere. I just do it once with the travel router and then all of my devices are gonna connect to the internet no problem.
We also like to travel around in our RV. And sometimes when we pull into a campground, they limit the number of devices that can connect to wifi. Now this is especially true for campgrounds where they make you pay for wifi.
So you'll pay for like 10 bucks for the week or something but they only allow up to three devices to connect at a time. You can work around those limitations by only connecting the Barrel AX to the campground wifi and then it appears as a single device connected to their network even though all of your devices are connected behind it. By the way, this also works if you use a power bank to power up the Barrel AX on a plane.
You can pay for one internet connection and share that internet connection with your whole family while you're in the air. Now I mentioned that I like to bring along a Roku stick for streaming services. If I wanna cast a video from my smartphone to the Roku stick, most hotel wifi networks are client isolated.
So wireless devices cannot communicate with each other for security purposes. But by creating your own LAN for all of your devices, you don't have that limitation, right? Same goes for printing if you need to print documents across the network while you're on the road.
Now let's talk about security. By using a travel router, all of your devices are on their own LAN behind the firewall which increases privacy and reduces the risks of connecting to public or semi-public wifi. Now on the downside, this does create a double NAT situation which may not be ideal but isn't really too big a deal in most cases.
I mean, general web serving and streaming video services, those work fine over double NAT but you may run into issues with voice over IP or other types of real-time communication. Another reason I like these devices is that you have full control over the DNS servers that your devices are using. So whether you're using the built-in AdGuard home to block ads and potentially malware, or if you're using some public DNS servers that do some level of content filtering, you're not forced to use whatever DNS servers the hotel provides for you.
I'm sure some folks will argue that you can also protect yourself by just using a VPN proxy service such as private internet access. And yes, you're right. That is a great way to protect yourself when you're connecting to public wireless networks.
But let's get back to convenience, right? When I'm traveling with my family and we have up to like 10 devices that need connectivity, it's way easier to simply configure the barrel AX to do that VPN connection out to private internet access and protect all of those devices at once rather than having to connect each device individually and potentially hit the device limits of what the VPN proxy service provider allows. Okay, so I could go on and on and on about these GL.
iNet travel routers. They're a really good idea to bring with you when you're traveling. But let's get into exactly how to set them up step by step.
You should know that I have also created a blog post that goes along with this video so that you can follow along with the instructions there as well. I mean, sometimes that's easier than like pausing and unpausing a video. And while I'm going to be configuring this barrel AX in the video, all of their travel routers are configured almost exactly the same way.
So you should be able to follow these instructions no matter which model you own. Okay, so sorry for the audio, but I am actually in a hotel room and we are going to walk through this entire travel router setup from start to finish. The first thing I wanna do is connect to the routers Wi-Fi with my laptop here.
And what you should see is something like GL-something, right, there's gonna be some sort of wireless SSID that it makes it clear that this is the GL. iNet device that we have plugged in. So it looks like we're already connected.
I must have had the default credentials already in my laptop, but if you need to get the credentials for the default wireless SSID that comes with the device, it's written on the label on the bottom side of the barrel AX. Now looking at pings here, we can see that I do not currently have any internet. So let's see what IP address my laptop was given.
And by running ipconfig, we can see that I have 192. 168. 8.
140 with a default gateway of 192. 168. 8.
1. So that is what we need to put in our browser to initially configure this device. And so here we go, I have put 192.
168. 8. 1 into my browser, choose your language, English is fine.
We're gonna set a password here and we're gonna say apply. And here we are now brought to the dashboard of the GL. iNet barrel AX.
Now look at the dashboard here. For the WAN side, we have four different options. I always prefer ethernet.
All you gotta do is plug in that wire. Usually with a hotel, they do not have any sort of captive portal on the ethernet connection because the captive portal is there to prevent people from sitting in the parking lot and connecting to the hotel's Wi-Fi. If you're already in the room, you can plug into an ethernet port and you're already in the room, right?
So you've paid for the room, you're in there. You're not really stealing their Wi-Fi or stealing their internet from within the room. But we're gonna set this up as a Wi-Fi repeater, meaning that we're going to connect to the hotel's Wi-Fi with the barrel AX, and then we are going to repeat that Wi-Fi to our own client devices, such as our smartphones, laptops, if you've got a Roku that you want hooked up on the TV.
If you don't have wireless repeater or ethernet as options for your barrel AX, you can also tether through your smartphone by plugging a USB into the barrel AX and then into your phone and use your phone's cellular data plan for the internet connection. You could also use an actual cellular modem, like if you have an LTE modem with a SIM card that plugs in via USB. All right, so let's go through our settings here.
Ethernet, there is no ethernet. So we're on repeater down here. We're going to want to click Connect.
It's gonna search around and try to find all of the available networks. It should find one for Marriott Bonvoy. I'm staying at a courtyard here, so that's a Marriott property.
And here we go. So I can see this if I wanted to. I could even connect to the Wi-Fi for the Outback Steakhouse across the street here.
But no, we'll just connect to the Marriott Bonvoy account. Here we're gonna click it and click Apply. Now it says Connecting.
Now you might notice that there's no internet when you first connect, and you might have to come down here to your Wi-Fi and see where it says Action needed, no internet. You can now click Open Browser and Connect. This has now brought up the Marriott Bonvoy captive portal, so we can now put in our room number and last name, choose our duration, we'll say two days, whatever, and then Connect Now.
And we should now be connected. Let me refresh the dashboard here. Now it says still the interface is connected, the internet can't be accessed, but we can see that we do have an internet connection, and we are connected to the 5G network of the GL.
iNet Barrel AX. Let's do a quick ping test here. And yes, we can see that we in fact do have internet.
It'll probably just take the dashboard of the Barrel AX a second to catch up. Oh, and there it is now. Now that error has gone away.
Okay, so we have now successfully connected through the hotel's Wi-Fi. So our laptop connected to the LAN side wireless of the Barrel AX, and then the WAN side wireless has gotten to the captive portal and bypassed that captive portal. So now we now have our own little private network inside the Barrel AX local area network.
Okay, so let's go through our settings now and get everything set up. By and large, you're only gonna have to do this the first time you connect to the Barrel AX, and then all you have to do is bring it to a hotel, plug it in, and usually there's ethernet which makes it real easy, and if there's no ethernet, you just have to go through that process of bypassing the captive portal and everything else should be set up as in your devices should already know the wireless SSIDs to connect to for the LAN side of the Barrel AX travel router. So let's click on wireless.
Here we can see five gigahertz Wi-Fi, five gigahertz guest Wi-Fi if you wanna enable your own guest network, and then if you scroll down, you've got 2. 4 gigahertz Wi-Fi and 2. 4 gigahertz guest Wi-Fi.
Now the guest Wi-Fi is disabled by default, but the five gigahertz and 2. 4 gigahertz Wi-Fi networks are both enabled by default. So I don't wanna go with the default settings here, so let's click modify.
Now you can only modify either the five gigahertz or 2. 4 gigahertz networks at a time, so you wanna make all your changes to five gigahertz, apply that, and then you can go through and make all your changes to the 2. 4 gigahertz.
So we're gonna call this on the road, again, 5G. We're gonna give it a nice strong password, and then everything else we can pretty much leave default. We're gonna click apply.
There we go. Now, since we just changed the SSID for the 5G network, we actually have to reconnect to the one that we just created. So on the road again, let's go ahead and connect, and there we go.
We have now connected to our custom SSID, and as you can see, we are getting pings once again, so we are connected. Let's now make changes to the 2. 4 gigahertz.
I'm gonna refresh this page, and we're gonna say modify on the road again, 2G. Change the password and apply. If we click on clients, we can see our connected clients.
Right now I've got this laptop connected. I probably have a phone connected since I'm using the same SSID and password that I had before I factory reset the thing, but there's where your clients are. Now let's look at some of this other stuff.
I'm gonna skip VPN for now, but we are gonna come back to that. Under applications, there's dynamic DNS, so you can create a dynamic DNS name that anytime this device is connected to an internet connection, you can utilize that dynamic DNS name to connect inbound to the device if you want. If we click on network storage, this is where you can take a USB drive and plug it into the USB connection on the Barrel AX, and it'll function essentially as a NAS for this network that we've set up.
We can enable AdGuard Home if we want, and then you can choose to have AdGuard Home be the DNS server for clients that are connected to the Barrel AX. There we go, and we can see the DNS queries. In fact, let me go ahead and turn this on fully.
There we go, and so now we can see all of the DNS queries that are going through this thing. We have parental controls, so we can enable parental controls. This is a beta feature.
I don't exactly know what this does. I assume it just has some sort of block list and is able to block certain sites on the internet or something. I'd have to read up on this.
I've never actually used this. I'm gonna leave that off for now, and then we have both zero-tier and tail-scale, right? So these are kind of the VPN proxy services that would allow a connection out to those devices, and then by virtue of that connection held open from the Barrel AX out to tail-scale or zero-tier, you can then have access inwards from other locations, so VPN, sort of inbound access, which is actually really cool.
I wish they also had Cloudflare tunnels in here. That'd be amazing. Okay, looking at our firewall settings, we've got port forwards.
We can open up ports on the router. We can create a DMZ if we want. We're not gonna worry about any of that.
You can do multi-WAN, so if I plugged in ethernet, I could have both wireless and ethernet, or I could have wireless with my phone tethered as a backup, so you can have multi-LAN, and that'll do either failover or load balancing across those multi-WAN connections. That's pretty cool. When we click on LAN, this is where we can set our subnet, so by default, we have a subnet that is 192.
168. 8. 1, and then we have a DHCP scope between 192.
168. 100 to 192. 168.
8. 249, so we can change this if we want. You can also make a completely separate guest network.
Here's your guest network DHCP settings as well. If we click Advanced, that lets us completely change everything, so if we wanted a slash-8 network instead of a slash-16, we could do that. I don't know why you'd need to for a travel router, but if you want to, that option exists.
Then we have DNS, and it says right now that AdGuard Home is enabled, so the router must use DNS provided by AdGuard Home, but otherwise, if you're not using AdGuard Home, here's your DNS settings. Different network modes. Are we functioning as a router, an access point, an extender, et cetera?
We can enable IPv6 capabilities if we want. We can clone a different MAC address with this device if we want to do that, and on and on and on. If we go to System, here's our overview, CPU overview.
We can turn off the LED if we want. Let's actually, oh, also, by the way, here is Upgrade, so my firmware's up to date, but the first time you run this device, you probably want to go to System, Upgrade, and actually get it on the latest firmware. If you come all the way down to Advanced Settings, you also have this, so GL.
iNet basically forked their own version of OpenWrt, but if you want to go to the actual OpenWrt interface, that is still available to you. You can just get to it with this link here, so if I click there, for example, and then log in with the password that I set for the router when I first set it up, here is the full OpenWrt interface for the GL. iNet.
I'm gonna go back to their friendly interface, though, and let's talk about VPN. This is one of the cool things about this device, is that it allows you to set up VPN clients. The way that I like to do this is you put in a VPN client, so say that's like OpenVPN out to Private Internet Access or NordVPN or some other VPN proxy service so that you are surfing through that connection when you go out, or you can do something like WireGuard to a home server.
For instance, I have PyVPN set up in my home network. I could create a certificate for the GL. iNet, and then we can connect to my home VPN on demand once I connect into this router, and I can be surfing as if I'm surfing from my home internet connection, and I also have access to all of the LAN services at home that I have exposed to VPN.
For example, if I had a NAS device at home and I wanted to access the files on that NAS device, I could do that right through this interface here by using WireGuard connected to a VPN server that I have set up at home, and then whatever I've allowed through that VPN server. Really cool. Okay, so this can also, by the way, function as a VPN server but for this demonstration, I'm going to connect my Barrel AX out to Private Internet Access, and I'm gonna show you how to do that right here.
So it says OpenVPN and it says Set Up Now, so if we click there, oh, NordVPN is the default. I do not like NordVPN, but we're gonna use Private Internet Access instead, and we can click Add Manually, and what it's gonna look for, it'll say Private Internet Access, and then it says Select a File or drag it here. So we need an OpenVPN configuration file which we can generate at Private Internet Access.
Let's go ahead and log in over there. Ah, and interesting, it wasn't letting me connect it first because AdGuard Home was actually blocking PrivateInternetAccess. com for some reason.
So I turned off AdGuard Home. I am now able to get to Private Internet Access. Let's go ahead and log in.
Okay, so within Private Internet Access, I'm gonna click on Downloads, and then I'm gonna scroll all the way to the bottom, and we have our OpenVPN configuration generator. So let's go ahead and do that. We're gonna open that up, and let's look at our options here.
OpenVPN 2. 4 or newer is fine. I'm gonna choose Linux for the platform, and then we can pick which server we wanna connect to.
So I'm out here on the West Coast, so let's just do the, I think they have a US West. Yeah, right here, US West. So I'm just gonna choose the US West server, and then this we're gonna leave default, and we're gonna say Generate.
This generated an OpenVPN file right here, as we can see. So now I'm gonna select that file, and then I also need to give it my Private Internet Access username and password, and we apply that change, and there we go. We now have a new profile for Private Internet Access.
Let's go ahead and try to connect it. Start, boom, so green light here means that we are successfully connected to Private Internet Access, and if we bring up privateinternetaccess. com slash what is my IP, we can see that we are protected, and this is from the router.
So all of my devices behind this router are protected by Private Internet Access. Let's do one better. On the side of the Barrel AX is a physical toggle switch, a physical button that we can switch on and off.
So when I'm setting these up, what I like to do is I go to the toggle button settings, and so the toggle button right now is set to no function, but we can do a lot of things with this. We can turn AdGuard home on and off, we can enable our OpenVPN client or a WireGuard client, or we can connect to Tor. So we're gonna do OpenVPN client on off, and we're gonna click Apply.
So what this means now is when I toggle that button on the side of the Barrel AX, it's then going to connect to Private Internet Access, which is really cool. I don't have to turn it on and off through the interface, I can just toggle that button. So now if we go back to the Barrel AX dashboard, I can see a number of things.
We are connected in repeater mode, I have VPN enabled, I have a five gigahertz and a 2. 4 gigahertz network, and then I have three wireless clients. That's gonna be my two smartphones and my laptop.
Now, again, when I'm typically connecting, I try to do ethernet for everything. So I plug my laptop in to the LAN port, and I plug the WAN port of the Barrel AX into whatever LAN connection I can find in the hotel room, if there is one. To me, that's the most solid setup, and that's what I prefer doing.
One more quick thing that I wanted to show you, I just said I always prefer ethernet. Here is why. If I bring over pings, so right after I stopped recording from that last little segment, I plugged in the ethernet, right?
Because I'd rather be on ethernet. And look at the difference here. So you can see in the pings, the response time is all over the place, 300 milliseconds, 100 milliseconds, 65 milliseconds, et cetera, et cetera.
You can see it's jumping all over the place. And then right about here, I plugged in the ethernet and look at it after that. It's about 60, it's like within a few milliseconds, like 65 to 70 milliseconds solid, all right?
That's why we prefer ethernet over wireless. You're not always gonna have the ability to plug into ethernet in your hotel room, which is why these travel routers provide so many different WAN connectivity options. There's basically a WAN option for however you wanna connect, even if you're tethering through your smartphone.
Okay, links to the product, as well as the blog posts are down in the description. And if you'd like to keep this party going, I have hand selected a couple of videos for you to watch next. The top video is my recent overview of the new Ubiquiti Pro Max switches with ether lighting.
And the bottom video is my rant about Wi-Fi 7 is mostly marketing BS.