do you want to learn how to make highly engaging videos just like Isaac this guy solved the YouTube algorithm with only four videos making him a part of an elite group of creators in the trending faceless Niche well today we will be breaking down his entire editing process with that being said are you ready I subtitle to miss you add consistent with it how your audio sounds jump cut is all about PTI number one utilize Boll one of the things I avoid like the plague is having a I've got a the jump we need to
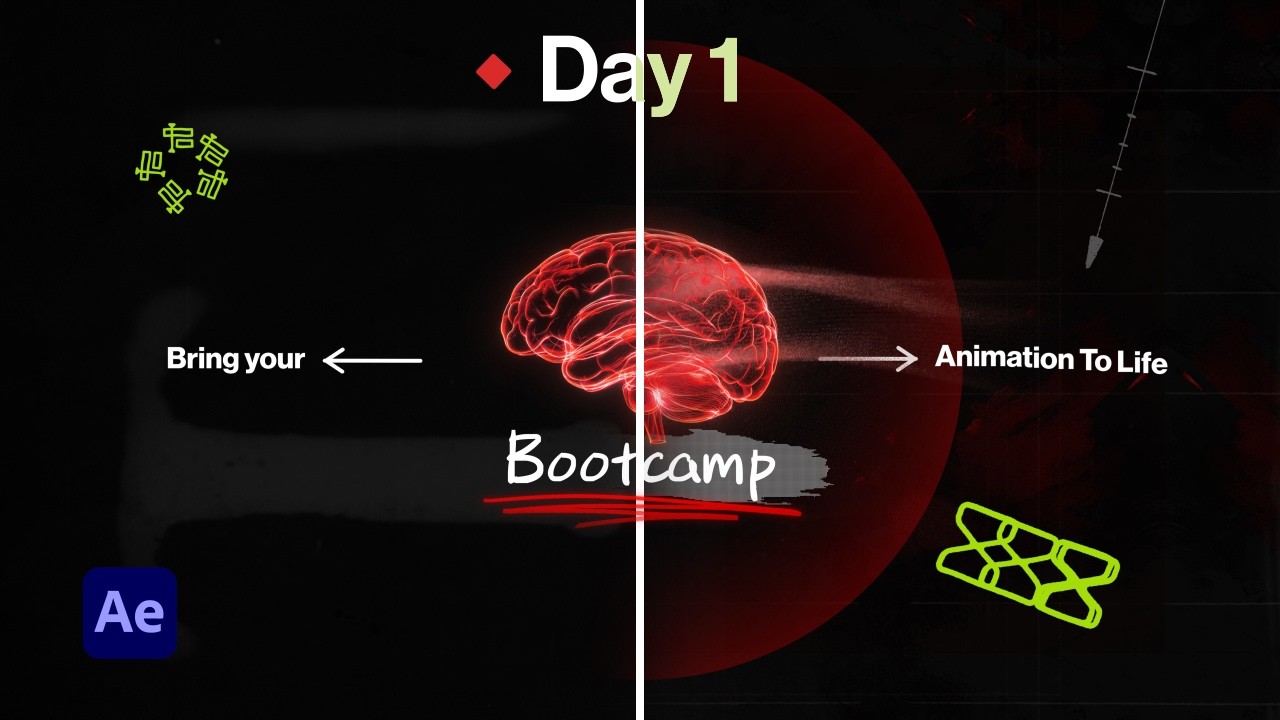
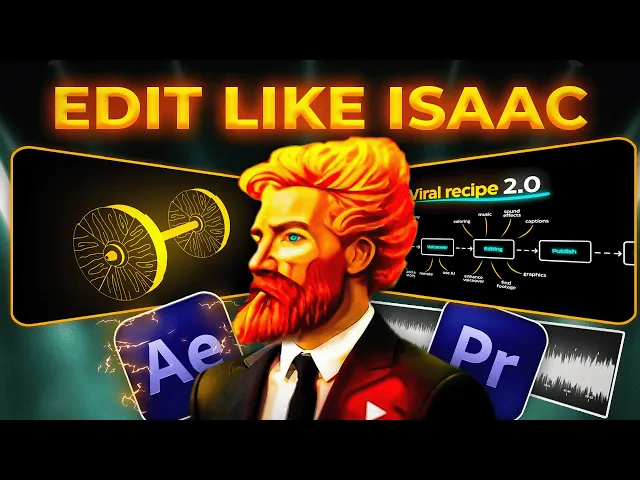
make better videos but before we start I've created every preset and ass it for you to follow along and yes it's free you can download everything with the link in the description and you probably should at least if you want to learn and improve your editing skills so here's the full guide on how to actually edit and animate like Isaac we will go from the animations transitions visual effects motion subtitles backgrounds 3D characters the first scene we will recreate is this one from his latest video can slightly tweak these in this animation there are a
few things happening which are really simple we mainly have the smooth camera movements the rounded squares are changing colors some electric elements on the thumbnail and his character slides in towards the end there are time stamps throughout so feel free to skip if you already know how to do this make a composition that is exactly 19 seconds long create a new rounded rectangle shape layer make sure there is no stroke and add a gradient ramp select black and white as your colors adjust the positioning of the Anchor Point so the white is at the bottom
left and gray is top right now right click on your layer add outer glow and copy these settings if you want to be accurate import the video from Isaac about the viral thumbnails and put the voice over for this animation so we can sync the changes with his voice to change the color of this gradient add a key frame for the start and end color where you want the change to begin then go to where you want the change to have finished and create key frames again now change the colors select the key frames and
press F9 to easy ease for the outer glow just do the same thing key frame where the animation starts and key frame where it ends then change the color and also make the layer 3D we now need to add some camera movement so create a new camera and just before the color change effect let's add a zoom simply create a key frame for both position and the orientation and then go to where you want the zoom in to end create another set of cre frames and just zoom in slightly easy easy the key frames go
to the graph editor and push them to the left so it starts fast and then slows down at the end something you've probably noticed in Isaac's video is the screen is always shaking or wobbling we will add this at the end in Premiere Pro once we finished with After Effects now we need to animate the camera zooming out and to the right side we can also see new shape layers animating upwards create key frames for where you want it to begin and then where you want it to end like always then just zoom out and
change the x value until it matches Isaac's video duplicate the current shape layer which you can press contrl plus d on your keyboard remove the key frames and add the original white and black colors change the outer glue color to white as well to animate it first double click the Anchor Point tool while holding control on your keyboard and put it at the corner of the rectangle move the rectangle slightly to the right set a key frame for scale and change the value to zero go a little bit further on the timeline and change the
value to 100 increase the distance or shorten it to adjust the speed of the animation press F9 and push the key frame slightly to the left not all the way it will start fast and slow down towards the end duplicate the shape layer and reposition them once you do that you should have something like this however you might notice that the gradient is messed up this one is much darker than the rest to fix this we need to key Fromm the anchor points for the gradient ramp effect go to where the camera movement starts then
add a key frame for the start and end of ramp go to where the movement stops adjust the positioning of the point do this for all the shape players but wait there's another problem they shouldn't be animating at the same time so stagger the layers this way each one starts right after the other now you just need to do the color change again which you know how to do so I'm not going to repeat it just follow the exact same steps as I did before to change the first box and do it for the other
rectangle angles as you can see he Zooms in right here and he changes the colors again there's nothing new here you just have to repeat what you've learned he's constantly key framing the gradient ramp and changing the colors so I changed them once again and zoomed in using the camera then zoomed out and reset the colors again now we want to add another box so create new key frames for the camera zoom out and adjust the positioning so there's space on the right then you can just duplicate one of the boxes move it over and
reset the key frames then you just need to change the color to Blue but don't forget the outer glow you can also copy the key frames that you've already created for the other shape layers like the scale animation next we have a zoom out and then it goes slightly upwards so I'm going to create key frames for the camera move a little bit further down the timeline and zoom out then I'll do the same thing again but this time I'll move everything up now let's go back and create the text make the stroke 100 and
make sure it's set to fill over stroke resize and reposition but make sure it's a 3D layer then add regular glow to animate this I suggest you download the animation composer 3 which is free in the folder that I've provided you with once you follow the instructions you'll be able to find it under window while selecting your text go to Transitions text layer animate words and add the flickering decode now duplicate reposition and change the text for the other rectangles also uncheck the motion blur for these layers because it will cause lag we will add
them again after we are done moving on we can see the thumbnail appearing with a San glow around it with a little bit of blur and the electric effect import the thumbnail make it 3D create a rounded rectangular mask and press the up Arrow key to increase the curvature on the edges right click layer Styles and apply outer glow you can just copy my settings if you'd like resize and position it in the correct Place write the text I use monster at bolt for the font write the view count and the time of the video
and change the color to a light gray then select the ellipse tool create a tiny gray Circle and position it in between the two gray texts once everything is placed properly select all those layers and precompose them so it's one layer then make it hit 3D and rasterize it now you should actually see it also double click on the Anchor Point tool while holding control on your keyboard we're going to animate the thumbnail moving upward by changing the position key frame don't forget to easy ease and push the graph to the left side now add
gajan blur to the layer and make a key frame increase the blurriness to a value around 30 go to where the animation is about to end and change the value to zero this way it slow slowly unblurring as it's going upwards press F9 to easy ease now I want you to import the electric elements that I've provided you with and open up the composition I've selected element number three from the electric elements in our folder I Chang the color to yellow and then copied it over made it 3D and made it start in the middle
between the blur key frames I resized it to fit on top of the thumbnail to make it look like the electricity element is the one unblurring the image I also key framed the position values so it moves at the same speed as the thumbnail play the video in slow motion if you want to see exactly what I did here finally we need to slide Up and Away the thumbnail bring the Minecraft image down while reducing the size of these boxes and also slowly fading out the text let's start with the thumbnail create a key frame
for the position value again move over and increase the Y value until you can't see it anymore now create a scale key frame but before we do any changes hold control on your keyboard and double click the Anchor Point tool Now set the value to 50 and do what we always do with the key frames next import the Minecraft image make it 3D scale it up and cut it where you want to begin sliding it down create a position key frame and move it up until it's way out of the frame go two seconds forward
and bring it back down easy ease and push the graph now select all the shape layers and create position key frames at the same time as the Minecraft house begins to slide down move over slightly to the right and before the last key frame for the Minecraft house play with the values until it looks something like this change the Y and Zed value to replicate Isaac lastly select your text layers and do the exact same thing so it stays close and under the boxes as everything is moving go to where the shapes stop moving new
key frames change the values until the text is under the boxes easy ease push it all to the left now key frame the opacity for all the text layers and just before it reaches the final position create another key frame and make the opacity 0% apply the gajan blur effect to one of them create a key frame at the same time as the opacity go to where the text is no longer visible and change the value to 50 copy paste this onto the other layers now apply a motion blur by checking this box for all
the other layers to finish up render the animation and place it in Premier Pro pause the video if you need to 2,000 years later drag the animation onto your sequence and create an adjustment layer now drag and drop the wobble screen Shake which was given you in the presets folder just make sure to import it first and restart premere for the character at the end I just Ed my profile picture since I don't have my own like Isaac then I nested the clip added motion blur drop shadow and the slide preset to my character all
provided to you in the folder render the clip for maximum quality and this is our final product like as your main color I chose yellow for mine then add three more one black one white and one in the middle you can slightly tweak these to match your main color but I like to keep it simple and finally add another color to highlight things there we go a color palette that's actually useful even though my sister says it looks like a Minecraft house made from diamond and gold let's move on very quickly I'm going to show
you how he creates and animates these 2D characters popping up and off the screen luckily for you I have already prepared a massive folder of characters already cut out with no background so your job is going to be way easier than mine open Photoshop create a new project with default settings you can just copy mine now import any character of your choice for the sake of this example I will use his beautiful face I will then use the quick selection tool and select everything except the head of the person I will try to keep the
neck so I can blend it with his face now click ctrl+ J on your keyboard to create a new layer with your current selection then delete or just hide the previous layer now grab his face resize and play around with it until it looks as realistic as possible now don't worry about this okay we will fix this problem problem let's take a look at his video to do you notice that his neck is blending with the color of the guy's skin so go back and grab your brush tool soft round and change hardness to 0%
while selecting Isaac's face create a mask by pressing this button now make sure this is black and white while holding the mask layer lightly tap by the neck to create this effect change the size of the brush by using these buttons on your keyboard the smaller you get the more accurate you become if you make a mistake then press right here to choose white this will read his orange neck black hides and white reveals furthermore do not be afraid to tweak the transformation properties until you are satisfied with the look after a short while I
got something like this and I think it looks pretty good now export your layer as a quick PNG open up your premere project and import your character using my presets add the realistic drop shadow and realistic motion blur now choose between any of the slide presets that I've given you and simply slap it onto the layer feel free to adjust the graph push the key frames closer or further to get a better look this may not be perfect as you can see I changed it up here my character was already on the screen on the
first key frame so I just lowered it down a bit you can also add the small Shake effect if you want this way the character will always be moving the next step of Animation is actually transitioning between two characters if you pay close attention to Isaac he either slides out the character or slides into the new one here it is in extreme slow motion so you can see what's really happening to create this effect it's done by key framing the position and opacity values of the layer first import the second character and apply the same
presets that we did for the first one drop shadow and motion blur and why not apply the small Shake as well make sure to place it in the position where you want it to be when it's finished moving so right here is where my second character will be when it's fully shown from here go 15 frames to the left you can hold shift and use the left Arrow key on your keyboard and press three times apply the Transformer effect onto our first character key frame position then go back over here now move him near the
second guy just like this so they are overlapping uncheck this box and make the shutter angle 360 select those key frames and copy My Graph as you can see we have this crazy motion blur as it moves from right to left we now want to slowly fade him out and make him disappear so create a key frame for opacity at the same time as the position key frame frame go eight frames to the right and make it zero easy ease the motion go back to our first key frame bring our second guy over create a
new position point and slide it to the right create another new point but this time overlap him with the first guy Easy E the key frames now push the right key closer to the left one until it looks like they match the same speed it should look something like this if it doesn't keep moving the second Point either closer or further the closer you bring it the faster the character moves now key frame opacity and change the value to 0% go five frames to the right set it to 100% and easy ease just like that
we have a perfect replication now before we continue I must tell you something that is very important especially if you're a video editor which I assume you are because you're literally watching this video now trust me do not skip this part nordvpn the sponsor of today's video this isn't some nordvpn men's escaped or honey sponsorship this will actually put more money in your pocket as a video editor it's called visualizers club and it basically gives you access to all those websites like invar story blocks epidemic sounds filac Pro for all the same price as if
you were to buy one of them on top of that you get $50,000 worth of assets and a bunch of editors that you can connect with I put the link in the description which will give you an additional 30% off if you want to save some money and if not I guess you're andate or something what color your create a new composition that's exactly 14.24% download it I gave it to you here are my settings for the Deep glow effect now create your text align it in the middle resize it and also make a 3D
apply regular glow to the text and change the glow radius to 25 once everything is how you like it select both layers and precompose never forget the 3D box now create a camera and zoom in slightly when we look at his animation we can see a small glow on the edges from the other rectangles so we go back into the composition duplicate the shape layer and copy it over now just change the colors to yellow and orange reduce the size slightly and move it over to the right until you can barely see it do the
same thing for the other side duplicate the shape copy the same blue colors and move it over until you can slightly see it I recommend also importing his voice over audio for this animation so we can syn our movements with the words just like we did with the previous one for camera movements like Isaac we've already covered how to do it so I'm not going to go in depth here you already know that you need to key frame the position and the orientation then use these two tools to move or zoom in or out you
don't even have to use the tools you can also just change the values on the screen to give you a better understanding here's a visual of what each graph does we commonly use the first one but you can also try other ways to get smooth camera movements I never do this on the first try I always keep moving them around until I'm happy with the speed and duration now before you panic no we aren't going to duplicate the layer a million times to create the slide animation we are going to use something called a repeater
which will save you hours first let's fix the anchor points for the gradient perfect Now open up the shape layer click add and select repeater change the copies to 100 and the x value to zero for position then use the Y value to space them out over each other once you're satisfied click p on the shape layer and move it down so it covers the space from top to bottom by the way feel free to adjust anything I readjusted the anchor points again the orange color and increase the stroke thickness of the shape you don't
have to copy my settings if you don't like them feel free to add your own Creative Touch before applying these steps to the other side let's move the camera just like Isaac does in the video after doing the same exact steps that I've taught you you will have something like this but now we need to animate this side going up and the right side going down this is very easy select the orange layer and keyframe position go to the end of the timeline and increase the Y value or the middle number the higher this is
the faster the slide and then repeat this for the other side but instead of increasing the yv value you would decrease it so it Scrolls up I also pushed the graph to the left side so it Scrolls faster in the beginning to change the color of the rectangle it's the same steps as the previous animation we've learned create key frames for the gradient ramp then move down and simply change the colors and the Anchor Point positions press F9 to easy ease and you're done the real difficult part of this animation was actually creating these moving
brush Strokes import the moving five brush strok Strokes make them all 3D and follow my steps carefully add a gradient ramp with yellow and orange colors don't worry about the anchor points for now copy the effect to the rest of the layers for each brush you are going to create a mask so we can reveal and hide the layer going over to my whiteboard I wanted them coming in like this so for each brush stroke you will play around with the scale and rotational properties I can't really do this part for you and it's not
very hard once you've achieved a similar look to mine unpause the video to continue following along after you've done this adjust the anchor points of the gradient for each brush apply glow 80% and 1.5 A and B colors select two orange colors one darker one lighter copy paste to the rest of the brushes now apply wave warp depending on the brush stroke I used a height value of either 5 to 10 and a width value of 120 to 150 I found the wave speed at 0.6 to be nice you don't have to follow mine you
can keep changing this until you are happy I even deleted one of the brush strokes and just duplicated one that I liked better and then I flipped it vertically rotated it and used it on the top side zoom out if you can't see all your brush Strokes to animate this we will create a mask path key frame from here take your convert vertex tool and while holding control and selecting The Mask path you will move the mask to the right side it's going to start animating from that direction move further a second or two and
then move the mask across I'm going to hide the other layers so we can focus on one at a time select all your brush strokes and move them behind your thumbnail text now create a black solid don't forget to make everything 3D always and resize it to fit the rectangle but make sure it's above your brushstroke layers go back to your brush strokes and copy the same steps I did for the first one to the other ones select all the key frames and easy EAS select the key frames again and push them to the very
beginning of the sequence stagger them so they all come in at a slightly different time but should end relatively close together once you do that all you have to do is duplicate them so they keep repeating the final thing I will show for this animation is the ending the main thumbnail goes between the blue ones first let's do the camera movement which is simply just creating key frames for when you want the movement to start and then key frames for what change you want so messing around with the rotation and the position values as the
camera moves and rotates the blue rectangles have already stopped and have already begun to open up we need to move the position key frame to the left of our blue shape now it stops scrolling right here now go slightly forward and create another key frame this is when the opening animation will begin duplicate the layer twice then go back to the original and make a cut now hide this layer select the duplicates and press p on your keyboard to see the key frames select the bottom one and create a shape mask by selecting the rectangle
tool and pressing this button located by the star now select the bottom half do the same thing for the top layer but select the top half now we have successfully separated them which means we can open them up go to where the camera movement stops then move the top half up and the bottom half down to make some space I did forget to cut the layers here which you should absolutely do because they are overlapping with the original one so make sure to delete the left side as the space opens up just animate our main
thumbnail slide in you also need to scale it down because it's bigger than the blue shapes you can also increase the space if there isn't enough or move the key frames further if the orange shape is overlapping with the blue color so basically if it's sliding in too quickly also go to your layers cut the black solid and all the brush stroke at this moment in time when the space starts opening up I recommend taking all the key frames for the pre-composed layer and pushing the graph to the right so it starts slow and speeds
up at the end but you can keep messing around with this it doesn't have to be exactly Perfect all that's left to complete this animation is what I've shown you earlier electric elements character PNG and the screen Shake which you can add in Premier Pro on an adjustment layer using my free preset after following all these steps and adding the electric elements with the character this was my version of the animation because your audience with those channels are different but it's the same with all these other channels so when it appears alongside those yours will
be much more likely to get more attention editing like Isaac isn't really that hard it's just repetitive and extremely timeconsuming once you know how to do the effects you have to do it a bunch of more times this is why he has uploaded four videos in the past 9 months well it's simple after spending hours rewatching his videos Isaac uses eight types of transitions you may have them but you still don't know how to use them so let's break it down very quickly to get the same style as Isaac you just drag and drop place
the lumetri color effect onto it and change the temperature to -250 to get that blue color you can even speed it up to match Isaac's transitions since his are fast-paced another way to replicate his quick blue overlay which he uses a lot is by using the glitch presets that I've provided you with all you have to do is mess around with the colors using the lri color effect and mess around with the speed to get similar to Isaac create a new adjustment layer and place it in between the two clips from the center go 10
frames to the left and make a cut then do the same thing on the other side now duplicate it cut the bottom one in half and apply the base preset to both of them now simply drag and drop the direction you would like to the top layer I need you to listen very carefully for this one go into the folder and grab this premere pro project you want to drag and drop it into your current project and make sure you check these boxes Now open up the folder and press this button to change the view
as you can see there are a bunch depending on your resolution but for most of you we need to use 1920 x 1080 under here you have many and I mean many options all you need to do is select the one you want and drag it over your clips and align the cut then delete the purple layer just like that you have a zoom transition just like Isaac however for the shake zooms don't use the first 10 just the bottom three they are the best and the ones Isaac actually uses same thing drag it in
check the boxes open up the folder select the one you want I'm going to use the rotation zoom in as an example because Isaac uses it a lot you can also preview the transition by simply hovering over the footage drag it over align the cut delete the bottom layer and you're all done yep you guessed it it's the exact same steps as the other one I won't bother going over it again create an adjustment layer 10 frames left side and 10 frames right side cut it in half where the transition begins and apply the blur
presets easy enough you tell me import the project file for the bounce Transitions and make sure you check entire project now double click on it to open the sequence from here just copy over the bounce transition and place it like so you have to render in order to preview also this should be the result but I also want overboard and give you an additional 30 Shake transitions so here's how you can use them for your videos each Shake transition is composed of two presets in and out you must place an adjustment layer over to two
clips cut it in half half and apply the in preset to the right clip and the out preset to the left clip make sure to use the same number twice if you use 01 in then you must use 01 out you have to render in order to preview as we know Isaac loves electricity because he can't stop spamming them every 2 seconds open up the essential Graphics tab in Prem your pro drag and drop all the energy transitions from here all you have to do is pick one you like and just place it between the
two clips I've taken this one as an example but you have so many options well this is what makes his content so good there isn't a single stop of movement throughout his entire video he's constantly zooming in a direction the camera is always wobbling shaking rotating or sliding in different ways objects and images are always in motion even if it's the angle that changes he's constantly stuffing your brain with constant movement to keep your retention and it actually works and unlike other crators I won't charge you anything for these I've done the dirty work for
you so you don't have to recreate all of this from scratch wait a second before I get to that I need to be transparent with you guys I've given you about 5% of what I offer in my paid preset pack for free it's over 70 GB of my videos project files assets and presets it wouldn't be fair to the buyers if I gave you all of what they paid for so I simply took 15 motion presets and this includes a few zooms screen wobbles shakes and sliding the most relevant for Isaac's style to use these
it's very simple for the Cal wobble and Shakes You must only apply this to the clip itself or an adjustment layer this is also true for the zoom motion presets however for the slides and other movements apply this only to a PNG or anything that you want to pop up on the screen an example would be a screenshot a character like Isaac and apple you get the point if you end up showing a clip for a longer period of time in the video adding these motion presets will help bring it to life so viewers don't
get bored creators like Iman godi Vega digital income project all use this technique so don't skip this part so that was everything let's move on oh subtitles a simple and easy way to control where the viewer looks and to keep them engaged see what I did there Isaac is fairly simple pop in effect with glow sometimes typewriter and he loves to stretch no no no I mean like stretch the text write out some text and apply the Popin preset if you want you can apply the Isaac text glow effect wow that was difficult I need
a break hey I am completely burned out from editing do you think you can continue helping my friends of course brother do you know where I come from let's get to work shall we duplicate your text layer remove the current animation and place in the stretch text animation oh my this [ __ ] is hard why did I agree to doing this write out some text then add the crop effect now go to the beginning and key frame right and set the value to 100% now go a little bit further and change the value until
you can see the full text in my case it was 28% easy ease and now you have a nice typewriter animation oh no hold on a sec I am not doing this [ __ ] again yo what's up sorry but I'm afraid that my time here is done you barely did any there isn't much to show here most of his backgrounds are very simple usually just a plain black or white color however every now and then he creates a moving gradient so open after effects create a new composition and a black solid apply the Four
Color gradient to the layer now hold ALT key press the key frame clock for .1 and write this in it will be in the description of this video if you want to copy paste no [ __ ] it's in the description of this video where else would it be okay man relax let me cook make it quick I'm tired all right sorry about that let's continue you need to do this for all four points so hold ALT key on your keyboard and press the key frame clock for all the other points and put in the
code from here all you have to do is select your colors I will stick with Isaac's color palette and choose a yellow orange combo and maybe a Canan color you can also increase the BL to make it look nicer or smoother you can also add noise and increase it slightly make sure you uncheck color noise though and choose a very low value for the noise open up after effects create a new project new composition rename it to formula animation and copy my settings so the biggest editing challenge is to create these crazy map animations that
Isaac seems to like showing off in all of his videos well let me tell you this recreating it is actually easier than you think before you actually create these Maps you're supposed to make a sketch of how you want it to look like I use the free online whiteboard to make a rough drawing so I have some guidance start by writing your text and adjusting it accordingly I use monster at black but you can use any of these fonts which Isaac uses download links are provided including visualizer club which is where I get all my
assets from and how this video was made now pre-compose the layer make a 3D and apply gradient ramp to it now open the text composition duplicate the layer and separate the words by deleting the second word on the top layer and then the first word on the second layer make the top color orange and the end color yellow change the positioning of the anchor points to get your desired look next apply deep glow to the layer 250 radius8 exposure 60% threshold and 25% spread I recommend hiding all the effects after you've added them to prevent
lag as we create the animation now import the brush Strokes from the folder make it 3D now apply a gradient ramp to one of the layers make the top color red and the end color a light orange we will adjust the points later now copy this to all the other layers then use the mask tool to cover each brush stroke so they each have their own mask we need to do this in order to animate them position them in the right places mess around with the size and the rotation until you're happy with the look
you can also duplicate and flip the brush Strokes if you need more I used a total of seven next adjust the anchor points we want the top to be red and the beginning to have a slight orange so simply move the Anchor Point for the orange color near the letters and the red Anchor Point at the top of the brush stroke do this for all of them next apply regular glow to one of the layers change glow colors to A and B colors threshold to 40% and glow radius to 25 change both color A and
B to an orange L yellowish combo but more on the orange side copy the effect and paste it onto the other layers if you want a background glue like Isaac then right click go to layer Styles and apply outer glow change the color to an orange SL reddish color size to 70% and range to 880 % if you like this copy and paste to all of them I feel like this is too much red so I will reposition the orange anchor points once again create a 3D camera select the cursor tool and zoom out you
should also create a black solid and place it under everything now create an adjustment layer make it 3D and apply the Mosaic effect change the values to 200 and create a mask on the area you want to blur in this case we want to blur the edges like Isaac now select the adjustment layer click M and change the mask feather to 80 directional blur and change the value to 15 you should get something like this now duplicate and position the effect over the other layers I recommend changing up the direction of the blur and keeping
it slightly different for all of them if you want to smooth out the edges just keep increasing the mask feather until you are satisfied you can also increase the Mosaic value if you want let's blur I'll keep everything the same for now if the background becomes black around the brush Strokes you need to increase the Zed value slightly when I change mine to five it fixed this problem however manually change the value to five for all of them select the rounded rectangle tool make a shape with linear gradient and remove the stroke if you want
to use the same colors here are the color codes finally reduce the opacity of the layer to 50% and adjust the size plus the roundness of the shape you can also adjust the gradient by moving these points now copy this over six more times and write the text adjust the positioning and sizes as you follow this step now apply the Deep glow effect to your text copy my settings and paste it to all the other text layers now take a different brush stroke of your choice import these curvy ones and use a mask to separate
it always make your layer 3D add a gradient ramp and choose your desired colors position it how you want and adjust the anchor points add a regular glow and you can now copy paste this how many times you need to you can write whatever text you need by these brush Strokes once you that you get something like this all I did was blur it by adding Mosaic to each text layer and regular glow I also added the typewriter effect which animates the text automatically then I selected the key frames and pressed F9 to easy ease
but we aren't done yet I'm going to teach you how to animate everything else just like Isaac step one the camera select both the position and orientation and create a key frame move those key frames a few seconds forward and create another set of key frames now grab this tool and zoom in until the text covers the majority of the screen next change the Zed value to 28° select everything press F9 and go to the graph editor push it to the left and your graph should look like this see it's very easy step two the
main text download animation composer 3 from the folder I've provided you with once you follow the instructions you will find it in the window tab simply select your text and under transitions text layer animate words apply the flickering decode effect now let's animate the brush Strokes first hide the camera layer so it's easier to navigate and see everything all you have to do is create a mask path key frame select your layer and click M create a new key frame and push it forward a second or two create another one press and hold the pen
tool to select the convert vertex tool while holding control on your keyboard move the mask to the direction where you want it to start animating and make sure to select the mask path down here or you won't be able to move the mask properly since I moved mine to the right it will start revealing from the right side then you want to select the key frames press F9 to easy EAS go to your graph editor and push them to the left so it starts fast and slows down towards the end repeat these steps for all
the rest now for the text move the key frame closer if you want the text to appear faster or further if you want a slower animation this is completely up to you the only thing that's left to do now is apply the electric Elements which is very easy import the ones from the folder into the software and open the composition double click on the final comps here you'll be able to see and change the colors of the electric charges if you don't don't like any of these then import the other ones I give you a
lot to choose from choose the ones you like and position it accordingly I used one in the beginning and four others on the sides I also did this light sweep like Isaac did in his most popular video to do this you have to create an adjustment layer and apply the CC light sweep effect and copy my settings create a key frame for the center where you want the animation to start now select this Anchor Point and move it to the top right of the screen screen The Sweep will start from here now move a few
seconds further and then grab the Anchor Point and slide it across to the bottom left of the animation also move the adjustment layer to 1 second so it doesn't start right away scale up the adjustment layer so it covers the entire frame hold the key frames press F9 go to the graph editor and copy My Graph now I'm going to add the rest of the electric elements you can watch me do it here I ended up changing the values again for the light sweep effect I also added these shiny Sparkles which I downloaded from YouTube
I imported them used the key light and then use this color pick tool to remove the green color then I just placed it behind the text you're all done and this should be the final result wait stop this animation was by far the hardest and most complicated to replicate so I recorded a full separate video breaking down how I made this animation all you need to do is request it through the link provide your email and it will be sent to you with the original project file now you might think the video is over but
it's only over when I say it's over it's over Anakin I have The High Ground you underestimate my power so don't go anywhere just yet and enjoy my own Isaac style 30second Recreation video of his intro you can also get this project file for free in my Discord my shorts channel has over 20 million views and many viral videos but my recent shorts aren't really doing well most of them stuck after getting that first a few thousand views again and again and again I need to break this cycle so in this video I will try
to create a short completely from scratch get at least 1 million views and show how much money I made from it let's dive in what day is it it's August 7 2023 we need to find [Music] Isaac time is now get your he druming there's a re coming


![2.5D is Incredible [Krys Polygon's Guide to 2.5D]](https://img.youtube.com/vi/e8ZW3WPgxOI/maxresdefault.jpg)