So, you watched three ICT videos, drew a box, waited for price to sweep liquidity, took the trade, and boom, price slept you harder than your Asian mom with a sleeper. Trust me, I know what that feels like. Let me guess.
You thought that when you start trading smart money concepts, you'll become the smart one. Nah, bro. You are the liquidity.
You ain't trading with SMC. You're just sucking SMC. Smart money.
You're not failing because of your strategy. you are failing because you still don't understand how you are being trapped. So in this video I'm going to be exposing the truth about inducements liquidity baits and how majority of the SMC ICT traders are just walking into the market like walking to the slaughter house.
Here's the big problem. Most traders that get into SMC or ICT and then they start thinking, "Oh my god, there's a order block right here, man. I'm going to draw the order block and then I'm going to wait for liquidity to be swept and then I'm just going to enter for the trade.
" But they miss the inducement which is the baits before the real move. So in theory they are actually doing everything right. Right.
They understand the concept. They know how to draw the zones and identify liquidity but they don't understand the story behind price. They don't understand the narrative of price which is exactly why they keep losing.
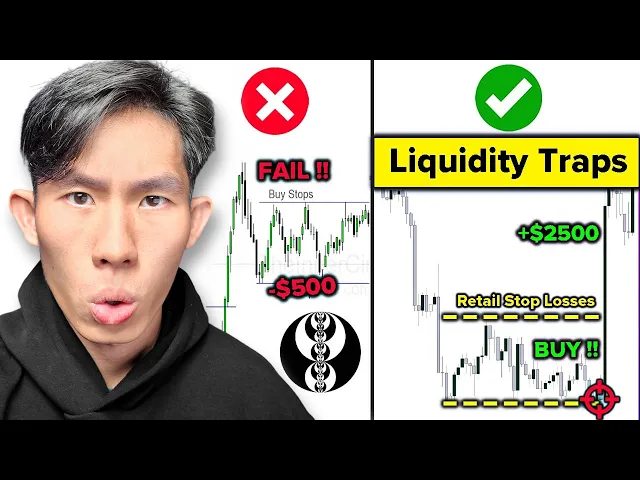
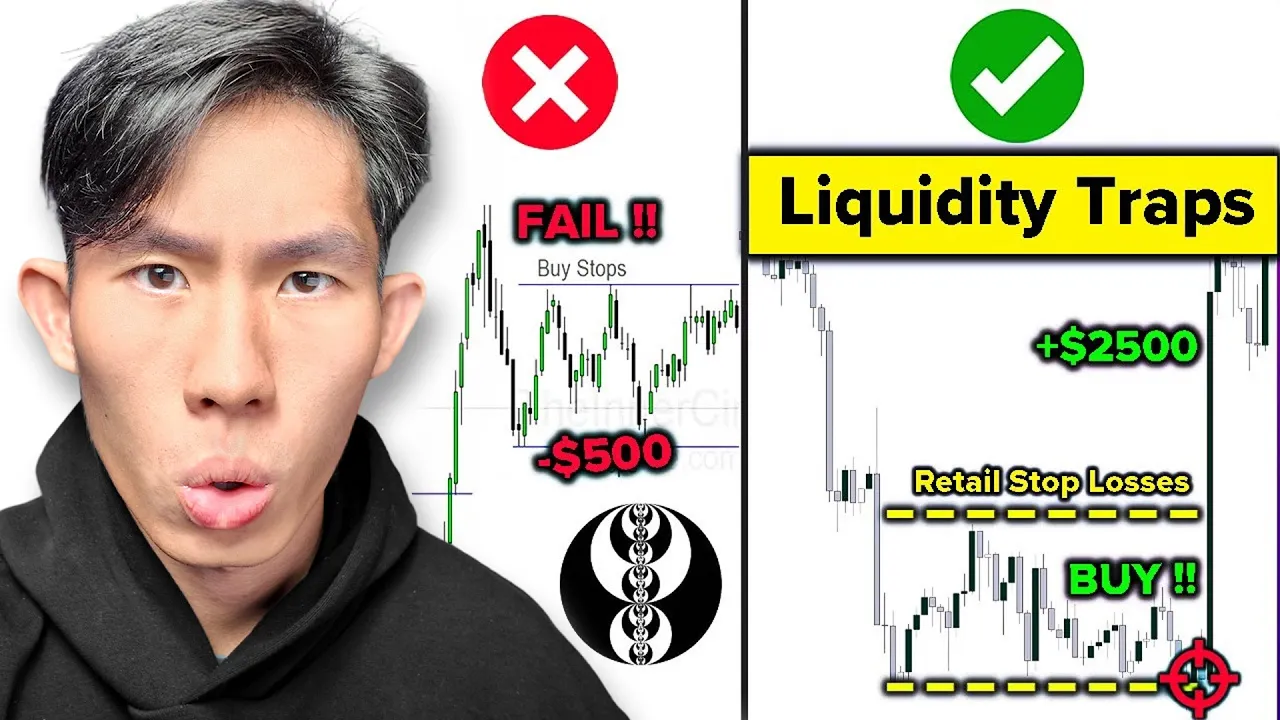
So what the hell is an inducement? Well inducement is a setup created on purpose to lure liquidity into a fake point of interest before the real one. What this means is that it's a trap laid out by the smart money to induce to seduce retail traders to enter early before the real move actually happens.
So in this particular example that we have seen just now you can see there's two point of interest that can be identified right here. This is the first demand zone right or order block whatever you like to call it and then this is the second demand zone that we have down here right this is the extreme demand zone. So in this particular case, this demand zone that we have up here, this swing low right here is actually just an inducement is to once again induce early retail traders to enter for a buy, right?
So in this case, a lot of retail traders, they see price mitigating this order block or demand zone to enter for a buy here, right? Maybe they see some liquidity sweep as well and then they place their stop loss below this zone or below this low and bam, they get stopped out before the real move actually happens. Why?
Because they got induced. They got induced. They got seduced into entering early for the trade.
Now, in order for you to spot inducements, you need to understand liquidity baits. Liquidity baits are pretty much like the traps in terms of patterns. Okay.
So, inducement is basically the trap, right? The liquidity bit is pretty much like the bait used to induce the retail traders. So, in this particular case itself, right, the liquidity bit will be this swing low right here.
And in order for you to understand how to spot liquidity bits, you need to first understand liquidity, right? Buyside liquidity and sellside liquidity most importantly. Now, before you can understand what are liquidity bits, let me explain to you how liquidity actually works.
There's two types of liquidity, namely buyside liquidity and sellside liquidity. So, buyside liquidity, it's pretty much a combination of retail buy stops and retail stop- losses. Okay.
So in this particular case that we have right here, this is a supply zone which was created upon a bunch of selling pressure, right? Whenever price comes up there, it it always gets rejected and pushed all the way down, right? So in this case, we know for a fact that a lot of retail traders who are entering for a sell at these swing highs, at these supply zones, they're going to be placing their stop loss above these highs itself, right?
But we also know that on the other side, we got retail traders who are interested in trading the breakouts, right? So people who want to trade the breakout of the supply zone, they want to enter for a buy. So as a result they're going to be placing their buy stop orders.
So once price take out this supply zone or resistance level whatever you like to call it they will be triggered into entering for a buy position itself. Right? So there is going to be retail buy stops and retail stop losses above this supply zone above this swing highs that we have over here.
Okay. So on the other hand right we got the demand zone over here right which is a zone where price has respected multiple times right where we know for a fact that there is demand at this point of time just pushing price up preventing price from actually breaking past this floor. So as a result once again all the retail traders who enter for a buy at these swing lows at this demand zone they're going to be placing their stop loss below the low itself right which is why once again there is your stop losses and then there is also going to be the breakout traders who want to sell upon the breakout of this demand zone right so as a result they're going to be placing the sell stop below this low itself.
So a combination of the buyer stop losses and the sell stop orders will give us sellside liquidity. The reason why it's called sellside liquidity is because of the fact that when these retail stop losses, right? When all these buy orders get stopped out, they get converted into sell orders, right?
Because in order for you to buy, you have to to sell, right? Someone have to sell it to you. So these retail stop losses become sell orders.
Same thing, these sell stops will also be triggered. So there's going to be a bunch of sell orders that is being triggered once price actually came down here and sweep all the sellside liquidity, which is why it's called sellside liquidity. Now to be completely honest with you, the naming doesn't matter.
You just need to understand that there is available liquidity sitting above every swing high, above every supply zone and also below every swing low, below every demand zone. So now that you got like a basic understanding of liquidity, liquidity bits are basically where the liquidity is hiding. Okay.
So in order for them to actually lay a trap, you must understand that they must first lay down the baits, right? The baits is pretty much where all the liquidity is hiding. So in this particular case itself, this is a new swing low that led to a break of structure, right?
So since this is a swing low, we know for a fact that that is going to be some sellside liquidity below this low itself, right? So that's sellside liquidity, which is why this is considered as a liquidity bait. So if you look at the right hand side, we also got like a swing low right here, right?
And before that, we even got equal lows. Equal lows right here. And a lot of retail traders when they see this equal lows, they enter for a buy right here.
Okay? But when in reality this is just a liquidity bit so that we can actually build up some sellside site liquidity below this lows itself. Now liquidity bits come in all shapes and sizes right.
Sometimes they are sitting below equal lows or equal highs just like this. Sometimes they are within trend lines right which means above all these trend line there is a bunch of stop losses as well. And then sometimes they are in im inbalance fields that price uses to trap breakout traders or early entries.
Right? So there's a lot of places where you can actually spot liquidity once you understand how to spot liquidity with your naked eyes. Trust me, it's like unlocking cheat codes.
It's the most powerful skill that you can develop as a trader. So in this particular example itself right over here, this was the inducement, right? This was the demand zone which uh is once again just to induce retail traders to enter for a buy early.
In fact, there's actually another demand zone right here once again to induce the retail traders. But once again, you must ask yourself where is the available liquidity. So in this case the available liquidity is actually over here right this is the swing low that is sitting near our extreme point of interest and once again there is pending orders sitting below this low right there is available liquidity below these lows.
So in this particular example, price actually went down there, right? Swept this liquidity that we have on the left hand side here on this inducement before pushing to the upside, right? And you must understand there is also another inducement right here, right?
Which is a little bit less obvious, but there is indeed an inducement here when price actually came down here, mitigated this point of interest and then it pushed up, right? So this is where once again all the retail traders, they want to enter for a buy early thinking that price is going to do this now. Okay?
Okay. And when this happens, they're going to be placing their stop loss below this low here as well. Right?
So once again, this is a liquidity baits. And then later on, price came down here, swept this low as well before the real move actually happens. So in this case, you can see there was multiple baits set in place by smart money to entice retail traders to enter too early to trap the breakout traders as well before the real move actually happens.
So this is where majority of the retail traders enter, right? And as a result they get trapped and then this is where the smart money actually enter. They enter on the second move.
They enter only once all the liquidity has been wiped out from the market. Now before we move on to the next trade example let me just quickly explain why you keep getting stopped out why you keep getting faked out and is usually d to one of these four reasons or any two or three of these four reasons itself. The first reason is because you mark zones without considering inducement, right?
And without considering liquidity bids and understanding where is the available liquidity, you are always going to be marking up the false zones, right? The zones that don't work, the zones where price just disrespect and then just continue moving to the upside or downside. And the second reason is you are entering too early on the first week instead of letting price show the real intention.
A lot of times you're just entering upon the mitigation of like a zone, right? So as a result later on price swap more liquidity before the real move actually happens. And once again because you lack patience you didn't wait for the market to actually speak to you.
You didn't listen to what the market is trying to tell you. Instead you were imposing your bias onto the market. You are rushing into the trade itself.
And the third thing is that you are relying too much on concepts blindly instead of narrative. Okay. So it's one thing for you to understand a certain concept.
It's one thing for you to actually apply the concept to the the market itself, but it's another thing to actually understanding how to tie all these concepts together, how to actually piece the narrative of the market, how the story of the market actually unfold. Like I always say this, you can have the strongest point of interest, you can have the most confluences, you can have the perfect entry setup, but if you didn't build the higher time frame narrative, you didn't understand what's going on on the higher time frame, your trade will not work out. The last reason is that you think every liquidity sweep equal entry but some sweeps are meant to trap you.
What I mean by that is that a lot of times you know we see okay liquidity sweep bam I'm going to enter for a sell right here but then later on price went up there swep more liquidity before push to the downside and then you enter for a sell here again and then later on price still go up there sweep more liquidity before pushing to the downside. So in this case you have already gotten stopped out like twice and you only realize on hindsight that these are actually inducements. These are actually liquidity bids.
These were not real liquidity sweeps right and by that time is already way too late. So it's all about understanding like I said inducements and also understanding the narrative of the market. Now let's look at another bearish example on US30 itself.
So in this example you can see there's a large amount of selling pressure right lots of imbalance right here. So as a result I've identified that this is my supply zone or order block right since there is so much selling pressure that we have on the left hand side. So right now we are assuming that price is going to continue bearish right.
So we are assuming that price is going to pull back to this point of interest and then it's going to go down just like this. Okay, it's just going to respect the point of interest and then just push to the downside. But we also understand that that will not happen without some form of liquidity sweep, right?
So price has to sweep some form of liquidity, sweep some inducement before it can actually do this. Okay. But in this case, if you look at the left hand side, there is no available liquidity.
There is no stack liquidity near the zone itself. Because in the ideal world, what we want to see is price comes down, pulls back and then go down even further. Right?
Because this tell us that there's available liquidity sitting above those highs. Then we can expect price to come down there or rather come up there, sweep this liquidity and then push to the downside, right? Because this will be our inducement.
But since in this case right here there is no available liquidity on the left hand side since it was just like a straight push down just like this. We want some form of liquidity to be built out on the right hand side during the pullback phase. Which means when price is pulling back just like this.
We want to see price create some form of available liquidity. We want to see inducement being formed right here during the pullback phase and then wait for that to be swept. Then I can look for my entry and short it all the way down.
So in this particular example, I'm not going to be doing anything until that actually happens, right? Until I get my point of interest mitigation until price actually come out of the supply zone and until the inducements get swept. Okay?
So at this point of time price is mitigated by supply zone and then price started pushing to the downside. This is where all the retail traders are getting induced into entering for a sell early thinking that this point of interest is going to work. Right?
So as a result they're going to be placing all their sell orders right here, right? the minute price mitigated at this point of interest or upon uh the the candle which mitigated the point of interest and then they're going to be placing their stop loss above the high itself and they can maybe target three or whatever, right? But little do they know this is just an inducement trap because you must understand it's not going to be this easy.
Price is not just going to respect your supply zone and then boom go to the downside unless it's like a super duper high property point of interest unless it swept some form of available liquidity. In this example itself, like I said, no liquidity has been swept. There was no liquidity right here, which means liquidity has to be built up right here.
And where is the liquidity? If I look at this right now, it's going to be right here. It's going to be above this swing high that was formed right here.
It's going to be above this supply zone right here because this is where all the retail traders who enter for a sell early, they're going to be placing their stop loss above this highs itself. Okay? And not only that, all the people who are trading breakout or trying to trade breakout, they are going to be placing their buy stop orders above this highs here as well, above this supply zone, right?
Because if price goes up there, they will get triggered into a buy order and then they can trade the breakouts. So this means that there is stop losses of sellers and there is also buy stop orders which means there is your buy side liquidity sitting above this highs here itself. So this is actually the inducement.
This is actually the liquidity baits. Which is why as professionals not retail gamblers, we are very patient. We are waiting for this inducement to be swept before we actually enter for the trade itself.
Right? So we wait later on price came up there. Guess what?
Swip the inducement right here. Okay? You can see sub little sweep before price start pushing to the downside.
This is where you can actually make your entry and then you can target three R after placing your stop loss above the high here itself. Right? So maybe just like this quick little three R as simple as that.
And let's see how this trade play out. They don't price go down. Smash your TP.
As simple as that. As elegant as that you can see all we did was that we identified where was the available liquidity right? Since there was no liquidity on the left hand side it has to be appearing on the right hand side.
And then once we actually identify it, we waited for that to be swept and then we make our entry. So that patience actually allowed us to make a ridiculous amount of profits right here. Now let's look at the next example in a bullish scenario.
So in this case right here, we have identified that this is indeed a demand zone that led to a break of structure, right? Price actually came up there and actually take out this previous swing high that we have right here. So our expectation is that price is potentially going to pull back to this demand zone, respect it and then continue going up and create like a new higher high.
So in that case this will be the new higher low being formed. But once again we are asking ourself where is the available liquidity? You always want to ask yourself that question before you actually look for your entry.
Where is the available liquidity? So in this case we ask ourel is there liquidity being built up on the left hand side during the continuation phase. Right?
So let me just go down to the 5m minute time frame to show you uh for all the blind folks out there right who can't spot liquidity. So over here what happened was that price goes up pull back and then go up even further. So we know that is available liquidity sitting above this or sitting below this swing lows itself.
In fact this is not a swing low. This is like a equal low right here. So guess what liquidity right easy sellside liquidity sitting below these lows itself.
Since we have spotted our inducement now this means that we are expecting price to sweep this liquidity and then push to the upside. Right? But in this case look at what happened.
Price actually came down here sweep these lows right here and push up. But there was insufficient liquidity. There was not enough buying momentum, buying pressure buyers in the market for price to continue to go up and actually take out this high to create like a new higher high which means it needs to search for more liquidity.
It needs more liquidity for it to fuel this continuation move to the upside. So where is smart money going to find more liquidity? Well, via inducement traps by placing more liquidity bits in the market.
So in this particular example right here, since this liquidity has been swept, we can indicate that with like a line just like this telling us that okay, we did got a liquidity sweep right here, but it was insufficient. So after this liquidity sweep price actually started consolidating a little bit over here and has tried to actually go up but once again there was insufficient liquidity right and then later on just came back down right so supply has still overpowered demand at this point of time so the best are still in control of price right so the bulls haven't managed to overpower the best yet so in this particular scenario itself like I said you must ask yourself where is the next available liquidity so in this case we have identified that there is a consolidation right here but if you look even more closely that is actually your equal lows being formed right here. Right?
So there's actually some equal lows being formed right here. Which means once again all the retail traders who got induced over here, you know, into thinking that oh price is going to go up right now and as a result they enter for a buy early here, here and here. They're going to be placing their stop loss below this lows itself, right?
And also remember the breakout traders who are wanting to to to trade like this um breakout of like this support level or this demand zone which means they are going to be placing their sell stop orders below this low itself. Right? So once again there's a ton of sellside liquidity sitting below this lows waiting to be swept.
So understanding that we know for a fact that okay there's a very high chance that price has to come down here sweep this final liquidity before it push to the upside. So once again we're going to be very patient and wait for that to actually happens before making any decisions. So in this particular example here if you look at the left hand side we can also draw like a refined demand zone.
So earlier on we have draw our 15-minute demand zone and right now we are on a 5m minute time frame and I can actually draw another demand zone right here. Right? This will be the extreme demand zone that price has to hold in order for it to remain bullish because this also ties in with our extreme 15minut swing low that we have identified right here.
Okay, so that is indeed the last line of defense and also available liquidity stacked right above it. So this is not a coincidence. So this means that if my hypothesis is right, what's going to happen is that price is going to come down here, mitigate this extreme demand zone, swept the available liquidity below all these inducements right here, all the sellside liquidity, grab all of that and then push to the upside and that is the move that I want to be a part of.
So let's test out our hypothesis to see whether we are right or not. So later on price come down here. Okay, swept the liquidity that we have below this low here but it has not mitigated the extreme zone, right?
and then it started pushing up here and later do we know that is just another inducement trap. Later on price came down here swept the available liquidity below this swing low that could be really indeed that last line of liquidity that needs to be swept tap into our extreme point of interest over here. Right?
So this is where I would potentially look for long for longs right here and then place my stop loss below the liquidation candle or even like below this demand zone and then look at what happened next. on price went up there and just magically just goes up once again because all the liquidity, all the inducement has been swept already. It's really really that simple guys.
So guys, let me ask you this. What happens if you actually miss this entry right here? Okay, so let's say today you forget to check the charts, right?
So as a result, you didn't manage to get in right here. You didn't get in at the perfect timing. In that case, what is the next best time to actually get in?
Where is your re-entry? Where is your next entry point? Well, it lies in the point of liquidation.
The point of liquidation is basically the point of interest that was created after the liquidity soup. And that can be found by identifying the liquidation candle. So in this particular case itself, we have identified that this is the liquidation candle, right?
This is the candlestick that led to price, you know, sweeping all of this insane liquidity. So we can actually mark that up as our point of liquidation, right? The demand zone that set liquidity.
And now since we missed our entry right here, our next best entry point will be when price actually mitigate this point of liquidation, which would be right here. Okay? So let's say you didn't get in right here.
Guess what? You just wait. Wait very patiently.
Wait for price to come back to the point of liquidation where the smart money is going to fill up the remaining buy orders which they failed to fill the first time around. And this is also where they scale into their position. And then you enter for a buy right here.
And then you place your take profit at 3 or whatever and bam, you wait for price to smash TP. You sit down with a pin colada sitting in the in Bali admiring the beautiful sea view and you enjoy your profits. As simple as that.
I just don't get why so many trading gurus, SMC traders, ICT traders try to over complicate something that is so ridiculously simple. I always say this, if you cannot explain something complicated in simple terms, you don't understand it enough. The reason why I can explain all of these complicated concepts into a way where like a 5-year-old can understand is because I truly understand this stuff.
I have a insanely deep understanding of all of these concepts that I'm teaching you today, right? Because I have enough skin in the game. I've been doing this for so long.
I actually trade for a living and I'm so passionate about this So with that said, understand that smart money concepts, ICT concepts, they aren't wrong. They works. They are indeed profitable.
If that's it, just understand that smart money concepts, ICT concepts, they aren't wrong. They are just misunderstood. All of these concepts actually work.
They are profitable, right? But it just depends on how you interpret it, how you implement it, how you apply it, how you combine it with the narrative of the market. And at the end of the day, the market doesn't respect your zones.
It respect two things and two things only. And that is liquidity and manipulation. Which is why if you can understand and you can master these two concepts, o, you're going to be printing money from the markets every damn day.
All right. So, here's what I want you to do next. I want you to go and review your past 10 losing trades and see whether they were inducement traps, whether you were the victim of liquidity.
Because trust me, I have a very good feeling about this. But majority of those losses are either due to because of the fact that you couldn't spot liquidity, you couldn't spot this inducements and you entered too early or too late or because of your emotions. And only when you carve the time out to go to the mental lab and actually review your losing trades, your shortcomings, your weaknesses, then you will be able to develop strategies to conquer these losses, conquer these mistakes and actually get better as a trader.
Right? Once you actually take the time out to understand yourself and all you know the the stuff that doesn't work within your trade plan then you can get start getting better. You can start making less mistakes and actually become more profitable.
But it all starts by doing the selfwork by confronting your losses by learning from your mistakes and your losses. All right. So if you have found this lesson valuable just understand that whatever I've taught you today is just 1% of everything I teach inside 1% club.
is just one of the 500 plus in-depth training that we have inside the 1% club. That is where I really go deep dive into every one of these concepts and show you a ton of chart walkthroughs and examples and even trade live with you. So you can see me applying these concepts in real time in live market conditions.
And that is also where you will get access to my personal mechanical trade plan which I use on like a daily basis to make six figures a month. my 10 entry models, my systems and processes, you get everything in there and so much more. So, if you want to get mentored by me and trade live with me, click the link in description, apply to join the 1% club.
And if you really enjoyed this video and you want more raw market mechanics lecture just like this, go down to the comment and #market mechanics. And as always, remember, you are just one trade away.