AI video is quickly becoming a must-have skill. Whether you're a business owner, a creator, or someone who wants to bring ideas to life, you'll end up wishing you learned this skill sooner. And that's exactly why I made this video to give you a clear, simple starting point instead of the chaos most beginners fall into.
By the end of this video, you'll know the basic building blocks of AI videos, the best tool to make them, and how to turn your ideas into videos without any prompting knowhow. Before we get into the steps, you need the basic theory and fundamentals behind AI video. Every AI video is made in two basic ways.
The first is text to video and the second is image to video. Both are powerful, but one of them gives you way more control than the other. Text to video is a simple one.
You just describe what you want in text and the model creates a video from scratch. It works well, but the downside is relying on the tools imagination. If you want the video to look a very specific way or follow a certain style, text only can be a little unpredictable.
Image to video is the method I personally prefer and the one most people use when they want their videos to actually look the way they imagined. Instead of starting from text, you start with an image and the AI animates that image into a video and inside image to video. Different models let you control things in different ways.
Some models only ask for a single image. You give them that one picture and they take care of the rest, but some models give you a lot more control. Instead of just choosing the first frame, you can decide exactly how the video should end, and the AI fills in everything in between.
This lets you make content of any length by generating clips that end in a set way and then using that ending as the start for the next one. You can connect them perfectly with zero cuts. This is the part where most beginners think things get complicated, but it's actually a lot simpler than it looks.
If you like the more controlled method, where everything looks how you pictured it, you'll need to know how to make good images. And that might sound like a whole new skill, but image generation is way easier than you think. You just need a few easy tricks to make your images look professional, and I'll show you those so you don't get stuck.
At this point, you're probably wondering how you're supposed to put all of this together. You've got different ways to create content. Tools that behave differently, and each one seems to work in its own way.
And honestly, this is where most beginners give up. Not because it's hard, but because access is a nightmare. Every popular tool usually sits on its own separate website.
Some of those websites are blocked in certain countries. Some are painfully slow and some barely ever update or charge way too much. And when you're jumping between all of them just to try and learn the basics, everything becomes confusing and it slows you down.
That's why the best way to actually start creating consistently is to use an all-in-one platform that puts everything in the same place. But to be completely honest with you, after testing pretty much every all-in-one tool out there, most of them were terrible. The interfaces were confusing.
Most of the good models were missing. The pricing made no sense, or they just lagged out and never gave out the result. There was only one platform that actually worked the way it should, stayed updated with the newest models, felt clean to use, and made making AI videos 10 times easier, and that place is Open Art.
So, now that you understand how all of this works, let me show you everything step by step inside Open Art, so you can start creating your own AI videos in no time. When you click the Open Art link and sign up, this is the window you'll see. On the left side, you have all your tools, and the ones we're going to use today are the video section and the image section.
If I open the video tab and hit text to video, it takes us to the first way of creating AI content, which starts from text. Before we generate anything, we need to talk about prompting. And don't worry, this is way simpler than most people think.
A lot of people think you need some kind of expert prompting skills to do well with AI, but you really don't. You only need to understand a couple of basics. And once you get those down, everything becomes 10 times easier.
Think of a good prompt like giving instructions to a camera operator and a director at the same time. You just need to explain what the video should look like. what is actually happening inside the scene and any details that absolutely need to be included.
For example, if I write something like a woman sitting in a cafe talking to the camera about her morning routine, the generator understands the location, the subject, and the action. But if I write ultra realistic close-up of a woman sitting in a sunny cafe, steam rising from a cup of coffee in front of her, speaking casually to the camera about her morning routine, you can see how the second option gives the system a clearer output, clearer setting, and better focal point. And the better the clarity is, the better the output becomes.
Another thing that matters is describing movement and behavior. Most beginners forget this part completely. So if I write a man walking down the street, the video generator will guess what that means.
But if I write a man walking down a busy street while looking around, adjusting his jacket, and talking as he walks, suddenly the clip becomes way more lifelike because the generator actually has something specific to animate. And it's the same for mood and style. If you want something calm, you say calm.
If you want something chaotic or energetic, you say that, too. The video generator follows your tone almost exactly. And now going back to what I said earlier about you not needing to know much about prompting at all.
I actually built something that makes this entire part effortless. I built a custom GPT for you called prompt architect and I'll put the link down below. Once you open it, all you have to do is tell it two simple things.
First, tell it which model you want to make a prompt for. I will write make a prompt for Sora 2. And then just tell it the basic direction of your video.
I will go with a realistic video filmed by a Gen Z influencer doing a day in the life vlog in Bali. And it builds the full optimized prompt for you automatically. You don't have to think about structure or formatting.
So with that prompt ready, we can go back to Open Art. In the prompt field, we simply paste it in. Then in the model selection area, we pick the one we want.
Open Art has all the newest high-end models, and each new release has a tag so you know what's been added. They also drop small updates and short guides whenever a new model gets released, which makes everything way easier. For this example, I'll select Sora 2.
Choose the pro version of the model. Set the resolution to the highest available. Set the duration to 12 seconds.
Make sure the aspect ratio is vertical since we're making a UGC style video. And then click create. Once our video is finished, let's take a look at it.
>> Good morning from Bali. Woke up to the sunrise at the villa and immediately brewed a coffee. Nothing better than this view while sipping it.
Heading into town on the scooter. The streets are already alive. Markets, incense, so much color everywhere.
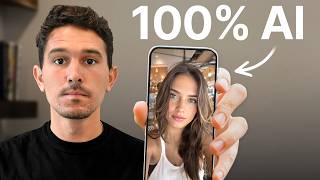
Spent the afternoon at the beach with friends just swimming. >> And honestly, it looks amazing. This is exactly what I meant earlier when I said you often can't even tell if something is real or generated.
Everything from the girl's voice to the environment to the general day in my life aesthetic looks incredibly convincing. Now, let's test the method I personally prefer, which is starting with an image. If I switch to the image to video tab, another reason I love Open Art.
It's super easy to move around between different setups. You can see it immediately asks us to upload an image first. So, before we can animate anything, we need to actually go create that image.
To do that, we head to the image panel on the left and hit create image. This is where you generate your images and you can pick any option you want from the selector at the top. Open Art offers all the newest image models.
And to give you a quick overview, here are some of the ones I personally think are best. Cream is a great all-around model. Nano Banana and its Pro version are amazing for editing existing photos.
The entire Flux lineup is very strong and performs well across almost every type of image. And one thing most people overlook is Open Art's realistic model. This one is trained to make people look human instead of like AI dolls, which is great for UGC content.
UGC or usergenerated content is a style of ads or content that's filmed in a way where you can't tell it's an ad. It's made to look like a casual video filmed by a creator and it's hands down the highest converting ad style on the internet simply because it feels real. For this example, I'll be using a model called Nano Banana Pro.
It works perfectly for what I'm about to do. I have this screenshot from the iconic Old Spice ad and I also have this image of Ed Sheeran. So, all I'm going to write is change the man in image one to the man in image two.
This kind of image editing doesn't require any complicated prompting. You just tell the model exactly what you want it to do. Then I'll click generate.
And here is the result. This looks exceptionally good. And this is exactly what I meant earlier when I said these models have gotten insanely powerful.
Next, I'm heading back to the original old spice ad and skipping forward a little bit here. The character is a little closer to the camera. So, for this next shot, I'll remove the previous upload, upload a new image, and write zoom in the camera a little bit.
And now we get a more zoomed-in shot that matches the original angle. Finally, I'm going back into the ad to the part where the actor lifts the Old Spice bottle. And for the prompt, I'll write make the man in image one be in the same position and holding the same bottle as the man in image two.
And here is the result. With all that, we now have our three images ready to be used in the video. Next, I'm going back to the video tab, switching to image to video, and in the model selection, I'm choosing VO3.
Here you'll see an end frame tag on every choice that supports this feature, so you don't have to open each one manually. I'll choose V3 and upload our original shot, the first one where Ed Sheeran is just standing normally and then upload the slightly zoomedin shot as the end frame. For the prompt, I'll write a single continuous shot.
The video begins with a man standing completely still in the exact pose. The camera performs a slow, smooth, constant zoom toward his face. He delivers this line.
Hello ladies, look at your man. Now back at me. Now back at your man.
Now back at me. I'll make sure the audio is turned on. I'll set the resolution to 1080p, the aspect ratio to 16 to9, and for video mode, it's important to select normal.
This part can be confusing because fast sounds better, but it's actually a lower quality mode. Normal is the high quality one, so that's the one I'm choosing. Now, I'll click create and let's check out the result.
Hello, ladies. Look at your man. Now, back at me.
Now, back at your man. Now, back at me. It recreated the ad extremely well.
The only inconsistency I have is the voice, but overall this is still a really impressive result. Now I'm going to show you the power of the end frame feature. By clicking this button, you'll see the previous end frame shift to the start.
For this next part, I'll use our last image, the one where the character is holding the bottle. For the prompt, I'm keeping everything almost the same, but changing the final line to sadly he isn't me. But if he stopped using ladies scented body wash and switched to Old Spice, he could smell like his meat.
Then I'll click create. Sadly, he isn't me. But if he stopped using ladies scented body wash and switched to Old Spice, he could smell like his me.
This one came out looking really good as well. But what I really want to show you is the full video stitched together. Let's take a look.
Hello ladies. Look at your man. Now back at me.
Now back at your man. Now back at me. Sadly, he isn't me.
But if he stopped using ladies scented body wash and switched to Old Spice, he could smell like his me. Here you can see how smoothly the two clips blend and how well the look is matched. This is an amazing result made with V3 inside Open Art.
Now for our final test, we're switching back to Sora 2 because I want to show you how to incorporate items, products, and even phone screens inside your generated videos. For this example, I have a screenshot of Uber's mobile interface. We're going to make a short UGC style ad for Uber.
So, in the prompt, I'm writing a natural late 20s business casual woman filming herself on her iPhone in a clean home office. She's holding up her phone showing the Uber app interface. She speaks quickly and naturally with small imperfections and handheld movement.
The exact script she should say is, "Uber made getting around my city so much easier. Booking rides became super fast. Comment the word fast and I'll send you a 15-day free ride voucher to try Uber yourself.
" Switching the model to pro and now we're ready to generate. >> Uber made getting around my city so much easier. Booking rides became super fast.
Comment the word fast and I'll send you a 15-day free ride voucher to try Uber yourself. And here we get a natural video similar to the first one with her holding her phone and Uber staying consistent. Another reason I love using Sora and Open Art is how well it handles small screen details.
But it doesn't just stop here. You can do plenty of other things inside Open Art. One of the features I actually use the most is the upscale tool.
A lot of AI content ends up in low resolution. And if you want it to look high-end, just click here and it takes you to a place that lets you boost the quality. I'm picking 2,160p full 4K.
And I can even choose the FPS I want it to run at. I'm choosing 120 fps, clicking enhance video, and after just a couple of minutes, I get back this extremely sharp, high-end looking clip. This is incredibly useful if you're posting your AI videos anywhere public or incorporating them into your own content if you're a creator.
Another feature I use all the time is the audio tool. Here you basically get access to a high-end voiceover generator that you can use for your own projects, for the AI content you've created, or honestly for anything that needs a clean voice over. In the panel, you can choose between tons of different voices.
You can sort them by accent, gender, age, and even specific use cases. So, for fun, let's test out one of the ASMR voices. I'll select Nicole right here.
And for the line, I'm going to write, "I'm fully AI generated. Isn't this crazy? " It's insane to think about this, if you ask me.
Inside the settings, you can adjust a lot of things. The stability setting lets you choose if the voice stays steady or has more life to it. I usually lower this to around 0.
2. The similarity setting keeps each result close to the last one, so I'm setting it to 0. 2.
Style exaggeration brings out more of the voice's quirks. So, I'm putting it at about 0. 6.
And for the speed, I moved it to one so it sounds more natural. Now, I'll click create. And let's take a listen.
>> I'm fully AI generated. Isn't this crazy? It's insane to think about this if you ask me.
>> This actually sounds really cool. The ASMR quality really shows and the line comes through in a really smooth way. So far in the video, you've seen how text to video works, how image to video works, how end frames let you create seamless shots, how to upscale your videos, and even how to add voiceovers.
So, if you've ever been confused by how AI content gets made, you now see how it all works. And the craziest part is that this is just the beginning. Once you understand these building blocks, you can make ads, sketches, product showcases, UGC videos, memes, animations, honestly, anything you can imagine.
Every idea that used to require actors, cameras, studios, or editing experience is now something you can create by yourself in minutes. But here's the thing you need to understand. AI these days is moving crazy fast.
New tools get released, updated, replaced, and improved basically every month. And anyone who waits even a few extra weeks ends up falling behind without realizing. Because once this becomes a common skill, the ones who never learn it are the ones who are going to feed it the most.
They'll be slower, less creative, and end up spending more money. And the gap between them just keeps getting bigger. And that's why having everything in one spot matters because the alternative is bouncing between 10 websites, guessing which model got updated, getting blocked in your country, waiting forever for things to load, and paying for multiple subscriptions just to move forward.
It's basically the fastest way to get confused and end up dropping it. Open Art is the exact opposite of that. It gives you all the major tools in one place.
It updates as soon as a fresh release drops, and the layout is easy enough that even a total beginner can sit down and get their first project done in just a few minutes of simple work. And for beginners, that difference is everything because when the process feels simple, you stay consistent and you actually make progress. So, if you want to start creating AI content the right way without the confusion and a bunch of tabs everywhere, hit the link now and you'll be working on your first one in the next 10 minutes.