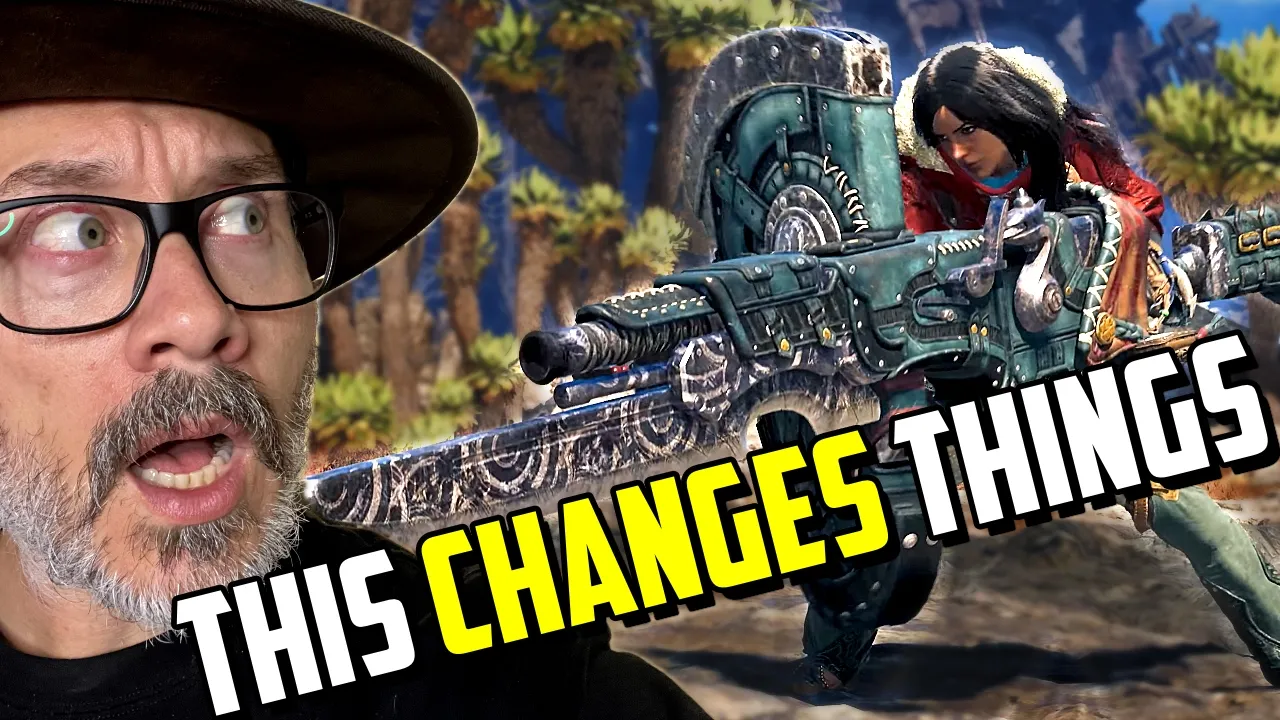
Ladies and gentlemen, today we're going to be talking about Monster Hunter Wild's Ascendants. I recently had an opportunity to go hands-on with the game over at the Capcom offices in the UK alongside a bunch of other content creators that you're most likely going to be hearing from today as well. This video I'm going to be doing my best to break down what that experience was like and all of the findings that I uncovered throughout my gameplay session.
I'm also going to be making separate videos breaking down the Gunlance experience in Monsanto Wild's Ascendants as well as what the base game feels like on the Nintendo Switch 2. So, if you guys are interested in both Monsa Wilds and Monsa Wilds Ascendants and you're not still subscribed, I would recommend that you do and hit the bell notification icon so that you're always notified whenever I'm going to be putting out a new Monster Hunter Wilds Ascendance video because there's going to be quite a lot of them. Now, before we begin, it is important to mention that this video is sponsored by Capcom because they offered to pay for my traveling expenses as well as my hotel stay.
And since I don't usually take that many sponsorship offers in the channel, I'm hoping you guys will be okay with me accepting this one. So, without any further ado, let's jump right in. We got to play the build that is going to be available this week at TGS 2026.
And in that build, there are three hunts that you can engage in. We got to play each of those hunts once, record that, and we're going to be able to use some of that gameplay footage. The very first hunt is a Chhatakabra hunt.
I'm going to be talking more about that one at the end of the video. The second hunt is an Araeta hunt. Now, Araketa is that new pack monster that they've shown, the flying one.
He's got a lot of uh pack members that kind of like are around him and whenever he does a special attack, they follow him and they follow through with his attack as well. kind of like the great isuchi if you guys have seen that. I'm going to be talking more about that specific monster.
Really, really fun fight. Uh, and then the other quest is the returning elder dragon that by the time this video goes live will likely have been announced at Tokyo Game Show 2026, and that monster is Teostra. So, Teostra we fought in the Oil Well Basin.
So, the only hunt we actually got to do in the Skybound area, which is the new area, was the Araeta Hunt. So, let's start by talking about what it was like to hunt in the Skybond area. This is the new map that is going to be available with Ascendants.
This is an area that is constituted by multiple floating islands that are connected by strands of the Drgon Torch, and there's a bunch of updrafts that allow you to navigate from island to island. There's a lot of verticality, but in terms of actually navigating the area, it still kind of boils down to just jumping on your sacred, pressing up on D-pad, and the sacred will take you wherever you want to go. You can manually control the sacred just like you were able to control it in previous maps, but I don't know how pleasant that is due to the limited time that we had for capture.
I mostly tried being efficient just like pressing up on D-pad. There is a little bit of difference navigation. Like I felt that if you were to control the glide cuz there are a lot of sections where the the sacred will actually go into a glide.
Whereas I feel that in previous maps in base monster Hunter Wilds, the sacred doesn't actually use the glide functionality all that much whenever you're on auto pathing to the next monster. And here it uses that a lot more because it quite simply has to. And you can also press R1 while you're gliding and he is going to like glide faster.
He's going to like start going downwards a little bit faster. I also managed to fall off the map once. I'm not sure if that's going to be something that is going to be in the final version of the game.
Do keep in mind this is still an early version that is just, you know, made so that people can check it out at Tokyo Game Show. But overall, the navigation was uh pretty much what you would expect if you guys have played a previous map in Monster Hunter Wilds. I enjoyed it.
I thought that the uh overall look and feel of this particular zone felt like a mix between Scarlet Forest because it has that lush vegetation. There's even certain sections that have little water ponds. It doesn't have as much water as you have in the Scarlet Forest obviously, but uh it was Scarlet Forest and the Waria ruins because some of the the more caveike sections look like they have that Wian architecture and all of that stuff.
I fought both Araketa as well as a Nurcilla because there was a Nurcilla in the map and I figured, hey, let's go whack on this Nurcilla for a little bit with a charge blade to see if I can figure something out. Guess what? I wasn't able to figure much out from the charger blade quite simply because there are too many changes uh for you to be able to figure out in like a short little 20inut hunt against arettas.
That that's just the way that it was. As a matter of fact, I wasn't even able to finish the hunt against the Arketa because I was just trying to focus on learning new moves for the gun lance and learning what I could of the charge plate and just end up being a bit of a mess for my recording session. But it is what it is.
The thing is, I don't think we had access to the entirety of the map. Like maybe some areas of the map were still locked off. I'm not saying that I went off exploring because again, time limit limitations in terms of recording and all of that stuff.
Uh throughout the entirety of the quest, I'm pretty sure that the zone was set to plenty in terms of like the the weather conditions. Uh I'm not sure what uh the other two uh situations are going to look like, the inclemency and the fall. We just know what it looks like from the plenty.
And it is very vibrant, very nice looking, very pleasant uh to hunt in. So I like the sky boundary, but there's not much else to say at this point. I'll be curious to see what the lore justification is for it to be floating up in the sky with the dragon torch stuff linking to it and all of that, but we'll see more about that in the final game.
So, uh, one of the new mechanics that I can tell you guys about is the new weapon swap. So, previously, if you wanted to swap your weapons, you had to go ahead and mount the sacred. So, you you would basically press right on the D-pad, sacred would come up, your character would mount the sacred, then you would swap weapons.
Now you don't have to do that anymore. Whenever you press right on D-pad, the sacred runs past you and your hunter automatically swaps the weapons without actually mounting the sacred, which as you can imagine is going to increase your overall speed, which seems to be one of the main themes of Monster Wild's Ascendants. You have the boost bracer that makes you attack faster, that makes you be able to do more offset and counter things that the monster is doing.
So swapping weapons is also going to be much faster this time around. you'll be able to swap weapons more efficiently if that is something that you're keen on doing and likely I can imagine a lot of people doing a lot of stylish stuff with this particular option. We shall see how that pans out though.
So now let's talk about the Araketa Hunt. Incredibly fun monster to hunt. not the best monster for me to play when I'm trying to do like showcase of moves from my weapon and stuff like that because it is a very agile monster.
And while you can hunt it very efficiently, when you have proper knowledge of your weapon, it's going to be a little bit more challenging when you're just trying to figure out, oh, I need to try and do as many boost bracer moves as I possibly can, which caused me to actually not do that many and have to basically analyze my footage afterwards to figure out the button inputs that show up on the top right hand side and figure out what each of those do by looking at the trailer. But the monster itself is very, very fun. I really like the animations.
I like the concept that it's got like these sacks in its wings that kind of like propel it. It's not really jet. It's more like compressed air almost.
So, it uses the compressed air in the sacks that it has on his wings, which initially I was theorizing like, oh, it's going to be able to like call monsters with that cuz it kind of reminded me of the crew sack that it has on its neck that uses to summon other monsters. But no, the Araeta uses that stuff to basically propel itself forwards. The animations of it are really cool.
It is a reasonably challenging monster. I think that most people ended up not finishing that particular quest simply because we were all just trying to figure out moves from the boost bracer and all of that stuff. We're not actually trying to be super efficient as we're hunting this monster.
So, a lot of us didn't even finish it. Like, we actually ran out of time cuz the the quest has a hard limit of 20 minutes. That is not going to be the case for the final game.
I'm pretty sure that this is just specific for this build because it's a TGS build. They want to keep people rotating in and out, so they're going to limit how much you're going to be able to play the game. But, uh, really fun hunt.
Uh, like I said, I also fought Nurcilla in here in a cave like environment, which is why I said that the cavelike environment reminds me more of the Wian ruins. There were like some red crystals in the cave where I was fighting Nurcilla with the charge blade, which I don't know what that's about, but might be related to the whole dragon torch thing. the reason why the islands are floating up in the sky, yada yada yada.
But yeah, Araeta, really, really fun monster to fight. Uh, super happy with the design of that monster. I'm hoping that we see more pack monsters like that because the the follow-ups that the monsters do.
Kind of reminiscent of Great and his little minions, stuff like that. I kind of feel like that is the way that pack monsters should behave. Not kind of like Doaguma wherein it mostly seems like, okay, here's the alpha doaguma.
Here's a bunch of annoying things that are just getting in the way of you hunting it. The other monsters also give you like openings whenever they uh like they'll do these things. I think they're trying to screech or something along those lines and they'll get you know one of those temporary weak spots in their mouth that you can punish with a focus strike.
So, uh that'll be good for weapons that require doing focus strikes, like say the charge blade for instance. you're going to be able to charge your stuff off of those dudes quite often once you actually learn how to fight them. I thought that it was a very good pack fight and I'm hoping that it contributes to better pack fights all around rather than what we had in base wilds with Doshaguma and uh what was the other one?
The little strappy looking thing. I always forget the name of that one. You got her bombies.
They were bombies. I'm hoping that we get um more packs like Aretteta because that was pretty fun. The other one, Teostra.
Teostra, uh, is looking pretty freaking good. Uh, a lot of people were saying that he looked bigger than what they remember. I'll be honest, I'm terrible at identifying stuff like that.
This is the the reason why I don't do a whole lot of crown hunting. I think he looked really cool. I think that his music also sounded really good.
Uh, it sounded a little bit different in terms of like not the composition itself. The composition is going to be very, very familiar. It's going to be like kind of like what you expect from Teostra.
But I don't know, there was something about the way that it was uh mixed together, the the sound mixing and all of that just made it sound more epic than what I'm used to from previous games, which I think is a really good thing. One of my favorite things about this Teostra, so it it has a couple of new moves. It was kind of hard for us to identify because we got completely obliterated by it just 10 minutes into the hunt, which again, we had a time limit of uh 20 minutes.
We actually did this hunt as a group. So, it was uh me, Ark, uh the Eric's team, I don't know who was playing. I think it was 26.
And then there was uh Rage Gaming. I think Josh was playing or maybe they swapped. You know, the Eric's team and uh Rage Gaming might have swapped midways so that both of them got to play during the hunt.
But basically, I carted once and uh I think Eric's team carted twice and uh we we died 10 minutes into the hunt and that was our Teios experience. But Tostra has a couple of new moves. He has like this fire tornado that he has in front that he does in front of you which I think is new.
He kind of just like pounces the ground and then fiery tornado came up. That was a pretty sweet move. But one of my favorite things is that sometimes with Teostra, it could be tricky to figure out what exactly is the range of the nova.
And this time whenever he goes into the nova, they actually spread out all of the particle effects that uh he has, you know, from his usual like little blast particles that he leaves in the air that he then like, you know, bites down and everything explodes. uh whenever he goes to do the nova, the particle effects just spread throughout the map and clearly delineate what the range of the nova is going to be, which I'm like, this is really cool because it's better at communicating how far you need to be in the nova. So that rather you figuring out whether or not you need to time for a superman dive or you need to, you know, try to try to do something to deal with it, you can just like, oh, this is exactly the range that it has.
this is what I have to do to kind of like outrange it or I can't outrange it at times so I have to go try and do a superman dive so on and so forth. I thought it was really well done. I liked it.
Uh it was a really fun fight. We got completely obliterated. You guys might be thinking how did you guys get killed by Teios and it's like look in these builds you have limited armor skills.
Uh so even though in the footage that I showed you guys probably saw people with different armors that is just cosmetic. Everybody has the same like couple of skills which is some basic stuff like some I I actually don't remember what were the skills in there but it's like some speed sharpening, some quick sheath, the usual. There's no like attack ups or perfect guards or anything like that.
I was able to block some of the attacks that Teostra did, but I didn't quite figure out whether or not when you are boosted if you basically get guard up. I don't think you do, but I'm not a 100% sure about that. But while we're talking about boosting, I figure it is time to bring up the subject that likely a lot of you guys want to hear about, which is what was it like to use the boost bracer?
And the first thing that I would like to point out is I don't think any of us in that room figured out how to do boost bracer from neutral, which is something that frustrated me a lot because I spent a lot of time trying to figure that out. It's likely going to be like the simplest button input, but we didn't really have uh like you know the usual guides that you have in in in the builds where you can just go up and see ah the gunlands. Here's a couple of basic combos there.
Those things were empty. I looked I was like there's nothing here. That's just like oh yeah the gunlands it shells.
Like that was kind of like the description that was there and I was like oh you dirty bastards I want to know the moves. So, they don't actually they didn't actually show the moves um in there and we weren't told what the moves were. So, I spent a lot of time trying to figure out like if you guys notice in the trailer, there's a lot of times where you see like a little clip, a little snippet in the weapon trailers where it just goes like and he he loads the the boost bracer.
I wasn't able to do that. Now, I'm pretty sure that with the gunlands because the input for triggering boost normally uh just takes you into the boost driver attack for your specific weapon. So, each weapon has a boost driver attack.
The input is uh right bumper and then Y and B or R1 triangle circle. And when you do that, your weapon instantly goes into an attack. So, I'm pretty sure that with the gunlands, because I've been analyzing like the the stuff on the top right hand side, all of the little button inputs, I've been completely obsessed with looking at all of all of the things that I can do with the gunlance.
But, uh, I'm pretty sure that with the gunlance, if you're blocking, if you press the right bumper, you are going to go into boost mode while blocking, and it doesn't actually do the attack. But, I'm not sure because I didn't actually test it. I've just I just saw that button input show up while I was blocking.
So, I think that that is kind of how that works. One of the things that I tried doing was holding block and then doing the combo. So, R1, triangle, and circle.
And what happened with that is I basically triggered boost and then started doing wyvern fire because it's also the same input for Wyvern Fire except it also has R1. So, it's kind of like a weird thing. I I didn't really get to to figure out how that works.
But one of the things that I can tell you that it works like this is that it seems that most of the the boost bracer functionality comes from the follow-ups of what you do after the the boost driver. So, after looking over my footage and looking at the inputs and all of that stuff, I discovered that for instance, if I go into the boost driver, which for the gun lance, it's basically run forwards with your shield. Uh, I think you're blocking while you're doing that.
I didn't really get hit while I was doing the boost driver, so I'm not 100% sure, but because the shield is facing forward, you should be blocking. Uh, and then if you press circle, it's likely going to do that offset thing where he goes up and then he comes back down. If you press triangle, it's going to do something called assault drake augur, which is what I did most of the time where basically it's kind of like doing the focus strike and then at the end it puts a stake in the monster.
But like I said, I'm going to be breaking down this a lot more in the Gunlance breakdown video. But just to give you guys an idea, most of the times it seems like what you're going to be doing with pretty much most weapons in terms of the boost bracer is going to be you're going to trigger your boost driver and then depending on your next input, that is going to determine what is the next action that you perform. And that is for certain weapons because other weapons, curiously enough, like the charge blade that I actually played a little bit against Nurcilla, what seems to happen is that depending on whether you do the boost bracer while you're in one-handed mode versus two-handed mode, you are going to get different attacks.
And by the way, I wasn't able to trigger the little timer thing on the files, the autofile reload thing. I wasn't able to trigger that when I was playing with with the charge blade. Just to let you guys know, another thing that I noticed is that while you are boosted with the weapon that can block, if I'm not mistaken, every single block is going to count as a perfect block.
This is the reason why in some of the weapon trailers, for instance, the one for the greatsword, they show you boosting before blocking be and then it instantly goes into a guard clash with the greatsword on that specific trailer. I think that's what they were trying to communicate with that trailer is that hey, every time that you block while you're boosted, you're basically doing perfect blocks because they they even change the animation while you're blocking the the boost cuz the boost bracer when it's active, it's got little purple things, little purple fire coming out of it. Whenever you go into a block, it gets like orange fire indicating that like no, this is not just a regular block.
This is like a boosted block. And there's even an indication of that because in the top right hand corner, you guys will notice if you pause through the footage and stuff, you will see that there is an indication whenever you are doing something that is boosted. There's a little icon next to it that tells you, oh, this is a boosted thing.
And whenever you are guarding while boosted, the action is always highlighted as being a boosted action. Uh there's also stuff that you can do mid combo that triggers the boost bracer. So you might with the gunland I didn't really get a whole lot of these but I noticed that there was like a a combo that I was doing and there's something in there that said like press R1 to boost.
I'm not exactly sure what that does. Okay, because again very little time to record, but there are going to be combos that you're going to be able to do that are not just uh you know press right bumper Y and B and go into your boost driver. There's going to be other inputs that you will do that will take you into a boosted state and that is likely going to take quite a bit of experimentation to figure out how those are going to work.
Certain moves that you will do will straight up be replaced. Like in the case of the gunlands, the wide slash is straight up replaced for uh the forget. I think it's called double wide slash.
The one where it kind of like does that cross slash. Uh, but not only that, it also changes some of the combos cuz like for instance, when it comes to the gunlance, whenever you do a perfect block, then you usually get to go into a slam. And in here, whenever you do a perfect block, you go into that cross slash thing that I've said.
So, some of your combos and other weapons will also straight up change. So, maybe stuff that you did before after a counter, after a perfect evade, or whatever might be something different while you are boosted. Do keep that in mind.
Since I brought up guard clashes earlier, it is also important to mention that guard clashes actually refresh your um your gauge. They refresh your boost gauge. Not not to full, I don't think, but they give you like a little boost.
So, if you do a guard clash, whenever you finish the guard clash, that is going to boost your uh your gauge. It's going to increase the duration of the gauge. Another thing that increases the duration of the gauge uh from my experience is also focus strikes.
Whenever you do a focus strike and you happen to be boosted and you land that focus strike on a wound, that is also going to extend the duration of your uh focus gauge. Now, whether this is because of um because of the limited skills that we had in our sets or not, it definitely seemed like the ariceta didn't get wounded quite as often as uh other monsters in base wilds. What I mean by this, I suspect that in master rank, they're not going to let you just spam wounds non-stop.
Cuz like for instance, if I go and I fight like a non-tempered monster in base wilds right now, it's wound city, right? I'm going to be wounding it every 10 seconds and I'm going to be capitalizing on that wound nonstop. That's just the way that things work.
Especially because I also happen to uh run whatever is the skill that increases the the thing for wounding because I like it. I like wounds. No, it is what it is.
Uh so I think in master rank you're not going to get as many wounds as before. So do keep that in mind. Uh and an important thing is you can do your boost driver attack even if you're already boosted so long as you have another boost charge.
So the boost driver consumes one of those boost charges. This is stuff that we've already seen from the trailers. If you guys have seen the weapon trailers, you'll know that there's you can have up to three boost charges.
doing well in combat increases the the rate at which the thing charges. It also charges over time as well. So, it's not just hit the monster and it charges up.
It's like just over time, it also slowly charges up. And if you hit the monster with cool attacks, then it charges up faster. But once you use the boost driver, you're going to be in boost mode.
So, your attacks are going to be enhanced and all of that. If you have another charge while you're still in boost mode, you can refresh boost mode and do the boost driver attack again. So do keep that in mind.
Uh but yeah, that is most of the stuff that I can tell you about the boost bracers. So now I also wanted to talk a little bit about the Chatakabra quest and why I think that that is of particular importance. So Chatakabra quest is the tutorial quest that you get when you first start playing Monster Hunter Wilds, the base version.
So what does this mean? The reason why that quest is there is because they also introduce you to the concept of the boost racer during that quest. If you remember how that quest goes is you basically have a bunch of cutscenes.
Then you actually go and you have to fight against the chatakabra who's terrorizing the people from the the village, you know, the wounded sacred and all of that. Uh and so you go there and you fight that chatabra. Then eventually you get the screen that says begin quest.
You beat the crap out of it and then eventually chatabra leaves. As the Chhatakaba is leaving, a tutorial message pops up indicating like, "Hey, you now have a boost bracer. Here's how the boost bracer works.
" Now, here's the reason why I think this is of particular importance. What this tells me about their design philosophy for the game right now is that they are planning on including the boost bracer in the base version of the game as well. So that when you buy uh you know the the pack version of the game that comes with both ma Monster Hunter Wilds as well as Monster Hunter Wilds Ascendants, what is going to happen is you're going to have access to the toolkit from Monster Hunter Wilds Ascendants in base Monster Hunter Wilds.
There's the same thing that they did for Monster Hunter World Iceorn and base Monster Hunter World. I'm not a big fan of that. I feel like that was uh very poorly handled in Monster Hunter World because fundamentally now if you want to play Monster Hunter World without Iceorn, if you want to have that experience again with a currently patched version of the game, you can no longer do that because monsters now have uh the Clagger animation, which is a new animation they've added specifically to take advantage of clutch claw, where you kind of like, you know, hit the monster enough times it kind of stumbles backwards and then gives you an opening to use the clutch claw, which if you choose not to use the clutch claw kind of, you know, it becomes weird because you're like, "What?
What happened? Why the monster just like bounce, not bounce, but like staggered backwards and I was just standing there looking at me drooling if I don't have the clutch glove? Doesn't make sense, right?
So, that is one of the things I'm not a big fan of adding the mechanics of an expansion to the base game, especially when you have something like Monster Wild, which as we all know there there were a lot of complaints in regards to Monster Wilds because it was too easy. And even though they fixed that in the title updates, the actual experience when you're playing through the story is still that the game is easier than what it should have been. And if on top of all of that, you add a boost bracer, if you don't increase the difficulty of the base game, it it's just you're just straight murdering monsters.
That's that's that's my biggest concern. I almost wish that the boost phrase would just be something that you'd be able to do with the expansion, but I'm curious to hear from you guys. What do you guys think about that?
Let me know in the comments section down below. But that's pretty much what it was like. Ascendants is looking absolutely fantastic.
I'm going to have more videos talking about what I learned specifically about the Gunlands, talking about the Nintendo Switch 2 version uh of the base game Wilds and all of that here in the channel. So, if you're looking forward to that, subscribe on notification icon, all that jazz. I'll see you guys then.
Thank you very much for watching. Stay strong, stay safe. Peace out.