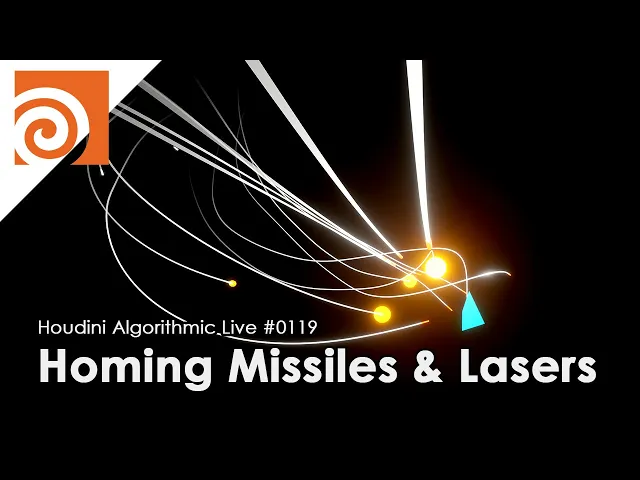
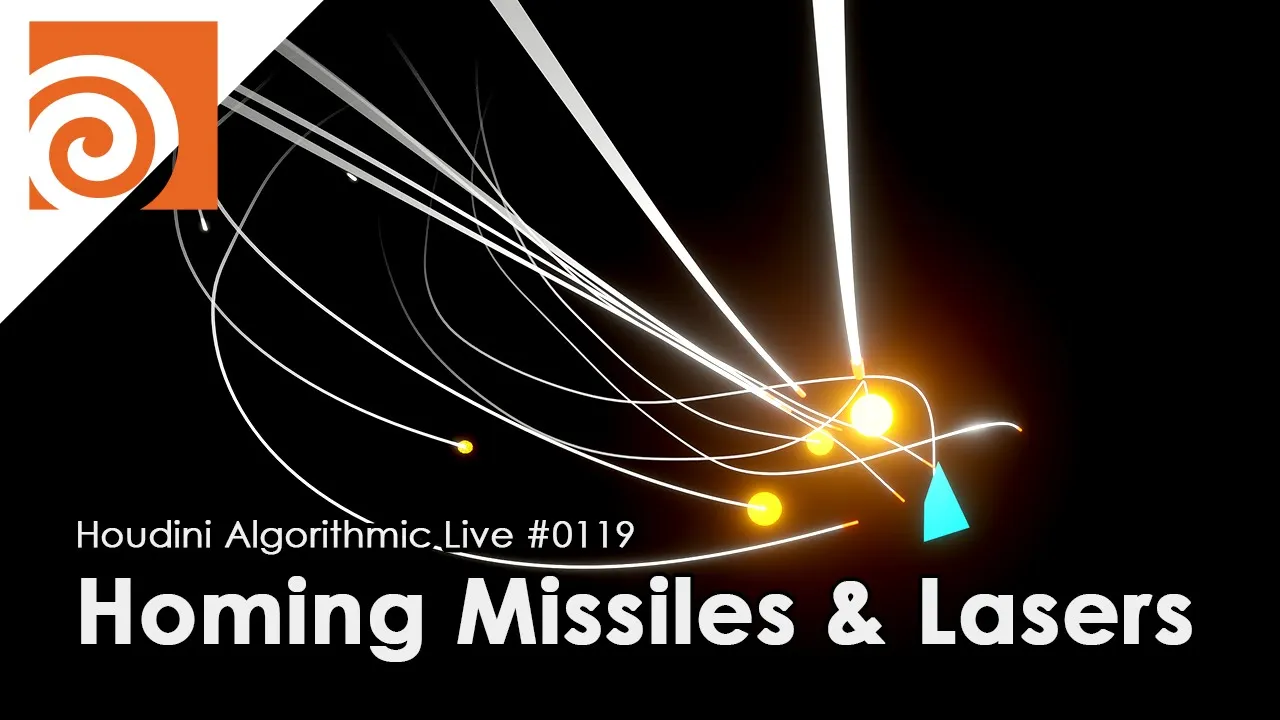
[Music] all right hello hello so can you hear my voice if there's anybody please let me know all right so hello this is Junior recover and this is the weekly live uh Houdini tutorial life called as Houdini algorithm algorithmic live this is 119th episode the theme today is to create a procedural homing missiles or lasers so-called Eternal circus effect or animation uh using Houdini so what that what it is that it's just a bunch of missiles homing to some specific targets like what you're seeing Right now and I'm gonna build this system using a subsolver
together with some simple really simple algorithm uh the algorithm that I'm gonna use to um implement this system is called boys the agent-based system particle system which uh is used to create assimilations of Flocking bird or school or fish or something like that so I'm going to use the same system pretty much the same ones to simulate the missiles okay and uh the term Eternal circus comes from a animator called itano Sun seems like his was the he was the legend In animation field and he made the method to show a missile the Homing missiles
something like these if you have seen these before and the way it shows is also controlling the camera like perspective and positions and directions as well as the missiles so I'm also going to control the camera view as well a little bit so that it follows the the target as well as Controlling some perspective to make it look more dynamic okay but it's pretty simple the things that I'm doing really simple if you look from the top view it's looks like this okay so you have a place where you are starting off the missiles and
all the missiles are following to this Target and as soon as it got close to the Target the missile got too close to the Target then it just explodes Or the missiles itself has life account and if the time has passed then it also explodes if it even if it doesn't reach to the Target something like that okay so those are some rules that I added to make it um somehow realistic okay and in the end I'm also going to Bring all the system all the animations that I made in Houdini for quick for quick
shading done in blender okay since the blender has a EV which is small like uh real time shading engines in PVR and which is in my opinion is better than the preview uh shading and Houdini so I'm gonna I'm just gonna use the quick shading In blender because it looks better out of the box all right so that's what I'm gonna do today from scratch okay so let's do that so let's start off with the new file for Houdini and let's plan out where to start so first of all I do I need a Target
Which flies around the space uh Trying to avoid hitting front missiles so let's create that first then I'm going to create the missiles bunch of missiles or maybe the launcher for those missiles or lasers to launch these bullets or Rockets and and the rest I'm going to implement the void algorithms to the missile so that it will follow The Target and also add some event to explode based on the collisions or based on the lifetime and I guess that's pretty much it and I'm going to add a bunch of parameters to control the way uh
the rocket follow the missiles follow the target so that you can customize how the trail looks sometimes uh the if you want to create laser looking like Trails maybe you want To make it uh straight in terms of the trail and suddenly it just rotates to a specific directions like 30 degrees or 45 degrees based on the angle based on the really straight angle that might give you a feel of lasers instead of missiles so let's try to create that customization as well since we are using a procedural system Right so start by making the
background dark and start off by creating some Target Which flies around the space randomly I'm okay just make it random so in any way is fine so one things that I could think of is just use a solver to make the target move around the space randomly that's fine or I could also use some Specific path to let the target fly around based on those path so maybe I'll do the letter method I'm just gonna try to create a random path first so that I can keep the path within some range the bounding box so
let's say I'm going to use attribute wrangle detail and you kind of use the noise function to create a random path first so any noise function is fine I guess uh But in order to make it pretty random maybe there are some uh nice functions that I could use I would probably use either noise or curl noise let's try with the curl noise so first starting off with nothing and I'll just create a number of points based on the number of frames so one point it corresponds to one of The frame here so number of
points is frame end and I am going to create a loop to create bunch of points with the number of frame end now I'm going to create a seed value to in order to use it for a curl noise um and for the X Y and Z for the seed I'm Going to use this I value for in some way Okay so first I'm going to create a f value by multiplying I by some multiplication make it scaled it could be that I is too big in order to use it for the colloid seed so
let's make it small by creating some slider multiplication I'm going to try with point one first okay then You could say FFF now I think it's also a good idea to randomize or make the X Y and Z value different so I'm gonna add some random values here just any value all right and probably also would like to have some additional seed float seed value so that I can also control the randomness by myself all right and let's make the range Pretty big okay and also add this to each of the component it's not really
necessary I think but just to make sure I get enough Randomness for every x y and z okay wait this has supposed to be one this supposed to be big numbers okay so now I have a seed I can now create Some Noise value So based on it um let's try using cool noise see what happens uh I'm gonna call this and Val noise and Seed now cool noise is often used for a vector field Creations within some volumetric boundings but I'm going to use this as a position To see how it looks so after
having this I am going to create a position by multiplying n value by some bounding books uh size so let's make the bonding box maximum 200 um all right then at point to that position okay so I have now a bunch of points in a space and let's see how it looks Like when it connected when it's connected so I'm gonna use add node to connect each points one by one in an order and that looks like this it's a bit too jaggy maybe I need to scale this down a little bit so it looks
like this not bad but there are some kinky points like these like these which I don't really like I Think let's see what happens with noise see what happens it looks a bit smoother there are some turns that goes really narrow so I might want to fix those points but overall looks fine yeah so if you are using noise the range is in between point zero to 1.0 but most of the time the minimum is like 0.3 and maximum is like 0.7 so let's Fix this range a little bit first I'm going to subtract it
by 0.5 for a force x y and z so that the range will be in between minus 0.5 to 0.5 for all X Y and Z and then multiply by two okay now it's been centered and now I might want to refit this a little bit using fit01 and the range is in between range that I Want to change in between 0.3 point no I shouldn't use 0.501 but I should use fit itself and the range that are converted to is from 0.3 to 0.72 0.02 one point see what happens oh didn't work because this
is this doesn't work with the vectors so probably I need to do like this so still doesn't work oh I realized that this is not the right range but since I have made a negative value I think I shouldn't should just remove that okay and I think I tracked some okay looks a bit weird okay how's this and okay I'm missing the and value okay so that looks fine I guess it's being clamped a little bit on this Side so maybe I should make it point two yeah a little bit better okay let's just go
with this and let's see how it changes by changing the seed okay so it does change the path yep okay that's good now let's also fix a little bit of those kinky curve and as well as some weird wiggling Um movement not sure why this happens here maybe based on the scale not sure maybe due to the due to this one yeah maybe no maybe not all just gonna get rid of this one it's not really necessary and to fix this I'm just gonna use smooth okay and also make this smooth a little bit Bigger
so that I will have more smoother on these uh a bit too narrow curve or when the curvature is really uh uh big maybe in those cases I could use attribute blur see what happens oh still had these problems this is a bit to move through that to smoothing out I guess oh wow just gonna go with these and Try to make the scale a little bit smaller may try to change the seed all right oh well let's just go with this and so let's say this is the path that the target flies around so
starting from the start points go around these path go along with these paths now so the target movement is not really restricted to this way anyway is fine so It's based on you favors and let me also make it back the negative value so that I'll be placed on the center okay all right so let's create a point which runs on top of this curve which is going to be the point where you're going to place the target I'm gonna make a really simple geometry it looks like a Plane this little circle it's starting with
the circle make it Square and use extrude extrude it on one distance and then also increase the inset that make it like a half diamond shape then maybe also close The back open the front then squash it on y direction and let's make it as plain for now you can replace this with something others later but for the testing I think it's fine something like that okay so let's create some points on a curve so how should we do that I could create a point Wrangle or maybe not the Point wrangle but the Primitive Wrangler
I guess primitive wrangle and just sample the point position on a curve by getting the Point based on the U value so in order to do that I also would like to get the tangent Vector as well as a normal Direction a perpendicular direction as well for a sample for reference So let's have let's create Orient along curve to create both tangent vectors as well as a up vectors the tangent Vector is going to be created as a normal and up Vector is being created as a perpendicular Vector value think like that okay and I'm
going to use it to orient The the plane which runs on top of this curve so let's create a point based on timeline so I'm going to convert the current time to a value between 0 to 1 meaning I'm gonna uh normalized value normalize the frame value to 0 to 1. so the current frame divided by the end Frame will give you a volume between 0 to 1. and now I'm going to use this to sample the Curve to use that to to do the sampling I could use Prem UV and there's only one primitive
so you can say zero I also need to specify the information that I need then Prem is equal to zero and UV is in this case This is just a curve so F zero zero is fine and the UV has to be in between 0 to 1 has to be normalized so you can just use this as it is now get the position and see if I got the right value I'm going to recreate the points then remove the path uh Why okay I shouldn't shouldn't have used one but I'm just referring to myself so
I can just say like this okay so where is the point so here it is you can see it um let's make the point size a bit bigger depth okay and if I play it so it's Running along the Curve based on the frame value okay those turns those narrow turns might be too quick but for now let's just go with it okay so that's how the target moves and let's place the plane to that position see how it looks like okay so as you can see it's the plane is Not rotating orienting based on
the curve so we need to fix that to do that you could sample the normals and up vectors as well just like you did for the position and set the attribute to the newly created points both n and up Okay now okay it's going backwards so let's fix that the easy effects is just just rotate the geometry itself 180 degrees so I'll just do this here okay all right now we can control the speed of This Plane by changing either the frame size or the scale of this noise function If you scale it down the
path will get shorter which means the duration going from start point to end point will take long time with slower speed or if you increase the total frame it also slows down because the path get longer maybe it's not really a good way to control the path is it no I don't think so maybe I shouldn't Use the fixed time frame for the lengths but um I'll just I should just do this manually so that it doesn't really care about the current frame gets better so let's let's decide the number of frames to Maximum thousand
now I can increase this uh the lengths by these integer values and also can use this scale hmm maybe scale could be fixed because it does it just makes this longer or shorter and smaller the value is you get high density points So pre should be better with the smaller value there are some some weird wiggling here about uh roll looks like this so let's make this scales fixed instead of having this 0.001 .01 um yeah maybe somewhere around here remove the scale try to make the number of parameters Small as possible okay that should
do it yeah I think it's good now see how the target moves okay maybe I can make this moving faster so that means I can shorten no make this path longer or make the frame smaller like 500. Okay let's go with this like a jet coaster okay now let's I think I'm good with these path the way it flies around the space so now let's try to create the the missile part part the main part so in order to create the missiles the missiles has to follow this current plane running a flying Target So we
need to have the point position Point information of this target so let's get that and we could get that information from here so this is the target position okay let's also save this to a today's folder now in order to create a missiles you need to have a launcher first where to start off the Rockets or missiles so let's create that position as well Now has to be close enough to the plane I guess to reach it so it should be within this bonding box which is determined by this Wrangle and specifically this size here
so I guess we could use this information somehow and this is indicating the size of the bounding box so this is 25 So 50 is more like a size of the boundary box on X Direction Y and Z Direction Okay so let's add a new point which I'm going to use it to indicate the starting point for the rocket launcher then decide the point position based on this value here so I'm going to copy this paste it Here just going to do this randomly and see if it's looks good and multiply everything by 0.5 so
that will be 25 25 and 25 on x y and z play somewhere on here so it's on the corner of the boundary box it might be interesting to move the launcher in real time or in the animation but for Now let's fix the position where it launches the missiles to here and create a bunch of of launch a bunch of rockets from here and which goes toward this flying Target so to do that I'm going to use a subsolver solver okay Foreign as a starting point I am going to connect this to a second
input of the solver just gonna create the new points inside a solver without referring to any initial inputs other than this starting point for the launcher or we also need a Target Point position so let's also connect that to the third input So I guess that's those are the two informations that I need in order to calculate in order to create uh Rockets or missiles Okay so it's good coincide solver and let's start by creating a simple code for the points to be created in specific duration or specific sequence For now let's think about in
specific um time on specific timing the new Rockets being launched from the position the initial position then all those Rockets are going toward to the Target so initial position coming from the input to this one and the target position is this one which moves based on the frame So we're going to use these two informations to create a new rockets so first I'm going to connect the point wrangle to the maybe not the point Wrangle but um I should use detail since I want to create the points one by one I think Based on the
frame so connect the second input which is the initial position for the missiles okay so let's make a conditions when to create the muscles and what conditions to create missiles let's say I'm going to create the missiles based on the frame number so if the current frame number calculate what the modulus equal to zero so every five frame let's create missiles Maybe I can parameterize this and start with five for now and and we are going to create a new point now we have to also decide the point position and this this point position is
coming from this second input so let's get that information there's only one point for now so let's just get the first one now the new Point has been created here Let's apply some point group we might need it later so we'll call this rocket all right okay so let's check currently the point is going to be created on the initial positions but it's not going to move at all so we need just need to check here if new points being created let's check the geometry spreadsheet and run the code Okay so the new points being
created every five frame good but nothing is moving yet so we need to fix that it's also merged these two so that we could check both the points and the plane where's the plane where is the plane okay here we go Maybe the plane is a bit too small to check I'm gonna color this brightly for now I should call it this red and make it really brightly red okay now it's obvious way it is all right maybe it's also small make it second two times bigger Right now let's make the points fly around let's
make those missiles that I created go forward to this target okay so now I've just created the rocket it's time to make them fry I'm going to use the point Wrangle to do that I'm going to refer to this moving Target as a second input and Create some simple particle Asian system based on the the idea of boys maybe it's much simpler than than the boys because there's not much Asians in this system so first of all you get the target position which is only one right now so you can just say zero from the
second input now I'll call this target position now the current Point position you can access with that P so direct you can then get the direction between from the current Point position of the bullet or the rocket to the Target position by creating the subtraction like that okay now after this um you could probably it's okay to Normalize this if you want to use the distance between those two points then you should have normalized but I'll just go with the normal light value just meaning I'm just going to use the direction the information to make
this fly to make this fired now I'm going to use more like a physics way to move the points so I need a acceleration value And velocity to move the point position so first I'm going to create acceleration and using this acceleration to update the velocity and then used in using this velocity to update the position that's how it works in terms of the simple physics so let's create the acceleration first based on this direction I'm going to name this ACC um PCC Target and multiply this direction by the acceleration speed so let's use some
constant value as a parameter not sure what's the right value for the acceleration value so let's start with 0.2 okay now after having these accelerations it's time to update the velocity and in order to do that first of all the velocity has to be updated um in an integration in every frame and so every Point has its own velocity value as an attribute I haven't created a one yet but let's just try to access it If it doesn't have anyone then it'll just read create the new attribute with a zero value initial initial value in
this case this is a vector value so zero zero zero Vector is going to be created if it couldn't find any now I'm going to update this velocity by acceleration Target just slide just by adding it just by adding the acceleration to the velocity okay now After doing this if you if you keep adding the acceleration the speed is going to be gonna go too fast in some uh in some range and it's gonna reach like a speed of light or something if you just keep doing it so you have to limit the maximum speed
at some point in the physics mode based on the gravity or something like that so let's assume let's also set the maximum Velocity value by normalizing the velocity multiplied by the minimum between the current current velocity speed or the maximum velocity speed so this will limit the velocity speed to this maximum size not sure what will be the best maximum so let's keep it one for now might be Too fast might be too slow not sure yet okay so now we have velocities now we can update the current Point position based on that first I'm
going to update the velocity attribute with the new one then update the point position with the velocity by adding it to the point position okay which will update Point position toward um The target position hopefully because the build velocity is being created by the acceleration and exhalation is being created by the Direction with from the current Point position to the Target so see what happens okay so it looks too artificial but yeah it is creating the points and all the points are following the target maybe the speed is too fast What overall looks fine yeah
now what I don't like is that every bullet is firing in the same speed maybe I might want to change the bead to make it a bit more randomized and also um you might want to limit the maximum speed a little bit so let's limit the maximum speed of 0.8 and also make the maybe make the acceleration Speed a bit randomized this one here Okay so not sure based on maybe the point number and the frame might be might do the job so I'm going to add another value here like noise and use the point
number with some large seed multiplied Plus some frame based value multiplied by some speed scalar then multiply by the exhalation speed now let's see what happens with that okay so the speed gots a bit randomish I guess it's a bit better mine looks still weird in the end but uh for now it's okay the next thing I want to do is to create the trail for each missiles Just like you see in the examples so the creative creating the trail itself is pretty easy you can just use something like Trail right after the solver increase
the number of Trail length then connect it with polygon opened and just by doing that you can easily create a trail like that Let's make it 30 or something see what happens okay starting to look good now because every point is being added every frame every five frames so you're going to have like a limited number of bullets in the end so you don't really want that it's gonna make it really heavy and it doesn't really look natural somewhere in this kind of conditions so I might need to reduce the number of rockets based on
some conditions and one of the conditions that I could think of is when D rocket reach really close enough to the Target like in the radius of one or something in those cases maybe we can make those bullet Rockets being exploded okay so let's try to create that conditions here and also let's try changing the Acceleration Target value to see what happens if I make this increased tries to follow more yeah tries to duck tries to turn really fast if you have a high number here we have a low number here it takes time to
rotate so it's going to take a little bit of time to follow because you need a lot of time to Rotate but also gives you a really interesting like turning effect which might looks natural so combining with the speed maybe there are some good numbers in order to make it look better maybe that that was too fast in this case it's going too fast and so it's just going off the target really fast So you need to find the right valence but if you make it too slow there is a chance that the rocket is
not going to reach to the Target because the target is flying in some constant speed yeah in this case the rocket is flying too slow so you need to find a good balance between the acceleration value and the maximum speed yeah so maybe these value might be Good okay for now now let's create a collision detection if I if it if the rocket goes too close to the Target then make it explode so let's call it these so this is the target I'm gonna use this to check if the rocket is really close to the
Target or not And I'm going to create a detection in the very first uh step I mean it could be at the end but I'm just gonna do it in the first step so I'm going to use the point Wrangle because I want to check every points which is currently set as Rocket okay and May connect this target point to the second input to check so that we could Check the distance Okay so the target position you can get like this and we can we can get the distance between the current Point position of the
rocket to the Target and we can now make a condition if the distance is less than the Collide distance exploded explosion distance or something Like that make it explode let's start with one okay so if it's less than one then let's set the group to the current rocket exploded and also remove the rocket group like this okay and as soon as it exploded I don't want to make this point moving anymore so by move removing the rocket group It's not going to be cold with this move Wrangle which I'm going to filter it with the
rocket group okay yeah let's try this so I'm not sure if it's been deleted or not can't really see if it starts happening maybe the distance is not close yet close enough let's make the Collision distance a bit bigger so that We could check at least check and invalid group rocket oh really because this is on the first frame there's no rocket group it's fine okay let's try with this so I just made the Collision detected distance to five okay as you can see some of the lines been disappeared because it's been crowded Okay now
I guess I need a little bit of effect so that I can see that it's been exploded so let's create some sphere on those position where the Point has been exploded make the size uh of the sphere a bit bigger a bit big Okay so we know where the point has been exploded by getting the exploded grouped points Here and those are the point that has been set as exploded so we can make we can copy the sphere to that position so that we can check when it has been exploded okay let's check play okay
yeah so we do see the explosion is happening Now keeping these uh spheres on the same positions with the same size it's not really looking good so let's also animate these exploded explosions so that it looks like an effect which we can replace it later with something else as well instead of sphere maybe we could just use another particle animations for the explosions something like that or mild some Props anything so but to do that we need to define the animated informations to those explosion points exploded points so as soon as we have ex made
the point exploded let's give some time based value which goes from zero to one one to zero which can be used as a scale value or Alpha value something like that Okay so um Define how much the explosion is going to live so let's create a duration attribute which could be an integer value I guess and set point attrib explosion duration with this integer Parameter so if it's 100 then it's gonna live 100 frames until it disappears maybe 100 is too big so we'll make it 20. for now and please silk should have used I
Okay so now that I have set the explosion Duration I need to make this decreased by one and each frame every frame somewhere so let's have that conditions as well so after being exploded let's update this explosion duration only for the exploded group maybe in the end this case explosion animation filter with the exploded And update the explosion duration subtract by one for each frame until it becomes zero so let's also clamp it with zero is the maximum is always zero when it becomes negative or if it becomes zero maybe we could just delete it
but I guess it's not a good idea to delete because we are using Trail here if one of the points deleted within the simulations the trail is just gonna mess up so it's not a good idea to delete the points but instead I'm just gonna keep the scale to zero meaning I'm gonna make it invisible okay now I'm going to convert this uh explosion duration as a p scale for this point so P scale and then a fit This current explosion creation which is in between zero two and I can go back here to get
this information let's have that as a parameter as well then make it zero to one as a Target remapped value Okay so in the start you have P scale of one but Then slowly goes to zero based on this time in this case using 20 frames to make from one to zero for the P scale see what happens and let's also make the initial size a bit bigger in terms of the explosion all right now I can see some basic explosion happening Right um you can also control the way it the way scale changes because
right now the scale changes in linear linearly which doesn't look natural an initial the size well it's all really big but it quickly just reduces the size in reality I guess so we could also have some curve map to this duration here something like like using the power functions Or use the CH ramp something like that see what happens now this is more like it it just quickly goes smaller with those power node power functions okay so this maybe we could also have it as a parameter but I'll just keep it as it is for
now let's try with four see what happens Yeah this is more like it more like uh fireworks maybe it's up to you so I'm gonna make it parameterized pow I'm gonna go with four my case now at this point I have a bunch of parameters already created in several places so let's gather all around and organize this a little bit See what kind of parameters we have In This Moment first of all the target so we have the target path just drag and drop the target related parameters let's name this Target Target pass seed Target
pass size this is Target plus links okay Separate it what else um well this one maybe we want to replace this later with some other geometries so I'm gonna connect with a new node some colors okay okay now okay so we might also want to change the the target I mean the bullet launching position as Well in this case maybe we could use make these 0.5 as a parameter so let's have Vector three to determine the point position for the rocket launcher okay let's copy this one of the parameters paste it where 0.5 is redo
the copying To all y and z replace this to Y here replace this 2C here okay okay currently on the center which you can remove this based on the ratio of the bounding box size all right could also go negative okay next go inside a solver Let's open up the parameter interface as well go inside a solver and so we have a condition when to create the missiles so while or I'm I'm just saying rocket so let's just call it rocket rocket um launch timing it's the frame value okay and Moving parameters so we have
two parameters one is the acceleration speed and one is the rocket maximum velocity okay and we have explosion conditions so so this is the distance to the Target and duration explosion duration What else we have the explosion speed power all right now I guess that's about it for now um do we have anything else nope I think not we have the explosion size as well here let's also bring that explosion size which we can either set it as a p scale Or the size of the geometry but maybe it's better to keep the P scale
in between 0 to 1 for ease of use so just set the sphere size okay so we have now a bunch of parameters we can control I'm not sure if you can see it clearly okay and try controlling like if I change the rocket timing to one it's gonna launch The missiles every frame all right seems working if I make the rocket maximum velocity to two it's gonna run really fast like that okay so it's working exhalation speed two one makes it turn really fast so it doesn't really look like a rocket more like a
insect hmm But so yeah maybe two five might be I good balance okay what else uh explosion distance if I make it to two does it still explode yeah somehow by B the speed is a bit too slow to catch up maybe I can increase this a little bit all right we'll go back this later and I'm just gonna make it three an Explosion deletion is I think it's fine explosion speed power fine explosion size fine all right so let's create additional conditions here um one of the things that I don't like is that sometimes
all those swarm of rockets uh being too close to each other that's not really realistic if it's if They are too close they might just gonna like explode to each other by touching to each other so let's create one smart conditions for the modern rocket so that it will try to have a distance between the other Rockets maybe at least like one or two or 0.5 in terms of distance between the Rockets so in order to do that we need to have additional Force being applied to each Of the point looking for the neighbor rockets
and try to go a bit far away from them try to have some space between them so that's also related to the concept of boys the separation okay try to have some space between the boys the agent based on the distance so that's what I'm going to implement Okay and I'm gonna do this on this move rocket code where we were making an act moving exhalation in order to add the force you just need to create additional accelerations and add it to the velocity and update the velocity by adding all those additional accelerations and finally
clamp it with the maximum speed so The first one is X ax axle iteration for uh going forward talk it the second Force installation for separation between Rockets okay so in order to do that you need to have a neighbor rocket information from The current Point positions so first you need to have a the distance information how much you want to have a separation so create a parameter called sep test which is going to be used as how much you want to have a distance between other Rockets it's let's make this one for now not
sure What's the right value for this yet now within if the if there are any Rockets within this search distance then you have to have a separate a separation forces applied to the current point so to search for the points within this range you can use new points function so what's the parameters so geometry Point group Point maximum distance so we're gonna look for the point group called Rockets And the current Point position is p at p and the searching distance is sep distance we don't need to limit the number of searches so just gonna
go with these or maybe if there if you going to have like a millions of rockets flying around the same time maybe it's better you could limit the size maybe limit 10. I'm not sure maybe we don't need it Maybe you will need it if you have a massive amount of Rockets okay then Loop through all the points there is a chance that you are getting the point of yourself so if you need to skip that one and in case of new points the self point is always the first point so you can skip the
first one by looping from one now Get the point number get the point position and get the uh Direction from the target point and closest point to the self-point position so cell Point position minus and pause will be the direction and There is a chance that we're going to find many like targets or many uh Neighbors and in this case we want to use the distance to use it as a weight if it's really close then we want to have more forces to separate from that point if the distance is far enough maybe the the
weight could be less than the closer one so We need to get that weight calculate from the distance so let's do that by uh first of all in terms of the direction I can just normalize it and in terms of the weight I could calculate the distance between the Crown Point position 2D and near Point position and subtract separation distance Minus distance because if the distance is equal to zero then you want to have more weight if this is equal to equal to if the distance is equal to separation distance then you want to have
less weight and also wanna I also want to regularize this so fit zero or in this case I can just say the distance set distance 1.02 0.0 yeah this will do so I have just created the weight in between one to zero right now let's create the vector outside a loop called total Direction and inside the Loop I'm going to add total Direction with Direction multiply by weight okay And in the end you get Direction where it's been affected by the closed distance points all right foreign and next I want to convert it into exhalation
in the end so um let's do that by First of all I think I also need to have a total weight or maybe I can just normalize it because this is just a vector and then you create a new exhalation call exhalation sep created by this total Direction I guess I shouldn't use Direction here because it's smaller already being used here it's not really nice so It's called accept distance and total sep Direction here multiply by hey ACC sip in this case I'm not going to use a noise to randomize the value because this is
this happens randomly based on the distance so I don't really need to care about the randomness of these separation so I think I can just go with constant Value here okay I think I have some errors here total receptive distance Direction Okay so I have now acceleration separation so it has to have some balance between the acceleration Target and exhalation separation let's go with 0.2 for now a bit smaller than the going forward a force then now that I have the acceleration I Can now update the velocity with this and the rest is all the
same see what happens okay hopefully we are having some separation between those bullets Rockets okay I'm not sure if I'm seeing it much gotta make sure that this is working correctly so let's make some exaggerated value here like separation distance to Five see if it's really working okay yeah I think it's working you can see that the distance the separation distance is having a really high value yeah so uh yeah doesn't really look good so let's update that and let's have that as a new parameter so this is based on the rocket information let's have
separation between the Explosion and the rocket let's have another separator here rocket sap dist and locate acceleration all right let's also change this one two follow speed okay see so we have rocket separation distance let's call This 1.5 let's make this equal to the acceleration speed for the following to the Target all right just think okay that I guess that's better than last time let's make this speed a little bit faster this one a bit slower this one a bit faster Find the right parameters a bit hard well okay now uh let's also have some
additional parameters or additional conditions where the rocket explodes with some life value if it's running too long then it just explodes by thems cells self-explode based on the time that might be additional conditions that I need in order to reduce the number of rockets in a space you don't release you don't really want to see Rockets running forever in infinitely so need to have some time lifetime so let's define that I'm going to define the life value when the new missiles new rock has been created here I'm gonna call this rocket And let's how do
I call this set point address life new PT and it's called this life okay maybe making them making the maximum like hundred let's go with 50 for now so using this value as a number of frames if it runs 50 frames and then it just Explodes so which means we need to decrease this life by one every frame so let's do that in the end live train for the rocket life has been decreased by one yeah this is it uh and once it becomes zero or negative we could make it explode and this explode node
So coming back here we could add additional condition here if it is uh if if the life is more if equal or less than zero then it could also explode yeah let's see this is if it's gonna work so you can see that the Bullets are being exploded before it's reaching to the Target so maybe 50 is not it's a bit too fast because it doesn't really reach to the Target yet so I guess we need to increase that value let's have that parameters as well so life life rocket Rife should we set that Somewhere
around here rocket life there's another parameter that actually I want to set which is the length of the trail so let's have that as well okay so we have two new parameters one is the life let's make it 100 let's also make the trail longer where is it 50. or even 100. All right begins getting better maybe the trail is a bit too long I give 50. okay I think it's getting there now right now it doesn't really look Dynamic yet because we are looking from some perspective View but we also want to make it
look dynamic so let's try to control the camera Valley as well so in order to make it Look uh cool so to do that I am going to place the camera close to where the launcher is maybe to the exact point what launcher has been placed so that we are looking like that and also make this camera looking forward to The target and see what happens so I'm going to create a camera and to avoid a position I'm just going to copy the Point positions of this add node here copy it paste it to the
camera right now in terms of the rotation we need to calculate the Euler rotation from the looking Direction so to do that Um what I would do is to First create a quaternion with vex from the looking Direction then look forward Direction and then convert it into an Euler so in order to do that we first need to determine how the camera is being placed Well let's check that first so let's make the camera rotation zero zero zero starting with zero zero zero Direction and if you look at it if you look at where the
camera is looking at when the rotation is zero zero zero it's looking at the negative direction of Z axis okay so we need to remember that it is looking at the negative Z Direction So in order to rotate this camera so that it will look at the target in this case this red one we need to First create a rotational quaternion going from this direction to this direction then we can convert that rotational information into an Euler angle and place it here so Let's do that we could go back here we can relate this point
and this point to calculate the camera Direction so let's create the point wrangle I'm going to connect the the launcher Point position to the first input and the target point to the second input then get the target there's only one target so I'll just say Zero direction will be Target minus at p let's normalize it so this is the direction we want to look at okay and for the camera and the camera is currently the current camera direction is set 0 0 negative one it's facing zero zero zero zero negative one and the target direction
is this one So you have we have current direction and the target Direction so we need to have a rotational quaternion going from this to this we could get that by um using a function called dihedral so from current direction to Target direction we can get the rotational either rotational Matrix or quaternion in this case quad training is better we Because there is a function called quaternion to Euler which we can convert this quaternion into an Euler angle so like this now we need to have the angle and decrease and we need to make sure
this if this is a degrees or in radians so let's check Criterion toiler okay we need to set the order so that I Think the default is x y z so I think that's the things that I want to use so what zero okay let's check the angle vector and seems like this is in radians so let's convert it to degrees now we have now degree angle X Y and Z and this is the value we want to place inside a camera parameter rotation parameter So in order to get that value we need to use
expression so let's create a null node so we can access this node from the camera and we want to access the point attributes so we're going to use point inside geometry there is a one called camera info and the attribute the point number that we want to access is zero there is because there is only one point and the Attribute we want to look at is the angle and the first one is the X okay getting correctly and the second one is the Y third one is the c and let's check if the camera is
facing the correct direction look at look at it together with the plane check so yeah I think it is Rotating correctly now if I look at look from the camera looks like this it's not bad but in order to make it more Dynamic we want to change some focal lengths make it really wide that's more like it and we also want to make this new clipping close to zero and okay kind of a missing those Uh trails because the camera is pretty much at the same point where the launcher is at so we need to
fix that as well because we want to be able to see those launching the starting launching lines these ones but at this specific camera positions we cannot really see it is being trimmed so in order to fix that one possibility is to change offset the Camera position a little bit to the back or left or right or we could also change that launching position as well right now actually it's um trajectory from a single point like this which might not be a natural things to do so instead of trajecting from a single point what if
I have Something like a toilet turret and for example let's consider the point of the circle is the where the the launching position for the Rockets so you have like 12 holes uh two launch the rockets and maybe we could launch the rocket and circularly based on the timing might be more natural in terms of the The look and the timing and also in order to look from the camera for in this case if you even if you have placed the camera in the center the position the point position of the launching position has been
offseted a little bit from the camera so the camera should be able to see those points hopefully so shall we try that and one thing I also Noticed is that if I look at the trail the initial Point position of the trail is not being placed on the exact point but it's been a bit offseted from the starting point so I think I want to also fix that let's go to the knee create new rocket this is where I created and as soon as being created this has been Moved with the velocity so that's the
reason why it the initial Point already has some offset so in order to avoid that well I could do what I could do is to move this create new rockets in the end so meaning I could move this in the end somewhere on here if I do it like this All the trail starts from the starting point yeah this is more like it okay now so instead of launching from one exact point let's try to Launch from this point of the circle okay so to do that I want to place this here and also facing
toward the target might Make more sense so let's also do that and then once you do that we need to have a normal and up vectors applied to this point which I don't have it right now which should be related to the Target position again so let's have that maybe we could actually use this camera Direction Node for that point yeah that might make more sense so since it's already been accessing to the Target position oh well yeah well after all it's not a good idea to just combine different meaning different codes in one node
maybe this that's faster but hard to read I'm just going to create one another Node for ease of organization ease of organized so connect it here connect Target position to the second input um up in Normal Okay so get the target position get the direction is so moist Target Minus current Point position so this could be the normal right now for the up Vector um you could currently I don't have any up pictures so maybe I don't I'm not gonna set any up vectors for this one just gonna use normal direct Direction to place this
circle to this point So let's try copying this circle to the points see what happens okay it looks good so camera looks like this and the turrets look like this and it should be facing the Target all right and I want to launch the missiles or Rockets from each Of those points circularly I guess okay looks good now instead of connecting the initial points let's just connect the circle here going back inside go back to where we are creating a new rocket this is where we need to change to get the initial Point position So
we have a circle coming from the second input here we have bunch of points from the second input so let's get the number of points first okay this indicates the num maximum number of points coming from the second input the end instead of using 0 we need to iterate this value By one based on the frame and if it goes over 12 in this case then reset to zero so we need to create an index value since I am using modulus here instead of using modulus I could make it like a division make one of
the value float then use floor to make it integer value this will create a Iterating value from 0 to Zero by iterating by one for each newly created missiles or Rockets then finally calculate the modulus calculator remains with the maximum number of points we could reset the index to zero if it goes over 12. then we could use that to get the point position from the second input right this wall supposed to create A turret like launching as you can see here there you go and if by doing this I think I should be able
to see those trails around the camera okay well Let's uh okay and we could now control like the size of the turret so see what would work best hmm We could also make these divisions higher like that okay getting better I guess let's fix it with the 16. so we have new parameters let's have those as well so we have turret and Camera so first of all the turrets or the launcher Size oop and I don't know how to call this so I'm just going to call it resolution okay and what else in terms of
the camera do I have any parameters nope maybe the the focal length might be another parameters so you might want to change oops not this Camera phone call things now I think I have enough uh information to create the foreign so-called etano circus I think it's time to actually visualize it with some like thicknesses or pipes wood rendering so let's have poly wire connected to the Trail and try to adjust those parameters okay and let's also care about some balance between the size of each of the elements okay not sure what if the size is
okay or not let's of this like six five color it really bright for now to check and shade it Um let's see um I might want to change the camera positions a little bit because it's a bit I don't really want to see those kind of fans from the camera so let's change this a little bit shall we let's make this positions a bit more Randomized based on the target positions shall we so to do that how shall we do it um Direction all right okay let's see how I did it lay so going back
to the camera info I think I want to change the camera positions a little bit as well so let's think That P is equal to um so currently I am getting the position from the source yeah so what if I move this point move this direction toward the target a little bit maybe using D Direction by two or Something see how it looks okay did it changed I'm not sure yeah it did change okay see what happens hmm well maybe not that good how about a negative Direction I'm not sure if it's really at the
right position Okay so camera also supposed to be at this point position but it's not is because I am not actually referring to that position yeah I realized I need to use point function just as I did here so I'm gonna do like this there you go now let's see let's also create an output so that I Can always render the final one now this doesn't look good let's move this to positive direction okay better than last time yeah more it looks more Dynamic I don't really want to see the the section of the trail
but uh instead of that everything looks fine I'm not sure how I can avoid looking at the Section of the trail maybe I could just increase the turret radius for that where is it sure hmm not sure maybe I can make the camera position close to the Target as well okay not bad not bad Okay I'm getting sick all right looks nice well now starting to look better there are still a few things that I want to do um first of all let's give some I think I'm forgetting something um Let's see rocket Life 2
100 is fine rocket lengths 30 . hmm full oxalation two what happens yeah it's getting somewhere and I think um I also want to add the last one conditions to the uh this rocket And that is that is what was it forgot huh what was it totally forgot so I have two exhalation value right oh yeah yeah one last parameter that I want to add here is to control the direction of this path just like it moves like a Laser so the laser moves like a straight line but right now as you can see the
lines moves like curved Trail which is good but in some case I want to move it like uh later since let's see how I could modify this so that it might looks more like it's look like a laser and what are these points I'm also curious Maybe these are the leftovers DeVries exploded deadly so we need to also delete those um those are coming from where here nope here so I think these are the points which has zero lengths in terms of the trail so we Could I think we could remove that by using clean
they're gone so in order to make these angle or just the Turning controlled we could go to the move rocket node and modify this acceleration or velocity a little bit so that we could control the turn how it turns now if you want to move the points if You want to move you're going to have the straight Trail straight look Trail then well you could do is to limit the angle difference between the new velocity and the old velocity if the angle between the new velocity and all velocity is less than let's say 30 degrees
then update the new velocity with the old Velocity direction which is going to create a straight direct Direction and once it's go over 30 degrees then that's when you can turn to that direction and that might be a way to make the rocket turn straight and straightly let's try okay so in order to do that we need to calculate The angle between the all velocity and the new velocity so this is the new velocity the old velocity is at the attribute right now so the angle of me two vectors can be calculated using a COS
Dot normalize to Velocity so this will Give you an angle between 0 to Pi zero to 180 degrees between the vectors and if the angle is let's say less than 45 degrees then the new velocity direction is same as the old one multiply by keeping the lengths of the old new velocity else you can turn to that direction So yeah let's say if this gonna work okay going outside check you can see that the line starts to turn with some straight angle which in turns start to hard to find the Target because yeah the the
angle is kind of a limited So we also need to fixed some parameters for that if you want to use it really straight turning angle like this you think you need to have more exhalation for that uh law rocket so meaning you need to increase the the axle the rocket full oxalation speed higher maybe one Maybe more yeah starting to follow so that's one thing you could try maybe in this case you could also increase the maximum velocity then you need to find the best parameters for that bit getting hard to find the target maybe
45 degrees a bit too large in terms of the angle yeah Or you could also update some conditions how it turns okay if you look at from the camera looks more like a Tron maybe I could increase more yeah starting to have more like it yeah more like it yes so the balance between the angle limitation and the acceleration speed is really important I guess Now let's have that angular limitations to the parameter to the new parameter so one Isis a little bit so oxalation is this one um let's separator here and the angle limit
go let's make it float oops Huh okay and let's have this somewhere around here rocket fell angle limit so to increase the maximum B to 10. or this one for this one and the maximum velocity maximum velocity is okay this one and this one is more like a global velocity parameter so It's also have to separate it this one as well well in the end I'll just gonna combine them together all right okay and the angle limit I'm gonna say 100 is the maximum okay let's see so right now it was the angle limitation previously
it was 45 so let's limit to 20 see what happens yeah you still get a feel of a straight line so it looks good limit the acceleration speed to a bit slow slower yeah still good I guess one all right starting to get dynamic so you need to have some balance between them 1.5 might do good hmm it's pretty hard 0.2 yeah somewhere around here well anyway both of them are okay so and if you make the angle zero you're gonna have more smoother Trail and in those cases you will not really Limit the exhalation
speed this is even to Launch yeah somewhere around here I guess all right now let's also control the uh the opacity of the trail so that the the one close to the Rockets which is at the point where it is running have Higher transparency I mean higher opacity no higher translucency yeah and what the one that's close to the tail have more transparency or thin as well and whatever value could be used for uh could be used for the thigh size could be used for the color it could be used for the fading or anything
in Houdini I'm just gonna try to draw it As color but when I'm gonna bring it to a blender I'm going to use that to control some shading value so let's have color based on the uh Trails position Point position which I can control it somewhere around here I guess yep and maybe I could also use fuse to remove Unnecessary points so 115 becomes 56 86. now based on each primitive I can have a a fading value probably by using resample in the easiest way if I if you want to also increase the number of
points you could use resample As well if you don't want it you could also uncheck this maximum segment lengths which will keep the current Point number and instead I'm just going to turn on curve U which will create a volume between 0 to 1 based on the position of the points and I'm going to color those points based on the curve View so this is going from dark Point dark Color to lighter color yeah based on the position now let's also make it brighter in the end didn't work okay I'll just go one and see
from the camera wait a minute is this correct yeah so based on the Trail positions it's changing its fading okay I think it's fine also The thickness of this Trail should be parameterized so let's have that so all the rest of the parameters is based on the visualization thickness um here for a little thickness right and is that it Okay um and for the explosion size I already have it I think yeah I think it's getting there so I think most of the setup is being done in Houdini side I think it's time to actually
quickly render it in this case I'm gonna try using EV on blender because that's pretty easy to create a Stunning image okay so so far so good let me know if you have any questions at this moment um if you want to know if you want to add any additional features to this let me know if you have any idea whatsoever let me know or if you have any questions or Feedbacks anything is welcome for now I am going to try to send this to a blender with the settings via so-called Olympic file so to
do that we need to prepare some groups so let's do that okay so first of all this is explosion group And for the explosion there is a point when the p-scale is equal to zero so those uh points where the P scales is equal to zero we can just ignore it so let's delete that additional delete here and look at the P scale attribute and if it's really close to zero just delete it oop Hmm just deleted everything why is that so P scale yeah there is one that's larger than point zero one so okay
I have to do this here okay this should do the job all right I'm gonna call this group X explosion And also want to make sure that I have no other group so I'm gonna use group delete to delete all the rest of the groups okay give it the same for the trail in this case I'm going to call this Trail okay do the same for the plane is this one and I want to add another object Which is the point the which is the the rocket itself yeah I'm gonna just create some simple tube
but maybe even later you can just replace it with other thing other geometry same for the explosion this one and for this rocket geometry geometry I want to place this to point of the rocket which is coming from here So let's get that get bracket am I getting it nope points yep and I also need to have a normal Direction to this point so it's copy the velocity to the normal just copy the normalized velocity right And copy two points check if I'm getting it hmm I don't see any okay um I need to remove
the P scale or this one there you go uh how is the orientation nope doesn't look good it doesn't really correct let's rotate this tube 90 degrees yep and the size must I guess must be related to the thickness of the trail so let's copy the trail thickness paste it to the tube radius scale make this radius one and a little bit larger than the trail thickness multiply by 0.1 or something Or I don't know 0.5 and let's color it to see how it looks gonna make it bright blue it's more like a electric plug
flying around the space catching some Tron like object which is also interesting um okay so it looks good just gonna go with this as a test all right now I also need to specify the group for it Delete the group and recreate it with a name I call it rocket okay that's it I think I got everything it's time exporting it as an Olympic and since I also had I have this camera I want to also export this camera information as well so that I have this exact view in blender So to do that just
use file export alembic and choose the file name how should I name it output then export everything yes accept and export the frame range and just export everything okay it's done let's go to the Blender and try to visualize what I have just exported gonna import first let's save this and import the alembic which I've just exported where is it I don't see it um did I export it to the where did I export it okay I think I'm missing the extension let me go to the directory Hmm there you go now go back to
blender import Lambic and let's test so I don't need this camera anymore so let's delete it so let's test playing it fine getting the animation all right that's cool okay and look let's look from the camera wait Uh wait a minute I think I deleted the wrong camera I think I need to delete this one and use this one instead there you go all right so after this it's just a matter of shading so almost done we can go to the output up I think you are missing the groups Because it's not recognizing the group
for each geometry that I made so maybe I need to make the material instead so I'm gonna create principal Shader in in Houdini this case I have four rocket Trail plane and what is it Was it uh Trail rocket and explosion let's also make sure we have groups maybe I know why because in the first frame there is only one group applied there's only playing groups alive here and seems like blender is only reading the first frame which groups exist so in the first frame either rocket Trail or explosion doesn't exist so That's I guess
that's why it's been ignored so let's create a dummy object on each of these group like create a circle make a triangle make it really small so that people can see it and have it as one of the rocket explosion or Trail just as a dummy so that we can we have At least one object with the specific group okay and so for now let's try to avoid creating material see if it's gonna work okay wait a minute what happened here okay so we have now at least one object for one group in first frame
this will do if that if it does I'm gonna delete the material Export Olympic replace the output export all right going back here remove the one that I've imported import the alembic again let's check okay now I have four groups so that was it I needed to have some some object applied with those groups So I think I don't need these material I'll delete it going back here it's time I set up some materials for each object I'm going to use the Shader mode with the EV let's check if I'm using EV yeah EV and
let's have bloom Okay so and for the background color I want to Make it black so let's have this black it's also High the grid well let's just keep the grid for now okay so for the trail and for the explosions I want to make it like unlit uh especially for the explosion I want to make it transparent so and maybe bright enough to make it look like it's been set at an Explosion so going into the material tab click the explosion use node I want now I need a node editor here so the Shader
editor for the specific material so this is for what is it explosion let's increase some emission for the explosion make it really high Like that see how it looks all right not bad also let's see if I can how alpha can affect Alpha doesn't really affect the emissions so maybe I'll just keep it as it is wait the alpha only works if I change the blending mode to Alpha Blend but still yeah maybe this would do some job hmm although I realize I don't have information to control the opacity or transparency of this explosion right
now so right now I only have constant value for these explosions I'll just keep it as it is for now Have you also then let's go to the plane I'll keep the plain color simple so blue maybe I can increase the subsurface yes I need a light till it I'll just be um lazy to use the emission Instead of using subsurface let's reduce this a little bit um well I don't know just go with one it's gonna go like easy all right so for the trail I'm also going to use emission also I'm going to
use the color information that I applied when I export it through alembic so I am going to create a node called Color attribute access to CD and there you can access to the color information maybe I can connect that to emission yeah as a color information also I could use this to as a alpha information so also have another node um separate x y z To the Constructor code The Constructor color get either X Y or Z and place it Alpha then convert this Shader to Alpha blend which will fade the Trail on the starting
point position and probably increase the emission strings a little bit higher then it's finally going to the rocket Let's also create the rocket color um again I'm gonna use some emission for this getting too lazy here blue wish let's change the plain color uh Skippy yellow let's see what happens okay play it And remove the grid stop um okay now let's tweak this a little bit going back to the trail maybe increased emission strengths a little bit um okay you want to change the color for the Trail maybe I can also Multiply oh Vector math
multiply this Vector with a color not this LGB maybe making this animated might be interesting huh that's too cheesy okay so to do that I could Use Hue saturation value and also use time frame oh why am I getting empty note interesting huh oh do I need to uh I actually don't know how to use this one um yeah Totally forgot how I could use the time based value I thought there was a node for it time what was it called hmm oh I see Okay so this is just a group okay my mistake thank
you um So I am not sure how I could access to the frame information or the time information particle info no input attributes ambient level camera color curve Fresno geometry parameters hmm not sure you stamp in the American values another node in a tree Shader no Group frame reroute script black body well I guess I could use script doesn't look smart is this uh python not sure I haven't used this can you use this nope okay let me quickly search how I can use time based value in the Shader editor okay so why not use
GPT Open blender switch to shading workspace and the Shader editor you make sure you have material you want to work with selected press shift a to open an add to menu navigate to input value right click on a value find a value in order to a driver oh okay let's try so value Right click on the Valley View add driver oops driver properties oh sorry driver properties expression frame divided by FPS for security reasons automatic execution of python script in this field it was disabled This may lead an expect unexpected Behavior is this the python
Behavior huh not sure okay I need to use I need to actually use the real number here 24. okay so does it work and use self unchecked okay it's unchecked click on update dependency to refresh The driver right so let's see if it works not sure if it's updating I don't think it's updating oh uh sharp frame and a value input oh really thank you let's try oh yeah thank you this is it this is it Now I could have a math node to divide it with frame rate and just limit this with another Divine
node so this will give you zero to one within one second so actually what I could do is to have another add node maths 24 for the frame rate and also create a value Like 10 multiplied to determine this is 10 second and then connect it here so for zero to one where this calculation means it's from 0 to 10 seconds now I could use the modulus where is it do we have it at subtract divide Round cell tranquet fraction modulo yeah with one so that goes back to zero and make it to Hue see
let's see okay I think I'm missing something so this being 63 divided and hopefully Hue is in between zero to one right oh Oh maybe I need to start from somebody like this might be too bright how's that all right that'll do so it's updating the color based on one rainbow color in 10 seconds got it okay well rest is just uh testing I mean nothing special Make this white ah my eye my eye too bright let's reduce the bloom oh anyway looking good I mean there are tons of controls you could have in this
setup so already maybe and you could add more if you want I'm looking for a Some screenshot okay let's see how this one looks hmm well it looks better in the animation doesn't really look good on image anyway that's about it I guess it would be nice to set the target pause as color for each missiles Trail it will be Inside the target pause as color Target position as color for each missiles Trail oh I see ICC um I see what you mean so using based on target position change the trail color that might be
interesting let's do that so we could bring the Target Geo no not this one Target position here which is within the range of this bounding box that I set here uh where is it yep so kind of need to convert this value into a color value so shall we do that um so if I want to change the color of The trail I could go right after I set the black and white color here or if I want to have it as an additional value um maybe I could use also maybe I could also use
UV as well right or use Alpha Channel since I already have this uh curve view which I want to keep it so somehow I Need to mix them so to do that that's what will be the best way hmm hmm well actually I could just get the Hue value instead of the color itself probably um maybe not What's important to determine the color is q saturations and the brightness and maybe I could forget about the brightness just set the Hue and saturations Okay so first of all I'm going to convert position [Music] To the color
by accessing to the position and also want to access to the bounding box information right and we're going to fit this point position based on the maybe I could just change everything at once hopefully from minus two positive and zero two one See what happens oops okay so I guess it's changing the color and what I want to get is the Hue value and the saturation value from this RGV value so lgbts HSV right now I could um a few In saturation then pass it to here so accessing to the color all right okay sounds
like look like a laser but this is not the actual color that I want to use this is just the information all right so I think it's done it's exp export this again Right I'm gonna replace the geometry camera not sure if I can replace it nope replaced it delete the old one so do I wait a minute hmm I think I am missing geometry Don't I what happened not sure oh where'd it go or just crashed anyway so starting from the start I'll shoot didn't saved it oh well and why am I missing copy
Hue set Huh I think I connected something wrong copy Hue set what's that this one why am I exporting this one let me reset the simulation see if I can export it or you can try recover it I didn't know that see File recover last session save to have it cool well that's cool thank you thank you so where was I here trying to import back the material I wonder how I can keep those materials That I edited and place it to a new geometry not sure how let's try I'm Gonna Keep It and import
Olympic okay so this is the new geometry oh yeah seems like it's been updated that's good that's good so I can now delete the old one this one is small save it Play it and let's update the trail based on the information that I wrote uh oh hey Jason mentioned thank you for the Super Chat uh uh ran a little late I'll re-watch later and have check a message on patreon uh sorry I didn't check the message on patreon I'll do that um later to do What was I it's a trail and the x is
the alpha or the gradient Valiant Y is supposed to be the Hue value so let's connect y to the hue and let's connect D to the saturation and for the value I'm Gonna Keep it one to make it bright enough and connect this to here here so this will I use the Supposed to use the okay it's not changing okay maybe I'm doing something wrong this is the trail it's not really changing the color so that is because I didn't change this one here hmm so the initial color has to be something I guess okay
now Is it changing slightly yeah slightly it's changing I think huh I wonder why it's the color is not really fixed weird the color is supposed to be fixed but it's gradiently ah well that is based on this Alpha Channel I guess so that's not the problem but oh and I'm seems like I'm multiplying wrong value here so I'm just gonna connect it here still doesn't look correct ha oh well even if I don't have Alpha the weird thing is that it's gradiently changing the value something's supposed to happen or is it something I did
wrong So there's only one Hue there's only one saturation so they're supposed to be just one color it's all CDG is solved same old GDP is all the same so if I'm using saturations and Q supposed to have the same color for every Trail but it's not somehow yeah so is huge oh yeah I'm getting so I'm having different Hues over the points interesting is this after this I'm having all the same green color it's weird also the blue color as well huh what I'm getting X Y and Z the same value somehow why I
don't know if I just connect it here just getting black and white or did I delete it the the old one let me try this again things looks a bit weird here this has The color this is coming from the dummy geometry but doesn't really matter hmm interesting save this export it alembic port hmm okay let's do this again I'm gonna try to delete the geometry file import alembic output okay so I have the same set up now this already isn't correct because if I'm just using the color itself looks like this it doesn't look
like that Hmm so I guess I'm doing something wrong what anybody know why this happens maybe I need to transfer the color to vertex Maybe I don't know hmm okay let's try let's just try Export I also need to make sure that the output is being replaced with the new one yeah so this is supposed to be the new one yeah I should be okay now let's delete this again import ant wait I think I'm looking at the different folder shoot that's the reason Um okay now material is gone oh yeah there it is and
oh yeah yeah getting the right value finally finally yes so the color so I wanted to use this as a hue this was the saturations this is a color and X has a alpha Channel Huh it's not really changing the colors it's maybe the saturation is too big no no yeah yeah maybe so instead of saturation let's connect this to value all right that'll do and seems like the explosion material is gone so let's remake it this one is easy just a huge emission Right playing exist rocket doesn't exist I'm gonna make white so hopefully
the color is changing based on the target position maybe I could reduce the saturations playing foreign let's just say it's okay I usually export from rope alembic these news mode Ogawa I see Rob alembic or can you use it inside Rock Network foreign I guess because you can use it with the tops yeah I'll do this method okay thank you um so I guess that's it for today Um so the main topic was to create a homing missiles or Rockets all lasers using the concept of agent base system adding some constraints like explosions when get
close to the plane or based on the life cost also um there's a separation forces applied To each of the uh uh Rockets to have some separation to each other and you cannot control the speed and forces speed and acceleration value as well as the angle limitation and so on so enough parameters to control The various types of Rockets I think hopefully you could try it out by yourself as well so and you can actually this one actually moves in kind of a close to real time because the implementation is really light weight so you
can try how many parameters during playing the animation some values don't work during the simulations I realized Uh where was it export this one is supposed to come here so let me try several primaries and I'll end this live stream let me know if you have any questions if not I'll just end whatever timing I feel like okay explosion duration 20 do rocket life if I make this rocket life to 10 I think It's gonna die really fast so you don't have much Trail that's not interesting is it let's make a hundred yep better Trail
lengths might be interesting longer I want to have more snaky like movement so those cases The balance between the exhalation for the Target to the Target and the separation is important if I make the separation really fast and also the separation distance a bit bigger five now I'm getting plain sick all right and a little bit of angle limitation might be interesting so 15 degrees in those cases I need to increase the The exhalation maybe like 0.5 that might be too fast 1.0 still too fast turning too fast there you go all right well getting
too complex too messed up maybe somewhere around 0.9 okay Maybe And now I realized Trail is a bit too long yeah I can pray with this all night I'm just gonna end it somewhere hmm Okay so wrong covered Rhino grasshopper versus sardini which better uh well the purpose of those softwares are totally different so I don't think there's yeah I don't think You can just compare it one to one it's really based on your purpose if you want to create a product design based on the precisions you use Rhino for sure Rhino grasshopper for sure
if you want to create like uh animations for gamings or modeling for gamings or animations for the movies you use Houdini so can't really say which one's better you need to know both You can learn bro both and you can just combine these both Tools in different situations yeah knowing one software is not enough for sure okay okay all right I guess that's it so thank you for those who have joined till now I am going to finish this live stream for today And hopefully I'll be able to do something next week as well okay
so see you sometime next week and good night have a nice week