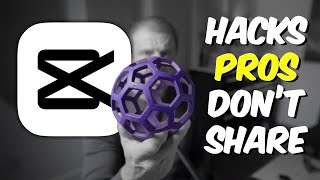
these are the five most profitable niches on YouTube number five fashion when I first see Nate wealth shorts like that they look impossibly create especially on your phone but here's the secret if you want to figure out how somebody creates something just look at it one frame at a time right here we have the first few seconds of Nate's open for that video and if I just go one frame a time like there's a frame of white another frame of white two frames white easy enough then I just go to the next frame and I
see that I've got okay I've got several elements if you look right here we've got a sky and some some grass we've got a hand and we've got these little pieces of paper with writing on them so we have all those elements and as we go through this whole video we can see you know we got this bag of money we need we've got a YouTube logo we got some YouTubers and we've got some mesh and some other mesh and a chicken a disco ball and some text and that's that's all of it but you
have to actually create all of those elements and lucky for you I created all of them some of them with AI some of them with cap Cuts AI some with photoshop's AI and then of course for the hand I just photographed my hand for you and I've given you all these elements they are linked in the description down below so what you can do is just go there right now download them for free then you can follow along with me as we recreate Nate wealth's open for that short and here's another kind of secret most
of these fancy animated graphic looking things that look so complicated mostly consist of cutting things out and moving them on the screen so if you can get good at those you're going to be way ahead of the game by the way it's uh 8:38 p.m. on a Saturday night and I just had my first shower in 2 days because pretty much all I do is make videos for you guys so if you could hit that subscribe button down there show me little love uh I'd be grateful now let's recreate the open for this Nate wealth
short let's jump into cap cut first thing we're going to do is name this so we can find it in the future with nothing selected in the timeline you get this details window that opens we click on modify and we just want to give this a name so we're going to say Nate wealth 3 and by the way this free layer should always be turned on if it's not on turn it on it is the reason you can't move text between layers a lot of you have that question like I can't move my text got
to make sure the free layer is on before you start your project you want to go ahead and change the frame rate to 30 not that it's the one true frame rate that's just the frame rate that Nate wealth used in his video and to match his it's going to make it much easier if we just change ours to 30 so bam 30 frames a second now hit save next we're going to move this guy out of the way and look when I move this out of the way and I'm leaving it on the timeline
so I can reference it when I'm trying to figure stuff out notice when I move it out of the way it just snaps back and that's kind of annoying unless you're just doing initial trim so to make that not happen we're going to click this button right here you can also hit the P key to turn off the main track magnet and now when I bring it over here look it just it just stays like it's supposed to so to get a couple frames of white here we could go into library and try to find
some white down here and there's some stuff that could easily work but here's a hack you can take any image any video or whatever just drag to the timeline and it's like oh no it's red it's the wrong color all you do is you have to make sure by the way that it's on the first track this won't work if it's on a track above it so down here if I scroll down under video basic I can see canvas and I can say I want a color and then I can choose the color I want
it to be white so now if I make this thing Invisible by jumping up here to say opacity now I've got white but just remember that when I put it up on this layer it doesn't work it just went away that whole canvas thing is gone it's got to be down here on the very first layer for this canvas feature to work and I can make it you know any color I want or and it's got some other funky stuff down here as well if we open that palette up it's got more than just color
it's got Styles and brand backgrounds and all kinds of fun stuff look at these Styles you do all kinds of junk to have a background just built in downloading bam that could be your background we don't need that all we want is white so I'm just going to go back here to color choose white there's a background it's ready to rock I'm just going to make this two frames long let's drag it over here bam okay we've got these two frames of white here but you might notice that this is widescreen we want this to
be a vertical video for short so we're going to click on ratio scroll down to 9 by 16 that's the right aspect ratio for shorts we can start adding elements to the timeline let's go ahead and add the Blue Sky down here and put the hand right on top of it and we're going to set key frames for both of these because we want them to move over time so first let's make the sky the right side just by clicking and dragging it up and having it fill the frame and the Hand we want the
hand to be small starting at the bottom right about there so that's kind of the starting position for these guys then they're going to zoom in so I'm going to set a key frame for scale and position for the hand and scale and position for the sky and then I'm going to zoom in quite a bit because I like to see what's going on when I'm doing this and have a really clear view and I can see frame by frame where I am here so we want to go forward probably about four frames about there
then we want to scale these guys up so the hand's going to scale up I don't know about that much and kind of move up about there actually it's going to be bigger it's going to scale up a lot where those guys start to go off the screen and then this is also going to scale up quite a bit so I'm going to scale it but I want to keep the grass down there visible so that's probably pretty good right there so so far it would look like that the next thing we want to do
is soften the landing because it's really harsh and it's softer in his video so to soften the landing we right click and we choose show key frame animation and we modified all of these properties so we just need to add curves to all of them and the easiest way to do that I'm just going to zoom out on the timeline a little bit so I can see all the stuff over here easiest way to do that is just one at a time double click on this space here click on this key frame so it's highlighted
and just click on this Auto curve now we have more fancy curves here but we're not going into that in this tutorial and I hit this left Arrow to go back to that first key frame then I do that for all three of these now I'm going to right click on this and choose hide key frame animation then I'm going to do the same thing for the hand with all the curves added it looks like this by the way I'm going to show you that again because we're going to be doing a lot of that
just going to fast forward you have to watch every single time but I'm going to show you a couple tricks to make it go faster so let's go ahead and zoom in a little bit and just play that for a few frames looks like that that's pretty close to what he did the only thing I do different is I think he had the hand up a little higher so I'm just going to position my playhead on this key frame by hitting this back arrow right here and just bring this guy up a little bit higher
like that so be closer to what Nate's was and now it looks like this now Nate has a lot happening very quickly in this video we are at you know frame six and we already have three elements we're about to add our fourth element which is one of those little little notes that he had there so I'm just going to go back and to click on all and open up this folder called notes and I'm just going to drag it down to the timeline here and it's the the most profitable his wor is visible but
mine are a little more visible I'm just going to position it where I want it to go and then I'm going to position all of them that one's at six frames the next one I'm just going to scroll over to 12 frames and how do you know what frame it is you don't have to count you can just look and go oh we're at 12 frames right here I'm going to add most here and scale it down to about where I want it to go at 19 frames we have profitable and I'm giving these numbers
so that you can do it and it'll match because if you're trying to guess frames and stuff it's going to be really really cumbersome so just go ahead and match what I do and you'll get the same result and lastly around for frame 27 we're going to add the word Niche right cheer and Ben we have all of these guys look like this and I'm going to scale this guy so he fits and he's in the background so you should be maybe a little bit smaller than the other ones because that finger's a little farther
away now they pop on okay which is fine but Nate had them animate on so we could manually key frame these guys and his were doing like crazy things but let's just do our own thing and use the features built in capcut to make this easier so for each one of these I'm just going to go over to animation choose in and find something that's you know kind of fun and one that kind of looks like NES is this rotating one here so I'm just going to double click on it it adds it to the
clip down here and it made it one second long that's too fast I'm just going to take this slider and slide it to the left a little now we could add the same one to all of them if we wanted or we could do something more fun and there's some much more fun versions than that of this of this animation in so we can go ahead and try I don't know how about Shake three I like that let's just add Shake three to the rest of them and we'll make them all about3 seconds like this
and that's a free filter hopefully it's available in your in your area and that looks that looks pretty good right boom boom boom bam so really quickly in a few seconds we can have these things animating on without messing with all those pesky key frames which kind of takes forever next it around 101 we want that money bag to come in so I'm going to position my play it at 101 I can see that it's 101 right there I'm going to go back back here and click on all and choose open and here's our money
sack guess where I made that you guessed it I made this guy right within cap Cuts AI in the mobile version because that's where you can create that mobile version and this I want it to be bigger and I want it to kind of fall on his hand right there right how do we get it behind his thumb we're going to learn that in a second too so we're going to animate this cache so it falls and then fall some more with the hand here's what we do and at 105 we're going to add a
thumb so we can cover this because you may have noticed in Nate's version that it looked like it was in his hand how do how do I do that well we positioned the bag about where we want it to go and then at around 105 which is where we are now we just add the thumb and how'd you get the thumb well I cut it out in Photoshop but there are other apps like photopia in which you can do things like this to cut things out in detail like that then we got to scale it
up and if you wonder oh how do I make it match that thumb behind there well I can look at the other thumb way down here and look at the size and go oh it's 14 49 and there's the position too if I can remember that uh so I can click here and take this up to 149 it'll be the right size and if it's hard to dial it in exactly you can just click these arrows up 48 49 now it's exactly the right size and then I can just position it right here over it
let and let's just make sure it's right 144 minus 1616 let's go ahead and click on this guy 148 - 161 so to make it exact 148 - 161 and then I can just type in there as well and now I know it's exactly precise and look at this watch this as soon as that thumbs there looks natural and it's going to look natural because the bag is going to fall right into it so you you just wait now the money bag starts out of frame up here at BAM like right there and so we're
just going to set a key frame for it here for I think we just well let's do position and scale in case we have to do both so there's scale there's position and it lands right here bam on the where the thumb appears so we're just going to drag it all the way down to here and look at that it like landed right at his hand it's kind of it's kind of magical don't you think like bam it's in his hand and now we want all of these things to move together how do I make
the hand these little notes and that bag all move together well I'm going to show the entire timeline the way I did that was by hitting shift to Z move this a little bit closer so I can see more of the timeline at once when I hit shift Z I'm going to cut the ends of all these guys off just by highlighting them all and selecting this guy right here this slice those guys and I'm going delete all of them see if I got them all missed one bam I'll slice that guy too it's better
to make a composition like this longer than shorter we're about to make this into one clip it's better to make it longer than shorter because if you run out of stuff if this thing was too short like say this guy was too short and I made a compound clip out of it it's like oh suddenly one of these guys had go away and that's bad so better to make it longer than shorter and we don't need this much but we're going to keep it this long and I'm going to turn these into a compound clip
so I can animate them all together to do that I'm going to select all of them except for the sky right click and I'm going to choose create compound clip now with this clip nested we can move it all together so we just going to go over to like 105 add a key frame for position and scale then you go forward to like 108 and have all these guys dip together watch this if I click and drag it it's going to add another key frame as I dip together just about like this that and that
looks like this boom it goes down there we want it to rebound back up so let's go to say frame 12 and have it rebound up to where it started and that looks like this and that's actually that's actually not bad then we're going to go about frame 121 right here and have everything leave the frame completely like in Nate's video bam Rama now it looks like this which is okay but it's a little bit jerky it's too linear so what do we do we add curves now you you don't have to add curves for
scale x axis and y- axis scale is size x-axis side to side Y is up and down the only thing we changed here is the y- axis so let's just go ahead and add curves to the y- axis to do that right click on the clip and choose show key frame animation or hit the key the keystroke option K and now we see all those but we don't need to worry about scale X we just need y so for each of these y key frames the up and down key frames are just going to add
the curve so I'm just going to use this Arrow over here to get to the key frame to be positioned on it and now I'm going to double click on this guy click on it when it's blue I can add a curve if it's not blue you can't tweak it so I'm going to add the curve for this guy then I'm going to click on this next guy add the key frame click on the next one add the key frame and click on the next one add the key frame you don't have to have the
playhead over it you just have to have it be blue and then I'm going to right click on this guy and choose hide key frame animation and it should look a little cooler let's have a look it looks not too bad when we're done with all this we're going to add some motion blur which will kind of sell all of it much better next it around 119 the YouTube logo starts to appear so let's go back to all so we can see our folders now sometimes this is so small that you forget like where's all
my other stuff you just click on all right here and here's YouTuber folder and there's my YouTubers is going to use in a minute we just want this YouTube logo to appear right here and this thing is really big it takes up about that much space we've already scaled it up and this doesn't enter the scene with motion this enters the scene with opacity so it starts at zero opacity we're going to scroll down to opacity here set a key frame take it down to zero move forward about one two three four frames and have
the opacity go all the way up to 100 so you can see that this kind of just Fades up just like that and right about here as this is fading up this guy we called it fashion and I actually found I think the ex exact same video that uh Nate wealth used in his video this guy appears on screen so I think he's something like that actually I think he's I think he appears about like that and then he drops and bounces let's go ahead and animate him he starts right here and then he goes
down a few frames and then he rebounds all the way back up so I'm going to make sure he's highlighted I'm on the first frame I'm going to just click the position key frame because he doesn't really change size and we're to go forward four frames and we're going to take him down from this point he starts to go more slowly up to around 221 so I'm just going to drag him up about where he ends in Nate's video and notice that it added a key frame automatically because I already had a key frame set
for that property and again you don't have to watch but I'm going to just add that curve well I'll show you the first one I'm going to add the curve to the Y AIS because that's the only property we modified show key frame animation double click on y click on each of these key frames and just go like this one thing you may have issues with is clicking on this first guy to get them to be blue I can't click them what do you do you just click on this Arrow right here to C on
the left Arrow one two three bam we're on that one now we can go ahead and add that y curve to this guy and close this and right now looks like this looks a little weird but again motion blur and all the other stuff happening on top of it is going to help I know this is a lot and I don't know if you want me in future videos to show you every frame I add or just show it once and kind of fast forward through it so let me know in the comments how you'd
like me to do it I'm going to try to do a balance in this video next at about frame 204 let's add Matt dlla right here and you'll notice that in Nate's video Matt was much bigger so we can just scale him up and he was kind of only on half the screen right over here and he was also at the top and it's like oh no he's at the top I can't get to anymore how do I get to him you just go down here to this magnifying glass and you just zoom out a
little bit so you have access oh he's not gone on forever now we're going to set a key frame right here at the beginning for both position and scale move forward to about frame to 11 here and then drag him down to the bottom like that then go forward maybe two frames one two add another key frame so he stays still for a second and we're going to have him rebound slowly till about 222 and since there's a key frame there I'm just going to drag him up so he'll slowly be going up like so
and I'm going to add that curve to the Y AIS the up and down one more time just going to do it for you the first one then you guys can do the rest on your own right click show key frame animation double click on y select a keyframe and select the curve and do the same thing for the rest next I'm want to add Ali abdal I'm just going to click and drag Ali and Alli was much bigger and he was off to one side like that I believe so we're going to set a
key frame for position the only property that's going to change we're going to go to 224 and at 224 he's going to be right down down I don't know about like that but in the beginning is going to be at the top so we're just going to go back to that first key frame and drag him right back up here to the top and that should look pretty good looks like this doesn't look great because we don't have those curves so I'm just going to add those y curves you don't have to watch at 221
Eman GGI enters the scene so I'm just going to click and drag him down here and Eman was much bigger so we're going to make him really big and he did come from the top but guess what he had something else above him he had a grid on him and I was trying to find a grid online that I could use without copyright and I was having trouble so I just made you one so you guys have access to three grids to use Forever Without Fear of copyright so we're just going to go back to
all click on my grids folder here and we want the transparent one we only need one of these other ones but um you have them all for your future use for your personal Library going to make this grid much bigger I'm just going to animate the grid and EM separately so they kind of slam down independent of each other I'm going to set key frames for both of them for both position and scale then go forward to about 226 and set another key frame for position and scale for both of them then I'm going to
go back to that first key frame and drag both these guys up to the top see that blue line that's trying to keep it centered for me it kind of snaps into place and I'll do that for em as well just drag him up there because Eman wasn't centered I don't get that blue line so I got to be a little more careful and I can manually J these if I want but it should be okay like that and now they both come down together and then they start to zoom back so I'm going to
click on the grid and jump to round 306 and scale the grid back a little bit just by adjusting this scale slider over here and do the same thing for e and I'll adjust him back a little bit too like that next at 3 seconds we're going to add this white grid just going to drag it down here and the white grid starts at an angle so I'm just going to angle it and it starts really big like this and it also starts rather transparent completely transparent so we want it to be angled uh we
can use this this thing over here to angle it so it's a little more perfectly angled like that I think that's about how it was starts pretty big we'll make it even bigger like that and then over the course of just a few frames it goes and gets even smaller so I'm going to scale it down a little bit it gets considerably smaller actually um but it also starts transparent and becomes opaque and look what look at that I forgot to set a key frame but since I'm here in the right place at 306 I'm
just going to set a key frame for it therefore scale and I'm going to go back to the beginning and just scale it back up like that bam and notice that it set a key frame automatically it looks like that and we want to go ahead and make it go transparent as well so I'm going to set a key frame for opacity here and go to the beginning and I'm just going to drag this down to nothing and then we get this bam and that looks I think pretty good right and then right at 306
we get our disco ball girl now I'm going to go over here in into all and click on disco ball Jen you might say Jen Jen who well I couldn't find that exact disco ball girl that he did so I had AI create you recognize her Jennifer Lawrence Forest that was one option and that was the other better option and this was created in capcut Ai and you might have noticed on my Channel that I have featured Jennifer Lawrence once or twice that's cuz okay I got to think for Jennifer Lawrence she's adorable what red-blooded
man doesn't have a thing for Jennifer Lawrence you like Jennifer Lawrence she's she's she's adorable so let's go ahead and add Jennifer right here at 307 she starts really big like that maybe even bigger than that and over here somewhere and we're going to set a key frame for position and scale and then until we get to around 313 and position her about right there that was kind of jarring so I'm going to add curves for all those properties you don't have to watch our disco girl starts to move to the right a little bit
and ends up around 404 four or so so we're just going to move her around like that just a tiny bit and of course I'll go ahead and add a curve to that as well the last element we're going to add is text so starting at 312 we're going to take the default text add it here stretch it out so we've got enough of it and we're going to type in number five fashion which is the fifth most profitable Niche according to Nate wealth and to highlight all of it we're going to change it to
any font you want but babis new is pretty close to what Eman gadg was using let's just scale it up and even had a pretty decent Siz drop shadow on it so we're going to scroll down to Shadow make the opacity be all the way up and turn some of that blurriness down I think it was a pretty harsh Shadow and we'll angle it away a little bit there so that looks pretty dang good maybe increase the blurriness a tiny tiny bit you may have noticed that Nate's Shadow looked like this where you could kind
of see through it so how do we do that well that's simply a different blend mode and we don't have any blend modes here other than adjusting the opacity so we kind of have to fake it to fake this and this is kind of a good trick make sure the opacity is all the way up if something doesn't work you want to add a special effect to text and the options not there how you do is create a compound clip so just right click on it create a compound clip now it thinks it's a video
or a regular image it doesn't know it's text anymore and look at this magically these blend modes appeared and the blend mode that works best is overlay right here and Bam it looks pretty similar to what ean's got going on with his and we had that thing popping up and then dropping down so let's just do that real quick I'll animate it you don't even have to watch now let's just clean it up by deleting this junk just going to hit command b control B on a PC delete that I'm going to delete this let's
look at it right now without motion blur and it's going to look a little bit jerky maybe it looks like this I'll make it big for you ideally I would export this and then reimport it and add motion blur in cap cut but cap cut motion blur has been really hit and miss in fact yesterday didn't work at all today it's trying to work but doesn't look great so if I just drag this exported clip of all of this stuff exported brought it back on the timeline I would simply click on it and scroll down
to motion blur and mess with it and it would it just it just looks all wonky here so it's not really usable now they'll probably have an update that'll fix it but right now it's not great so what I'm going to do is I'm going to add some sound effects add some motion other program and show you the finished Masterpiece in T minus 1 second these are the five most profitable niches on YouTube number five fashion there has never been a better time to grow on YouTube but there are two things holding you back right
now if you're not seeing the growth you want the first one is that you haven't mastered editing yet the other one is that you are completely skipping the things that actually get you views and subscribers and you're not even aware I can solve both of your problems and help you literally skip almost 20 years of trial and error with my new course master capcut in my course I teach you everything you need to know about cap cut getting you on the path to becoming an editing wizard you're a wizard Harry imagine being able to figure
out on your own what I shared with you in this video secondly in section two of my course I teach you how I went from this this is day one when I started this YouTube channel April 21 2018 one view on my video I went from that and about about 200 videos later I started doing this and this is only a few months ago so I am new if you're new like I just started implementing the things I teach you in section two and I literally went from getting you know a few thousand views a
day with 200 videos on my channel and now I'm getting 5,000 4,000 10,000 11,000 12 18,000 views every single day on my channel and my subscribers same thing happened remember the beginning right here months and months for actually for years I was getting nothing then I started implementing the things I teach you in in section two of my course and Bam now I'm getting hundreds of subscribers every day and this is live stuff I'm not I've got nothing to hide from you here is the last 28 days where you get a better take on it
where I'm getting 286 367 315 it just keeps going up and up because of the things I teach you in section two of my course I guarantee you can do exactly the same thing or you get all your money back no questions asked if you want results like I'm getting right now on YouTube please go to Master cap cut.com or click on the link in the description below right now since you're still watching this video I'm guessing you are above average so the odds of you blowing up on YouTube are probably quite high as you
probably know you need 1,000 subscribers to get monetized on YouTube so this is the perfect opportunity for you to make more money from YouTube and set yourself up to become a full-time YouTuber doesn't matter what your background or Niche is what I share with you Works in every Niche faster than anything I've ever seen if you don't get results you get your money back no question questions asked I can't wait to see you crush YouTube and make your goals of YouTube success come true so please go to the link in the description below or click
right here and sign up right now you quite literally have absolutely nothing to lose you will become an editing Wizard and your channel will grow or you get your money back if that doesn't interest you please watch this video because YouTube knows that's what you're looking for