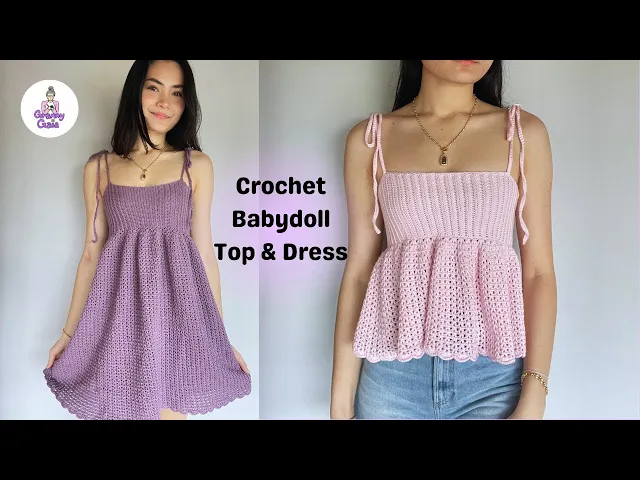
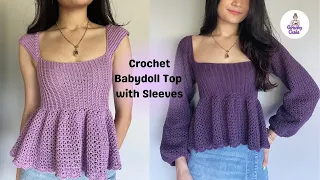
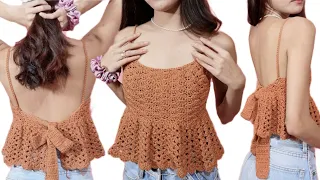
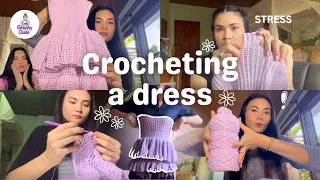
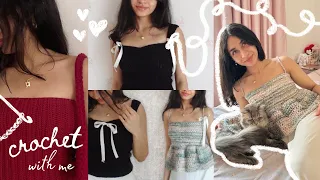
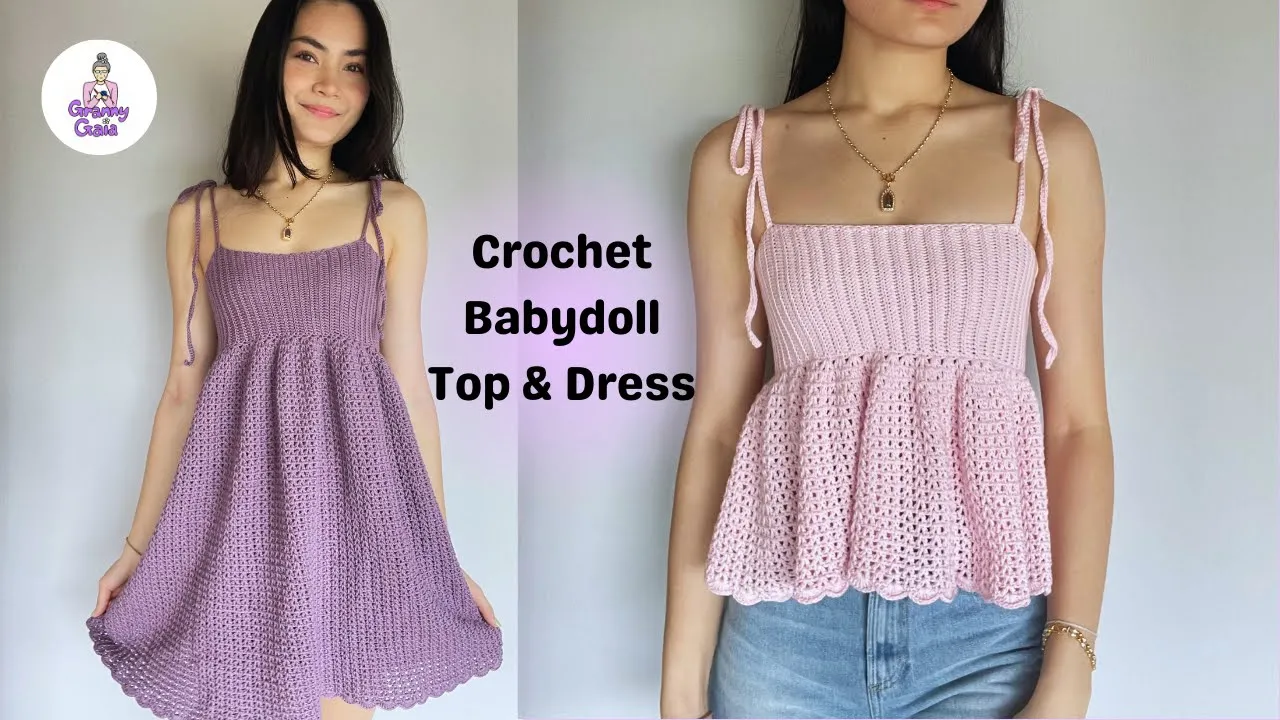
Hi everyone welcome to my YouTube channel And in today's video I'm going to show you how to make this crochet babydoll top I think it's super duper adorable and it has tie straps so you can always adjust them So yeah this is what it looks like on me I'll do a full spin for you I also made a dress version of this top which I think I'll insert a picture or video for you to see. If you want to make the dress you just continue making more rows of the v stitch which i will show
you how to do in this tutorial so yeah if you have any questions please let me know oh one more thing for this top I used about 250 to 270 grams of yarn and for the dress I used about 550 grams of yarn i hope that helps and if you have any questions let me know in the comments and I'll try my best to answer you this is the top we'll be making today and I hope you enjoy ok so for this tutorial I'm going to be using this 100% soft cotton yarn and this is
a number 2 weight yarn together with this 3mm hook you can use any yarn and hook you like since I'll be providing the measurements in inches first we're going to make the top part I'm going to start with a slipknot and I'm going to chain the length of my top part so I finished making my chain and I want it to be about this long it covers this part of my bust I've added 3 extra stitches because we're going to be working with slip stitches and as we work with slip stitches it's going to sort
of shrink the size or length of our project by a little bit so I just chained an extra 3 so once you have your chains ready you're going to do a slip stitch so we're going to skip the first chain go into the second chain from the hook and do a slip stitch we're going to make sure that out slip stitches are super super loose so that our project doesn't keep shrinking and it will be easier for us to go into the stitches in the next round so do slip stitches all the way down our
first row making sure to keep it super loose to help keep track of the number of stitches we can put a stitch marker in the very first stitch we made doing this will help us ensure that we're not skipping or adding any stitches at the ends of our rows because slip stitches can be a little hard to see once you've made your last slip stitch of the first row we're going to chain 1 and we're going to turn our work now we're going to make half double crochets in the back loop only as you can
see here I've turned my work this is the chain 1 we just did and this is the first stitch we want to go into we're going to go in through the back loop only I'm going to yarn over go in picking up that back loop and making a half double crochet again you can mark this very first stitch just to keep track and make sure that you're not skipping or adding any stitches that way when we come around to it the next row we know where our last stitch is we're going to continue making half
double crochets in the back loop only all the way down the second row so I've made it to my last stitch I'm going to make a half double crochet in the back loop only when we're done with that we're going to chain 1 turn our work and work slip stitches in the back loop only all the way down so again I'm just going to mark that first stitch so I don't get confused and I'm going to continue doing slip stitches in the back loop only that's basically going to be the pattern for the rest of
the rows we're going to alternate between slip stitch in the back loop only and half double crochet in the back loop only and at the end of each row we chain 1 and turn so from that row you're going to chain 1 turn and do half double crochet in the back loop only all the way down after that, you're going to chain 1 turn and do slip stitch in the back loop only you're just going to alternate between those 2 rows so this is what it's supposed to look like you can see the ribbed effect
this is the good side and the bad side will look like this so we're just going to continue alternating between these 2 rows so I'm done with my panel here and don't worry if your rows a little slanted you can see mine are also a little bit slanted it's going to be ok because once we stitch up the sides together the edges will still be straight you're just going to continue making enough rows for it to fit around your bust when you're trying it on make sure that you're stretching it as well because it needs
to fit quite tightly and overtime as you wear it the top will stretch out so make sure to make it fitted to your bust now it's time to sew the sides together using slip stitch make sure that you're doing the slip stitch on the wrong side so this is our right side the ribbing is more clear here and the other side is our wrong side the ribbing is less prominent here but you can choose which side you like best and the one that you like is going to be the right side so for me this
is the right side I want to make sure that I'm working on the wrong side first thing is chain 1 and then go through the back loop of this first stitch and on the chain side as you can see here this is our very first chain I'm just going to go through like that and then I'm going to do a slip stitch we go through all the loops that's our first slip stitch so again we're going to keep doing that all the way so the back loop of our second stitch and the second chain so
we're going to keep doing this until we sew up the sides of our top this is what it's supposed to look like so far once you're done slip stitching it should look something like this now we're going to make single crochet all the way around here to start I'm just going to put a stitch marker here because we need to flip this around to the right side so this is what our seam looks like on the right side now we can go back to that stitch we marked and start with a chain 1 and place
a single crochet all the way around I like to place 1 single crochet in the raised row and I'm also going to mark that very first stitch just so that I know when to stop when I come back around then I'm going to make 1 single crochet in this half double crochet row and again one in this raised row so we're going to make a single crochet in each row so in each half double crochet row and in each raised row so I've made it to our stitch marker and I'm going to place one more
single crochet into this area here which is our seam that's going to be my last single crochet and then I'm going to slip stitch join into the very first stitch now we're going to work on the bottom part of the top or the dress and I'm going to start by chaining 4 and then I'm going to go into the same stitch and make a double crochet so what this is is a v stitch so that first 3 chains counts as a double crochet and then there's the chain 1 and then there's a double crochet so
this is considered our first v stitch but for the very first round of the bottom part of the top we're going to do a increase row so we're going to chain 1 again and in that same stitch put a double crochet in that first stitch it's almost as if we have 2 v stitches and we're going to do this all the way around so we're going to skip the next single crochet work a double crochet into this second stitch or into the next stitch and then chain 1 and in the same stitch work a double
crochet then chain 1 and again in the same stitch work a double crochet repeat that again skip this next single crochet and into this next stitch put a double crochet then chain 1 into the same stitch put another double crochet then chain 1 and into the same stitch put another double crochet then repeat that again skip the next single crochet stitch and into the next one put one double crochet stitch chain 1 and in the same stitch another double crochet chain 1 then in the same stitch another double crochet so we're going to keep doing
this al the way around until we reach the beginning so I've made it to the end here and since I have 2 stitches left I'm just going to put 1 more increase v stitch here so again skip 1 stitch put a double crochet in the next chain 1 and double crochet and then I'm going to chain 1 and double crochet again now we're going to slip stitch into this beginning chain so here we have chain 1 chain 2 chain 3 go into the third chain and slip stitch once we have slip stitched we're going to
slip stitch again but this time we're going to do it inside of this v stitch so here we just slip stitch and this is out next v stitch so we're going to insert our hook there and slip stitch again then we're going to chain 4 and then double crochet in that same v stitch so that's going to be our first v stitch and then we're going to continue making v stitches all the way around and for these rows onwards it's not going to be increase v stitches they're going to be regular v stitches so I'll
show you how to do that so our next v stitch that we're going to work into is this chain space here so in every chain space we're making a v stitch so yarn over do a double crochet in the next chain space then chain 1 and again in the same space make a double crochet so that's what your v stitches will look like and we're just going to continue doing this all the way around so our next v stitch space is here double crochet chain 1 double crochet in that same space again here is our
next v stitch so we do a double crochet chain 1 and a double crochet all in that same space so I'm at the end of my second row so we're going to slip stitch into the third chain so 1 2 3 like that and then we're going to slip stitch into this chain space here like that and then we can chain 4 and then we can start making our v stitches all the way around just like the second round so yarn over go into the same stitch and do a double crochet so this counts as
our first v stitch then we go into the next chain space do a double crochet chain 1 then another double crochet int he same chain space then we just repeat that all over so in the next chain space double crochet chain 1 double crochet in the same space again so just like how we did our second row so this is going to be the pattern for the rest of the rows we're just going to keep making rows and rows of v stitches until we reach our desired length I have finished crocheting the bottom part of
my top obviously if you want to make a dress you can just keep going until you reach your desired length so since I'm making a top I'm just going to stop here I'm going to give you some measurements so my top part is about 6 inches long and my skirt part is about 7.5 inches long and together in total it's about 13 inches long so if you want to make the same measurements as me then you can follow those but of course you can crochet as many rows as you want to make it fit your
body now we're going to add the scalloped edging along the bottom of our top or dress so I've just zoomed you in here I have slip stitched into that third chain and now I'm going to again slip stitch into this chain space and now chain 3 this chain 3 will count as our first double crochet and into that same chain space I'm going to do 6 more double crochets so I have 6 double crochets in that same chain space plus that chain 3 so in total here in this shell we have 7 double crochets because
the first chain 3 counts as a double crochet now into this next chain space or into this next v stitch I'm going to do a single crochet and in our next chain space here I'm going to do 7 double crochets then in the next chain space I'm going to make 1 single crochet and in the next chain space I'm going to add 7 double crochets then in our next chain space 1 single crochet so I hope you get the pattern for our scalloped edging here or our shell stitch edging however you like to call it
so you can see how the stitches sort of fan out to create this shell look so I'm going to do that continuously all the way around the bottom of my top I've made it to the end and since I have 1 extra stitch here so usually I would go into this stitch and make another 7 double crochets to make another shell but because that would make it to close to our first shell it wouldn't look evenly space out so what I'm going to do is slip stitch into this next chain space and then slip stitch
into the third chain so 1 2 3 like that that's what you can do it you have the same issue as me where you have 1 extra chain space but if you don't lets say you have enough to complete it after you do your single crochet you can just slip stitch straight into that third chain like this so once you have done your final slip stitch you're just going to chain 1 and cut off your yarn then pull to tighten this knot and then weave in your ends now all we have left to do is
add the straps so for this part you're going to mark where you want your straps to be and to do that you're going to try it on and then mark where you want them to be but before we try it on I'm just going to take a stitch marker and find our seam because our seam is going to be on the side of our top and not at the back so here is my seam I'm just going to mark it this will help me mark my straps later I'm going to try it on and then
we'll place stitch markers to where we want the straps to be I have put my top on and here the seam is on the side where we just marked and now I'm just going to take 2 stitch markers and mark where I want my straps to be so I have put in my stitch markers for my straps and I'm going to take it off and then we'll mark the back straps I just took off the top you can see our stitch markers so now we want to make the back straps align with the front straps
what we marked was the front straps and what I'm going to do is count the number of rows to make it even so count the number of rows in between our first strap and the seam so I'm going to count the raised rows to make it easier so for me I have 1 2 3 4 5 raised rows in between these 2 stitches so now I'm going to count the same number to this side so that's 1 2 3 4 5 so I'm going to take the same color stitch marker as this first strap and
mark where we counted so just to double check in between here we have 1 2 3 4 5 and in between here you should also have 5 so now these stitch markers we know makes 1 strap we're going to do the same thing on the other side so I'm going to choose another stitch marker color so mark the other edge of my top so I'm going to count the same number again 1 2 3 4 5 and put the stitch marker these 2 blue and pink stitch markers mark the edges of our top and then
this yellow stitch marker will mark 1 strap and this purple one will mark another strap so from here we count another 5 again double check 1 2 3 4 5 1 2 3 4 5 so now our straps are marked and we can start crocheting them i recommend you try this on again just to make sure you like the strap placement before we actually make the straps I'm going to make a row of single crochet along the top here so I'm going to start at the seam and I'm going to add my yarn here this
is just how I add my yarn you can add your yarn however you like I like to tie it then we're going to go into that same stitch that we tied it to and pull up a loop like so and I'm just going to chain 1 and we're going to make single crochet all the way along you can start here again I'm just going to mark that first single crochet just so I don't get confused when we're done so just like how we did the single crochet row down here I'm going to put 1 single
crochet in each half double crochet row and in each raised row so when I come to this stitch marker I'm just going to remove it but also remember where it was because we're going to need to mark it again I like to go into that same stitch I marked so that I can just mark that single crochet then we continue like normal so I've made it to the end and I'm going to slip stitch into that first single crochet we did right here and then chain 1 and cut off my yarn then just pull to
tighten now we can add our straps you can start at nay stitch marker I'm going to start here and add my yarn now I'm going to chain the length of my strap so I want to make mine quite long and I'll give you a measurement of how long my chain is I made 153 chains which comes to about 27 to 27.5 inches long now we're going to work into the chain skip this first chain and do a single crochet in the second chain and just continue making single crochets all the way down the chain I
have made my last single crochet so now I'm going to slip stitch into this next single crochet stitch here like so and then I'm going to chain 1 and cut my yarn pull to tighten just like that we have our first strap now do the same to every stitch marker I've placed so our next one is this yellow one again add your yarn into that stitch then go back into that same stitch pull up a loop and start chaining the same amount you did for your first strap continue to add straps to where ever you
put stitch markers I have finished making my straps now the only thing left to do is weave in my ends just to show you again this is how the top looks like and I hope you enjoyed my tutorial bye see you next time