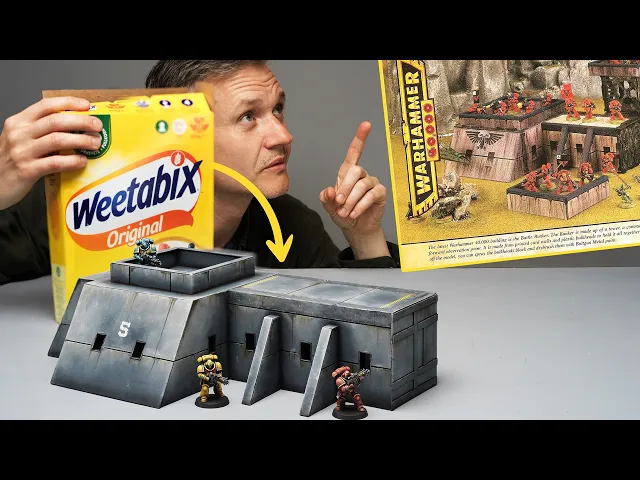
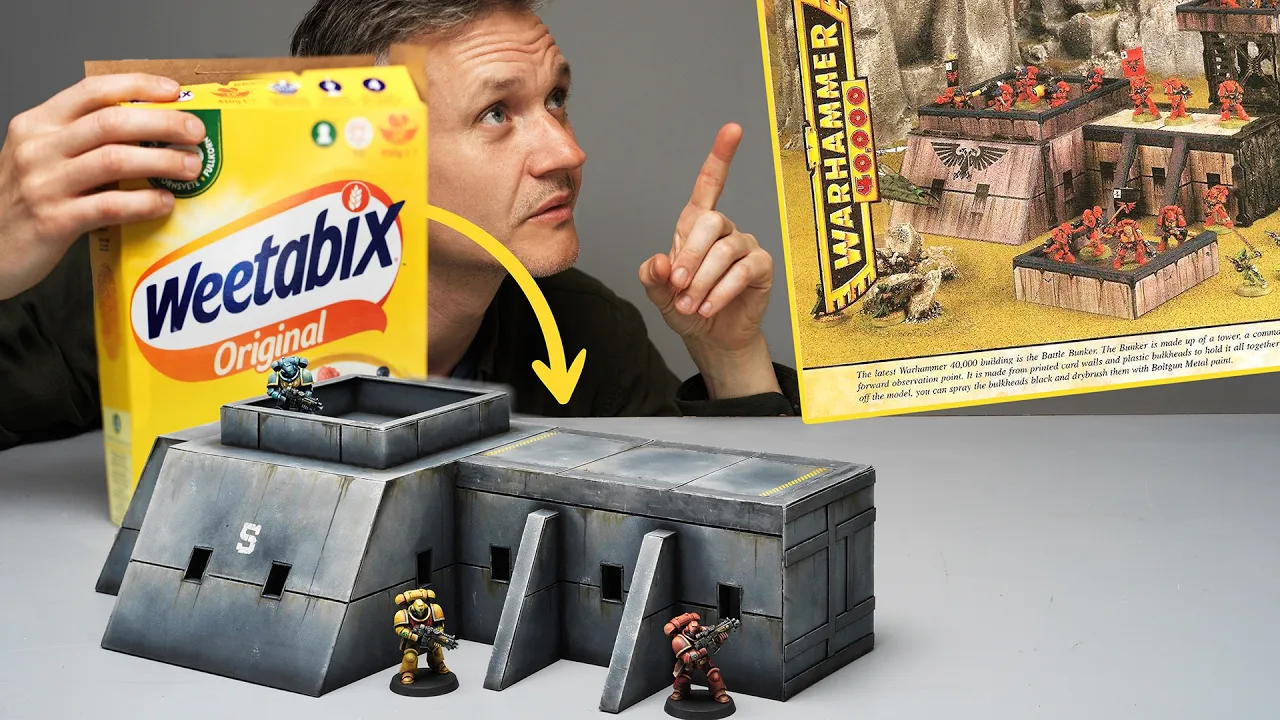
These are buildings for tabletop games I've made from cardboard. I like making things out of cardboard because, >> [music] >> well, it's free material. Now, I'd like to see if I can make something inspired by the grim and dark future.
I'll be honest, I'm not heavily into 40K. There's a lot of cool models. However, I'm not into the gaming side of things.
I've seen a lot of games played though, you know, friends that play. And that L-shaped ruined Gothic thing is a bit overrepresented, right? Practical, I'm sure.
But I found this inspiration. How cool is this? Retro Warhammer really tickles, in a good way.
And as sci-fi goes, this style could work for a lot of games. The best thing is this bunker or firebase is a cardstock build. So it's already shaped after the limitations of flat sheet building material.
Let's make one out of cardboard. First step is to make what I call super cardboard. I'm afraid I don't think I can register trademark that, but I wish I could.
A combination of cardboard and cereal packaging. Cardboard on its own sort of warps easily when painted and hasn't really got a very durable surface. Gluing cereal packaging to the cardboard remedies this.
There's two sides to cereal packaging with different textures. I've used both. The insides are more textured, the outside's smoother.
For this build, I'll use the smoother outside. Now, by also adding a printed out grid on the other side of the cardboard, the one without cereal packaging, I get a grid that is very helpful when cutting and measuring. Also, because this results in adding glue to both sides of the cardboard, I minimize the amount of warping that happens when the water-based PVA glue starts making the cardboard swell.
And then, to minimize warping further, I let the sheets dry under something flat and heavy like a big book. We don't always get absolutely flat but close enough. In both cases, I use thin and even layers of PVA glue or white glue or carpenter's glue.
Remember, the more glue, the more moisture and the more warping. Now, I'm not sure of the original measurements of the cardstock kit. All I have is a few images to go by but it doesn't really matter.
I'm going to do my version anyway and I think if I do it just slightly smaller, I'll be able to get more out of my stack of super cardboard. I do all my builds based around inches, not because of nationality but because of aesthetics. Basing everything on a measurement system that is based on dividing things by four rather than 10 results in better looking coherent builds to my eye and inches seem to translate well into the gaming realm.
So, I sketch out things loosely at first trying to figure out some good measurements, trying to figure out the measurements of the original cardstock build and then I transfer my sketch to a reference sheet drawing up the different pieces I'll need. This way, I can kind of mentally work my way through the build and make most mistakes I need to make before I cut my precious sheets. The original cardstock is printed with a few details that I'd rather make three-dimensional.
One is obviously the windows but there's also lines across the build. If I cut thinly through the cereal packaging but not the cardboard, I can then pull away thin strips giving me physical indentations. Now, when gluing a build together, it's important to figure out ways to do so that doesn't mess up the measurements we've based everything on and there's sort of two ways.
Sometimes, you might need a bit more cardboard to work with. So, I add the width of my super cardboard, my construction material to my measurements and then cut. Other times, like with all corners on a build, you'll need to remove a bit.
What I do is cut away a strip equal to the thickness of my building material at each end, but I don't cut through the serial packaging, only the cardboard. I can then pull off just the cardboard bit and things can then be glued together nice and neat flush corners. And this is another great reason to use super cardboard.
When gluing walls together like this, I line up the sheets to the grid on my cutting mat, trying to make sure all the angles are 90°. Now, the absolute trickiest bits are these angled walls on the main bunker. There's cuts here that just need to be done at an angle and I mostly just wing it and hope for the best.
Now, the back is a bit of a mystery. I've not found an image of what this is supposed to look like, so I'll just go for what I think should be there, a large blast door and another smaller door because doors are cool, especially blast doors. I do all my sort of design choices based on measurements.
As I said, all measurements are based around inches and quarter inches. So, the cut indentation lines in all the walls are 1 and 1/2 inches from the ground. The top indentation cuts are 2 quarter inches from the top.
This side angle bit is cut so it fits center on the side of the wall with the 3/4 inches on each side. The blast door opening is 2 quarter inches deep because sticking to this system, everything will just look so, well, meant to be when done. For these angled wall bits sticking out on the sides, I thought of first I'd make them smaller, but realized they're a pretty decent size to get miniatures into cover.
But, I don't like that they go all the way up to the top, up to the roof. In the original design, this is probably a cardstock kit design choice, but I think if I just cut away a bit, cut them down so they don't reach all the way up to the roof, things will look better. And we'll get more of a bunker style vibe.
The little angle walls are just two pieces of super cardboard glued together with a strip of cereal packaging covering the exposed cardboard edge. And yeah, I think it does look better making them this shape rather than the shape they had in the inspirational piece. Now, magnets.
I've been pondering the big blast door, open or closed? If I use this build for a more skirmish style game like Infinity, it would be cool to have the option to go inside. But having just a huge gaping hole where the blast door should be, not cool.
So I should make a door that I can choose to have open or closed. Magnets. Two sort of pillars of cardboard on the inside with magnets in them.
And then a large sheet for the door with magnets placed correspondingly. I mean, it's not rocket science. To get a good initial bond for the magnets on the door, I use superglue.
And while that gets a little time to cure, I continue on the main building and add some beams of cardboard for the coming roof to rest on. Now let's see if the door works. No.
It doesn't. It's not rocket science because a rocket scientist would have placed the magnets the right way around. I mean, at least I know this will probably work as it now doesn't work spectacularly well.
So I remove the magnets and glue them back together facing the other way around. And now, yes, it works. We've got a detachable blast door.
Pretty neat. Take that, inspirational cardstock kit. Now the roof is just going to be cereal packaging, just to save up on the super cardboard.
But for decorative purposes, I figured I'd repeat the thin gap thing that we have around the build, but on the roof. One big sheet for the main bunker, but then three sheets for the side building, glued on with a slight gap in between each sheet. Things like this just add detail, and that makes these cardboard buildings look like they're worth the time it took building them.
And again, a reason to spend some time on your sketch beforehand. If you rush a build without first sketching and thinking out some conceptual ideas, then it's more likely to end up with something that just very much looks like a cardboard box. And in that case, you might as well just use a little cardboard box and get on with your life.
And with that in mind, while the roof dries, I add a bit of blast door looks to the blast door. Creating symmetric sci-fi patterns like these is a breeze if you've got a grid glued to your cereal packaging. But some pointers are due, and this goes for all the cuts so far.
The grid is on the back of the material, right? So, everything you do has to be mirrored to what you actually want. And when you glue sheets onto the build, either make sure the grid paper is properly stuck or rip it off if it's not.
Otherwise, you'll just be gluing a loose piece of printer paper to your build and not the actual sheet itself. And this goes for everything so far, like the roof and that. Admittedly, I'm not going to go over heavy on the details on this build.
I think the shape looks cool in a cleaner brutal style, and frankly, it's a bit more flexible. This could be a Star Wars table, an Infinity table, or Star Grave, not only 40K. But there needs to be a few anti-shoe box attempts.
I continue with a thin strip aesthetic on the roof, making another indentation up here makes the edge around the roof look like it could be sort of thick beams or something. And this is all coming together nicely. All that's left of construction is this square wall on the roof.
Now, a big trick to making cardboard builds look more than what they are is to always ensure no cardboard is visible. With that, I mean the wavy cardboard structure inside the cardboard that becomes visible at every cut edge. This cardboard interior is what tells our brains we're dealing with cardboard.
By removing it visually, well, then we're just dealing with flat surfaces, not cardboard. So, for the wall on the roof, I'd take my time to dress it in cereal packaging. Strips on the inside.
I do some strips along the outsides for design purposes, placed with gaps in between each strip. Now, if you want to cover angles like I've done here, a good trick is to lightly do a cut on the back of the material and then bend it. And then thin strips up top.
I know I'm rubbing this in, but this is 1/4 of an inch. This means the wall will look like it's 1/4 of an inch thick and overall visuals become spot-on. Now, I made this enclosed wall smaller than the one on the inspirational Games Workshop version.
I figured it would be fun if you could actually fit minis around the outside of the wall as well. And I think it looks better as it's now made with the same width as the angle wall on the side of the building. And well, fits centered on the roof with 3/4 of an inch all around it.
Now, to measure these things I'm constantly rubbing in, I tend to save some of the cut-off cardboard at varying length. Like a few quarter, half, 3/4, full inch bits left over from when cutting. It's handy to have these around when placing bits to ensure they're sort of centered and are easier to handle than a long ruler.
And then some final decorations on the side here. I don't know what the original is supposed to look like, the side of a very large future space container or something. I figure I just add some strips, make something happen, but nothing too elaborate.
And I guess we're done. I have to say I'm surprised at how well this all turned out. The original structure has a great shape and even if this is pretty simplistic, it's got a great feel to it.
Very brutal, very dystopian. Before I prime, I smear in a bit of PVA glue around the bottom of the build. When moved around a bit, you know, on the table used for some games, the cardboard can get a bit worn down there.
So, this PVA glue will strengthen things up. And the day after, just as I was about to prime, I realized I hadn't covered the visible cardboard in all the little windows. So, well, I did that and then primed everything black.
It's such a transformation when all that subliminal fiber advertising vanishes and instead there's proper tabletop terrain taking its place. I'm going to breeze through the painting process here. It's pretty similar to how I painted my prior cardboard builds and there's already two videos for you to check out for more inspiration there.
But, it's mostly sponge-based painting. Makeup sponge. The sponge is soaked in water, then squeezed out to the extent that it's no longer a wet sponge, but a damp sponge.
And using paint heavily diluted in water, I'm going for almost half and half. I dip the sponge in paint, dunk off excess on a piece of paper, and then stipple on the paint. The first dark layer is pretty covering, but as you can see, we get great shadows in all the places where the sponge can't reach, and that's exactly where we want the shadows.
Next layer is a bit brighter, warmer gray. And this is applied with more variation and planning, trying to brighten edges on the top of the building more than the rest. And we now have this lovely, varied, and textured grim dark concrete look.
For the final step, I use a very bright gray or pale white, and instead of the makeup sponge, I use a piece of sort of kitchen type sponge. With this, I can create chipping all around the edges that also serve as a sort of edge highlight. I know you can't really see it from here, but this is kind of what it looks like after this step.
And I can use the same sponge and do even more wear and damage by dragging it straight down with very little paint in it. I get these sort of scratches and random damage. You can see I'm always trying to do this where it would feel natural to get extra damage at edges and where there's details that would be more prone to wear and tear.
Now, this is all very monochrome and I think that's a good life choice. But I do want to darken down a few details and I just got my hands on some of these speed paint markers from Army Painter and thought I'd try one of the dark grey ones. I don't really think this is what they're intended for, but it was a handy way of applying paint.
I had to add a bit of speed paint medium as well to not darken things too much. But the result was pretty cool for a sort of tarnished metal vibe. They were super handy for these small details like just doing these little well, I know it's a bunker, but I'm still going to say window sills.
But in this case a lot easier than doing something with a brush. The next step before weathering is getting some details on. Things like transfers and what I like to call high definition details take buildings like this into another realm.
It's like just a few choice items of high detail. It could even be plastic or resin bits hides the fact that the rest of it is just your breakfast leftovers. First some hazard stripes.
This splash of color will do a lot, but it's also funny like, "Hey Space Marines, mind your step. You might trip over the edge. " The fact that orcs like hazard stripes now kind of makes more sense.
Anyway, these self-adhesive strips, I think I got them from Green Stuff World quite some time ago, are great for this. And just using a small sponge to apply the paint gives a great result. Next, a few transfers.
And so, I spray on a glossy varnish first. You can brush on, but this is just a little smoother. Now, obviously on the big angled walls, it's where you would put the big winged two-headed eagle thing.
But, I'm going to go for the fact that this is just bunker number five. Numbers like these just add to the dystopian vibe, I find. I then use Micro Sol and Micro Set when applying the transfers.
Large transfers on slightly rough surfaces like this is a pain. I kind of screwed it up a little and I got a little angry. But, we'll hide most of these mistakes soon.
The most important thing is just trying to get the transfer on straight and centered, which sounds easier than it is. Now, while the transfers dry, I start painting on dirt streaks with a heavily watered-down very dark brown all over the building. Also, while the transfers dry, please like and subscribe if you've been enjoying this video.
You can also check me out on Twitch for weekly live streams. Oh, and look, now the transfers are dry and I varnished over them with a matte varnish. And then, I can use the same diluted dark brown paint to tone down that stark white into something a bit grubby-looking.
With a bit of the gray paint used on the building, I can also add chipping and scratches to the transfers. Aim for around the edges of the transfers for a convincing result. And then, with a bit of dirt streaking down over them, they'll look fully integrated into the paint job and a natural part of the building.
Transfers on their own are just so stark and boring and flat, but treating them like this and it kind of looks like you've just got some high-level freehand skills going. The last layer of weathering is going to be streaking grime from AK Interactive. This is an enamel-based paint and because of that, it feathers out beautifully and you can create some very sort of staining and streaking.
I had this on the top of my previous streaks, as well as, well, just more everywhere. Then grab a soft, wide brush, moist in thinner, and brush down to feather and pull down the paint, creating sort of softer dirt streaks that, together with the first harsher acrylic streaks, paint a pretty grim and dark picture. And there we are.
I'm actually stoked about the result. This is a really great shape. It's large, and that's fun.
I mostly got smaller buildings done so far, and this sort of adds the whatever Imperium Imperial presence on the table. I can see some torturing of heretics or rebels going on on the inside, as well as the repairs of an assault bike or a CPH speeder bike. It's also cool getting pretty close to that old Games Workshop cardboard design, all with pretty much only materials that are free at hand for most.
Together with my other cardboard builds, this is all starting to look more like the distant spaceport I wanted it to be. As always, a great thank you to my patrons who keep this channel running. Well, no, they don't.
I do that, but they keep me running, so it's like a circle of infinity, as long as there's patrons or I get captured by the Imperium. But, if you'd like to join their glorious ranks, not the Imperium, the patrons, it would make my day. The patron offers access to a Discord community where we talk [music] hobby stuff and, for some reason, a lot of books and pets.
My Patreon is completely transparent, so you can go there and see how much I earn and deem for yourself if that is what this work is worth. Thank you for watching, and see you in the [music] next one. Bye.
>> [music] [music] >> Mhm.