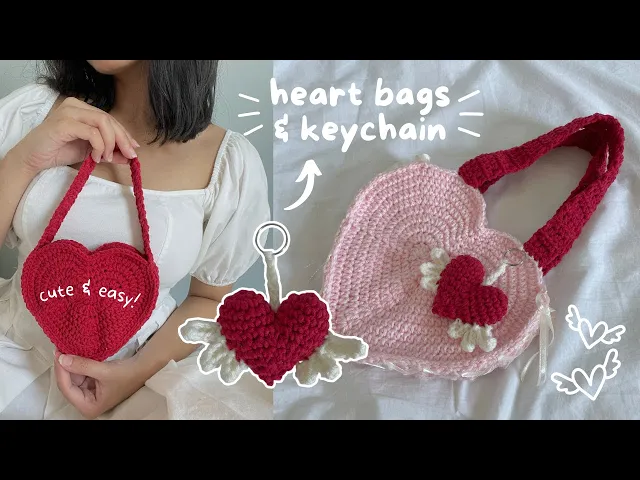
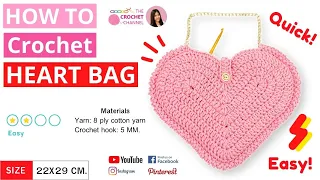
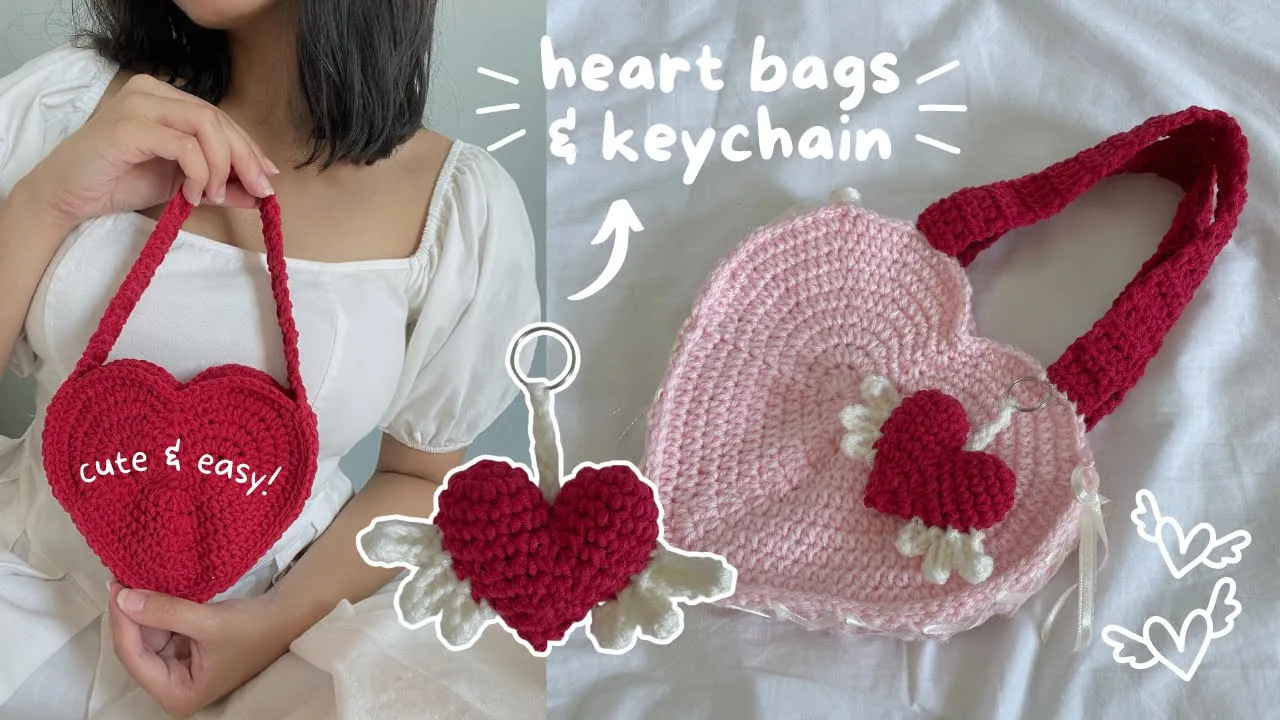
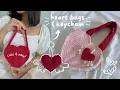
foreign welcome back to my channel my name is moham and I crochet cute things you can find some of my free patterns and written versions of my YouTube tutorials posted over here and if you like my work and want to support me with donations or purchase some of my special copy patterns you can do that over here starting from today I'm going to be posting Valentine's Day projects today we're going to be making this adorable little heart keychain and I'm going to be showing you how to crochet and design your own heart-shaped bags in any
size that you like in the first part of the video I'm going to be explaining the method of how to make the bag so that as you're following the steps in this tutorial or the written pattern you are able to adjust and modify the pattern to make it any size and design that you want but before I start explaining the method I want to talk to you guys a little bit about today's sponsor which is skillshare skillshare is easily my all-time favorite learning platform there are thousands of classes on skillshare that range from a lot
of different skills and categories there's arts and crafts graphic design marketing and crochet as well just to name a few what I love about skillshare is that it's perfect for Content creators like myself there are lots of different classes by creators who are in the know and are already successful in that field I joined skillshare during a time where I felt really overwhelmed when it came to anything crochet related I feel like I was just really unprepared to handle all the things that come with content creation and that's when I came across Ali abdal's notion
master class on skillshare so I'm going to play you guys a snippet from his class that I really connected to on a super personal level just to help you guys get an idea of how the classes on skillshare from people who are already successful in the field how they can help you progress further in your creative Journey here we go list of tasks and projects and things to think about and it can get pretty overwhelming to be honest for a long time I felt like my life was a complete mess so I just had this
list of things that I wanted to create all the things I wanted to do with my content that just kept going on and on and on so this is my notion before the master class and this is my notion now it's super organized and I know that I can go about creating without being worried about all the organizational fluff here are a few more classes that I've joined I'm doing this YouTube success class to improve the quality of my videos and I'm doing this beginner's guide to creative blogging class it's really good it's helped me
set up a platform for my blogs and it's gotten me started on writing proms so once you're ready to start your creative journey to progress further on the journey that you're in right now or to learn a new skill you can get one free month of skillshare membership by joining skillshare through the link in the description box for the hardback I'm going to be using a 4.5 millimeter hook and 100 acrylic yarn you can use any yarn size any hook size that you want but then the size of your bag will differ from mine but
don't be worried use whatever you have and you can always do more rounds to make it the size that you want or less rounds to make it the size that you want I have written patterns on my blog and you'll be able to make the heart shape from rounds 1 to 12 you can do six to nine rounds for a smaller piece or more than nine rounds for a larger piece you're going to be making two heart pieces with the exact same number of rounds and then you're going to be making your straw piece and
then of course comes the decoration whether you want to add ribbons on the side which I'm going to show you how to or you just want to add a keychain or leave it plain we're going to start off by making a slip knot to do this you wrap your yarn around your fingers making sort of like an X shape and then you grab this end over here and just tighten to get your slip knot now we're going to be making the base of our work with the foundation chain so you're going to be chaining a
eight one two three four five six seven eight to sure that your chains are tight and not too loose and now we're going to be inserting a double crochet into the third chain from our hook so that's our first second and third so yarn over go into that third chain pull up a loop yarn over pull through two yarn over pull through two and that is your double crochet insert a double crochet into the next chain as well so not this one that's the one that you just worked into into the next one over here
and just do another double crochet now in the next two chains this one and this one we're going to be inserting three double crochets in the same chain so yarn over insert your hook that's our first double crochet yarn over in that same place you're going to be inserting your second double crochet yarn over in that same chain you're going to be inserting your third double crochet so the pattern would read three DC X2 which means you're going to be putting three double crochets in the same chain and you're going to do this two times
that means in the next two chains or stitches so in my next chain I'm also inserting three double crochets in that same place and now in the next chain we're going to be doing one double crochet and in this last chain over here we're going to be inserting four double crochets so that's one two three and four so that's your work and now we're going to be turning it to this side and in that same place where you just inserted four double crochets you're going to be inserting three more double crochets in that same chain
but on the other side so I'm going to do one two and three it's completely normal for your work to have holes in it during this stage and it's also normal for your work to curl like this that's completely fine and now in the next four chains so this one this one this one and that one over there we're going to be double crocheting them together so to double crochet four together you're going to yarn over insert your hook into that first chain pull up a loop and then yarn over pull through two but don't
complete the double crochet instead yarn over again go into the next chain and as you can see I'm also working over this end over here pull up a loop yarn over go through two but do not complete the double crochet instead go into the next chain so we're going to our third chain right now pull up a loop yarn over pull through two but don't complete the double crochet we're going to do this one more time for our fourth chain So This Is Us double crocheting four stitches together so you go through two and now
at the end of this you should have five loops on your hook and if you've got five loops on your hook then you're on the right track and then you're going to yarn over and pull through all five of these and that is how you double crochet four together and now we're going to be inserting six double crochets in this last chain over here so when the pattern has the number before the stitch for example 6 DC that means that you have to insert that many stitches into the same Stitch so 6 DC is basically
inserting six double crochets in the same place but when the number comes afterwards for example if it says 6 DC X2 that means you have to insert six double crochets in the same stitch for the next two stitches so over here I'm just inserting six double crochets into that last chain and please make sure that you're inserting your hook in the same place and not accidentally going to any other chain here's the tricky part you have to identify which Stitch is basically the very first double crochet that you made so the way that I can
tell is I'm just going to stretch this out and see if it has like a stitch attached to it but it doesn't this Stitch is attached to this Stitch over here if that makes sense so I can tell that this is probably a chain one of the two chains that we left at the beginning when we were doing our first double crochet and this must be our very first double crochet hopefully that makes sense let's look at that over there so you're going to be inserting your hook into that very first double crochet and you're
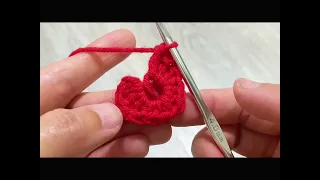
going to be making a slip stitch by sliding one Loop through both the loops like that and that basically ends our round one maybe starting round two we always start our rounds in the same place where we inserted a slip stitch and what this does is just makes everything really tight and stops any holes from forming so we're going to be starting round two by inserting two half double crochets in the same place where you just slip stitched so go into that same Stitch and insert two half double crochets to half double crochet you yarn
over insert your hook pull up a loop and then yarn over pull through all three loops on your hook like that and now in the next four stitches we're going to be inserting one half double crochet so the pattern would say one HDC X4 that means one half double crochet in the next four stitches and now in the next Stitch we have to insert three double crochets so it's double crochet yarn over insert your hook yarn over pull through two yarn over pull through two and we're going to be doing three of these in the
same Stitch I'm sorry if I'm putting a lot of emphasis on some of these parts of the pattern I just want to make sure that it's easily understandable by you guys and so you don't get stuck anywhere now next we have to insert one half double crochet in the next four stitches so just one in each Stitch four times three and four next we're going to be doing two HDC X2 which basically means you're going to be inserting two half double crochets in the same stitch for the next two stitches so over here I've inserted
two half double crochets in the same Stitch I'm going to go into the next one and insert two half double crochets in that same Stitch as well and now we're going to be doing three half double crochets in the next two stitches so you're going to be inserting three half double crochets in the same Stitch two times and now in the next Stitch we're going to be inserting two half double crochets so I'm going to do this once because there's no X that tells us how many times to do it so you just do it
once because it says 2 HDC and now in the next Stitch we're going to be doing one single crochet to single crochet insert your hook pull up a loop yarn over and pull through both loops on your hook like that so that's a single crochet and now we're going to be single crocheting two together so to single crochet two together you insert your hook pull up a loop but don't complete the single crochet instead make sure you're keeping this tight go into the next Stitch as well pull up a loop and once you have three
loops on your hook that's when you're going to yarn over and pull through all three Loops like that and what this does is it creates that little tight part which brings your heart inwards like that so this part's really important make sure you're keeping it tight don't make it Loose now in the next Stitch we're going to be inserting one single crochet and then two half double crochets in the same Stitch and now we're going to repeating the same pattern that we did over here so we're going to be doing three half double crochets in
the next two stitches so three half double crochets in the same Stitch two times that was my first and I'm gonna do my second over here 's another part that you need to be careful of so we've got just one more Stitch left where we are going to be inserting two half double crochets in the same Stitch so let's do that and now here's the part where you shouldn't get confused but basically this Stitch over here that you see right over there this one is not actually a stitch that counts towards your round sorry about
that this is your slip stitch that you did in the previous round so it doesn't count as one of the stitches that we're going to be working into during our rounds and you're going to have this little um Phantom stitch in all of the rounds and you're just going to ignore that instead you're going to go into the very first half double crochet that you did so see that's your very first half double crochet that you made in the beginning of the round that's the one that you're going to go into so completely ignore the
slip stitch sorry about that go into the very first half double crochet you made at the round slip stitch again to connect the rounds together now what you could do is you could get a bobby pin and you could Mark the very first stitches of your round so you don't get confused so starting off round three you're going to yarn over go into that same place where you just slip stitched and insert one half double crochet and we're going to be inserting one half double crochet in the next six stitches as well so this is
what I meant about the bobby pin once you've done your first Stitch of the round you could just put a bobby pin in it like that to mark it so you don't get confused about which one is your first Stitch so now I'm going to be doing one half double crochet in the next six stitches so here I've done seven half double crochets starting from the very first Stitch to this one over here that's seven and now in the next Stitch we're going to be inserting two double crochets in the next two stitches so you're
going to be doing two double crochets in the same Stitch and you're going to do this in the next Stitch as well because you have to do it two times and now we're going to be inserting one half double crochet in the next eight stitches so I've got eight half double crochets and now we're going to be inserting two half double crochets in the next eight stitches sorry six stitches this basically means that you're going to be inserting two half double crochets in the same Stitch six times so in the next six stitches that's what
you're going to be doing Stitch count is very important for this project so please make sure that you made sure that you did six with two half double crochets each so we're going to move on and we're going to be doing one single crochet in the next two stitches and I'm just going to remove this bobby pin because it's making a lot of noise um so yeah one single crochet one single crochet that was two times and now in the next two stitches we are going to be single crocheting four together sorry so in the
next four stitches so this one this one this one and this one we're gonna be single crocheting them together like that so to do that you're going to insert your hook pull up a loop go into the next Stitch pull up a loop go into the next Stitch pull up a loop and finally the fourth one go into the next Stitch pull up a loop and make sure you keep all of these really really tight and once you've got five loops on your hook you're going to yarn over and pull through all five of them
make sure you're keeping everything tight now you're going to be inserting one single crochet in the next two stitches so one and two and by keeping everything really really tight you're gonna start seeing this like curved part of the hearts forming so in all the places where we do double crochet that's the pointy part and the places where we do the single crochets two or four together those are the curved parts of the heart now we're just gonna be repeating the pattern that we did on the other side and we're going to be doing two
half double crochets in the same stitch for the next six stitches and after doing this you should have just one stitch left and then again this is your Phantom Stitch the slip stitch that you're not going to be counting at all and then this is your very first Stitch they were going to be going into so now in this one stitch that's left over here you're just going to do one half double crochet and then you're done with round three as well so don't go into that Phantom Stitch go into the very first half double
crochet that you made in the beginning of the round and slip stitch over there and now we're going to be starting round four but starting round four we're going to be doing one half double crochet in the next nine stitches starting from the Stitch where you just did your slip stitch so go into that same Stitch be careful it is the same one and insert a half double crochet just one and then if you want you can get your bobby pin and you could place it right over there to Mark the very first Stitch once
you're done doing nine of these you're going to be doing three double crochets in the next Stitch so all three of them are going to be in the same Stitch so you're done with that you're going to be doing one half double crochet in the next 12 stitches over here but once again when we reach this part make sure that you just make it super tight and then you're gonna keep getting this heart shape if you make your stitches too loose then your heart might be wobbly and not look as good next few stitches we're
going to be repeating a pattern and the pattern is going to be two half double crochets in the same Stitch one half double crochet two half double crochets in the same Stitch one half double crochet and you're going to repeat this four times so I'm going to start and do this one time first so you're gonna do two double crochets sorry two half double crochets in the same Stitch and then in the next Stitch just one half double crochet so I've done the pattern one time I'm going to do it the second time so two
half double crochets in the same Stitch oops sorry and then one half double crochet in the next Stitch so now I've done the pattern two times and we're gonna do this two more times to make a total of four so 25. 99 so how it works and the pattern would have the pattern that you need to repeat in Asterix the little star-like things and then next to it it would say x 4 times 4 which basically means repeat this pattern four times and that's how you do it and these are increases that give your heart
that like rounded curved Edge now we're going to be doing two single crochets in the same Stitch so one and two and now we're going to be doing one single crochet in the next two stitches so one and in the next Stitch two now we're going to be single crocheting two stitches together so this one over here and that one so you're gonna go into that pull up a loop go into the next one make sure you're keeping everything nice and tight and then yarn over and pull through the loops on your Hook and the
next two stitches you're going to inserting one single crochet and then the next Stitch you're gonna be putting two single crochets in the same Stitch and now it's time to repeat the same pattern that we did over here but this time we're just gonna switch what we do first so instead of doing the two half double crochets in the same Stitch first we're going to do one half double crochet so here's the pattern one half double crochet and then two half double crochets in the same Stitch and you're going to repeat this four times so
here I finished doing the pattern four times you should have three stitches left not counting your Phantom Stitch over here now in the next three stitches we're going to be inserting one half double crochet three and now to end this round we are going to be slip stitching to the very first Stitch that we did so with this one not that over there this one over here go into it and slip stitch like that so here are the finished pieces this one is from round one to six it is slightly smaller than my hand and
this one can fit my phone pretty comfortably it is the size of my hand and it is from round one to nine I forgot to film what I was doing when I fastened off and I quickly made a scrap piece to show you so let's pretend this is the heart and I'm done doing the rounds when you're ready to end your work you're just going to slip stitch into the very first Stitch like normal and then you're going to follow the steps that I'm going to show you to fasten off after you've slip stitched into
the first stitch in the same way that we end the round you're just going to chain two you can even chain one but if you want it to be extra secure chain two and then you're going to take your scissor cut and then pull this up like that and then you're going to tighten it into a knot in the next part of the video I'm going to show you how to make the piece that will run along the sides of your heart bag and for this one over here I'm going to make a really long
piece so that the piece can go all around my bag and make the strap and then go back over here but for the other one the side piece is going to be a bit shorter because I only want it to be attached to the sides of my hard bag but not make a strap with it so both these methods will follow the same steps you're just going to change how long they are now the size the width the length of the strap piece is completely up to you but you're going to start off by making
a slip knot and now you're going to chain the width that you want for your piece so the width is basically the thickness of the piece so I'm going to be chaining for my smaller bag I'm going to be chaining three and then for the pink bag the larger one I'm going to be chaining four so chain the width that you want for your strap piece once you're done you're going to be doing your turning chain which doesn't count as a stitch it's just going to help you start a new row and now you're going
to be inserting your stitches into the three chains or whatever number of chains that you did I'm going to be using half double crochets for this that's my favorite Stitch and it works up pretty quickly but you can use single crochets you can use double crochets it's completely up to you um I don't recommend using single crochets because that will take very long but I really like half double crochets so that is what I'm doing I inserted one half double crochet in each of the three chains and then to start a new row you're going
to do your turning chain again turn your work and now you're going to insert your hook into the very first Stitch so this chain one doesn't count as a stitch these are your stitches one two and three so I'm just going to be inserting one half double crochet in each of them and that's all so depending on how many chains you did how many stitches you want what width you want just do rows of whatever Stitch you want to do I'm doing half double crochets so I chained one that's my turning chain turn my work
and now I'm just gonna keep doing rows of half double crochet until my strap piece is as long as I want it to be so here's what I mean about wrapping the piece around your heart you basically have to make it long enough to start from one end make the strap and then go all the way back over here and then we're going to connect it once you have the length that you want you're going to be joining the two pieces together so in your very last row don't chain one just do your Stitch and
then leave it like that and then you're going to get the other end and you're going to be putting the two pieces together when you have your pieces all lined up you're going to take your hook and you're going to put it through the edge of the other piece and then pull up a loop and slide it through both like that and then you're going to turn your work so turn your work to the other side and you're going to join these sides together so you're going to insert your hook sorry this might be a
bit confusing but basically I'm going to insert my hook through one of the pieces like that go through the other piece and then pull it through the loops on my hook like that so let's do it one more time so go into the next space over here and then the other piece and pull it through and that's basically how it's just going to be joined together like that once you're done you're just going to fasten off so you chain one chain two and then you cut and Pull and now we're going to be attaching our
strap piece to our hearts for this part please get some bobby pins and place them in the Stitch to Mark the part where you want your piece to basically stop being joined to the heart I'm gonna join all around but when I reach this bobby pin over here I'm just gonna stop joining and then this part will be my strap there are many different ways to join crochet pieces together I like using slip stitches around the sides to join my pieces together but you can pick any method that you like they have different ways that
they look different end results they give but here's how I'm gonna do it I'm going to be making sure that this bottom part over here is near the corner of my heart like that and then I'm just going to line it up not being too stressed about whether it's aligned perfectly and I'm going to remove my bobby pin and I'm going to insert my hook through the side of the strap as well as this Loop over here so let me show you one more time so you're going to be inserting your hook through the strap
piece and then you're going to be inserting your hook through the back Loop of your heart and you're going to get the yarn that you want to use and you're going to make a little loop with it like that and then you're going to slide your hook through both the pieces then you're going to chain one like that and now we're going to be slip stitching all around so to do this you're just going to tuck in your end inside and I hope this is clear but you're basically going to insert your hook through the
strap piece through the edge of the straw piece and then through the back Loop of your heart piece and then you're going to pull through all of the loops on your hook like that so one more time the edge of your strap piece there's no specific place you have to go in just whatever is there on the edge and then the back Loop of your heart piece it's just one Loop and then you pull through all of the loops on your hook one more time so strap piece back Loop and slip stitch once you're done
with that side you can turn your work around and then you can get your other piece Mark the areas and then find the place where you want to attach it and then you're going to be repeating the same steps as before where you're just going to insert your hook into the stitches and slip stitch it together once you're done you can chain one two to fasten off and just cut your yarn and then you're done with this bag for the other bag I did the same thing and I followed the same steps for the strap
piece and now I'm going to be attaching it on the sides only so I'm not going to be making a strap with it I'm going to attach it along the sides like that when you're done joining your pieces together this is what it should look like you should have empty open space over here where you can put your things through and now I'm going to be showing you how to make the strap now for the strap you can use any Stitch you want I'm going to be using half double crochets you can make it as
wide as you want and as long as you want it's completely up to you I've zoomed in a little bit just to show you what I'm gonna do more clearly but basically I'm going to be working into four stitches so I'm going to be working to one two three and four and that's going to be the width of my strap and I'm going to be attaching my yarn into the back Loops so the this is the front of your Stitch and then if you turn it this way you're going to see that you've got the
back of your Stitch over here so I'm going to insert my hook through the back stitch as well as the back Loop of the front Stitch and now you're going to get the yarn that you want to use and you're going to make a little loop with it just like what we did for the slip stitch and you're going to slide it through like that and then you can chain one to secure it in place like that I'm sorry I'm just going to zoom out and in that same place where you just did your chain
one you're going to be inserting your first Stitch I'm using half double crochets so I'm going to insert a half double crochet and then make sure you're only going through the two back loops and not the front loop as well so do as many stitches as you want to make the strap as wide as you want it to be I'm doing just four and once you get past this part the rest of it is super easy and it works up pretty quickly too okay so that is my first row and then to start a new
row you're going to chain one you're going to turn your work just like how we normally do rows of crochet and then you're going to have four stitches so you're going to be inserting one half double crochet in each of those four stitches once you're done making the strap as long as you want it to be you can just chain one chain two and then cut your yarn to fasten it off and now we're going to be attaching it to the other side of your bag now you're basically going to hold up your piece like
this make sure that it's aligned to where you want to join it and then you're going to start attaching so you're going to go into the back loops and then the loop on the other piece so make sure it's only one little Loop and then you're going to take your yarn the one that you want to attach it with I would recommend the same color pull it through and then you can chain one tighten it and now you're just gonna slip stitch so you're gonna grab I'm sorry if the camera is blurry so over here
back Loops only not the front Loop and I'm going to show you why not the front loop at the end and then over here you're going to have your front Loop and then you're gonna have your back Loop so you're going to go through the back Loop like that it's gonna be a bit tricky there's gonna be lots of ends to maneuver around and then you just slip stitch so once you've done it till the end and you turn it back around you're gonna see this really neat Edge over here that looks pretty similar to
that side over there and then you can weave in all your ends to make your work even neater but this is basically how the strap is gonna go you're gonna do this on both sides and there we go the steps that I'm going to show you you have to repeat them on both sides once on this side and then once on the other you're going to need a ribbon I had a really thick ribbon that I cut in half and I would recommend that you not do this because it is going to fall apart I'm
going to need your hook for this you're going to take one end of your ribbon and first you're going to slide your hook through the stitches on the side of your bag like so and then you're going to pull the ribbon through with your hook like that just to get it in place and then you're going to do the same on the other side so make sure they're aligned the Stitch that you go through you've got it on the other side as well you're going to do the same thing and you're going to pull your
Ribbon through the Stitch like that and then gently just pull it all out and then you're gonna pull the ribbons until they both align or are the same lengths so I'm just going to pull until both these ends are the same length so I'm just going to show you so pull pull pull until they're the same so this one should be the same length as that so I'm just going to hold them together like this with the ends connecting and then I'm just going to pull to make them equal once that's done you're going to
start making the x shape and to do this you have to wrap your Ribbon across each other like that and you're just going to keep Crossing them on top of each other until you reach the top over there and so to do this you're gonna insert your hook through the stitches on the side and then just slide the ribbon through and that's all there is to it you're just inserting your hook through a stitch and then sliding your Ribbon through it to get it to look however you want to and then do the same on
the other side so we're gonna pull this through make sure that the stitches you choose line up and then just slide your Ribbon through it thank you and don't worry about all these extra pieces that you see here I'm going to cut them off later make sure that your ribbons aren't too tight so make them loose otherwise your strap will get pulled really close together and so that's all I did I just kept making X's all the way up basically once you're done making the excess all around your straps you're going to be tying them
into a bow or you could also fasten them off but I'm just going to tie them into a bow so to do that you're just going to make a knot it's going to cross the ribbon pieces and you're gonna pull it up so just a regular knot make it tight but not too tight and then you're going to make a bow this is how I make a bow make a little loop I wrap around it I grab it and Pull and once you're done with that you just adjust the bow to make it to your
liking how big you want it to be or how small you want it to be in this part of the video I'm going to show you how I made the hard keychain starting with how I made the small heart piece then I'll show you the steps for how to crochet Wings on the side of your heart and how to attach it to a key ring to turn it into a keychain so to make the hard piece I followed this class on skillshare however if you've never done amigurumi before I would recommend that you start off
with this class that's the class I joined when I made these stuffed toys that I recently posted on my Instagram stories here's a reminder that you can access the one month free skillshare membership from the link in the description box and crochet this heart keychain with me literally 6am but look how cute these two are I'm going to go to the next part of the class and then see how I can join them together to make the heart shape here's a little tip for when you're using the skillshare class to make the hearts you can
go over to transcript and that will give you sort of like a written pattern to refer to while you're crocheting over here I'm adding some stuffing if you don't have stuffing you can use cotton or you can open up a pillow or a cushion that you don't use anymore and take out some stuffing from there or you can use scrap yarn and just stuff it with yarn that you don't want to use anymore look how cute and tiny this heart is I'm gonna make so many of these for my friends for my family it's just
like the perfect little stuffed toy and the pattern is very adjustable so you can just add more increases add more decreases and make this heart any size that you want I'm so happy with how mine turned out I'm going to be adding it as like a keychain on my heart bag and in the next part of the video I'm going to be showing you how to add the little wings and how to turn it into a keychain before I show you how to make the wings it's important to understand the method so that you can
do both sides on your own so basically when I was making this side I attached my yarn over here and worked this way but since I'm going to be showing you on the other side I'm going to be attaching my yarn here and working that way which means that I'm going to be starting with this piece of the wing first but when I was doing this I started with this piece first and all you have to do is just switch the pattern and do the opposite when you're doing the other side so I'm going to
explain this in more detail as I go along but basically get the yarn that you want to use and we're going to attach it on this side you're going to find the side of your heart and then insert your hook through the stitch on the side and this is going to be a bit difficult to do just make sure you don't grab one Loop try to grab at least two to make it extra secure and once you've got that you're going to get the yarn that you want to use and make a little loop with
it like this and then you're going to slide the loop through the place where you want to attach your yarn and now you're going to chain one to secure and then make this chain really really tight and now we're going to chain six so including this one we're going to be chaining five more three four five and six so that's a total of six chains and now we're gonna skip this first one and we're going to insert a single crochet into the second one over here so skip go into the second one and make a
single crochet and now in the other four chains we're going to be inserting one half double crochet so that's the chain you just worked into ignore it we're going to be working from this one so we're gonna do one half double crochet and then another half double crochet and basically do four half double crochets one in each chain that last one over there be careful with the last one it could come undone because you're going to be pulling on the chain that basically got left here so I'm just gonna pull it to tighten again and
when you're making your wings that's the technique that we're going to be using we're going to chain and then we're going to be inserting stitches into that chain so over here if you started from here you would only chain um four and then over here you would chain five and then over here you chained six and then you're inserting single crochet into the second chain and then half double crochets into the rest and once you're done with one piece of the wing you're gonna go into the next Stitch or the next place in your heart
where you want to attach the wings and then you're gonna slip stitch so to slip stitch you take that same Loop and you put it through the other loop like that now we're going to be starting our second Wing to do this we're going to chain five one two three four and five we're gonna skip the first chain insert a single crochet into the second chain and then half double crochets into the other three chains and make sure you're keeping your chains straight so don't accidentally work into the back of it just keep everything nice
and straight so nothing gets twisted and there we're done with our second Wing now we're gonna slip stitch so you pull up a loop and then you drag that not drag sorry you pull that same Loop through the other one on your hook so this is what it should look like so far and we've got only one more left to do but for our last Wing we're going to chain four one two three and four now we're going to skip the first one go into the second one and insert a single crochet and then half
double crochets into the rest so there's two chains left so two half double crochets and I really like this technique because you can adjust the size of how big your wings are by increasing the number of chains and by changing the Stitch so if you want your wings to be thinner then just do single crochets instead of half double crochets if you want your wings to be bigger you can use double crochets instead of half double crochets it's really adjustable and it's kind of similar to the way that I did the star then you can
slip stitch and then you can fasten your work off so slip stitch once you're done you're just going to chain two and then get your scissors and just cut pull and just tighten it so you can just push your ends into one of the holes with your hook just push it in to hide it instead of weaving it in or anything to turn your heart into a keychain you're going to insert your hook into the middle of your heart it would be better if you inserted it towards the back side rather than the front over
here so like I did and then you're going to get the color that you want to use you're going to make a little loop with it and Slide the yarn through the hole like that and then you're going to be chaining one to secure it in place I'm just going to hold on to this and I'm going to chain one and now you're going to chain however many chains you want to do before you want to attach your key ring so I'm going to chain six more to make a total of seven three four five
six and seven now we're going to attach it to our key ring to do that you're just going to place your key ring on your hook like this and then you're just going to chain like normal so look I'm just gonna pull it through and there your key Rings all attached then I'm gonna securely fasten it off so two I'm just gonna chain one two and then I'm gonna cut and Pull and I'm gonna tighten this there you go that's how you turn your little hearts into a keychain and what I'm gonna do with this
end over here is I'm basically going to work it into my chains so I'm just gonna pull it through the loops of my chain so I can hide it basically without having to leave it in or anything so you can do that too it's pretty easy just go into your chain and you slide it through you attach your key ring to your bag if you want to do it like mine there's this little place over here that you can open and slide into a stitch slit it through you can just adjust it and there you
go your keychain would be attached to your bag like this