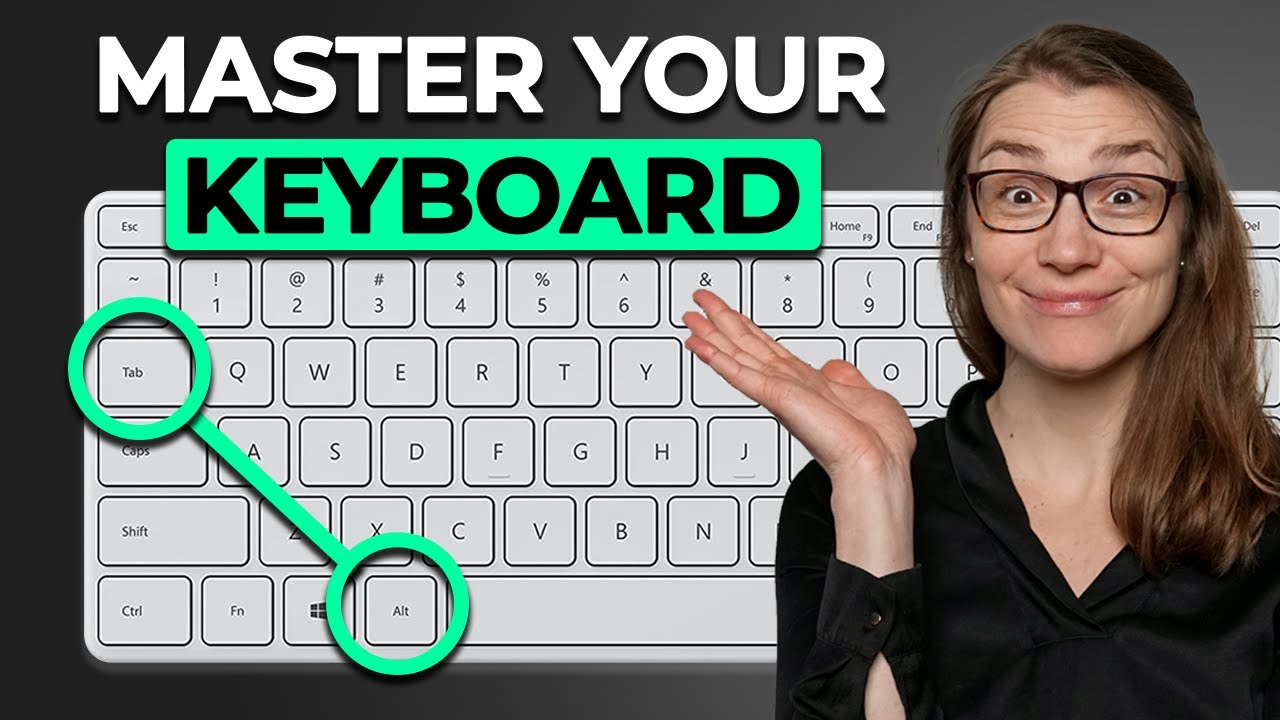
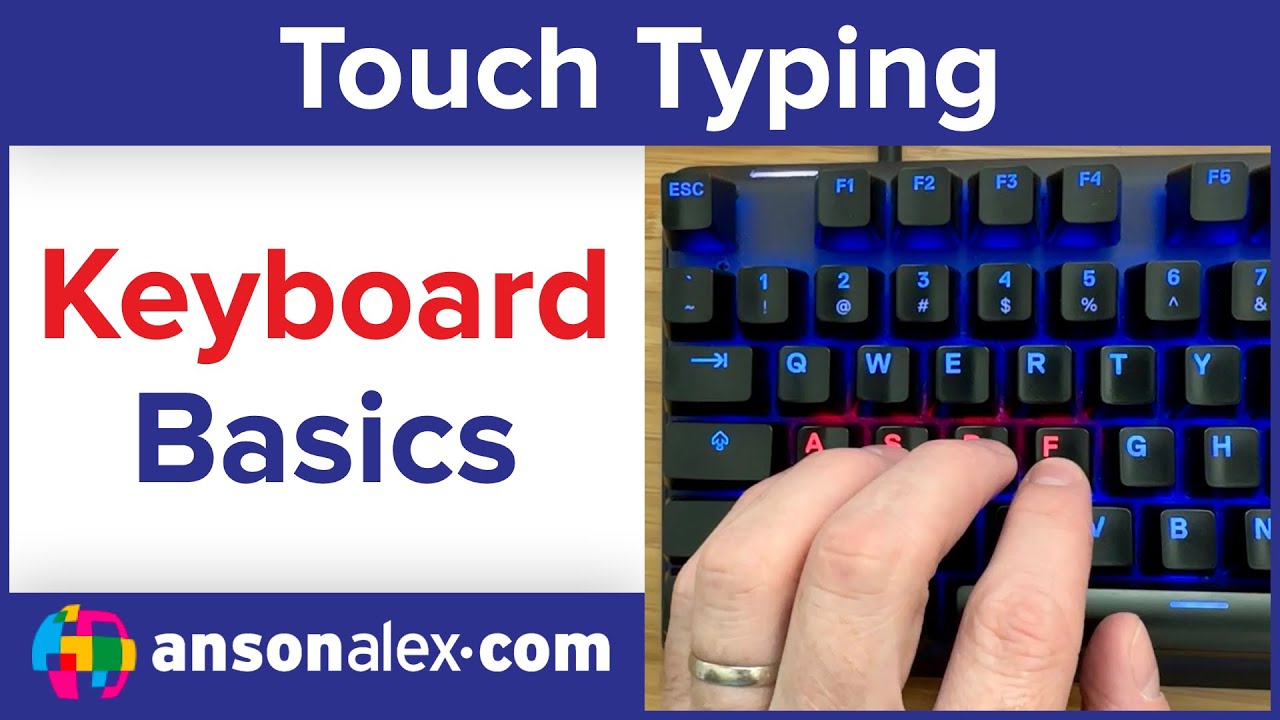
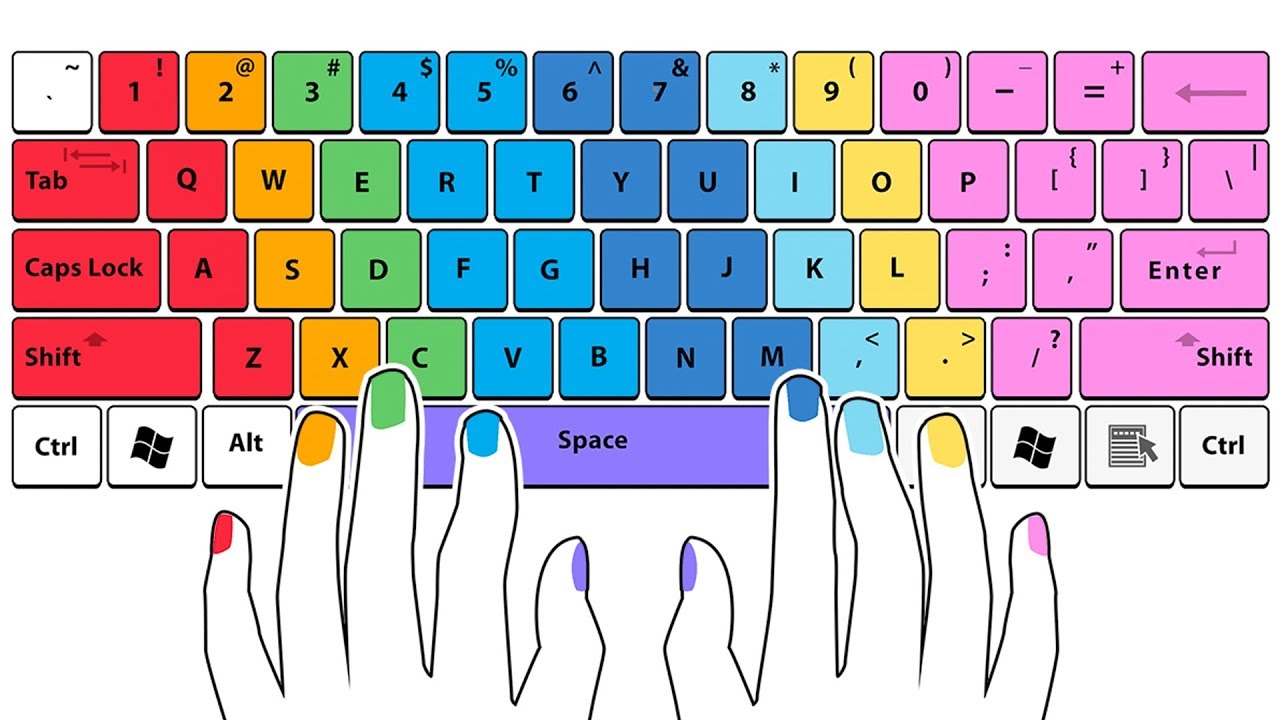
a majority of keyboard layouts are going to be exactly the same regardless of the type or the make or the model that you use but I did want to just go over quickly what the keyboard parts are remember that each type can be slightly different especially when you talk about laptop keyboards versus a regular desktop keyboard laptop keyboards can often have keys in different places so you might need to become more familiar with your laptop than you do with a regular desktop keyboard all of them are going to have alpha numeric and symbol keys this
is called the querty layout by the way and if you wonder where that name came from just look at your keyboard if you look at the first line of letters they're qwe r t y so the query layout is the easy way that's opposed to an alpha numeric layout that you might see say at an airline kiosk if you've ever tried to check in using an airline kiosk those are alpha numeric meaning they just go ABC D not necessarily the same way a keyboard would be laid out if this layout seems odd to you just
know that when they first created typewriters somebody really thought about this and they put key combinations so that they are easier to work with than it would be if you simply lined up the letters and numbers in alpha numeric order you're also going to see any set of standard Keys these can include the shift key caps lock tab Escape Control Alt a Windows key arrow keys page up page down home and backspace and even more now these may seem very foreign to you right now but these are actually keys that you will use very often
for example when typing you're going to use the shift key to make an uppercase letter or if you want to type in all uppercase you might use the caps lock so you don't have to hold the shift key likewise the Tab Key can be used but it does different things the Tab Key can either move you across the page if you're doing word processing or it can move you from field to field when you're filling out something like an online form we won't talk about all of these now but as as we work through this
course we'll talk about many of these keys and how they can be used as shortcuts for menu commands these are the function keys that I mentioned in the last lesson F1 through F12 now these function keys actually have special uses and the use depends on what application you happen to be working in the one I can tell you right now is that F1 almost always brings up a help window all the rest of them though F2 through F12 will do very different things depending on which operating system or which application you happen to be working
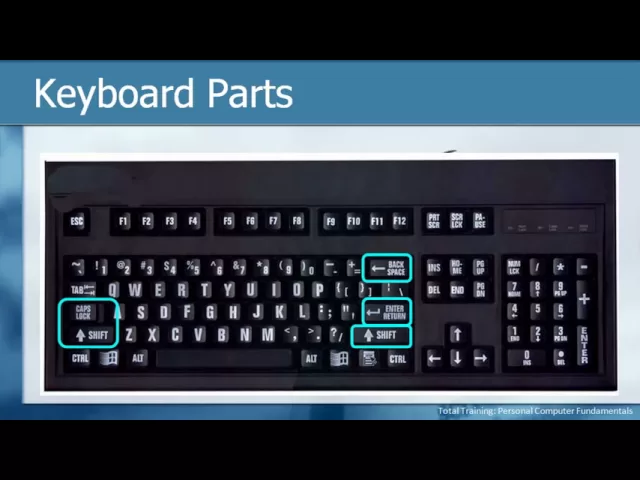
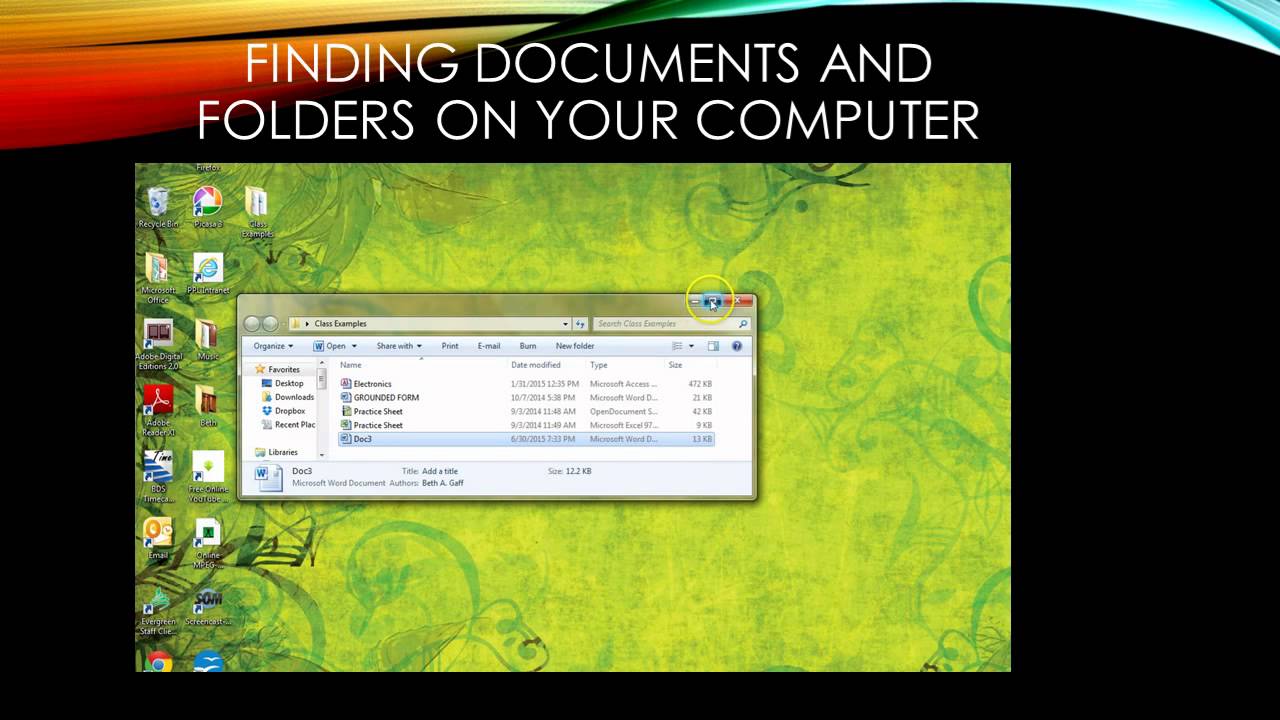
in as I mentioned you also might have a 10 keypad for quick numeric entry which is great when you're trying to enter a lot of numbers accountants especially love this and you might also have those special Media or computer keys with this in mind let's actually take a look at an actual keyboard so we can see where all of these different parts reside now remember this actually is just a sample keyboard and your keyboard may be a little bit different I've also also brought up a picture of a keyboard that is used sometimes for people
with visual impairments so what you will notice is that the print on these Keys is much larger than it might be on a regular keyboard that's just so we can see things better for this particular demonstration the function of the keys though and the location for most of them will be very similar in all keyboards naturally we're going to begin with those alpha numeric and symbols that we've talked about if you're familiar with a typewriter this is going to be the same but you know what it's interesting in the generations of these days many people
especially younger people have actually never touched an actual typewriter the only thing they know is the keyboarding in fact we don't even find typing classes anymore they're all keyboarding classes so for those of you who are a little bit older like I am we can understand and kind of smile about the fact that typing and typewriters are actually a fairly old technology instead we'll call it keyboarding but the alpha numerics that we see highlighted here are going to be the same this is the querty layout that we were talking about before when we're typing we
often need to work with making capital letters or using symbols instead of numbers typing in all capital letters or erasing Letters by backspacing so I've highlighted here the shift Keys which can be found on both the left and right sides of the lower part of the keyboard we also have the caps lock the one highlighted on the upper right is the backspace which allows you to erase or go back from the right to the left and I've also highlighted the enter or the return key which is how we go to a new line in a
computer or do a paragraph break won't get too much into that one because that's more about word processing but these are very basic keys that almost everybody uses anytime they're typing some type of text next comes the 10 keypad as you can see the layout is very similar to what a 10 key would be or a calculator you also see along the top and the right Edge that we have the basic meth mathematical symbols the forward slash for division the asterisk for multiplication the dash for subtraction the plus sign for addition there's also an enter
key which allows you to set an entry and another key that's important is on the upper left this key is the numlock key if you ever are typing and you're trying to type numbers on your 10 key but instead it's moving the cursor it means you need to press that key when this is disabled you you can see for example on the number four there's a left Arrow if the numb lock is not on then pressing the number four is actually going to move your cursor to the left likewise the number six moves it to
the right the number eight moves the cursor up the number two moves it down and you can see that there are other things there as well like page up page down home and end so if your 10 key isn't typing numbers and you want it to press the numlock key the more common way to move your cursor using the keyboard is to actually use the cursor or the arrow keys usually located between the alpha numeric keys and the 10 key these are simply up down left and right and we'll move your cursor in that specified
Direction just above this is a set of six special keys that actually I use quite a bit they include insert and delete home and end page up and page down insert actually toggles you between insert mode and over type mode which again we won't talk about here because that's a word processing thing delete is kind of the opposite of backspace when you press the backspace key it erases things to the left of the cursor when you press the delete key it deletes things to the right of the cursor the delete key can also be used
to remove something that's selected so for example if you left clicked on a file to select it and then pressed delete it would delete that file from the computer the home key moves your cursor to the beginning of a line and and the End Key moves it to the end of a line and page up and page down simply scroll your screen up or down in the appropriate Direction now we get to some special keys there is one on each side of the spacebar the control key and the ALT key the short version of this
is that these Keys usually in combination with other Keys allow you to do special things for example pressing the ALT key and a letter will display a menu alt f for example displays the file menu instead of having to click on it with the mouse the control key usually does system things for example contrl P prints something contrl s saves something and crl O will open something these are some shortcuts that we'll go through again as we move through the course but just so you know for now control and ALT are often used in combination
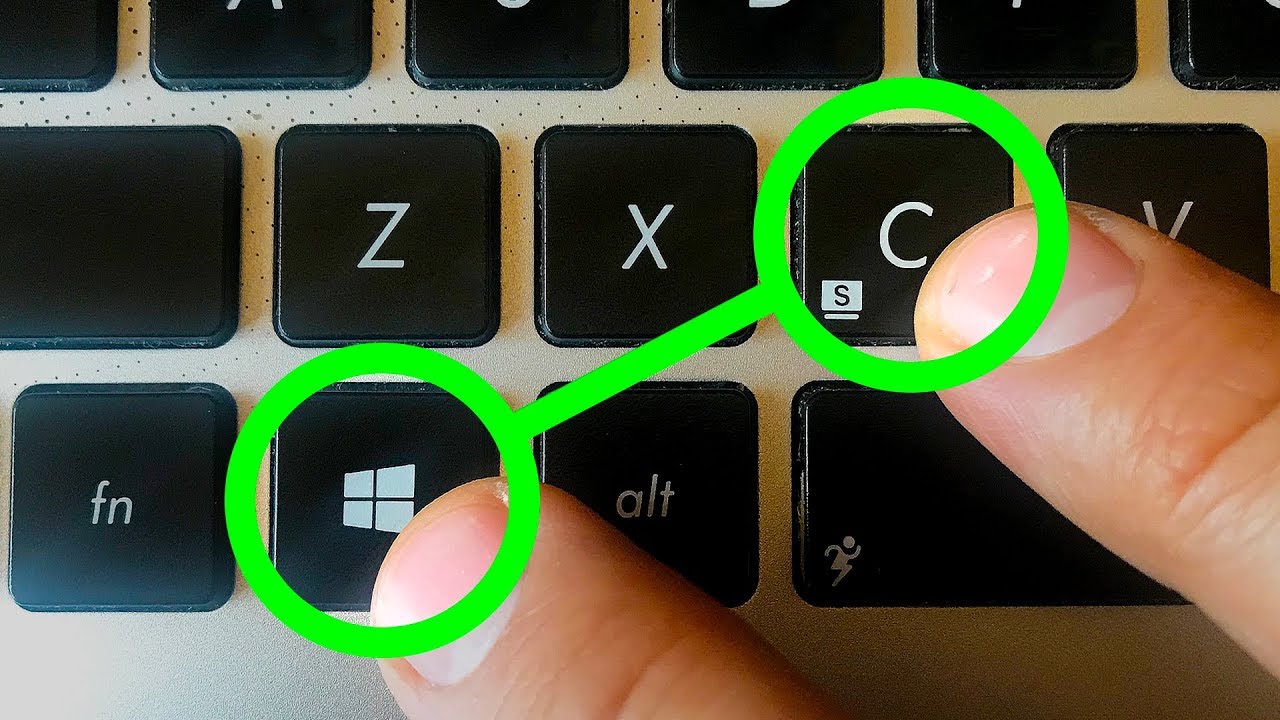
with other keys to perform special functions recent keyboards will will also have a Windows key of some sort and this is used for doing Special Windows things and I'll demonstrate some of these when we get into talking about the Windows desktop one of the things it does though is this is the same as clicking on the start button so again if you didn't have a mouse or you didn't want to move to your mouse you could press this button on the keyboard to display the start menu which we've already seen a couple of times in
this course then we get to those function keys which I've mentioned a couple of times F1 through F12 F1 almost will bring up help for whatever you happen to be in so if you're looking at the Windows desktop it will bring up help for Windows if you were in Microsoft Word it would bring up help for word the rest of the function keys do very different things depending on the specific application that you're in and that's part of learning about those software programs the last key that we'll talk about is the Escape key now I
love the Escape key because it does some nice things basically the Escape key lets us back out of something so if I selected something and I didn't want to go ahead and click on something inside of that I could press escape to get out of it if I display a menu it will hide the menu if I opened a dialogue box pressing escape will close the dialogue box without having to click or without having to make a choice we'll talk more about the Escape key as we work with some special applications as well so now
when you look at the keyboard you can see that instead of just being a whole bunch of buttons they actually are located in specific areas and those areas tend to do specific things you may or may not use all of the buttons and I don't care if you do what I do care about is that you're familiar with what each of these can do even if it may have a special function within a certain piece of software or applic so when you want to use the keyboard what do you do well I think everybody knows
that we can simply press the key so if I want to type ABC I'll press the a key the b key and then the c key one at a time what you may not not have known unless of course you happen to do it on accident is holding down a key repeats that key entry now you can adjust how long of a delay there is before it starts to repeat and then how fast it repeats and these are some of the keyboard settings that we'll talk about in the next lesson also know that there are
special key combinations when I just said you wanted to type ABC I said you would press a and release it then B and release it and c and release it and that would type those three letters but sometimes you actually want to hold down multiple keys at the same time for example when I said you could do alt f for the file menu you want to press and hold the ALT key and then press the F key while you're still holding alt in order to do that and other things for example control alt delete which
is a very common combination to do things like restarting your computer you need to hold down all three of those keys at the same time anytime you want to do some plus sign between it and that's how you know that you should be be holding them down instead of pressing them individually alt plus the letter key for example alt f as I mentioned is a common combination most often seen to access a menu instead of having to use the mouse the control key plus a letter key such as contrl p contrl s or CR o
is going to do some type of system command like printing saving or opening a file and then kind of the granddaddy of all key combinations to know control alt delete when shown this way means that you're going to hold down all three of those keys at the same time in order to execute whatever needs to happen in this case it will give you the option to restart your computer now that you're familiar with some of those let's take just a few seconds to see how they actually can work using a keyboard on our computer system
itself from the Windows desktop I'm going to double left click on my project files folder and then I'm going to doubleclick the mouse and keyboard skills document and that actually opens this document up now we can do a lot of different things with the keyboard that will be easy for you to see using a word processing document and we'll start off by using the arrow keys the set of four Keys between the 10 keypad and the main set of keys on your keyboard you'll notice that right now there's a blinking cursor a blinking vertical line
before the W in welcome to the world of personal Computing I'm going to walk you through keys that I'm pressing to show you how I can move the cursor if I press my right arrow once twice three times you'll see that every time I press the right arrow key it moves over one character likewise if I press the left Arrow once twice and three times it moves the cursor back to the left one character at a time if I press the down arrow that moves me down one line at a time so I'm pressing it
down once twice three times times and again I've moved down three lines and the same would happen if I press the up Arrow two times now let's move up to the set of six keys that are above the arrow keys remember that we have and an end key notice that my cursor is now blinking about a third of the way across the first line of text if I press home which I'm doing now it moves my cursor to the beginning of that line and if I press end it moves the cursor to the end of
that line so this is much faster than going left left left left left left left left left for however many characters are happens to be home will move it to the beginning move it to the end and then you can use the arrow keys if you want to move one or two characters in the other direction I'm going to press my down arrow 1 2 3 4 five times and also press end to make sure that I am at the end of the last line of text my computer might ding at me to let me
know that it's currently at the end of the document and even though I pressed the End Key it can't move any further now I'm going to press the enter or return key which is going to force it to move to a new line and if I press enter one more time it will force yet another line now I'm going to move to the left side of my keyboard and find the Tab Key the Tab Key can do a variety of things but in word processing it moves your cursor across the page so I'm going to
press tab once twice three times what you'll notice is it's basically moving a half of an inch at a time so if you were trying to indent the first line of a paragraph or if you wanted to offset type by having it in further than the left margin of the document the Tab Key can help you do that remember the Tab Key also does special things for example if you're working in a form in that case the Tab Key will move you from one field to the next field instead of having to click with your
mouse and then moving your hands back to the keyboard to continue to type now I'm going to use the numbers on my keypad if I simply press 1 2 3 we can see that it types those letters but now I'm going to press the numb lock or the numbers lock key currently my computer has the number lock on that's why I'm able to type these digits but if I press the numlock key that will turn it off and now if I press for example example the number eight key that's the same as using the up
key because instead of being a 10 key it's now simply moving the cursor so remember if it's not behaving the way that you want usually that means not typing numbers you probably just need to press your numb lock key on some keyboards there will be a special light that will show you when the number lock is on or it may actually show up somewhere on your operating system or your window for example in Microsoft Word nuum will appear in the status bar to show you that your number lock is on now I want to show
you one of my special keys and remember I've been talking a little bit about the key combination called control P I'm going to go ahead and press and hold the control key and then press the letter P on my keyboard and this is displaying the print dialogue box there are a few other ways I could have brought this up which we'll talk about in later chapters but this is one of my favorite keyboard shortcuts because when I'm typing along I can very quickly press some key combinations to do several things very quickly for example I
might do crl s contrl p enter crl s saves my document contrl P prints my document and then pressing enter is the same is clicking on the print button and that actually sends it off to print you have to trust me when I say that's a lot faster than moving my hand to my mouse going to the file menu coming down and clicking save clicking back on the file menu clicking on print and then moving my mouse to the print key pressing that button and being done key combinations can often be much faster than using
the mouse it doesn't matter to me which ones you use because they all do the same thing I think you'll just find eventually that it's faster and more efficient to use keyboard shortcuts when they're available one of those keyboard shortcuts that I want to show you now is the last key we talked about when we looked at the keyboard itself on screen and that is the Escape key the Escape key is often the default or the same as pressing cancel we have a cancel button on the bottom of this window and I could click on
it to close the box without printing but I can also press Escape which I'll do now that makes it go away which is perfect and now you've seen a little bit about how your keyboard can work within a word processing document I'm going to move over to the right side of this window and do a single left click on the Red X to close it out since I've added some changes I am not going to save these changes so I'm going to do a single left click on the button that says don't save then I
will also close out the folder by clicking on the Red X on the top right side of its window before we finish up though I promised I would show you an example of an onscreen keyboard so I'm going to click on my start button if you're using Windows Vista or Windows 7 you'll be able to do exactly the same thing I am if you're using Windows XP this option isn't available at least not quite as easy easily so let me just demonstrate it to you here I'm going to type onscreen keyboard type the whole thing
an onscreen keyboard is displayed at the top so I will press enter which is same as clicking the highlighted option this is an example of an on-screen keyboard that comes with Windows Vista technically this is part of the accessibility so for people who may not be able to use a regular key keyboard they may be able to use the onscreen keyboard instead I could use my mouse to click on these keys or I could simply press the equivalent key on my keyboard the point is that this is what you might see on a lot of
mobile devices or things that have touch screens these are the type of variations that you'll see a lot of now if this isn't the issue the ability to type on a keyboard then maybe your issue could be just typing itself well that's not exactly what this class is about but let me make a quick recommendation if you need some typing help there are some free typing tutorials you can find on the internet by simply searching for free typing tutorial there's also some software that's been around for forever and while I usually don't make specific recommendations
this one I will it's called Mavis Beacon teaches typing and it's the equivalent of the old keyboarding classes or typing classes that some of you may have taken in the past it takes you through some drills and just let you practice and get more efficient at typing in my opinion now the best thing that you can do is to Simply start using your computer you have to trust me that when you just start using it very quickly you will get much faster and much more proficient at your typing skills but regardless now you're familiar with
what keyboards do what some of the different regions or areas of keys are and even seen some examples of how you can use them on your computer Windows operating system actually has some settings that can adjust how the keyboard behaves just like we had settings for the mouse fortunately the keyboard only has a couple of settings unlike the mouse which can be very timec consuming let's go ahead and take a look at these though by moving down to the bottom left of the screen and clicking on our start button if you're on Windows XP you
would then need to click control panel and then doubleclick your keyboard settings on Windows Vista and Windows 7 we can simply type keyboard now I could certainly take my mouse move up near the top of the start menu and click on keyboard but because we're talking about the keyboard I'm going to use my arrow keys instead onscreen keyboard is currently highlighted but if I press my down arrow twice once twice then it highlights the keyboard command I actually want then I can press enter on the keyboard to launch this now I'll move up and we'll
take a look at the couple of options that we have here for the keyboard they include the repeat delay and the repeat rate the repeat delay determines how long if I hold down a key before the computer starts to repeat that letter so for example if I held down the letter A would it immediately start typing a a a AA or would there be a little bit of a delay the second thing is how fast does it repeat so let's do this let's first of all click and drag and move the delay to a long
period of time and likewise move the repeat rate to slow now I'm going to click down at the bottom where it says click here and hold down a key and we'll actually see how this works now I'm going to do some counting because you can't actually see I'm going to press and hold the a key and then I'm going to count so we can see how long until the second a appears and then we'll also see how fast it repeats so I'm pressing a Now 1 2 now you saw that there was kind of a
delay there let me do that again I'm using my backspace key to get rid of those A's hold and there it goes now keep that in mind when I move these to the other end now I'm going to say that I want a short delay and I want to repeat very quickly now I'll move back down and I'll click move my cursor out of the way so you can see it and now press and hold now and you can see almost immediately and it's a lot faster now for this particular computer I'm not seeing as
much of a difference as I do on some other computers so actually your operating system your processor and a lot of other different things like Hardware can make a difference on how this appears the point is that if you're ever typing and you tend to be the kind of person that presses your keys slowly and maybe tends to hold them down a little bit longer than a faster typist if you end up getting multiple letters when you didn't want them you can come in here and you can say I want to make the repeat delay
long longer and I want to make the repeat rate slower that way it will work the way that you want it to the one last thing that we have in here that's not completely related to the keyboard but it's at the very bottom of this dialogue box is something called the cursor blink rate for most people the default is going to be comfortable and we can see it over here if you want to make it go faster you can drag the slider and you can actually bring it all the way down where it actually is
none now I don't ever recommend that because if you look at this we have a hard time seeing that that's a cursor it looks more like it could be a letter L so we always want to have it somewhere the point is that you want to have it fast enough that it's easy for you to see but not so fast and honestly one of the reasons they added this is because they have found the blink rate for people who may have seizure Tendencies can actually cause them to have small seizures sometimes larger ones that's not
something we want so for most of us it's just going to be an optical thing how do we want to see it but for other people there may be some medical reasons why you want to slow down your cursor rate that's all we wanted to look at so I'm going to go ahead and click cancel because I don't want to save any of these settings and now I know how to set up my keyboard to behave just the way I want it to to accommodate the type of typing style that I