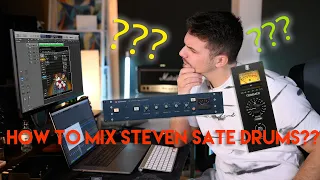
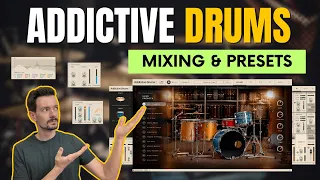
hey guys welcome to today's video this is Martin from martinmixing.com and today I want to show you exactly how I mix absolutely monster drums for really heavy genres I had the pleasure of mixing a really really amazing song for a very cool band I cannot share more because it's not released yet but I can show you how I approach the drums I'll show you how I created a drum kit from scratch in Steven slate drums and how I processed it to get absolutely monster results let's do it [Music] oh [Music] okay so let's jump right
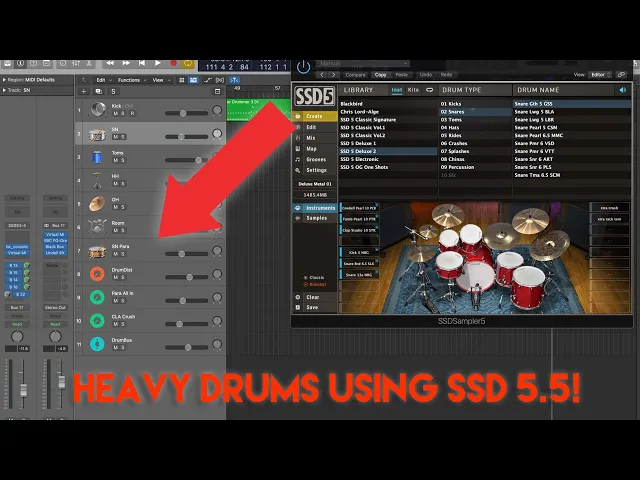
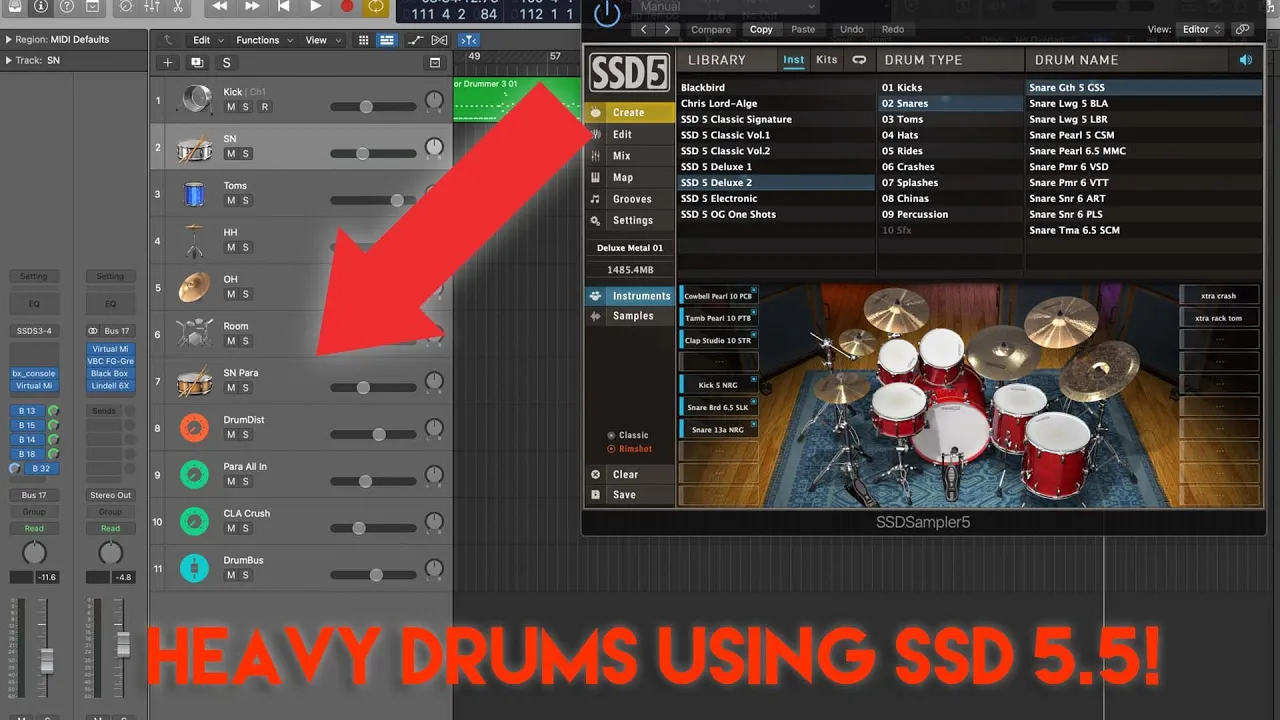
into logic as you can see here on my screen I have this midi drum kit in front of me I have Steven slate drums with the deluxe metal preset deluxe metal one I kind of went through a few presets to choose a really good starting point but of course it didn't stop just there I ended up adding a couple more kicks or at least one more kick so we have this [Music] Pearl 22 we have the nrg5 and for the snare here we started out with a Ludwig a black beauty and then added this 6.5
SLK and another snare from the NRG series so we added a few layers here the toms I picked the kids so the toms work well and the rest of the symbols they're also the stock from this preset so let's have a listen to how this kit sounds like just straight out of Steven slate drums as you can see I have spread it all out across multiple channels we have kick snare and a few little secret things for later the toms hi-hat overheads room and then all the other stuff which I'll show you later on I
kept just a few things on which is kind of the drum boss on a Neve setting doesn't do crazy amounts and on my master bus I have a few little things but nothing that changes the tone dramatically it's just kind of my Baseline to how I start to mix which is a little bit of Channel emulation a little bit of tape nothing special let's have a listen foreign [Music] cool so we have a really cool sound as you can hear it's a little bit on the dark side and although it is powerful it has the
right ingredients it is not quite there to be you know a polished release ready kit just yet before we jump into how I mix this I want to also share with you how it sounds in the end so just so you have a little bit more motivation to stick with this video so let's have a look foreign so cool now that you heard how it sounds after it's mixed let's do a mix breakdown so everything that's Rock and metal lives off the kick and the snare the snare and the kick can be genre defining then
it really gives the overall direction of where everything else will go so for me it was very important to have absolutely brutally crushing snares and kicks um have you have your thumbs of course but I wanted to keep the symbols somewhat smooth I didn't want to get anything harsh because I want to be able to listen to this song at really really high volumes in the end and of course if the symbols are too harsh then what happens is that people will compensate for that by turning the volume down I don't didn't want any of
that kind of trashy sound that we sometimes get with some metal genres but I don't like it I want to be able to listen to this song very very very loudly while the kick and the snare just punch me in the chest every time so let's have a look in how I approach this so first we have the kick here as we said we have two different kicks I lowered a little bit the kick out microphones it's mostly the kick in mic of the two separate kicks okay so it's a really good starting point I
don't think there's that much that has to be done and I didn't do that much as you can see I did kind of standard kick tweaks as you can see I boost a little bit of Top Hand 6 DB at 8K nothing crazy here 3 DB at around 60 and I reuse a little bit this uh boxy muddy area just about 270 ish let's have a look at how this sounds like so big difference with very little tweaks as you can see I'm compressing about three to six DB as well usually I don't compress that
much on the kick but with this particular compressor you can do as much compression as you want and it will sound good and for me it was really important to get a strong powerful transient and the consistent sound out of this and then what I ended up doing I added the Steven slate lift just on the big setting to add a little bit more of that sub bass let's have a listen so it is a noticeable difference and it's a difference that paid off in the end now let's have a listen at this snare [Music]
cool so as you can hear there is a really good transient on the snare it has a good body it has a little bit of that boxy sound which is very natural for snare recordings what I did I reduce this snare bottom microphones a little bit because I didn't want too much rattling I wanted more of a punch more of a thud and for that I also chose the sample it actually took me a little while until I found the right sample that didn't have too much of that kind of scratchy rattly sound but had
a more powerful thud so consider this when you're choosing your samples when making metal drums you might want to I don't know you might want a more readily kind of harsh snare for me it was important that it's a thuddy thick sound so again BX console I mean you cannot go wrong with an SSL what is this e-channel it's just it just works um you know I have no biases I'll use whatever I like most and whatever is convenient this just happens to work amazingly well foreign [Music] [Music] so no crazy adjustments here I boosted
quite a bit of top end above 12K it's important for when you're using a shelf on a snare to put this frequency relatively high so you don't end up boosting the mid-range too much because it's not like an instant separation of where it's boosted and why not it's kind of a gradual slope and in this case I didn't want the upper mids to be emphasized too much so I set it to 12K and I could comfortably boost 1990b of this top end I didn't end up doing anything else apart from compressing it in this case
the compressor is before The Equalizer so I'm compressing first and then I'm adding this top end this helps me get even more of the transient actually again 6 DB of gain reduction to get more of that powerful sound I can turn it off let's have a listen foreign [Music] so this is already a really good starting point now what I did next is kind of a trick that I use on snares a lot when I mix rock metal music because there is a conflict between Peak and perceived loudness so I can have a really really
high peak loudness Peak volume that will you know blow up all of my meters everything is in the red and I don't know how to compensate for it I can lower the faders but then I don't have a loud enough snare so what I usually do is I end up clipping this transient quite a bit and you can use anything you want that is an amlo analog emulation I use the virtual channel on the E setting it works really well the Neve works really well too tape works amazingly or any other Clipper that you can
find even the built-in Clipper and Logic the clip Distortion works really really good for this so let's have a look at what this does and let's have a look at the drum bus meters down here so without it we get an average reading off [Music] thank you foreign let's say -7 minus six ish so now what happens when I add the clipper [Music] wow minus 18 I wasn't even expecting that I didn't do the reading when I was doing this so we have almost 12 DB 11 12 DB difference between just by chopping off that
transient and distorting it so thereby we still have the perception that we have a transient because we hear Distortion and it will translate to us as snap as a cool transient but we saved 11 DB of level this means in return that I can push my snare 11 DBS up before getting clipping and it will not make any difference to any of my channel strip settings um so I highly encourage you to use this kind of trick because you can push your kicks even and your snares you know beyond loud just by using a little
bit of clipping or in this case quite a bit of clipping so with the toms the toms are next I have kind of my preferred way of how to mix Toms I did I have a preset that I use for Toms all the time it's a little bit of reduction in this case in the upper miss it I didn't want quite a bit of a reduction the lower mids which you usually have to do a little bit of a low cut just to tighten things up a lot of lift on The Punchy setting in the
present setting on the Cs lift and a bit of compression well actually quite a bit of compression but at a low ratio so I want an even sign I don't want too much crazy compression artifacts here let's have a listen so that's without and that's with now this might not sound good on its own but once it's mixed in with the rest it works so I remember actually reducing these upper mids later as I mix the song and I realized okay it's not quite working with the tonality of the song with the guitars the vocals
Etc so I just ended up cutting a little bit like a 6 DB quite a bit actually of the upper mids hi-hat bit of low mid-range reduction it was a little bit on the boxy side and the 3.8 so hi-hat symbols they'll always have a resonant frequency a really unpleasant one as a matter of fact and I always end up producing this resonant frequency to smoothen out the sound so you don't have this kind of whistling harsh tone that is really not a problem in most ROM recordings so in this case the resonant frequency was
at 3.8 [Music] as you can see I also use a CQ to boost a little bit of level 10 DB because it just wasn't loud enough I wanted to get more so I don't have to use the faders for that little adjustment but it makes a difference okay next one and here we come to the most important elements of any drum to me it's the overheads in the room that makes or breaks a drum recording like everything else doesn't matter if you don't have good overheads and you don't have good rooms you might as well
just throw out the whole thing so that's why I say that a well programmed drum kit is better than a badly recorded one if you don't have a good room to record or a suitable room to record drums in don't record drums if you don't have good mics to record good overheads and good rooms why butter you know don't do it so it's much better to spend less time actually programming drums than spending a lot of time and a lot of money to record drums in you know a not very suitable room however if you
want professional like really good quality go to a good Studio spend the money spend the money on good drums good engineer good drummer a good kit and all of these ingredients that make a good drum recording and then make sure you have a good mixer to do it because it can also make a huge difference so overheads I usually start out by a digital EQ or with a digital EQ just to get rid of The Unwanted bits again here we can see it's again this resonance and the lower mids a little bit less of a
listen foreign [Music] [Music] that's it on this side and then virtual mix rack as always okay here we're going a little bit more crazy so I'm reducing an extra 4 DB of 400 I really like the CQ and I particularly like the 400 Hertz on this one a bit of Neve emulation it just gives a bit more harmonics might as well not have it doesn't do that much a bit of boost at 12K in this case this is a bell and that's important to note because what it does it creates a boost like this instead
of like this so it has more of a focus around the 12K so this this is what we still hear I didn't want to boost the crazy highs because that can translate into harshness and have some unwanted stuff there so I didn't want that so that's just the EQ that's a listen thank you [Music] foreign [Music] and then I did something that I don't usually do on drum recordings but in this case the genre demanded it I ended up using compression two compressors as a matter of fact to get a bit more oomph out of
this so I use this 1176 modern modded version I believe to tame the snare a little bit [Music] this was important for me because I wanted the direct snare mic to dominate the sound and not have too much from the overhead contributing to it because in this overhead recording also which is something I don't like the snare is actually off to the right a little bit as you can also hear so I didn't want to have every snare hit you know followed by a sound that is a little bit off to the right and then
I added the monster which is the 1176 at an all-in setting and this just really made the sound in my opinion [Music] foreign [Music] so this is already starting to add a bit more aggression a bit more oomph to the whole kit so let's have a listen to all of these components together now before we jump into the most important part of any drum recording [Music] [Music] so that's quite a big difference with not that much crazy processing I would say so a little bit of a boost here a little bit of a boost there
it's not that crazy but the difference is already huge and now let's get to the most important part of any drum recording in my opinion which is the room like a good room can make or break any drum recording and not just that but it will put such a strong stamp such a strong character to the whole on the whole recording that you know it's really worth trying different Studios for an album maybe even try different Studios for different songs on an album it's a huge difference let's have a listen foreign [Music] 's a bit
muddy not very impressive so let's have a look at what I did here um usual kind of same adjustment low mid correction and the harshness reduction [Music] and now the secret sauce really again like you can achieve a lot with very little here so I ended up producing again a bit more of that 400 and then I ended up really really crushing the drums with the monster let's have a listen [Music] thank you cool now let's have a listen to the kit with the with the rooms [Music] foreign [Music] so the room really adds a
lot of Dimension a lot of character to the kit when I muted it I thought actually it's quite cool dry as well but then you don't really get a lot of depth cool and then finally I sent all of these elements all of these separate elements into my bus 17 which is my drum bus so here I do a bit more processing I add another mix bus emulation [Music] all right [Music] and I'm not shy on going heavy on this you know if I clip a bit more of the transients I'm fine with that because
that just means I get more level in the end here only the snare is clipping which is very much welcome actually then I use a bit more compression a boss compressor SSL G of course [Music] all right [Music] foreign [Music] this is what 3db makes a huge difference actually it's it's amazing it's mind-blowing how much the snare in the kick come alive here um and especially at such a low ratio you know two to one ratio with a three millisecond attack so it's not even aggressive settings but it makes a huge difference it just brings
the kit together and gives a bit more punch to the kick and snare then I have to admit this is kind of a secret sauce plugin that I ended up using a lot and I and I use this a lot in recent mixes actually it just makes such a huge difference the Black Box this is a plug-in Alliance plug-in it's amazing it adds beautiful overtones it's just a kind of a secret thicker maker let's have a listen [Music] thank you [Music] so quite a big difference just from this plugin it just makes it so much
richer thicker and bigger and finally I ended up using one of my favorite um kind of top and bottom Shapers the Lindell 500 this is a pull tack emulation and I use this usually to push some final lows and bottoms on my recordings or mixes [Music] thank you [Music] so again huge difference the kit just gained a lot of size it sounds bigger it sounds heavier you know it's these little things that make the difference sometimes okay now let's move on to the really cool parts that I did with these drums I think so this
was kind of just the introduction really this is just the shaping and now we get into the really cool Parts which is all the parallel processing that I did so as you can see I have quite a few things going on I have a parallel just on the snare I have a parallel which I call drum Distortion an all-in and the CLA Crush setting that I took from one of his seminars so let's have a look at what these do individually so the parallel snare I did to really add a huge thud to the snare
I wanted to add a lot of low end a lot of power and I wanted to emphasize the ringing of the snare so let's have a look at how this sounds [Music] so this is not a very clear sound what it has it has a lot of ringing which I like and it has a lot of low end which I wanted it has a lot of thud which I wanted and it works amazingly with the nicely shaped transient heavy direct snare that we have let's go through the settings quickly as you can see I boosted
a lot here I boosted this 800 a little bit which is the ringing I reused a little bit of mud just because I'm boosting a lot of the lows here below 370-ish but I boosted a bit too much of this 300 which I didn't one a bit more top why not and then two different compressors one with the SSL Channel adding another 360 B of compression and then also the monster to really really make the big difference let's have a look at how these affect the snare individually foreign [Music] [Music] so we get a lot
of snap a lot of attack from the SSL and then we get a lot more sustain it kind of chokes it down a bit but that's okay because we still have the direct snare to give the livelier sound so you get a lot of the sustain in the body from the monster now let's have a look how it works when it's Blended in without [Music] so as you can hear the difference is quite big it added a lot of body it had a lot of low end a lot of thud this really makes the snare
in my opinion then next we have a drum Distortion this is something I've been experimenting with for a while it was very difficult to come up with a setting that doesn't add unwanted artifacts but really just adds a little bit of grit to the transients to the top of the snare and the kick actually so this one I'm using on the snare kick and the thumbs as well um so this is a so let's have a listen what it has exactly [Music] so as you can hear it's quite nasty and on its own I probably
wouldn't like it but it's the result that counts in the end so I started out with a low cut to not add any unwanted harmonics to the super lows I didn't want that then a bit of compression to even things out this way I will add even amounts of distortion later on to these elements as a whole [Music] okay maybe a bit more compression and then I ended up using the fat Traders so again it took me a while to dial in the Distortion that I wanted and I went through a lot of different Distortion
units that I have and I ended up with this one uh and you know it really does exactly what I want [Music] and then the Black Box just to round things off [Music] cool now so let's have a listen to how these things sound together I'm gonna start with the drum Distortion muted and then I'm going to turn it on [Music] thank you [Music] so as you can hear it adds quite a bit of grit to the to the shells and I really like this sound and really really makes the drums cut through so what
is next now on top of this I added two different parallel compressions to the entire kit one is the CLA Crush setting which again uses the Black Box because I just love this plugin and then a quite moderate chain that I nicked from one of the crystal Audiology seminars it's actually not that much compression but what it does it adds a beautiful glue and a consistency to the drones let's have a listen foreign [Music] so it's kind of heavily compressed but not heavy pumping so it's not in 1176 type compression it's just compression compression that
actually brings out a little little bit more of the transient and the Mesa drums punch here as you can see I also boost a bit more of the top and bottom here and the reason why I do this because I know that this CLA Crush will be the one I owned automate in the end so as the song progresses and moves from verse to chorus pre-chorus and into the last heavy chorus the heaviest chorus this is the one I will blend in more and less to you know make the drums pump more to open up
the top end and the bottom end a bit more it's kind of like a parallel EQ slash compression at the same time and I encourage I encourage you to experiment with this because it works really really nicely then secondly I have the all-in setting we all know what this is we all know exactly what this is this is just the 1176 all in let's have a listen [Music] now this brings out a bit more of the room it adds a bit of pump to the entire kit and I just love this song and I wanted
this particular sound for this kit now let's have a listen to the kit without and then with the parallel chains foreign [Music] so as you can hear the difference is huge let's just try once again without the parallel processing including the snare foreign [Music] the difference is huge as you can hear and to me these four parallel chains really make the drum sound it really just comes alive and the beauty is that with these chains now there is almost infinite possibilities in what you can do with these drums you can blend the two different rooms
in different ways from verse to chorus or different sections of the song of course the snare parallel you can add more or reduce depending on how heavy you want the particular section to sound the drums Distortion speaks for itself of course this song was just heavy throughout the whole thing it was just brutal but if it was a more Dynamic song I might mute it completely in the middle eight you know a melodic soft middle eight or breakdown and then bring it back in at max volume for the last Chorus for instance as I said
I end up automating the parallels quite a lot especially the CLA Crush which is really opens up the kit quite nicely and adds more body and more volume to it as well as the parallel all in which is the 1176 setting if I really want a brutal crushing sound for certain sections so before we finish this video let's have a final listen to the before and after of the whole mix [Music] [Music] [Music] foreign [Music] I mean there you go it's hard to believe it's the same kit isn't it okay guys thank you so much
for watching if you want to learn more about mixing and mastering I'm actually starting my own mixing course which will be coming up very soon so I will keep you posted on this and also there will be a second part to this video where I show you the entire mixing process of the whole song so stay tuned for that and for now thank you for watching and I'll see you next time ciao hello