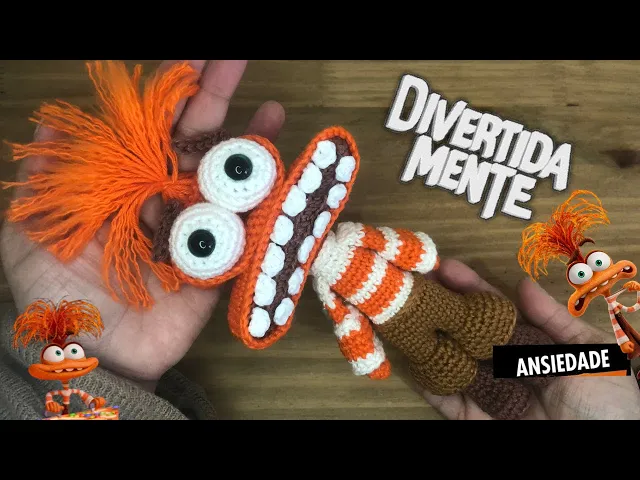
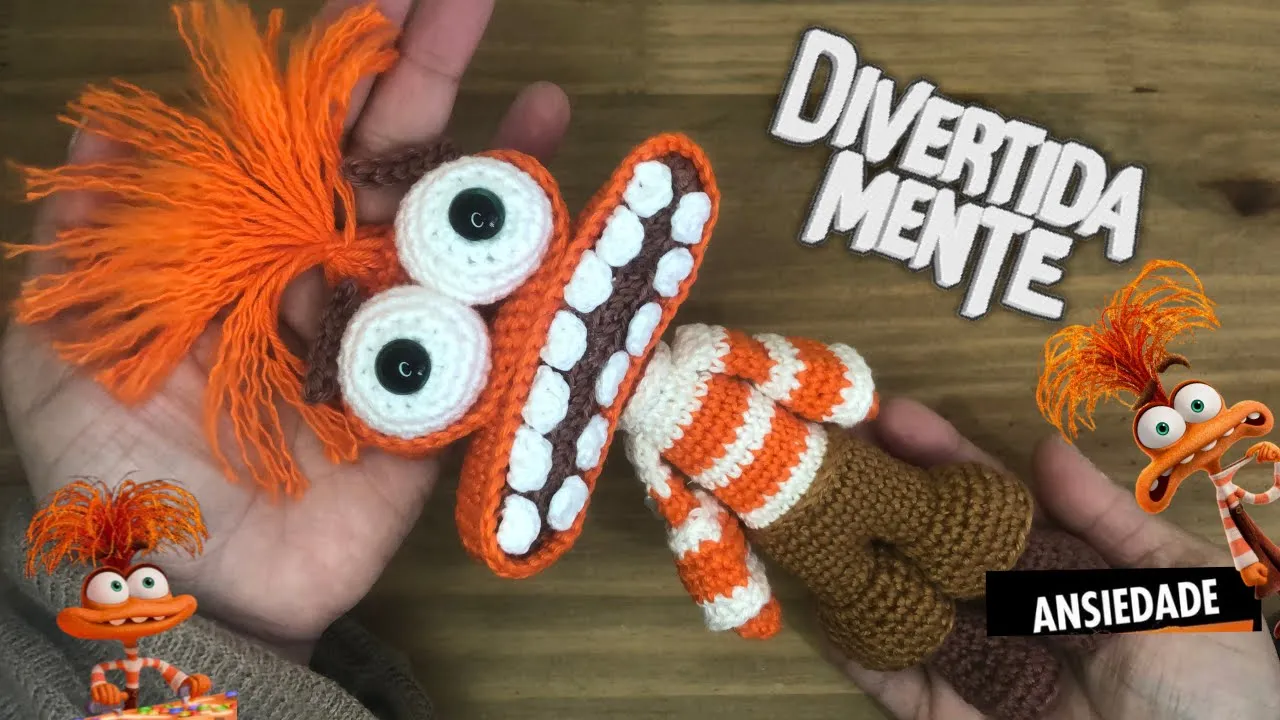
Hello girls and boys, how are you? I'm Débora, creator here of the channel amor crochê by Deb, for those who are new here, you are very welcome and today I bring this amigurumi that is not as cute as I usually bring here on the Channel but it was requested from a lot of people there in my Direct here also on YouTube a lot of people commented on other classes, you know, about the characters from amusingly, in joy, in sadness in the little shop, people were asking to bring anxiety, I was a little reluctant because I think she's really ugly, people, but I answered your request, it was 20 cm in size, it's the largest in the collection and it stayed like this, I'm asking you to leave a thumbs up, share if possible in the groups on social media, leave a comment to tell me what you think of my channel, if my videos have been relevant to you, this helps a lot with the channel's engagement and for those who are not yet subscribed, subscribe Activate the notification bell so that whenever I post new content here, YouTube will notify you ok and before we go to the tutorial I want to leave a word of reflection and talking about anxiety I will read with you there in the book of First Peter which is a book in the New Testament of our Bible First Peter 5 Verse 7 which says so cast all your anxiety on him because he take care of yourselves and to complement this verse I will also read it in the book of Psalms which is a book from the old testament Psalms 9419 which says like this when anxiety already dominated me Deep down your comfort brought relief to my soul and that's just how it is when we cast our desires and our worries on God, he sometimes takes care of us, sometimes we don't look for God to help us, to help us, we know it's too much concern about the future. So on that day, let's really cast all our our concerns to God because He takes care of us, okay, let's go, so for our step by step we're going to start with the little feet, I already have one ready, I'm going to do the other one with you, I'm going to use this color of brown, which is cocoa brown, I'll start by making nine chains nine chains I come to the second chain from the needle I do a single crochet I will put the marker so that I have the stitches exactly right so we don't get lost I made a single crochet I do 2 3 4 5 6 seven double crochets in the last chain I make three single crochets in the same space I come from the other side, already securing this thread six single crochets I made 1 2 3 4 5 six single crochets here in the last chain I make an increase this first row we have a total of 18 single crochets I remove the marker I make one stitch down I return with the marker in the same space I make one more single crochet making an increase I make five single crochets 1 2 3 4 5 single crochets I make five increases in a row 1 two increases three increases four increases five increases and complete with the remaining seven double crochets 1 2 3 4 5 6 seven double crochets our second row ended with 20 four double crochets I remove the marker in the third row we will do stitch over stitch but taking the back straps we will work in blo we will make 24 single crochets I finished the third row with 24 single crochets we work in block I come to the first stitch now taking normal stitches I do a single crochet I return with a marker And I continue doing stitch after stitch now taking normal stitches 24 single crochets I finish the row when I remove the marker I make a single crochet I return with the marker I did one single crochet I do two three 4 5 6 7 double crochets I do six decreases in a row one [Music] decrease two decreases three decreases four decreases five decreases six decreases I do 1 2 3 4 five double crochets Our round ended with 18 double crochets I remove the marker I make one single crochet I make one single crochet I make 2 3 4 5 six single crochets I make four decreases in a row I make four decreases I make four single crochets one in each base stitch and our row ends with 14 single crochets I remove the marker I make one stitch low I did a low crochet I do 2 3 4 5 six single crochets I make two decreases in a row I make four single crochets Our round seven ended with 12 single crochets I will pull the filling loops a little with the help of tweezers I deposit the fiber inside here I remove the marker I make a single crochet I return with the marker now we are going to do the row eight which is the one we are starting now until row 14 point over stitch 12 double crochets in each row finishing the row 14 marker shot I cut the thread I skip a base stitch I come to the next stitch with the Needle from the inside out, I pull this thread inside, I come to the finishing point, with the Needle from the inside out, I pull the thread here inside it and I tie it up here inside and this little thread I leave here inside, now I'm going to use this color that It's Craft brown I make a loop on the needle I come here at the back I do a single crochet this thread I bring it to the front to fasten together I do stitch over stitch I'm going to work this row 15 and row 16 stitch over stitch 12 single crochets in each row I finished row 16 I remove the marker in this row we will work stitch after stitch but taking the back straps we will work in double crochet 12 double crochets all around I finished row 17 I remove the marker I do a single crochet taking normal stitches I place the marker in this row we are going to work stitch over stitch 12 single crochets I finished the row 18 I remove the marker I cut the thread and cast off I skip a base stitch I come to the next one with an inside needle to [Music] out I pull this thread here in I come to Cast off stitch with the Needle from the inside out, I pull the thread into it and cast off here on the inside, I make a loop on the needle, we're going to work on these little straps here, I insert the needle, I do a single crochet in the next stitch, I make an increase I've already been fastening the little thread here together I made an increase in the stitch I do a single crochet in the next one I make an increase and continue doing it this way all around a single crochet and an increase single crochet and an increase I finished the first row of the pants detail I come to the first stitch I do a single crochet I place the marker Let's work stitch over stitch 18 single crochets I finished the second row with 18 single crochets too I remove the marker I do a single crochet I insert the marker I did a single crochet in the next stitch I did a single crochet I made two stitches one in each base stitch in the next stitch I make an increase I continue doing this sequence two single crochets and an increase all the way around I finished the TRS row with 24 single crochets I remove the marker I make one single crochet I insert the marker now we are going to do the rows that ec stitch after stitch 24 double crochets in each row I finished the row C remove the marker I do a double crochet I put the marker in I did a double crochet in the next stitch I did a double crochet I did two stitches one in each base stitch then I did a decrease I continued doing In this way, all around, two single crochets and a decrease, I finished row six with 18 single crochets, I remove the marker, cut the thread, cast off and I'll be back with you, I already made a loop on the needle with the brown Craft thread, now I come with both pieces I'm going to work with the little feet with your back to me, I'm going to fold this piece like this, in the middle I insert the needle here on the side here on the side I do a single crochet in the same way I double here the little foot I come here on the side I do a single crochet V put the marker here which will be the beginning of the row this row is 19 is the Union row I made a stitch and I have been working stitch after stitch around this little leg we are going to do 12 double crochets around the other leg also 12 double crochets until we find it here at the marker, finishing row 19 with 24 single crochets, I remove the marker, I make a single crochet, now we are going to do row 20 until row 25, stitch over stitch, 24 single crochets in each row, I finish the row, 25, I remove the marker and now I am going to make one detail here I take the front straps and make a slip stitch, I'm going to do this shape all the way around, taking the front straps and making slip stitches, I finish the Come back, I cut the thread, take out the marker, I'm going to put this little tip on the tapestry needle to do the finishing here, I'm going to finish it here on the inside, okay, I'm going to add a little more filling here on the legs, now to make the blouse, we're going to use this tone, which is off white You can use white too, okay, but I opted for this color and this color, which is tangerine, you can use any shade of orange, whatever you have, I'll make a loop on the needle with off White yarn, I'll come here at the back, I won't work these here, okay ?
here where we did the slip stitch I'm going to work these from the inside Oh these little straps here I do a [Music] stitch under this thread I'm already bringing it to fasten and we're going to do stitch over stitch 24 single crochets I finished the row 26 I come to the first stitch I do a single crochet, I place the marker, I made a single crochet in the next stitch, I made a single crochet, I made two stitches, one in each base stitch, then I made a decrease and I will follow this sequence all the way around, making two single crochets and a decrease, I finished the row. 27 I remove the marker I do a double crochet without closing I come with the thread in tangerine color I pull it here into the loops I adjust the two threads so that the stitches are very straight and I work stitch over stitch I will cut the thread off as it is already attached I will do stitch after stitch with the orange color of row 28, which is the one we are starting now until row 30, I finished row 30, I take out the marker, make an incomplete stitch and return with the off White thread, doing the same pattern, I'm going to do rows 31 and 32 with the thread off I'm going to do about four five stitches here and I'll cut the orange thread I've finished row 32 I remove the marker I make an incomplete stitch I come with the orange thread I do row 33 until row 35 stitch over stitch I've finished row 35 I remove the marker I do an incomplete single crochet and return with the thread off White Let's work two more rows of stitch over stitch rows 36 and 37 I finish row 37 I do a single crochet I insert the marker I do a single crochet in the next stitch I do a decrease I do this sequence all the way around a single crochet and a decrease I finished row 38 with 12 double crochets I remove the marker I come here in the front straps I do a single crochet I put a marker in the next stitch taking the front strap I make two single crochets In the same space, I will continue doing this way all around, a single crochet and an increase, always taking the front straps, we will work in a flower all around, I finished row 39 with 18 stitches, I can now cut the thread, remove the marker, I will finish off with a tapestry needle But you can use a crochet hook too and now I come back with the orange thread, we're going to work these little straps here, I make a loop on the needle, let it push this fiber a little bit, we're going to work these little straps here and those over there inside, they're not these ones from the last row, they're not these ones, they're a little difficult for me to show you that I'm embarrassed, we'll take them, we'll do stitch over stitch, 12 single crochets, we'll already be attaching this little thread here together, I finished row 40, I come to the first stitch, I make a single crochet, I place the marker, we will work stitch after stitch, 12 single crochets, I also finished row 41 with 12 stitches, I remove the marker, I make one [Music] stitch, low in the same space, I make one more stitch low making an increase in this row we are going to make increases in all stitches two single crochets for each base stitch I finished row 42 with 20 four single crochets I do a slip stitch I will cut the thread to a long size so that later we can sew the I'm going to wrap this thread around the head, I'm going to leave it here inside the piece and then we remove it from here just so it doesn't get in the way when we sew the little arms here to make the little arms I make a magic ring with orange thread a little chain to fasten the ring I make four stitches lows I close the ring I come to the first [Music] stitch I do a single crochet let me adjust this thread because it was wide a single crochet I put the marker in the same space I do one more single crochet making an increase and I continue making increases in all the stitches, the second row had a total of eight single crochets, I remove the marker, I come to the first stitch, I make one single crochet, I insert the marker, now we are going to do row 3 until the stitch over stitch row, eight single crochets in each row, I finished the row in the stitch, the marker, I take the loop from the inside of the back, I do a double crochet in this row, we will work stitch over stitch, taking the loops in the back, we will work in Bloc, I finished the row 10, I remove the marker, I do a single crochet, taking normal stitches. we are going to do row 11 and 12 stitch over stitch eight double crochets in each row I finish row 12 I remove the marker I make an incomplete double crochet Let's work with the thread offl I adjust the threads well I do stitch over stitch on row 13 and 14 I finish the row 14, remove the marker, insert the needle, taking both sides, do a single crochet, make 2 3 four double crochets, cut the thread long enough for us to sew, then on the body, I make a loop on the needle with off-white thread and come here for the straps from that row that we worked on in BL I do a single crochet in the same space I do one more single crochet making an increase I already fasten this thread together here I made an increase and worked seven more single crochets I finished the row with nine single crochets I made an increase plus seven stitches double crochets totaling nine stitches I come here in the first stitch I make a single crochet I place the marker in the same space I make an increase and continue making stitch after stitch we will make eight single crochets I finished the second row with a total of 10 single crochets in the first stitch without closing I take the orange thread I make a single crochet I adjust the two threads well I made one I make two three single crochets then I make an increase I cut the thread off White I make three single crochets an increase I make 1 2 3 four single crochets let me adjust it here turning the rows so that stay correct and our third row ended with 14 single crochets I come to the first stitch I make a single crochet I place the marker I make a single crochet I make 2 3 four single crochets in the next stitch I make an increase 1 2 3 four single crochets in the next stitch I make one increase 1 2 3 four single crochets Our row number four had a total of 16 single crochets I remove the marker I make one single crochet I return with the marker this row we will do stitch over stitch 16 single crochets I finished the row five I remove the marker I make one stitch without closing I pay for the off White thread, don't forget to adjust the threads here I do stitch over stitch on rows 6 and 7 After finishing both rows we will cut the thread and finish with the two little arms ready and now I will position them here in the Corpinho I'm going to position it here, in the off part here between the first and second row, right here, on this side also the binding facing here towards the body, right towards the leg and the seam is a little dot on the little body, a little dot on the little arm, little dot on the little body, little dot on the little arm then we finish it here under the arm and hide the thread inside the body to make the head.
I've already made 22 chains, I'm using the same color, I've made the body, the blouse on our anxiety doll and Tangerino, I'll come on the second chain, I'll make one single crochet I make one single crochet for each chain we will work until the penultimate chain I made 20 single crochets now in the last chain I make three single crochets inside it comes from the other [Music] side and work 20 single crochets one in each base stitch We now use this thread to hide it, I did the 20 single crochets in the last chain, I made three single crochets in the same space, the first row had a total of 46 single crochets, I come here in the first single crochet, I make one single crochet, I add a marker and I continue making stitches. on stitch we are going to do 20 double crochets in total I finished the 20 double crochets now here on the round I will do three increases in a row I do 20 double crochets here on the other side and finish with TR consecutive increases here on the round again and the second row ended with 52 double crochets, I take off the marker, I do a double crochet, let's do stitch after stitch from row 3 to row 6, I finished the row, if I remove the marker, I come to the front strap, I do a single crochet, I insert the marker and work 20 single crochets taking only the front straps let's work in flower I made the 20 single crochets now in the next stitch I make an increase always taking the front straps in the next stitch one single crochet stitch alone in the next stitch an increase in the next stitch one single crochet and in the next stitch I make an increase I did a sequence of an increase and a single crochet three times now I make 20 double crochets and repeat the sequence of increases here an increase and a single crochet an increase and a single crochet three times I finished the row seven with 59 double crochets I cut the thread and make the binding that I usually do I will use the brown Cocoa thread which is the same tone here as the feet I make a loop on the needle we are going to work on these little straps from the inside in the direction of the binding I make a single crochet, I now bring the thread forward to secure it and I do stitch over stitch, I finished the row, I'm going to call this part here first, it's the inside part of the little mouth, I got 52 double crochets, I come to the first stitch and I do a single crochet. I'm going to put the marker here and in this second row Let's work stitch over stitch again 52 double crochets I finished the second row I remove the marker I do a slip stitch I'm going to cut the thread to a long size so we can sew I'm going to reserve this part because I'm going to add stuffing and I'm going to sew the eyes here at the top before closing here and now we're going to make the eyes, I already have one ready, I used this eye which is number 11, it's a green eye and white thread, I use a magic ring, a chain to hold the ring six single crochets I close the ring but you don't need to tighten it too much because we're going to put the eye here in the middle Ok so you don't need to press it too much I come to the first stitch I make a single crochet I put the marker in we will make increases in all the stitches in the second row remaining with 12 single crochets third row one stitch and an increase all the way around totaling 18 stitches fourth row two stitches and one increase all the way around totaling 2 single crochets then we will do row 5 until row 7 stitch over stitch 24 single crochets and then we start with the decreases on row eight, we will do two stitches and a decrease all the way around totaling 18 stitches .
closing with a Tapestry needle Remembering that as we close the piece, you deposit the filling, coming back here to put the eye with you, then I pull the loops a little bit here, I will use this oil applicator to make it easier, the piece is already well filled with fiber I put the thread on the Tapestry needle and now I finish closing it, do it at the same time as you finish one eye, catch it on the other so there is no difference in size Ok with the orange thread I made 15 chains we are going to make a detail of the eye of ours Anxiety doll will be like a little crib to put the eyes in, so I measured here about 15 chains, now I come to the second chain, I do a single crochet and work one stitch for each chain until the penultimate one, I made 13 single crochets here in the last chain, I do three single crochets in the same space on the other side I make 13 single crochets I made the 13 single crochets here on the other side here in the last chain I make three single crochets in the same space this first row had a total of 32 single crochets I come to the first stitch I make one stitch At the bottom, I place the marker, I do 13 double crochets, I have already done one, I continue doing stitch after stitch until I total 13 double crochets, I did the 13 double crochets, here on the round I make three increases in a row and here on the other side I do 13 single crochets and here on the round, three increases in a row I finished the third row with 38 stitches, I remove the marker, I do a single crochet and let's do row 3 until row 5, stitch over stitch, I finished row C, I'm going to do one more row let's do it until row six, okay I do a double crochet and do stitch over stitch in this row if it will be better one more row I reached the end of row six I remove the marker I cut the thread I skip a base stitch I come here at the stitch [Music] Next, I pull the thread inside at the finishing point, I pull the thread here towards [Music] behind and I finish here inside, I put orange thread on the needle, I made the Nozinho on the tip, put an eye [Music] first, right here in the corner. Adjust it so that it stays well centered, okay, I make some dots , holding it here from below, there's no problem with this Nozinho staying here because this part will be hidden . ok and it looks like this after sewing I'm going to apply a little fabric glue here and I'm also going to add some little pins to stick and now we're going to close the little mouth here I've already put the thread in the needle That long thread that we left when we finished this part of the mouth and now I'm making the union, I'm taking this little strap here on the outside with this little strap here at the back of the bottom like this and we're depositing filler and we're adjusting it so that this little mouth is very correct now I I'm going to remove the thread that was curled up inside here that we reserved for PR, sew the head, put it on the Tapestry needle, I'm going to position the head very centrally, let me show you, and I'm going to sew it around here, there's a little dot on the head, a little dot on the neck a little dot on the head a little dot on the neck all around the back put a little more stuffing here on the neck to make the teeth I make a magic ring a chain I do a slip stitch three single crochets 1 2 three double crochets I make a slip stitch I close the Ring and cut the thread, I close the Ring tightly and these little threads I'm going to cut a little more and I'm not going to tie it off because then we're going to glue it like this, we're going to glue it like this, so we don't need to tie it off because the little thread is going to stay back here We're going to apply glue and it's going to stay safe here and it looks like this.
I'm going to make a few more teeth and I'm going to put them here at the bottom. It's also the same recipe for the top teeth, so I'm going to do that, I'm going to glue them and I'll come back with you, the teeth look like this. out of our anxiety, I made more teeth and glued them here interspersed and it looked like this to make the hair I cut 10 strands in the size of 25 cm and now we're going to do it like this, just take them two by two, I took a bigger needle, I'm going to pull them here, right at the kinda Zinho, I'm not going to give it Nozinho, I'm going to leave it loose here so we can tie them all together and I'm going to pass it two by two, it looks like this, I thought it was too little hair, I cut a few more and put it here, I'm going to unravel this hair a lot , I unraveled the hair and now I I'm going to get it right with the scissors, I've been cutting it, rounding the ends [Music] I loosened the hair and I'm going to give it one more tidy, I thought it was too clumsy here, I'm going to tie it just here [Music] below, I'm going to give it one more tug, I just did the eyebrows and it's very easy to do I made seven chains I came back doing very slip stitches that's all And now we're going to glue it like this, one I'm going to glue it in a little foot right here above the eye and the other I'm going to glue it straight, I'm going to glue it like this and the other I'm going to glue it straight and it's done So I glued one with a little foot making a curve and the other one I glued it straight, I put the fillets to save it for drying and this is how our anxiety doll was, it was 20 cm in size and that's it, I hope you enjoyed our step by step, thank you for it.