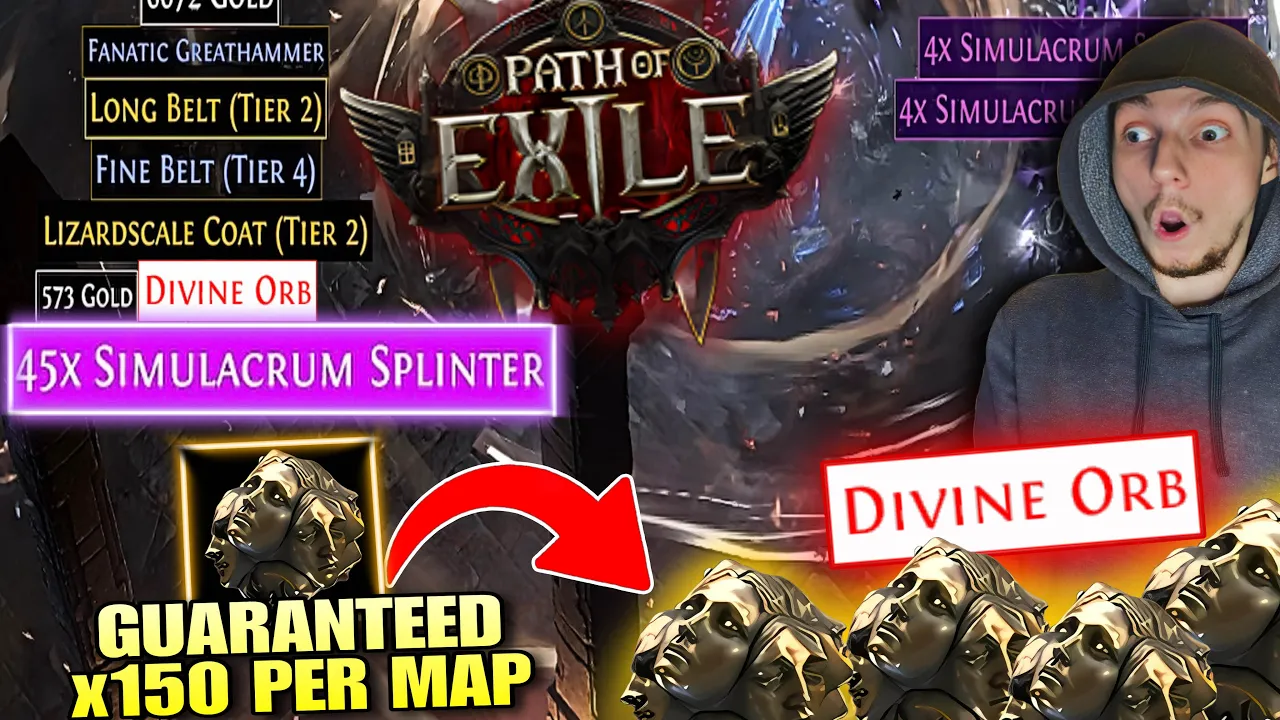
10 per. So, another 50. So, you know, we're we're over 200 plus exalted orbs in just currency from the one map.
All right, folks. Here's the deal. This has to be the best guaranteed currency farm strategy I have ever tried or even seen for that matter.
Not even including any raw divines, perfect jewelers orbs, or any other lucky highv value drops such as that. I'm making anywhere from 100 to 150 exalts worth of just raw currency drops alone. Most of which is coming from an average of about 250 Sim splinters per map, if you can believe it.
alongside roughly 30 or so tiered rares per map as well. Once you start throwing raw divines and stuff like that, then it just gets a bit crazy. On top of all of that though, at the time of recording, the investment required for the tablets and waystones you're going to need are cheap enough that you can actually make it all back in just one to two maps.
So, first up, I'm going to show you guys what I got from just the last two maps I did. Then I'm going to show you guys how it works, why it works, and what you need to make it work. And then for anybody that's still interested, I'll probably just quickly run through a map at the end of the video and talk a little bit about the details and nerdy math side of it all.
So you got to stay tuned. Sh. All right, folks.
Here it is. This is what we made from the previous two maps alone. As you can see, here's all of the currency as well as all of the tiered rares and just some extra assorted junk, jewels, waystones, tablets, all that good stuff.
As you can see from the previous two maps alone, to be clear, we made 520 simulacrim splinters, nine chaos orbs, 55 exalted, eight alchemies, and just a bunch of, you know, random other junk that's not that important. And if you don't believe me, that's fine. You can just stay tuned to the end of the video.
You can see it all firsthand. But I've got no reason to lie. Lying does no good for you, which ultimately does no good for me.
So, trust me, this is how much I made from the previous two maps. With that being said, I'm going to go and convert all of the currency into exalted orbs just to give you an idea of what that would be. And boom, there it is.
295 exalted orbs. To be clear, from two maps, raw currency, realized gains, like I picked it up in the map and could immediately exchange it for exalted orbs at alpha. Honestly, I mean, I don't know.
I don't think I've ever done anything in POE2 that makes this much currency in this amount of time, especially guaranteed currency. So, this is just insane. And also, once again, to be clear, this is not including the I don't know 50 plus tiered rares that we have here sitting in the stash along with the jewels, the base types, the way stones, the tablets.
I mean, it's just crazy. So, now let's go and go over how it works and what you're going to need to get it set up. But first, because I know there are some comments coming about this, saying, "Vinnie, Vinnie, those aren't real tiered rares.
" Let me just go and hover over them really quick to show you chefs that I am not capping. These are all tiered rares. There were probably 100,000 plus rares in my previous two maps.
I would have rather have uninstalled the game before picking them all up. So, yes, these are all tiered rares specifically. With that being said, as for how it works and what you're going to need to get it set up, I'm going to keep this section pretty short, simple, like just the quick and dirty version.
If you want the details, the nerdy math stuff, make sure to stay tuned for the map and like right before the map. That's where I'll go over all that. So, like I said, short and simple version.
You can find links in the description for these planners. But, you're going to need to basically mirror my Atlas passive tree pretty much one to one. Specifically, you need every increased effect of explicit modifi explicit modifiers on your waiststones points as possible.
So, it's going to be 1 2 3 4 5 6 7 8 9 10. And then you also need all four of the precursor tablet explicit modifiers on your maps nodes as well. So, it's 1 2 3 4.
And then you're going to grab the precursor nodes in between them as well because they're also quite good. In addition to that, I'd recommend just mirroring this tree one to one. I've messed around with other setups.
I don't think there are any better setups. And you pretty much kind of need to go this way anyways to get all of the increased effect nodes. So, I'd recommend just mirroring this.
You can tinker with it if you want, but simply put, just mirror this. Moving on to the to the delirium tree because this is obviously a key part of the strategy. You need four points.
So, you need to come up here and grab this. Would you like to see my face? This is going to give us 50% increased stack size of Sim splinters found from nonunique monsters in your maps.
Very, very important. So, you need this. The strategy basically won't work without it.
Additionally, getting your fifth, sixth, seventh, and eighth points. It's not mandatory, but like would I do this strategy without those points? I'm not really sure.
They make a big difference. 50% increased mirrors and 25% increased unique bosses results in just a plethora of additional splinters. So really getting your sixth and eighth points is like semi- mandatory as well.
Everything else doesn't really matter. Although I will include in the planner what I use and I'll even do an expedition setup even though I don't have my points yet. I'm going to get them very soon and I know what I'm going to put here.
And I will be using expedition like a couple of expedition tablets in this strategy. but you don't need to. You just have some extra tablet slots to play with.
And I'm going to put expedition ones there. Moving on to the meat and potatoes, the tablets and waystones. So, first things first, you can do this with a two tower setup, three tower setup, or even a four tower setup.
But, of course, four towers are extremely rare. So, for this video, we're just going to focus on two and three tower setups. If you haven't already guessed, the main strategy here is to juice up our increased stack size of Sim splinters to the moon.
By default, at 0% increased stack size, if a monster were to drop Sim splinters, it would drop one. A non-unique monster, so like not one of the bosses, just a regular monster, it would drop one splinter. At 100% increased drop rate, it would drop two.
200% three, 300% four. You get the gist here. So, the goal is to juice that as much as possible.
Here's how we do that. For a two tower setup, I'm going to go over like the full two tower setup example really quick with a little bit of math involved. Just so you understand what's going on for the two tower setup, you're going to have six total tablet slots.
Three of them need to be 10% increased stack size of Sim splinters found in your maps and ideally increased quantity of items found in your maps. The increased quantity of items is not mandatory for the Sim splinters to drop properly, but I just think it's the best prefix to put on these tablets. So, I'd highly recommend it.
Increased number of rare monsters or increased rarity is also fine, but quantity is definitely the best in my opinion. So now you've got 30% increased stack size from your tablets. Just keep that in the back of your head for now.
And next up is going to be to instill your map with three distilled despairs. To be clear, the only way this strategy works is if you use an instilled map. You cannot go into a delirium map and then walk through the delirium mirror.
Otherwise, the regular monsters will not drop sim splinters. So it has to be an instilled map. Additionally, the reason why we're using distilled despair is because, as you can see, each one gives us 30% increased stack size of sim splinters.
It does also make the area 20% delirious per despair for a total of 60%. So, this is arguably some of the hardest content in the game. This would be the one barrier to entry for this strategy is you do need a decently put together character.
But I've got a build guide coming for this character tomorrow, so make sure to stay tuned for that if you want a cheap build that can do this. I'll also just quickly add that not only is this build really strong and decently cheap, but it's also super fun. You literally just get to fly around spinning in a circle and you just obliterate everything.
All right, let's go ahead and instill the map now. So now we got 90% increased stack size of Sim Splinters on our map. And this is an explicit modifier.
Hence why the increased effect of explicit modifiers on your wave stones passive points are so very important. Let's get back to it though. So now that you have 30% increased stack size of sim splinters on your tablets as well as 90% increased stack size on your waist stone which is an explicit modifier.
Let me go and show you guys some of the math so you really understand how it all comes together. Let's go ahead and pull out the trusty dusty calculator here. And I did do all this math last night while staying up all night.
So, feel free to correct me in the comments if I make any mistakes here, but I'm pretty sure this is accurate. I did do a lot of testing or it's very close to being 100% accurate. Anyways though, we have 90% increased stack size.
So, we'll start with a 90. And of course, if we go back to our passive tree, I'll just do the math for you guys here really quick. We have 20% flat increased effect from these types of nodes.
Then, this is 2% additional increased effect for each explicit modifier we have. In theory, we usually have five to six. So that's an additional 10 to 12%.
So we'll just say 27 + 10 37% because I usually do five modifiers just so I have one extra portal in case. So that's 37%. And then additionally for a two tower setup we're getting an additional 6% increased effect here.
So that's 37% plus 6 43%. So we take that 90 we multiply that bad guy by43 we get 38. 7.
Then we add that to 90 and we come up with 128. 7. So just remember in the back of your head, we have 128.
7% increased stack size so far. So that means already the regular non-unique monsters will be dropping two splinters each instead of one, which is already pretty good. You can actually do this with zero towers, in case you couldn't tell by now since, you know, we're getting 128% from just the three despairs.
It's kind of an infinite money glitch. If you don't want to do any of the tablets, any of the towers, you can literally just infinitely go run regular maps with three despairs. You'll get two sim splinters per mob and you'll be rich or you'll make a ton of profit based on what you're investing for the three despairs cuz each of these are like 3 to four exalts right now.
Anyways, just remember you're at 128. 7%. Now, we're also at 30% from the tablets, but the tablets are getting increased as well by 32% from these four nodes.
So, we're at 30 *. 32. 32.
My mistake. 30 + 9. 6.
That's 39. 6 plus 128. 7.
And you can see we're at 168. 3. So, we're still only getting two splinters per drop right now.
But this is where this node comes in and why it's pretty mandatory is because we're getting an additional 50%. So, of course, 168 + 50. Now we're up over 200%.
So every time a Sim splinter were to drop, you're now going to get a stack of three instead. Which is why, if you saw in the intro, I had all those stacks of like four splinters popping up at once. It's because of this.
Now, of course, I have a more than two tower setup currently. Um, I actually have a four tower setup running right now, but the clips that you saw were from a three tower setup. You can you can get four sim splinters per map with a three tower setup, but you have to get a little lucky.
Long story short, though, that's how you get three splinters per drop on a two tower setup. Now, let me show you just a little bit more math for the three tower setup. Why I said for the three tower setup, you're going to want five of these tablets instead of three is because if we go back and we do the same math, so we're at 128.
7 from just the way stone, right? Then we're at 50 from the tablets. Whoops.
128. 7. Well, we'll just leave that for now.
50 from the tablets. 50 times. 32 because of these four nodes puts us at 66.
However, there's this node right here, which is 20% chance for double effect of precursor tablets on your maps. So, if we were to roll the 20%. We would actually have 50 + 16 which is 66 * 2 which is 132 + 128.
7 plus 50 from this note up here. And you can see over 300%. So you have a 20% chance to actually get four Sim splinters per drop.
Now, technically on a three tower setup, this is what I did, although I'm not going to recommend it because I actually don't think it's the best. On a three tower setup, you can make it to where you have a 20% chance. Let me let me rephrase that.
If you use nine tablets, stick with me. If you use nine of these tablets and three towers, so you have nine slots. If you use all nine slots with this tablet, 10% increased stack size, you have 90% total, you can actually make it to where you have four Sim splinters per drop guaranteed.
You don't need the 20%. And then what happens? So now we've got our original 128.
7. Keep that in mind. That's from just the way stone, of course.
Then we have 90 from the tablets times 2 if you get the 20% chance right right here. Then times 32 for the increased effect of our tablets. So then we add 57.
6 + 180 237. 6 plus 127. 8 plus 50.
If you were to have 90% increased effect and you were to roll the 20% chance of double, you would be getting five Sim splinters per drop. I've yet to have this happen, but if you were to have it happen, I imagine you could expect at least 350 to 400 Sim splinters in one map. And that's with maybe one unique boss.
You can get two unique bosses. I get it all the time. And if you get two, you'd probably be at least 500 Sim splinters, which is ludicrous.
Like actually ludicrous. So, I'm sure that was a little bit long. I apologize for the details.
It's a little bit nerdy, a little bit annoying, a little bit of details here and there, but hopefully you guys kind of understand the gist of what's going on. Now that we have all of that out of the way, the only other thing that I think is important to cover is the additional tablet slots you have and just my recommendation for those slots. So, of course, like I said, for a two tower setup, I'm going to recommend three of the delirium tablets.
For a three tower setup, I'm going to recommend five. I wouldn't recommend going for nine. I don't actually think it's the correct play.
And I'll explain why. Because there's a unique tablet I think you should get on a three tower setup. And if you're getting that, then of course you can't use nine delirium tablets.
So stick with me on that. I'll put the unique tablet up on screen now though. Essentially what this does is it makes it so that if the map is radiated, you can do the map once.
It removes the irradiation, but then you can redo the map again. So now, and I actually have this set up right now. I can go do this map, get 250 splinters, roughly 100 to 150 exalted orbs, and then I can just do it again.
I don't have to move on. I can do it again. I can get the 50% increased quantity and the 90% increased stack size of Sim splinters, just all the juice one extra time.
So, you get double the value basically of your big tower setups. And this unique tablet, although not mandatory, I wouldn't recommend it for a two tower setup because it's a little bit expensive. It's like one to two div for the tablet, but for a three tower setup, it's 100% worth the investment.
You will make it back within like one to two map nodes at most. And outside of that unique tablet, so for a three tower setup, you're going to have five delirium tablets, the one unique tablet. That's six total so far.
For your other three, I would recommend a combination of breach and expedition. Personally, of course, you can really use whatever you want here because these are not directly related to the strategy anymore. It's just really whatever you prefer.
However, the one thing I will say is ritual kind of bogs down the whole strategy. Something I really like about this one and what makes it so fun to me is that you just get to play the game. Like, you get to load up the map, you just get to run around, kill everything.
You get to explore the whole map because you're looking for all of the uh fracturing mirrors for extra splinters. And you just kill everything and you pick up the loot. you go on to the next map and you just blast blast blast blast blast and it feels really really good.
The moment you add in ritual, it kind of slows it down a lot. Kind of the same thing with expedition, but I think expedition slows it down way less. And expedition, to my understanding, scales really, really well with increased quantity of items, which of course we're stacking super hard.
As you can see, we've got 48% increased on this map node, which when we actually get into the map, ends up being like 100% plus on like the full map. Um, in combination with a quantity map and all the increased effect and stuff like that. So, expedition just definitely seems to be the best way to go.
With that being said, I think doing a mixture of expedition and breach is what I prefer the most. For the breach tablets, I think the best is going to be increased quantity of items found, of course, and then increased monster density for your breaches is very, very valuable. If you want, you could try like a breach splinter setup as well and do breach splinter and sim splinter, but breach splinters are just so much less valuable than sim splinters.
Right now, three sim splinters is like one exalted. So, you're getting a ton of currency from the sim splinters, not so much from the breach ones. and it's really hard to scale breach splinters because you don't have like an instill that gives you 90% increased stack size.
So I would say just monster density. And then for the expedition tablets, I don't have one currently, but I will certainly put one up on screen now. And once again, increased quantity of items found absolutely goated.
And then in addition to that, the expedition log books is going to be the best. If not that, really just get whatever suits your fancy. There's a couple of good options for expedition, but the expedition log books is certainly the best.
So, if you can't get that one, I wouldn't worry about it too much. Just grab some random expedition tablets. You'll be good to go.
The the expedition log book ones log book ones are a little bit expensive. My apologies for the rambling and slurred speech. Like I said before, stayed up all night running on fumes.
Shoo. All right, folks. I just had to slam a monster and throw my glasses on cuz my eyes were getting extremely tired.
But last two things I wanted to talk about and then we're going to hop into a map really quick. One for the now you know what tablets I'd recommend for the three tower setup. Of course, five delirium tablets, the one unique tablet and then three additional tablets really of your choice, but you got my recommendations.
If you're doing a two tower setup, which is still fine, you can easily guarantee three Sim splinters per drop with three delirium tablets. Your other three tablets, I wouldn't recommend the unique tablet at that point. I think it's probably a little bit less worth it.
If you want to, you can. That's up to you. But alternative to that, what I would probably do is three delirium tablets, two expedition, one breach.
And something to keep in mind here is you probably even for the three tower setup as well, you probably don't want to do like three delirium tablets on one tower. You probably want to spread them out a little bit. For example, the best thing I can think of here is the unique irradiated tablet.
If you had three towers, you've got one on the left, one on the right, one in the middle. You probably want to put that unique tablet in the middle. So, it's kind of getting the most important nodes, the nodes that are going to be juiced the most.
And then you can repeat those maps, you know, twice. So, you're going to get the most value there. Just a little tip.
And then finally, the last thing I really wanted to quickly touch on, should have mentioned this earlier, but when it comes to your wave stone in specific, there's three things to keep in mind. One bare minimum is something like this. A way stone with just rarity.
There's two important prefixes. There's rarity like this. And then there's quantity like this.
Quantity always rolls as a double. So you get some quantity, some rarity. Rarity will roll as a single as well though.
So bare minimum is just rarity. pretty ideal is just the quantity is better than rarity. So quantity over rarity and then of course the best is quantity and rarity.
And the absolute best, although not common, like you shouldn't shoot for this. I wouldn't shoot for this, but the absolute best would be quantity, rarity, and number of rare monsters for that third prefix. The suffixes don't matter.
Just try and avoid temp chains if you can. Um, ignited ground, like whatever your build struggles with. Of course, it's going to depend on your build.
Thankfully, my build struggles with nothing except temp chains, even on the 60% delirious maps. So, let's go ahead and show you guys what it looks like. Let's go and throw some of this stuff in our stash and yeah, let's hop to it.
All right, so as you can see here, this is a 90% increased stack size from the tablets, 48% increased quantity. We're going to go and throw in the quant rarity map. This is a very juiced way, of course, and let's hop into it.
This is actually a six mod map, so it's a little spooky. We only have one portal. I haven't died in forever though, so hopefully this is not the time we die.
That would obviously suck. It is a V factory though. It's quite a scary map.
And I'll be giving you guys a little sneak peek at my build here. So, for those of you that are interested, we are playing a whirling/ignite glitch. Yes, I know, a very weird build.
Cooked this one up, homecooked. Uh did some dirty research on Pee-Wee Ninja. There's like five people messing around with setups like this or some [ __ ] I looked into it and it's kind of insane.
Um, not going to go into more detail than that though. Full build guide coming soon. And I'm sure we'll probably edit through some of this uh or like speed up some of this so that way the video doesn't get too long.
But here we go. We've already got a unique boss, a unique semi boss. I can't even see where he is.
And I mean I mean it's just so crazy. Two exalts, 52 sim splinters plus four over here. Easy peasy.
You can also really quick I'll just show you guys here. You can see that, you know, everything is working as intended. We have 252% increased stack size right here plus the 50% for a total of 300% or more, which is why we're getting the four Sim Splinter drops per stack.
Also just want to quickly point out here, we got one tiered, two tiered, three tiered from this one little pack. We got one, two, three, four, five, six, seven tiered items. I'm actually not going to pick up any items other than sim splinters for now, though.
And then I'll just I'll keep you guys updated on the sim splinter tally. And then I'll probably give you guys like a full update on the total hall once we're done with everything. There's a 14 breach splinter pile.
Not bad. Chaos orb. That's like 10 exalts per chaos.
Not bad. We love chaos. We kind of butchered this breach, but it is what it is.
We're locked in. If I haven't already said it yet, I'm super tired. It's probably part of the reason why we butchered the breach.
It's okay though. Breachch isn't that important to be perfectly honest. We mainly care about the sim splinters.
As you can see, my build has a little bit of a bug. It can't do damage to enemies that are on a different height. So, I have to kind of like wait for these guys to get on the same height as me and use my conalolescence.
Just got to play a little extra careful cuz like I said, I only have that one portal. So, definitely don't want to die. This is a very juicy map, obviously.
Oh, there we go. There's a second unique boss. It's actually super common to get two unique bosses per map.
So, here we go. Here's a second one. We get another 49 Sim splinters.
And yeah, let's just go and go pick up all the sim splinters really quick and just give you guys a little update so far on the map. I mean, we've done like barely any of the map so far. And I mean, we're already going to be well over 100, it seems like.
Look at my Look at my map. Like, look at all the [ __ ] all over the freaking map. It's just crazy.
It's so crazy how much there is. Breach some Xbox. Also, if you want to know a good way to find good way for cheap, make sure you use the for discord.
You can find quantity wast, but just quantity wast like the 20% temp on the road. It's definitely worth it. Super good deal.
Highly highly recommend it. Let's grab the rest of these and we'll give you guys a quick update. Breachimal chaos.
Okay. Yeah. And we are already like, bro, we're already at 177 Sim splinters.
We've barely done any of this map and we're already at 177. Well, let's keep going. probably just going to go ahead and do some cuts here.
So, you got to stay tuned. And it looks like, wow, this was a juicy one. We got over 340 sim splinters from this one map.
A full simulacum and then some. I mean, it's just insane. Oh, we got more actually and an extra exalted.
Fair warning, bosses do not take much damage whenever it's 60% delirious. Just a heads up, the bosses can be quite difficult with 60% delirious effect. You have to be a bit careful.
All right, there we go. Big old juicer map. Not bad.
Okay, so before I even leave the map, so there's no funny business. We got 20 37 five full simulacum plus 53 plus a log book plus 50 breach splinters and that's everything that matters for the currency side of things. So market value on all this stuff is about 95 for the semilacrim plus 53.
That's like another 17 exalted give or take. Yeah, it's like 17. Uh 17* 3 is 51.
You're getting about one exalt per three semacrim splinters. So it's about another 17. So we'll say 110 for the semilacrim and splinters.
Then we got 37. So 147 plus like 10 to 15 for the log book. 160 plus the breach splinters were like 170 or like 165 plus the chaos orbs.
That's another like 10 per. So another 50. So you know we're we're over 200 plus exalted orbs in just currency from the one map.
I mean come on now. And that is going to conclude the guide. I hope you guys enjoyed.
I cannot guarantee how long this strategy will be viable once people kind of like figure it out. I assume the market will start to adjust. If you're curious about the number of tiered rares I got from that map, it was well over 35.
I haven't picked them all up yet. I got to go do that still, but it was a ton. Let me just be clear.
And other than that, yeah, hope you guys enjoyed. Make sure to subscribe, share with your friends. I'll catch you guys live hopefully tomorrow.
I'll show you guys this uh you know in action on stream. Later, chefs. And last but not least, take it easy, chefs.
Hey, as you fade away.