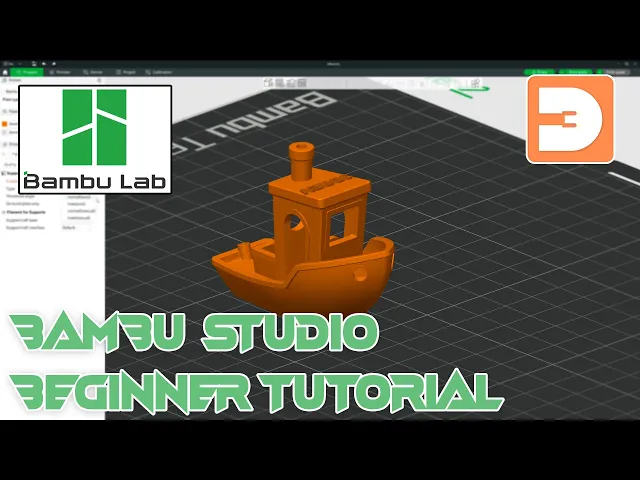
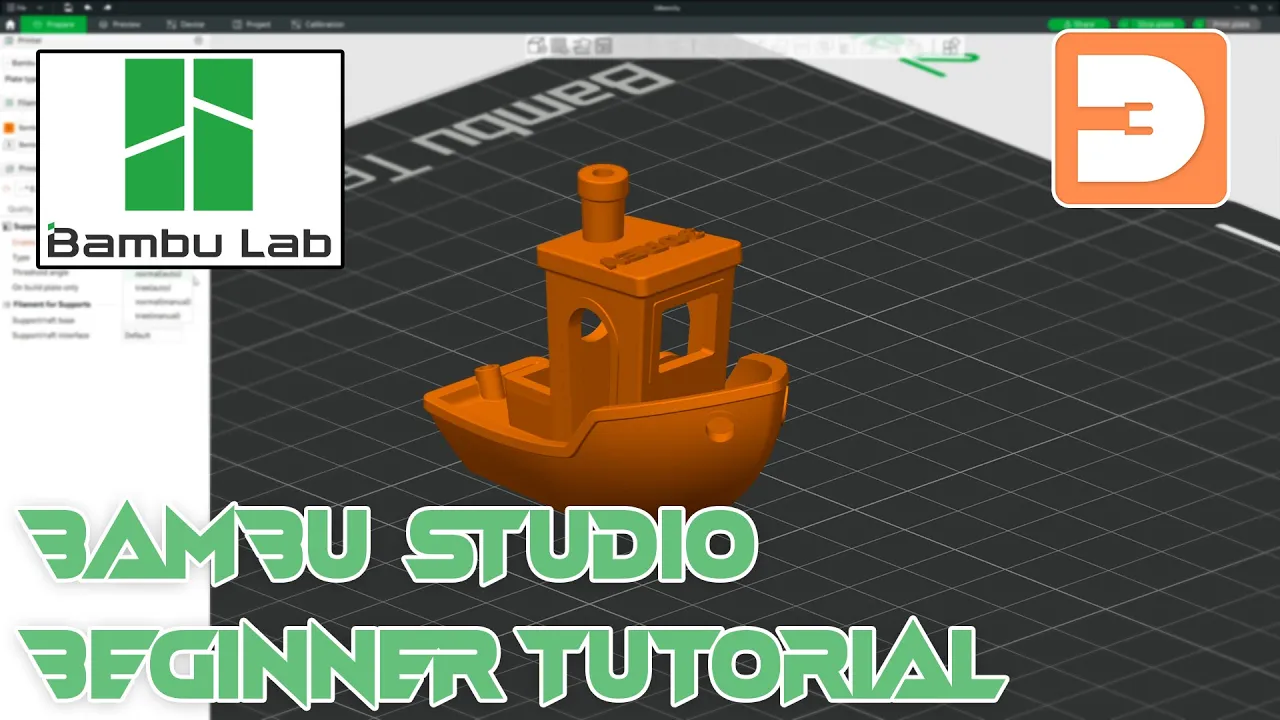
Bamboo studio is one of the most popular slices available in 3D printing at the moment and whether you're new to 3D printing or just new to Bamboo studio in this video I a to give you a complete beginner guide to all the functions options and settings that you need to know about to get you printing so let's have a [Music] look despite being made by bamboo Labs Famed for bringing us printers such as the x1c or more recently the A1 Mini or the A1 bamboo Studio can actually be used with pretty much any fdm 3D
printer out there if however you are using a printer from bamboo you're much better off to use bamboo Studio because it gives you some extra control and features of your machine that you won't get with other slices such as direct control of your AMS in this video I'm going to be taking You through all the basic features and functionality in bamboo Studio that you need to know to get yourself up and 3D printing if you then want to learn more about some of the other features which I don't mention here in this video or you
want to go on to the more advanced or expert modes in the slicer make sure you check out my other videos that are either available now or coming very soon so without further Ado let's get started and get bamboo Studio set Up once you've downloaded and installed bamboo Studio the first time you open it it's going to come up with a window like this and this is just the initial setup so let's click get started the first thing you'll want to do is select the region that you're in so I'm going to go with Europe
and click next as with installing any new software these days it's asking if you want to join a customer Improvement program which will send some information to the Developers bamboo labs this isn't necessary and doesn't impact the quality or performance of your software in any way so I'm going to unclick that and click next the next thing you want to do is go through this list and select any printers that you're going to be using with bamb boo Studio this has whole range of printers in it including priser printers and this is basically just going
to apply presets for those Printers in bamboo studio for you so for now I'm going to clear all and just select the bamboo lab X1 Carbon .4 nozzle and 0.2 and I'll click next the next thing you want to do is select the filament presets that you want preassigned within bamboo Studio again these are just presets and you are going to end up customizing them to your own preference so just select the ones that you're going to be using regularly to begin With I'm going to clear all and I'm also going to undo all up
here cuz you can filter them by by both the materials and the manufacturers so I'm only going to show pla TPU and pet G for now and then bamboo lab and generic which is basically going to cover anything that isn't bamboo lab polymaker Ean or Ure and then select your filaments that you want the presets for and click Next if you are using a bamboo 3D printer there are some features that will only be available if you install the bamboo Network plugin this includes things like being able to send your prints job via WLAN and
being able to view a live stream of your prints via both the handy app as well as bamboo Studio itself on your computer so I'm going to leave this ticked and then click next but if you're not going to be using a bamboo printer with this there Is no point in installing this and you can untick that and then continue okay now that has installed we can just go ahead and click close And we have here bamboo Studio I'm going to full screen this so you've got more to look at and here is the user
interface so before we continue the first thing that I would recommend doing is signing in Via login and register up here if you haven't already got a bad bamboo login then you'll just need to set one up cuz That will give you extra features if you're not using this with a bamboo 3D printer the login isn't as essential but I would still recommend doing it because it gives you some extra features which I'll talk about later on as I mentioned even if you're not using a bamboo printer there are some benefits of being signed in
to Bamboo studio and this is one of them once you've signed in It'll ask you if you want to synchronize your personal data With bamboo cloud and what this means is if you're using bamboo Studio A multiple computers you can have all of your presets and all your settings synchronized across all of them so if I change something on my desktop and then I go and slice something on my laptop later on anything I've set up on my desktop a a setting that I've changed for example is going to be replicated down there automatically so
I'm going to continue and click Yes okay and here we have the bamboo Studio user interface this is just the main menu or home which you can can see represented by the house up in the top left here so there are a few things to quickly take you through the first thing is obviously now I've logged in my username is over here and I can log out here we are on the models tab which is where you will always load automatically when you open bamboo studio and then beneath that there is the user manual And
each one of these sections takes you to a whole host of information it's really well documented and really worth giving a proper read through so let's go back to the model section for now we got here online models and this is a regularly updated list of popular models on the maker World website it's nice to see that actually one of my own models is currently third on this listing beneath that it says recently opened and because this is a fresh install there's Nothing here but if you were using this over time it's going to show
boxes like these down here for each STL or each 3mf project you've previously opened so you can quickly jump into previously opened projects above here you've got got open project so if you have a 3mf project already saved on your computer you can click here and open that up or you can create a new project and that is what we're going to do right now so let's click new Project and this is the bamboo Studio user interface this thing in the middle here is your print bed you can rotate around it by left click and
dragging you can move around it by middle Mouse click or right Mouse click and dragging and you can zoom in and out by middle wheel scrolling up and down up at the top here we have our toolbar which we'll be looking at more in a minute up here we have our mode tabs where it says premere preview Etc and on the left here we have Our settings column that we'll be looking at a little later on so let's get a model imported so I can show you how these features work there are three ways you
can import a model you can go up to file import and then import three MF STL Etc you can press control or command and I on your keyboard or you can just come up to the toolbar and click add and for now we're going to bring in a 3D Beni which is a popular model Designed as a benchmark hence the name Beni for 3D printing to test a printer's performance this is actually a really popular model and it's pre-loaded on a lot of printers so you may have already printed this without even having opened a
slicer so let's get this imported before we move on to the tools and settings I want to introduce you to the preview tab bambo studio is a slicing software which means it's taking a 3D model and the settings you've chosen and It uses them to slice the model into a list of a machine commands written in something called gcode it'll say something like move xais 13 mm extrude 5 mm heat to 220° Etc the preview tab displays what the model is going to look like after slicing it and it gives you a preview of the
actual lines it's planning on printing which is great to give you an idea of how your settings will affect what the print is going to eventually Look like when you click on preview it takes a few seconds for it to actually slice the model and prepare the preview whilst it's happening you can see a progress bar in the top left if it isn't processing you can pop up and click slice plate which will be green in the top right here once it's sliced this window will appear on the right here giving you a key of
what each of these colors means in the print beneath that it'll give you an estimate of how much Material it's going to use for this print both in length and in weight it will give you an estimate of cost based on the cost that you assigned for that filament and it will tell you how long it is going to take the machine to prepare before it starts printing how long it will take to print the model itself and how long the entire process will take together this bar on the right represents the height of your
model let's zoom in a Bit at the top here this is 240 and that means there is 240 layers in this print with these current settings and it is 48 mm high if we grab this plus and drag it down we are going down through the different layers of the print and you can see what the different layers are going to look like this bar at the bottom represents the layer we're currently on and if we drag along that we can see how this layer is Going to be printed and what order it's all going
to be printed in at the top of this menu is a dropdown and this gives us a few different views now currently you can see there's lots of different colors and those colors are represented by different types of Extrusion so the yellow line is the inner wall the orange line is the outer wall or perimeter and then the red is the infill but you can change this to all different sorts of things to Represent things like the speed or the temperatures uh or of course the actual color that is going to be printed in at
the end of the job okay we'll be back here later but for now let's jump back to the prepare window now we're back in the prepare window let's zoom out a bit and deselect that so you can select a model by just left clicking it and then you can move it around just by left click and dragging around the Bild plate and place It wherever you want alternatively with it selected you can come up to the move tool if I select that you could either set a specific coordinate on the print bed for it to
be placed or you can click and drag a specific axes you can also click and drag the Zed axis but it is always going to snap back to the bed because you can't print a model with the whole thing sitting in midair similarly you can also click the rotate tool and that will allow you you to rotate the Model however you like again there is also a scale tool and here you can change the size of your model either by setting a percentage based on the original size that it is now or you can set
specific measurements if you change it currently with uniform scale ticked if I change one of these it's going to change all of them to match it if I untick that it will allow me to change things differently so if I untick that now and go 60 it's going to Stretch the model because it's no longer a uniform scale similarly I can resize it just by dragging the shapes on the image itself this next tool is called the lay on face tool and when you've imported a model it may not be in the orientation that you
want it to actually be printed in with a model selected as this one is already if we go up and click lay on face it's going to to cover the model in these white shapes and if we click on One of these shapes it will place that side face down on the bed so if we wanted it to be printed on the chimney for example we just click on that and that is the way it's going to be orientated but obviously what we want is for it to be printed on the base so we can
just click on here and that side is placed flat on the bed next up we have the cut tool and this is a really useful tool for various reasons but primarily if you're trying to print something That's just too big to fit on your print bed obviously this isn't but we'll get use this as an example so with the model selected select the cut tool this then brings up a white plane and this plane represents the area where it's going to cut through you can see the white marks representing the parts of the model that
are going to be cut the two resulting models are being shown in two different colors we've got blue and we've got pink you can move this cutting wall however You like so I'm going to rotate it and I'll rotate it again in addition to just cutting it you can click add connectors and here it gives you three different options we've got plug D and snap and they're just three different types of connectors so let's grab snap and we'll just click on the orange cutting plane here we'll select one there and one there you can change
the settings and size of your connectors if you need to and once you're happy with that just Click confirm connectors and we'll go back to the cut window once you're happy with all of your settings click form cut and it's then cut the model into two pieces you can see here is the main piece and here is the front of the boat and it added these connectors here it's added connectors on the front of this part and it's added matching holes to the base of this part so now we can print these together and the
whole thing can be connected together really easily After the print let's put that back together with a control Zed or you can come up to this Arrow edit undo now mesh Boolean I'll be covering in a future video as it's not necessary in this beginner's guide but effectively it allows you to delete or add sections of one model from or to another these next two tools I'll be talking about later on as they directly relate to some settings we're going to be looking at over here finally we have the text to shape tool So again
if we select our model and click Text shape we'll now come up with a new menu if we select a font I find aerial black is quite good for this cuz it's bold clear to see and easy to print and we can change the size and the thickness and then we'll enter some text down here now if I zoom in and hover over part of the print you will see that the text that I've entered is being placed flush to the surface of the print if I was to click here it's going to Apply this
and make it part of that model if I didn't want it wrapping around the shape of the print I can just click surface and then it will be a flat object stuck out from that side of that surface but let's click surface and just whack it on the top here for now any point just click away in an empty part of the build plat to deselect things at the end of the toolbar we have assembly view again this isn't something That we need for the beginner's guide but basically if you've downloaded an item that has
several components if it's put together appropriately hitting assembly view will allow you to see how they are meant to be put together once printed now you may have noticed that I missed some of the options at the beginning of the toolbar but I wanted to come back to them now we've already seen this first One Import but this second one is a bit different to most slicers Usually in a slicer you'll slice for one print at a time but in bamboo Studio you've got one build plate one print here in front of us but if
I click here add plate we add another build plate to the project we can actually have as many build plates as we want allowing us to save a multi-print project in one file nice and easily each plate is numbered and you can give them names here the darker plate represents the one you have selected left click on another placeat To select it now we've got a few extra plates let's bring in some more models to demonst rate the other tools you'll notice that this Auto Orient button looks similar to the place on face button that's
because it basically does the same job but it does it automatically and looks at everything in the entire project so if I was to click this it looks at all the models and automatically tries to figure out The most appropriate orientation for it to be placed in and moves it there I'll press control Zed now the next button is the arrange button you'll see our prints are all scattered around and some of them are intersecting with each other if we printed them like this they would be fused together and printed as one object you can
see bamboo Studio has actually highlighted a warning system saying some items are too close to each other in the Bottom right so if I click this button I get some options I can set a minimum spacing I'd like between each model I can select whether I'm happy for it to rotate models and I can set whether I'm happy for multiple materials be print did on the same build plate I can also ask it to avoid the Extrusion calibration region the Extrusion calibration region is this shape which is printed at the start of the prints on
some bamboo printers and then scanned to Check Extrusion and flow rates before it continues to print whilst technically you can print in this area if you did it would merge with this Extrusion calibration and that could ruin your print so it's advisable to avoid this area even if you aren't doing an extrusion calibration because your bed type isn't compatible with it or you're using a printer that doesn't have this feature there are some parts of this that will still be printed to ensure That there is a decent Extrusion flow before it starts printing the model
now when I click arrange it sorts all the prints in the smallest space it can whilst keeping the minimum distance and because there is nothing requiring them to be on separate plates it's managed to fit them all onto one bed let's press contrl Zed the next two buttons in the toolbar are again something not necessary for now but if you were to download and import a File that had multiple components and you wanted to move them around the build plate separately click one of these buttons and it'll separate them so you can treat them individually
this final toolbar button is variable layer height I'll be talking more about layer height later on and I'll also be releasing a video specifically looking at this feature in more depth very soon I've actually already released a video on variable layer height in Cruiser slicer Which bamboo studio is built on so you can check that out in the meantime and it'll be a very similar process but what this does is allow you to have different layer Heights at different parts of your print saving time where you can but still allowing for improved quality where necessary
you may have noticed there's also some buttons on the side of each build plate this first one X is just delete so if I was to create a new build Plate and click X next to it it just deletes that build plate the next is auto Orient it's the exact same as this one here but it's only applied to the build plate that you click it on so you can see it's affected this but it hasn't affected these two over here the next is auto arrange and again it's exactly the same as this one here
but only applying to this particular plate the difference is it doesn't give any of the settings and Options that this one up here does this button at the bottom here gives you a variety of settings it gives us three different options the first is to allow us to assign a different plate type to each plate in our project so we've got call plates engineering plates smooth Pei plates textured Pei plates the alternative and what is set as default is same as Global plate type and the global plate type is the one that you've Set at
the top of the settings column that we'll be looking at shortly the next is print sequence and this is the order in which things will be printed you can either print by layer or by objects and we'll be looking at this more later on and finally we have first layer filament sequence and this allows us to customize what order multiple colors if you are using them will be printed on the very first layer on the bed okay now let's click okay finally we Have this padlock button this locks the plate so it is then not
affected by the Orient or arrange buttons at the top so if I could lock one plate and then hit arrange it'll only combine the other two and not this one as it was locked in the same way it would ignore orientation of any object on this build plate okay so let's clean up some of this mess before we continue to delete all just press control D or command D and then we'll import just one model for Each of these print plates here it asks if I want to import all the objects I've just selected as
a single object and no I don't I want to be able to treat them as two separate items now before we continue I just wanted to go over a few extra settings that may not be that obvious to people and that's up in the very top left here under file we've already seen the import for importing models you can also Import and Export configs from here that's Something I'll be looking at in another video but in the arrow next to file we get some more options under edit we do have the standard copy paste and
delete and stuff and you can also with a model selected come up here and and go edit clone selected set number let's say three and click okay and it'll create three clones of that model it's Place those clones over here CU this is the build plate that we had selected when we did it and that's where everything new Will be placed so let's press contrl Z for now we don't need those next if we come back up here and we go to view we have a list of predefined camera positions so we can click through
these or we can use the hot keys of control and a number back up into view we have a few more options now here we have perspective View and orthogonal view I've currently got this set to orthogonal view because that was a personal preference but by default it's Probably going to be set to perspective view I would recommend changing this because it affects how things are going to look and how easy it is to manually line things up or move things out of the way on your print bed what perspective view does is it gives
it perspective so things that are further away will appear smaller and things that are closer will appear larger if you look at the shape of the print bed for example as I click perspective view you can see that it has Drastically changed how we perceive the objects it doesn't actually make any difference to the print itself but it will make a difference to how you interact with things I would personally recommend changing this to orthogonal view next up here back in view we have show labels if I click that it will put a label over
the items on the print bed currently I've only got this bed selected if I was to select this bed it would show the name tags for the items On this print bed obviously we've only got a couple of objects now but if we had several this is a useful way of seeing what's what and next we have show overhang so an overhang in 3D printing is where it's printing over an area where there is nothing on the layer below effectively is printing in midair there are a few different types of overhang so for example you
you've got this doorway here there is this Arch technically this area here is printing In midair as is the lip on the outside of the boat you also have this window here where it's printing from here to here but these are different types of prints so let's jump into the sliced View and I can explain a little more about this so if we jump back to this doorway you can see that different things are highlighted in different colors and this blue represents overhang so you can see as we come up through the arch it's only
moving out a Little bit each time and as a result it's only just sticking out into the air and is still mostly supported by the layer below once we get up here it does stick out a bit further you might get a bit of sagging or drooping here but it's not going to be too severe because it's not that far similar thing applies to the lip around the outside of the boats here cuz it's only ever sticking out a tiny bit from the layer Below this window on the other hand is a bit of a
different story it starts out similar to the door frame where it's just sticking out a little bit more and then there is this big section here where it's just printing in midair this is referred to as bridging because it's printing from a fixed point on the layer below here to a fixed point on the layer below over here so it's able to Anchor it at both points the really problematic source of overhang is where there is no Bridging and it is sticking out significantly further from the print if I had an armed coming out from
the hull of the boats here and it was coming out to here there is nothing for it to bridge to and it is sticking out far too far to get any support from the layer below this is just going to end up falling away from the extruder and turning into what is popularly known in 3D printing as spaghetti so if I jump back into prepare mode and then we look On the underneath of the Beni here if I then go up to view and select overhang you can see that it is highlighted all the areas
of overhang on the print which can be useful to see what you need to be aware of later on this video I'll show you ways that you can get around severe overhang for now I would say that everything in this view section is a personal preference I would definitely suggest using the orthogonal view rather than perspective I personally leave show Labels and show overhang turned off unless I need them the last section in this hidden menu is the preferences menu now we would already set our region when we first installed bamboo Studios but here you
can change your language if you need to you can also change the units bamboo salosa Works in I would suggest that even if you live in Myanmar Liberia or the US you switch this to metric as 3D printing is pretty much all done in millimeters and if you download files From makeer world or printables or thingiverse you can pretty much guarantee that that's the units they were made in next we have zoom to Mouse position let me give you an example of this by default when you zoom in and out it zooms to the middle
of your screen for to move around like this it's zooming in and out like that even if I move over here it's zooming in and out like that it's the middle of the screen is where it's zooming to if I was to Come back up to preferences and change to zoom to Mouse position and then close this if I zoom out when I move my mouse let's say over the cross at the top of this build plate here if I zoom in it's zooming in to where my mouse is if I move back out again
and then place the boat over here and place my mouse over the boat it zooms into the boat I personally like to leave this on zooming into the center but again this is a personal preference let's switch That back for now next you have Auto bed type and unless you're going to be changing the type of build plate that you're using on pretty much every print I would advise keeping this tick it just saves you a couple of seconds so you don't have to keep on setting your build plate each time the flushing volumes is
something we're going to be looking at more later on but I would advise especially as a beginner keep this ticked for now under Presets providing you signed into bamboo Studio when you first set it up I would highly recommend keeping this ticked especially if you're using multiple computers this is the feature which will help synchronize your settings and presets amongst all of your different installations of bamboo Studio although you'll likely end up relying on your own custom presets I'd also suggest you keep this one ticked so that the built-in presets always reflect on the latest
Research if bamboo studio is going to be your primary slicing software on this computer I'd suggest keeping all three of these boxes ticked to make things easier when working with downloaded files but if you're only going to be using bamboo Studio occasionally and will mostly be using another slicer such as prer slicer or cira then untick these for now let's pop back to the home page for a second if we go up and click the house button here remember this list of Online models it can be a good way to not miss exciting popular new
designs but equally this online model section could feel like it's really clustering up your homepage if you jump back into preferences and untick this box the whole section will disappear if you remember underneath that there was a list of recently open projects well here you can set the maximum number of projects that will be displayed here by default it set to 18 But to avoid it looking too clustered I set this to 10 and you can hit clear in preferences or on the homepage clear them all off anyway unless you really know what you're doing
when it comes to 3D printing I'd advise keeping this box unticked to ensure you get a warning if a file you've opened has modified G-Code which means it may be asking your printer to do something that bamboo Studios isn't showing you auto backup is a really nice feature to have I just Leave it on the default 10 seconds and the only reason I could suggest changing this is if you've got a particularly slow hard drive or processor which is causing it to lag every time it saves just set this to something a bit less common
maybe every 60 seconds next we have the default download folder which is where it automatically download to when you're downloading from maker World which is where it automatically download to when you're downloading from maker World after that we have dark mode I personally prefer enabling dark mode I find this much easier on the eyes but as after a new installation bamboo Studio loads in lights mode I feel that lights mode is a more appropriate mode for the beginner tutorial finally you have developer mode and as part of a beginner tutorial we don't need to worry
about any of the developer mode tools so let's click X and go back to the prepare Window and finally we're moving onto the settings column which is this area on the left the settings column is divided into three sections we have our printer settings our filament settings and our process settings to begin with the printer on the right hand side here we have a cog symbol and if you click that it brings up the setup wizard that we went through when we first installed bamboo Studio here you can go through and add any printers that
you might have Missed any new configurations or any new printers that you've got and then just click confirm that will then add them to this drop- down menu of your system presets if however you have a printer which isn't in that configuration wizard click on this drop-down menu and go to create printer here just enter the settings for your printer click okay select a preset for a printer similar to that printer that you can use as a basis and then you Able to save it as a new preset within this tab the last section under
print settings is the plate type under here you've got cool plate engineering plate smooth plate and textured Pei plates this will obviously also depend on what type of printer you have but presuming you are using a bamboo printer I have found that the texture pii plate is superb and print pretty much everything on there with the exception of TPU which I print on the Engineering plates just out of personal preference you can technically still print that on the textured Pei plate okay let's move on to the filament section much like with the printer settings under
filament we have a cog symbol and if we click that it brings up the filament configuration wizard that we went through at the beginning of the installation so here you can add new presets if you've started to use a new type of filament or you can remove a Preset you've previously added if you find that you're not using that anymore this section lists all of the filaments that you've applied to this project and have available to use this number at the beginning is the number of that filament and the Box behind it is the color
of that filament so if you click that you can change change the color of that filament and click okay this next section says what type of filament it is this is your preet that Is applied to that particular filament here we have bamboo pla basic but if you click this you can get a drop- down menu which goes through all of the presets we've got the user presets we've got the system presets and you can select whatever you would like from this list I'll keep that as bamboo pla basic for now if you wanted to
change the settings for a particular filament select the preset so let's go with generic PLA and then click the edit button next to the Name here you'll be able to change all of your settings including your filament settings which includes your diameter and temperatures your calling settings which is the speeds and usage of the fans and your setting overrides all of which will be used anytime this filament is being used you can then hit save and set the name that you want for this preset and click okay if you'd like to create a new filament
preset either because you have New settings you'd like to use more regularly or because you've started using a new brand of filament that isn't listed in the built-in preset go to the drop- down menu and select a preset of the same type of material for example pla or petg or TPU as the preset that you want to create and once you've selected that click the edit button now make the changes that you want for your new preset the diameter of the filament in most 3D printers these Days is 1.75 mm but if you're using a
new supplier who isn't well known for high quality materials it may be that it's not exactly 1.75 mm take two or three measurements of the Reel then take an average and enter that diameter here it will help ensure bamboo Studios knows how much material to expect per millimeter of length so it will be able to adjust the Extrusion ratees accordingly temperatures are all based on the manufacturer of the filament Obviously different materials requireed ire different temperatures pla is lower than that for example of pet G however getting pla from one supplier it might require different
temperatures to that of pla from a different supplier so make sure that you use the recommended temperature ranges from the supplier that you have bought from the calling settings are usually fine to leave sets to default providing this default is for the same type of material that you're Assessing the Press up for because pla for example has different calling requirements to that of petg or ABS one thing I will not is that even on materials where you do require heavy cooling throughout the print it's common not to have the fan on at all for the
first one to three layers as this will help aid with bed adhesion and allow it to properly fuse with the bed during Printing and finally we have the settings overrides in which we have the Retraction settings both length and Zed hop retraction is when the printer needs to stop extruding and move from one part of a model to another which without drawing a line between them imagine you were printing Two Towers you wouldn't want to print a bridge between them if they were supposed to be separate items so with retraction the length represents the amount
that the filament is basically retracted inside the extruder before it starts moving and the Zed hop Is the amount that either the extruder moves up or the bed moves down to physically separate it so again it doesn't draw this line usually this is absolutely fine to set to default so only change this if you're having real issues once you've updated the settings that you want for your new preset just hit save and then give it a new name including both the manufacturer and the filament type these plus or minus symbols allow You to add or
remove filament reels so let's add a couple more here and you can see that it's added them as the same type of material that I had selected in the first one and it's assigned random new colors we can then change the colors to what whatever we want and we can change the materials to whatever we want if you are using a bamboo printer and you have an AMS connected and turned on this button here allows you to synchronize with your AMS so if you Click that and then click resync it checks what reels you actually
have physically in your AMS at the moment and it updates the filament listing here to represent what's in there an AMS only has four slots so why are there five filaments loaded here well numbers 1 to four are the reels inside my AMS and this fifth one is a reel that I've been using as an external real TPU isn't something that you should be using inside your AMS so this was the last Reel that I use as an external filament if I click minus it will just remove that from our list and again I can
change the colors of these so let's change number one two orange and now we get down to the process settings which is where the bulk of the changes get made the first option here is global or objects Global any settings you change here affect everything in the project space objects allows you to select specific objects And then apply settings that only apply to those objects if you have an object with multiple parts let's say we select the boat and we put some text back on it you can now see that the part are both separated
into different plates we've got plate one with the Beni and plate two with the Cali Dragon but under the Beni we also have both the Beni model and the text shape so we can apply specific settings just to one or the other but for now we're going to go back To global settings the next thing on the process bar is the advanced Tab and if we click that it unlocks a lot more settings and functions you may have noticed a similar thing when we were in the filament settings there is an advanced tab there as
well well because this is the beginner's guide and these are not essential functions to get you up from printing we are not looking at them here but I will be releasing a bamboo Studio Advanced tutorial very Shortly so keep an eye out for that next to that is the view all object settings and this lists all of the objects and their relative settings now you'll see here that we've got the Beni and we've got the layer height of 0.2 but both the benhe she and the shape beneath it don't have different layer Heights and that's
because two parts of the same object can't be printed at different layer Heights and at the end of this row we have a compare presets feature where you Can compare different presets that you have already made below this we have a drop-down menu and this is a list of all of our process presets we have my user presets these are my own custom presets I've made and we have the system presets which are the built-in preset to Bamboo Studio you will find that these are different depending on the printer you have even if I was
to switch to the bamboo lab X1 Carbon 0.2 nozzle these would change it Would give me a 0.06 mm extra fine setting for example compared to the 0.08 so that is going to be a factor if you wanted like me to create your own presets to quickly jump to settings that you prefer make all the changes that you want in the settings that we're going to go through below and then come up and hit save and give it a new name this will be then added to your list of user presets that you can jump
To really quickly and easily so now we come down to Quality and the first section in quality is layer height the layer height is the thickness of each layer the printer prints before it moves up the smaller the number the higher the resolution the print but the longer it takes to print the bigger the number the lower the resolution the print but the faster it prints the reduced resolution is less obvious in straight parts of your print and much more obvious in Slopes and curves if you wanted to keep the high quality in the curves
but save time by using a bigger layer height in the straighter part you can do that by using the variable layer Heights if we go back to prepare you can do that by using variable layer Heights I'll be releasing a video specifically about this in bamboo Studio but in the meantime I've already released one about variable layer Heights in priser slicer which Bamboo studio is built on so check that out and have a play around regardless of what layer height you print with usually you'll have the very first layer height set to 0.2 mm or
at least thicker than your standard layer height to help work around slight imperfections in the bed surface and also to help with bed adhesion as the printer prints the Outer Perimeter when it gets to the end of that Loop it will meet the point where it started and from there it will need To move up or in this causes a tinely little bump and collectively they are called a seam you can see the seam here in white and all the seams together you can see here again in white this option here gives you a choice
of where these seam dots take place there are four options there is nearest and this is going to create a seam at the nearest point that it is going to naturally create the end of Each Loop and you can see here it's quite scattered all over the place the next is aligned and it is going to try and create an alignment of all the seams throughout the print you can see here it's created lines down the horns and down the face but there are still some scatterings along the back the next option is back but
bamboo Studio doesn't know that this is the back of the model it refers to the back of the build plate so if we create a slice now you'll see It's created an the alignment of the seam on the back of the build plate not on the back of the model you can obviously get around this just by rotating your model facing forwards so the back is the back of the model alternatively you have random the idea of random is it tries to space them out as much as possible the idea being that they're very small
dots and therefore you're unlikely to see them if they're spread out enough this isn't always the Case and it can make the print just look a bit messy the alternative is to paint the seams and to do that we go back to prepare and we select the model and come up to seam painting with that selected we get two different brush options we have Circle and we have sphere Circle will just paint onto the surface that it is looking at and sphere will create a sphere at that point and paint on every surface within that
sphere's volume that It touches all we have to do is point and click at a specific area that we would like like the seam to be placed in so we'll draw the line down here and remember that the seam happens on every Loop that it creates so there is going to be a different seam here and a different seam here so I've created a line there and then we'll create another line here obviously haven't done the rest of the body but if we create a Slice now you can see that it has created a line
along those points that I had requested this way you can try and make sure that those seams are out of the way in a place that you're not going to see along corners and edges is a really good place to really hide them now back in prepare we'll go back to the boat here and even though we are not in advanced mode there is an advanced section here although we only have a couple of Settings to choose from the first is only one wall on top surface so if we have a quick slice of this
model if we zoom in a top surface is a flat surface at the top a flat surface where nothing is printed directly on top of it so we've got this surface here we have this surface here and we have this surface here because it is sloped the flat surfaces are all the sections in between each of these steps now if we look in on the very top One here the topmost part of the chimney you can see this orange line here represents the Outer Perimeter the outer wall and there is only one as we scroll
down you'll see that there is lots and if we scroll down into the model itself there are two walls there is one there and one there so on the very top we have one wall on top surface and we've got it set to all top surfaces so that is all top surfaces across the whole model that you can see the Alternative being topmost surface only that is only now going to affect the chimney you can now see we now have two walls on every other top surface the reason to have one wool on a top
surface is to try and emphasize the infill pattern rather than the outer wall shape so usually you would just leave this as all top surfaces the option below this is only one wall on first layer and that is the exact same feature but for the base Layer usually you would keep this ticked off because that is going to help with bed adhesion and formation keeping on the topic of walls we're now switching over to strength and the first option we have here is wall Loops this isn't referring just to the very top layers this is
the walls throughout the whole print so again if we were to slice the print and then move down to a convenient area like this you can see with the orange of the outer Wall and the yellow of the inner wall there are only two walls set if we were to set that to four walls and slice again you can see there is still only one outer wall there can only be one and then there are three inner walls even though this is inside the print this is referred to as an outside wall because there is
a gap at the top of this this is on the outside of the print is not facing the infill or the inside of the print the advantage of extra wall Loops Is strength waterproofing and also transparency with some materials the fewer w you have the more see-through it's going to be the more walls you have the less see-through it's going to be and if you're printing a multicolor piece and the outer layers are potentially slightly more see-through you might want to use more layers to prevent seeing part of the infill usually you'll end up using
between two and four Walls next we have top and bottom shells so these refer to the top and bottom surfaces and and the pattern that is printed on them so if we were to slice this now you can see we've got the monotonic set as our top surface pattern and that is quite a standard one it is just these single Direction Stripes throughout the entire print on every top surface top shell layers refers to the amount of layers that are a solid layer at the top so this is a bad example Because we've just got
Loops for come down to the surface of the boat you can see here we have five top surfaces like that however there is also top shell thickness and this is not in layers this is in millimeters this size the top shell thickness always overrides the shell layers so you can set a minimum thickness that you want the top and the bottom of your print to be for strength and for Aesthetics and then even if you went and changed your layer height which Is obviously going to affect how thick five layers would be you can ensure
that it's always going to still be the correct thickness that you want there are different types of surface patterns available and really it mainly comes down to Aesthetics so if I go back up to the chimney obviously at the moment it's just got these Stripes but if I was to set the top surface pattern to concentric and slice again you can see it's created these Concentric rings around that and it looks a lot better however it is applying this top surface pattern to every top surface and then it could look a bit weird in other
parts of your print there are various different ones and like I say it's pretty much an aesthetic choice so experiment with them and find ones that you like for you finally at the bottom here we have sparse infill and for that we'll go back over to the Cali dragon as an example And the sparse infill refers to the infill of the model is what gives the model its strength so if we pop to preview and scroll down you can see this infill here this red is the infill and this is a pattern printed on the
inside so it doesn't need to fill the entire model the first option you have here is the sparse infill density and this is the amount of the inside of your model that is printed with material zero would make it completely Hollow and 100 would Make it completely solid plastic however that is never necessary and usually anywhere between 5 and 25% is more than enough let's go back to 15% and then look at the actual patterns by default bamboo slicer has grid selected so let's have a look at grid grid as the name suggests prints a
grid shape however there is an issue with grid and I personally would not recommend using it printing grid prints a grid like this but both of these lines Are on the same level and especially if you're printing a large print with lot of these points it can cause an issue with a collision between the nozzle and another another line that it's already printed on that layer if you want this style of pattern I much prefer the Rector linear fill pattern which will still print this grid but it prints the different directions on Alternate layers meaning
there is never a chance of any sort of Collision my preference on infil however is for the most part gyroid this type of infill was actually developed for 3D printing with metal and printing brake pads is designed for maximizing strength and heat dissipation at the same time and it's a really nice to use infill it actually uses slightly less material than the others that we've just looked at but it does take a bit longer to print so that is the strength section done now let's pop back over to our Beni For the next example I
mentioned before what an overhand was and that if it's sticking out too far from the layer below and isn't a bridge it will cause issues support material is the solution it effectively prints scaffolding beneath the points of overhangs giving them something to print onto click enable to enable it there are two types of support material and two modes for each one we have normal Auto tree Auto normal manual and tree manual so if we Start with normal Auto and we click slice we can see that our Ben sheet is absolutely filled with support material if
I look down through here you can see that it has supported the inside of the cabin and that is going to be an absolute nightmare to remove what's possibly more important is that you can see that it's also printed support material starting on top of the model itself and that can cause issues with print quality on the surface we can Get around that by clicking on on build plate only and if we slice again this is now going to only produce support material where it can start it on the build plate and it's no longer
starting the support material on top of the model however whilst the Ben sheet doesn't actually require support material for this example what if we did want support material supporting areas up here that is where the tree support comes in and tree support material is Relatively new it other slices it's also referred to as organic support material if we switch to tree and keep build plate only turned on if we slice again you will see that it has kept all the support material only printing on the build plate and is Branched over into the boat to
support where it thinks it needs it with both tree and normal auto mode it's automatically generating support material for anywhere that it thinks needs support with with an Overhang where the angle is below that of your threshold angle that you have set what if it's still generating support material where you don't want it let's say we don't want any on the inside of the cabin but we do want some on the windows and door frames well for that we can go to the painting support mode if we go back to prepare select our model and
then go support painting this gives us four tools we're already familiar with Sur And sphere we also now get fill and GAP fill we'll look at Gap fill later on but if we select fill now we get the option to choose an angle and this basically is the angle at which anything greater than it it will be separated from so at 27° if I was to highlight the door frame now this is highlighting the whole door frame and anything that's connected to is separated by an angle greater than 27° if if I was to left
click let's say with the brush tool on an area then it Paints blue this means this is an area that I would like it to add support material to if I click my right Mouse button and paint this is an area I'm telling it I do not want support material to be placed so if I Now erase all that painting and select the fill tool and then I look underneath it and right click on the ceiling it's going to paint red and that is now going to prevent any support material being made for the inside
roof of the Beni if we Pop back to prepare and now we slice again keeping the tree Auto turned on if we slice it has now taken into consideration my recommendations I do not want the support material on the inside of the cabin but it has generated everywhere else it thinks it's suitable but what if you only want to support material in certain places well that's where the manual modes comes in let's select tree manual and go back to Painting if we go back to support painting mode here and I'm going to select the brush
mode and paint a blue support material here and here and then I'll go back to slicing the plate now with manual selected it is only generating support material where I have told I want it and you can see it has created tree support material in those areas this bottom section here is the material to create the support Material out of if you are using an AMS or another multimaterial system here you can set a different material for your support materials you can also set different materials for both the support base which is the bright green
section and the support interface which is the dark green section generally even if you were going to be using a different material for your supports you could printly support base out of the same material as your main object and just Use the support material which is usually more expensive for the interface which is the only point where the support is going to come in contact with your main model usually however you're going to have no issues printing your support material in the same material as your main model and especially with tree Sports it's much easier
to remove them okay let's undo supports cuz we don't need them for this model and we'll switch over to Others now before I continue you'll notice down here there is a warning which says support enforcers are used but support is not enabled that's because I've just turned off support systems but I've still got supports requested via my painting so I can go back into support painting click arase all painting and then come back and the warning has gone we can now move back to others the first first section we have is bed adhesion and here
we have skirt And brim they're both very similar but they have different functions skirt draws a perimeter around the outside of your model without touching it its original purpose was to do things like ensure that there was a decent Extrusion before you started printing the model but we've already got that function built in now and the other was a nice way of seeing exactly where it was going to be placed but again with modern printers that isn't really necessary now Traditionally it would just be printed one layer high but there is actually a potentially useful
little trick to do with it if you are printing with something like ABS which is quite susceptible to changes in Ambient Air Temperature and you don't have a printer which has an enclosure built in or an enclosure around it this can be used as a tool to protect your model first of all let's slice the plate and see that the model is 240 Layers High let's go back to prepare set the skirt Loops to three and set this to 240 layers high if we now slice again you will see that it is going to print
a protective wall around your print moving up at the same rate as your model this wool will then help prevent slight gusts and changes moving around your print from causing warping and Distortion but again this is only relevant if you're printing with very specific materials and you don't Have a printer with an closure for now we're going to switch back to prepare and reset the loops back to zero a brim is very similar it's still printing a perimeter around the outside but the difference is it is attached so if we was to select outer brim
only and click slice plate you can see that it has created a 5 mm brim around the outside one layer High connected to the model the purpose of this is to help with both bed Adhesion if you're printing a particularly thin part that doesn't have much grip on the bed adding a brim gives it a bigger footprint to hold on the other use of a brim is if you're printing with certain materials that ends up lifting at the corners of the bed adding a brim can hold it down and prevent that from happening printing in
pla and petg I tend to very very rarely need brims and only use it if I'm printing particularly thin items so I'll Set that back to Auto which generally doesn't use it at all you can turn it off entirely by clicking no brim now we get to the Prime Tower and both these settings and the flush options below are to do with multimaterial multicolor printing let's bring both of these models onto one bet second now currently they're both set to the standard position one filament so filament one which is an orange pla basic but if
I Wanted this for example to be painted in green I could right click change filament and select one of the other filaments available that I've set up here so let's select filament 2 but what if I want the roof of the boat to be in a different color to the rest of it well that's where painting comes in as soon as you've got one or more filament available under your filament settings this color painting tool appears if you select a model and Click that you then go into painting mode this gives you a list of
your available materials as you have set on the left here and a set of tools select the color you would like to paint with so I'll select the green PLA and then select your tool type we're already familiar with the circle and the sphere as well as the fill but there are a few other options here before you zoom in on the boat 3D models like this are all created out of a series of triangles and With the triangle tool you can highlight and then select and paint specific triangles so if I selected this triangle
here and clicked it would create a green triangle the height range where you select a height let's say 1.27 mm when you then hover over your model it will highlight a height range of 1.7 1.27 mm if you then click it will then paint that entire height range a height range is going to be quicker to print because it's only printing one color for the Entire layer and doesn't need to do multiple filament changes per layer the Gap fill is an interesting one let's come back to that in a second if I take a circle
tool and I make my brush size my pen size a bit smaller and I zoom in if I draw like this you can see I've left a bit of a gap there if you're painting a big and complex model you might leave a few little gaps like this which are going to be irritating if you print them Without changing that the Gap fill tool when selected gives you a gap area bar and as you drag that it changes the gap size as soon as the gap size is larger than the size of a gap in
between painting it will highlight it like it has here and if I click apply it then paints that Gap in for me so for now let's grab the fill tool and AR raise painting and then we're going to paint the chimney with an angle of 30 and then the inside as well and now we have the Two colors for our boat you can click away from your model to exit paint mode now you'll have noticed as soon as I changed the color of the Cali Dragon this box appeared on the print bed this is a
Prime Tower and if Prime Tower is enabled which it is by default this will automatically appear as soon as there is more than one material or color being used on the same print plate regardless of whether it is two different models or two colors in the same model the tower Is used for when the printer changes to the new filament it needs needs to get rid of any of the old filament before it starts printing to make sure it's printing in the right color if we jump back to the filament settings you'll notice a flush
volumes button at the top here these numbers represent the amount of filament that is purged when moving from one filament to another each time you add a new filament it automatically updates these numbers And tries to work out how much purging is necessary between each color bamboo studio is very bad at working this out and tends to majorly overestimate the necessary Purge volume I'll be doing a series of videos on how to reduce this but I've never found a situation when printing in a different color of the same material type that these numbers ever need
to be higher than 250 and often much lower for now as you're new though feel free to either manually cap These at 250 or just leave it as automatic for now and click okay you can adjust just the size of the Prime Tower here with the width and the print volume and you can click and drag and move it around if you need it in a different place on your build plate or you'd like to move it out of the way of the time lapse another thing you can do to reduce the amount of wasted
material when purging is to make sure that both of these boxes are ticked it will then Try to do as much of its purging as possible whilst printing the support material if there is any and the objects infill which it would have been printing anyway even if it was in a different color finally we have special mode print sequence refers to the order in which things are printed on the plate by default it's set to by layer which means it will print the bottom layer of all the models then move to the next height and
print the next layer of everything Etc alternatively you can set it print by object this prints an entire object from the bottom to the top then goes and prints the next object the problem here being that the first model can get knocked by the print head as it's printing the next one with B object selected it displays a safety border around the objects that it estimates is needed for the print head but just leave this in by layer there is no need to print by object spiral vase Is a mode that will print an object
completely Hollow and very quickly by just printing the very outer perimeters however it only works with models specifically designed for it which I'll be covering in a future video if you're using a bamboo printer it has a camera built in which you can get to do a time lapse of your print taking place it will show a photo as it completes each layer of the print traditional mode does so with the print Head in situ but you can switch this to smooth mode which will move the print head out of the way for each photo
but this can affect print quality I tend to leave this untraditional fuzzy skin applies applies a randomized fuzzy texture to a print this is a good example of showing how to apply a setting to a specific model so if we go to objects we can then select a model let's go with the Cali dragon and we will Select others and then fuzzy skin Contour now if we slice the plate you'll see it has applied a fuzzy texture to the print it is possible to apply this to just certain parts of a print and I will
be doing a specific video on how to do this in bamboo Studio but if you'd like to learn more in the meantime I've already covered it in a video on prer slicer which again bamboo studio is built on so is a similar workflow check Out my video on modifiers in priser slicer so with all the settings done let's quickly turn fuzzy skin off for now go back to prepare and we're ready to print I'll move the c dragon onto the other plate and we can now go through the printing process so the first thing to
do is I want to have another look at the slicing button up here we have been into the preview window before and we have seen sliced models but let's have a quick look at what this Arrow next to it Is this gives us two options slice all and slice plates and by selecting them from the drop- down menu it doesn't action them it just changes what the button does slice plat will only slice the plate that you currently have selected if you have slice all selected and then you click that it will slice both of
the plates and you'll be able to see the progress bar on the left here and at the end it will give you an overall stats for both plates or all the Plates in your project you can then click on a specific plate and you can see the stats for that specific plate when you're printing a plate with multiple materials you'll see the breakdown now also includes the specific details for each of the filaments you'll see how much material is being used for the model itself how much of that material is being flushed how much is
being used in the print Tower and then the total amount of that material being Used you'll also see the amount of filament changes that will be taking place during this print also if we scroll down a bit and we start scrolling through this layer you'll see on the right hand side here it actually shows you a list of the G-Code this is the code that the printer will be reading this is saying where it wants to move certain axes and what it needs to do right so with our print sliced now we need to print
it once your print is Sliced you next need to export it or send it to your printer if you're not using a bamboo 3D printer go to the arrow here go down to export plate sliced file click that and then it'll allow you to save the print file the 3mf file for your printer which you can then transfer to the micro SD card or octo print for your printer that you're going to use if you are using a bamboo printer make sure it's turned on and connected To your network and then you have two options
you can print it or you can send it to your printer if you select send and then click this it will send the files directly to your printer and save them to the micro SD card which you can then access from your printer screen or from the handy mobile app or from within bamboo Studio at a later date to print it if you select print it will send the print via bamboo Cloud to to your printer and then start the print Immediately before I continue with that there are two other versions of the options you
have print plate and print all and send and send all the difference here is by sending or printing just the plate you are only going to send the plate you currently have selected if you send or print all you're going to send the entire project to your printer and from there you'll be able to select which plate you print if you send it you'll then be able to choose the other Plate at later dates and print them separately for now let's go print plate and we'll select print this is now given me a few more
options here we can change the name this will make it easier to see what it was you were actually printing when you go back through your print history below that you have the estimated amount of time that the print is going to take and the amount of filament in total that it is going to use below that you have the Colors that it's going to use the top half of these boxes are the colors that you've collected in bamboo Studio the bottom half are the colors that you're actually going to print with and these are
based on what's actually in your AMS at the moment so I've already got a green in my AMS so it is automatically selected that for me I don't have an orange so it's currently suggesting to use the white if I select the drop- down menu here I can select any other Filament in my AMS that is the same material type this is sliced to use pla I can't select the pet G but I can select the black green or white white pla so let's select the black if you select auto refill if the filament that
you're using Runs Out mid print it will automatically start using a different roll of the same material type from your AMS to continue the print if you're not printing in multiple colors or if you're planning on painting your model after It's printed this probably isn't going to be an issue beneath that you can select which printer you're sending it to if you've got multiple bamboo printers then just select the one that you want to print with beneath here you have four options I would always recommend having bed leveling set it can take a bit longer
before it starts actually printing but it helps ensure a decent quality Print I would recommend making sure flow Dynamics calibration is turned on unless you are printing with a printer that either isn't compatible with it or you have a textured Pei plate which also isn't necessarily compatible with it time-lapse is obviously a completely optional option uh so it depends what you're Printing and if you want a time-lapse of it if you have this tick it will take a time lapse and it will save it to the micro SD Card if you are printing with AMS
regardless of whether you're using multiple colors or not you need to make sure this is ticked if you are printing with an external spool or if you don't have an AMS make sure this is not ticked and then just click Send this will send it to the printer and start the print if you're not using a bamboo 3D printer that is a whole of bamboo Studio that you need to look at right now as part of this beginner's guide but if you are Using a bamboo printer you can now pop over to the device tab
at the top here provided your printer is turned on and connected to your network you can monitor and control your printer if your printer has a camera head down here and hit the play button and you'll get a live view of the camera inside your printer on the right hand side you can click these buttons and you can control the different axes of your printer you can also edit things like the Temperature of the print head the print bed you can see the ambient temperature inside the enclosure you cannot change this you can turn the
lamp on and off and you can control other fans beneath this if you have an AMS you'll be able to see the filaments that you have fitted in your AMS you've got the four filaments here and this will be the last filament that you used as an external spool if you run a calibration on your Filaments which I'll be doing a separate video on it will also show the value applied to each of your filaments beneath the names if you were actively printing it would have details of your live print down here showing you a
progress bar and how long is left on the print next if we come up we can go to micro SD card providing your fitted one into your printer and to begin with this will show all of the time lapses that You currently have saved on your micro SD card from which you can either delete them or you can download them to your computer then at the top you can select model and this is all of the print files that you have sent to your printer either sending them via bamboo Studio or saving them directly onto
the micro SD card and from here you can delete them print them or download them to your computer the last section we'll look at here is the update Tab and from here if There is a firmware update available like there is here you can click update and this will run the update on your printer for you okay so now we've gone through all the settings let's have a quick refresher on the whole process to get something printing open up bamboo Studios start a new project import your model place it where you would like it on
your bed ensuring that it is appropriately oriented make sure that The correct printer and plate type is selected make sure the filament that you want is is the correct material and color go through and make sure that the correct process preset is selected and all of your settings are as you want slice your plate check it over and make sure everything looks okay and then print it sending it to your printer with the correct settings well I really hope you found This video useful if it has helped you get set up and printing with bamboo
studios please make sure you hit like below that makes a big difference to me if you do want to learn more about 3D printing in general make sure you check out my channel I've got tons of tutorials and videos on there already and if you'd like to see my bamboo Studio Advanced tutorial that's coming out or all of my other videos that I've got in the pipeline make sure you hit Subscribe as you'll be seeing them very soon either way thanks very much guys and I'll see you next time thanks very much for sticking all
the way to the end guys once you've supported me by hitting that like and sub subscribe why not check out some of my other videos I've got a whole series on 3D printing and the environment and how to make 3D printing more environmentally friendly and I've got a video on when I use 3D printing to convert a real pumpkin into A portal gun turret why not check him out thanks very much guys and I'll see you next time