this trade that I'm getting ready to walk you guys through is one of the videos that just recently went viral if you haven't seen it it's one right here it's where I was closing a trade at a bar with my sister done it was a $35,000 trade and this is the video where I want to break it down to you guys now yes you guys got to see the video of what it looks like in real time me closing a trade but now let's actually break down the trade itself the entry the exit the video
probably made it look as though I opened the trade made $35,000 right there at the bar closed it had some drinks maybe did it while drinking none of that is true that trade that I closed from the video was a 3 to 4 day trade it took an incredible toll on me so you can see in the video there was a huge sense of relief when I finally closed it I was up a significant amount watched it completely evaporate went back up again in profit then continued in my favor made an aggressive move and I
couldn't quite hold it for any longer I was emotionally exhausted I had trade exhaustion which I've experienced so many times this year but it's really cool to see kind of what everyone thinks when they see this video because there's not much context behind it and since it did go viral there's a lot of new eyes on it so most people didn't think it was real accusations which was funny cuz then obviously you must be new here because this is what I do for a living so I'm going to try to break down as much as
I possibly can pertaining to this trade in this video so let's get into it I took my entire family on a trip to Disney World and Universal Studios placed a trade on that trip that paid for the entire thing plus some and also I you guys are going to you're going to say something so I'm just going to bring it up now I'm acting different okay I got my nails done these are for the girlies Slay Slay I don't care what you guys have to say I'm obsessed with them I love them they're aggressive they're
long extra long they have so much going on and I love everything about it so if you see me just type in away mind your business so I always start by showing you guys my broker statements it's a Futures regulated us broker and they offer Futures and equities I have never ever experienced a problem where I want to make a withdraw this has been a Brokers that I've used since day one if you're interested in signing up for tradestation go to tradestation.com to they're doing a promotion right now where you deposit in x amount and
they'll give you cash back into your account to trade with okay now I usually show you guys my monthly statement but since the month of March is not over yet I have to show you guys my daily statement all right guys this is my daily statement from trade station here up to the left you can see the date here my name and then let's go down to the Daily statement so you can see it looks a little bit different and it's a little bit more messy when we're looking at the daily statements versus the monthly
statements this one shows the commissions exchang and clearing fees NFA fees totals this this is the confirmation then this is the purchase and sale and then finally right here the 20 contracts gross profit and loss 34,7 55 you guys can see the beginning balance was 342,000 then we've got the total gross profit and loss looking at 34755 and then the ending balance of 377,000 dude the growth on this account this year is absolutely insane so crazy now remember this is the beginning balance that day and then the ending balance that day if you guys are
interested in my beginning balances each month go back to my monthly reviews I show you guys I've started in January did it in February so you guys can see the beginning of this year what my account balance was and now we're looking at 377,000 but this is the broker statement this is the trade closed and now let's actually get into the chart analysis why did I get into this trade why was it so exhausting why did I get out what was the trade management like so the year to date we're looking at $1 12227 48
in seven trades so far this year and the trade that we're going to go over is right here March 13th so it looks like there is a discrepancy between Trad Zella and my statements I don't know if that's because the time zone that it was closed in maybe was Eastern and I have my trade Zella set up in some other time zone maybe I have trade Zella in Eastern and my trading view in Pacific now maybe it could be that I don't get to see my statement until the next day so technically if the trade
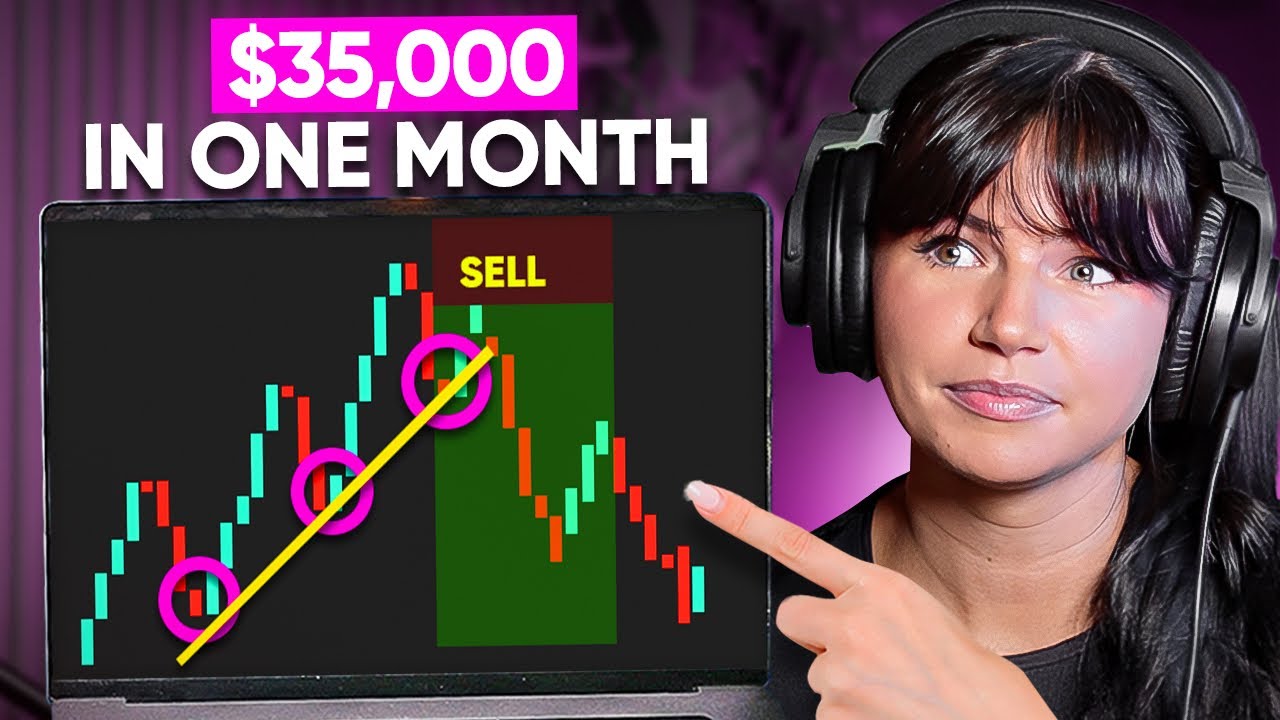
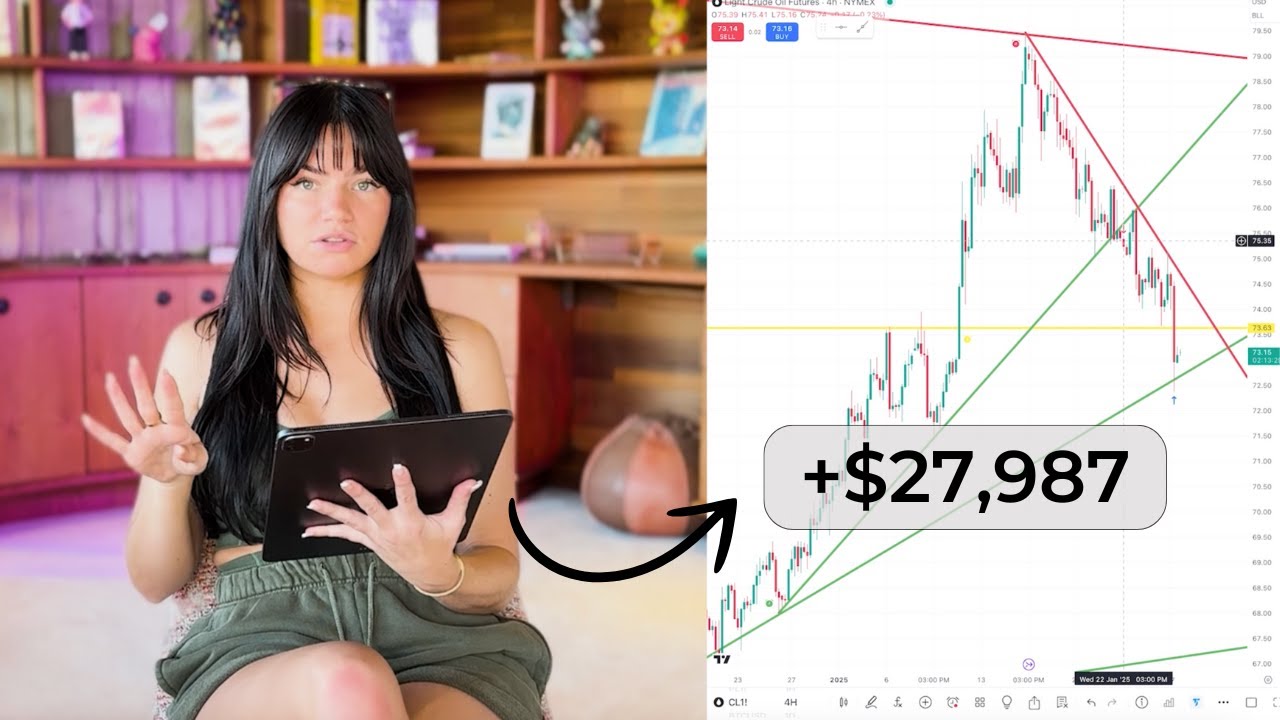
was closed on the 13th but regardless let's get into it all right so I already have my entire chart marked up here in trade Zella so that I can go back and kind of replic ate why I got into the trade what the trade management looked like and why I got out so first of all let's go over the Playbook What playbook did I use for this entry so I have connected my three touch Point Break Playbook we've got one two three actually technically four touch points and if we really want to get nitty-gritty with
it I could have came in a little bit tighter with that trend line and it would be 1 two 3 four five touch points so we've got a ton of touch points here but to be honest I should change the name of this Playbook and call it the three or more touch Point trend line break nonetheless we've got 1 two three minimum touch points and then we've got a break now let's go over what my risk is when I got into this trade how much was I willing to risk if this didn't work out first
I want to change the color of this one because all of my upward lines I like to make green there we go so I was willing to risk $1,925 if this trade didn't work out if this trade immediately went against me and went down to 96125 this area right here broke this upward trend line I'd be willing to take that loss and close that trade let's go over some of the over all information before I get into the the trade management and what this felt like so I'm trading with 20 contracts it cost me around
66,000 to place this trade that's never how much I'm willing to risk so I always talk about this idea of think of it like you're purchasing a house or a car or a watch you still have the item it's just a matter of how valuable that item still is when you go to sell it if you've purchased a vintage car and it becomes really popular now it's very sought-after and there's not many out there you have now made money you still have have the car so the initial investment's still there it's just depending on if
the market is looking for it or not so if the price is higher or lower than what you originally bought it for so yes this position cost me 66,000 that's never how much I'm willing to risk so just remember I'm trading 20 contracts here so you can always kind of help to put that into perspective if you were trading with half the amount it would cost you only 33,000 so just kind of do the math here on if you want to make this more tangible or more relatable to how much you would have actually made
or how many contracts you would have actually placed so I just like to use that analogy when I know a lot of people always ask they're thinking that is how much I'm willing to risk if this trade doesn't work out that's never how much I'm willing to risk how much I was willing to risk was right here the 16,000 16,924 so if price was to go against me immediately that's my initial risk and then the coolest part about my strategy is my risk always Trails so at one point my risk was no longer 16,000 as
price progressed as it created a pullback I was willing to risk nothing I was able to move my risk to break even which is the coolest thing I love to see this play out and then eventually I was able to move in profit but I actually closed sooner than and should have still stayed into that trade but we'll we'll go over that in just a moment so the risk how much I'm willing to risk 16,000 my realized R multiple was 2.05 R I have shown you guys the cost of the trade I have shown you
guys the risk of the trade why I got in but now let's go through the this is my favorite part and it is the most satisfying is to be able to check off these boxes for for my trade Playbook making sure I followed all of my rules and this does abide by all of my market conditions my entry criteria and my exit criteria so let's go to my playbook here okay here is my three touchpoint trend line break now we have realized together that this was a more than three touchpoint trend line break and I
may need to change the name of this to the three or more the three plus or the plus three touchpoint break but let's start with the market conditions were market conditions trending at the time of Entry when I placed this trade we were in a downward Trend we had 1 two 3 four five touch points of a downward Trend so we can go ahead and check this box off beautiful now the next thing is the entry criteria so first entry criteria is does the trend line have three touch points Yeah we actually can say this
has more this has 1 2 3 4 five touch points so we're going to go ahead and check this box off beautiful and now was this a lowrisk setup this I'm actually not able to check off this was a higher risk setup I was willing to risk almost 17,000 16,900 so this was on the higher risk side this is something I can recommend to you guys but I don't follow it anymore so it's more of a do as I say not as I do when I am presented with a highrisk opportunity there's things that I
can do to mitigate or lower my risk I don't opt for that anymore I have a bigger account size that I'm trading with now I have 10 years of trading experience I'm able to withstand these higher risk trades these bigger swings of profit and loss being up being down but now I will say as far as my recommendation goes when you're presented with a high-risk setup ask yourself these two things things first before actually taking the trade so the first thing that I do is if I'm presented with a high-risk setup and what does that
mean if we look in parentheses that means the price is close to the safety line if you guys have done any of my trading strategy breakdown videos I did a trend line trading Master Class video on YouTube if you haven't watched it watch it right over here you can access that it's it's under 17 minutes anybody can get the the idea or the gist of the strategy in under 17 minutes and you could even watch it in two times speed and really get it but if you're ever presented with a high-risk trade that that's just
how far away the price is when it broke your action line from your safety line the first thing you can do is always reduce your position size I'm trading with 20 contracts I very well could have came in with only 10 contracts and completely cut my risk in half that's the first option second option is can you come in with a steeper upward trend line I'm only working with two candles when the price broke so there is no pullback so I couldn't come in with a steeper trend line but always try to opt for reducing
your position size when you are presented with a high-risk trade but since I took this high-risk trade I can not check off this second box here so I actually took a higher risk trade but now let's go over the last entry criteria did this trend line have over a week's worth of data so when we're looking at the first touch point we're looking at February 12th all the way to entry March 11th so we've almost got a month's worth of data so absolutely plenty of data here so we're looking at more than three touch points
we're looking at way more than a week's worth of data so a lot of weight behind this this move or this trade here felt almost A+ if I had reduced my position size to low risk this would have checked all of my boxes and would have been an A+ setup but I cannot check off the lowrisk setup so we're going to go over here and select the over a week's worth of data let's go over the trade management what did this trade look like what did it feel like and I will be able to show
you guys when we scroll down here to the running profit and loss this was a roller coaster you can see this truly looks like a literal roller coaster we're looking at the chart the graph here that looks like a really fun roller coaster now was it fun for me no not at all I got to watch this trade go into profit $24,000 and then watch it completely evaporate to zero to nothing well we'll call it 1,000 bucks but to watch all of that go away it's it's the craziest feeling so I want to touch a
little bit on psychology before we continue the trade management and the exit criteria and walk you guys through what something like this does to you and how it could influence your trading decisions in the future and what you need to do to not let something like this affect you when you're in a trade and you're up a decent amount uh we'll call it 10,000 5,000 a th000 whatever it is in conjunction to your Capital that is a significant amount and then to watch that start disappearing you're never going to be satisfied with anything but that
high that you had then and what you likely will do when presented with a situation like this or a trade like this is this is where a lot of Traders will just give it back they'll continue to to give back their profits over and over and over again because they're never satisfied with that high that they had or the highest amount they were making in that specific trade and that's the coolest part about this strategy is that there are so many times where I give up that most amount that I was up because I'm not
trying to catch highs and lows when I'm trading my strategy I'm just trying to catch the movement in between the meat in between and I think that's how it's it's helped my psychology is I'm never trying to catch highs and lows sure there are sometimes I will catch it just simply by closing at a support or resistance area but I'm never trying to capitalize on highs and lows and I'm never trying to predict them so I think that's what's helped me psychologically when I see numbers like that and where I'm up you know a big
amount or a large amount and then to watch it disappear and I'm okay with giving some of it back but a lot of Traders aren't they they'll never be able to feel that satisfaction or that that feeling of how much money they were up then and they won't be happy with anything until it comes back to that amount or higher and that's where a lot of Traders just continue to give back profits over and over and over again so if you can be okay or work on or practice giving up some of the profit just
to see your strategy play out you're going to find so much more success in the future you're going to be okay with watching it EB and flow and allowing some of it to go away so that you know for sure this trade is over I followed my rules so I don't know if that made a whole lot of sense but I and I'm sure there's actually some signs behind it and I'm sure even based on gambling there's some sort of chemical or the way that your brain reacts to being up the most you've seen and
to never be satisfied or to not be happy until it comes back and then watching it all just completely disappear and evaporate so I went through that whole feeling but the coolest part is I didn't have to guess when to close this trade we'll go back up to trade management and the exit criteria here and you guys can see that even though I had to give it all back if this trade wouldn't have worked out and it would have crossed my safety Line This trade just wasn't for me I would have had to see myself
up 23,000 and then close it break even because I I simply followed my rules and this is something that could be presented with many times over so I got to experience that don't get me wrong it's exhausting regardless if you have it mastered or not it's exhausting so just start getting comfortable with being okay with taking less than your highest amount you were up but just make sure it's according to the strategy according to your rules but this scenario I followed my rules I got very close to having to close that trade we were looking
at just only $1,000 1,300 ,000 almost had to close that break even and then to see it come all the way back up and then plus some so this is a scenario where that Traer that happened to just hang on and not be satisfied with anything less than 23,000 would have made money in this scenario but the panic and the despair that they would have had to watch it all go away probably would have scarred them or sent them and who knows maybe they would have closed when it got closer to that a th000 because
they just didn't want to see it now go negative so it's just there's a lot that comes with with trading I mean really in general I mean you've just got to have a handle on your emotions you've got to be able to to work through these to work through this EB and flow this swing of profits to almost negative to break even to watch it come back so this right here this running profit and loss was the roller coaster of this trade that gave me trade exhaustion to see it be up that amount to watch
it disappear and then to come back in profit even more 32,000 34,000 it was a lot to handle so by the time we hit that 34,7 55 yes was I at a bar with my sister yes was I so ready to close it even before we got to the bar yes I was ready to close it at 27,000 at 32,000 and then finally it made a little bit more of a move when I was out to dinner with my sister and I'm I'm talking to her about the trade and I'm just telling her that I'm
I'm ready to close it I have trade exhaustion I can't hold on to it any longer that feeling to have to give it back again I couldn't I couldn't withstand I couldn't handle it so I closed it right then and there so now let's see if I followed any of my rules when exiting this trade back into the charts my first area of resistance was over here at this 1 2003 it had touched before and acted as resistance back on February 21st it acted as Support over here on February 9th and then let's see if
we've got any more touch points H and then yet another as resistance back in January 10th so significant key level here it got to it when I was up that 25ish th000 and then completely melted retrace that's when I had to give it all back right here this is what that swing looks like so gave it all back it got right to it truly truly respected this area of resistance the last last time the price of platinum got to it it didn't come back for a long time so this one happened to retrace the very
next day but the coolest part is my strategy will tell me to stay in a trade for the entirety of the trend now I did have the option to close I can always close if we go back to exit criteria I can always close when price gets to support and resistance or when it crosses my safety line my safety line is this upward trend line price end it up not Crossing that now this is the old contract of platinum so this stops you can only see till March 18th which now we're on March 27th but
I shouldn't have closed this trade until price crossed now what's cool is we can go back and see real time price actually did cross and ironically enough regardless of which exit criteria I would have chose it would have been at the same price which I love to see that's always cool to see that whether it was support and resistance or whether it was the safety line getting crossed the cool part about this one is it would have been the same area but now I looked for another area of support and resistance so when I'm closing
a trade I'm looking for any other area of support and resistance to help give a a little bit more validity behind my exit so if we hit the refresh button we can see there were some touch points back here we had one around February 11th price came back and hit and acted as Support over here on February 11th and then came back and acted as resistance back on February 17th and then I decided to close when price got to it over here on Thursday March 13th thinking it would act as resistance and then start to
fall over well it didn't it ended up going completely sideways moved through it and then crossed it but at least we can say all right yes there is at least some sort of area of support and resistance acted as Support over here resistance over here I thought all right maybe it's going to do it yet again over here so we're going to go back through that Playbook and mark off our very last check mark exit criteria was support and resistance hit or safety line safety line was not hit but the support and resistant was boom
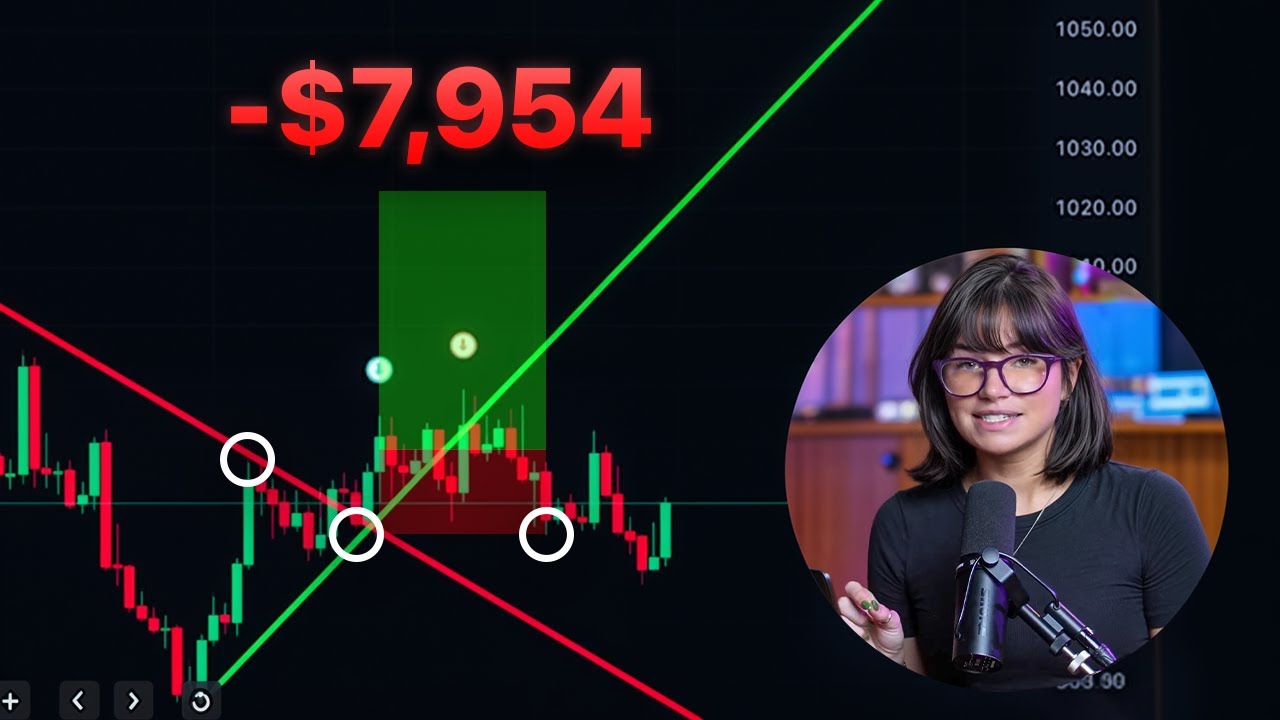
baby there we go so I followed four out of five of my rules on this three touch Point trend line break this was the trade as a whole I know this was a lot especially compared to the last trade very easy very straightforward $7,000 loss A+ setup just didn't work out great psychology great risk management this one very close to an A+ setup here the only thing that didn't quite meet the Mark was my risk management so I took a highrisk setup and instead of turning it into a low risk and reducing my position size
I simply just took the high- risk setup so I was able to follow four out of five of my rules let's go back through some of the stats real quick just as a recap this was a long position 20 contracts my playbook here was my three touch Point trend line break and my stop loss the trade risk was 16,924 my realized multiple was 2.5 and then let's see the time of the trade 3 days so this was a 3-day trade all right guys I think that is all I can share on this trade there are
any questions that you guys have that I didn't go over or that you would like for me to start going over in all of my trade breakdowns don't forget to drop it down in the comments below and don't forget to hit the like button subscribe hit that Bell for notifications so that you guys know every time I place a new trade or come out with a new video all right guys I will see you in the next one [Music]