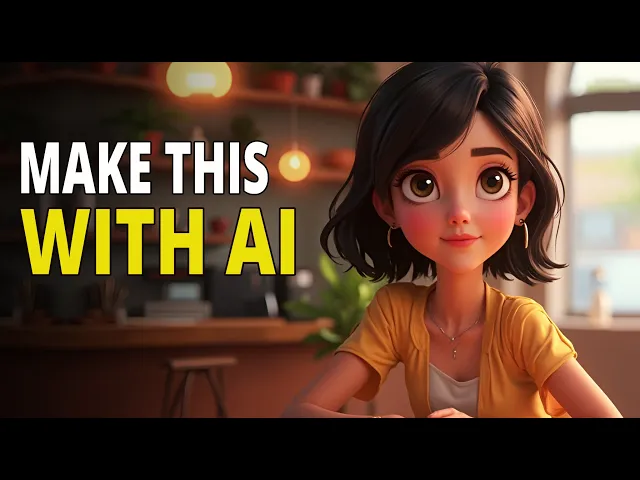
Want to create animated short films where characters actually talk, react, and feel real. Just like this. >> Wow, you're real.
I was almost sure you were AI. >> Okay, real question. If this cafe suddenly caught fire, >> I'd save the coffee first, you second.
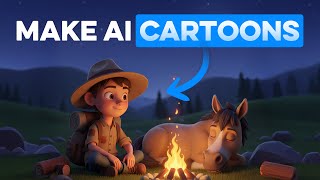
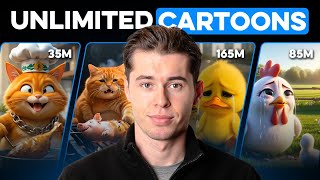
>> In this video, I will show you exactly how to make scenes like this using only AI. No design or animation skills needed. Videos like these get millions of views and creators are already making money with them on YouTube.
Let's jump right in. To create the animated videos, we will follow five simple steps. Step one is creating the story.
If you already have a script ready, feel free to skip ahead. But if you don't, no worries. You can use chat GPT to generate one in seconds.
Here's a prompt template you can use. Just plug in your topic, define a theme, specify the target age group, the number of characters, desired story length, and tone of dialogue. I have added examples alongside each one to show you exactly what to fill in.
These are the settings I will be using, but feel free to tweak them to craft fresh, engaging stories and character dialogues for your animation. When you are ready, open chat GPT and paste in the prompt template. Hit send and within moments chat GPT will generate a complete story line with dialogues for every character.
Once your script is ready, simply copy it and paste it into Google Docs or any text editor to keep your project organized. Now that the dialogues are ready, it's time for step two, adding voices. You can skip this step if you prefer to add voices later during the lips sync process.
To begin, go to your script and copy the first dialogue of Liam. Open chat GPT and enter this text followed by the dialogue and hit run. Just below the generated response, you will see three dots.
Click on it, then select read aloud. Chat GPT will read the line in a natural expressive voice. >> Wow, you're real.
I was almost sure you were AI. >> If you want a different voice, on the bottom left, click your profile icon and go to settings. This window will pop up.
Under voice, use the dropown to choose from a variety of male and female voices. Select one and chat GPT will now use that voice to read all your text. >> Hello, it's lovely to meet you.
>> But there is no option to save the audio. For an easy workound, open this Chrome extension. Now, click add to Chrome to install the extension.
And don't forget to pin the extension for quick access later. To record your audio, switch back to your chat GPT tab and click on the extension. Then hit start capture to begin recording.
To play the narration, tap the three dots. Select read aloud and the voice over will get recorded. >> When finished, click the extension again and hit stop capture to stop recording and this page will open.
Once the processing is completed, you can download the audio. Repeat this process for each character in your story. Be sure to name each audio file clearly so you stay organized.
Once all character voiceovers are ready, we will move on to step three, creating the scenes using just two character images. Let me show you what's possible. Here's the boy riding a motorcycle to a cafe.
And here's another scene. A girl sitting at a cafe table with perfect consistency. Now imagine this.
Both characters sitting together inside a cafe or relaxing on a park bench. Every scene visually cohesive and perfectly consistent. Let me show you this in action.
>> Okay, real question. If this cafe suddenly caught fire, >> I'd save the coffee first. You >> the best part.
You don't need Photoshop. You don't even need any drawing skills. Let me walk you through how it's done.
I'm using a platform called Design. ai, AI, an all-in-one creative suite with tools for image generation, lip sync, and animation. Inside Design.
ai, there's a new image model called Nano Banana, and it's seriously impressive. Here's how to get started. Go to design.
ai from the link in the description and create your account. Once you are in, click on new project. The first step is to set your canvas ratio and name your project.
Then click apply. At the top you will see the toolbar and on the left are all the main AI features available in canvas. For this example click on the canvas area and upload an image.
Now click on the uploaded picture. This will bring up the editing panel at the bottom. Click on chat editor and from the drop down on the left select nano banana as your image model.
You can also change the aspect ratio from here. To generate a scene from the image, you will need to enter a prompt. Let me show you a few examples.
Here's the first one. The girl is sitting in a cafe placing an order with a waiter standing nearby. In this one, she's holding a cat while sitting at the same cafe.
Then I uploaded a picture of the boy and typed the boy riding a motorcycle. You can also upload more images by clicking the plus icon. Here's one with both the boy and the girl sitting together in a cafe.
Just repeat this process to generate all your scenes and download them to your computer when you're done. Let's walk through the lipsyncing process. To begin, click on the lips sync tab.
You have two options to start with. Pick a face image or upload a face video. Let's start with a face image.
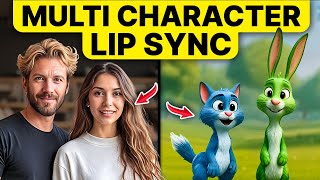
I will pick this image to upload it to the canvas. design will automatically detect all the faces in the image, making it easy to lip-s sync multiple characters in a single scene. Here's how it works.
Click on the face you want to lip-s sync. To sync multiple characters, select them in the order they speak, first, second, and so on. Then click next.
The image and selected characters will now appear in the timeline. Click on pick a voice for the first character to open this window. Under text to speech, enter the character's dialogue.
Then under voice tone, browse through the voices and preview them before picking one. >> Hold on to your hats, folks. >> But as we already have our voice tracks prepared, I will switch to the upload audio tab and upload the audio file instead.
Once uploaded, it will appear in the timeline. Repeat the process for any additional characters, arranging each audio file in the timeline as needed. On the left panel, you get two generation modes.
Pro is for multi characters and better movement and clarity. Finally, click generate. And in a few moments, your lips synced video will be ready.
As you will see, the tool does an impressive job syncing lip movements. >> Wow, you're real. I was almost sure you were AI.
>> Disappointed. But the character movements are quite limited. So what if you want to take it a step further?
Imagine your characters moving, reacting, even using gestures and expressions, just like in a real conversation. That's exactly what design lets you do. With video lips sync, you can turn a still image into an animated video with lifelike motion and then sync it with audio.
This approach allows your characters to move naturally. Use hand gestures >> and react with realistic body language. It adds a whole new level of expression and engagement to your scenes.
Let me show you how it works. On the left panel, click on AI video. You will see that design integrates with some of the best AI video generators available.
For this example, I will choose cling 2. 5. Next, click on the upload icon and select the image you want to animate.
In the prompt box on the left, describe the kind of motion or expression you'd like to see in your video. For example, subtle gestures, head movements, or emotional reactions. Then, choose the duration for your video and click generate.
Once your video is ready, simply download it to your computer. And here's the result. To get more expressive results, you can also include hand gestures or body language cues directly in your prompt.
To add lips sync to the video, click this tab to head back to the lip sync page. Click the upload a face video button to upload the video you just created. And just like before, it will automatically detect the faces.
Select the faces and hit next. Then continue just as before and upload the audio of the first character followed by the second character. Arrange the audio in the timeline and hit generate.
After a few minutes, your lips synced video will be generated. Click this button to download the video. And here is the result.
>> Wow, you're real. I was almost sure you were AI. >> Disappointed.
This method brings your characters and scenes to life with greater realism and expression. By spending a little extra time refining the movements and overall scene, you will achieve a much more polished and professional result. >> Repeat this process for all the scenes you had created and turn them into video.
Then lip sync them and download them to your computer. Once done, open any video editor. I will go with Clipchamp.
Import all the video clips. Arrange them in the order of your story and export it as your short AI film. >> Wow, you're real.
I was almost sure you were AI. >> Okay, real question. If this cafe suddenly caught fire, >> I'd save the coffee first, you second.
>> Good answer. Shows priorities and honesty. Next time, don't be late.
>> Next time, >> don't ruin the moment. That's how you can create AI animated films using Design AI. Link in the description.
If this helped, check out these other tutorials to see what else is possible with AI.