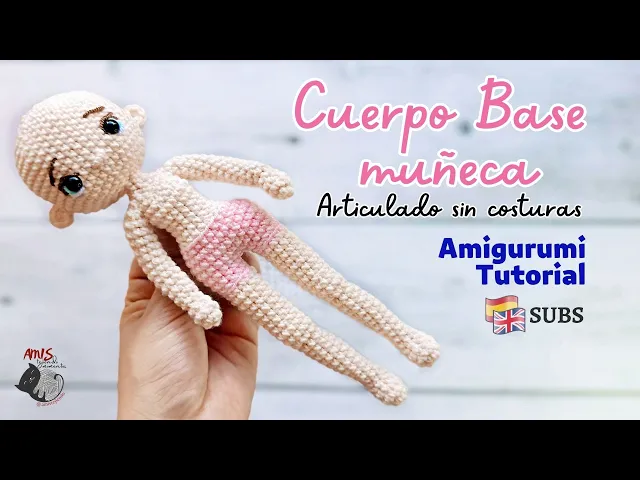
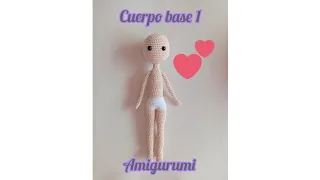
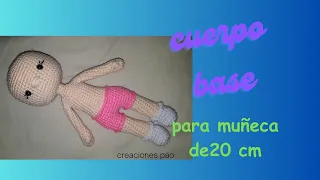
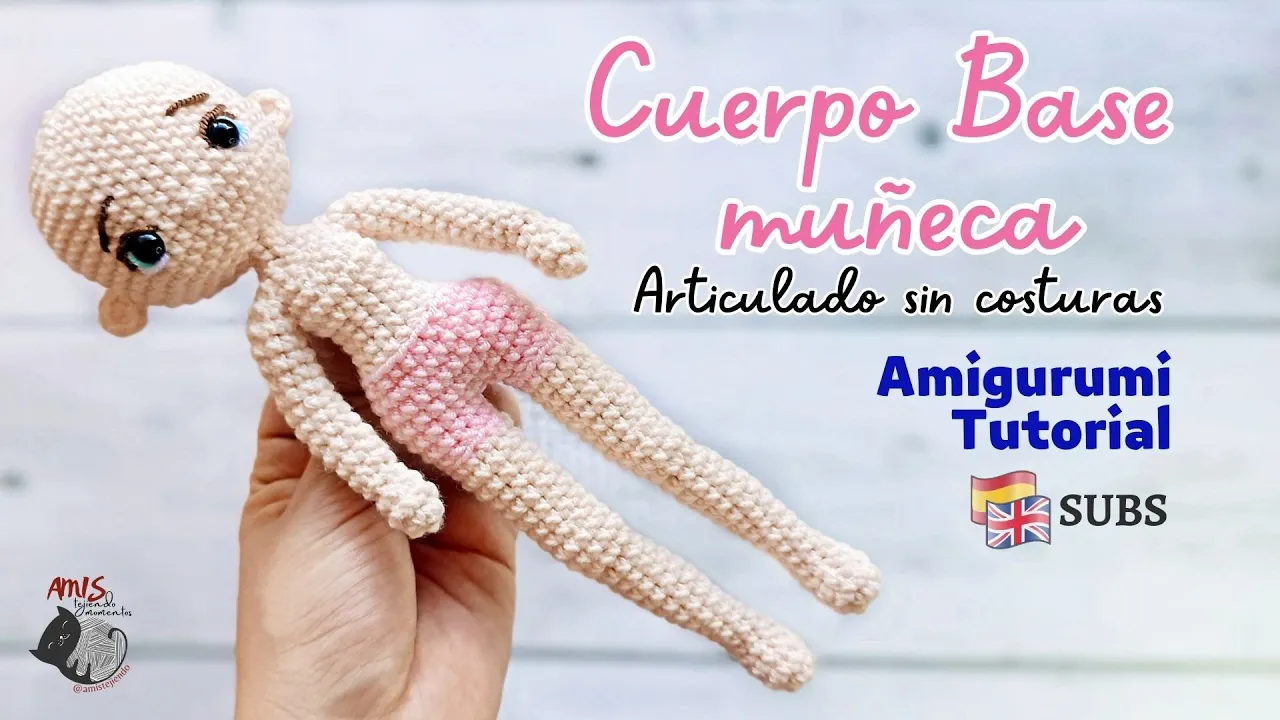
Hello hello, greetings and welcome back to the Amis Tejiendo Momentos channel, I am Esmeralda and today I bring you the tutorial to crochet this beautiful base body for a doll, approximately 21 centimeters high, look how beautiful it is, it is a basic body but at the same time it has some details marked, in addition this base body is articulated, that means that we will be able to move its extremities, to give it different positions and to return to its original shape without any problem, and well, for crochet it I am going to leave here the list of materials that we are going to need, do not forget to subscribe to the channel, leave your likes, your comments, they always help me a lot when you do it. I am also going to leave here the list of stitches that we must already know to be able to crochet this base body, that means that we must already have previous knowledge in the elaboration of amigurumis, and a basic intermediate level of execution, and well, don't forget that this video has English and Spanish subtitles, so you can activate them if you need them, and to start with our base body we are going to start with the arms. I recommend making single crochet in x, and not in v, if you have any doubts about it, you can look for videos explaining the difference between the two stitches, generally when crocheting in x the work leans less, so it's more recommended for making amigurumis in general, and we start the arms making a magic ring of 5 sc in the next round, we are going to make 5 increases, to have 10 sc now, we are going to make 3 sc and 1 decrease, twice, to have 8 sc now, we are going to make 1 decrease and 6 sc, to have 7 sc in the next round, in FLO, that is, in the front loops only, we are going to make 6 sc and 1 increase, to have 8 sc and now, we are going to do 10 rounds of the same 8 sc.
At that point we can fasten off, we are going to cut there and we are going to make another arm exactly the same as this one. Here I already have the two arms ready, and I am going to reserve them to continue making the rest of the body, we are going to make the legs. For the legs we are going to start making six chains and starting from the second chain from the hook, we are going to make 1 increase, 3 sc and 1 increase, and we are going to do the same for the other side of the chain, 1 increase, 3 sc and 1 increase in this way there should be a total of 14 sc around, and now we are going to make a round of the same 14 sc in the next round we are going to do the following: we are going to make 3 sc, 4 decreases, and 3 sc, to have 10 sc now, we are going to make 3 sc, 2 decreases and 3 sc, to have 8 sc and we are going to make four rounds of the same 8 sc, we are only going to fill in the little foot, because as we are going to articulate the body later, we will have to put the wire and then fill in, although if you are not going to articulate the doll, I recommend that you fill in as you work, and now, in the next round we are going to make 2 sc, 1 increase and 5 sc, to have 9 sc now, we are going to make 2 sc, 1 increase, and 6 sc, to have 10 sc like this, and we are going to do 3 rounds of the same 10 sc in the next round, we are going to make 2 sc, 1 increase, 2 sc, 1 increase and 4 sc, to have a total of 12 sc now, we are going to do 3 sc, 2 decreases, and 5 sc, to have 10 sc and now, in FLO, that is, in the front loops only, we are going to do 8 sc and 2 increases, to have 12 sc now, make two rounds of the same 12 sc in the next round, we are going to do 4 sc, 1 increase, 4 sc, 1 decrease, and 1 sc, to have 12 sc and now, we are going to do six rounds of the same 12 sc This is how this leg is going and now, we are going to do 8 sc, which will be 8 extra sc with the last stitch we are going to change to pink color, that means that at this point the rounds will start now.
because the sc we made were extra points. And then, in this round we are going to do 12 sc in the next round, in BLO, that is, in the back loops only, we are going to do 12 sc like this, here we can fasten off and cut the first leg, and let's crochet another leg exactly like this one, but without cutting because we will continue crocheting. Here we already have the two legs ready, and now we are going to join them, and for that in which we are working, we are going to make a chain and we are going to hook it at the point where it corresponds on the other leg, that is, approximately here like this, and now we are going to do the 12 sc that we have in this leg and we are going to do 1 sc on one of the two sides of the chain, in this way now, we do the 12 sc on the other leg and we finish the round doing 1 sc on the other side of the chain like this, there should be a total of 26 sc around, because we have 12, 12, and 1 and 1 on each side of the chain, which gives us a total of 26 sc, and now in the next round we are going to do the following: we are going to raise the butt a bit and for that, we start making 2 sc, we make 2 increases, we continue with 18 sc, we now make 2 increases and we finish the round making 2 sc in this way, there is a total of 30 sc around and now, what we are going to do is two rounds of the same 30 sc now, before continuing we are going to articulate the body and for that, we are going to cut a piece of wire approximately 40 centimeters long, which we are going to fold in half like this, and with the help of pliers we are going to fold the ends like this, and we are going to cover them with electrical tape or masking tape, it can also be, we cover them in this way so that there is no risk or problem, like this, and now we are going to insert these wires into the legs, like this trying to get it to go all the way down, and we are going to locate the central point between the legs, here approximately in that area we are going to put another piece of electrical tape, in this way we will do it, and once we have the tape on we are going to open each leg a little in this way, to also give support to the hip, so that it is more similar to the shape of a skeleton, this is how it should look, and now we are going to introduce this into the legs again, like this and with a long object we are going to proceed to fill in the legs, but we must not press too much, because we do not want them to lose the shape we gave them so, we are going to fill in preserving the shape of the legs as much as possible.
This is how the legs look with the stuffing, this is how they look, pretty and now we are going to continue, crocheting with a wire in the center is really not my favorite thing, that's why I almost never articulate the dolls I make, but this time I wanted to do something different and more complete, also for those who like to articulate their dolls, but obviously this is not an obligation, you can do them without wire without a problem, and well, in this round we had 30 sc and now, in the next round we are going start by making 1 sc and 1 decrease, three times, and now we are going to do 12 sc, and we finish the round by making 1 sc and 1 decrease, three times, in this way we mark the buttocks a little, we will also take this into account when we are filling in so that it doesn't lose shape, we have a total of 24 sc around, and now, in the next round what we are going to do is 4 sc and 1 decrease, four times, to have 20 sc, and with the last stitch we are going to change to skin color and now, in BLO, that is, in the back loops only, we are going to do 3 sc and 1 decrease, four times, to have 16 sc This is what it looks like, and now we are going to do 3 rounds of the same 16 sc So we go, this is how the waist of this base body looks, and now we are going to start to mark the chest a little too, for that we are going to start making 5 sc now, we are going to make 3 increases, now we will make 2 sc continue with 3 increases and we finish the round making 3 sc in this way we have a total of 22 sc around, and now what we are going to do is a round of the same 22 sc So we are going, in the next round we are going to join the arms, then for that we are going to start making 6 sc we are going to hook the first arm here, like this, and we are going to make the 8 sc that we have available here now we are going to continue here, making 3 sc now we make 1 decrease now 2 sc 1 decrease 3 sc Thus, we are going to take the other arm and hook it at that point, and we are going to do the 8 sc of the other arm and we finish the round doing 4 sc on the back so that the union remains between the arms and the body, there should be a total of 36 sc around, and now if we also want to articulate the arms, we are going to cut a piece of wire approximately 15 centimeters long, we are going to also fold the ends, the idea is that it covers from the wrist of one arm to the wrist of the other arm, not up to the hands, because in my case it does not reach there, and we are going to cross this wire through the middle of the column, which would be the column, and we are going to introduce it into the arms in this way, it is okay if we have to bend the wire a bit because it can return to its normal shape, so we are going to put the wire in both arms like this, we take our time to locate it well these wires, to locate the weaving well and that we can continue crocheting without major problems. So, something like this is what it should look like, and we're going to lower the arms so we can continue crocheting something like this and now, we're going to continue on the next round. We are going to make 1 sc and 1 decrease, 12 times, to have 24 sc we are going to fill in the waist and the chest, in such a way that it is also marked a little, in this way, so that we also have a straight back, and now we are going to make 12 decreases like this, we are going to fill in the shoulders a bit, but very little, just so they don't look flattened, like this, and now we are going to make 1 sc and 1 decrease, four times, to have 8 sc Look how nice the body is left, how beautiful it looks, and now we are going to make two rounds of the same 8 sc Now, we are going to start with the head and for that, in the 8 sc that we have, we are going to make 8 increases, to have 16 sc now, we are going to do 1 sc and 1 increase, 8 times, to have 24 sc on the next round, we are going to do 1 sc and 1 increase, 12 times, to have 36 sc So we go, and now we are going to do 5 sc and an increase, six times, to have 42 sc like this, with our hands we are going to flatten these stitches a little so that it does not look wrinkled, so that it is as even as possible when filling in, like this, and now we are going to make 9 rounds of the same 42 sc So we go, and now in the next round, we are going to do 5 sc and 1 decrease, six times, to have 36 sc now, we are going to do 4 sc and 1 decrease, six times, to have 30 sc So we go, and now we are going to place the safety eyes, I am going to be using 7 mm eyes and well, to place the safety eyes what we are going to do is that counting from the round in which we have the 8 increases, or the 16 sc, in which we start with the head, we are going to count seven rounds upwards and between rounds 7 and 8, with 8 stitches between the two, the safety eyes will be located.
So, first we are going to put a couple of pins to make sure that they are well centered and well located towards the front of the body, and we are going to proceed to put the eyes, so after putting the eyes there are approximately 6 free points between the eyes, so this way, and now, before putting on the safety eye caps, I am going to show you a basic outline of the eyes, this is optional, you can do it however you like, in my case I will use this base body for a doll that is blue-eyed and blonde, so, first, I am going to take the color of the eyes, which in this case is blue, I am going to take a piece of this color and the yarn needle in this way and we are going to draw the yarn through the side of the eye, through the middle side of the eye, that is, approximately here and we keep it in the center of the bottom part, here like this and we do the same in the other eye now, we take a strand of white yarn, We are going to pull the white yarn through the upper middle of the eye, that is, here, in this way we will save it again through the midpoint of the blue eyeliner, that is, approximately here something like this, and we do the same in the other eye so it should look like, and now we are going to do the eyelashes. For the eyelashes we are going to take a strand of brown yarn and we are going to take it out through the inner middle of the eye, that is, here in this way, and in a straight line we will keep it again, approximately one point beyond where we have the white yarn, that is to say, something like that, in this way we take out the yarn again through the point below and keep it at the same point in which we took out the white yarn, like this This is how the eye looks with its eyelash and now, let's go to do the same in the other eye This is how it looks, it gives a pretty nice expression, and now we are going to do the eyebrows. For the eyebrows I am going to use the color of the hair, in this case yellow, and I am going to take a point above where we have the eyelash, that is, here, in this way we count 3 points and keep it diagonally, that is, for the upper round, 3 stitches in the upper round like this and we do the same on the other side this is how the eyebrows remain, this is how the details of the face of this base body remain and now, we are going to put the safety eye caps, and we are going to try to fix the yarn on the inside of the head, so that they do not move, and that's it, they are like this and now we are going to continue decreasing, we are now going to make 3 sc and 1 decrease, six times, to to have 24 sc we are going to start filling in the head, like this, and now we are going to make 2 sc and 1 decrease, six times, to have 18 sc we finish filling in what we need, and now we are going to make 1 sc and 1 decrease, six times, to have 12 sc we make 6 decreases at this point we can finish off and cut, we are going to leave a long tail to be able to finish closing the head with the yarn needle, and also to make the nose that I already show you how we are going to do it then, with the yarn needle we are going to pass this yarn through the 6 front loops of the stitches that we have left, we pull and introduce it through the center of the closure, and to make the nose, as I had told you, we have 6 stitches available between the eyes, then we are going to place the two that are central, aligned with the bottom of the eyes.
So, on one of those two sides we take out the yarn, we count two stitches, we turn it around like this, taking it out through the first stitch, like this and we don't finish pulling because we are going to wrap it a few times with this same yarn around, I turned it around seven times in this way we introduce it through that same point we take it out from behind, we pull And that would be all, that's how the nose would look, that's how the face is ready, look how pretty it looks and now, we're going to make the ears. For the ears, we are going to make two magic rings of 5 sc, we pull, we are going to make 1 sl st in the center, like this and a chain, and now we are going to cut to be able to sew these little ears to the head, we make the other exactly the same, and we are going to sew them to the head of the doll, approximately 7 stitches behind each eye, in the direction of the eyes, something like that is 7 stitches behind each eye, here I already have them sewn, I just realized that I told you that it would be a seamless tutorial, but hey, the ears do have to be sewn, but it's very little, and this is how this beautiful base body for a doll of approximately 21 centimeters high remains. Look how pretty it is and well, that's all for today's tutorial.
I hope you liked it, that you made it, and if you use this base body for any of your projects, and upload your photos to social networks, don't forget to mention me or tag me as @amistejiendo or Amis Tejiendo Momentos, on Facebook or Instagram, and well, we'll be seeing each other in the next tutorial, until next time!