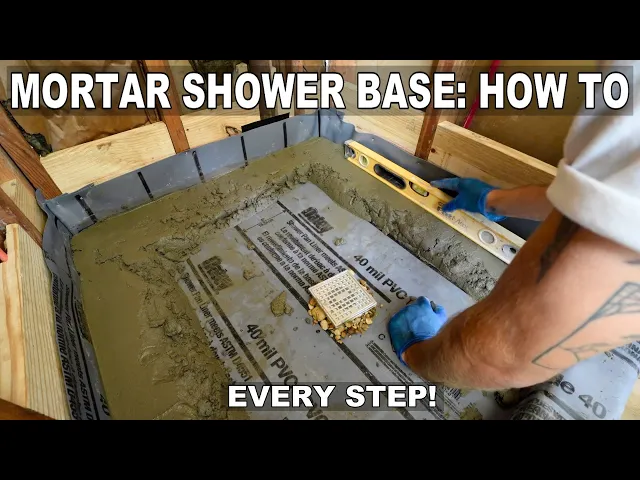
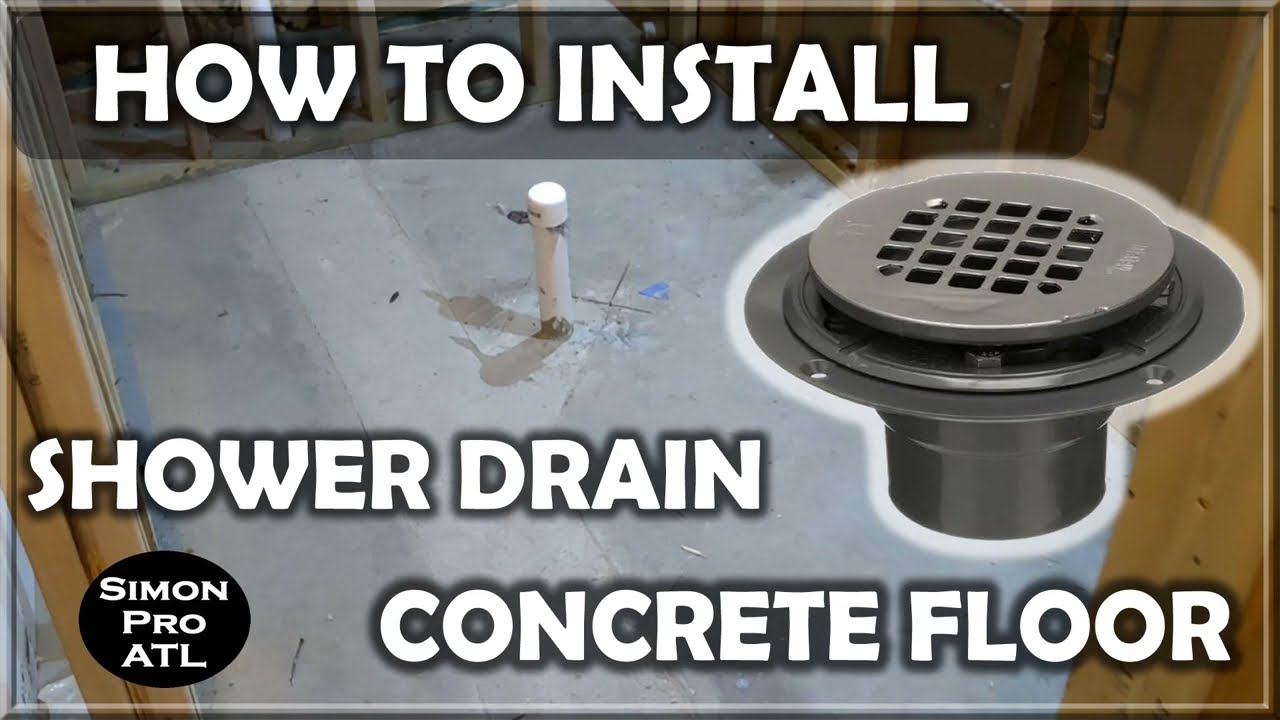
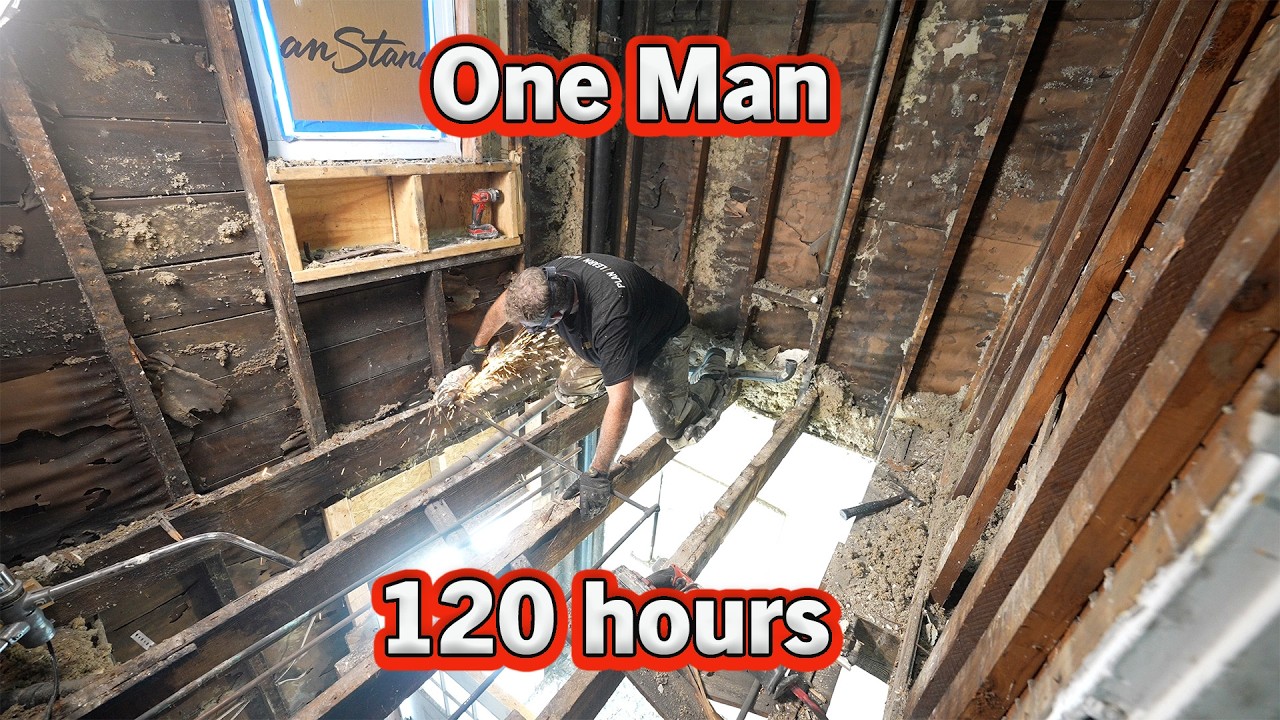
hey everybody my name is Mike Montgomery and today I'm going to show you every step for building a mortar shower bed from installing the drain all the way to being ready for tile so let's get started on Modern builds welcome everybody to the bathroom renovation this is the shower where I used to have a toilet tucked into this corner we've already taken that out and I'm going to be upgrading this bathroom from a half bath to a 3/4 by adding a shower to begin with we had some really damaged subfloor where the toilet used to
be but before I could tear that out I needed to get the drywall out so I had access to the edges of the plywood we're also going to need to replace this with fiber cement board before we tile anyways so this is a necessary step I split the subfloor plywood in half with my circular saw that way I could use a pry bar to get it Loose I was working around the 2-in PVC that I had a plumber install for the drain and it was a really tight fit there was basically no clearance around it
so getting this second piece of the subfloor up was difficult but it wasn't too tough we got it oh minut that was a lot tougher than I expected and we'll be putting down a new piece of tar paper between the decking and the new plywood I'm going to need to make some space for this drain and I've got a floor joist right here so I'm hoping we're going to be able to shift over a little at first I just cut a really small opening to make sure that there was nothing in my way and once
I knew that I was safe I cut about a 4 in Square to see if this pipe had wiggle room so I could sit more Square to the decking because it was previously leaning at Home Depot I was able to get the same thickness plywood as the rest of the subfloor in the house that's 153 seconds of an inch if I remember correctly I found what the center point of my drain was and from there I marked measured and then cut out a 4in hole for the drain to recess into I cut this out with
my jigsaw after making an accent hole with a/2 in spade bit this was also the perfect time to cut a new piece of roofing felt or tar paper and this goes in between the decking in the subfloor as well as between the subfloor and our first layer of mortar I'm cutting both of these pieces now because the plywood subf floor is the perfect template for the outline and the center point for the drain back in the bathroom I marked and cut my pvc pipe to the correct height so that that drain sat about a half
of an inch above my subfloor after I made the cut I cleaned it up and chamfered it with a little bit of sandpaper and then I did a dry test fit to make sure my measurements were accurate that should be perfect so now we're really making progress and this is going to start assembling quickly after I put my tar paper down I could throw down my plywood subfloor piece and screw it down to the joists under the floor decking this should have about an E8 in gap between the wall and now it's time to connect
our drain first I'll apply primer to the drain and once this this is on you'll want to let it set for about 30 seconds so you get a strong bond and next I can apply my cement in this clip I'm putting it on a little bit heavy but i' would rather do that than not have enough you can always clean a little squeeze out and you'll want to give it a little bit of a Twist to help the cement grab and it helps it slide on there more easily if I screwed this directly to the
subfloor it would only sit about a quart of an inch above it so I used these shims to get it to the correct height and I double checked it was sitting as level as I could get it considering we got it 90% more straight than it was when we started I'm happy with the result and now we're all cleaned up and we're going to move on to cutting the 2x10 blocking for between the 2x4 studs I used my 12-in speed square with my circular saw and make sure I got Square cuts it also just helped
make sure that I got them cut to the correct measurement because each piece was a different length and now this should just slide right in and once this blocking is in it basically acts as a backboard for our shower liner that way it's 100% supported rather than just trying to be nailed onto the 2x4 studs or something like that you won't be able to nail from every end so toenail where necessary and check out this custom piece that I cut so I could fit around all these wires it really wasn't too complicated I just used
my table saw to cut these grooves by raising the height of the blade to whatever amount I wanted to cut away and then using my miter Square I cut these dato grooves and this should hopefully give me the most amount of meat left on this wood so this whole perimeter is as strong as it can be let's check the fit it's perfect we took a little off the top but that nail actually is really sunk in there all good I got a pretty tight squeeze with everything but that really isn't necessary just make sure you've
sunk all of your nail heads in and I really am happy with how all this 2x10 blocking went everything definitely feels more rigid and our final step before our mortar bed is to build the front curb which is crazy simple I'm just going to cut three 2x4s to the same length that I'm ultimately going to end up stacking together and attaching to the subfloor this will all get waterproofed and you're going to see how it happens so make sure and stay tuned I measured off the back wall and double checked everything with square before I
nailed down each layer and after a quick length adjust I double checked the fit of my second layer of tar paper and once I knew it was a good fit I used it as a template to cut my wire mesh and I just use some tin snips for this the wire mesh is reinforcement for the first layer of this mortar called the pre-s slope and the tar paper is really a moisture barrier for while the mortar is curing you don't want the water to Wick away into the plywood too quickly and that's why it's there
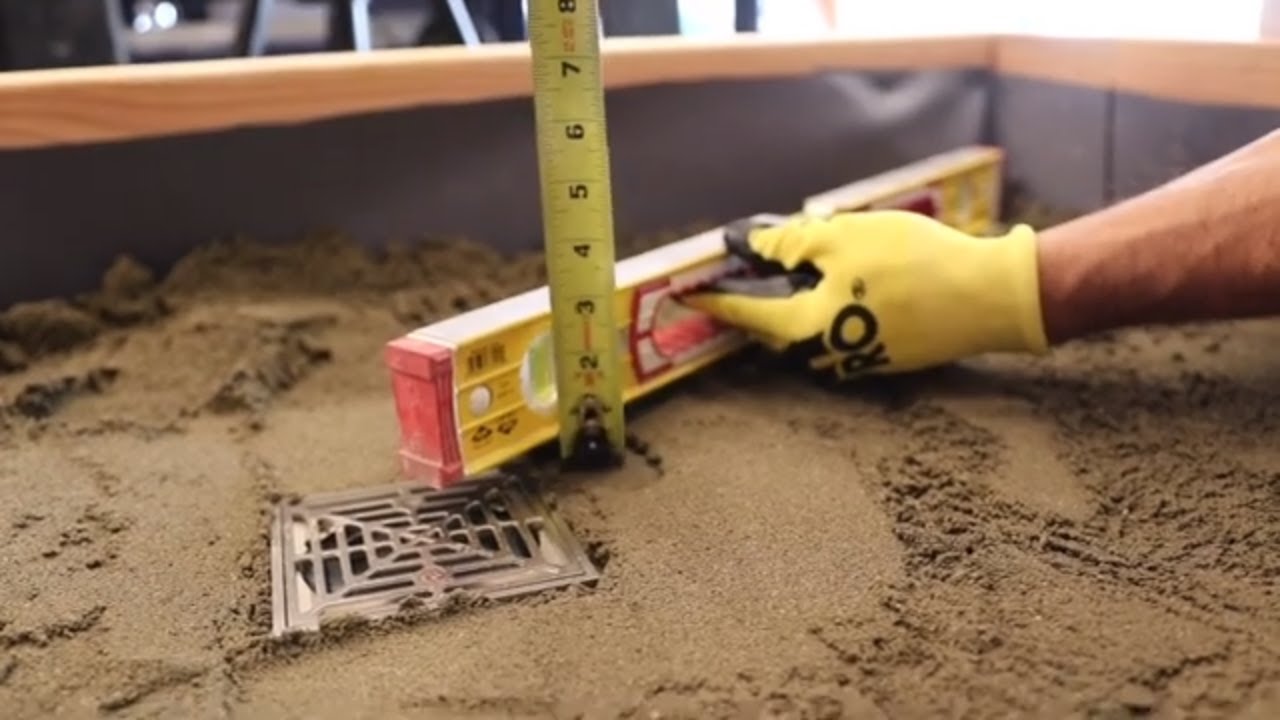
and now that everything's stapled down we are ready for our pre-slope mortar bed pour the math for figuring out your pre-s slope is actually really simple you just need a slope of a/4 inch over every foot plus whatever the height of your drain is for me a half of an inch around these three sides of my perimeter it averages out to about a foot and a half from the drain to the wall but I'm going to be referencing this far part that I mentioned it's about 2 feet a little bit less from that wall so
that means the/ qu inch per slope foot needs to be multiplied by two for a/2 in and then we'll add that/ in for the drain so now I'll use a level to make sure that I've got a really Flat Line 1 in up all the way around the wall I also see some people making a mark a little higher than they actually want to be that way it's always visible and I just say do what works best for you after disassembling these parts of the drain that go on after the membrane I used painters tape
to cover up the actual drain so I didn't get any mortar down there I also put a piece of t paper around this old vent pipe so the mortar doesn't interact with it at all and now it's time to mix I'll be using this m or Mye 4:1 mud bed mix which says it's ideal for shower beds with any product like this I would highly recommend just following the directions on the bag it's specially formulated and they definitely know how much water to put to get the best results but you want it to be able
to Clump up by hand like this and not lose lose its shape but if it crumbles then you know that it's still too dry I started by adding mortar to the back of the shower and getting that first bit leveled to the line that we made with our permanent marker then back filling towards the drain and these screeing boards are going to help making the slope really simple on one side I'll pivot from the drain because I want this mortar to be flush with it and then on the other side I'll use it to match
the line that we've already made it worked out pretty convenient that 1 in was the top of this 2x4 so we're just going to bring this down a little bit to match that and notice how this end is on the drain this is how we screed away the excess and now I'm going to switch to my shorter one so that I'm referencing closer to the edge instead of over here and one more time we'll go shorter and hopefully you can see how much closer we've already gotten on this first pass we're just going for a
B minus not an A+ yet and now I'll start cleaning some of this up with the actual trout and in this step you can really start seeing the shape get refined and then I backfilled any negative spaces or voids before doing our second screeing and now we are starting to look really really good I don't think I'm going to have enough to finish this out unfortunately it's going to be really close I just mixed up about a quarter of a bag by hand and as I went I constantly did that test where I balded it
up to make sure it wasn't too dry or too wet I followed the same steps on the front of this pre-s slope but I kind of stuck to the shorter screeing boards all right that was a good guess I don't think I had very much extra there and now I should be able to smooth this out by hand and totally blend it and this is where I would say we are going for that A+ or a minus remember it doesn't have to be perfect we are doing another layer on top of this so I really
don't think that could have gone better but we'll have to come back tomorrow morning to check to see how it cures and to do our final second pour but right now I'm going to give a very sweaty thank you to the sponsor of today's episode Squarespace for a long time Squarespace has been your One-Stop shop for an online store custom website or just a domain but designing your own website has never been easier now to blueprint Ai and their enhanced search engine optimization using the AI text prompt to describe your business and your brand along
with the website you want to create squarespace's blueprint AI takes all that information and then builds your own design template where you can edit infinitely from there there's also no limits to the number of products that you can sell using a Squarespace store whether that's a physical good a digital good or a service product and online customers have tons of payment options customers can pay with credit cards PayPal or Apple pay and now in eligible countries customers can buy now and pay later using clear pay and after pay and the last Squarespace feature I want
to talk about are there online courses you can use Squarespace as tools to build your online course from scratch turning your knowledge into income and you can choose whether you want that to be a one-time payment or a recurring subscription fee so to learn more make sure and follow my link in the description squarespace.com sodern builds where you can build out your entire Squarespace site without entering any of your credit card info but then when it's time to make your site live don't forget to use my code modern builds for 10% off your first site
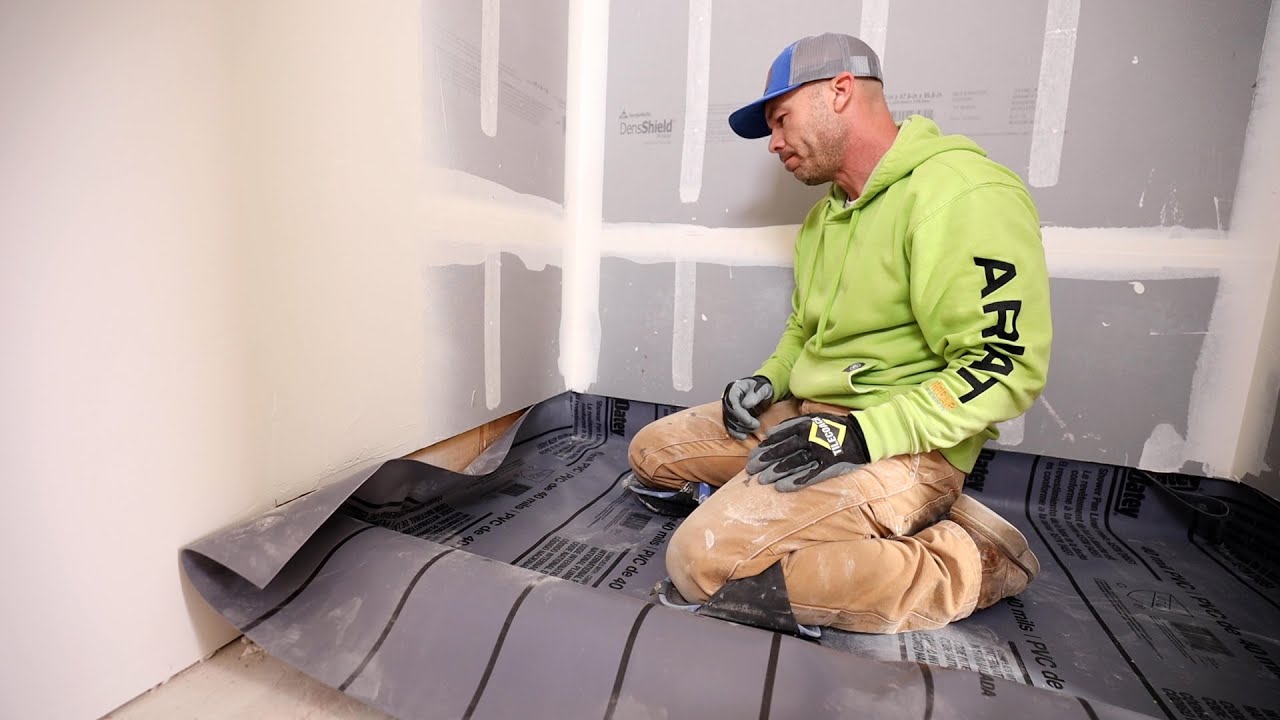
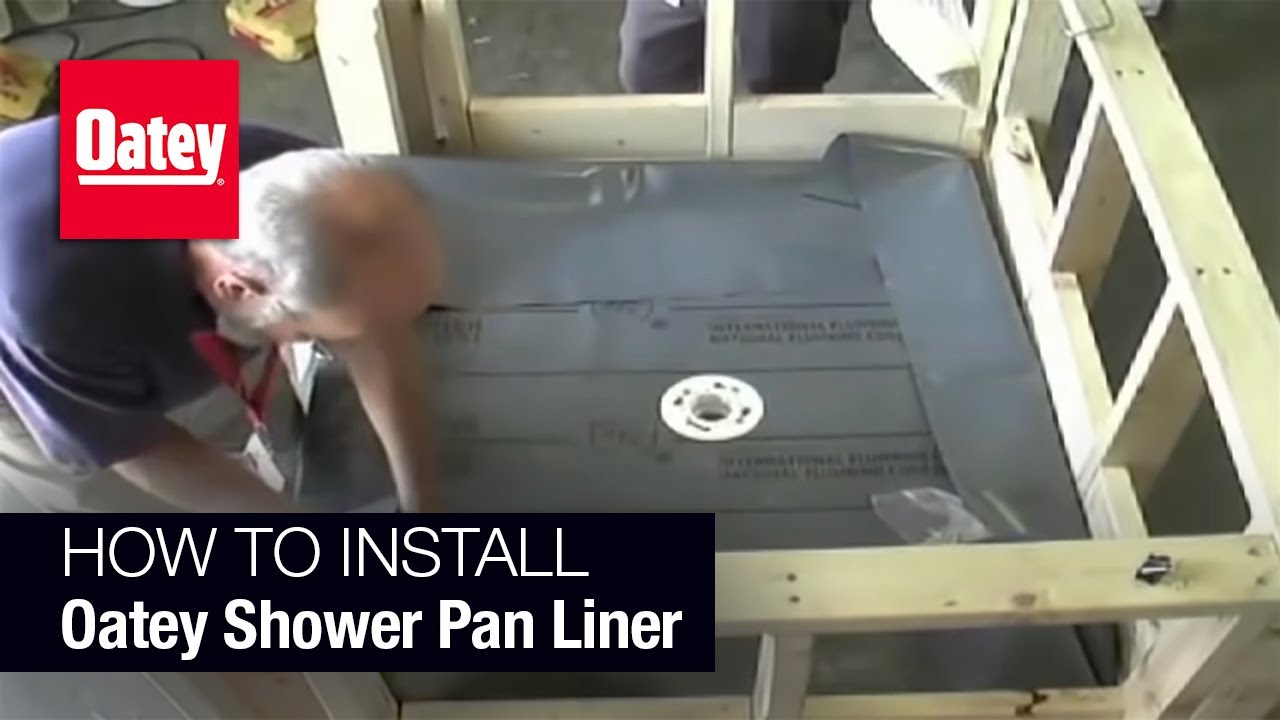
store or domain through Squarespace as always huge thanks to Squarespace for supporting modern builds content and you all for watching I'll see you tomorrow I have awesome news it's been a little less than 24 hours but our mortar bed is cured and looks awesome I'm going to scrape away a couple of these little loose pieces and get everything cleaned up and I'll be ready to install My Pan liner I'm going to go ahead and unfold this outside so I can sit in the Sun for about 15 minutes so it can flatten out and be a
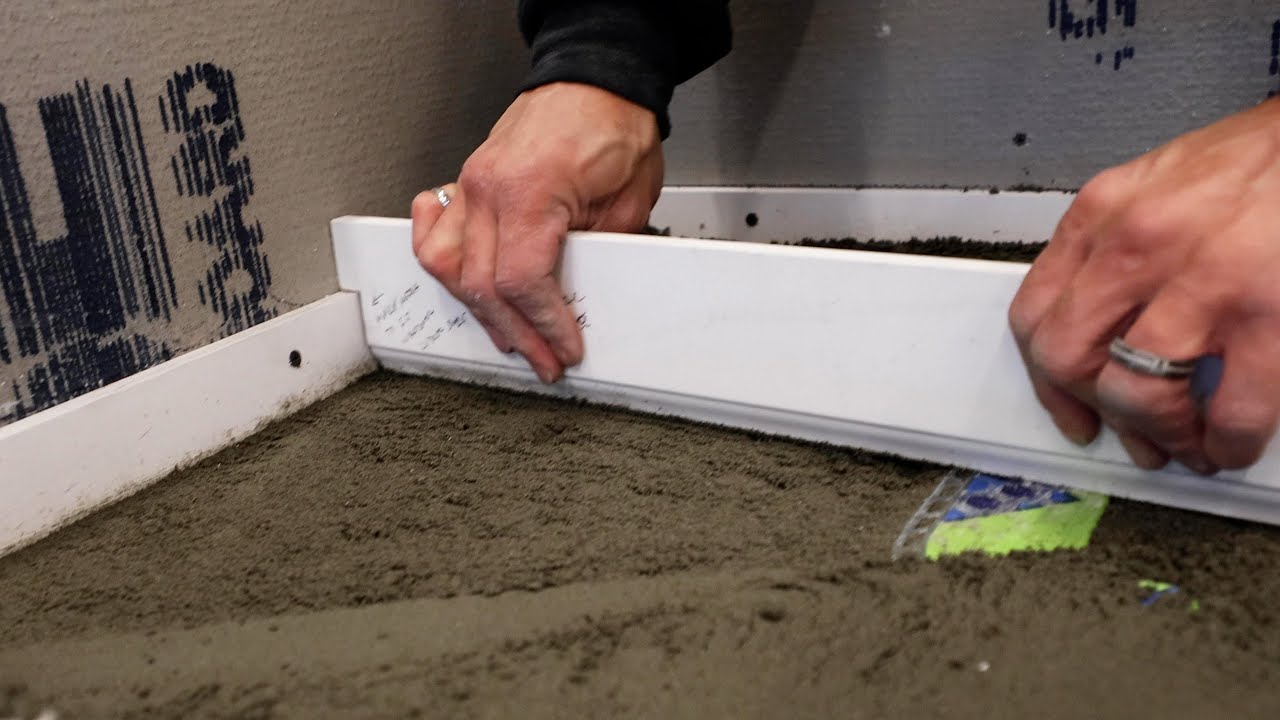
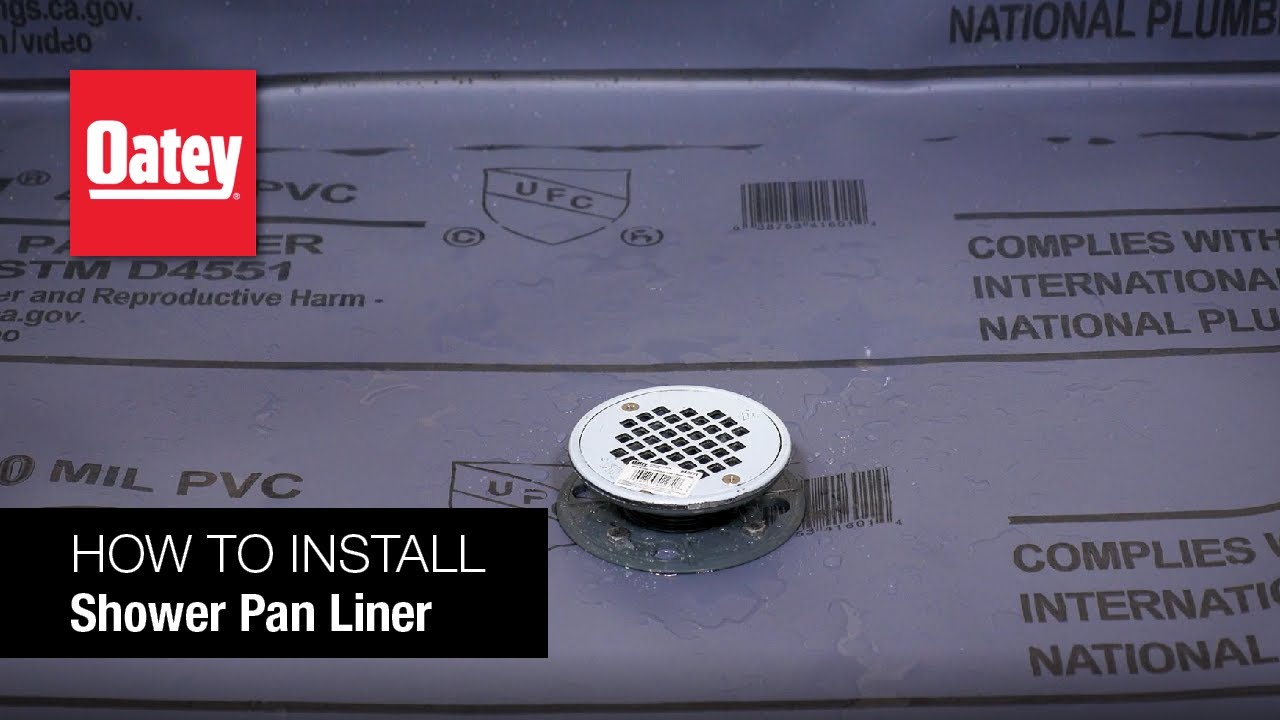
little easier to fold and while that's happening I'm going to measure for the liner the bottom here is basically 34 in wide and I want it to go up 6 in around the wall on all three sides and over the curb I used a straight edge and I would air on the side of cutting this an inch or so larger than you need you can always trim a little bit of excess once it's installed I used a little bit of silicone in between this drain piece and the liner just to make sure that there's a
seal that would never go bad and then plopped my liner in place and started lining it against the back wall and you want to attach to every stud you can also staple these kind of what that one ended up being and next we'll do a close-up on a corner and it's important that you just don't cut this corner instead you want to fold it so first I'm going to make sure that it's actually got no slack and it's in the corner nicely and then when I press into the corner you can see it naturally folding
on itself just like that in a way that folds flat without me needing to cut it I stuck a nail through all of those layers above where the cement board is eventually going to lay over the top of this liner and the steps on the previous Corner are really similar to what I did on this front curb you can see how I make a custom cut after I make sure it's folded into the corner really well and then with this extra cut off piece I used it as a backer piece that I'll glue on but
for now we'll just nail that in place and before the silicone dries will address the drain I used a utility knife to cut through where all four of those bolts can poke through after that I cut the center drain hole and next I'm going to use some of this PVC cement I used this everywhere I've already got overlapping seams but then I used these inside corner patches to make sure that everything is super waterproof I'll leave links to these and everything else I used down below in the description and I totally botched this corner but
I'm going to do my best to make it look decent either way I'll be certain it's waterproof even though it kind of looks tragic and there's no way I would leave this without a patch once the patch was on I was really confident that this is super waterproof but before I secure this down I'm going to make sure that the liner is all the way in the corner like pressed in and then I'll fold it over and then nail it here that way I don't have Fasteners on the top there's never going to be standing
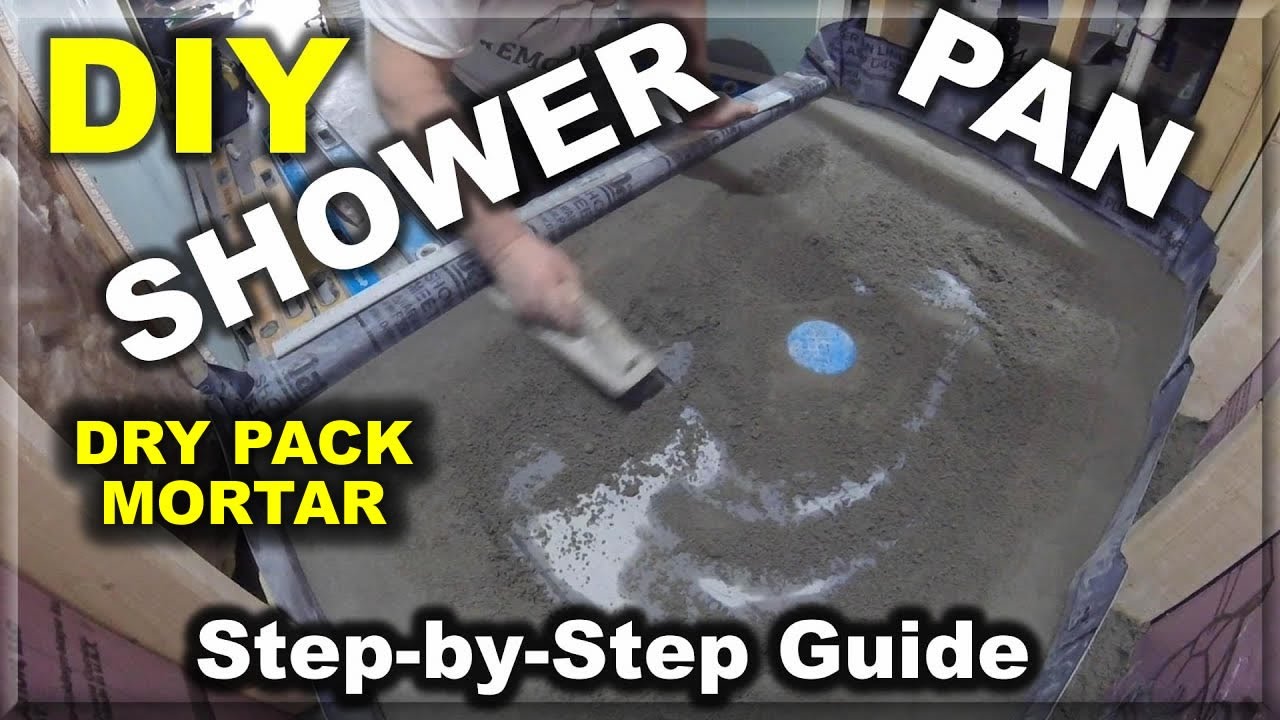
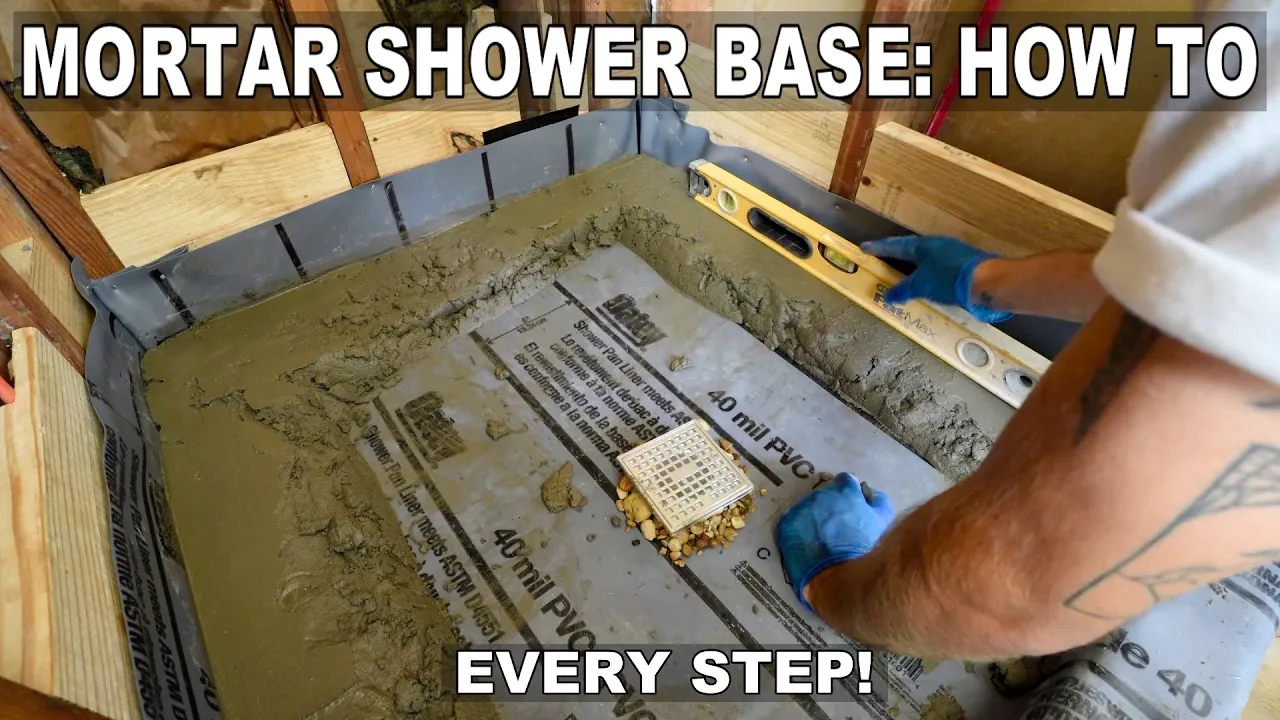
water on the steps so it's really not a big deal but we are now ready for our mortar bed now I can install this part of my drain and this is pretty similar to all drains and I'm going to raise this to about an inch and a half the same as a 2x4 and this is what I'll use is to mark my reference line around the perimeter and I'll make sure it's sitting level before I mark it remember we've already established the slope with the first coat called the pre-slope and so now we just want
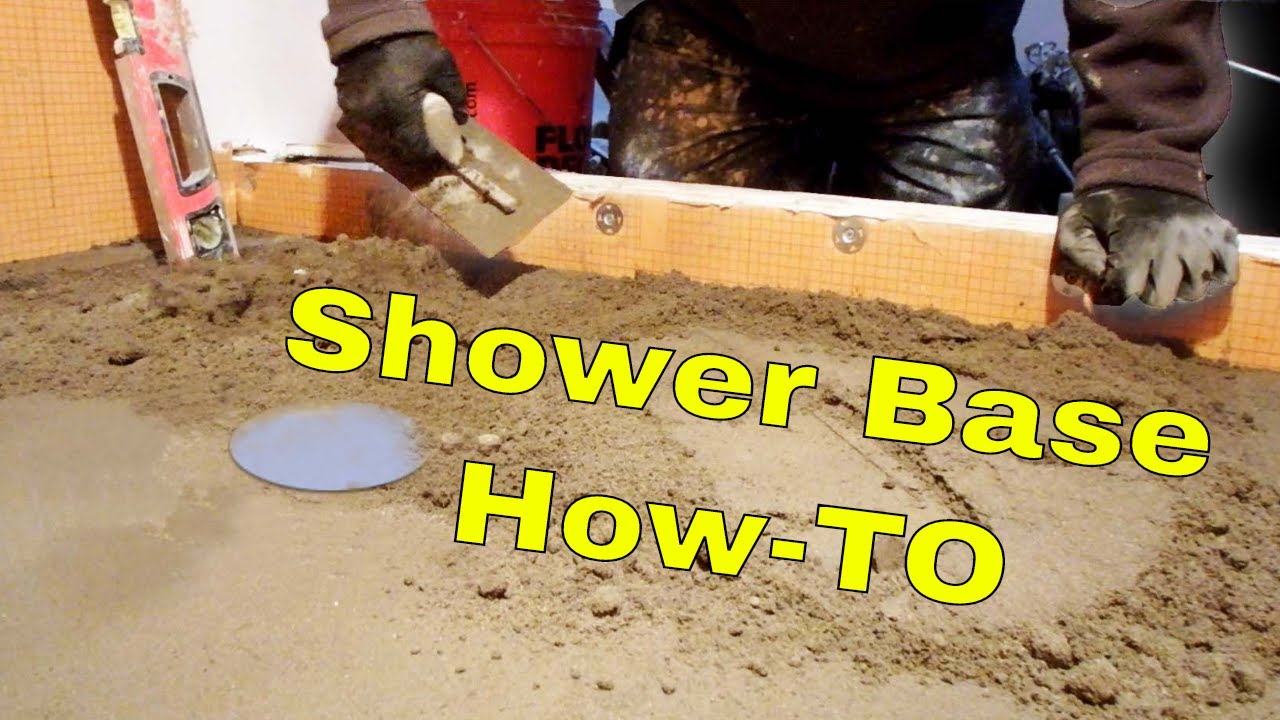
to match it maybe just make it a little more aggressive to be safe and it's a good idea to double check that you are in fact sloped and you can see the bubble there is by pretty much an inch that's perfect before I add my mortar I'm going to add this little bit of tea gravel around the shower drain this allows any potential water to weep through back into the drain and now we can add our mortar once again we're looking for a relatively dry mix here we're not looking for anything wet it needs to
hold its shape I'll start again here towards the back while I've still got easy access and this time before I get too much material I'm going to go ahead and flatten out the back and get it to the right level and if you don't trust your eye or if this seems difficult you could always use spacer boards around your perimeter right there's a pretty decent starting spot and now I'll work this way if you do that after you screed everything make sure you remove those boards I think that's a pretty good starting point again to
me this seems like a quicker easier method but you let me know down in the comments if you've done both that all looks close to the line I drew but now let's make sure it's level that's almost perfect the back is a tiny bit High the right side's High here I can tell then back there we're very close so this corner here is a bit High just try and make it to where we can see that line again wow that's dead level so is this one awesome perfect all right so now we can start filling
it in to me that was way easier than using spacer boards removing them and then back filling all of that mortar where the board was Dripping sweat I was hoping I wouldn't have to do another bag this is where I made a sort of tragic mistake I added a little bit too much water and this was my last bag of so I couldn't add more mix almost done hydrate it was a little bit too watery but it wasn't anything catastrophic maybe I was being dramatic a second ago all right now we should actually be screeing
here towards the drain the more I worked the mortar the more I got a little bit of water to rise to the surface but I got most of that out of there this is going really great we're going to go ahead and fill up the rest of this shower pan we're going to really make sure to pack it into the corner just like we did earlier and build it up to the the permanent marker line just like before we're trying to get this like 70% of the way sloped and then we'll get it refined on
the second pass so that's our first pass done I'm going to double check that we're sitting level around all of our edges before we do a final screen that's perfect so now I'm just hoping that this side is good which it's very close the front needs to come down just a tad so I just removed a little material with my TR oh man the front needs to come up a little bit now so we'll put a little bit back in we are now level yep that's perfect we just need to double check the front and
that's perfect you can tell I've got a little too much water in my mix because it's standing on the top but it's still holding its shape perfect which is the most important thing I didn't get the best footage during this second stage of the slope just because my body was in the way of the camera quite a bit and once the water had settled towards the drain I used a towel to wipe it all up before smoothing everything out for a final time I won't lie I'm bummed about adding too much water but we'll check
back tomorrow and see how it looks oh check that out even though it took a few extra hours for the water to Wick away from our mortar bed it looks great everything is sloping towards the drain but all of our perimeter edges are super level that's going to make tiling so much easier really quick I cleaned up the Chrome part of our drain I made sure it had the plastic cover on while we were doing our mortar bed pour and now we are ready for tile boom after a little framing electrical and drywall we'll close
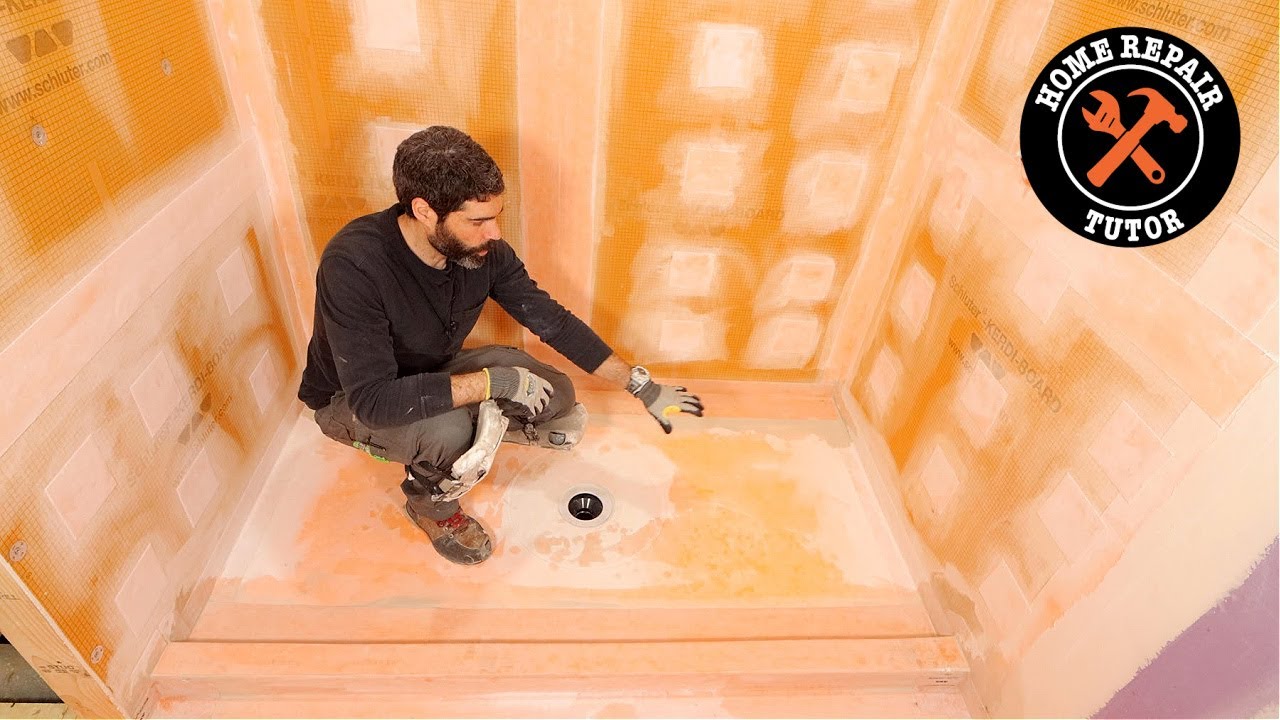
this whole thing up and I'll make a video on how to install the cement board and waterproof your shower wall and then we'll be ready for a full video on tiling the floor and the walls of this shower to complete the series so make sure to click the Subscribe and notification Bell below thanks again for watching this has been another episode of Mike's first flip it's Mike's first flip that's me see you next time bye