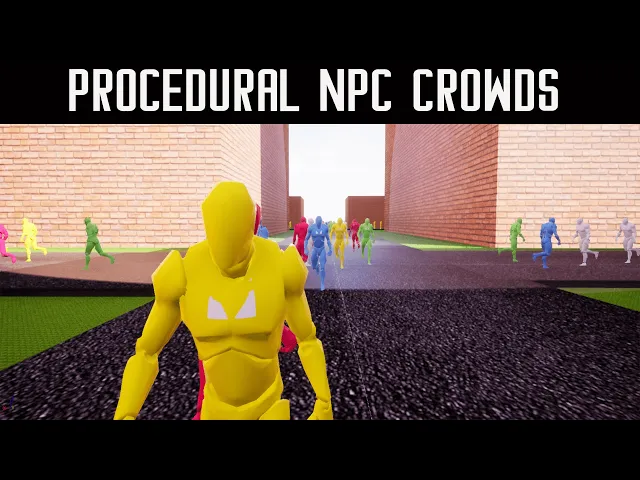
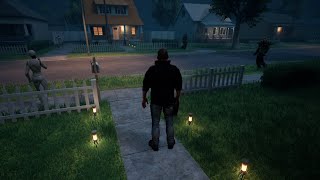
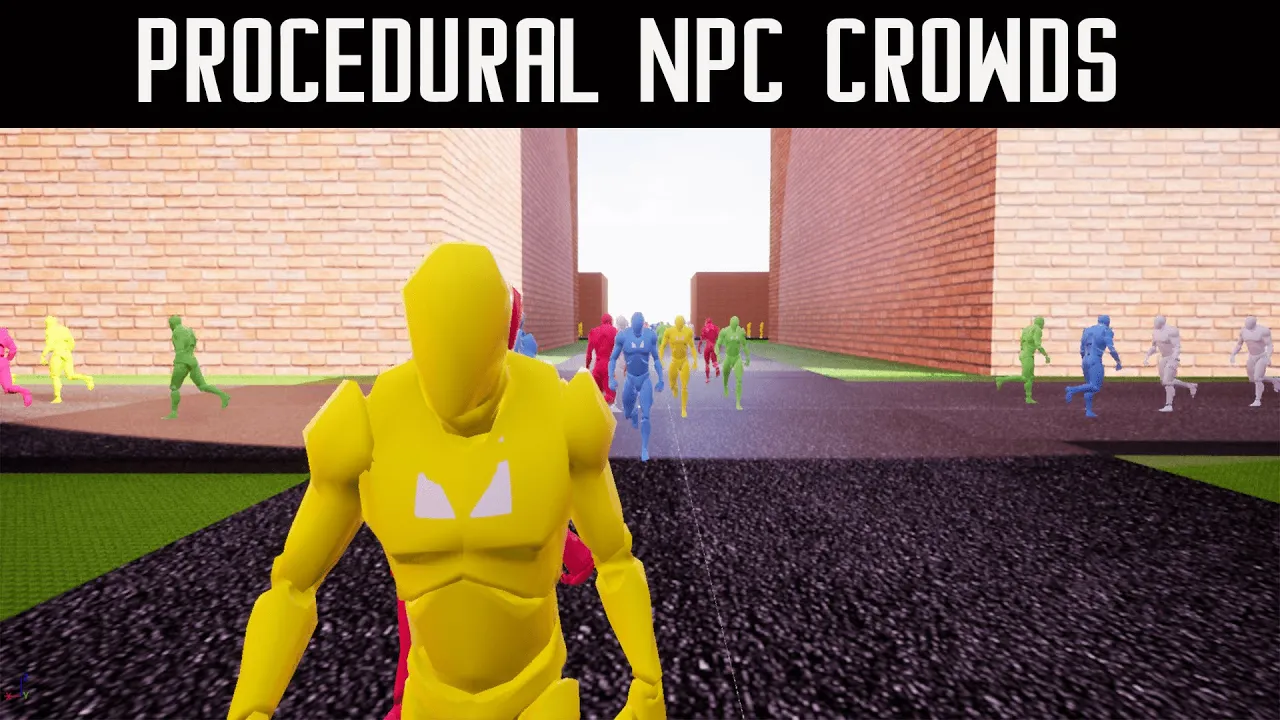
hi welcome to this tutorial and demonstration of the procedural mpc crowds from the unreal marketplace so what is this plugin basically it allows you to simulate large scale pedestrian crowd systems or even ai crowd systems uh for animals um while keeping it extremely performant so i have some demo content here and the main uh the main systems for the plugin and i'm gonna go and show you a demo real quick of what it looks like okay so as you can see you have all these ai walking and you can increase this if you want now this is an editor so we're not going to have very high fps but we're already at 90 fps with all of these ai there is not there's almost no fps drop so if we were to go into standalone game or the the actually cooked launch version of it from a package game um it would be above if it's at 100 now it would be at above probably 160 200 fps with all these ai and you can increase this amount too if you're okay with a little bit less performance so with that said let's go ahead and get into what's included with the plugin so we've got the demo content now all of this let me let me be clear all of this is deletable if you're going to use your if you're going to use your own behavior tree your own ai character that you already have and um then you can delete all of this okay if you do want to use the ai character and the behavior tree that i have it's totally fine uh just keep the behavior tree and the pedestrian folders everything else can be deleted though so with that said um let me show you real quick how you would set this up in your in your own game so basically what you would do is i already have one here so i'm not going to spawn it as you won't be able to really tell but i'm going to these in the pedestrian systems there's a path just drag this path in okay drag this path in rotate rotate it to the face you want to do and get the point that extrudes out so as you can see there's there's this point right here zoom in a little bit more there's this point right here so take that and go to the drag part and drag it out here okay the move tool and then if you want to extend it in either direction okay hold left alt on your keyboard and drag it out and then you can do that all around all around okay you can do it all around as many times as you want and that's basically how you set it up and now pedestrians and path findings and all that's going to spawn um so i can actually show you real quick so it's going to spawn extra around here because there's you know there's the spawner but that's basically that's basically how you do it um that's if you want to go ahead and skip the rest of the video you can just put that in there but i'm going to go and show you what the rest of this looks like okay so let's go ahead and delete this real quick okay all right so let's get into the first of the behavior tree the behavior tree think of these if you're not familiar with them think of them like little tick events that have logic on them so in this case we're just setting a vector and then moving to it on both of these okay these are the nodes that come with it so find next waypoint is its name okay and then there's wander so these are the two nodes that come with the plug-in this can be used for scaring wandering around in random locations uh patrolling areas okay this will be used for pathfinding or any anything that needs them on a set path or procedural path okay so that's that so basically you set the variable and then you move to it now one important one very important thing about the behavior tree is the object to use i'm using vehicle but you have all these collision channels the object to use needs to be the same has the waypoint okay so on the waypoint box slider this needs to be box letter this needs to be set to vehicle so this and this variable need to be the same okay now for the new waypoint which is right here the move to that's just an empty blackboard key i set up same with the random waypoint okay and that's basically how behavior tree works so it goes goes from left to right finds a waypoint moves to it and then if this condition is true activate wandering you wander it activate wandering is just pressing f on the keyboard for demo purposes okay so i'm going to go over the variables in here trace distance is basically think of that like line of sight like how far can they can the aic in front of them sphere radius think of that as their peripheral vision how big is their peripheral vision if it's something small like 100 they're only going to see a narrow a narrow area in front of them something 600 they're going to see a big peripheral vision okay debugging is just for drawing the sphere trace that it uses object to use we already went over that next waypoint vector that's the next half point that's going to go here so new waypoint find waypoint is used if they get lost so we're sitting at the new waypoint because we want them to go to the nearest waypoint around them find the nearest one and move towards it so if they're like lost in grass or they're lost in the street or something they'll move towards the nearest waypoint with this okay wander this is a this moves them in random directions uh by the way both of these are written in c plus but used to be extendable to blueprints so they're highly optimized which is how we were getting 100 fps in editor with all this ai okay so the random location this is random waypoint and this is the water radius so the main thing you want to change is if you want them to wander farther away you want to up this if you want them to wander in a smaller area like a patrol in a smaller area you want to move this down i'm keeping that 800 for now okay now there's a couple things for the project settings that we need to do to get this to work um is we need to go down to crowd manager okay and under max agents set this as something like 2500 and by default it's set to 50 and that means that there can only be 50 ai in the level that'll operate at a time so if you have like 150 ai only 50 of them will be moving and that'll cause a bug so set this like 2500 that way you know there could be a max of like 2500 ai in the level um that's that's a lot you're probably never going to have that many but just in case i always have it higher the other ones leave them at 2500 too these are for like avoiding different agents and stuff different ai different walls one thing you can do is you can resolve collisions this will help to make sure they're not stuck but it's a little bit more um a little bit more expensive but it'll make sure they don't get stuck on each other so i recommend that okay so that's the project settings and the behavior tree now i'm going to show you the spawner and the component for it so i condensed all the logic for spawning the pedestrian based on distance from the player to a single node okay and that is done by adding the crown spawner component which comes with the plug-in so when you install the plug-in you'll have this and then you just type in the spawn pedestrian npc crowds it'll give you this node now each one of these variables i'm going to go from very briefly the distance to spawn is how far away from the player should they start spawning the max spawn amount is a exponential incrementer so that means that one would be the default so that means the default amount spawn so it'll spawn one ai per spawn point zero would mean zero spawn and then two three four etcetera increments now remember you're spawning hundreds of ai so if you increase this even two or three it cannot it can up the amount by 100 200 300 400 so just be aware of that okay it's exponential i recommend keeping out one or two one or two okay character height i put this at 94. you can leave it at zero but 94 will help make sure that the pedestrians don't get stuck in the middle of the ground because sometimes if it's at zero they'll spawn and it'll like their collision will be set properly and so they'll be stuck in the middle of the ground which you don't you know obviously don't want that that's a big bug the npc to spawn that's the character the character class that you have your pedestrian as in this case it's the one in the plug-in procedural separation you can set this to whatever value you want but it's going to make the ai spawn further apart and walk further apart so i'm using 250 250 leave the z-axis on zero or they're going to spawn in the air spawn rotation you can leave this at zero but i that's what i do um but this would let them rotate in different directions whenever they're spawning okay this is just running on a timer event you could put it on tick but i'm putting on a timer event to make it more optimized okay now that's that now the bp spawner works with the pedestrian class okay so it works with the pedestrian class so if you were to have your own pedestrian that you made make sure you add the pedestrian destroyer component and then set up the removed pedestrian node on a timer i'm using a timeline tick but you can use a timer okay now distance to destroy or distance is spawn i named it this is i need the variable distance to destroy but you'd want to leave this as the same variable value that you set in the spawner so in this case we set it to 8 000 you want to make you want to make this 8 000 too so that means that when they get greater when the distance is greater than 8 000 vectors they will be removed from the level and if it's less than 8 000 they'll be put back into the level and that way you don't have ai running around the whole map 10 10 miles away from you right you don't want that you only want them around the player okay so with this this is all optional this is just for the demo purposes of setting that wander bool in the behavior tree you can delete that if you need to you can delete this this is for setting the material to randomize it you can use the same logic for a skeletal mesh okay so you can change the scalable mesh so you can have like a bunch of different pedestrians uh models which is great and then of course it does the destroy by distance up here okay so that's the bp pedestrian and then the uh the final thing would be the path okay now this is the thing i showed you earlier you just drag this into your level and it works but if you wanted to modify the values of it that's what i'm going to show you here so it does all this on beginplay so it spawns everything on beginplay okay now distance between waypoints this is the variable you would change so right now it's 300 that means that the the all the waypoints the pathfinders in the level from the spline they're going to be 300 vectors apart consistently now if you want this to be higher you can make it higher but just be aware that the line of sight for the pedestrians they might get stuck or lost you probably won't get stuck but they'll get lost if they can't find a waypoint um and they're gonna have to find the waypoint again by you know moving around the level and stuff until they find one so just be aware of that just be aware that you know you want to keep this at a lower number for the pedestrian spawners just to make it you know very populated i am using the same one so it's 300 however you can use your own variable for this distance between pedestrians okay and this can be like 600 two thousand and this will spread out the uh pedestrians throughout the level so they're not so jam-packed flows together if you're going through a bustling city vibe um i recommend this but if you're going through like a more standard you know level and you only want like 10 a. i per per vector like per 500 vectors i would spread this out okay another small thing i wanted to let you know is if you spread this out you can up the um where is it the bp spawner right here you can up this max spawn amount because they'll be further apart so if we were to make this like three right but we made them further apart we made them you know 2 000 vectors apart it'll give the same feel but like they're farther apart so you see so we keep the same performance but we can increase the amount they spawn so that's a little tricky you can do okay and basically that that is all for this um just remember just plug the just plug the uh the pedestrian path sorry about that i was thinking for a second just plug pedestrian path in here and spread it out of the level that is basically how you use it i just wanted to go over the different the different um you know content in here uh but that is basically one more thing i wanted to go over is the optimization and the ai controller for the ai controller if this is this is only if you're using your own pedestrian already and you just want to implement the pathfinding stuff if you're using your own make sure that the ai controller that they use is a blueprint class uh detour crowd ai controller it works pretty much the same in like standard use it works pretty much the same as a standard ai controller but it allows us to um do things like crowd collision and stuff and it also is more optimized for high levels of pedestrians so use that um on on the pedestrian we're just running behavior tree on begin play that's all you got to do in there and then for the character optimizations a couple things i did was i set this to where is it optimization so on the mesh on the mesh i set it to only tick pose when rendered and enable update raid optimizations what update rate optimum optimizations does is it changes the tick rate based on distance automatically from the uh animation blueprint so you know if they're farther away we don't need to you know check their speed all the time right or something like that okay same with the character movement we want to change this to rendered update only rendered this is going to give us a lot of frames per second because a big um part of the performance is making sure the character movement component isn't ticking all the time so if we have like let's say we have 150 ai in the world we only need to really see the ones that are rendered right we only need to see them moving so you can also you know make your own logic for this too with lods and stuff but for this if you uncheck this the performance is going to go down a bit not a whole lot it's going to be about 10 20 fps but they will move off screen so just be aware of that if you turn it back on if you turn it back on that's um so just be aware um you know now we're at 100 fps right in editor so that's very impressive so just be aware if you turn that on or off it will change the performance um a little bit about 20 fps another thing you can do is on the mesh you can go to skip simulating bones so type in skip and under skeletal mesh you can turn this off to skip all bones and it should increase performance a little bit do be aware that if you're using ragdolls this will glitch out the ragdoll so keep skip simulating bones on if you're using ragdolls however if you're not using death rag dolls or the ragdolls keep this to skip all bones that's very important okay so now it's about the same but uh it it stops the physics sim which helps a little bit so that's an extra small little thing you can do i'm going to turn it back on okay the the um final thing i want to do is there's a note that i wanted to tell you about on ue5 with 5.
02 5. 0. 2 if you create a new project from that i noticed that the the ai will all be rendered at once it's some sort of like occlusion calling bug that they have i reported it to them so hopefully it'll get fixed in the next update but right now if you create a new project with uv 5.
0. 2 it might do that if you have an existing project from 5. 0 or 5.
0. 1 it should work no problem but for some reason when you create a new project from 5. 0.
2 it does that so i've already reported it to epic so hopefully they can get it fixed here soon but just be aware of that if you're using 5. 0.