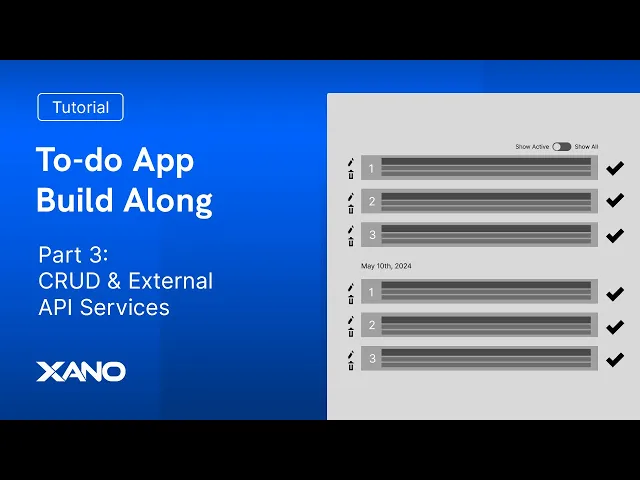
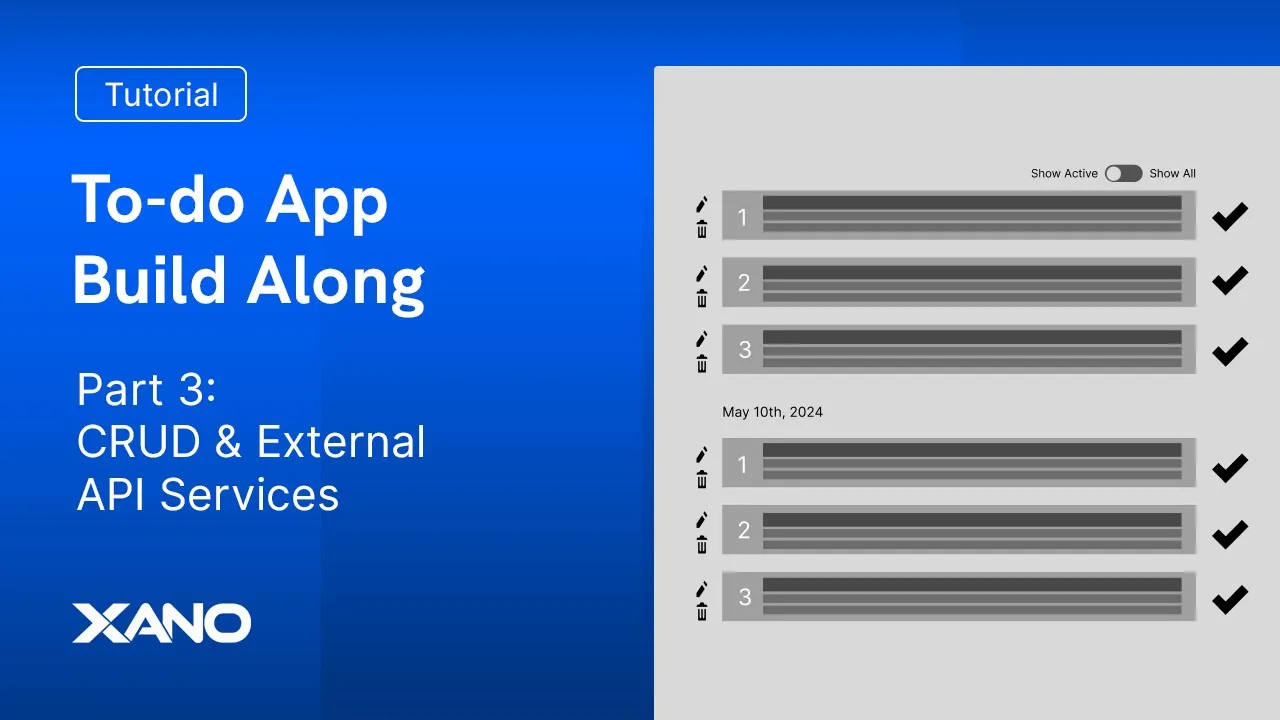
C here from Zano support and today we're to go ahead and get started on quering our data as well as manipulating it with our function stack and we'll also explore how to edit data and maybe even a little bit of deleting so let's go ahead and get started so hopping back into the to-do list what are we doing here well we're going to be quering data you can see that this data is aggregated looks like we have our dates the aggregated information you know all the actual tasks we have a toggle switch to show completed tasks or all of the tasks and a subscribe button if this is not your task then also on your page you'll have the ability to see all the same information as well as edit delete and complete your task so to get started we're going to head into Zano and what we're looking for is the query all task records uh you can create your own custom endpoint but we're going to keep it simple so for this what I want to do is leverage the user data table the username column so we're going to load the username into this endpoint or we're going to send it into this endpoint we're going to use that information to find the right user find the right task list and then load all of the appropriate tasks so let's start with a text input called username and another thing that we can also think about adding here for our inputs is this show active or show all a toggle switch which is just a Boolean field or a true false so we'll go ahead and add that as well let's select bolean and we'll say show completed perfect the next thing that we're going to do is want to get that user of that username so let's go ahead and do just that under database requests get the record of our user and I'm going to change the field name to our username so we're searching the username column using the username input and we'll click save I'll drag that up above and what I'll do is I'll add a precondition down below that if that username doesn't exists we'll just return a 404 and say hey this user doesn't exist so I've added a precondition and that condition is going to be checking if my user wants and I'm adding a filter here is empty this filter is going to return a true or false whether or not that user object is empty or null or zero or false anything of the sort what we have the ability to do is change our operators and I can say is not using this exclamation equals so is not empty or is not true rather and we'll click save here for our airor message we can say this user doesn't exist and we can copy and paste a into the payload our air type will be not found and we'll click save so if this user isn't found then uh we we'll throw this air if they are we should just be able to return our tasks so you can see I have Cameron's username here and if I run it that user does exist but if I change this to just Cam that user doesn't exist so perfect let's go ahead and just ensure that we have a username that we can pass in to test now beyond that we want tasks only relevant to this user specifically what we're trying to do is find uh tasks relevant to the user relevant to their task ID so or their task list ID if we go ahead and head to this add-on what we can do is we can select let's just create a new add-on so we'll create a new add-on and we'll select it from our to-do list and we'll select a single item and we'll say that we're mapping the to-door list. user ID with this users user ID so we'll call it to-do list of user and um I'll actually add V here just for distinction and we'll remove this underscore and it should automatically be mapped for us so I'll click done and I'll click save and I'll click run again and no errors were thrown so let's just double check real quick uh what our user is returning so if I go to the debug and look at our user we can see that the to-do list of user V2 is returning our list information with the ID of one perfect so I'm going to copy this here so we have our user one. to doore list of user V2 then ID to get that actual list ID the reason we want that is because when we click on this query all records we want to go ahead and well configure our query so that it's only getting those relevant tasks so we'll select the tasks.
to doore listor ID and it needs to equal our user one. too list of user v2. and we'll click save and Save when we run this we should get all of the results relevant to this user so perfect the next thing that we're going to want to do though is we are going to want to change the way that this data looks this in list form is going to look different than how we want it grouped by dates here and so the way that we're going to go ahead and change that is by selecting our query all records we're going to go ahead to our output and click on this blue pencil next to our return where we'll change it to aggregate we'll have it grouped by our due date we'll call it task due date and we'll aggregate it by the order and we'll say that it will be in two list ascending form so we'll go ahead and click save and save and so keep in mind this is what it looks like now if we run again it changes pretty dramatically so what we have here is an aggregated or grouped uh data so in this particular object in this particular object within this array we have tasks that are going to fall under this due date and we have tasks that are going to fall under this due date the next thing that we're going to want to do at least the way that I'd want to approach this is by changing our dates to reflect what it shows on the wireframe we can do this by updating our variables but this is an array so we need to actually iterate through all of these items in the array to do so we'll go ahead and add a loop here underneath our query all records and the list that we're going to be iterating over will be our tasks so it's select tasks and we'll call each task a task inside here we're going to be updating our variable so I'm adding an update variable function inside this Loop and what we're going to be want to updating is each task.
tasks due date so task. tasks due date and what are we actually doing we have a filter a very cool filter called format timestamp right here let's get a converted timestamp into a human readable format we can go ahead and Supply this format and it changes this date here as well into uh a more human readable kind of kind of format so the way that we can get this data and how to format it is through the PHP sort of like glossery that we have here um and we're going to be providing characters that are going to convert what we're essentially passing into this format on the right hand side so left- hand side shows the characters that we can pass in the right hand shows the output the format here is going to be capital f space lowercase j capital S comma space capital Y you also have a time zone that you can go ahead and manipulate if you'd like but we're going to keep it simple and just keep it UTC so we'll click save and run again and you can see here that our task due date has now adjusted to match what it looks like in our wireframe perfect the next thing that we're going to need to do is iterate through each of these arrays within the main parent item that We're looping through and we need to now go ahead and get the appropriate task to load the way that we'll do that is by adding another loop so it's a loop inside of a loop and what we're going to be looping through is the task. tasks order so let's go ahead and add that here and we can call it item or we can call it order whatever helps you out but for the sake of this we'll call it order as We're looping through it now what we need to do is get all of the appropriate tasks the appropriate tasks will'll retrieve via query all records we'll search our tasks and we're going to configure our query to at particular things so first we'll start with the easiest the order the order is the item that we're currently iterating over so we'll just say the task stop order needs to equal the current order that we're iterating over and we're also going to want to make sure that this is the right date so tasks.
do date it needs to equal our task. due date and in this case we can go ahead and write out task I'll click save here for just a moment I'll copy the tasks due date because that's the column that uh we're searching again so the tasks. duate needs to equal the task.
tasks duate we'll click save and click save and just run this again real quick we haven't done anything but no errors is good the last thing that we want to do is just make sure that this is associated with the right task list so what we'll do is we'll select the tasks. Tod doore listor ID and we'll then get the same list from our user here so user one too list of user v2. ID and click save and click save after we get this data so we're getting this record here we're going to add it to this task order so what this looks like is an update variable so we'll go ahead and click update variable our existing variable or the item that we are going to be updating with this new value is that order item that we're iterating over so we're essentially saying yep we're going to take this item and replace it with more data it looks like our return variable here for our query all records is Task one so we'll just keep that as task one for each order item we're going to replace it with the found record and click save and run again what we see here is that we have an array and an array so we might need tojust this let's go to query all records we're going to go to our output and clicking this blue pencil we're going to switch it from list to single we run it again now it's a little easier to look at here perfect so we actually have now all of the information that we need the only thing that's missing I think is that when we're querying all of our records from our tasks we're not asking if we want to show completed or not so I'll click on step three to query all records from our tasks and I'll just make sure that I add an and and I'll select our completed equals our show completed that is if we go ahead and run this again perfect so none of these tasks have been completed so I'm saying show completed is false I'm not looking to see completed tasks essentially so one thing that we do need to factor in is whether or not we're showing the completed William the way I like to go ahead and proceed with whether or not it's exclusive or inclusive filtering is actually by introducing a conditional I just find it a lot easier to implement instead of introducing like any new parameters so what we'll do under our precondition we will add a conditional and in this conditional we're just going to be checking is show completed true because if show completed is true we're just going to drag our tasks here into the then then we can go ahead and clone this task and add it into our else and the reason we're going to be adding or modifying this statement is because if show completed is false that means we should be excluding all of the completed tasks which means We'll add an and we'll say completed equals false what this now does is allows us to run again so you can see I have a test that I have completed actually uh did recently Just Adjust that and then we also have this show completed equals true so if we run it again we get all of our values all of the information so just let's do a little recap here to make it make sense we have our get record from user we're going to be going ahead and getting our data and getting our to-do list of that user using this add-on from there we're simply just checking if that user exists if that user doesn't exist we're going to throw an error if that user does exist we'll proceed and we want to check are we asking for whether or not things have been been completed cuz if things have been completed that means essentially we're saying let's go ahead and show everything so we're just going to make sure that this is the task that belongs to us or this user otherwise if we are saying that the tasks show completed is false that means well we don't want those in our query so we need to tell the system task.
completed equals false get us all of those records where the tasks haven't been completed yet these would be like our active records from there we're going to keep the same names so that we can then use the tasks variable and the rest of the logic where we're going to go ahead and update that due date and of course you know we before we get too far ahead of ourselves we want to ensure that these query all records are going to be Aggregates but from there we update the date then we Loop through each record within this array and we take the order and we say for each order let's go ahead and find the appropriate task of this list of this user of this dudy and we then get that data and update it so that at the end it looks like this where we have an array of multiple items of multiple groupings with the tasks involved so we'll go ahead and click publish and we have now completed the ability to successfully query our tasks so if we show active this is going to be what we're saying no we don't want to see any that have been completed we want to see all the ones that need to be completed and then our show all is saying yes show everything even the ones that have been completed we're going to revisit the subscription in just a second what we're going to do is move forward on the edit and delete as well as completed aspect so let's go ahead and do that so to edit our tasks what we're going to do is we're going to go to our tasks within our API Group and we're going to find the patch so this is uh a traditional method that more along the line says we're editing something so we'll click it open and we can see that we already have the edit record tasks created for us awesome so if we click it open we get to see that well it's going to update with all of these inputs now sometimes you're going to be editing information where these inputs aren't here and we don't want to reset our data so let's go ahead and run this real quick and what we're going to want to do is find a task that we can pass in so let's head to our database we'll go to our tasks and it looks like task ID one will be what we proceed with so let's go ahead and make sure that we're authenticated as this user and pass in task one so keep in mind this task had information it had a task name a description and so on so if we click run you can see that we've updated all that information we've edited it that information is no longer there so how can we ensure that when we're editing something even if we're not passing in our inputs that it doesn't erase our inputs unless there's well inputs to update click on this edit record and it pulls open this panel and what we're going to do is we're going to Leverage our Expressions this is probably the easiest way to proceed you could see that this changed from input. too listor ID what we're going to do is introduce this expression syntax you can see that what we've done is introduced a filter as well as then a ternary operator or operation that's going to say we're going to update it if this is true otherwise if it's not true we're going to do something else and so what we're saying here is that in our input Tod do listor ID if it is empty so if that equals true then we're going to take this item and we're going to take its column and we're just going to provide its column otherwise what we're going to do is then Supply the input value so we're just going to go ahead and update everything else so what you'll see is that I just updated task name with the same expression as up above if we highlight it and then select command D or uh contrl D in this case we then highlight all of them simultaneously so you can see here we highlight command D and now we can type in task name all in one Fell Swoop without having to update everything else it does look like this guy here was not captured which is a little interesting so we'll go ahead and just update him and we'll move on to our description where we'll paste uh what we have up above highlight command D or control D and type in description for some reason it is not liking the following it should be updating all of them on at once that is a little interesting but no worries nothing that we can't overcome so we'll go ahead and just continue on with this expression we're going to proceed down all of our columns and update all of these values and click save so now what we're going to do is we're going to pass in a task name I'm going to go ahead and say task number one this is a test and give it the order of one it needs to be formatted in iso8601 format so let's provid it a string of 2024 0515 and completed it's showing as a zero it's the same as saying false so we'll just click run again you could see this information's updated but what happens if we remove this task name so if we go ahead and click run again it hasn't updated because we haven't actually supplied a value so it doesn't need to update again what we're saying in this logic here we're actually checking the input itself and asking is it empty because if it is empty if it's true then what we should do is take the value from the actual record itself otherwise let's use the actual input and so this expression it simplifies what we need to do because prior to this we'd have to get a record we'd have to update a variable and then we'd have to use some set filters and it would just make the process a lot lot longer but using this expression syntax allows us to do it all in one function so we don't actually have to do anything too crazy it's my favorite hack if there's anything that you learn from this it's that the expression andn txt is super powerful so that's how you edit your records but we also have in our wireframe the ability to delete and the ability to of course complete let's just double check our delete task and before we do that let's just publish this real quick and so we just want to make sure that that Prem middleware is attached when we run and debug this if we select Cameron here the user of this and say test task number one it did reset it looks like and we need to provide this 8601 format date so 245 we'll say 16 click run cool that's updated Chris is an admin so if we select Louie and try to run it's working perfect and so this is how you edit your tasks leveraging the Expressions your middleware and all the next thing that we need to do is take a look at how we can complete a task and so what I'd like to do is introduce a custom endpoint so we're going to add a custom endpoint by in the top right hand corner selecting add an API endpoint and our custom endpoint what we'll say is that this will just be a completed now we have the ability as well to introduce Dynamic content such as the task ID as you have seen there in my autocomplete what we're doing is creating an endpoint and saying this is going to be a variable this task ID let's go ahead and set it to a post and authentication will be enabled for the user authentication we'll click save first and foremost we are going to want to provide a task ID so we'll go ahead and click on this blue plus sign for our inputs add a table reference and say tasks so we have our tasks ID that's been populated perfect from there what we want to do is we want to go ahead and edit our tasks so we'll go ahead and edit our record we'll then look at our tasks what we're going to do is select the ID the field value of that input and then scroll down and select completed turn the eyeball on and select true we can go ahead and publish it don't forget to make sure that your middleware here has been enabled for security click save and then publish again but we did it so we've created this custom endpoint here very easily we've created our own name and then supplied a variable and said well we're going to be passing in a tasks ID this tasks ID is going to be an input here and then when a user has completed their task where they click on that checkbox this endpoint is going to be triggered we're going to send over that task ID and then we're going to find it within our data table and Mark it as completed so perfect we have the ability to get the data we have the ability to edit the data we have the ability to complete the data the last thing before we move on to the subscriptions is just deleting the data so if we go to our delete task sort this endpoint here you are going to want authentication enabled you are are going to want to ensure that your pre middleware has been created and then what we have the ability to do is well not much we really don't need to do a whole lot but we can change the response so Zeno allows us to create a custom response if we want and what I like to do is add these two little curly brackets to create an object and then add a semicolon in between and it automatically populates this uh text editor where we can then go ahead and provide keys and values so I'm just going to say status is delete with filters and I'll click save so that way when I go ahead and run this as me I can go ahead and click run and I get that status has been deleted if I go to my database and I go to my tasks and I look at id1 no longer there so that's perfect I'd like to make sure that the pre middleware is working the way that we want it to so I'm going to go ahead and select tas's ID select Louie click run and it's not working perfect the next thing that we're going to explore is our sub descriptions so let's just do a quick recap of what we've done so far well we have our to-do list we've manipulated our queries here we've grabbed our Aggregate and then manipulated it so that we can get actually all of our tasks and in in a list form here that looks a lot like this with our orders with our title all the content that belongs we've also introduced a method of being able to show active or show all we've also introduced the ability to edit our tasks delete our tasks and complete our tasks the next thing that we're going to want to do is subscribe to these tasks because once we've subscribed to these tasks what's next well when a task is completed everybody that's subscribed to it should be sent an email so we're going to explore postmark and their API and triggers and going ahead and sending emails so let's go ahead and dive into that to get started we're going toe do our database and what I want to do is I want to create a new data table for holding who's subscribed to which task so I'll add this table and I'll enter my data manually and I'll call this subscriptions and we'll keep it just like this you can of course always change your primary key type to be sequential or uid so on and so forth we will add the basic crud in points to the default group and we can go ahead and add our table what I'm going to do is I'm going to add two table references first off who is the user that is subscribed and another table reference to which task have they subscribed to that's it next what we can do is we can go ahead and click on this show references button and what we're going to do is head to this post subscriptions first we're going to want to ensure that this is authenticated so only authenticated users can subscribe after authenticated users can subscribe what we want to do is we want to go ahead and add this subscription based off the user ID and the task ID so if I wanted to go ahead and say that user 4 has subscribed to task ID 2 I can do that I'll click run and I'll head to my subscription table where I should be able to see that Louie has subscribed to the second test task from the API perfect from there we have one additional thing that I'd like to do I'd like to go ahead and delete a subscription I have uh the idea here that a user can subscribe and unsubscribe if they don't want to be here so we'll click this back button here under the subscriptions group we'll just simply go to this delete what we're going to want to do is just make sure that the user can delete what they need we don't have any access controls for our subscriptions within our premod or and it's not always a bad thing this app is lightweight enough that if we wanted to we could absolutely go back into those controls and change them but we also have the means of introducing preconditions here within this endpoint so what we need to do first and foremost is we need to get our subscription and we're getting our subscription because it's going to hold some information for us so let's go ahead and get our subscription and what are we actually searching well we're passing in a subscription ID so we're going to search the ID and we're going to use the subscription ID input to find the right record let's go ahead and move it up a little bit we're also going to want to make sure that this is an authenticated endpoint only the authenticated user should be able to adjust this endpoint from there what we want to do is we add a precondition so let's go ahead and add our precondition here and what we're checking is that our subscriptions one. user ID equals the ID of the off token so let's go ahead and click save and I'm just going to head to my subscriptions real quick and head to my output but make sure that that schema is right so it is going to be and we can change this to just subscription if you'd like and update our reference so we have our subscription.
userid where in our precondition we're just making sure that our subscription. user ID equals the user who is authenticating otherwise this user doesn't have access to perform this action cool copy and paste that into the payload air type will say unauthorized and click save otherwise they do have permission and we can go ahead and delete that record so let's go ahead and run this real quick I'm going to run this as Lou actually I'll run this as cam first and subscription ID of one I don't have the ability to subscribe but if we change this to Louie and then click it we do have the ability to delete that record so you can see what is happening here is it's returning our subscription as it's found before it's deleted which is fine of course you can do that but it's not advised instead we should go ahead and introduce a custom status so I like to do just status and and deleted but of course Sano is so cool that you can change it to whatever you'd like and then have the front end respond appropriately so we're just going to change that custom output to status is deleted but we now have our subscription being able to be subscribed to and also removed so the next thing that we have to do is think about well when a status or a task is completed how do we send emails to everybody how do we actually notify everybody all at once that this task has been completed good question well what I've done behind the scenes is I've created a postmark account I've created a postmark account and added a sender signature of my email so that I'm allowed to send emails essentially of course you can do more you can add a domain or even more signatures it's helpful definitely for authentication to ensure deliverability right now just for this we're going to proceed with just the single sender using my email that's totally fine but we're going to head to our servers and we're going to click on this default broadcast string so you can see that I've sent seven emails in the last 30 days as I have been building this up but we can also click on this setup instructions when we come to our setup instructions you can see here that we have this curl code very easy to import this curl code but essentially all we need to do is pass this information and configure this information so that it sends an email to a user of course fully customizable in your own way but let's explore how to do that and where we set it up what I want to do is I want to focus specifically on the tasks so we have our completed or not completed I'm going to use a trigger very cool feature we can click on the settings in the top right or that little three dots and select our triggers and add a database trigger and what I'm going to call this is our send email notification this sends email emails two users who are subscribed to this task and what I want to have happen is I want this to send emails when this record is updated and specifically I want it to do so when the new completed equals true so when this record has been completed we're going to send some so what do we actually need to do first well what I am going to do just to even get started is I'm just going to head back before I've done anything and click on the complet it then I'm going to head back into my trigger and inside my trigger I'm going to go to my request history I'm going to wait for this request history to show up and if it does not show up that's because you need to go to your settings you need to go to your branch defaults and you need to go ahead and select trigger to enabled so we'll go ahead and click that and I'm just going to toggle this completed one more time and head back into my trigger where I'll go back to my request history refresh this and eventually we should see our request history show up where things have happened there isn't a thing that does happen inside this trigger so that makes sense but what I do know is that we want to go ahead and query all of our data from our subscriptions so let's just go ahead and do that there we go our request history showed up in the meantime and the reason I'm doing this is so I can grab my inputs and what I want that for is so I can test inside my trigger instead of having to go back and forth I can just trigger everything here and click run now there is no response in a trigger so what we will do is add a stop and debug now I'll go ahead and return my subscriptions and I'll click run again Louis's been deleted from that subscription so if we actually head back and our subscriptions and select uh we'll use my email here so this is Task ID number two that we're going to be focusing on here so if we go ahead and run this you can see that this user information has been found so here we have our uh subscription ID to our user ID of one is subscribed to our task ID of two from there what we're going to do is we're going to Loop through this array for all of our users now we are missing a little bit of information we have our user but we don't have their email so let's click on our query all records and head to our output where we're going to add an add-on and we'll create a new add-on for our user single item where we map the user ID we'll just call it user and we have our I like to delete that underscore and then we can customize our response because we don't need all of this information so we only want that email returned so we'll go ahead and select save and done and Save once we have this we can introduce a loop so we have all of this data coming back and it's going to be coming back like this with our user ID add-on we'll go ahead and call the list well we'll say that the list is our subscriptions and we'll say each as is a user what we want to do is introduce our external API request so this is how we make that bridge between xano and other third-party applications we have this import curl setting in the top right and where we're just going to paste that CR code from postmark and we'll click import very quickly we are now ready to send emails but before we do that I want to introduce some best practices first off we have this x postmark server token this is going to be our authentication so that postmark allows us to use their service what I'm going to do is I'm going to head to my settings I'm going to go to manage and I'm going to add an environment variable I'm going to call this post mode and I'm going to paste that thing that I just copied the Header information so the X postmark server token you can call it whatever you'd like but make sure you save it and heading back into your trigger you just want to go back to where it exists inside that external API request find it within your environment drop down and click update awesome don't need to do a whole lot more apart from change the two to be the user that we're iterating over so user and before we do that what I'd like to do I'd like just to see what that actually looks like when we run in D bu to see the schema so it's going to be our user that we're iterating over user. email so if we go ahead and reenable this and head to our two it'll be user.
user. email and click update and save we should now expect an email to be sent to cameron. beano.
com before we do that I'm going to drag my stop and debug inside my Loop and return the response of api1 so it's only going to Loop over once and we should see if it does send successfully so if we click run we can see here that air code zero message to cameron. beano. com so it did send successfully status of 200 is always a good thing before we proceed any further and actually take a look at that email we're going to do a couple more things we're going to first change this text here you can say hello dear user you can also customize your user response to return their name and then using tokenization replace that name with their name but we're just going to keep it simple here and say your or the task that you subscribed to has been completed and click update and then save what I also want to do is I want to ensure that this person doesn't get another email in the event that they have already received an email for whichever reason who knows but we'll go to our database head to our subscriptions and we're going to add a new column called sent or email sent no be a Boolean here so we can go ahead and Mark whether or not it has been sent true or false back inside our subscriptions I am going to change this custom query where what I am going to be looking for is first off I need to find all of the users where the task ID equals the new.
tasks ID and I can just double check the schema here cuz I believe believe that's it no it's actually just ID my apologies so we're going to ensure that it's new. id so first off we're finding all the subscriptions that belong to this particular task and we want to make sure that the email sent equals false because we don't want to send it to a person who's already received this email and very lastly promise we're about to test this under step 2. 1 or under our API response we are going to edit that subscription rate record so that' be field name of ID um well it's actually going to be our we're calling it user we're just going to call it uh user.
ID so maybe we do want to change the name that we're iterating over in our subscription list and call it just sub I think that is going to help clarify so uh we have our sub and it's going to have the ID so we're going to say that we're modifying our sub.