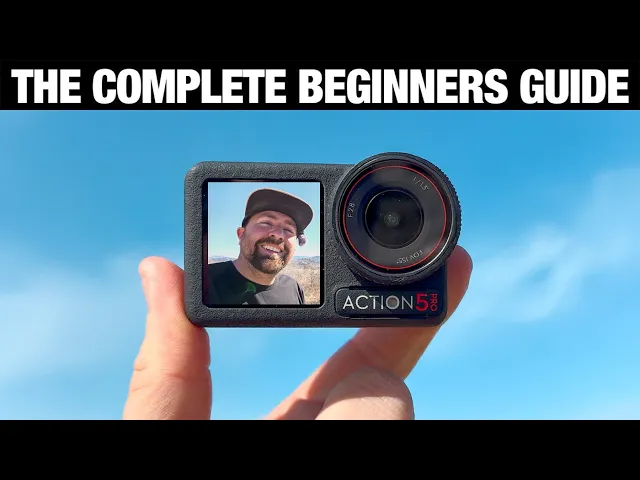
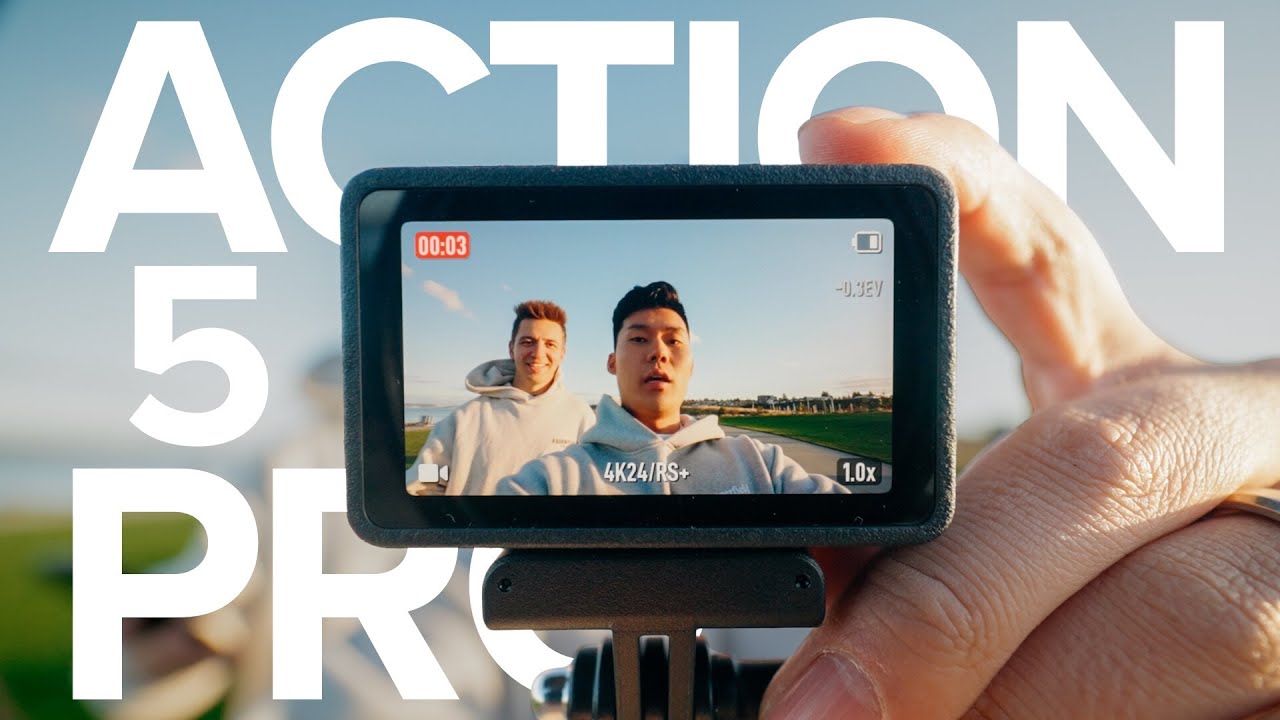
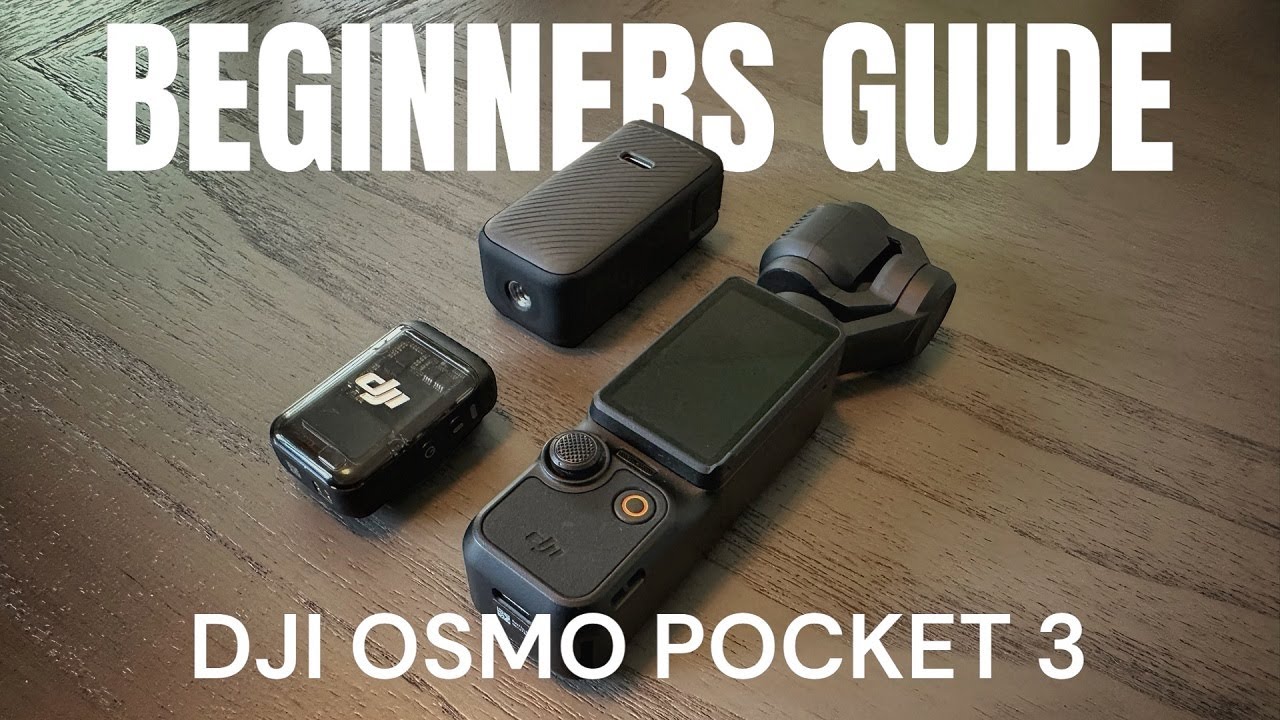
Welcome to your complete beginners guide for the DJI action 5 [Music] Pro in this video we're going to go through everything that you need to know about this tiny little camera so you can get up and running fast to make your videos now the way I'm approaching this is using this as both an action camera and a vlog style camera because this is a camera that you can put anywhere and Be able to get some really interesting footage that's really going to help you craft your video and tell your [Music] story so let me give
you a quick outline of what you're going to find in this video so I'm going to go through every button on the camera and how everything works and then we'll dig into all of the different shooting modes and the deeper menus so that you can understand how to use everything in this camera and then After you have a complete understanding we're going to go through how you actually attach audio and use this camera in a variety of ways to be able to get the best footage when you're out filming so if you're ready let's get
into it and I want to say a special thanks to DJI for sponsoring this [Music] video all right so the first thing I want to go over is just everything you're going to find on the camera Itself so you have two screens you have one on the back one on the front the front one is so that you could see yourself when you're vlogging or if you have the camera positioned in a way where you can't see that back screen well the front screen allows you to have a view of what you're seeing and there's
some different ways that you can change this front screen whether you want to see the full width of what you're capturing or you just want to see a Quick indication or you can even turn it off now on the side you have your power button and also your quick shot button so if you press and hold it's going to turn your camera on hold it it's going to turn your camera off and I'll go into some more features with the quick shots in a little bit underneath that you have a little door so you can
open this up and you'll see that you have a USBC so this is how you're going to charge the camera if you just want to charge it With the battery inside also if you want to transfer your footage off of the camera you can do that using this USBC now on the other side you have another door and this door is where your battery compartment is but it's also where you put a Micro SD card if you want to use more data than what's available inside the camera now on the bottom you have your magnetic
Mount so you could use this as a magnet hook it onto anything if you just want to stick it on there But also it has two clips and it works with all the different mounts that DJI offers to be able to clip it in and so this will never fall off when you're mounting it to something like a bike a car a selfie stick you don't want to just use that magnetic Mount you want to make sure that you have one of these mounts where it clicks in so that it will never fall off now
also on the front you'll see where it says action 5 Pro there's two microphones right there And there's also a color temperature sensor which is super useful especially if you're someone who's taking this underwater so you can get better looking footage under the ocean or pool or whatever water that you're in now also on the bottom of this camera you can't see it but there's a pressure sensor so this camera can tell how deep you are in the water or it could also tell you your altitude that you're out on the top you'll see these
three lines this is a Speaker so when you're playing back your footage you can hear it properly and of course on the front is your lens and this is completely removable so if you want to put other filters on this camera you just unscrew the clear filter that's on it and then you can put the other filters on so if you're someone who's going to be using D filters or you want to use something else like a polarizer well you can easily screw them on and off and there's a little rubber ring That comes on
and off the outside of this clear filter all right so that's everything on the camera itself let's talk about some of the accessories that you're probably going to want to use with this [Music] camera so when you're using the action 5 Pro the main thing that you're going to be using is this magnetic clip on the bottom of the camera this allows you to hook to different mounts and be able to Put this in interesting places so one of the main mounts that you're going to use is one of these pronged mounts has the two
prongs on it and you can hook this to a bunch of different accessories it's a good idea to have a few of these mounts handy so that you can have them on some different things and be able to clip this camera in and out one of the things that I personally do because I do a lot of overlanding is that I'll have one of these mounts on my Dash to my Jeep but then I also have one on a suction cut Mount so I can go from my Dash and then pop it off by just
using the magnetic use the quick release pop the camera off and then I can switch the camera over to one of my other mounts like on the side of my Jeep to get a side shot or the front of my Jeep and then I'll also have an additional mount on a selfie stick so that I can pull this out get a vlog style shot of myself or get a shot of me hiking or whatever I'm doing without having to go through and use the prong Mount and screw it on and off the different accessories it's
much easier to just have a bunch of these two prong magnetic mounts and mount them in a bunch of different ways that you're going to use this camera so right here I have the camera on a tripod with a selfie stick and this way as I'm making this video I can pop this out use the camera pop back on and I'm good to keep filming now if you're someone who's Going to be mounting this for biking there's a bunch of mounts that will hook to handlebars if you're going to be someone who's using this for
something say like Motocross and you want to hook under your helmet there's different sticky mounts there's a lot of different mounts that you can get and I highly suggest just go through dji's website and you'll be able to see all the different mounts that they offer there's also a ton of thirdparty mounts that Will work with the action 5 Pro now there's also a plastic case that goes around the camera and this is useful especially if you're someone who's going to be shooting vertical content because your camera easily clicks into this and now you could
set it up in a vertical way using the case so it has the same magnetic amount that it has on the bottom of the camera on the side of the case so if you are someone who's doing a lot of vertical content and you're going To be using the camera in this way the plastic case is an easy addition to be able to always have this accessible to put it in a vertical style it also adds an additional layer of protection around the camera itself now a couple other things that I personally use one is
the three battery charger this will be able to hold three batteries for the action 5 Pro and also you put it in this case plug in the USBC and you can charge all three batteries at once it's just a good Accessory to always have so that you have enough batteries for this camera and you can swap them out easy also it keeps them nice and secure in your bag so they're not all over the place and it's just super easy and small now I use this camera sometimes for Vlog style content just talking to the
camera and there's this additional Vlog handle which gives you a bunch of buttons on the handle and it also is a battery that will charge the action 5 Pro it comes With a USBC that attaches into the camera and you could also add additional things like a 3.5 mm microphone into the handle which you could use with the camera so it's a good little assess access to have if you're someone who is going to be using this camera putting it on here and like talking to the camera being like hey what's up we're here next
to this big tree and one more accessory that you might want with your action 5 Pro is a set of filters like I mentioned Earlier this is a set of ND filters that brings down the exposure so that you can add more motion blow into your footage now not everyone needs ND filters it's definitely something if you just want to get motion blur but not everyone needs motion blur the footage you get out the camera looks great without putting filters in front of it and so I'll include a link Down Below in the description to
where you can check out a page that goes through all the Accessories that you could get with this camera and you just need to find the things that will help you mount this camera in the ways that you're planning to use it because it is super easy to mount with this magnetic quick [Music] release all right for this next section let's dig into the camera itself and how you actually use it and I'm going to break this up in a few different sections that are more specific and you Could check the timeline down below for
the different chapters in this video if you want to look at something specific but first let's just go over what you're going to find on the screen itself and how you swipe and use the touchcreen so to turn on the camera you just press and hold the power button and you're going to start seeing an image right away now you'll see some info that tells you what's going on with the camera at that time so in the upper leftand corner You're seeing the amount of footage that you have on the storage method that you're using
on the right you're going to see your battery life now below that you'll see a one this camera does allow you to zoom so I can click this button here and I could zoom in up to two times now underneath that you'll see some settings that tell you what's going on with the camera what your settings are and in the lower left hand corner it shows you your mode so right now it's in Photo mode but you could click this and you could scroll through the different modes that are available in this camera above that
is the little play icon you can click this and you can see all of the previous footage that you've already shot so let me just show you how you could scrub through and see some different shots up at the upper left hand corner there's the four boxes you click that and you can see as I'm scrolling through here's all the footage On the camera and it's on the SD card I can click where it says 85 SD and I can actually switch over to my internal storage and you can see everything that's on the internal
storage so this camera has both internal storage and micro SD card and you can switch between them at any point and I'll show you where that is in a minute so you can scroll through and you could click any of the shots and it's just going to give you a preview and you'll be able to hear The audio and on the bottom of the screen you could scroll through the entire shot to see what's going on now at any point you could click back and it goes back to the main screen ready to film so
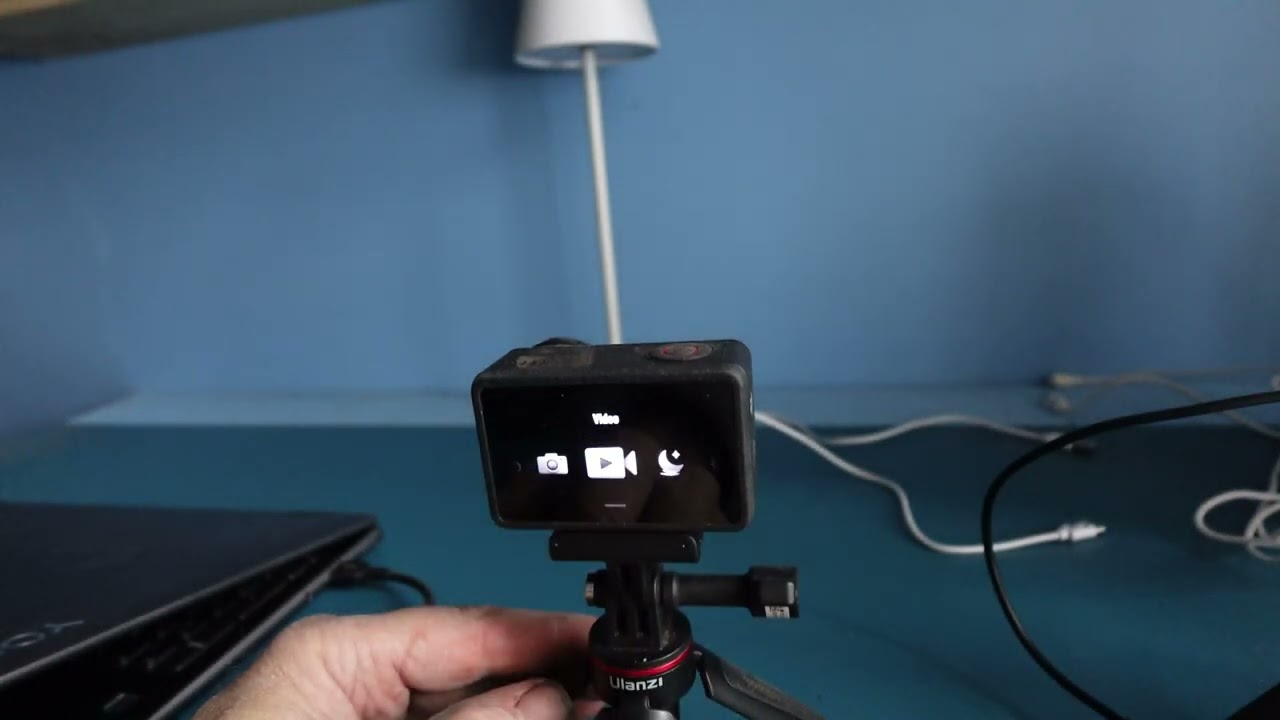
let's change some settings let's get your camera all set up so if you want to get into say video mode you click the little button in the lower leftand corner bring up your settings and then you could switch over to your video mode now if you want to change Your settings for your video mode you swipe up so you swipe up this is going to have all of your settings to change your camera so right now you see I'm in 1080P resolution I could switch this up to 4K 16x9 I could do 4K 4x3 if
I wanted to I could go all the way up to 120 frames per second but for right now I'm just going to keep it at 30 and then in the upper leftand corner you can change the width so how wide you want the lens to be or you could change your Stabilization so there's a few different modes you could set up here and we'll do a quick demonstration in a minute to show you the difference between all of them but you could set up your rock steady you could turn it off you could turn on
Horizon balancing basically everything was stabilization and the width you set up here now now when you're done setting up your settings you pull it down and you can start shooting by clicking the red button on the top of The camera and then you click the red button again stop recording now when you start recording you could swipe down and you could tell the camera how long until you want the screen to go off but it will continue to record so I just set mine to Never So now the screen is just always going to stay
on no matter how long I'm recording now I could pull this down and I could say 3 seconds so in 3 seconds you're going to see the screen go off But the camera is going to be still recording so it just has this indication on the screen that shows how much time has been recording but you're not actually seeing what the camera is seen and you see it here on the front too this is good because this helps preserve some battery life especially if you're not using the screen at any point you could slide this
slide this down and be able to set this differently and there are some other ways to use this camera When it comes to swiping up is all your camera setting but you can also swipe to the right or left if you want to change the mode that you're in so you can either push the button in the lower left hand corner or you could swipe to select and then if you want to change any of your exposure settings over here on the right hand side there's these two lines with dots you click this and it's
going to show you your settings and this is for exposure white balance it's also Where you're going to be able to set log up and right now I'm in full auto but I could click Pro in the upper right hand corner corner it's going to show you a lot more options and at any point you just click on the screen and it's going to pull that menu away now if you swipe down this is going to bring up the deeper menu which is going to be how you adjust more settings within the camera itself and
the front screen is also a touchcreen and it has all of the same Functionality so you can swipe down to bring up that deeper menu swipe right or left to change the different mode that you're in swipe up to change the settings of that mode basically everything that you get on the back of the screen you also get on the front of the screen and the reason for that is you could Mount this in different ways where you don't have access to the back of the screen but you still want full access to the camera
so everything is Functional no matter which way the camera is pointed and you could use either screen really cool feature to be able to use this camera in a bunch of different ways all right so that's the basic functionality of how the camera works now let's dive into some of these deeper menu settings and let's play around with the image a little [Music] bit all right so let's go over some of the different mode settings that you Have available when you're playing around with the camera so I'm in photo mode right now if I swipe
up I can turn on and off a countdown so this allows me to to set the camera it's going to start a timer before it takes a photo so if I do 2 seconds click this button gives you two seconds and then it takes a photo if you go over to the right side there's this wide you could change the size of the lens and so in photo you have two options you have a standard Which is equivalent to like a 14 millimeter and it's also going to dewarp the image so it's not going to
be so bubbly and then you have your wide setting which is equivalent to a 10 mm so much wider but you're going to have some of that bubble it's wide it's going to see more Distortion click back at any point you have your aspect ratio so you could go from 169 4x3 69 or 4x3 and that's in both large medium or large so medium Setting is 8 and 9 megapixels and the large setting which is the full use of the sensor it's 36 and 40 megapixels whether you're in 69 or 4x3 if you're going to
be shooting photos I always suggest just shooting 4x3 because you're getting more of the sensor 16x9 you're just cropping in so you could always go in later and crop in on your photo you don't need to actually do it in camera unless you're trying to save space so I would just shoot large 4x3 unless you Need smaller sizes and then at the bottom you could do how many images you want to shoot when the camera actually starts taking photos so you could do two pictures in a second 3 6 or 9 or you turn that
off so it'll take a series of photos so if you're doing something like a jump shot well you might want to take nine photos so you make sure you get it properly now one other thing that you're going to want to set is whether you're shooting Jpeg or raw so you're going to click the two lines with the dots on the right hand side bring up your settings and then underneath the format it says jpeg or it says jpeg plus raw so if you want the ability to edit the photos with more depth later you'll
want the raw setting but if you just want Quick photos and you're not going to do much editing you could just use the JPEG and save some space all right let's go over to video cuz the settings are obviously a little Bit different so if you pull up in the upper leftand corner you have a few different video modes so you have video pre-record or Loop recording so with pre-record the camera is always going to be recording and when you hit the record button it's going to start the recording but it's also going to record
the amount of footage that you set here before you hit the button so if I have it set to 30 seconds when this camera is just on it's constantly filming it Doesn't mean that it's necessarily recording that footage but it's Gathering it so that when you hit record it's going to start recording at that moment plus 30 seconds before that moment so if you're worried about missing something happening like some crazy action set this up so that you make sure that you never missed the shot now there's also Loop recording which means it's just going
to continue and record even at when it's to the end of The card it's just going to keep recording over that footage so it's just constantly recording now in the upper right hand corner you have your your stabilization and also your width now when it comes to your stabilization and the width of what you're capturing it's going to change based on some of your settings so when you have it in off you have no stabilization turned on you're going to get more of your sensor you put on Rock Steady it's going to punch in Slightly
you put on Rock Steady plus it's going to punch in even more and each one of these stabilizations is depending on what your filming now one of the cool things when you're setting this all up you could go to something you could go to a stabilization mode like rock steady and switch the lens and you'll be able to see what width you're getting and it shows you the equivalent on the bottom of the screen so in Rock Steady your standard or the dewarped Mode is equivalent to a 15 mm your wide is equivalent to a
12 mm and the ultra wide is equivalent to 11 mm and in video mode you have access to this Ultra wide not just wide so if you're doing something where you have a lot of action maybe it's on a mountain bike or something you're going to want to switch to this Ultra wide mode whereas if you're vlogging or if you want to feel more like a traditional camera switch it over to the standard mode now when we go Back a menu this is where we could set up our resolution and our frame rate and there's
a bunch of different modes here it all depends on how you're going to use this footage typically I'm shooting 4K 16x9 30 frames per second if it's real time 4K 60 if I might want to slow down the footage but if I want some super buttery super slow motion I'll put it at 120 now when we go over to Super Knight mode this is like a low light setting and you could use this if it's Getting dark out you're shooting maybe at night in a city and there's some lights well you're not going to have
access to the same modes but it's similar so you swipe up you up to 4K 16x9 up to 60 frames per second and you don't have access to the ultra wide mode so your settings will be limited somewhat but you could shoot in lower light situations because of the bigger sensor on this camera and it optimizes the camera to be able to use it in these Settings where they're super low light now there's a few other modes that you have access to so you have subject tracking which is going to keep you centered the entire
time and there's a few different things that you could set up for this you only have access to 2.7k you have no 4K in this mode because it is cropping in on your footage to keep you centered the entire time and you only have access to 60 frames per second terms of width you only have access to The standard mode all right so let me show you how this subject tracking works so I've hit record and you can see there's a little green box around me and now the camera is going to follow me wherever
I'm at in the frame and because I'm shooting in a 9x6 vertical format you'll see as I move to one side and then the other side basically it's going to keep me centered the entire time and so the subject tracting is a great tool just to make sure no matter where you're At in the frame you're always centered now the next mode you have access to is your slow motion so when you're shooting in 4k 120 frames per second in the video mode it's still shot as if you're shooting real-time footage so it's going to
have audio on it and when you play it back on your computer it's going to be real time like this it's not going to be slowed down when you swap over to the slow motion mode it's going to automatically create the slow motion File for you and so you have access to 1080p up to 4K 4K and 2.7k is 120 frames per second 1080p goes up to 240 frames per second so if you know your clip is going to only be for slow motion you could set it here in the slow motion mode and change
your settings and it will automatically slow down the footage for you the last mode that you have access to is your time-lapse mode and this is for both doing a timelapse if the camera is say on a tripod or if you Want to do a moving time-lapse a hyperlapse you could set that up here so you could swipe up and you have the two different options time-lapse or hyperlapse and it's going to give you some different ways that you could set up your time lapse DJI gives you some modes that are already set up for
you so you have crowds clouds sunset or your custom parameters which allow you to tell the camera how often you want it to take a photo and for how long so if you Haven't don't have a whole lot of experience with time-lapses you could play with the settings that are already in here for you like sunset or clouds start learning what's going to work best for the type of scene that you're filming and you could do some custom ones as well and with hyperlapse it just has a rate that you want the footage to move
at so there's Auto which is the camera's going to create a hyperlapse based out of how long you record the Footage for you could set it 2 times 5 times 10 times 15 times 30 times so it just depends on how long you're going to be moving with the camera and how fast you want that clip to be so a good thing when it comes to time-lapse hyperlapse and all the other settings in this camera is go test them go take them out play around with all of these different settings to really get a good
feel of how you want to use this camera and which features are going to be the most Useful when you're out filming and just like the other modes you you can go in the upper right hand corner and change the different widths of how you want the camera to record whether it's standard wide or Ultra wide now when it comes to high prolapse and time-lapse in the upper leftand corner you could set your resolution 1080p up to 4K and you could say your frame rate which is either 25 or 30 and when you have your
settings all set up you'll see it here on the Main screen so I just turned on time-lapse I'm going to shoot for 60 minutes and it's going to turn into a 20se second clip and as it's recording you'll see a countdown and you'll also see as the 000000 goes up as you get deeper into the time lapse and it's the same thing with the hyperlapse however you don't see that indication pop up until you hit record and so you can see now it's recording and it's saying that I've done 10 second 13 14 15 and
made 1 Second of footage at the end so play around with these settings to find what's going to work best for the type of scene that you're filming [Music] in now we have a very different lighting setup it's uh super cloudy dark and right now I'm doing my audio with the DJI mic 2 which is just right here at my chest it's automatically connected and also I can record the 32-bit float file as well as the file that's being Recorded on the action 5 so you can have both but in terms of stabilization you have
a few things that you could do right now I'm on just the basic rock steady and the pole is kind of like bouncing all over the place now there's a rock steady plus option which I just switched to it's going to crop in a little bit on the footage it's going to be more stable but with both rock steady and rock steady plus if you do dips like you go side to side and the camera's Dipping you're going to see that Horizon dip left and right so now I've switched over to Horizon balancing and this
is going to keep the Horizon level even when I'm dipping the camera left and right so I'm going up this hill taking a turn the camera is at an angle but you're not going to see that angle so you can go up to 45° on either direction and the camera's going to auto rotate using the digital image stabilization and always keep it Flat now 4K 30 frames per second I can only go up to Horizon balancing however there is an additional mode if you bump it into 2.7k so now I've switched it over to what's
called Horizon steady and this is equivalent to like a 19 millimet lens so I can still get this kind of a shot but here's the cool thing I'm going to rotate the camera 360° the camera's now upside down and back to normal and when I was Rotating you didn't see any rotation so you can do a full 360° rotation spinning the camera around and always going to keep the Horizon level pretty cool feature especially if you're in like crazy situation where it's all over the place and you want to have that steady Horizon now I
switched back to 4K and I'm in the standard mode which is equivalent to like a 14 mm now this also Dew warps so you don't have the bulbing edges and it looks more like a Traditional camera what's pretty cool is you go from standard to wide to ultra wide and this is equivalent to like a 14 but when you go over to the ultra wide it's equivalent to a 9 mm now right now I have the stabilization turned off because the stabilization doesn't work if you want it the widest possible but if you bump it
into a rock steady on the ultra wide you get a equivalent to 11 mm so crazy width with this lens you can go super wide but you could also zoom in There is a digital zoom function that you can zoom in two times so just depending on how you want to shoot you have a range of focal links just with the different stabilization and different ways that you're shooting all right I feel like we've been going for a while digging into this camera there's still a decent amount that we need to go through but all
of my footage that I shoot with my action 5 Pro and all my other cameras I color grade using my set Of Adventure LS and in the next section I'm going to talk about your camera settings and where you set up log but how I typically shoot is I'll shoot in a log format and then I'll use my Luts that I've created from the different projects I've worked on over the years and it gives me a quick color grade so I don't have to go through and manually color grade each clip and also I have
a standard look that I like to use from videoo video across my channel and all The videos that I make and I've put them into a set of lots that you can find Down Below in the [Music] description all right let's talk about changing some of your pro settings because this camera works great in full auto but there are times where you don't want to just shoot in full auto you want to take control of your image to be able to get the best look for the scene that you're filming so I'm going to switch
Over to video mode and I'm going to pull up my exposure settings so I'm going to tap the two lines with the dots on the right hand side and this is going to pull up my auto and pro settings so in Auto you just have a stabilization scenario and it's either daily or it's sport those are the two options that you have access to now daily is for like walking around not a ton of motion little bit of motion but not like crazy motion and when you switch it over to Sport this is for if
you're high paced action it's on a mountain bike you're running with it it's on the outside of a car put it into sport mode and it will help the foot look better with the stabilization now also in the auto you have this image adjustment so you can click this hit custom and you could change the texture and the noise reduction so the texture is how sharp your footage is so you can bring this down if you don't want it super sharp And you can bring your noise reduction down if you don't want to have the
camera doing internal noise reduction this is going to be something that you're going to have to play around with and see what looks best for the types of videos that you make you can add some more noise reduction up to one and you can add some more texture up to two or you could go down to a minus two it really is going to depend on what you think looks best you could just leave it On default if it's not something you even want to play around with and you think the footage looks great out
of camera all the b-roll footage that I've showed you from this camera it's just on the default I haven't gone through and brought down the texture or the noise reduction for any of this footage now when you're ready to take control of your footage you hit the pro setting in the upper right hand corner it's going to bring up your pro setting And you could change things like your exposure white balance color your stabilization scenario and your image adjustment so let's talk about your exposure so when you click your exposure there's either some Auto settings
that you can tweak or you can go full manual so with the auto settings you can change the range that your ISO is operating in so you could go from 100 to 800 or you could go all the way up to 25,600 and so as you go higher in your ISO your footage is going to get a little bit more noisy and if you're some who wants less noise well you could change this range for the audio to only go so high and then on the left hand side you have your EV which is your
exposure value and you could expose brighter than what the camera thinks is auto or you could expose darker so for this scene here I'm going to expose three stops under what the camera thinks is Auto and you can see here the image Is super dark now if I go the other direction I can expose three stops over what the camera thinks is proper exposure and it's it's all completely Overexposed so you use this with your auto settings if you are getting footage that's a little bit too bright or a little bit too dark you could
go in here and just adjust your EV to change what the camera thinks is looks best make it a little brighter make it a little darker now you could take full manual Control by clicking the M lower leftand corner and now you have control of your shutter speed on the left make it darker or brighter and you have your ISO on the right and you could also and you could change spefic specific isos or you could also do the range 100 to 1600 100 to 3200 you could play around with this any way that you
need to to be able to adjust your exposure so the other thing you have access to in your PR mode is white balance so right now it's set to Auto I could go to manual set and set this to 5600 because I'm out here in the Sun and then when I'm moving around whatever scene that I'm in you won't see the colors fluctuate so if I was going behind this tree and then back out then back in well you might see a small shift in your color this way you don't see that shift when you're
recording and if you don't care about that and you just always want the camera to decide what the white balances just leave it on auto White balance now the next option you have access to is your color mode so you have 8 bit or 10 bit color in this camera and 10 bit allows you to do some more color grading so if you want to do some color grading in your editing software you always want to be shooting in 10 bit it's going to be more data but you're going to have more flexibility to color
grade later on now you have access to normal noral 10 bit or you have hlg 10bit or you have dlog 10bit and for me I'm usually shooting in either dlog or the normal profile when I'm out filming so dlog is going to make your image super flat it's going to be a completely washed out looking image but it allows you to do more color grading so if you are going to apply a lot or you want to go through and color grade each shot independently you would want to put it in the dlog setting so
you can get the most out of your footage and it's going to do things like preserve your Highlights preserve your shadows so so that when you go into your color grade you're going to be able to actually color grade the footage and you're not going to lose things like your Sky it's going to bring down your dynamic range so the image is flat but that allows you to do the color grading to make the sky look how bright you want the sky and how you want the Shadows to look and so I'm going to bring
back up my exposure and I have it on D 10bit dlog M and you can See there's this color recovery on the other side when I click this on you're going to see an image that has contrast and saturation however it's still recording the log the flat image so if you want to see the log flat image turn this off and you'll see what the camera's actually recording now in the normal setting the stabilization scenario is available sport or daily but when you switch over to log that option is not available so it's only something
That's available in that normal setting and so shoot log if you want to color grade your footage shoot normal if you want to be able to edit it without doing color grading or you're just like posting on social media or something like that 8bit if you're not going to touch the footage whatsoever but if you are going to play around with this footage always shoot in that 10 [Music] bit all right so let's dig into some of The deeper menu settings that's going to help you shoot with this camera so at any point you could
swipe down on the screen and it's going to pull up this deeper menu this more the more advanced settings the first one is your custom profiles if so if you shoot in the same way over and over you could set up a specific style here so let's go back to the main screen and let's set up a style so I shoot in 4k 16 by9 let's say I'm shooting at 30 standard Rock Steady Plus For shooting some Vlog style content now what I would do is I'd swipe down hit the little button in the upper
leftand corner hit that plus icon and it's going to show me all those settings and I can hit confirm now at any point if I want to switch to that set setting I just swipe on the screen and I could go to video one which is what I have set up with those settings now also if you want to switch modes and you don't want to use the Touchcreen that's what the quick shot button is on the left hand side of this camera so you just click this log video video photo and you could switch
through the different modes that you have set up and you could hear that it's actually talking to me so if I'm not looking at the screen I could just click this Vlog video video One video one is the one that we just set up now I know I'm in the right settings to start recording now if you don't want the camera to talk To you you swipe down and there's the button that says Qs you click this and you turn off the voice prompt the voice prompt is what's telling you video one photo Vlog whatever
and also in this quick shot menu you could set up which modes are set up on this quick shot button on the side so there's going to be modes when you swipe across that you'll have but you don't always have to have those all in the quick shot so let's say if I just want that video One and I want to take off photo I want and I want to put on hyperlapse and take off video now press the quick shot there's only two modes video one and hyperlapse video one hyperlapse so only put the
modes that you actually are going to use on this quick shot menu now at any point you could go back and you could trash this style if you don't like it so I go over to video one hit the trash icon in the upper right hand corner and I can delete it so you could Set up different modes depending on the way that you're shooting now there's also some modes already set up for you so if you're in this menu you can click this plus icon and you could scroll through all the different modes that
DJI has already set up for you there's Vlog there's fishing there's hiking there's skiing diving surfing a bunch of different modes that have some different characteristics to each one depending on the activity so again it's really comes Down to doing the customization to get the most out of this camera now back to this Advanced menu screen if you press the the little Sun it shows the brightness of the screen so you can turn this up or down the little gear icon is going to go into another settings menu and even deeper menu the little square
with the two arrows is your orientation lock so this camera when you're using it you can rotate it and the menus will automatically switch so you can see when I rotate this all the menus will switch and I can swipe up and the camera is now position for this vertical orientation switch back to horizontal everything is oriented back to horizont setting and also when you rotate it it's automatically going to adjust the orientation of the footage so when if I rotate it hit record it's now going to be shooting vertical content switch back to horizontal
with the camera not recording click record again it's going To shoot horizontal now if you don't want it to do that and you just always want to shoot horizontal or you always want to shoot vertical you use this button to use your orientation lock and so set the camera how you want it to be click this button it's going to lock that orientation now next to that is a screen lock you can click this at any time it's going to lock your screen so no matter what you do and you touch the screen not going
to change any settings And then you swipe up to get out of that screen lock now the next option is for voice commands so you can turn this on and you could actually talk to the camera and it will start recording so I could say start recording and the camera's going to start recording and I could say stop recording and the camera's going to stop recording so this is a useful feature if you need to be able to talk to the camera and you don't want to physically Touch it so say I had it in
my Jeep like in the passenger side facing me a little bit wider shot I could say start recording it's going to start recording I'll hear that Ding and I'll know that it's recording and the last button in this menu displaying the full front screen either on or off so when it's on basically it's going to fill this front screen so it's actually going to be cropped in but you're recording more than what you're seeing and when it's Off you'll see that there's black bars on top and bottom if you're shooting 16x9 cuz it wants to
show you the full width of what you're actually capturing so if you just want to use this as a quick reference say you're vlogging and you just want to make sure that you're centered you could leave this to on and then you always have that full Square filled with what's going on versus having it off and you're going to have black bars on there so it's going to be Even smaller of a screen all right so let's dig into the deeper menu the gear icon in the upper right so now you have some different options
here that you don't really need to dig in that often but there might be some stuff you want to turn on before you actually go out and start recording so the first option you have is for snapshot so at any point you can press and hold the record button when the camera's off it's going to turn on start recording in a setting that you Have set up and then when you click the record button again it's going to stop recording and turn off the camera this is called a snapshot it's a quick way to get
up and running fast with this camera without having to turn it on and then press record so you can have this set up to a specific mode or you can just have it set up to the last settings that you use so when you turn the camera off press press and hold the record button the snapshot will use those previous Settings and here's where you could switch what settings you want to have happen when you click your snapshot now also in this menu you have a single screen preview so only one of the screens is
going to show you what's going on you have wireless mic you have a boost lens so if you have a additional lens that you can add on front of this camera you have to use this setting to turn that on it's called the fov Boost lens you have your voice controls and You can go in here to change your language but also this is where your voice commands are so start recording stop recording take a photo and shut down you have an option for depth and altitude so when you're using this you could say oh
I'm hiking and parachuting and I'm going to display my altitude and you could do relative or absolute and so when we're recording you'll see that there's a little indication here on the side that shows you at what altitude You're recording at right now it says I'm at 0t pretty close oceans right over there so I'm a little bit more than 0 to one foot but but when you start actually going up into like the mountains up in the sky you'll see this change depending on how high you're going and it's the same thing when you're
diving down into say the ocean now you could set up your display to always be on or you could turn that off and you could show the style when it's off so you could just Have a little indicator or you could have timer show how much time is recording just depends on what you want you could have your screen record when you turn off it's that same thing when you swipe down you can tell how long until your screen turns off you you have a built-in mic as an audio backup so you could always have
your audio recording as a backup on the camera there's an option for a timer shooting so you can have this camera turn on at a certain Time and start recording in a mode that you have set up there is a USB mode so you could attach this to your computer using USBC and use this camera through that USBC there is a wireless connection so you can hook wirelessly to your phone and be able to use the DJI mimo app to control it and I'll show you the DJI mimo app in a little bit so we
could go through that as a secondary way to operate this camera you have your bit rate so if you want to do a higher bit Rate you could do that here and this is for video so you can shoot in a higher bit rate more data more ability to control your footage you could turn your sounds on or off so as I've been making this video you've been hearing the you've been hearing the camera beep and do different things you could turn that off if you don't want any beeps but I like to hear it
unless I'm in a setting where I don't want to hear it there's a grid so you can have a grid on the frame To help you with composition so you could do rule of thirds which is pretty standard you could do diagonal or you could do diagonal and rule of thirds it's kind of the same as dji's drones now there is an option in this camera to do time code and you could display this time code on the actual on the camera when you're recording so you could turn this on and you could sync to
your phone it will display your time code in the frame now not everyone really needs that But if you're using multiple cameras it's good to sync via time code now you can't Jam sync this camera like you can other cameras however if you get it close then you could use that time code to help you with your editing so for me I often have multiple Camas running especially if I'm shooting like documentary style content or I'm out doing an adventure it's good to be able to use time code to know when in the day something
was shot so that if something Happened in the morning I can know oh I shot some footage from the morning with the action 5 Pro but I also use this camera and I'll be able to sync them up and use them together so it's a good idea just to always have all of your cameras just synced as close as possible ible to time and day time code options to do some naming management you could do an auto power off so how long till the camera turns off with nothing happening on it you could do some
Calibration in here you could also go in here and adjust your storage if you need to format your cards and you could also attach your Bluetooth remote controller there's some time and date settings factory reset device info all of that now you can record both with your micro SD cord or the internal storage now if you ever need to adjust your storage you click the storage button in this deeper menu you could set where you want to record the footage so right now mine's Set to internal I can quick set it to SD card and
then if you click the storage button this is where you actually can format now I appreciate that DJI has put this so deep in the menu cuz you never want to accidentally click on this menu and then format your card with a bunch of footage in it so this is buried deep for a reason and you'll go through and you can format your internal storage or you can format your SD card but make sure you take everything off of it Before you actually format it so that's everything in the deeper menu now let's dig into
how you actually use a wireless microphone with the action 5 [Music] Pro so if you are going to be recording audio with the action 5 Pro you're going to be doing something like this the easiest way is going to be to use a DJI mic 2 because this is not only a transmitter that can sync with your action 5 Pro but it's also a wireless Recorder as well so to set this up you'll just want to make sure to turn on your DJI mic 2 go into your deeper menu and you're going to want to
scroll down to wireless mic so you'll tap on this and then what you want to do is on the DJI mic 2 is press and hold the record button until you see the green light on the side of the DJI mic 2 turn blue now what you'll want to do on the side of the DJI mik 2 is there's a little chain icon little link so you'll press and Hold that it's going to put it in pairing mode and then you're going to tap tx1 or tx2 it's going to pull up this screen and it's
going to automatically connect and now you could use your DJ mic 2 for your audio and you can see here's some settings so you shows you how much battery life's left how much data you have left on the microphone as a wireless recorder you could set your monitor volume so if you had headphones Plugged in you could what you're getting out of this microphone and you can turn that up or down you could turn on your LED lights you could turn on your vibration on the mic to you could turn on Dual audio recording so
that it's going to record in the camera but also on the backup as well so you have both you could add a low cut filter which I'm going to turn that off you could add your 32-bit float recording you could do an auto power off and you can also Format the transmitter in here so you have full control over this transmitter in the action 5 Pro and you can hook up to two of these transmitters so you can have two people talking and get wireless audio you could hook it to your shirt you could hook
it to your hat and now you just have audio and you could walk away from camera I often like to use one of these wireless microphones so that I can get wider shots and not always have to be so close to the camera And when you're using the DJI mic 2 when you're back on the main screen you'll see that your audio levels are at the top of the screen the green line that pops up so you can always see getting if your audio is too loud or too quiet it's all right here on the
screen [Music] now let's dig into how you use this camera with your phone so you can control the action 5 Pro and this is also going to be where you update the Camera so I highly suggest when you first start using your action 5 Pro hook it to the memo app so that you have the most current firmware so I'm going to pull up the mimo app and I'm going to connect the camera so I'm going to click the camera icon it's going to search for the camera and you'll see that the camera pops up
I hit connect it's going to go through and connect it's going to want me to join the Wi-Fi network that the action 5 pro has set up it's going To connect to that Wi-Fi and then it's going to pull up my camera view so you can see right here I'm seeing what the camera is seeing so I could control this camera completely wirelessly and on the side here is all your different modes so you have hyperlapse timlapse slow motion video photo everything in the upper left hand corner you have your home button click the camera
to go back to this menu you have your settings so you can do all of the same camera settings manual or Auto you could set up your resolution and your frame rate you could zoom in here and you can click the three dots in the lower leftand corner to adjust all your pro settings and there's some extra things in here that you don't have on the camera itself so there's an overexposure alert and there's a histogram so this is going to help you if you have footage that's very Overexposed so let's put it back to
a normal let's go to 400 ISO 800 shutter And you can see that the sky and all of this is overexposing you get these zebras that show you where your overexposure is and so let's bring this back to Auto and then also you have your histogram and this shows you all your exposure values from the darkest to the brightest and you can see where the exposure is so if it's too far to the right showing you things are Overexposed if it's too far to the left it's showing you that things are underexposed now in The
upper right hand corner you could set up your custom modes lower leftand corner you could see all your previously recorded footage it brings up your whole library and you could pull up your footage you you could go in here you could do your log recovery which is just going to bring up a standard look or you could go in and adjust manually all your settings now if you've edited your footage you made it look how you want it to you can hit export you could change Your ex your resolution you can export your video and
it's going to go to your phone this is one way that you could take the footage off your camera and just bring it directly into your phone and start using it in different ways in your social media or if you're editing using your phone if you're using this on your computer well what you're going to want to do is just plug in the USBC and then it'll load up like any other camera and you pull your footage off that way The memo app does give you some flexibility to do color grading and things like that
in the app itself go back to my photos and now this is on my phone and I could share it and you can see there's a little watermark in the lower leand corner you could take that on or off when you export your footage now if you do want to edit your videos in the memo app there is this editor button back on the home screen and you could go through and actually use dji's Editor to create little videos but you do have this option if it's something that you want to do on the DJI
app now I've switched over to the DJI action 5 Pro normal color I'm not going to do any editing to this I put the wireless mic so I could have a conversation with you and so that is basically everything that you need to know to get up and running fast with this camera like I said earlier go through find the settings that make the most sense for the types Of things that you're filming you could use this camera in so many different ways could use it like this in a vlog way you could mount it
to different things and get some really cool footage action style footage this camera has a lot of features packed into it that's going to be able to help you get the footage that you need for the videos that you're creating so if you have any questions or if you want me to dig into any topics deeper with the action 5 Pro Let me know Down Below in the comments and if you're someone who wants to make Outdoor Adventure Style videos well then you should check out this playlist right here which is going going to go
through a ton of different tutorials on how to make Outdoor Adventure Style videos with your action 5 Pro I'll see you over there