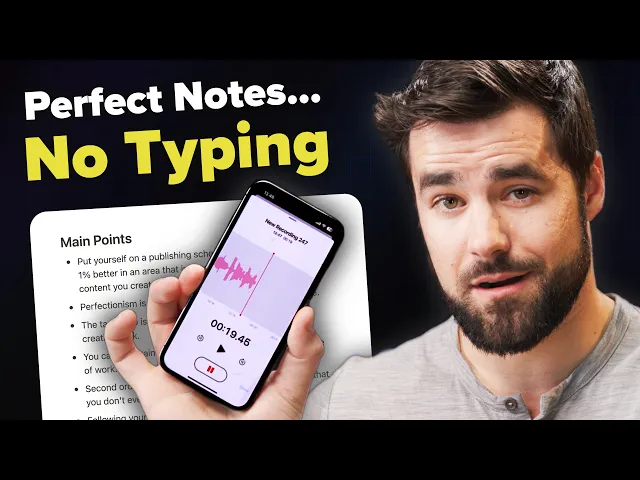
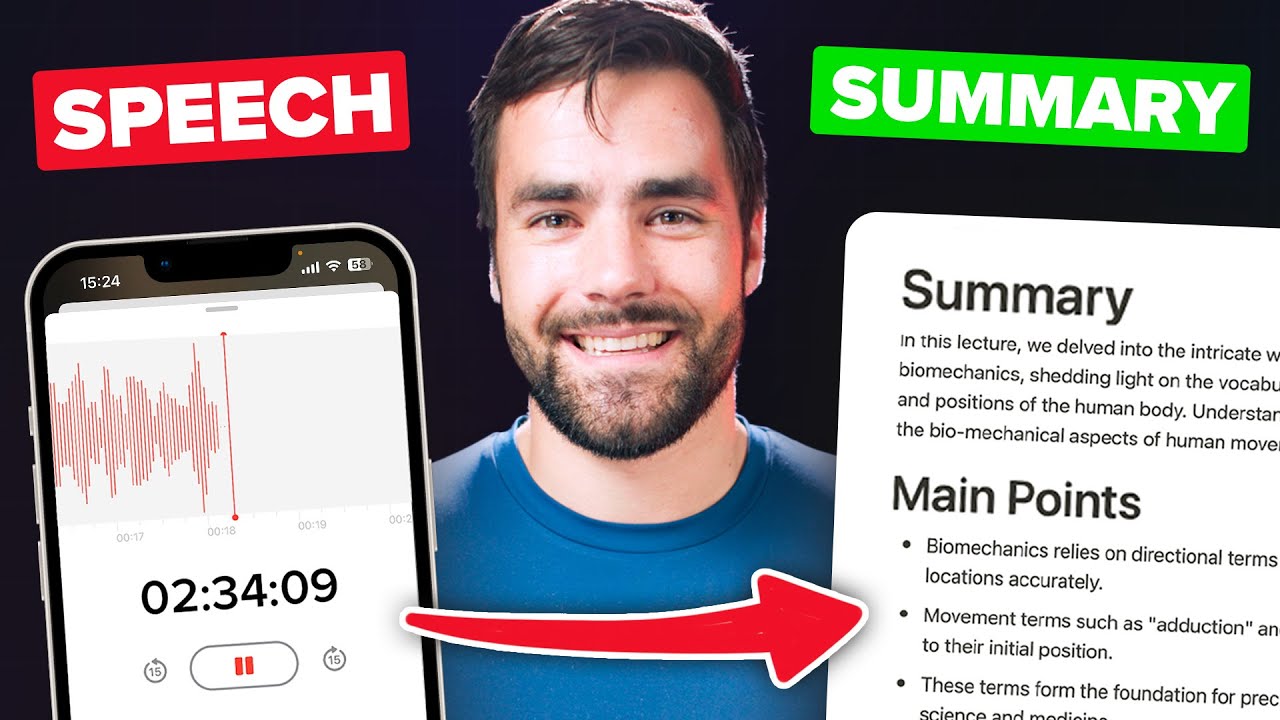
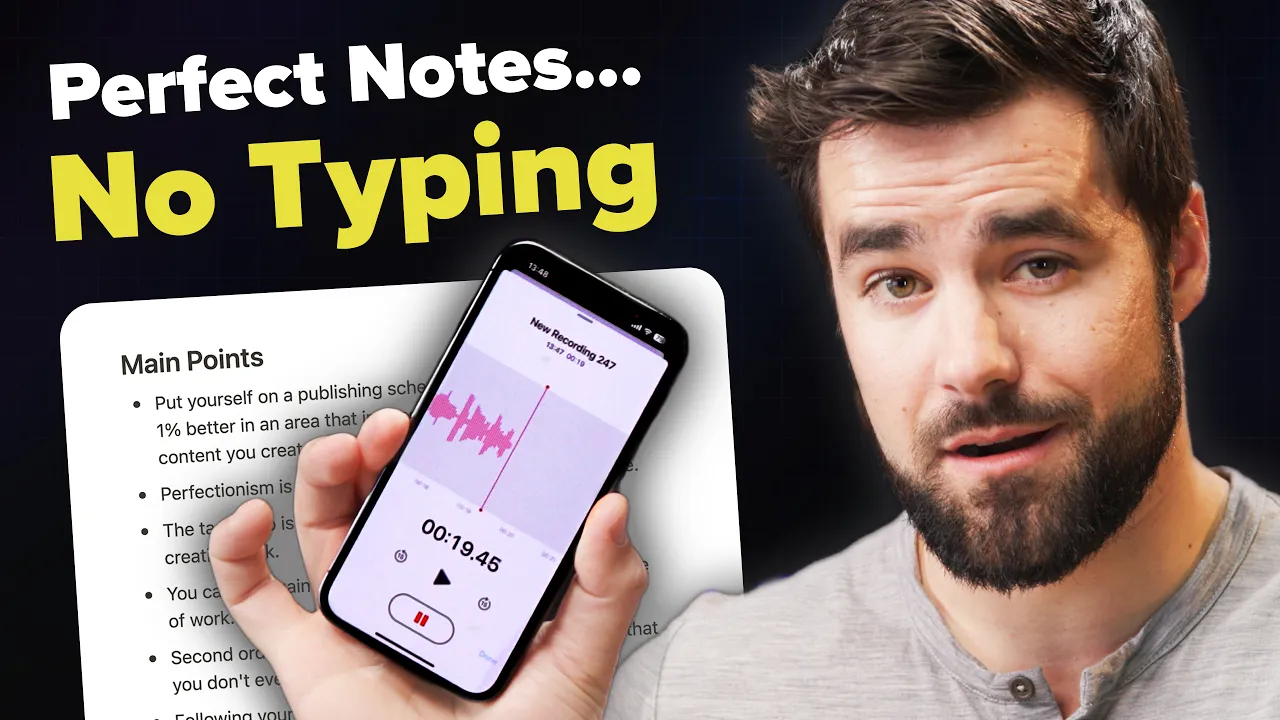
Well, hello there! So, this week I built a bot that takes voice notes, like the one that I'm recording right now, turns it into text, and sends that text to my notes database in Notion. And by text, I don't just mean a transcript; I also get a full summary, a list of the main points in the text, and also a list of action items.
Today, I'm going to show you exactly how to build this workflow for yourself. It is surprisingly easy to set up, and once you do have it built, it is completely hands-off and automated, which makes it awesome. Now, there are two recent AI tools that are doing the heavy lifting in this automation.
First, OpenAI's Whisper model is going to take the audio file and turn it into a transcript—basically, turn it from audio to text. Secondly, ChatGPT is going to take that transcript and use it to generate the summary and those lists of action items and main points, and so on. Of course, what ChatGPT actually does with our transcript is entirely dependent on the prompt that we give it, which means if you wanted to, you could change up that prompt and do something different, like say, recording a note on your phone and getting a blog post draft as a result.
For that reason, later on in the video, I'm actually going to share some tips for writing consistently better prompts that are going to give you better output, which means that you can either replicate my workflow exactly, or you could change it up and customize it to your own note-taking needs. It's that customization that makes me so excited for both AI tools in general, but also this workflow in particular, because I see it as really widening the pipeline between my actual brain and my second brain inside of Notion. In the past, if I wanted to brain dump a thought into my second brain while I'm on the go, I would have to use my thumbs and my phone keyboard, which is very, very slow.
But now, I can just grab my phone, talk to it, and get that perfect transcript inside of Notion, which is super cool. By the way, if you do want to turn Notion into your own second brain, as I've done, my Ultimate Brain template for Notion is the best way to do that. It’s got a robust task manager, it has a project management dashboard, goal tracking, and most relevant to this video, it has a full note-taking system.
In fact, this is my note-taking system, and one customization that I made to it recently, if I go down to my voice notes section here, is all of my AI-transcribed notes that I have made through talking to my phone are in this section, along with this page right here. If I click one at random, I've got my summary, I've got my transcript, all that good stuff. So, if you do want to learn more about Ultimate Brain, you can go over to thomasjfrank.
com/brain to check it out. There is also a discount code in the description down below, so check that out as well. I'll talk a bit more about the features near the end of this video, but for now, let's start building.
Now, as always, I've got the entire video's table of contents right there and below, so skip around to your heart's content. We are going to kick things off with a bit of an overview of the four tools you will need to actually get this to work. The first one is going to be a Notion account, which I assume you already have, but there is a Notion link in the description down below.
If you haven't signed up, you will also want a notes database inside of Notion. That can be any old database, so it could be a template like Ultimate Brain, you could use one of my free templates, or you could just set up a database inside of Notion. Just make sure you have a database ready.
Secondly, you're gonna need an OpenAI account. This is what's going to allow you to actually use the Whisper API for transcribing your audio and then use the ChatGPT API for the summaries and the lists and so forth. You can get that over at platform.
openai. com. Third, you'll need a cloud storage provider—somewhere to upload your audio—that will also kick off the automation.
I'm going to use Google Drve in this tutorial, but you could also use Drpbox; you could probably use OneDrve. Just get the one that works best for you. And fourth, you'll need a Pipedream account, which you can get over at pipedream.
com. Pipedream is the automation builder that's going to allow us to stick all these other apps together, and that's going to drive the automation and have it automatically kick off every time a new audio file is uploaded to Google Drve. On that note, I want to go over to Whimsical, which is one of my favorite tools here, to basically show you how this automation is going to work at a high level.
So, basically, we are going to be taking voice notes on our phone. They're going to be uploaded to Drpbox or Google Drve, whatever you want, and then Pipedream is going to kick off an automation that is going to query the Whisper API, the OpenAI's ChatGPT API, and then we're going to send all of the stuff we get from OpenAI to a brand new page in Notion. So that is like the broad strokes overview of what's going to happen from your perspective.
But what's actually going to happen behind the scenes? Well, if we scroll down on the canvas to this little graph. .
. Here’s the text you provided, perfectly punctuated: That I've created here, we get a bit more of a detailed look. So, this is where we're actually going to be building.
We are going to be uploading our audio files to our cloud storage, and the moment an audio file hits that cloud storage in what we're going to call a watch folder, Pipedream is going to see it, and that is going to be the trigger for our automation. At that point, we are going to be downloading the audio file into what's called Temp Storage. We're going to send the audio file to Whispers for the transcription.
We're going to send the transcription, basically the text, to ChatGPT for summarization. In those lists, then we're going to do a little bit of formatting to get all that stuff in a nice little bundle, and we're going to send it on to Notion, creating a brand new page. So hopefully, that sounds relatively doable to you, because it is actually time to start building, and the first step that you're going to want to take is signing up for a Pipedream account.
I'm going to assume you already have one, and once you have one, you should see this little dashboard here, or it might take you to a brand new workflow right away. If it doesn't, you will have this new button right here, and I'm going to go ahead and click that and start building our workflow. So this is basically where everything is going to happen, and we're going to create a series of steps much like you would in Zapier or Make.
com. Then, when our automation actually triggers, it's just going to go through all those different steps. So I'm going to first name this workflow, and let's just name it "Speech to Text to Notion.
" The first step of the workflow is always the trigger, and the trigger is also the only step in each workflow that you cannot rename. It's just always called "Trigger. " So, in this instance, we want our workflow to trigger every time an audio file is uploaded to a specific folder in Google Drve.
So, to do that, I'm going to search for Google Drve, and actually just right there on the screen, I'll click that. Now I have a list of different actions that I can pick from, and for Google Drve, there is a "New Files" action that says to emit a new event anytime a new file is added in your linked Google Drve. So I'm going to choose that as my trigger, and now I need to actually connect a Google Drve account.
So I'm going to go ahead and click to connect, and once I'm connected, you can see that the drive option here is set to "My Drve. " That is actually what we want. We could choose shared drives if they existed, but we do want "My Drve," and I want only files that go to a specific folder to be watched.
In this case, I don't want it watching my entire Google Drve account. So I'm going to click the folders optional field here, and I'm going to search for a folder. I actually have a folder pre-prepped for this that's just called "Audio Upload Test.
" I believe there it is; I'll check that, and I will hit "Create Source. " Now that I've got my trigger set up, before I can start making additional steps in this workflow, it says action required, and it wants me to generate a test event for this trigger. Well, this event involves uploading audio files to Google Drve.
Now, I could do that from my Voice Notes app, but for demonstration purposes here, I'm just going to open up my Google Drve to this folder, and I'm going to drag an audio file into it. Now, I can see that one new event has been detected by the trigger, so I'll go ahead and open that up. I will select this new file that it has detected, and every time you get a successful result in a step in Pipedream, you're going to get this green success message.
Also, in the exports tab here, you're going to get an exported object. Basically, what we're going to be doing throughout this entire process is accessing properties of this object and referencing them in additional steps. Now, you will notice that there is both a "Copy Path" option and a "Copy Value" option.
If I click "Copy Value," I'm going to be copying the exact value from this particular run of the automation, so it'll be "the one percent rule sampleaudiotest. n4a. " Usually, you don't want to do that; usually, you want to copy the path because that's going to dynamically reference the value that comes in every single time that the automation runs.
To continue, I actually want to go up to this ID property right here, and I'm going to hit "Copy Path" so I can dynamically reference this ID. So we're going to go ahead and hit "Continue. " Then the next thing that we need to do is actually download the file from Google Drve into Pipedream's temp directory.
The reason we need to do that is that Pipedream has been authenticated and can access your Google Drve, but OpenAI's Whisper cannot. We have to actually upload the file to Whisper, and to do that, we need to download it from Google Drve first. So luckily, Google Drve actually has an action for this.
Once again, I'm going to search for "Drve" in this step. I'm going to find Google Drve, and there should be a "Download a File" action. You can either search for it or you can hit "Load More Actions" to find it.
I'm just going to go ahead and search; there it is: "Download File. " Once again, we can see my Google. .
. Drve account is already connected, and under the file property, we're going to reference that dynamic value from the previous step. So, to do that, instead of choosing one of these options here, I'm going to enter a custom expression.
I could either go here and hit select path, or because I copied the path earlier, I could just paste it right here. So, notice we're using double brackets here; this is the convention that Pipedream uses for referencing these projects. If you went through my Notion API guide, it's not necessary for this tutorial, but that could be useful.
You will probably recognize this format here; essentially, we are accessing properties of an object called steps, and those properties might have other objects as their values. So, if I go back up to results, we can kind of see what's happening here. There's this steps.
trigger object, and then I can sort of drill down into that. One of the properties is called event, and that is an object itself. I can drill down into that and find the ID property, which has this value.
So, I'm basically telling it I want to download the file that corresponds with that ID, and then I need to provide it with a destination file path. We get a little bit of help here; it says the destination path for the file in the /TMP directory, and it gives you an example. So, what I could do here is type /TMP and then just give it a name like /recording.
mp3. The only problem with this is you might actually have different kinds of audio files that you upload to your Google Drve. For example, if you're using an iPhone, the Voice Notes app actually exports m4a files, but if you're using a different app, maybe it does MP3 files.
So, instead of typing MP3 there, which is going to give us an error, what we actually want to do is go back up to our results here. Before I do that, I'm going to go ahead and hit this little pin icon so this actually stays open, but I'll toggle open results. I'll pin that as well, and we can actually get the file type of this file because it is one of the properties in this event object.
If I click more here, I can find more properties; if I scroll way down, there is this full file extension property, and we can see m4a is displayed right there. So, if I copy this path, what I can do is come back to my destination file path, and instead of . mp3, I'm going to do .
and there it is: steps. trigger. event.
full_file_extension. Now, if I do an m4a file, or an MP3 file, or really any kind of audio file that Whisper supports, it's going to work, and I'm going to be able to dynamically set that extension. So, I'm going to hit test here, and as long as I did things correctly, I should get a success message.
Then, I should have that file in Temp Storage, and there it is! We've got a return value; we have the name right there, and we have the mime type. All that is good.
So, the next thing that we want to do is actually send our audio file to Whisper to OpenAI and get it transcribed. To do that, I'm going to hit the plus icon down here, and then I'm going to look for the OpenAI Chat GPT app. When you click that, you're going to get a list of actions just like you would for any of the other apps, and the one that we want to pick here is create transcription.
So, if I click that, it's going to ask me to connect to my OpenAI account. This is where I'm going to actually show you how to make an OpenAI account if you don't already have one. If you already use Chat GPT, you likely have one; if you don't, you're going to have to sign up.
But either way, you can go over to platform. openai. com to log in or create an account.
Once you do, if it is a brand new account, you should get five dollars worth of free tokens that are going to expire after three months. If I'm doing my math correctly, that should actually give you about 12 hours of audio that you could upload, transcribe, and get summarized, which is a pretty darn good amount for a free trial. Anyway, after you sign up, you're going to have this little dashboard here, and if you go up to Personal in the top right corner and you go to Manage Account, the first thing I will point out is that if you do want to upgrade to a paid account after that trial is over, you can do so in the billing overview area.
If you want to, you can even set a hard limit that will ensure you don't go over a certain amount of spending every single month, which is pretty cool. After that, you're going to go to the User API Keys option here, and you're going to create a brand new secret key. Now, I am going to delete this key after I make this video, so don't go trying to use it; make your own key and pay for your own AI transcription, please.
Thank you! But I'll hit the copy button right here, and I'm going to go back to my Pipedream workflow and paste the API key right here and hit save. The next thing I'm going to select is my audio upload type, and because we have our file in Temp Storage, I'm going to click file right here, and then here I actually have to.
. . Define the file path for our file.
Well, earlier we typed /TMP/recording. Then, what we actually have to do is, once again, get that file extension from our first step here. So, I'll kind of scroll down here to show you this.
You can actually go into any of the objects for previous steps here, and we know that our file extension was in the trigger step's object. So, we're going to go there, and we're going to see if we can find it. And actually, if we search for it, I believe it was "full file something, full file extension.
" There it is! Cool! We'll select "path," and now this should access our recording.
m4a perfectly well. So, once again, we're going to go ahead and test. So, I will point out there are some optional fields here.
Typically, with transcription, you don't need to set any optional fields, but some of these will actually be set in the next step when we're working with ChatGPT. So, for now, I'm going to go ahead and hit test. If things go well, we should get a full transcript of the audio file that I just uploaded.
And just like that, we now have our transcription in this little return value: the transcription property here. We can see it is pretty much a perfect transcription of my audio file. Now, this is the part in the building process where you can run into a couple of different errors, so I want to briefly cover those before we move on.
First, you might get an error when you test this transcription step, saying that your recording no longer exists. That can happen because the temp directory doesn't keep files in it for very long. Now, when you're actually running the automation, that's not going to be an issue, but if you're taking a while to build this automation while watching this video, you might run into that problem.
So, if it happens, just go ahead and basically upload another file to Google Drve, test the download file step again, and then it should work. The other potential problem is that by default, Pipedream workflows will time out after 30 seconds if they haven't finished. Now, most workflows are going to finish a lot faster than that, but with Whisper in particular, if you're uploading a pretty long file, it can sometimes take longer than 30 seconds.
So, to deal with that, you can go over this three-dot menu up here, go to your settings, and I'm going to go ahead and leave without deploying. You will find this execution control setting here, and I'm just going to go ahead and set my timeout value from 30 seconds to 180 seconds. I'm also going to mention that there is a lot more detail around Pipedream and this entire workflow in the written version of this tutorial.
I'll have that link in the description down below. There is also what I'm going to call the "code-heavy method" that I'm actually using personally. So, if you want to do this the code-heavy method with all these code blocks, you can just copy and paste.
There are some advantages to doing that, and the blog post kind of goes through them. For this video, I'm keeping things simple; I'm just doing the no-code method. But there are some details about the Pipedream settings, pricing, and workflow—all that's in there.
I'm not going to pad out this video with all that detail. Just in summary, I'm setting my timeout value to 180 seconds, and I'm going to go back to my editor, and we'll keep building. So, now that I have my transcription, I can add another ChatGPT step.
So, I'm going to go with OpenAI ChatGPT once again, and I'm going to choose "chat" this time instead of "transcribe. " So, this is the point where we're actually going to be working with ChatGPT via the API to summarize our transcript, to turn it into lists, all that good stuff. So, let's take a look at the different configuration options we have here.
We're already authenticated with our OpenAI account; we don't have to worry about that. If you happen to have beta access to GPT-4 via the API, well, number one, lucky you! And how can I get that access?
Because I don't have it right now. But you could select that right here. Otherwise, I recommend going with the GPT-3.
5 Turbo model. This one right here is frozen as of March 1st, 2023, so you're going to want to pick this one that isn't currently frozen. The user message is going to be your prompt, and with that, we are now going to briefly go to "prompt school" because your output that you get from ChatGPT is very, very dependent—the quality of it is very dependent on the quality of your prompt.
So, there are three different parts to a prompt. There's what's called the query or the user message; there is the context; and then there are the instructions or the system message. So, basically, the user message is what you would type into, say, ChatGPT, like "write me a poem" or "summarize this email that I got.
" The context is going to be the transcript—in this case, an email, or basically anything that you're asking the chatbot to analyze and use as context in your prompt. And then there are the system instructions. Now, if you're working with ChatGPT via the actual website, the system instructions are one and the same with the user message.
It's going to kind of try to parse that out, but when you’re working with the API, that is actually a different parameter; it's called the system instructions. And if you were to look at. .
. The code, it would actually be a different section with a completely different prompt, and what the system instructions do is essentially instruct ChatGPT on how to respond in terms of formatting. You can also give examples in the system instructions, and I have found that if you provide an example in the system instructions instead of in the user message, your output is almost always going to be a lot better.
Okay, prompts go over. Let's actually start filling out the user message, and then we will handle the system instructions. To fill this user message field out, I'm actually going to go back over to the written version of this tutorial because I have the prompt pre-written.
So, I will have this link in the description down below via the handy-dandy table of contents on the sidebar. Underneath the "No Code Method," which is what we're doing in this tutorial, you can find this "Summarize the Transcript with ChatGPT" step, and if you scroll down a little bit, you're going to find this code block that has the exact prompt that we're going to use. So, you can click "Copy to Clipboard," go back over to your user message field, and I'll just go ahead and paste that in.
We can look at what we're doing here. So, all of this is what we would call the user message. I'm saying, “Write a title for the transcript that is under 15 words.
” I'm being specific; I'm asking for a specific limit in the words of that part here. I'm also asking it to write “--- Summary ---. ” The reason I'm doing this is that this is what I call a delimiter.
It's going to basically allow us to parse through the output that we get from ChatGPT and do some useful stuff with it. The reason we're doing that is we actually want to separate the title, the summary, and then the lists and place them on our Notion page in different spots. Obviously, the title is going to go in the title field right here, and then the summary is going to go at the top, and we want to have—at least I want to have—all of these lists beneath the actual transcript.
So, to do that, we’re going to need a way to split the title, the summary, and the lists into three separate pieces of data that we can work with individually. The way that I'm going to do that is by asking ChatGPT for these delimiters here, “Summary,” and “Additional Info. ” Beyond that, I'm asking it to write summaries at Heading 1, and then I'm asking for a summary.
Down here, I'm asking for a list of the main points, action items, follow-up questions, potential arguments against the transcript, and you can get creative here! Ask for any kind of list you want or ask for basically anything you want—it's ChatGPT. At the bottom, I'm providing the transcript, and once again I am dynamically linking—and this is kind of a weird bug here that I'm seeing—but I'm dynamically linking to the return value of the previous step.
I'm going to go ahead and delete that out of here and redo it just to sort of show you how it works. So, if I come back up to my results here and create a transcription, I'm going to find this transcription property here. I'm going to copy the path, and once again this is how we dynamically reference values in additional or subsequent steps here in Pipedream.
Basically, it's going to take this as the user message, take the entire transcript from the previous step as the context, and the last thing we want to set is system instructions here. If I go back to my written version, I can scroll down just a bit further, and I can find my system instructions. This is the real secret sauce here for getting consistent output!
I tell it, “You are an assistant that only speaks in Markdown,” which is a formatting language that gets us like headings and bullet lists and all kinds of stuff like that. "Do not write text that isn't formatted as Markdown. " So, that right there should be enough to get ChatGPT to always respond in well-formatted Markdown.
But, to be extra thorough, you can actually give it example formatting. Here, I've said “Example Formatting,” and I've given it exactly what I want, including these delimiters as I want them written. So, if I set that as my system instructions, along with my user message, and I pass it the transcription as the context, I should be able to test it and get a good result.
One other thing that I'm going to do, though, is set a temperature setting. Temperature is a value from 0 to 1 that basically determines or influences how creative the output is going to be. So, if you want ChatGPT to be very creative—if you want it to write like a poem or something, or a blog post—you might want to set a high temperature value.
But in this case, I want well-formatted Markdown, and I also want it to be pretty straightforward in summarizing and creating main point bullet lists out of the transcript provided. So, I'm going to give it a value of 0. 2.
You can always experiment with this, but I found that 0. 2 works pretty well. The rest of these you don't have to worry about, and you can go ahead and hit test after that.
Okay, once again we have a success message, and if we drill down into this choices property here, which is actually an array, we can keep on drilling. Down until we get to this little content property here, and we can see, here's our title, here's our summary delimiter, here's our summary, additional info, and main points, all formatted as Markdown, just as we asked, which is awesome. As a bit of a demonstration for why we're formatting in Markdown here, I'm going to go ahead and hit "copy value," and I'm just going to go over to my Notion workspace and create a brand-new note.
We'll just make it in the inbox here, and I'll just show you that you can paste that Markdown, and it's going to come in with heading twos and bullet lists, just as we wanted. So that's sort of why we are having an output in Markdown. One nice thing about Pipedream is it will actually parse Markdown and send it to Notion just like this.
However, if we go back to one of our examples here, we will notice that our summary is here, and then our transcript is here, and our lists are down here, as I mentioned before. Whereas our result from Pipedream has our summary, has our main points, our transcript is not in here, and we have our title in there, which we would want to put in the page title, not in the page content. So we are going to add one small code step to this workflow, which I guess technically makes it not entirely no-code.
Sorry for the clickbait if I do title it no-code here, but it's going to make things a lot more elegant, and it's going to save you a lot more calls to OpenAI. Because if you didn't do it this way, you would have to make a call to OpenAI for the title, and then another one for the summary, and then another one for your additional points, and we don't want to do that. So I'm going to add another step here, I'm going to choose Node, and then I'm going to choose "Run Node Code.
" I just want to choose any of the actions there because it's going to get me one of these code windows. This is really the power of Pipedream; Make. com does not allow you to write your own JavaScript code in your automations, Pipedream does.
So basically, they're taking care of all of the execution environment for you, they're taking care of the security, the authentication, all that kind of stuff, but you get the option of writing JavaScript or writing Python, if you know it, and that's really what makes the platform so powerful. So what we're going to do here is delete all of this code in here, and we're going to just paste a code block that I have pre-written for you. You don't actually have to code anything.
To do that, I'm going to go over to the written guide once again, and I'm going to go to "Format the Title, Summary, and Transcript. " I will have a direct link to this section of the blog post in the description down below so you can easily zoom over to it. If we scroll down a little bit, we're going to find this code block; all we'll have to do is copy it and paste it in.
But before we do that, I do want to give this step a more descriptive name because right now it's just named "Node. " If you will notice in all of our exports here, the path to any of the values we're referencing in future steps is steps. dot.
What is it? It's the name of this step here, steps. dot.
chat. If we look at this one, it's going to be steps. dot.
create_underscore_transcription. So the export value of this block right here, by default, would be step. dot.
node, and then if we changed it later, then anytime we're referencing that steps. dot. node path, it would break.
So before we even build this, I'm going to change this to "formatter," and now it's just a little bit more descriptive. From there, I'll go over to my blog post, I will hit that copy button on that block of code, and I'm going to go ahead and paste it in there like so. If I hit test, what I'm going to get is an object that basically splits that title, that summary, and all those lists into three different properties.
And here it is; here's my return value: I've got title, I've got the transcript as well, I've got summary, and I've got additional info. I guess one other thing that this bit of code is doing is turning the transcript from a wall of text into basically paragraphs that have no more than three sentences each and that have a blank space between them. This is going to cause Pipedream to send each of these paragraphs to Notion as its own text block instead of having just a super big wall of text, which is another reason why you might need this code block.
So now that we have that, we are done with the coding. Told you it would be easy and painless! All we have to do to finish this up is send this bad boy to Notion.
So I'm going to add one final step. I'm going to search for Notion as the app here, and then the action I want is not create page; it's create page from database. These are two different options here.
So I'm assuming you have a notes database that you’re working with. We're going to choose "create page from database," and then the first thing we have to do is connect a Notion account. So you've probably seen me do this before if you've watched my other tutorials.
I'm going to authenticate with my College Info Geek workspace here. Hit select pages, and then I think I actually have to drag this out because I'm kind of zoomed in. I want to make sure that the notes database that I'm going to be using is selected here because if it's not, Pipedream is not going to have access to it.
But I can see here, "All Notes CIG," that is the database that I want to be using, and it is already selected. So, I'm going to go ahead and hit allow access, and we should be good to go from there. From there, I need to actually choose the database that I'm going to be using here, and I'll set that in the parent database ID field.
So, I can click right here, and it's going to give me a whole bunch of options based on what Pipedream has access to. You could also manually enter a Notion database ID; that is also covered in the written version. One thing that I do want to note is if you don't see your database in this list, it might mean that Pipedream actually doesn't have access to that database.
So, I will show you briefly how to set that access manually. If you're at your database, I'm actually going to open this as a full page and then go one breadcrumb to the left to access the entire database. You can go over to the three-dot menu in the corner here, and you can see all these apps that are connected to this database.
Now, I actually have two Pipedream accounts, which is why I have two here. But if you didn't see Pipedream here, you could go to add connections, search for it, and, because I already have it, it's not there. But you would see Pipedream there; you could add it to that database, and that's how you would make sure that that access was granted.
But I do have that access, so I'm going to go ahead and hit my "All Notes CIG" database right here, set that as my parent database ID, and now we can actually specify the page content that we are going to send to Notion. We can see here you can use Markdown syntax, which is pretty cool because we can basically dynamically decide how we want our page to be laid out. But for the sake of time and the sake of making things easier for you, I'm just going to go back over to the written version.
I'm going to go to "Send the Transcript and Summary to Notion," and I'm going to find my third little code block here, which I will copy and paste into my page content like so. So once again, we are dynamically referencing values here. Here's our summary, here is a transcript heading one, here's the actual transcript, and finally, there's an additional info heading and all of our lists inside the additional info object right there.
Now, we also want to set a page title, and we might also want to set some additional page properties as well. So, to do that, we have some optional fields down here, one of which is called "meta types. " That's going to be for your icon or page cover, and the other one is going to be setting property types in your database.
So first, let's set a meta type because I do want to actually set a page icon here. I can choose an icon, and then, from experience working with this platform, I have found that it's better to also enable the property types you want before setting your meta type specifically. So, I'm going to go ahead and choose some property types.
I think for this one I at least want to set the title, which is by default going to be the name property in your database. I've just changed it, and I also want to set a property called 'type' to a value called 'AI transcription. ' So, I'm going to choose those; I'll choose an icon, and now I have the option of actually enabling these.
So, let's go ahead and add them all. For emoji, you can actually just search for emojis here, so if I do, I think it's Windows key + semicolon. If I can search for the robot emoji, which looks kind of like a football player on Windows, I like the one on Mac better.
For the title, once again, we're going to dynamically reference an object, and I'll actually show you how to do that. So first, I'll pin this configuration option here, and I'll go back to the formatter success message. There is our title property, for which I will click copy path, come back down to title, and paste just like that.
Then, for type, we actually are going to get all of these different select options. I'm going to click AI transcription, which I've set in my Notion database, and from here we can finally click test. So, to prepare ourselves, let me go back over to my notes area.
I'm going to go to my voice notes because this is a filtered view that I can show you. Here is going to show notes where the type is AI transcription, which means that once we hit test, we should see our brand new transcript and summary show up in that exact view. And there we go: create a page successfully!
We have all of our exported return values from the Notion API, but more importantly, if we go back over to Notion, we should have our brand new transcript and summary. And there it is—there's our summary, there's our transcript, and all the way down here we have main points, action items, follow-up questions—all that good stuff. So from here, all we have to do is hit deploy, and now our workflow is live, which means it's going.
. . To be waiting for events, and any time you upload a brand new audio file to that folder in Google Drve, this is going to kick off, and you're going to get that same transcript and summary inside an ocean.
Now, I will note again that this is the no-code version, and there are some limitations to the no-code version. Namely, uh, Whisper has a 25 megabyte file limit right now. However, if you want to get around that—if you want to say, transcribe very long podcast episodes or you want to talk to your phone for an hour and transcribe that—the code-heavy version of this tutorial in the article is going to help you get around that.
So, if you are comfortable with at least copying and pasting code into Pipedream, maybe copying and pasting it into ChatGPT if you want to change it up and you get it explained for you, then check out that section of the tutorial. It is just as comprehensive, if not more, than this no-code version, and that, I will note, is the version of this tutorial that I'm actually using myself in my own workflow. I just felt that for the video, the code version might be a little bit too complicated for a lot of people who just want to get this working for simple voice notes, and that is what this no-code version is going to do for you.
Now, once again, if you want to get a note-taking system just like the one I have here, which is going to be perfect for this AI transcription and summarization workflow, you can get it inside of Ultimate Brain. This is my truly all-in-one productivity template for Notion that includes task management, it includes Getting Things Done (GTD) workflows if you want to use those—you don't have to use those. There's a project management dashboard, there's goal tracking, there's a recipe tracker, and there is this all-in-one notes dashboard where every single one of these pages has its own dedicated page as well.
So, it works really, really well on your mobile phone. In addition to all these features, Ultimate Brain is one of the only Notion templates out there you're going to find that has active and dedicated support. We have a whole support team that answers every single question, and we also have a community full of customers that are constantly sharing their own customizations and changes to the template.
So, if you want to turn Notion into a second brain, Ultimate Brain is the best way to do it. You can get it over at ThomasJFrank. com/brain.
There's even a discount code in the description down below, so check that out if you want to get a pretty hefty discount. And as always, thank you so much for watching! If you want to get notified when I make new Notion tutorials or release new templates, you can always get on my Notion tips newsletter as well; there's going to be a link in the description down below for that.
There's also a full Notion fundamentals course on my website that is completely free. In fact, I can show that to you right now! We've got this fancy little sticky menu; you can go to Notion Fundamentals, and everything you need to learn Notion from the ground up is on this page—from page basics to the writing system, all the way down to databases.
There are new lessons being developed right now as well. And, of course, right here is where you can sign up for that Notion tips email newsletter. If you have questions, leave them in the comment section down below or hit me up on Twitter; I'm TomFrankly over there.
I'm very active on Twitter, so definitely interact with me over there if you are on Twitter. Once again, thanks so much for watching! Click one of those videos there or there if you're looking for something else to watch.
But really, go off and implement this workflow; I think this is going to be super helpful for anybody that has a lot of ideas when they're on the go. So, get it built for yourself, try it out, and let me know what you think! Thanks for watching, and I'll see you in the next one.