in this video we'll show you how to create new flows using flows Builder interface and connect an endpoint as a backend to populate flows data we will show you how to build flows that let users book an appointment and how the available appointments can be populated dynamically from your server so you can integrate flows with other systems or apis flows Builder is a rich tool that lets you create update and preview flows you can find flows Builder and WhatsApp manager under account to tools flows in the left sidebar to create flows you need to verify
your business then click Start building Flows In The Following screen you will give the flows a name and select the relevant categories for it you're going to select appointment booking category you can select one of the templates as a starting point for flows when you select a template you will see its preview on the right side and you can see how different screens look the templates without an endpoint are for static use cases but the templates with endpoint are for use cases where you want to populate flows data or control navigation dynamically from your back
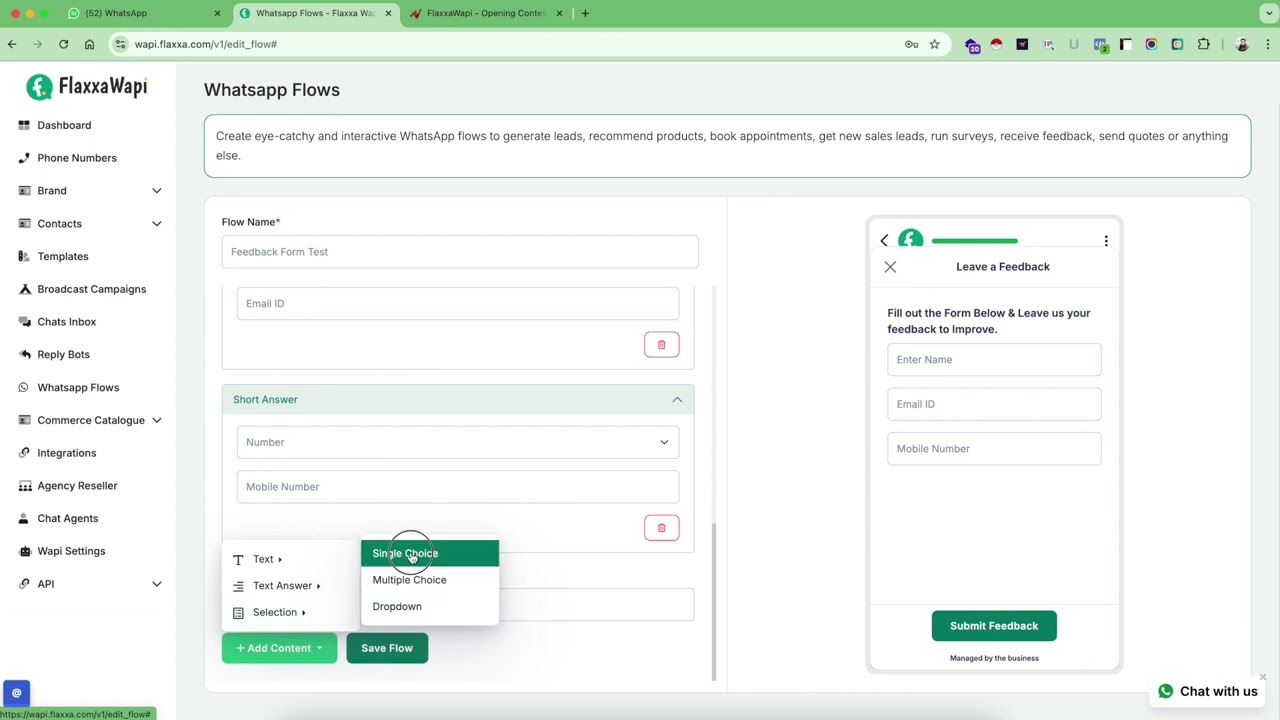
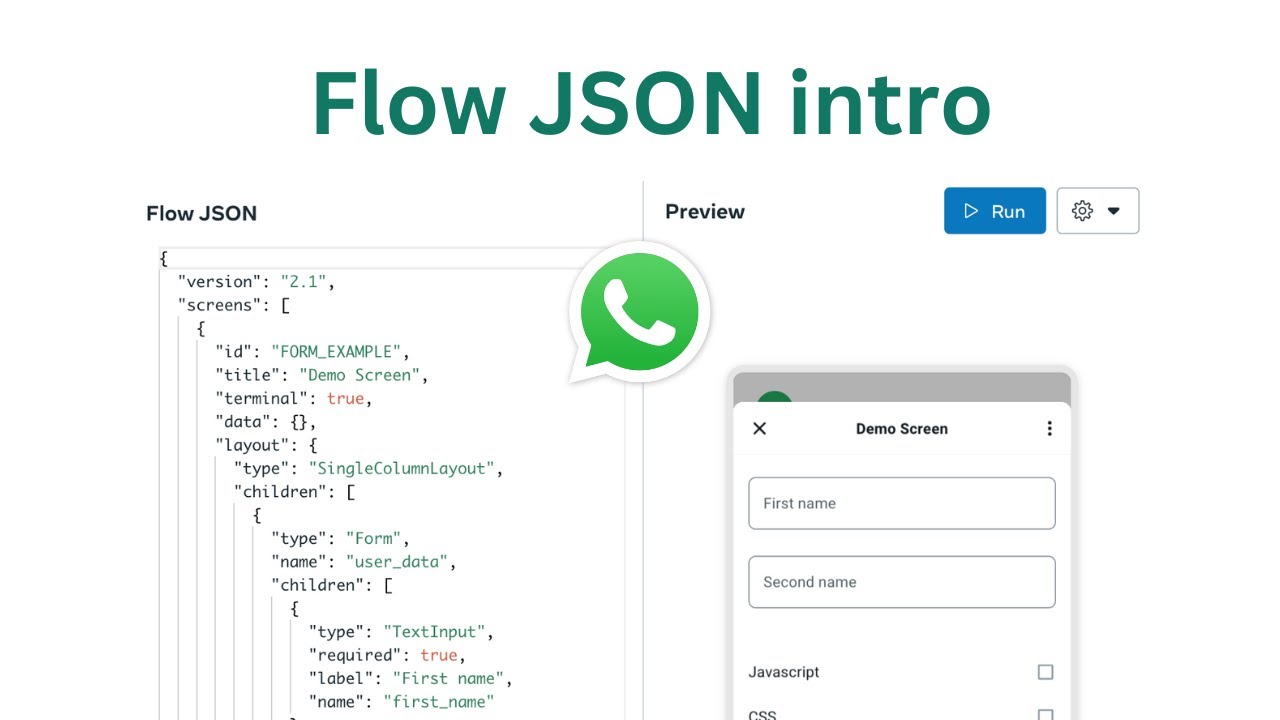
end we will use the book an appointment template with an endpoint as we want the appointment times and locations to be dynamic once you create flows you can see flows JSO editor on the left side and the live preview on the right this flows has four screens appointment is where the user will select the appointment location type date time details is where the user will fill in their contact info and notes about the appointment summary will show all the details to user to confirm before submitting terms is a placeholder for your terms and conditions flow's
JSO n is how you define the screens and components for your flows for example you can change the title property of the first screen to something else then click run to preview the change if you are happy with the change we will click save if you make a mistake in the JSO and make a typo in the title property name the editor will underline the error and show a hint also the preview will show the error message the data property in each screen defines the data model that will be fetched from the endpoint to populate
the screen the value in the example property is used for the preview before connecting the endpoint the component in the screen are defined under the layout property to make a certain component call the endpoint to fetch some data you use an action with name dataor exchange and the payload contains the data we want to send to the endpoint