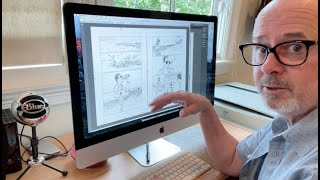
hey guys welcome back Scott Drummond and this time I want to talk a little bit about basically the ending of making comics so the sort of backwards I know because you know usually we would start with hey I'm I've drawn all these comic pages etc and how do I do that but since I'm sort of starting this channel I just figured I'd go through and talk about what I'm doing at the time and not try to do things any you know I'd have order and all that stuff so I'm gonna talk about today is the
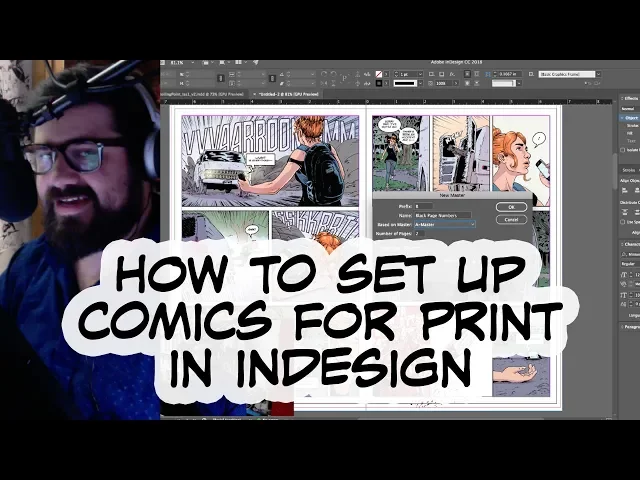
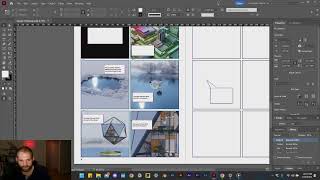
last part of my process usually in creating a physical comic book and that is laying that book out in a program called InDesign Adobe InDesign it's what I use to lay that program around here I've got it here's InDesign this is the cover from my book and so I kind of want to talk about what I do to lay all this out you know you can see over here I've got all my pages in this area so page 1 etc all the way down and then I've got the cover at the back and I'll explain
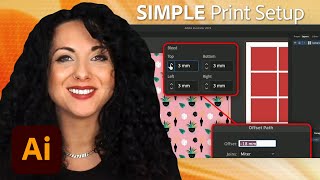
why that is in a moment but the first thing you want to do is you want to set up a file so you're gonna set up a new file you're to open a new document it's very easy and you basically just set up the document in the dimensions that you wanted create your comic in the typical American comics size is six point sixty five by ten point two five it's as many pages as you want and if you set up you know some some bleed this is the bleed that I use basically an eighth inch
bleed it's probably enough for a comic page you're gonna do well with that if you want to use margins you're welcome to it's not gonna really affect anything especially if you're bringing finished pages in you could set your margins at whatever your page size is you've already set up in your other documents for your pages but it's not super important you create that document all right looks great you got a new blank document what the heck do you do now so oh shoot I already screwed it up so I'm gonna close this document and I'm
gonna show you what I did wrong when a new one same settings do you want to have facing pages that way when you are looking at pages side by side they very easily you can see what page goes next to it the page next to it so I'm going to create this document now so now you can see over here that we've got you know page one starts here at page 2 3 4 5 6 7 etc they have all these little a is next to them which I'll get to in a moment but so
what you're going to want to do when you set all that stuff up they'll basically bring in all your pages now and to do that what you'll do is you'll do file where to go place there you go I usually hit Apple D or control D on a PC to place your image so you would want to place an image let's see if I can grab a page here and I'll show you what I mean so the first I would grab the first page of my comic book and that's gonna be in my PS DS
folder looks great that's page 0 I want this page that's the first page of my comic book and it comes up with this a little bit because I haven't sucked in a box for it to be in and so what you want to do is just tap and then it will create that comic page at the exact size that it is that that file is set up for initially I you can see that it's a little off-center yeah you can very easily Center it by going up here to the align or if you have your
align panel open up over here if you don't have an align panel you can get it out by hitting window up at the top and going down to objects in layout and a line this little guy here next to these aligned guys will tell you what kind of a line you're going to do so I'll I do a selection I'll add a margins page or spread if I have it a Lendl selection you only align to the things that are on it so if I clap click these now they're not gonna do anything but if
I want to align this to the page I would just click that under that little drop-down and align that to the page now I've got a perfectly set up page there that's exactly where I wanted it to be and you can see how I have already set up that interior margin to be the exact distance of of that so that's a how you do that it's pretty easy so then you go through and do that page by page you could also grab each of these pages and copy that page and go into the next page
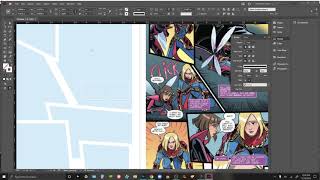
so you can see this one has two pages so I want to grab this guy from page one and put it onto page three so what I would do is hit edit and I'm gonna paste that into place so that's gonna go right over here now you can tell right off the bat that it has gone over the center line and that's okay for right now basically I've set up all my pages to go to bleed left and right and that'll become apparent and here in a second so what you're gonna do is you're gonna
grab this guy and you can copy it and move it over or I'd like to in this kind of situation hold down the option key or the Alt key which is like directly next to the control or command key and and just hold that button down and then click and slide it and that's gonna create a new one of these pages basically copy that page so that's a very easy thing to do and while you still have online to page selected in your on page two you can grab that and click the horizontal center and
it'll put it right in the middle and now they have this all set up what is going on is what kind of is happening in the behind the scenes is that this has created an InDesign just created a box there is a box here and then it is linking an image inside of that box so I can grab the edges of this box with this black arrow key the selection tool by pressing V and I can move that box big make it bigger or smaller it won't affect the size of the box but it will
cut off whatever is inside of it so basically that image is inside of this box I can also if I have the white director selection tool selected I can grab the image that is inside of it and move it around within that box so I can slide that image around these are things you probably don't want to do with this but it could come up later if you have moved boxes etc but what why that's important right now is because with the selection tool I want to take these two boxes and I want to pull
them and get them to the center right here so I'm gonna grab that and it's gonna snap directly there if yours doesn't snap you might need to turn on snapping which you can do under view and grids and guides so you can snap to guides etc and that's how you turn on snapping so it doesn't matter much for these two pages because nothing's going over on each side but it could matter later so let's show what's going on so we already have page 1 in so let's put in page 2 you would hit a command
D or go file a place with this here so we're gonna place this guy we're going to put in page 2 looks good alright now page 2's they're in exactly the right spot we're gonna do the same thing here put page 3 on there we go so you can see down here this little bit of splatter is kind of going off the page and that's why we have these bleeds but we need to have them go beyond where the actual page will get cut so when they're the idea of the bleed is that gives the
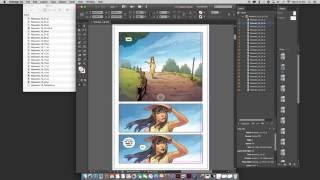
the printer a little bit of room for error when they're cutting up your pages because they have to physically do a ton of these so that's a pretty basic way to import all of these now that you've got this going and this has been started on page 1 what you're gonna want to do after you get all that stuff in is you're going to want to number your pages currently these are numbered at all it's not a big deal you can do it on the page if you want to but I like to do it
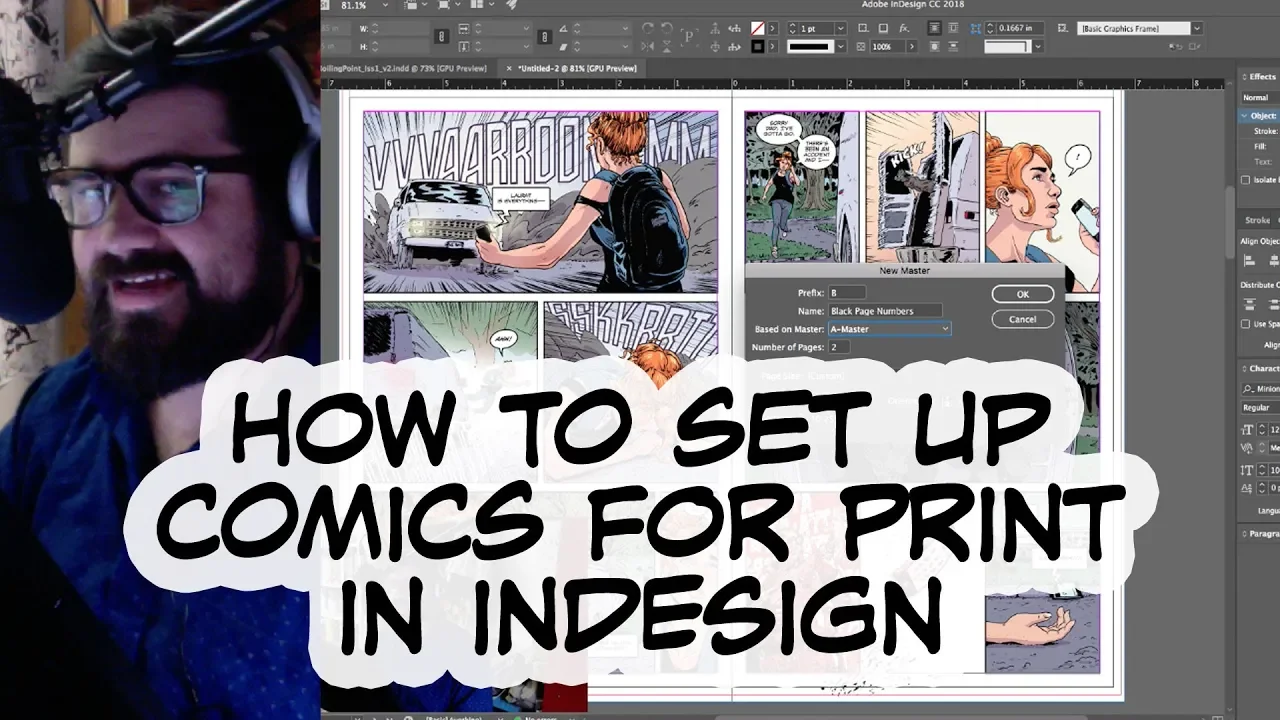
in InDesign because it's just easier so what I like to do is I like to set up a couple different types of numbers and the way that I do it is through master pages master pages sounds scary but they're very very easy to do basically I set up three masters my a master has no numbers on it it's basically blank so look at me I already did it nailed it got it done the second thing you do is you're gonna she want to create a new master you'd go up to this little menu button here
next year and next year pages and you're going to have a new master for any new pastor your prefix is gonna be pretty easy and I'm gonna say and call it black number page numbers if I can type that's based on the master a which is fine doesn't really matter too much but basically what that means is inherit anything from A to B so since there's nothing on a there will be nothing on B I could just leave a blank also doesn't really matter so number of pages to because I've got two pages left and
right page size is the same as I want from the other ones and so I'm gonna say that's good to go so it's gonna create a new master over here and based on a so that's why these little a's are next to it and then what i can do is i can create so i want to basically also go back to him down here i've made everything in here on the first layer we have a mess with layers yet so that's all on layer one however i want all of my page numbers to be above
my pages otherwise you won't be able to see them if i create page numbers that are below my pages then they'll all anything that's in a master layer will always be below what's in a Content layer so that's why I will assume now create a new layer here so I'm gonna good a new layer and so this layer is gonna be the page number layer so I'm gonna type in page numbers so for my black page numbers master I'm gonna go up here and double click on this guy and I can grab the type tool
let's just do this well they have the type tool kit so we're gonna grab that type of tool kit and we're gonna type as if it was a page number it's 1 got it cool by hitting the T key you can bring up your type tool I can change this to whatever I want to be a let's make it a no but into a wide I'm gonna make this centered so it'll be centered on my page by clicking this little guy over here I want this to be a little smaller so I'm going to make
it a 10-point maybe an eighth point that looks pretty good click off of that and I think that looks like a pretty good one let's grab this guy I'm gonna align it to the center of the page by doing what we've been doing with the alignment there and then oh this is kind of cool too so if you have a box like this and it's a text box you can double click on any of these and it will automatically shrink that box to the size that it is the smallest but in the opposite direction so
if I won I have this box here at the maligned at this bottom part I like that so I would click here but if I wanted to on the other hand say oh man I really liked where this guy is let's shrink this box this way you could do it that way I'm gonna pull this down since I know that my my borders are along this margin line I am going to make sure my numbers are below that border so that they won't be on top of my content inside of my panels so that looks
pretty good I like the way that's looking that number and so what I'm gonna do is I'm gonna grab that and I'm gonna hit type I'm gonna select this number is what I'm gonna do now hit type and now you want to have a special character let's see here's insert special character did you do to do to do to do and you want current page number now it has replaced this with a B which doesn't seem like a page number at all however I had escaped key to make that change permanent whatever you did in
there we're on B black page numbers so technically this is page B according to the document so when I grab this I'm gonna copy it by either going to edit copy or hitting command C it's pretty easy and I'm going to then paste it in place again drag it over I'm gonna align it to this page and now it's another be there so then you get your black page numbers set up there ready to go over here cool Scott sounds great nothing happens over here though darn it what's going on that's because you have this
is still set to a master currently so to change this all you have to do is you can either right-click on this and say apply master two pages and then you would change this to be master or I'll do that for this one pretty easy you hit OK and that page number appears it looks great the other thing you can do is if you wanted to let's say we wanted this one to have another one you would grab this guy slide this over and drag from here to here and you did it pretty easy pretty
easy you can also grab multiple ones and right-click by holding basically you click here and you hold down the shift key and you click here and you can right click and now if I wanted to apply master all of those pages it would automatically populate with two through eleven there I could say B black numbers and there you go I don't want this one to have black numbers though because it's got this little bit down here so after that I could either go apply master pages go back to a no numbers or I could drag
this a on to it the same difference so that's a pretty easy way to set up page numbers the other thing you can do I mean sometimes I'll I'll create these textbox boxes and actually bring stuff in and do some design in here but for the most part since I've already made a lot of the comic the actual comic that's that's the majority of the page so you've already done 95% of the work once you probably a more like 99.5 percent of the work once you create the comic page pulling it into this is super
easy so you'll notice that I don't start with the cover that is because hey I want this page to be number one so I set this page as number one in the document then at the end the very end that's when I put my cover and then the very last page is actually the inside front cover and then want to export this that's when I start moving the pages around for the prayer so it's very easy to say okay cool I got this guy so what I'll do is I'll say export I'll say a high
quality print I'll save that I'm going to keep I want to keep the marks and bleeds when I export so that way the printer has them so I want to go to marks and bleeds and I have all the printers marks and then I want to use the document bleed settings otherwise it's going to mess with everything so you want to make sure that those two things are tipped under marks and bleeds when you export and then your export so you can see it's still exporting by this little thing of this background tasks up here
so it's exporting this so I guess I'm gonna just let it do it since it's taking a long time and we'll be back here in a second mmm-hmm okay it's done all right cool let's go check it out pop this bad boy open so you see that we've got all the printers marks on here basically showing them where they need to cut giving them you know some colors that they can check to make sure that those colors are printing right you know the full spectrum of white to blacks and kind of showing them what document
this came from and when it was exported so every page will have that as you go through which is pretty handy so when you go through here and set this up for the printer there's probably an easier way to do this but this is how I do it just to make sure everything is fine I just grab the pages that I want to move around and I move them around in this case I just grab these two last pages and I'm in Adobe Acrobat Pro here another of the Adobe suite products and I grab that
and I can click and drag them all the way to the top I probably get a cut and pasted them but I'm in the middle of this now and drop them there so now my book is in order so search to the cover the next page is the inside cover and you got page one right there where you want it another thing I wanted to show you this is pretty cool there are two kinds of printers basically if we're gonna do a small run of comic books and by small run I mean under 500 typically
what you're going to be looking at is digital printing so the printer basically is going to be using like a laser printer to digitally print your work because it'll be cheaper that way and you want to be cheaper they wanted to achieve where everybody wants it to be cheaper so if you're gonna print a book comic book that has five hundred fewer copies you're gonna get laser printer books so if you do that great that's not really too big of a deal if you in that case you can do RGB or CMYK usually it's not
too big of a deal either way if you do a laser print book a digitally printed book however that said if you do plan to make a larger print run book at some point let's say 750 a thousand copies of a book you're probably going to want at that point to make a CMYK like a full plate press book it'll be cheaper for you to do that in the long run and it's gonna look great it's gonna get that real nice comic smell also which I love that so if you want it to set it
up that way you do absolutely absolutely have to do CMYK for that and a big thing about doing it that way is when you're setting up your CMYK you want to make sure that your all of your lettering is in pure K which K is black in the CMYK see Zion yellow is why Amma's magenta and k is black I assume that K is for like the last letter of black so they're not confusing blue and black I don't know the way you do that when you're doing your lettering in whatever program you're using make
sure that that lettering is set to just 100% k and not 100% C hundred and 100% why I'm percent K because what's gonna happen there if you're using the the full press they're making four plates to stamp the colors right and so they'll stamp the C looks good you're gonna stamp the Y they're instant to em and they're a stamp the K the black on top of that so when you're doing all that stacking sometimes those plates can shift if your lettering is specifically lettering is more than just Auto percent black you're gonna get some
weird color haloing going on behind your letters and that's gonna look really bad when you're doing the full plate press books so again this is not a big deal if you're doing a small red book with a laser you know printer that's under like a 500 run I mostly if there you can ask your printer obviously what they recommend but that's been my experience in the past and so I would recommend that and that's really about it if you have any more questions about how to do this if there's anything specific that you want to
know about please let me know ask me any questions in the comments and I'm happy to field your questions answer them and maybe even make a video explaining what I'm you know my process would be to do that hopefully that helps you understand kind of how to make you know print versions of comic books in InDesign this was super helpful for you give me a thumbs up make sure it'll you know like like the video make sure to subscribe to the channel we got a whole bunch more of these I'm hoping to do yeah that's
about it all right thanks much [Music]