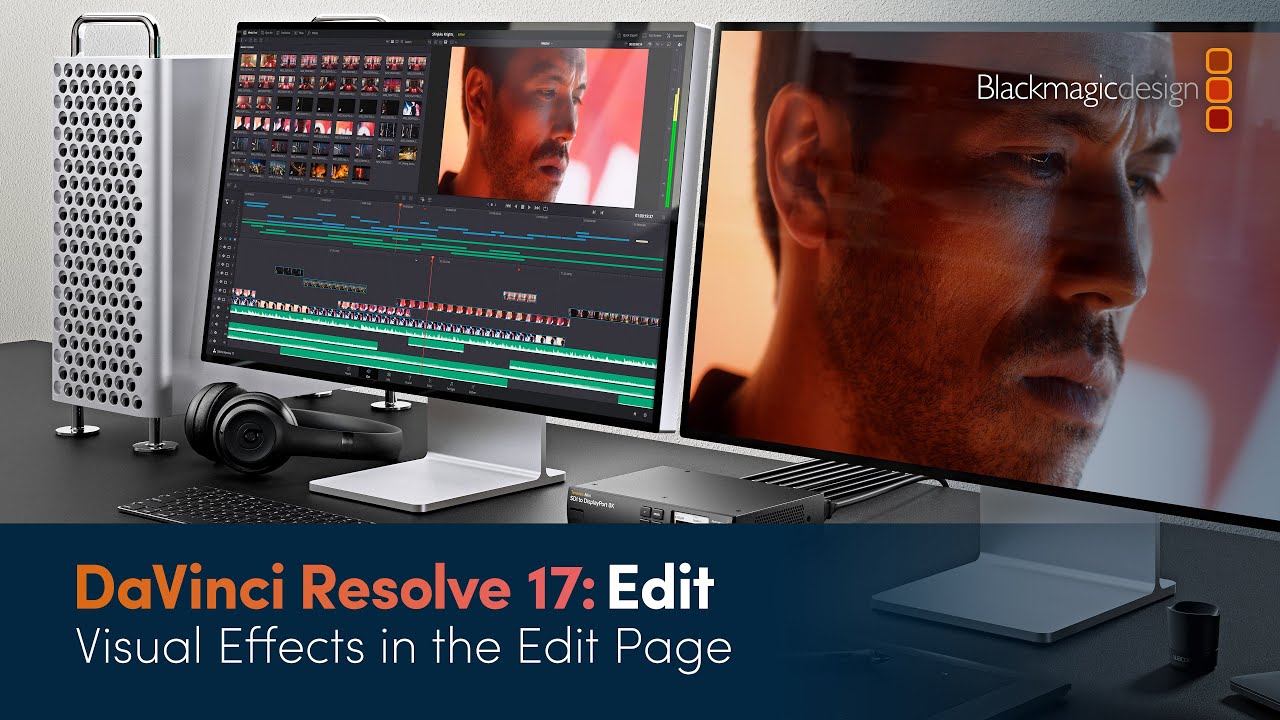
Hi i'm chris i'm an editor and a davinci resolve master trainer today i'm going to look at some of the editing functionality that you can access in davinci resolve we've been sent some footage to put together a short trailer for a documentary film by the filmmaker brian tawiliga and so to do that we're going to start by creating a new project so here i am in the project manager and Just click on the new project button to create that and give this project a name age of airplanes trailer choose to create and davinci resolve opens
directly in the cut page now the best place for me to do importing an organization is actually in the media page so down in the bottom of the interface here just click on the media page Now on the top left of the media page it gives me access to all of my system storage locations so i'm just going to right click here inside and choose add new location i'm going to navigate to the location where my footage is in this case it's actually in my documents folder go to the editing folder and then choose open
and that creates a new storage location For me to access here now the video and the audio clips that have been sent to me are actually in separate folders and to a certain extent i want to preserve that folder structure so when i import the footage into resolve i actually want to import and also to create a series of bins simply select these two folders in the media storage location right click and then choose the third option Which in this case is add folder and subfolders into media pool creating bins now at this point davinci
resolve is asking me to change the project frame rate this is so that the project frame rate will match the frame rate of the footage that i'm bringing in so in this case i need to accept the change so now the footage has been imported into the media pool it's ready for me to start working on and organizing the first thing i'm going to do is just Access the audio clips bin and you can see that although i've got a folder of sound effects that actually contains a series of sound effects that i'm going to
use within the trailer the other clips aren't organized into bins so let's create a couple of other bins so that we know where this footage is so first of all with the audio clips been selected i'm going to come to the file menu and choose the option here new Bin there are also a series of shortcuts that you can employ here as well such as shift and command n because i'm on a mac that then creates the new bin i'm just going to call this music and then take the clip music for trailer and just
drag and drop that into the music folder so organizing clips into bins is very similar to organizing files in folders on your operating system I've also got two voiceover clips here i'm just going to select both of those and this time right click and choose create bin with selected clips i'm going to call this vo so that's got all of my audio clips organized into separate bins i now need to do the same with the video clips but in this case rather than just using simple bins i'm going to use a series of smart bins
So selecting the video clips folder you can see i've got a series of thumbnails for each of the clips if i actually just take my mouse and run the mouse across the clips you can see that each of the video clips is previewed for me if i get to a clip that actually has audio you can also hear i've also got audio scrubbing as well i'm just going to turn that off for the moment just by pressing shift s on my Computer now we're not hearing the audio scrub obviously these three clips that i have
here are interview clips so i'm actually going to tag them with a keyword called interview i'm going to shift click to select all of those three clips and then in the metadata panel down in the bottom right hand corner of the interface i'm just going to display the keyword metadata field that i need Clicking in the sort menu for the metadata panel i'm just going to choose the option shot and scene and this will actually show the metadata for the shot and the scene information for these clips you can see scrolling down through this view
here that we actually have a field for keywords so i'm going to enter the keyword interview just typing interview or Beginning to type interview in the metadata field means that it actually bring up a list of options for different keywords but you can always put in your own keywords in there let's choose the option for interview and choose save so that's how easy it is in order to be able to add keywords to any clip within your project now that we've added the keywords to the Clip it's actually really easy because davinci resolve will automatically
display any keyword eclipse in their own smart bin down in the bottom left hand corner of your bin list simply select the keywords option and then toggle it open using the disclosure arrow and you'll see in there there is a smart bin for interview so my three interview clips are now being displayed within that smart bin Just to show you how easy it is to keep adding keywords i'm just going to select the video clips bin and select the clip called credits in the keywords i'm going to add the type add the keyword credits and
now that has actually tagged that clip with that keyword you'll see that i have a credits smart bin available to me so now you can carry on adding whatever keywords you want to any of the clips Within your project and organize them however there's much more to the metadata than this if we select the video clips bin for example and then select this first clip here for the aerial shot for this kenya clip if i come up here and select the inspector in the top right hand corner and then choose the file tab in the
inspector you can see that we've actually got a series of metadata fields That we can easily access these are the same metadata fields that you'll be able to see in the actual metadata panel itself it just means that they're easier to access here inside the inspector now i can actually populate this with a series of metadata just by simply clicking in these fields and start to type in the information however if you've got somebody on the production team that might be logging These shots it's actually easier to import the metadata rather than to add every
single piece of metadata individually so let's go to the file menu and we'll choose import metadata to media pool navigate to where your editing footage is on your system and choose to select the aoa login dot csv file a csv file is a comma separated values file it's very simple to create in any Spreadsheet application i'm going to choose to open that and you'll see that when i'm importing this login information you can see that it is also asking me for a series of things that it's trying to match to now in this information we
don't actually have time code information for these clips so in this case i'm just going to uncheck match using clips start and end time code I'm going to uncheck that option and then choose ok and you'll see that the information has actually been imported and now 27 media pool clips have been updated if i select any of these clips again you'll now see in the file tab in the inspector i've now got additional information in terms of the scene number also a shot number and quite often sometimes whether this is a good shot or a
good take or not Just scrolling down to the bottom of the file inspector you can also see a comments field has also been added so having added all of that metadata to these clips how can i actually use it well i can actually use it in order to be able to do very quick searches across the project if i select the master bin for example and let's say i wanted to do a search across this information for any shots that were that was shot at san francisco Airport for example i can actually click on the
search option here under this little drop down arrow at the side i can also choose whether or not i want to search the selected bin or all bins so in this case i actually want to search the whole project so i'm going to select all bins and now i need to choose which fields i'm actually trying to match So you can see here the filter by is actually based on the file name of the clip which is absolutely fine if you know the file name that you're searching for in this case though i actually want
to match to the scene information so if i just tap s on my keyboard and keep tapping s it will cycle through all the metadata fields until i get to the scene selecting that i can now type in sfo and you can see that all of the clips in The project that have actually got that scene information sfo will now be revealed let's say i want to find a clip that actually has the comment for kenya from the filter by i can choose the comments field just by tapping c many times until comments appears and
now highlight the text for the search and again type in what i'm actually looking for That's the power of metadata in order to be able to search right the way across your project to find the clips that you're looking for but we can go one step further if you clear the search field and close down the search field by clicking the search button now go to your davinci resolve preferences menu choose user editing You can see that there's a category of preferences for automatic smart bins by default the automatic smart bins for keywords is already
on however you can also see that we can create automatic smart bins for anything with shot or scene metadata click the automatic smart bins for the scene metadata and click save and now in your list of smart bins you've now got a new scene category use the disclosure arrow to open that up And you can now see that the information for each scene is displayed as its own smart bin just simply select the smart bin in order to be able to access the contents but you're not simply limited to the default automatic smart bins that
you can have within davinci resolve you can actually create your own custom smart bin in this case i'm going to go back to the file menu and choose the option new Smart bin this field then opens up and it's asking me for a variety of rules that i can actually input in order to be able to narrow down the footage that i actually want to locate let's rename this smart bin b-roll so now i need to choose my first rule so in this case i'm going to say media pool properties but i don't want to
match on the file name i actually want to match On the keyword information to begin with so keywords do not contain interview so now my smart bin search is automatically filtering out any clip that has the interview keyword i'm going to add another rule for this media pool properties for keywords does not contain credits this was the other keyword that i actually added To my title that i actually don't want to see in the b-roll bin you can also choose to add a sub-set of rules to your smart bins as well holding down the option
or the alt key on your system when i click on this plus button actually turns it into an options menu and now i actually have a subset of rules that i just want to match any two and in this case i actually want to specify clip types So i'm going to choose media pool properties change the second drop down to clip type just by tapping c on my keyboard clip type is video this means that only video clips not audio clips or still image files or timelines will find their way into this smart bin but
that's just video what if i have video with audio well in this case i'm going to add another rule to this sub rule And set and specify the clip type is video and audio now i can choose to create my smart bin and the results of that smart bin will be automatically updated so if i add any additional clips to this project providing those clips meet the criteria i'll be able to find them in this smart bin if you want to edit a smart bin for any reason just simply double-click on the Smart bin and
the rules of that smart bin will open up allowing you to change them there's one other thing that we can actually use the metadata for in resolve and that's to actually use the information in the metadata in order to be able to rename the clip within the project this can be very useful if you actually want to do a search across a clip name or you just want to simply have a sanity check as to what that Actual clip is by naming the clip in an appropriate way it's easy to check that so here in
the b-roll smart bin i'm just going to select all of those clips just by dragging a lasso across them then i'm going to right-click and choose clip attributes choose the name panel from clip attributes and highlight the default clip name so in this case i actually want all of my b-roll clips to start with the Initials aoa for age of airplanes so i'm just going to type in aoa underscore in order to separate the next information now i want to take information from the metadata and in order to do this i need to add what
we call a variable to add the variable all you need to do is put in the percentage symbol and now it'll give you an option to choose whichever metadata field that you want to add in this case we want to Choose the shot metadata field so i'm just going to type the word shot after the percentage value and you can see here in the menu i've got the shot option so i'm going to select that and that has now added a tag to my clip name based on the shot information for each of these clips
again i'm going to use underscore percentage and then use comments Now when i click ok the clips are now all renamed in the media pool using aoa underscore the shot number underscore the comments field this is going to make it easier for me to be able to locate each of the clips and actually use them in my edit i want to do the same with the interview clips so i'm going to select the interview smart bin select the interview clips right click Clip attributes in the name highlight the name field and this time i'm going
to type in int underscore percentage shot underscore percentage comments and then choose ok and now you can see that the interview clips have been named with the appropriate sound byte Information now that i've got all of the clips organized for the project i'm now going to go to the edit page that i can actually start editing just simply click on the edit page button and all of the information that you've just organized inside the media pool and the media page is now available to me and the great thing is is that i can keep organizing
this footage as i'm Working and the organization process when you're editing never really stops it just gets refined the more that you do i'm actually going to start by selecting the master bin in the media pool and creating a new bin just a regular bin that i'm going to call timelines in this case it's often useful to keep your timelines organized in separate bins so that you know where they all are make sure you've got the timeline been Selected and then go to the file menu and choose new timeline let's just change the name of
this timeline so something a little bit more appropriate for this project aoa trailer and we'll just call it version one quite often you'll go through a number of different versions for all of your edits If you wish to you can actually override the default project settings for any timeline just simply uncheck the use project settings option and then you can go into the format to change the timeline resolution and the timeline frame rate however in this case because we already changed the frame rate for the project we know that this is actually the correct setting
so i'm just going to re-enable the project settings and Choose create now i have a timeline i can actually start assembling the material directly in the timeline and start putting together this edit and making some sort of sense of the material that i've got so let's go to the interview smart bin so that we can actually see the interview clips from the sort menu in the media pool just click and make sure that you're organizing these clips by clip name This will put them in the order that we're roughly interested in in this case we
actually have int 01 and it's called shoot the real world based on the naming convention that we're using for this project you can see that as i'm scrubbing backwards and forwards my live media preview is on so that i can actually see the content of that clip if my audio scrubbing was also turned on i'd also be able to hear the audio scrub As i move my mouse back and forth to turn the audio scrubbing on and off you can use shift s i'm going to double click this clip and that will actually open it
directly into the source viewer now i can use the scrubber bar here in order to be able to return to the beginning of that clip and i'm just going to play the clip through just so that we can all listen to the interview You could use the spacebar or the l key so in this film making a documentary about how the airplanes change the world it was really important to go out and shoot the real world and how the airplane is connecting and making all the things possible that i want to convey in the field
well obviously i don't want to use all of that interview but in this case as a good starting Point i'm actually just going to bring the whole clip into the timeline now there are several ways in which we can do that for example i can just pick the clip up from the source viewer and drag it and drop it into the timeline this is often a manual way of being able to edit but it's very limiting on what i can actually do when it comes to editing footage together so in this case i'm just going
to press Command or control z just to be able to undo those changes and this time instead of dragging and dropping the clip into the timeline i'm actually going to pick the clip up and drag across to the timeline viewer and you'll notice on the right hand side of the timeline viewer i've actually got all of the editing functions that i can perform inside the edit page this is a useful way of being able to remind yourself of the different functions that We have the default is actually overwrite edit if i now let go of
the mouse the clip is edited instantly to the beginning of the timeline the timeline viewer has automatically become active so if i use the up arrow on the keyboard i can return to the beginning of the timeline i'm just going to play forward just like i did in the source viewer using the l key on my keyboard Yeah so in this film making a documentary about how the airplanes change the world it was really important to go out and shoot the real world that's a good place for this sound bite to end now you can
see in the timeline i've got a good guide with the image of the waveform where he starts and stops speaking and you can actually use this As a guide when you actually want to position the playhead for the next edit and in this case i'm actually going to click the detail zoom button just to be able to step into the timeline a little bit clearer and then use the j and l keys in order to be able to find the exact point within that interview where he's finished that line real world and you can see
from the waveform this is very Clear where he stops speaking and where he starts again now i'm going to return to my full extent zoom function this allows me to see the whole timeline from beginning to end and the playhead is now the location that i'm actually going to perform the next edit so let's find an interview clip let's go to interview 02 double-click from the media pool to open It into the source viewer and now i'm going to return the playhead to the very beginning and i'm going to play through the interview well seven
continents 18 countries it was very important that everything was real uh if it was possible to shoot it we wanted to go shoot it if we couldn't get the shot or the weather wasn't right we would either go back to that location stay at that location longer or it didn't make the movie it was really Important every shot was original and that everything was real but there's a few things only and again i don't want to use all the interview i only want to use a portion of the relevant part of the interview so in
order to be able to see the parts of the sound bite that i actually want to use i'm actually going to use a feature inside davinci resolve which i find very useful on a day-to-day basis if you come up to the top of the source Viewer and click the options menu that's the three dots that you see at the top of the viewer we can actually choose to show the zoomed audio waveform you can also choose to show a full clip audio waveform let's try that first and that actually shows me a waveform very similar
to the waveform that i have for the clip in the timeline but because it's actually showing me the whole interview it's actually a little bit Difficult to actually focus on where i want to concentrate on so in this case i'm going to click back in the options menu again and choose show zoomed audio waveform now as i scrub through the clip you can see that it will actually show me a detailed waveform view depending where i am within the clip i'm going to return the playhead to the beginning of that clip i'm just going to
play it through and i'm listening for The first line for his sound bite well seven continents 18 countries it was very important that everything was real if it was possible to shoot it we wanted to go shoot it so that's why i want him to start where he says if it was possible to shoot it we wanted to go shoot it so i'm now just going to press the j key just to be able to back that up to the beginning of that sound bite And listening to it closely there's an r at the beginning
that i'd actually don't want to include within the sound bite so now i can actually jog through if i turn on my audio scrubbing i can jog through one frame at a time you can use the left and right arrow keys for this but i actually find it's really useful holding down the k key and tapping the j or the l keys so at this point i want to add an in point into my source viewer there's only One way you really need to know how to do this and that's by pressing i on your
keyboard so i'm now going to play the interview through to find the end of the sound bite that i'm interested in if it was possible to shoot it we wanted to go shoot it if we couldn't get the shot or the weather wasn't right we would either go back to that location stay at that location longer or it didn't make the movie it was really Important every shot was original and that everything was real but there's and that's the word real where i actually want this sound bite to end so i'm just going to back
the playhead up and that everything was real but and again you heard a little bit of the butt at the beginning so i'm just going to come back just a few frames find that gap that you can see there in the waveform and that's where i want to add my out point And of course magic shortcut is o for out now that i've got my in and out points set i might want to just double check that they're in the right position so i can actually press shift i to jump directly to an in point
shift o to jump directly to an out point if i actually want to preview the sound byte between the in and the out point i can hold down the option key and press the forward slash key on my keyboard if It was possible to shoot it we wanted to go shoot it if we couldn't get the shot or the weather wasn't right we would either go back to that location stay at that location longer or it didn't make the movie it was really important every shot was original and that everything was real and it's a
little bit tight on the output there so i'm just going to jog forward just a frame and reset the out point by pressing o However sometimes you don't want to listen to the whole sound bite from beginning to end it could actually be quite long so if you actually also want to preview where the out point is just simply bring your playhead a few seconds to before the out point and then from the playback menu you can choose play around 2 play 2 out and you can see here keyboard shortcut is option command forward slash
And that everything was real so now that i've got the in and the out point set for this soundbite i'm going to edit it into the timeline using an overwrite edit now i can pick the clip up again and drag and drop over the timeline viewer to access the overwrite i don't need to drag to the actual overlay however if i just come down here to the top of the timeline you'll see that there are three editing function buttons These buttons are probably the most common used editing features which is why they've been included at
the top of the timeline you'll see that the middle one of those buttons is actually overright clip and my keyboard shortcut for this is f10 now if you're on a mac you may find that the f10 key doesn't perform an overwrite edit by default in which case you'll need to go into your system preferences and change the keyboard settings so that It uses all the f1 and f2 keys as standard function keys if i just press f10 you'll see that the clip is overwritten into the timeline it's actually overwritten the tail end of the first
interview clip if i use the up arrow key to navigate back to the previous edit point and then preview the edit using the forward slash key shoot the real world if it was possible To shoot it we wanted to go the first interview clip now ends at the right point and the second interview clip starts at the right point but it's a little bit too tight we've also got a very nasty visual jump cut between two interview clips so we now want to start to insert some of the b-roll in just to be able to
pace out those interviews let's go to the b-roll smart bin let's go for this second clip here of This a380 taking off let's double click to open it up into the source viewer and then use the jk and l keys in order to be able to preview this clip that's fine just as the wheels are about to leave the tarmac let's set an in point a second or so before that and let's set an out point just after the plane has left frame before we get a very horrible sort of camera movement there So that
set and out point as the tail of the frame has left the shot because the playhead is in the right place in the timeline i don't need to worry about where this shot is going to end up make sure that the playhead is on the edit point in the timeline so that you're inserting it in the right place and in this case i'm just going to pick the clip up and drag across to my overlays and this time to perform an insert edit i'll just Drag it to the insert overlay and that inserts the clip
in the timeline and moves the second interview clip out of the way this is one of the advantages for using those overlays rather than the drag and drop approach to editing using a drag and drop approach you wouldn't be able to insert the clip as efficiently so again one reason for using these functions in the timeline let's move the playhead Back to the start of that clip so we're on the first frame of the lufthansa plane and in this case let's go to this clip here it's called a01 a380 taxi let's double click that to
open it up now you'll notice straight away that this clip has audio it's not great audio however so what we need to do here is we need to actually make sure that when we insert this into The timeline that we're not actually going to use the audio now there are a couple of ways that we can do this a simple way would be if we were using drag and drop editing over the timeline viewer we can actually come here to the source viewer and actually specify using one of these overlays whether we want to edit
just picture or just sound so in this case i can click on the overlay drag across to the timeline Viewer and choose insert in order to be able to just insert the picture and not the audio for this clip however i'm just going to undo that with command z because if i want to use my keyboard shortcuts or my editing buttons at the top of the timeline unfortunately i can't specify using that overlay whether i'm using just the picture or just the sound for example if i come here and use the Insert editing function you'll
see it will actually edit the audio in as well as the picture again i'm just going to undo that so there's actually another control that we can use in order to be able to specify whether we're editing just picture or just sound directly into the timeline it's these two buttons that appear with red borders along the left-hand side of the timeline these are your source controls i'm Actually going to come down to the audio source control here and i'm just going to simply click once in order to disable that button in the timeline now when
i perform an insert edit using the timeline button no audio is brought into the timeline and this also means i can use my keyboard shortcuts efficiently as well another insert edit that we're now going to want to do is actually within this interview clip here So i'm going to move the playhead to the beginning of that interview clip i'm just going to play through the beginning of it for the first bite if it was possible to shoot it we wanted to go shoot it if if it was possible to shoot it we wanted to go
shoot it that's where i actually want to insert the next shot because we wanted to go shoot it if the shot that i'm actually looking for is in my b-roll smart bin and it's the clip of Aoa 10 maldives so double-click that to open it into the source viewer i love this shot is this wonderful sort of in and out shot where the camera is half submerged in the water and there is a plane that comes in over the top of the camera i'm actually just going to set an in point just as the shadow
of the plane appears over the coral and now i actually want to specify Around about a three second clip so one way that we can do that is actually to use time code information to be able to move forwards and backwards through the clip in this case i'm just going to hit the plus key on my keyboard and type in 3 0 0 which you can actually see in the top time code field in the source viewer actually translates to three seconds hit the return key press o to set the out point in order to
set a three second Clip actually technically it's three seconds and one frame as you can see from the duration field however the playhead is inclusive of the frame that you're currently on so the out point is always set at the tail of that frame if you need it to be three seconds exactly you just need to come back one frame before you set the out point but now i can do an insert edit by pressing f9 Excellent so now we've got the edit really starting to come together however at this point you're probably wanting to
get a little bit more control of the timeline particularly when it comes to zooming also you might want to start refining parts of the timeline by removing sections zooming in the timeline is actually much simpler in davinci resolve 17 than it's Ever been we've already encountered two fixed zoom functions these are the full extent zoom which will always show the full length of your timeline irrespective of how much content is in the timeline and you've also got the detail zoom button which allows you to zoom in to a fixed point on the timeline wherever your
playhead happens to be however you've also got a custom zoom option as well so this button allows you To set your own zoom level which you can do by just simply dragging the slider or using the plus and minus buttons to zoom in and out or you could use keyboard shortcuts command equals allows you to zoom in on your playhead command minus allows you to zoom out if you're on a pc instead of using command you just simply use control and you can also use shift z in order to be able to fill the timeline
Window this isn't the same as actually using the full extent zoom button however the shift z function allows you to see the full timeline zoom but it doesn't remain fixed at the full timeline zoom so if you add any other clips to the timeline you'll have to manually change the zoom in order to be able to focus on the parts of the timeline that you actually want to work with however shift z is very useful if you Actually want to return to a previous zoom level in the timeline just simply toggling shift zed is a
very useful way of being able to step in and out of the timeline if you've got a three button mouse with a scroll wheel on it then what you can do is just hold down the shift key and use the scroll wheel in order to be able to dynamically adjust the height of each of the tracks and you can also Change the bias between the video and the audio part in order to be able to get a larger audio track and you can actually see how easy it is now to see the the waveform for
those clips if you don't have a wheeled three button mouse then you can always use the timeline view options menu here and then actually use the track height sliders at the bottom of that menu in order to be able to adjust the height of your video and audio tracks So now that we've looked at how to adjust the timeline zoom level so that you can comfortably view the timeline depending on what you need to do let's look at how we can remove some of these clips and start to refine the edit a little bit further
to begin with you might want to actually remove just a simple portion of a clip for example you might want to remove the video or audio part of a clip if i actually concentrate on this middle Interview here i'm just going to move the playhead over that and hit my detail zoom button so that i can focus on this you should notice on the left hand side of the clip in both the video and the audio there are two little chain link icons this indicates that this clip is linked in both these video and audio
portions using linked clips is very very useful because it means that you can move them Around very easily when you select the video portion of a link clip the audio portion is also selected automatically so it means it's very hard to move these things out of sync however in this case i just want to remove the video portion of this clip to override the link temporarily on the timeline just simply hold down the option or alt key on your keyboard and then click on the video clip in order to be able to select it Alternatively
you can actually turn off the linking for the whole timeline by just coming up and choosing your link selection button here and with that turned off if you hold down the option key and select a clip it will actually select any linked parts of the clip automatically so basically the option or alt key just simply reverses whatever your link selection is set to for your timeline with the video clip selected i'm just Going to go back to my full extent zoom so you can see what happens to the timeline and i want to ripple delete
the clip so in this case i'm going to hold down shift and use the delete key in order to be able to remove that clip and you'll see it removed the video clip but it didn't remove the audio portion of the clip more importantly it's also closed the gap and rippled the timeline in order to make the timeline slightly shorter and The full extent zoom is actually still showing me the full length of that timeline however something else that you may need to do is actually be able to remove a portion of a clip from
within the clip and a good example of this is if you're working with interview clips let's move the playhead to the start of the last interview clip in the timeline and then use the detail zoom button in order to be able to zoom in There's a line in this clip that i actually want to remove so i'm just going to preview the clip just by playing it if we couldn't get the shot or the weather wasn't right we would either go back to that location stay at that location longer or it didn't make the movie
it was real so he says we either go back to that location stay at that location longer or it didn't make the movie it's a little bit repetitious it's not quite but the director actually Wants to take the the second line out there stay at that location longer so let's look at how we can do that first of all we can actually see the waveform where the portion of the dialog is that we actually want to take out again using the shift key and the scroll mouse i can actually make that even bigger i'm going
to move the playhead back and my audio scrubbing is going to come into handy here so i'm just going to play Forward and stay at that location and i can hear the beginning of the word stay making sure that my playhead is on that point you can see from the waveform in the timeline that i look as i'm at the correct location and now what i want to do is i want to cut this section out so i'm actually going to use the blade edit mode for the timeline coming here to these first four buttons
At the top of the timeline these are my different timeline editing modes the first of these is the default selection mode this allows me to click on clips move them around and delete clips i've also got my blade edit mode featuring a very frightening looking razor blade icon i have to say if i select that or use the keyboard shortcut b i can then bring that blade down into the timeline here Making sure that my snapping is on you can see how easily that line will actually snap to where my playhead is and i'm just
going to click once in order to be able to add an edit that's the beginning part of the clip that i actually want to lose from the timeline i now need to find the end stay at that location longer or it didn't make it almost longer or and i'm looking for the word or About there it's taken a little bit of sort of jogging back and forward one frame at a time just in order to be able to hear that but i was actually trying to find the beginning of the word or again i just
want to take my blade and just come near the playhead and click once more in order to be able to add a second edit point this is now isolated the portion of the clip that i actually want to remove from the timeline However i don't want to use the blade mode again so i'm going to switch back to the selection mode just by pressing a on the keyboard i can now select that clip and then press shift backspace or shift delete in order to be able to remove the clip from the timeline that's got rid
of the portion of the clip that i isolated but i now need to hear how that edit is working so if i press the forward slash key right we would either go back to That location or it didn't make the movie it was really important it's probably not the tidiest of edits but don't worry only the very skilled and experienced editors will be able to get that right first off more often than not when you're editing something you just need to make your best guess and then refine it later so we'll leave this for the
moment but we'll come back to it in a few minutes In the meantime i'm actually just going to go back into my full extent zoom so that i can see the whole timeline and now what i want to do is remove this portion of the first interview clip you remember that we overwrote the tail end of that clip however the beginning part of the clip is still in the timeline so i want to remove that now if i use my selection edit mode here i can select the beginning part of that interview And if i
trim that you can see that it will actually trim and remove a portion of the clip but it will also leave a gap this is not a huge problem but there's more efficient ways that we've got been able to trim that and not leave a gap so i'm just going to undo that in order to put the clip back to how i originally had it and again i'm going to change my timeline editing mode I'm going to change it from the selection mode to my trim edit mode and trim edit mode is a really powerful
way of being able to manipulate the clips in the timeline and davinci resolve you don't need to keep going in and selecting specific tools this one mode will actually do all of the trimming functions that i need on a day-to-day basis using t allows me to select the trim Edit mode and now when i go back into the timeline i can click the same edit point and start to trim just by dragging the mouse to the right as i do so you can see that the rest of the timeline is actually changing i'm actually rippling
the rest of the timeline back thereby shortening by the amount that i'm actually trimming off the beginning of that clip you can also see i can go the other way as well i can actually add footage back To that clip if i need to if i keep going so [Music] and you can hear from the audio scrubbing where the actual interview starts so i can now let go of the mouse and you can actually see the tool tip there actually says that i'm removing at three seconds and four frames from the beginning of this clip
now if i return the playhead to the Beginning of the timeline i can play from the beginning in this film making a documentary about how the airplanes change the world and i've actually got a much sharper start to the interview and i can also use the trim edit mode in order to be able to fix the problem with the edit in the interview that i was just doing earlier move the playhead to the edit point and then use the detail zoom button to zoom In sometimes i only want to be able to trim a frame
or two in either direction so being able to zoom in means that i'm much closer to the footage and therefore have a little bit more control over it in this case i'm actually just going to select the outgoing part of this clip here where the waveform is that shows me that probably i'm just catching the outgoing word there and now i can actually click and drag in Order to remain able to remove one or two frames at a time if you haven't actually got the level of control that you're interested in you may want to
turn off your snapping here at the top of the timeline keyboard shortcut n is always worth remembering because you can always do this at any time even if you're in the middle of an operation so in this case i'm going to click and i'm going to tap n on my keyboard and Now i can actually remove a single frame from that clip but you can also do this using keyboard shortcuts as well for example if i use the period key i can actually add a frame to that clip and if i use the comma key
i can remove a frame from that clip so now if i press the forward slash key right we would either go back to that location or it didn't make the movie it was really important And again it feels a little tight still i think the outgoing portion of that is fine but let's let's now select the incoming portion and let's just trim it back one frame so i've now added a frame using the comma key in order to make that timeline one frame longer because i'm always rippling the footage right we would either go back
to that location or it didn't make the movie it was really important And that's only pretty good to me but you might would want to sort of explore this a little bit more what would happen if we added another frame to the incoming shot using the comma key right we would either go back to that location or it didn't make the movie it was really important again it's probably about the same so i'm just going to take that frame off again and probably leave it at that point so now i'm happy with how that edit
is working i'm actually Just going to start adding a few more clips to the timeline just so we can pace out the edit and see where we're going with things so in the timeline i'm going to deselect the edit point and go back into my full extent zoom and just use the shift key and the scroll wheel on my mouse just to adjust the track height so i've got a little bit more space for the audio i'm going to return the playhead to the beginning you can either simply drag it Or use the home key
to go back to the top of the timeline so at this point i'm just going to add some music to this timeline well we already created a music bin earlier so we know exactly where to find that piece of music in the bin list select the music bin and then i'm just going to turn off my audio scrubbing by pressing shift s and then i'm going to double click to open the music into the source viewer Now when you open audio in the source viewer you actually get an upper waveform which actually represents the whole
of the audio clip and a lower waveform which actually represents a zoomed in portion of the clip so it's like having the two waveform displays side by side which is very useful to work with in this case we actually want to take the whole of the clip so we don't need to set any in or out points to this clip And in this case i'm just going to pick the clip up drag it across to my timeline viewer and choose the place on top function this then simply creates a new audio track at the bottom
of the timeline and places the clip in it may seem counter-intuitive that i actually use something called place on top to actually place the audio at the lower part of the timeline but it just is the way that that edit works with Audio which typically lives below the video in a timeline the audio is actually quite loud this piece of music is so i'm actually going to move my mouse over the clip and actually find the point where i can actually locate the volume curve on the timeline if i now click at that point i
can grab hold of the volume curve and lower it to an appropriate audio level i'm actually just going to take it all the way down to around about -12 db in the timeline here doesn't necessarily mean to say that's the right level however it's a useful starting point and i always need to refine the levels later anyways now that i've got the audio at a reasonable level i should be able to hear the interview over the top of the music in this film making a documentary about how the airplanes changed the world it Was really
important to go out and shoot the real world that's fine at the moment it gives me something to work with it might be that the music gets changed at some point in the future or i might need to refine it a little bit more so i don't want to spend too long adjusting the levels and making them perfect not at this stage now that i've got the music into place that actually gives me a time for the edit so i've now got something to aim For in terms of an overall duration let's move the playhead
to the edit point between the two interview clips halfway through this piece of music we're going to start by editing a new clip in here and it's actually just going to help us to fix that very nasty jump cut let's go to the b-roll bin and let's find the clip called south pole double click that it's aoa 8 shot at 8 And i'm going to set an in point just as the tail of the plane is coming out from behind that yellow sign so an in point there and i'm wanting to take five seconds i
don't know if five seconds is the right duration but it's just a good all-round number that we can tend to work with for putting shots in so i'm gonna use plus five zero zero in order to jump the playhead forward by 5 seconds Hit return set an out point and now i can just make a simple overwrite edit with f10 if i back the playhead up in the timeline and then hit the forward slash key right you can either go back to that location or it didn't make the movie it's really important and i think
that edit works nicely the audio of the interview is working very well and the new picture that's overwritten the end of that interview Actually covers the jump cut so now let's add a few extra clips to the end of this timeline and then we can actually trim those clips to the correct duration from the b roll bin select the kenya clip aoa 07 hold down the command or control key and select aoa 11. that's the martin landing and then again hold down command or control in order to select aoa 14 Aerial alaska with those three
clips selected i can actually drag those clips directly to the timeline viewer and choose the append at end edit what the append at end is really useful for is throwing clips at the end of your edit so you can use them to quickly assemble footage into the timeline and it doesn't depend on where your playhead is it just depends on where the last clip is in your timeline Obviously those clips are way too long for this edit so i just need to reduce their duration to select the clips i'm going to switch into my selection
edit mode select the clips now go back to my trim edit mode right click any of those clips choose change clip duration command or control d is the shortcut and from the change clip duration box i'm going to choose the 5 second preset As i said 5 seconds is not necessarily the correct duration it's just a duration that's worth starting at click change and now my clips have been trimmed on the timeline however i've still got a little bit of work to do here let's move back to the beginning of the south pole clip and
then let's use the detail zoom button just to zoom in a little bit here i want to make the south pole clip a Little bit shorter because nothing really happens in it so a five second shot is a good starting point but let's just let's just make it a little bit shorter from the beginning so if i select the incoming part of that clip just to select that clip there you'll notice i haven't selected any audio and i'm using the trim edit mode here in order to be able to select the beginning part of that
clip and i'm just going to Remove a few frames just to bring it down to about four seconds duration you can see that as i'm trimming it the tooltip is telling me how much i'm actually trimming it by and the gray numbers underneath represent an overall duration however look at what's happening to the underlying audio clip of the interview remember i had the interview working in terms of the audio by changing it like this i'm actually Losing parts of the outgoing audio clip i don't want to do that so in this case i need to
undo that change now the reason that this is happening is because resolve fights to keep everything in sync after the point at which you are trimming so if a clip starts at the trim point or afterwards then it will move in an appropriate direction in this case we Actually need to break that functionality that up until now has actually served us quite well so in this case i'm actually going to come to the track header and i'm going to choose to lock the track that will prevent any additional changes being made to any of the
clips on this track i'll now trim that clip to the four second duration that i was aiming for And you can see that the audio underneath is now no longer moving let's go back to full extent zoom and then play to review the change go back to that location where it didn't make the movie it was really important every shot was original and that everything was real [Music] that's a nice shot of the kenya plane however you'll notice the beginning part Of that clip was just a little bit untidy so again i'm just going to
ripple a few frames out of the beginning of that clip if we move the playhead to the beginning of the clip go into the detail zoom use the trim edit mode in order to be able to ripple a few frames out to get rid of the the yellow part of the plane at the top of the frame there again bringing the duration down to that around about four seconds It's not important to get it accurate at this this point it just means that just refining the beginning of the shot let's continue playing [Music] now there's
a few things that we need to do here first of all we still need to be able to bring the duration of those clips down but they're actually in the wrong order i want the alaska shot to follow the south pole shot on the timeline Then i would actually like to finish with the saint martin shot now if i use my selection edit mode to be able to move a clip around the timeline alls i'll simply do is overwrite what is currently there so i need to use a different function for this and this is
what we would call a shuffle insert edit and it's a little bit of a secret Function that you now know about to perform a shuffle edit hold down the shift and command or control keys and then use the comma and period key in order to be able to move the clip backwards and forwards through the timeline so i can now put the aerial alaska shot after the south pole shot if i hold down the command key and use the left and right arrow keys this will allow me to select another clip hold Down shift and
command and use the comma and period keys allows me to reorder those clips as well and you can actually select multiple clips on the timeline and use the same keyboard shortcuts in order to be able to shuffle those groups of clips around the timeline this makes it really easy to move one scene from one part of the timeline to another so now i've got the shots in the right order i'm just going to trim the aerial Alaska shot before adding the credits to the end let's go into detail zoom make sure in my trim edit
mode by pressing t and i'm just going to trim the end of that shot again to the magic 4 second duration i'm going to go back into my full extent zoom and i'm just going to play the timeline just so that i hear the last beat of the music [Music] I'll use my audio scrubbing just to be able to find the beat of that music so using the audio beats for the music is a good way of being able to guide the edit now we need the credits so let's go to our credits smart bin
let's double click to select the credits in the source viewer and in this case we actually want to take all of the credits So we're not going to set any in or out points instead we're just going to perform an overwrite edit with f10 if i use the up arrow key in the timeline use the forward slash key [Music] now that i've got those shots in at the end of the timeline i just need to go back through and refine which parts of the shots that i'm using so i need to use the trim edit
function for that as well Let's position the playhead over the martin shot at the end of this timeline and use the detail zoom button to zoom in if we preview the shot by selecting it and pressing the forward slash key [Music] you can see that we're actually using the beginning part of the shot where actually the plane is quite far away so instead of that if we use the trim edit mode and actually click on the Upper part of the clip on the timeline this will enable us to slip the actual content of the shot
you can see how the clip is slipping on the timeline and how the thumbnails are being updated if i click keep on dragging if you look at the timeline viewer you can see in the upper right corner you can see the outgoing frame as the plane disappears overhead and out of shot and that is where i want that shot to end This is called a slip edit [Music] the slip edit is one of the most powerful trimming functions that we have in the timeline i'm going to return to my full extent zoom and just position
my playhead over this alaska shot again i'll select that and just press the forward slash key just to preview it every shot was original and everything was real [Music] it's a nice shot but it's lacking a certain amount of dynamism so another thing that we can often do with shots is we can adjust the speed of them with that clip selected i'll just come up here to the top right hand corner and open up the inspector scrolling through the inspector i actually have a category called speed change if i just simply click on that to
open It up i can now specify the speed of this clip speeding the clip up should give us something more to actually see as it looks as though probably the plane is actually going to be flying a little bit faster selecting the speed percentage type in 200 and hit the return key that then adjusts the speed of the clip so it's now playing at 200 percent or twice as fast If i hit the forward slash key was original and then everything was real [Music] there's now a little bit more movement in that shot so in
this case i can now slip the clip in order to use a later part of the shot as the camera pans around the plane so that we now get this shot in the top right quadrant of that timeline view as you can see the end frame is now the plane with the Mountings in the background every shot was original [Music] another way of using a different part of the same shot is actually to use a match frame and replace function in this case if i move the playhead to the first frame of the kenya clip
if i actually want to reveal the original source clip for that clip i can just press f On the keyboard in order to be able to do a match frame this actually brings the original source clip up into the source viewer this means i can now see all of the rest of the clip without actually having to manipulate it directly on the timeline if i now choose a new starting frame for this clip just as the plane is coming over this shot of the flamingos here i've now got the playhead in the correct Position and
now i can use the replace edit function in order to be able to match the two playheads together you can use the replace edit by simply dragging the clip over the timeline viewer to the replace edit overlay or alternatively you've actually got a replace clip button at the top of your timeline or you can use your keyboard shortcut of F11 and in this case the replace editors actually replace the clip by matching the two playheads together so the playhead here in the source viewer is actually placed at the location of the playhead in the timeline
and then the clip is actually replaced based on the source media clip after the playhead it's a very very powerful function if you actually want to be able to synchronize clips together it's Useful for being able to edit sound effects into the timeline or to be able to match two images together with different actions for example here if we go to the last clip here in the timeline where we actually have the saint martin landing plane flying overhead [Music] sometimes instead of match framing to the same clip you actually maybe want to Reveal the clip
in its original source bin this is because usually additional takes of the similar sort of footage would be available usually in that bin so in this case instead of match framing to the source clip right click the clip in the timeline and there you can use the find in media pool option that will then reveal the clip directly in the media pool in the bin and usually other clips around that Would be alternative takes for example this clip aoa 12 actually has the similar plane landing but also has lots of people in the foreground this
is a much more dramatic shot than the original one that we were using if i double click that clip to open it into the source viewer and then actually use my jk and l keys in order to be able to to find a frame which is sort of visually matching the frame That i'm viewing in the timeline viewer with the two playheads in these in the correct positions i can now simply do a replace edit and match the action across the two shots [Music] so these are just some of the trimming and some of the
editing functions that we have within resolve in terms of being able to put an edit together just before we actually move to the next Stage of the editing process just going to make a slight change to some of the audio for the interview and in order to do this of course i just need to unlock the entire track and in this case i just want to find a beginning of his interview here just at the very end of the interview didn't make the movie and i actually won't want to separate this part of the clip
here and just move It a little bit further up and out of the way so i could use my blade edit mode here to cut that clip or i could use a short keyboard shortcut for this if i select the clip and press command or control b that will actually split the clip and now i can move that clip and position it where i need it to be that there will do it was really important every shot was original and everything was real [Music] so hopefully this video has been useful in showing you some of
the editing functionality that we have within davinci resolve don't forget if you've got any further questions then please feel free to join us on the forum pages where questions are answered on a daily basis we've also got a full range of training materials available for free as well so check out the davinci resolve training Pages where you can download further videos and books to help you get to grips with resolve thank you very much you