hello and welcome to the next story about preparmix this video will be different than the previous ones because i will show you how to create the hexahedron mesh in gmash and import it to prepomex let's leave the performance for now and i'll show the geometry that's just the face it actually represents the back face of the beam and that we discussed in one of the tutorials the one about plasticity but modeled this just as a face you will later see why it was done this way and i just simply created a sketch and then use
the part make face from wires tool to create the face of course then i exported it to a step file all right let's go to gms gmash is an open source software it's far from user friendliness of preponx but it provides quite powerful meshing capabilities and most importantly you can generate hexahedral meshes which is not possible with most open source codes so let's open the geometry and that will use in this tutorial and that's the file displayed here and you can see that this is displayed just as edges and so i can enable display of
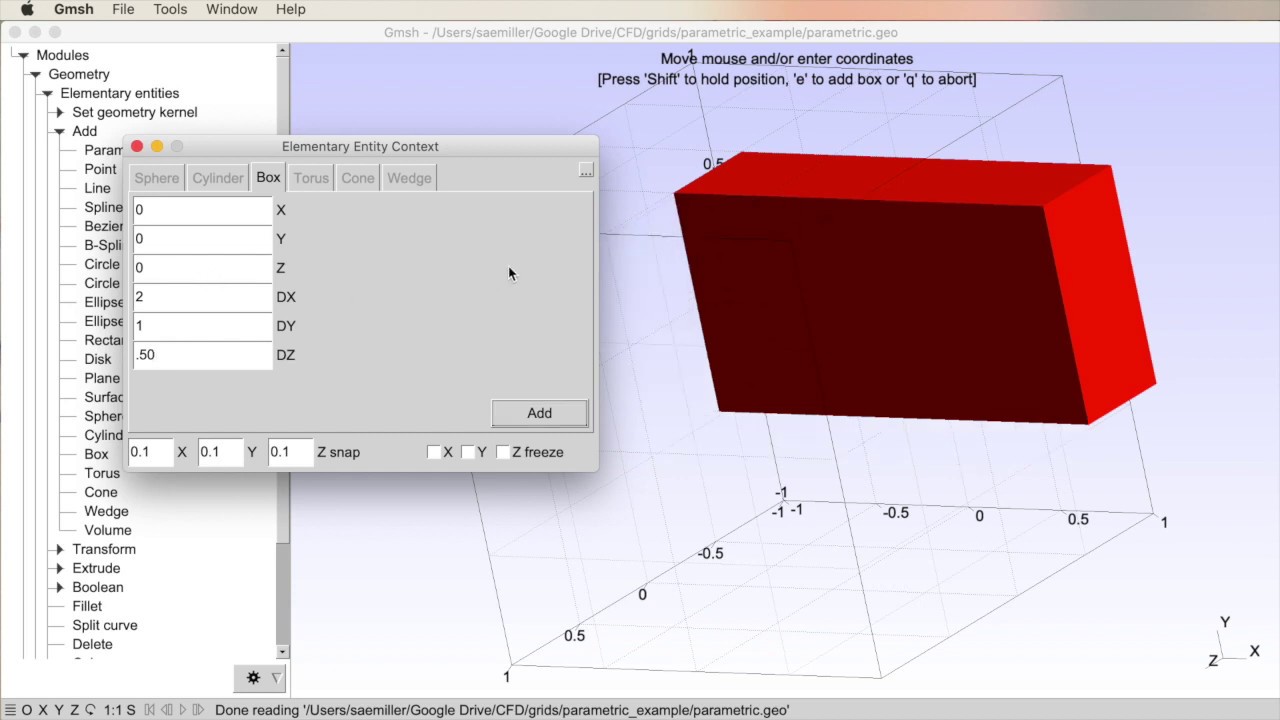
surfaces too the surfaces by default are displayed using these dashed lines i could change this but this is not important for now so so let's leave this like this and now i have to go to geometry elementary entities and set geometry kernel and select open cascade and this is necessary for for the whole process to work and i have to create a new geo file and you later see this file and this is the file that holds the the commands it's a script file to all the commands generated by gmash all right let's now go
to mesh define and transfer it and i will select the curve option i have to pick the four edges here and i need to specify the number of points and i will select six this is important because this affects the size of the mesh and that will be generated later and now i just have to press the e button to end the selection and q2 abort and also let's do the same with surface and i will select the middle of the surface here and again i press e to confirm q2 abort and that's it you
can edit the script so we will see how it looks like the commands that we used are listed here it does that the parameter they specified i could change this here save the file and reload the script and gmash would load the changes so you can also work this way interchangeably basically now let's just extrude the geometry along with the with the mesh but i also have to specify a few options for meshing i'll just select the automatic algorithm and recombine select all quads and that's basically what we need and i will also change the
visibility of the mesh to adjust the 3d element faces and edges that's all we will need in this case all right if you want to see the faces display normally you can go to aspect and select the solid display of the faces but this is not important so let's leave this all right now i will go to geometry extrude translate and i have to specify a few parameters and that's the distance of the extrusion and so i will specify uh the length of the beam that's that's what we need to provide here of course i
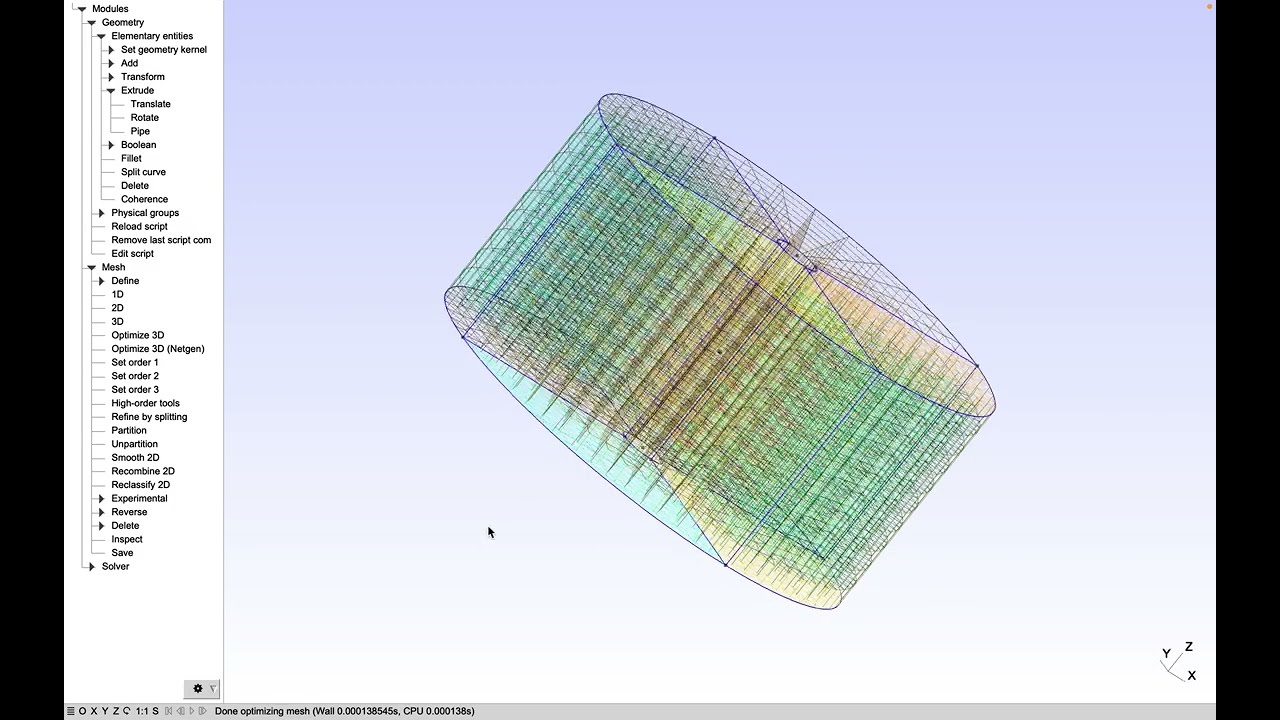
have to select the extrude mesh option i need to specify the number of mesh layers which also affects the density of the mesh and that's all i have to do i just need to also select the the face that will be extruded again confirm the same button as usually and press q to abort and now i can zoom out and see the generated geometry now i could display the faces properly but again it's not so important let's now um let's now generate the the mesh that we need but first i will do one more thing
i will create a physical group this is important because uh this way in the exported input file that we'll use in proper max won't contain unnecessary element types otherwise it could would it would contain surface and line element type so this is something that we don't need so we just need the solid elements uh for for the volume so i will just create a physical group for the volume and this will make the g mesh export just the uh solid elements let's confirm uh and close this uh i could i could also add the script
again and you can see all the definitions let's close this and now i will generate the mesh 1 d 2d and 3d and thanks to the display options that we set in the beginning you can see what we need uh to see let's hide the surfaces and we'll see and how the mesh looks like is the the hexahedral mesh that we generated using extrusion from from the surface all right now let's export this mesh um i have to specify the format like it can guess from the extension so i can just specify the the extension
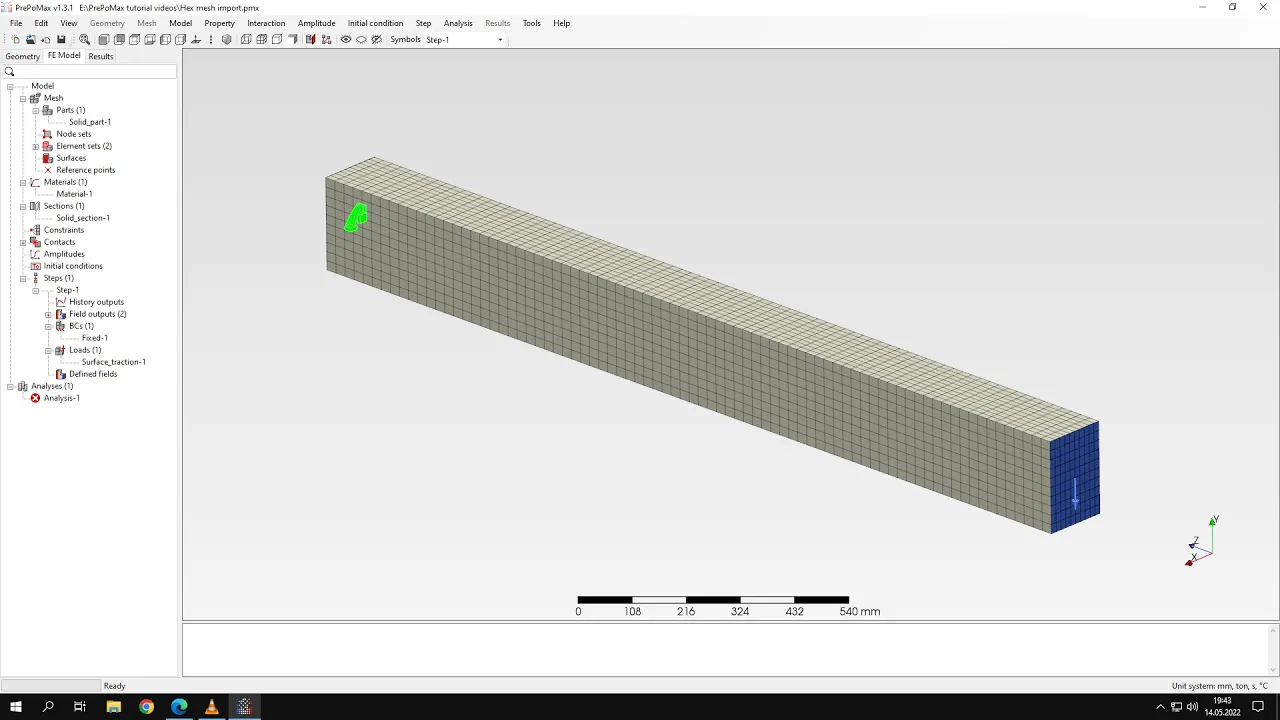
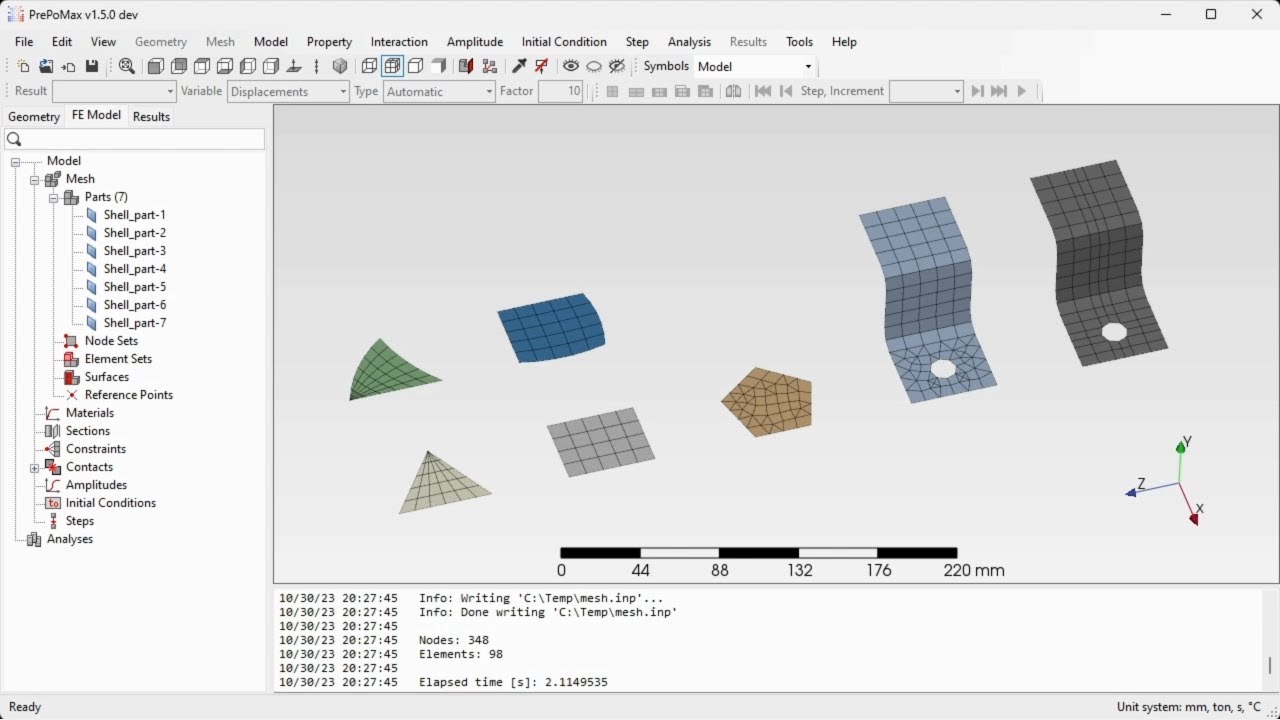
this will be input file and let's save this and use this mesh in prepare mix all right i can confirm this and now let's go to prepomex i will create a new model and this will be 3d model now i have to import the geometry of course and let's select the input file i can also use other formats universal files are also supported so mesh could be imported in different formats but input files are a good option for calculation and pre-comics all right you can see the mesh it was properly generated along with some sets
that we don't actually need one more thing is that i would like to change the type of the element i mean this will be hexahedron element but there are several types available and if you go to edit parts i mean in this tab you can see that we can change the type of element we can select from the list and those are the elements that we need to with reduce integration uh those are incompatible modes mode elements you can you can test them in various applications uh they are better for for some types of analysis
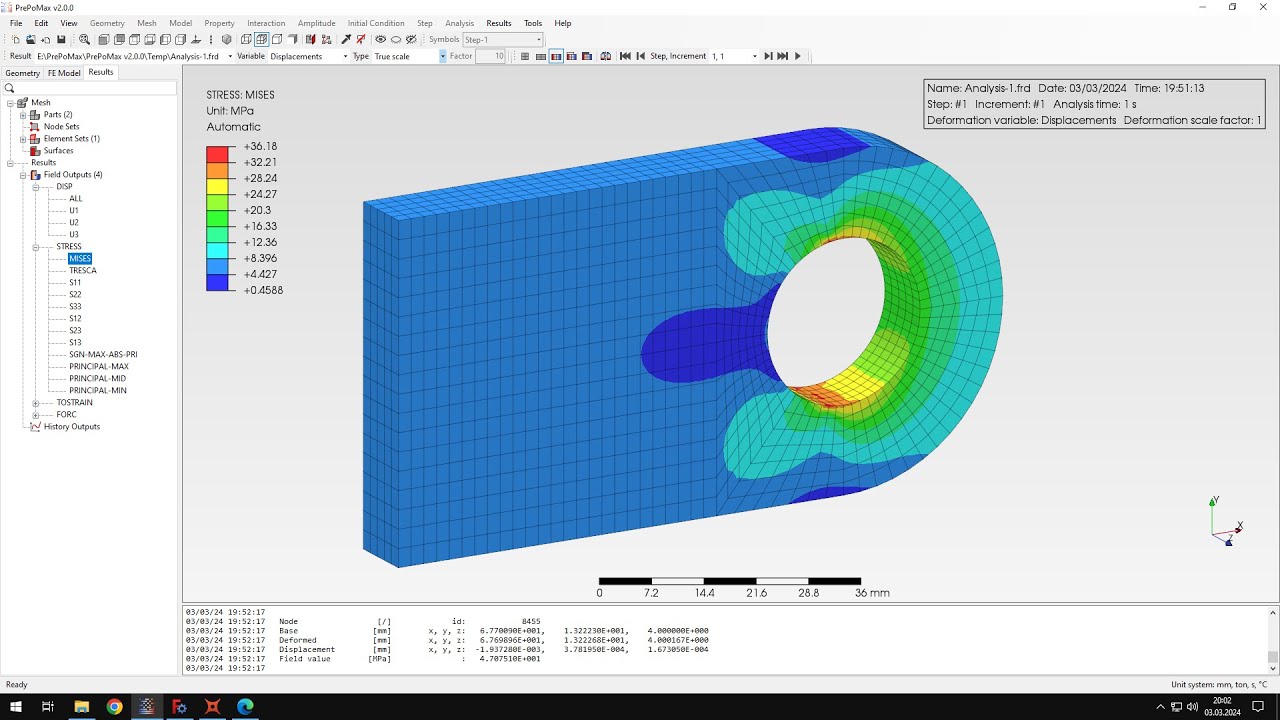
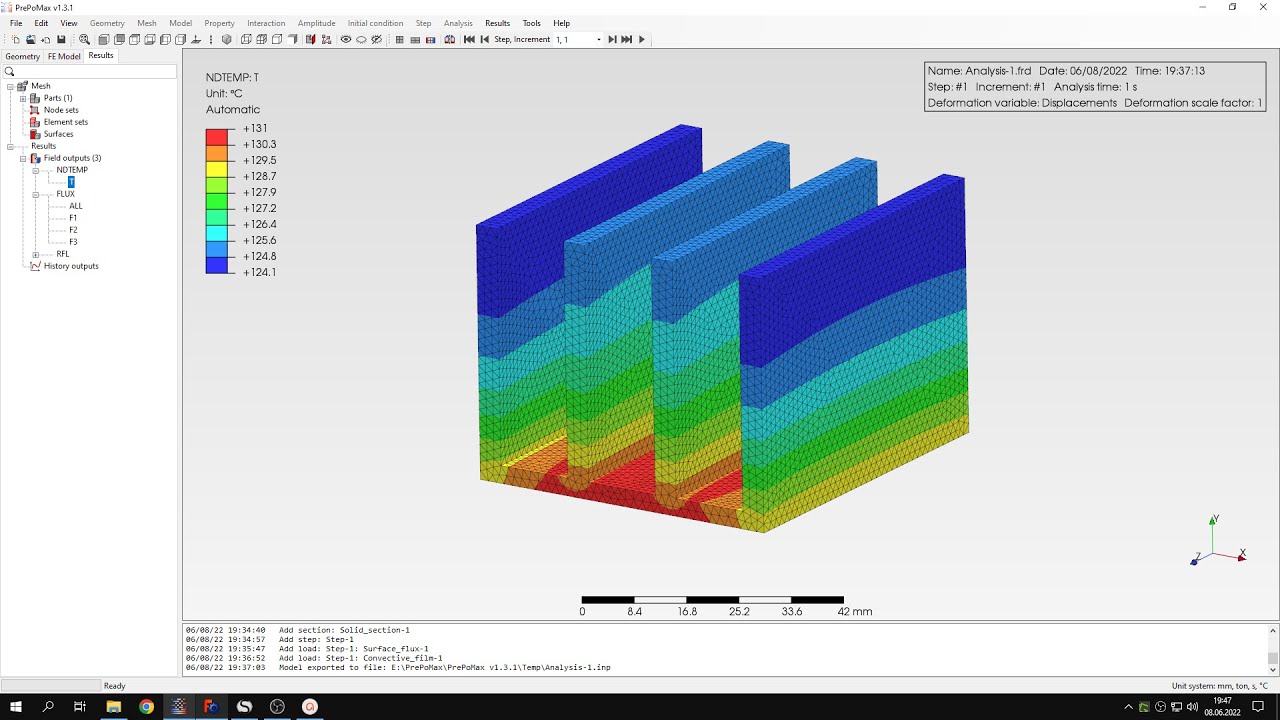
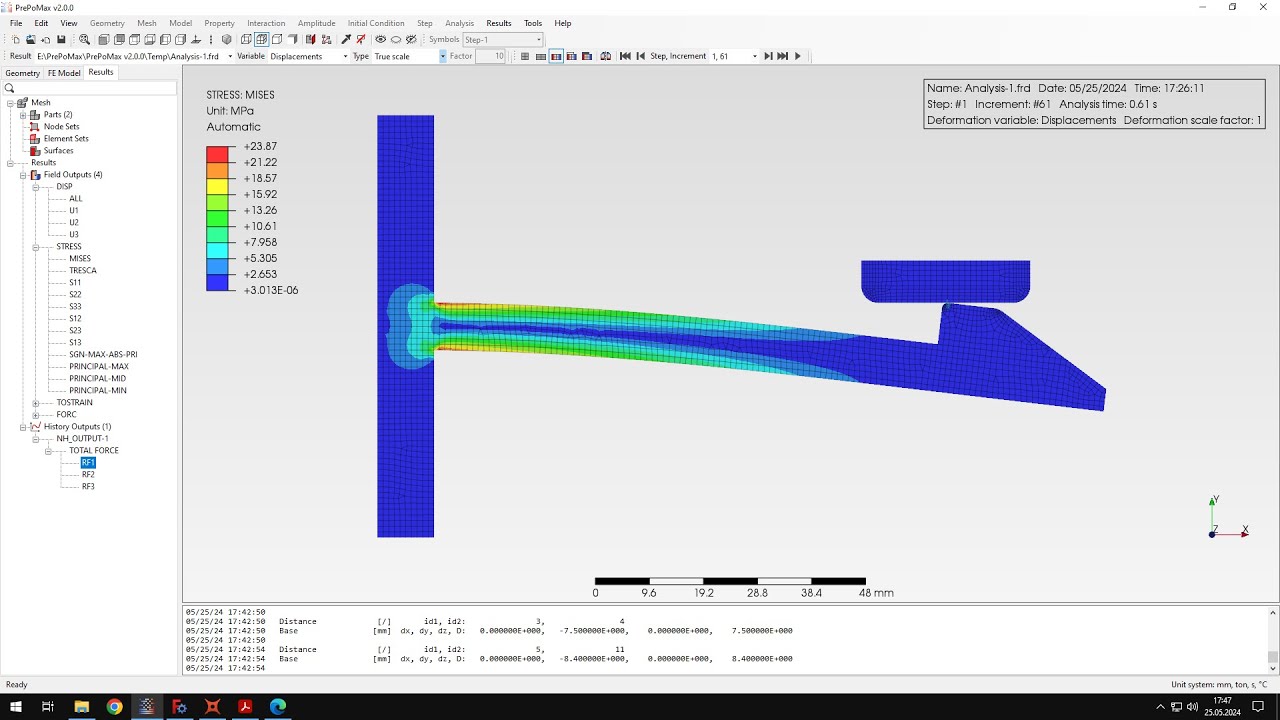
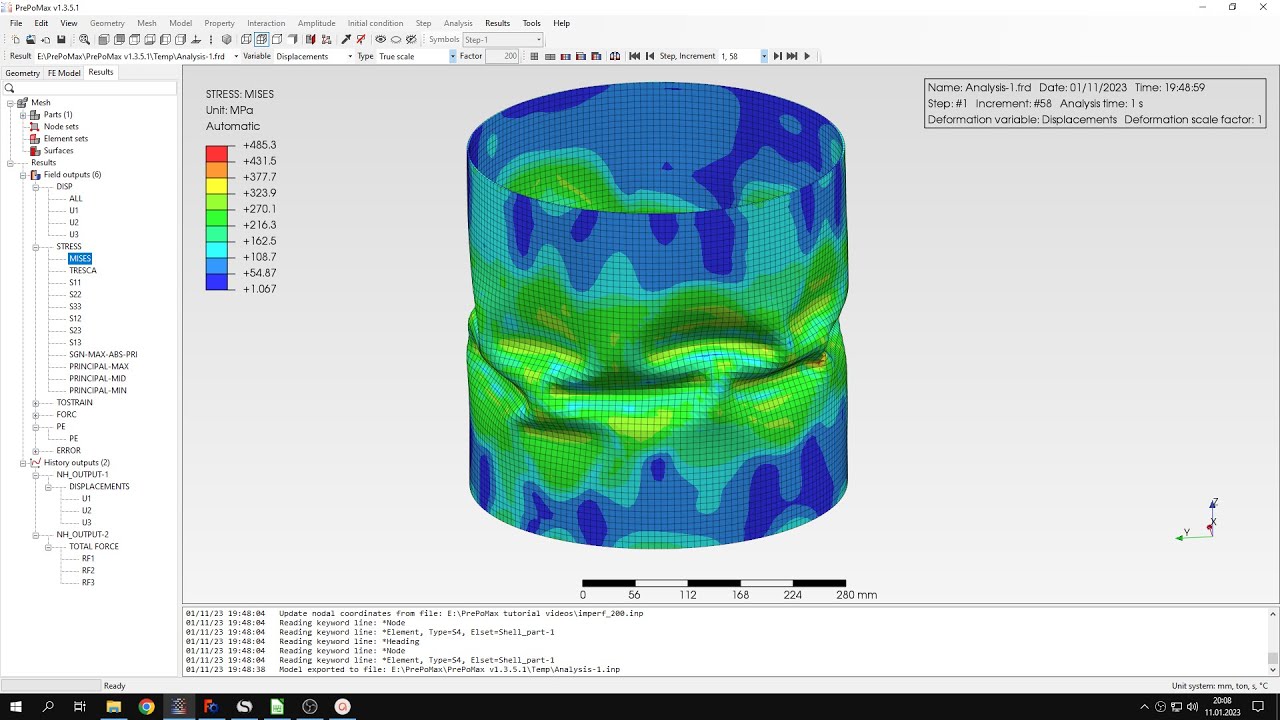
and in this case the the one here should provide the best results like actually i can show you here are the results that i obtained with various types of elements and using surface traction in calculus those are the the results you can also compare with tobaccos but this is the the result that we are looking for something around this the mesh will be a bit different because i i use different meshes before and but we lose the same element type and and type of the way we apply loading and so we should get around this
this value and this is pretty close to the identical solution and you i will show you this the solution of course later on and so now let's let's confirm this and i will specify the material and this will be steel so i will rename this and specifying typical values for the steel and i will use also plasticity and because i mentioned that this is the same model that we discussed in tutorial about plasticity and i used of course the same values so let's confirm this let's create a section apply this to the beam again confirm
and let's go to steps i will create a static step and now i just have to define boundary conditions and loading i'll select the the fixed boundary condition and you can see that proper max easily recognizes faces even if this is just an important mesh so i'll apply a fixed boundary condition to one of one end of the beam and now i will apply load in form of surface traction to the other side of the beam and the value that i would specify is of course again and the same as in previous tutorial about this
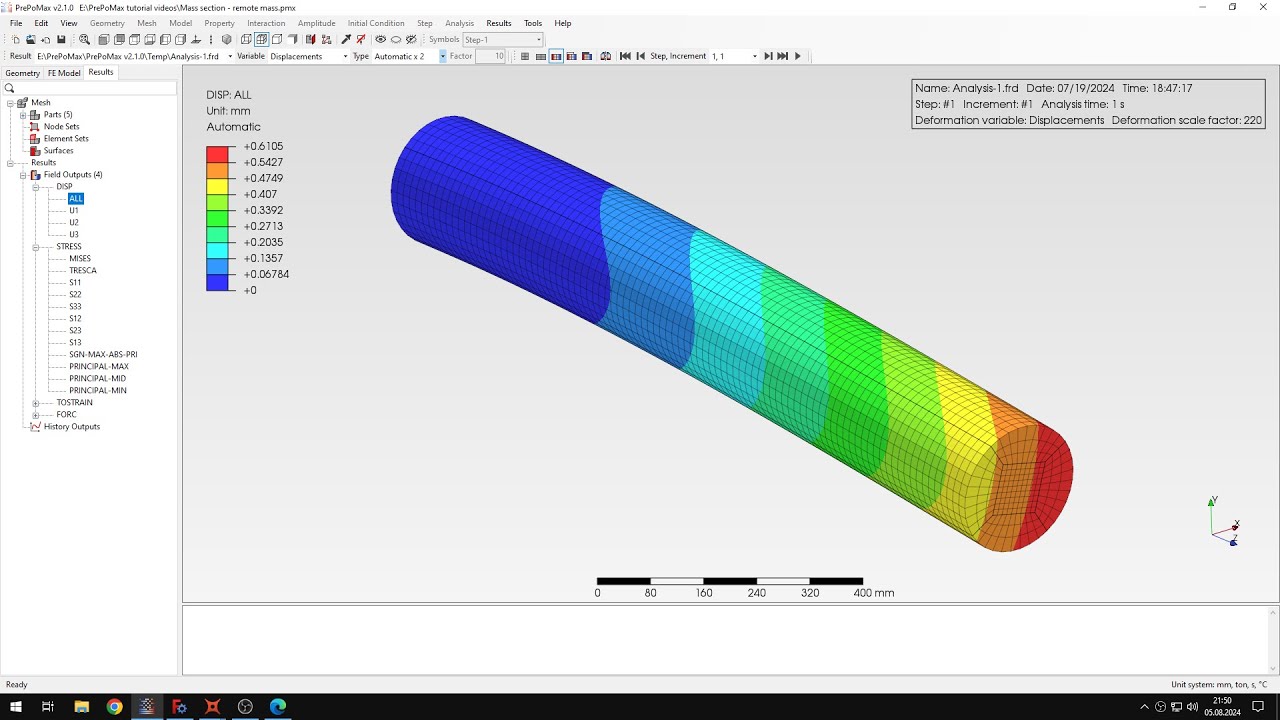
beam this case and because we want to to compare the solutions directly and now i have everything defined and i can submit the analysis let's do this you can see that the results are already available so let's check them and what we will be comparing is uh deflection of the beam so let's select the deflection in right direction let's go to the spread the sheet where i have the analytical value this is the same calculation that i showed you in in the previous tutorial about this beam and here you can see the the volume and
that we are looking for in people max and i should also show you the value that i obtained previously in previous approach with tetrahedral elements and you can see that it was not that close to the undergo solution that we use that we obtained here all right so let's see how it looks like here and you can see that it's much better uh it's not it's again it's it's not the accuracy still could be better but it's much better than it was with tetrahedral elements and you can see that we are close to what i
obtained previously for this type of element so uh i hope that everything was clear when it comes to gmesh i started using this software recently so i can make some mistakes please tell me if i should do something differently also please tell me if you want to see more tutorials like that about creating hydro meshes in external software importing them to the preformax and this is an interesting topic so that's it for this product tutorial thank you very much for your attention as always feel free to ask any questions and suggest topics for tutorials in
the comments have a nice day and see you in the next video
![[GMSH tutorial 1] Installation and first model building and meshing](https://img.youtube.com/vi/aFc6Wpm69xo/maxresdefault.jpg)

![[GMSH Aster Tutorial] Solving a Gmsh Model with Code_Aster (Groups, Mesh Format, Solver)](https://img.youtube.com/vi/sxah02VvWkY/maxresdefault.jpg)