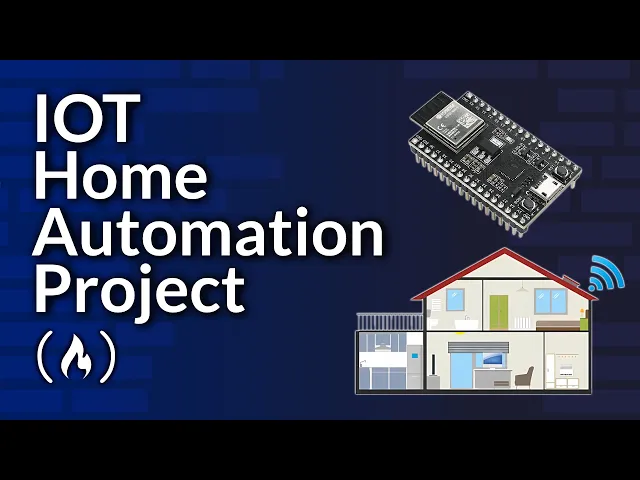
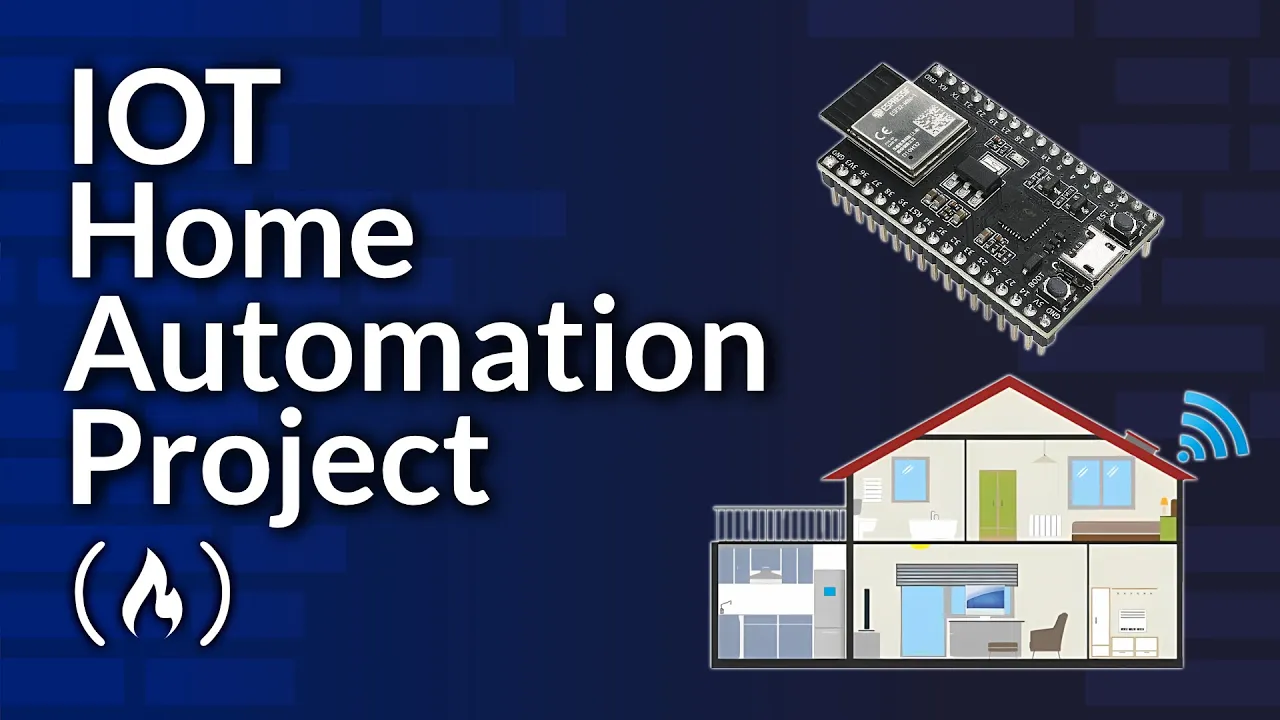
Welcome to this iot home automation course where you'll learn to build Smart Systems using esp32 microcontrollers LEDs and Servo Motors aabra will guide you through every connection and configuration to create a complete home automation system that can be controlled from either a Raspberry Pi or your laptop using industry standard tools and practices hello everybody my name is aena assab you can call me asab Currently I am a grand student at University of Massachusetts Amherst and my field of study is in electrical electronics and computer engineering in this video we will build an iot home automation
system using esp32 MCU and a Raspberry Pi to track real time data from temperature to pressure to air quality and light sensors we will simulate the sensor vales and send them over to the server a Raspberry Pi acts as both an mqtt broker and also no JS Backend server handling the data with postgress SQL database and soet iio every 5 Seconds the sensor data updates a live web dashboard displaying real time plot from the web client you can easily switch sensors on or off we have connected four LEDs and a Servo to the esp32 client
for example turning the air quality sensor on or off will move the Sero Moto the other sensors control the LEDs since all sensor data is saved in the postgress database you can also Carry historical data with just a few click for example if you want to know the sensor data that was saved within a particular time let's say between the last 1 hour and 5 hours now before we dive into the demo let's take a look at the hardware as you can see from the screen the hardware is pretty straightforward we will use esp32 MCU
right here as the mqtt client we will be connecting four LEDs to the esp32 C and right here I have defined the pin but of Course you can feel free to use any pin that you want I will be using the raspberry pi 3B model but feel free to use any Raspberry p it should work perfectly I'm showing a laptop here for a reason which is representing PC because we will first build the node.js app on a PC in my case I'll build it on my magc book then copy it over to the Raspberry Pi
so you can just SSH into your raspberry pie to run the server alternatively you can push the project To GitHub and clone it to the Raspberry Pi any way that you do it is fine now let us take a quick look at the demo now this is the web interface of the project which is hosted on the Raspberry Pi now on top we see the switch buttons that controls the various sensors that are connected to the Raspberry Pi so whenever we click on one the sensor that is connected to the esp32 it's either switched on
or off so the air quality control is connected to the Sero motor The temperature and the pressure sensors are both connected to the LEDs when we look at the aduno ID e all the values that are sent via the Raspberry Pi broker is received by the aduno rde and it shows it in the terminal so when we switch on we can see one is sent and when we switch it off it S zero so when the ESP 32 receiv zero or one it uses that information to either switch on or off an LED and in
case of the Sero Moto when we turn it on it goes In the clockwise Direction and when we turn it off goes to anticlockwise Direction so the values that I received are presented in the graphs so right here in the ID we can see every value that is received from the Raspberry Pi broker is logged in the terminal so when we press the temperature on you can see right here temperature is one and when we turn it off it to log Z to the serial ID now the second web interface or the web page will
help us to query database That is the average sensor values are saved in the postgress CLE so when we go to that URL and we can choose the time range in which we want to query it so let's say we want to query in hours let's say we want to get the values that have been saved between the last zero and let's say 20 hours between Z and 20 hours then we can write it and when we press on the search button it will go and the database and it will present it just Like that
so this page is the sensor data record and it is pretty simple using postgress this is the entire Hardware of the project that is the es32 the LEDs and the Raspberry Pi to the flowchart of the program right here at the center of the project is a Raspberry Pi 3 Model B it will function as the mqtt broker and also host the node.js server the esp32 will be the client that publishes And also receives data from the broker now on the back end we have a nodejs server that is running with a postgress cqo database
because we want realtime communication between the server and the web client we are going to use socket iio if you don't know socket iio that is fine it allows bir directional communication between the server and the client so that they can communicate in real time just as you do with instant messaging applications now how does this Entire Project work starting from the esp32 microcontroller unit it will read the sensor values and publish the sensor values via a specific topic to the mqtt broker that is the Raspberry Pi the broker in turn will take those values
and publish them to other devices any device that is connected on that topic will receive that data so mqtt protocol is very easy and efficient that is why it's kind of popular in iot Frameworks now when the mqtt broker gets the data It will publish it and also it will save the data in the datab base once the data is saved we can retrieve it later time either via the web client or even if we build a mobile application we can just send HTTP request and retrieve the data that has been saved by the end
of this tutorial you guys are going to learn couple of things first you will learn how to set up mqtt communication among devices you will learn how to create a nodejs server and incorporate circuit Iio for realtime communication you will also learn to set up and create manage a postgress SQL database if this is your first time of hearing about mqtt protocol you shouldn't worry the mqtt as we simply call it is a message keywin Telemetry transport right it is a lightweight messaging protocol designed for small sensus and mobile devices in low bandwidth and high
latency so mostly it is used in remote places where the networks mostly are not reliable in Particularly is very important in iot applications mqtt follows published subscribe model where a client communicate through a central broker rather than directly with each other so we have a broker which serves as a central point and all the clients will be connected to the broker so a client is the device that can let's say send message to the broker for example in our case our client is the esp32 right here a client can also Subscribe to a particular topic
whenever messages comes in through that topic the broker will send that message to those clients that are subscribed to it a web application could subscribe to temperature topic to receive and display data in real time in our case we have mqtt client and also we have the web client so the mqtt client will be subscribed to a particular topic let's say the topic is home/ living rooms SL temperature and it will periodically Publish data to that topic right the web client over here can also subscribe to that topic so whenever the client this one publish
the temperature data from the Census It Go goes to the broker and the broker will transmit it to the web client very easy I've included materials in the description if you want to learn more about mqtt protocol and web soet let's go on let us write the program for the esp32 open your Adeno IDE and create a new sketch we need to add the esp32 Board to the IDE go to tools right here and go to boss manager search for esp32 and add to the Library once you are done we need the pop sub client
that is used for the mqtt protocol go to tools manage libraries so in the manage libraries type popop client you can also install this we need this will be the two installation that we will add leave some space and let's begin writing the code include wifi. H we will also include the UPS up client include HTTP client we start by setting up the credentials for the Wi-Fi and the mqtt for the Wi-Fi we will need the Wi-Fi name the password and also for the mqtt we will need the server now the server is whatever Network
your broker is connected to for the broker I'm using the raspberry pi and the Raspberry Pi is connected to my own local network now if you have a Raspberry Pi and you SSH into it you can do if config to review the IP address the next thing to do is to Define the pins that we are going to use for the sensors as we said we have four sensors in this project for temperature for pressure for light control and also for air quality this will be the PIN for the sensors we will set up the
Wi-Fi so that the esp32 can connect to the Wi-Fi network let's write a function here and call it setup Wi-Fi it will return void delay for 10 milliseconds and let's say we can print something connecting to something the name of the network and we Will not leave this while loop until we are connected we will call the inbu wifi while status is not equal to wl. Connected we will delay for about 500 milliseconds if we are connected then we can say Wi-Fi connected now we know that wireless connections can sometimes be unstable we need to
define a function whenever we are disc connected the esp32 will once again connect to the Wi-Fi so let's just Define something like reconnect Loop Until we are connected in here we can do a w Loop and we call the Wi-Fi client it's part of the library whilst we are not connect we always attempt to connect we need to call the esp32 client you pass this to it you can print something so once we get in here we are connected and other than that we keep on looping once we are connected to the network because we
are dealing with mqtt communication this is where we try to subscribe to a topic in here we can call The client do subscribe and we will use this ESB CMD so that is the topic which means that the broker also has to create this topic and publish it for the client to be able to subscribe if we get to this stage it means still we are not connected so to reconnect maybe we can print the state of the network we will wait for a few seconds we want to wait so we call the delay function
for 5,000 that is exactly 5 seconds if connection fails it will Reconnect again now we are going to write a call back function and it's responsible for receiving messages from the broker to the client we know that the client can transmit and also it can receive so we call this function call back we will pass the topic the load the message that is coming and we will also get the length of the message whatever message is coming we can get it inside the string can do for Loop Here length we can add everything To the
string whatever the payload is so let's say if the broker send something like put off the fun we will get that and we will turn it into a string then we can print the message so now we have the message we need to handle the message first we need to make sure that the message is coming from the topic that we are subscribed to we will check the topic if it is equal to what we have subscribed to right and top here we said we are subscribing to this topic so in Here we will do
es/ CMD that is the beautiful aspect of the mqtt protocol you subscribed something and you are waiting for messages through that topic once this if statement is true this is a string pointer let's convert it to a string okay this is ACC create okay so once this if statement is true it means that we've gotten a message from what we've subscribed to we can print receive message now when we receive Message we need to call function to pass the message right we need to decode the message that is coming do this and we pass in
the message so let's come here and Define the function it will take a string let's pass by the reference now the string that will come in will contain the name of the sensor and also the command so let us find where the comma is and we separate between the sensor name and the command we call this comma index and whatever String we get we try to find where the comma is so once we know where the comma is we can use to extract both the name and the command we create a string to hold the
name of the sensor sensor name and we can use this adrenal command substring we already have the index of the comma right here so the first part of the string will be the name of the sensor and as you right the second part is going to be the state of the pin right that is the command that we want We will call this pin State because basically all that we are doing is we are going to write a high or low to the pain that the sensor is connected to p state is equal to string
do substring and this will be the command that comes after The Comma you do this plus one and we convert it to integer once we have everything we can print the sensor name and also the pin State we have decoded the incoming string from the broker into the sensor name and the pin state so we Can go the next step and actually issue the command right we have four sensors so we can make a switch statement and we say that for example if the sensor name is temperature then write the pin state to the temperature
pin this should be very easy if sensor name is equal to temperature digital right whatever value that comes into the temperature pen so we call the temp pin and you write the pin State this should be easy we will do it for the Rest we can also leave a space to handle unknown names that are passed but we will leave that empty for now that should be all for passing the string so now we can come into the setup function of the Aden code setting up the Sera ser. bit and 115200 and we can call
the setup Wi-Fi function that we declared right here above set up Wi-Fi set up Wi-Fi now we can also set up the client for the mqtt set server inbu function we call the Mqtt server that we declare above and it contains the IP address of the broker and this is the default Port that we use for mqtt communications and we call the set callback so in the set callback function we pass in the Callback function that we defined which is this receiving messages from the broker once we are done we can also set up the
pin modes we will do pin mode we set all the pin modes and they are all outputs that is all for the setup function in The main Loop we try to maintain connection or when we have a disturbance in the Wi-Fi connection we will need to reconnect so this is where we call the reconnect function we defined earlier inside here we will check if the client is connected to the network or not if he is not then we call the reconnect function okay and we will Loop it after making sure that our connection is intact
we can read the pins that the sensors are connected to right we could Use analog in or digital in but this time let us simulate sensor readings so we are going to provide random values right so float temperature let's give the temperature a between Z and 100 and we want it to be float so let's do this divided by 100.0 we do similar things for the other sensors this should work for simulating the values once we have the values like this we will put the values inside a string then we will publish it onto the
Topic so the broker is already subscribed to that topic and the broker is going to receive that we call the payload and we will use the inbu string function to turn the float values into a string once we are done we can publish it so we you can do client. publish and we need to indicate the topic on which we want to publish this so we can call the sensus then we call the payload we use the inbuild function St Str we can also print to the seral we call in the Payload this delay for
about 5 seconds so this means that we are going to send the sensor values every 5 seconds if you watch closely you can see something that we are publishing on this topic right but we are also receiving some values from the broker on a different topic if you remember this okay so in this instance the esp32 clan is publishing and it is also what receiving because it is also subscribed to a topic from the broker that will be all for the program On the esp32 mqtt client let us move to the next let's make a
few modifications to add the server code to the client go to tools manage libraries now I want you to search for esp32 Servo um this will pop up then I want you to install it once you are done so include esp32 Servo Doh um let's instantiate it to my Servo and also declare a pen and call it s pin 13 just like that scroll quickly to the setup code and let us attach the PIN to the Sero just call the my Sero object That I created call attach and into that function pass the servo pin
once you've done that we want to create a function and call it run Servo so this is a very simple function it will return nothing and the parameter it will take int value when the value is zero you will write zero to the servo Moto but otherwise we write 180 which means that whatever pin that we will attach to the servo if we turn it off on the web client Sero will move to zero know the Sero it deals with Angles and when we switch the sensor that is connected to the Sero and the Sero
will go to an angle of 180° so once you are done defining this function I want you to go to the pass string method that we Define here and in the else if statement where the sensor name is equal air now previously we had this code digital right air pen State now this is supposed to toggle the LED that is connected on the air pan commment that and instead call the Sero and pass in The pin State whenever from the web client we turn the air sensor on or off the Sero motor will move to
zero or move to 180 open your terminal I'll be writing this on the Mac OS but all the installations that we are going to do today I will provide a link in the description where you can get the command for for Linus terminal but those on Windows I think you can find a way to install postgress CLE and also mosquitoes going to use home brew if you Don't have it I think you can install home brew on your Mac OS so first I will make sure that everything is updated we will install the mosquito and
the command is bre install mosquito now the mosquito is for the mqtt so we will do this we need to wait for a while for it to finish installing okay our installation is complete all right it has given us the command to start this service H we can do that but for now we need to Edit something in the configuration so that it will allow this to have access to the server if not the server will not allow you to have access via the IP address so let us do this mosquito okay password H okay
okay so first we need to allow Anonymous we can remove this okay and also we need to add a listener so that other devices can have access to it so let's see right above this let us add listener 1883 this is the default Port for mqtt 0.0.0.0 so that this will allow anybody on the network the home network to have access to the mosquito once we are done we can save it and you can choose to edit with anything but I prefer to use them maybe you can use nanu or something at this point we
can start the service or restart it mosito we are done with this the next installation that we need to do is to Set up postgress SQL on our system now if you don't have postgress installed we will once again we can choose to update re update then we can do bre install postgress CLE okay so just like this postgress C enter okay we wait for a few minutes it looks like our postgress is already started all right these are the two main installations that we need to the next thing is to create our node.js application
and do some small npm Package installation I have just created a folder called developer and inside that there is a direct code server this is where I'm going to write my code as usual to start a nodejs application we can do npm in it you can press enter to accept the default we will add G later keyw nothing then maybe you can type in your name okay so let's see okay we need to make some few package installation when you look at our diagram you can we are Going to use soet iio we use mqtt
we are going to use express for the nodejs application and also we are going to use a postgress Eco so go back to the terminal and let's do npm and install few packages so we will install Express HTTP PG and socket.io these are the main packages that we are going to use so we press enter and wait for the installation to be done perfect now to be sure let's let us look into the packet. Json file okay So Express is here HTTP PG and circuit iio okay we need to also install a package for the
mqtt all right it looks like we have all the dependencies once we are done and we can open code from the terminal with this so this is our vs code and these are what we have in the directory go back to the terminal and let us create some few files we set in the npm installation that the index.js is going to be our entry file so let us create a File called index.js now we need to make some few directories first we will create a directory called public this directory will contain all the static files
that is the static web files that we want to show on the client side you also make a directory call Source yes and um let's press enter let's see do CD and go into the source file in the source file we are going to create a few directories first we create models e space Services Controllers and config directory we also need to add route for the HTTP routing so type enter let's see yeah the files are created now CD into the config file and inside the config file we will put the configuration for our database
so inside there I want you to create a file and called db. config okay now leave that file go back into the source file and now let's go into the models inside the model we want to create db. JS and also we want to Create a file and call it sensus model. JS now go back now let us go into the controllers inside there we create a file and we call it census. controller.js that will be all now go back let's go into the route inside the route we create a file and call it index.js
and also a file we call it sensus do routes. JS now leave the route and let's go into the Services let's create a file and call it sensus do services. JS so basically this will be the file structure for this program as you can see I will include a link into the description for you to see the structure more clearly once we are done with creating our file structure we we will proceed and create the API for accessing the database this is how our directory looks Like inside the server we have the node modules public
source and these files go into the source and into the configuration we created this file db. config but we need to rename it it has to be db. config.js so you can do the renaming here we are going to set up for the postgress EO we need to First give the credentials of our database and Export it. export and inside this object we will give a few credentials the user will be hostress we will add a host give The name of the database we will call it home the next thing is to add a password
just create any random password that you want for your database I'll use this and the port it's always 54 32 once you done go to the modules and inside the modules the db. Js so this is where we are going to create an object that will help us to connect to the database we are going to require the PG that is for postgress and also we will get the DB config that we just created so let's try to access that Config SL DB config constant pool and we are going to create a new instance of
this pool that we got from the postgress so you do this and you leave space side here we call user and the user that we created in the DB config we call host DB config do host database call a password and we call the port you bring a semic colon when the database is connected we can print something so un connect we can write something to the console now in case there's an error you can also print Something to the console error on the client you can print the error and exit after everything nodejs application
we always need to export and this export will be the pool object that we created this is a concise program here that will allow us to have access to the database from this in the same directory I want you to go to the census. mod. JS a model is going to describe the fs in our database and the operations that we would like to Do in the database so for example we would like to insert something into the database we would like to find something by an ID we would like to delete we would like
to update all those things we are going to describe in the model so that later on we can reference the API and we don't need to rewrite the queries manually we will call the pool that we created here so on top let's call constant pool they in the same directory right so DB the first function is we Have to create the table that we want to have access to when you go inside the database we have tables in case the table is not created then you have to create it and we call it create sensor
data table we have to make it asynchronous in case it has to wait for a response inside here we will write a query to create table and so we can do constant query like this as a convention we have to write in capital letters but you can also write in small letters we Do create table and the name of the table will be sensor data we need to bring this let us Define the fields in the table so first this sensor data table will have an ID primary key so that it will keep on increasing
and it has to be unique we will have a field for Tim stamp so that anytime that we send data it will get the time stamp of that particular moment and save it in the table you will call an inbuild function called times um F now now the Next field will be for recording the temperatures and this will be numeric you create the field for the pressure the field for air quality and also for the light intensity which will also be numeric you will just call this function here so this function will be called automatically
in case the table does not exist so we say create table sensor let's add if not exist if we already have the table then I want to create create it okay the next function that we Want to create is a function that will go into the database and carry all the data that we have so we can do const get all sensor data now we are going to do a try and catch let's put an error if there is an error we will throw that error throw new error now inside the try block here we
can do constant result we call the pull object and we pass in the query we want to select everything to do that we write select sty from sensor data and we will Return all the rules the next function will be to get a specific row of sensor values by the ID get sensor data by ID it means that we have to pass an ID to this make sure you bring your semic column inside here we will do try and catch our constant result we do await pool. query and this time the query to select a
rle of data by an ID we write select St from sensor data where ID is equal to the ID that we want to add right we do star one we go Our side here and we put this in bracket ID once we have this can do return then we only need one value so we get the first row and we have to do the C error now something that we would like to do with this project is that we want to enable the user who is accessing the web client to input a Time range in
which he wants to see the sensor data so you go to the website and you type let's say 1A 5 it means that you want to see the sensor values that has been recorded Between the past 1 hour and 5 hours so let us write the query for that we can say constant. get sensor data within range a sync so this time we need to give it the time range that we want to query the data bring your semicolon let's do a try block here you're going to do select star from sensor data this time
we will use the word clause now if we look at our database you can see we have a time stamp filed so we are going to use that so where the time stamp we Want to find the time stamp between certain period of time right let's go to the next line and do time time between now and we need to subtract let's get the time the time that we passed here this time we get time end so this is going to be an object so that object will have a field that we call Time end
it will be in hours okay let's continue the query go to next line now we will get the time start so now minus interval we do the same thing this time is going To be time do time start also in hours and we will bring a semic column this query will do that for us it will get the sensor data within a specific range so now we can get the result like we did for the previous a wait P do query and we pass in the query once we get it we can return the result
and this time it's going to be a lot of rows we return everything now let's cat the error the next function will help us to insert sensor data into the table right And also we will create a function that will delete a row from the table so the function to insert we will call it create sensor data this will be async and when we are creating a sensor data we need to pass the data that we want to create right so this is going to be a post request you send a post request with the
key value P we do this make sure you bring your semic colon so inside here we will try and catch so we trying we need to get the query we're Going to insert into the sensor data table we get the field that we want to insert to we get the temperature field pressure field the air quality and the light intensity now come to the next line and the values that we want to insert the values we want to insert will be coming from this so this is going to be an object so we are going
to call this object and we will get all the fields that we want insert here in postgress CLE you can just represent them with numbers we have four values to insert after creating it we want to return the object that we created so we will add this once you are done here let us get the objects that we want to insert that is the fields that we want to insert let's put them into like an array we can do constant values right going to be an array and we will pass the field from it so
this is temperature here data dot the next one is pressure air quality and um Light intensity now this as I said is going to be a post request so make sure that the fields they match this exactly other than that it will return an error and we can do constant result the same as the above a wait P do query and this time we'll pass in the query that we just created above and also the values so we get the results and we can return it we are creating one object so we get the first
index and we throw it the last Function that we create is a function to delete a field in the database so as usual let's say delete sensor data think now when we are deleting sensor data it means we are going to delete a specific ID so let us pass the idid here except you want to delete everything inside the sensor data table this is not what we want to do um bring your semicolon we do try and catch any error the query is delete from sensor that where the ID is equal to we will Return
the rad that we deleted so bring comma inside and also outside bring comma right so once we have this we can do result once again we call the the pull object query and we pass in the query and also we need to pass the the ID that we want to delete okay then we return it we are only deleting one so we get the first index then we can catch any error so we can do module do export so first we export the get all sensor data Get sensor data within the range literally all of
them except creating the sensor table and also delete Comm now that is it for the census. module. Js from here we will go inside the services and we'll write the code for the sensus doservices so the sensus do Services is going to require the functions that we created in the model that is why we exported it we create all these abstractions and it makes it easy for us to manage the database go to the Census. services. JS which is inside the services directory now that we we are done with the sensus model. JS go to
the services directory that we created and let's write the code for the sensus do service first thing that we do is to import the model that we defined so we do constant sensor model we go to the model class then we select sensors. model we will Define a service function for each of the models that we defined what I mean is when you Go back to service. model. Js all these functions we need to create service functions for them starting with the first one We Begin by saying export now when we do the export it
means that we are exporting directly the previous one after defining the functions we exported but one way is that we can also do it directly export. getet or sensor data this also going to be synchronous and we do our Tri block basically we are going to call the similar function in the Model so we will return sensor model we call the get all sensor data if there is an error we will throw that error so seeing that this is very easy you can go ahead and do the same for the rest of the functions in
the model you can do get sensor by ID now because we are getting sensor by ID we need to pass the ID whenever we call it so that we can give it to the model next function could be the get Sensor within range and that one we would give it the time just as we did here it is this function that we are calling inside the service reading range we pass the time the next function create sensor data you can past itate and when we create sensor data we pass the data to it now we
need to do the same for the delete sensor data can choose to Write the delete will take the ID we have created the service functions for the models so what happens is that we are not going to call the model directly we can choose to call the services once we are done with the services go to the controller directory and let's write it so just as we did for the service we will now Imports the service we can do constant sensor service we will import from the service SL sensor service now once again we are
Going to write the controller for all the services the controller is um the functions that we use for routing when somebody for example wants to access a specific API get all the sensor data then the routing file that we write after this will route the request to this controller the controller will call the service and the service will call the model which will execute the query we use this abstraction in nodejs application it makes it very easy so we Will do a sport get all sensor data going to be async but this time because it
will be receiving the HTTP request we will pass in the request and the response to this time we are going to get something from the service something that has to return so we can say sensor data and we will await and we will call the sensor service do get all sensor data once we have this we can return the HTTP response that the request was successful so we can do response do Status status 200 means that it was successful we will send the sensor data in adjacent format we can pass the sensor data just like
that then we will catch get any error so we can use a response of 500 the request failed and this time and do a message message then we will get the error do message now we are going to write functions for the rest of the services so the next one could be get sensor data by ID request response we try you will get the sensor Data that we want we call our wait then we need to pass the ID um if this is a request then we will retrieve the ID from the parameters can do
request. params do ID and that should be it we can return the response 200 mean it was successful then Jason then we pass in the data if the request was not successful we print error can use 500 and we can do the same the next function we can get the sensor data within range we try the data that we retrieve We put inside a variable this one and if we look at the fun function when we come here the get sensor within range pass the time right is the function that was called here the time
so if we are calling it in the controller then we need to pass the time and this could be a post request so we will get the body of the request can do request. body then we can return it HTTP status as successful if not error Ur we catch it we can create the create sensor Data try we call the function from the service create function so the create is going to be a post so we pass in the body and we return the request status so after creating an object whatever it is it will
return it if not then there is an error and we get the error like that need to remove this one what is left for us to Define will be the Del sensor data and this one it takes the I D of the row that we want to delete and after deleting it will return the row or the Entity or the sensor data same process we call the delete sensor data and we pass the ID so we get it from the parameters that is we pass it in the get request if not an error occurred okay
so we have defined the controllers for this application the next thing is for us to Route everything so if we look at how it works the service calls the model the controller calls the service now we will go and Route the request so that when the request comes in we can route it to A particular controller so first let us get Express and we will also get the router express. Router we will get the controller so sensor controller we go to the controller directory we select this we are going to route each request to the
functions that we have created so first we can do post when the post comes in like this then we will route it to sensor controller do Create sensor data you can do a get request on this slash sensor controller get all sensor data now what this means is for example if we have a domain name right and Slash and it's a get request then the request will be routed to this right we can do router do if we want want to search we can call the get sensor data within the range so that will be
a post request if we want to get a request by the ID so if a request comes in by this path then it can get Sensor by ID the next is to Route the delete so if the delete comes in ID we can map this to delete when we are done we need to export the router and this is very easy so in the same directory go to the index. JX now before we begin to write the entry point of our program that is the index.js we need to install something when you look at our
package you can see all the dependencies that we have Express HTTP mqtt postgress and socket Iio we need to make a last installment for ejs ejs embedded JavaScript it allows us to embed data into HTML file for example if we query our database and we get rows of data we can decide to embed it inside HTML so go to your terminal and move back to the main application that is the server and we will do npm install ejs now the package is installed it looked like it required root access open your index.js with vs code
or whatever Editor you are using first we will get Express we will get mqtt we will make up out of the express if you know how Express works then we will get the port as I said we are going to run it on Local Host so we could make it Port 3,000 and this is the nodejs server so that when you go into your browser you can type HTTP colou SL your IP address colon 3000 then we can get the the HTTP to require HTTP next we can get a server out of the HTTP that
we Created the HTTP do create server and inside the server we will add the app this app that we got from the express we will get a path object because we will be saving static files on the web client the next one we will do this server and we will require soet iio we are going to use soet iio and we need a server to do that so once we have this we can do IO is equal to then we call the server that we have already defined up here so we create a new instant
out Of that server and we pass in the HTTP server right so we need to create a server for the soet iio whenever a request come in it needs to be routed can Define constant routes we go back into the source and Source we get routes and you get the index JS and the last thing we can get sensor model Source models and sensors. model we will set up the embedded JavaScript we call up. set we call view engine that is the default name for this and we will use Ejs now we also want to
specify a directory which will contain the static files that is our web pages so so we can do app. set we need to specify from which directory we are serving our static files so we will do views like that then we call the path object that we created then join directory name and we want to be serving from the public directory we are not going to save every sensor data or row of sensor data that comes in so we create a buffer and for Example we will save about 5 minutes of data inside this buffer
after the buffer is completed we will find the average and we will save the average inside the data base let sensor buffer you set it to empty array Middle where to pass Jason data we are going to use express. Json we call it like that now we add routing here so that when HTTP request comes in it will route it to the appropriate API so we can do app. use we will say like API which means that Whenever a request comes in and it has this this after the domain name right then it will be
routed to this now it's time to set up the mqtt so we can just create a constant and call it m mqtt client and this one we are going to call the mqtt that we created up here this so we do mqtt and connect now inside this connect we are going to add this and also we will add our IP address now the IP address that my Raspberry Pi has is this look at yours You can go to your Linux terminal and type if config it will show you the IP address so we type in
the IP address and we type in the default for for once we have our mqtt object we are going to Define two main functions that is when the mqtt is connected and also when message comes in we do mqtt client that we just Define above on connect we are going to call this JavaScript function for debugging purposes you can print something to the console connected to Mqt broker but when connection is made what we can do is we can subscribe to a part particular topic so we can do mqtt client. subscribe and when we looked
at the code that we wrote for the esp32 client we created this subscription home do sensus SL dat in case we catch any error okay make sure you bring the semicolon here we can print it to the console you say fail to subscribe we can put in the error in case you have Another topic subscribe to a different topic now we will leave this entirely just as we've done for mqtt client. unconnect that is when we are connected we can also do that when message comes in right and we decide what to do with the
message we can decide to save the message or also we can decide to send the message to update the web client right we will do mqtt client dot this time on message right so when we have a message we want this to be async right So that it can work in the background we passing the topic and also the message we need to make sure that this is the topic that we are expecting for example we might be publishing couple of topics so once we know the topic then we can route it properly if topic
is equal to what we are expecting this time we are expecting h/ sensus SL dat constant get payload string and we will call the message and we will convert it to string payload String received once we are done we can convert the string into appropriate format that we need we be passing it as JavaScript object an object that has the fields of temperature pressure air quality and light intensity we say sensor data we create a function and call it convert payload string to object we will pass the string inside it can do console.log sensor data
right when this is complete we can update the web client right and We said we will be using the soet io for Real Time Communication for the web client so the object that we created for the soet io is here IO so inside here we will call this Emit and we give a name for it sensor data the working principle of the socket aisle is easy all that you need to do is that you need to emit data and you go to where you want to get that data for example when we start writing the
HTML we will call socket iio object and we will do for example soet do on Whenever we receive this on sensor do data then we can retrieve this object okay then we can decide to save the sensor data that we have received that is the average save average sensor data this function we've not created yet but we will create so you know we have two main functions that we will create we have this to convert the incoming string to object and also this function that will save the average of the sensor data that we have
recorded over a period of 5 Minutes move down and we need to Define few end points we will do a get request when somebody visit the home like this we want to see if the page is working right so request response console. log we will say hello world then we can return response then we can just pass a message like data receip do app.get slra the request comes in the response show graph after that we are going to save the request with the static HTML file so we can do rest. send file we add the
Directory where the files are and the files are located in the public /. HTML I mean when you go inside the public we are going to create two HTML file one will be graph. HTML and the other will be detail. HTML in here we will do app. getet detail request response we will do try because we'll be accessing the database so we say constant data and this is why we defined the sensor model we imported it here if you go up you see the sensor model we want to access the Database directly sensor model then
we get all sensor data and we will send the response now we will be using the ejs embedded JavaScript so with that you call res. render we give the file name the data that we quered from the database we want to embed it inside h HML so we do it like this and that is all here we are assuming that you are using a template engine after this try in case we get an error we will cat the error like that Error retrieving data we have to make this also async the next thing that we
will do is that we will create the connection for the soet iio so iio do on this time on connection you create an object and call it socket and you will say that a user connected to ciruit iio on the web client the user will have the opportunity to either turn on or turn off a sensor and we are going to use check boss for that we do circuit Doon And this time we'll call it check boss data when such data comes in you'll get the data like this once we have the data that we
want to send to the client we need to call the mqtt client and we publish that data we can call mqt TT client that we defined above then we will say publish let's create a topic and call it ESP SL CMD then we will pass the data that we received from the web that is the checkbox data and basically that is All whenever we get data from the web client send it to the esp32 and when it goes to the esp32 it will take it and it will execute it when somebody goes to the website
and he goes to the detail. HTML and he wants to see the sensor data that has been recorded over a period of time you know the web client does not contain the database the database is part of the server so what we are going to do is that we are going to use the socket iio to emit something to the Server the server will receive it and the server will perform the database query now when the server perform the database query it will send back the results to be updated on the web client now we
will create this socket and we'll call it search time range this is going to be a synchronous we are expecting a search time from the user or the client inside here we are going inside the database to retrieve the time period the user wants to see return data and this Time we call the sensor model and we will get sensor data within range that we defined and we will pass the search time just like that after retrieving it we will emit it back to the client so what is important is that you emit it on
a different channel so you use a different name received range and we will send the return data so when we go to the client and we also do soet Doon Rec range it will give us the data that is the Simplicity of using socket iio we Call two functions that we have not defined yet so we can start defining them so convert payload string to object go down here and let's create that function so this function as we Define is going to take as parameter a string okay so we will pass a parameter like payload
string as we said when we get the string we are going to convert it into a JavaScript object we will kind of split the string using the split command into an array so now we are going to Call the split function on the string that we will be receiving which means that the four sensors that we have we'll be sending the values like temperature comma pressure comma air quality comma and light intensity so we will split them into an array and we return an object we can do return object we give the field for the
object so let's say but we need to convert them to float that is how we Define our project the first value will be for temperature the Second will be for pressure the next one will be air quality the last will be the light intensity so this function will pass the string and convert it to a JavaScript object delete this semicolon the last function we need to Define is the function to save the average sensor data so scroll to the bottom and let's define the function async we paste the name and it is going to take
the data now first let us push It to the buffer that we created as we said we are not going to store every sensor data that we get but rather we'll put them inside the buffer and when the data is collected over 5 minutes okay then we will find the average and send it we will do push and we push the data inside here now we will write our logic here we are going to send sensor data from the every 5 seconds if that is the case it means that we will have 60 samples in
5 Minutes okay so whenever we check the length of the buffer and it is greater than or equal to 60 then we can say that okay we've collected data over a period of 5 minutes so we can do if sensor buffer do length right if it is greater than or equal to 60 inside here we will find the average sensor data that you want to save inside the database so we will create the variable you start with the temperature average temperature we call the buffer here and We are going to use the JavaScript reduce function
we call the reduce and we are going to sum all the temperature values after that we will divide by the length of the sensor buffer so here we can put sensor buffer do length Okay now come back inside and let's write the JavaScript function to do that we are going to look through all of them and add the temperature variable and we bring zero what we can do is we can just copy it for the rest can copy and paste It four times so when you come here it will be D do pressure average air
quality and the last one will be the light intensity once we have this we can put them back into a JavaScript object and we call the API to save it we can do constant maybe save object temperature we convert it to float as usual average temperature and we only want two decimal places we will do the same for the Rest so this is the object that we have created then we can call the API to save it after saving it in the database it will return the results then because we are going to call the
model to do that we need to make it async then we will call the create sensor data that we created for the API and we will pass the save object save obj correct this one let's make it like this so after saving it we can print to the console and see if the return return value was correct Then after that we need to clear the buffer so that it will store the next 60 row of values that will be coming from the esp32 client you make it empty all right that is all for this you
just do server. listen we created the port already server is running on the sport so this is all for the mqtt broker okay so we are calling our mqtt functions and also in the web soet that will communicate between This Server and the Client the last thing that we will need to do is to go inside the public directory and create the two static files that we need the final part of our project is the two HTML files the first one is the graph. HTML file that will display the graph for the temperature pressure air
quality and Li sensity and the detail. ejs will display the saved sensor data that we will query from the database so if we select to show the sav sensor data between the last 1 and 5 Hours this HTML file will be used to display that data we will start with our normal HTML tag I am assuming that you already know how to write HTML this video is not really about building HTML we decide to put some inline TSS you can also choose to create a CSS file and put it there it doesn't really matter but
more importantly we scroll down and we add circuit. now we come here and this is where we Define the header for the website that is the iot home automation Project now we scroll down further and our dashboard start right here we can remove this space but at this point we Define the four containers that display the sensors in four different colors so this container is showing the temperature this is showing the pressure we have the air quality right here and the last container is showing light intensity control by the way this template that we are
using is from W3 CSS template the HTML template is very Very simple to use now we scroll down here we can see the graphical display of the connected device this is the htmf file that will be used to display the graph of of each sensor as we showed in the demo every sensor has its own graphical display so as we are sending the values from the server into the front end every value that is received will be displayed in the graph and also it will be shown in the part that represent the value now this
script is For displaying the graph so we first Define values for the four temperature sensors and also as we saw in the demo we display the time and sensor values so right here we are kind of getting the current time for the graph we use the plotly library if you don't know about the plotly library it makes plotting graphs very easy so all that we have to do is that we need to define the graph for whatever variable so this graph is defined for the temperature we Define For the pressure right here so we say
on the x axis will be time and on the Y AIS will be the value that we want to represent so we do it for the rest of the variables the update plot function performs a crucial role here because as we receive values from the server we need to update the HTML file so we have this function that does that we start with random values as usual but as we move on WE update the variables that we created with the new values okay so when We pass the data the data will be an object and
that object will have the temperature pressure air quality and um light intensity FS so we update it and in order to make the graph readable we only show 20 points so what we do is that if we get more values than that we just have to shift it that is why the graph keeps on shifting to the left so after doing that we will update each point individually okay so we already have the name of the graph then we will Update it with the new and we do it for all the force in that was
the script for updating the plot now I have a script here foring values from the back end now we are using soet iio first we need to declare an object for the soet iio and these are the four variables that we will be dealing with that is the state of the sensor now the first function we've declared here is the function to handle the check B change as we saw in the demo we can choose to switch on or Off a particular sensor so we use this function to deal with that and whenever a click
happen we emit the sensor value and also the sensor data and it will be received at the back end via the soet iio now right here you can see we are just adding event listener so that we can change the value of which checkbox was clicked or selected now after doing that here we can see we have defined a circuit iio parameter here if sensor data is emitted from the server this Circuit will receive it we will set the values and we also update the plot and we defined the set values here when we pass
when we pass the data to this function what it does it goes and gets the HTML Elements by their IDs and it will pass the respective data values in here that will be all for the graph. HTML let's quickly look at detail. ejs now maybe you might be wondering why we are using ejs ejs allows us to embed data into the HTML file as usual we need To include the soet I object now here is where we Define the headers now this is where we Define the radio buttons just right next to the search input
button you can see we have options to choose the time interval in which you want to carry sensor data when you click it it will show you whether you want to query data in minutes hours days or years and this is the placeholder for the the time range in which we want to carry the data and we have defined the button here the Rest are simple HTM ml file now this is where we use our ejs so the values that we will receive we can pass to this htmf file obviously it's an object that contains
the time stamp that we recorded it contains the temperature pressure and O quality we open the tax because we are dealing with tables we have the row here and we have the table data so we pass them here and that will be pretty much the HTML file but when we scroll down here so here in the d. ejs we define Soet iio object the server will emit on this name so the soet iio is waiting on this so when it catches it it will pass the database to this function Right add sensor content and this
function obviously is going to update the HTML file to the function ad sensor content first it receives data from the back end and it creates a new HTML element and call it t body right so that is a table body and it gives it an ID here and because it is an array you know we carry It from the database so it contains couple of data it will Loop through each of them first it it creates a TD element for each and it will append elements to the TD elements and it will then append it
to the table row element after that very simple it appends the TR to the table body that should be all when we scroll up a little bit we also Define a function for for the search button so after you have typed the type range in which you want to carry the sensor data This is how we are dealing with it first we get the input of the time range you have typed right so if you type 1 comma 5 so we are splitting it into two so first we'll get the time start and the time
end after doing that we combine it into an object and we will pass this to the back end when we took a look at the back end code the circuit Doon is also waiting on this when it gets it it goes through the database and it will fetch the data according to the time start and The time end basically that is the end of the two HTML files they are very easy files and this brings us to the end of the iot project I hope you had fun and I hoped you learned something I am
working on an SCM 32 free outs project is really going to be a solid project I'm also working on building embedded firmware from scratch no IDE only using command line tools and working on the terminal see you