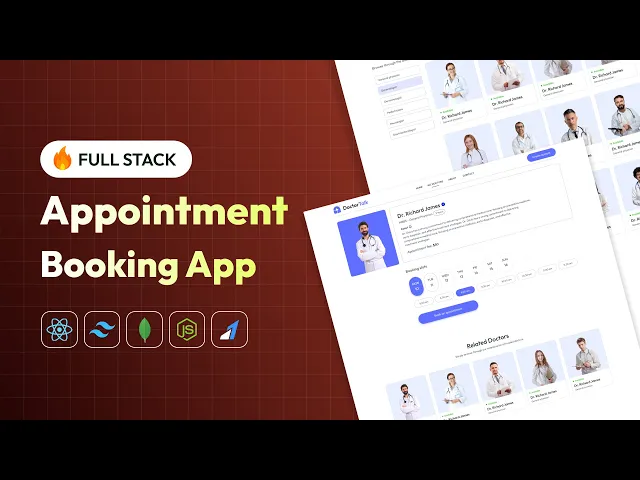
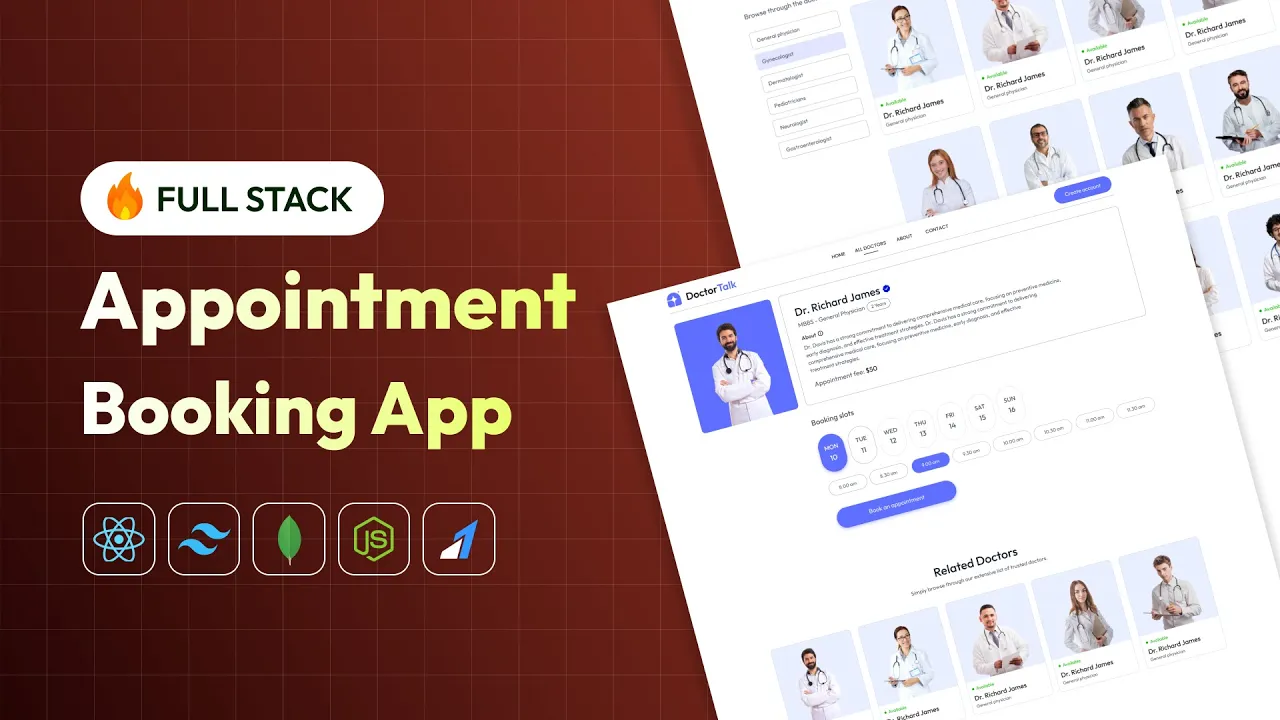
Hello and welcome to another exciting tutorial of great stack in this tutorial we are going to build a full stack doctor appointment booking app using mongodb Express react and nodejs in this full stack project we have added three levels of login first one is patient login where patient can login and book the appointments second one is doctor's login where doctor can manage the appointments check their Earnings and update their profile and the third one is admin login where admin can create and manage the doctor's profile along with this we have also added the online payment
Gateway in this app so that user can pay the appointment fee online so let's explore all the feature of this doctor appointment booking app so this is the homepage where you can see we have this Banner then we have these images to choose the doctor with some a speciality then we Have the Top Doctors list and after that we have the banner and at the bottom we have this footer let me scroll up and if I click here on all doctors it will display list of all doctors available on this app right and in the
left side we have option to filter the doctors based on the speciality if I click on this one dermatologist so you can see we have three doctors and if I click again on this link so it will be deselected and we will see the list of all doctors Again right now we have this about page and then this contact page after that let's go to all doctors and click on any doctor image so it will open the doctor's appointment page here you can see the doctor image doctor's detail like name their degree and year of
experience then we have the about text then we have the doctor's fee and here we have the option to choose the booking slot we can choose the date and time right and then we can click on this book Appointment to book the appointment and at the bottom we have the related doctors but before booking an appointment we have to create one account so let's click on this create account so it will open this account creation form where you have to enter the name email ID and password and you can create one account or here we
have the option to login so I already have one account so I'll enter the email ID and password and login into my account So I have added the email ID and password then click on the login button so now I am logged in on this website here you can see now we have the option for my profiles then my appointments and we have option to log out so let me go to this my profile here you can you can see we have the image and other details if I click on this edit button here we
can update the image name and some other information then click on the save information that's It and if I go to my appointments right now you can see we don't have any appointment so let's book a new appointment I'll click here here I will select this first doctor here we will select the date let's say Fifth and we will will select the time 12:00 p.m. and click on this button book an appointment so now we have successfully booked the appointment with this doctor right now after booking the appointment we have the option to cancel This
appointment or we can also pay the appointment fee online here you can see we have the option pay online right so after booking this appointment let me come back to the admin panel so this is the admin dashboard if I refresh it hit you can see we have a new appointment with this doctor that we have just booked right and here we have option to cancel it and if I go to appointments list so you can see the patient name right here we have the Doctor's name then appointment fee and here we have the date
and time correct now in this admin panel we have the doctor's list also so the admin can see the doctor's list and admin can also add add a new doctor here we have the add doctor right so using this form we can add a new doctor let me select the image I'll select this one after that we will add the information about the doctor so let me add the doctor's name let's select the speciality then we'll add the Doctor's email ID so let's add this dummy email then in the degree we will add mbbs then
we will set one password for this doctor then here we have to add the address let's select the year of experience then we will add the doctor's fee and here we will add the description about this doctor then click on this add doctor so you can see the notification doctor added and you can see the same doctor in this list if I scroll down Here you can see Jeffrey Williams that we have just added right so this was the admin panel now let me log out from this admin panel and here we have the option
to login again and you can see here we have option for Doctor login let me click here and here we will add the login detail for the doctor so let me add Richard at demo.com we will add the password and click on Login so this is the dashboard for the doctor and in this one you can see the earnings appointments and number of patients so here you can see the new appointment that we have just booked so after completing the appointment Doctor can click on this check mark to mark this appointment as completed or doctor
can also cancel this appointment by using this button right and here we have the appointments list so here doctor can see all appointment data and here doctor Can update their profile also if we click on this edit then doctor can update the description doctor can update the fee and address right then click on the save so this was the doctor's dashboard here you can see the payment mode is Cash because we have just booked the appointment we have not made the payment now let me complete the payment online I'll click here and here we have
two option a stripe or razor pay let me click on razor pay here let me add the Card detail this this is the test card detail after making the payment here you can see it says paid now let me go to the doctor's dashboard refresh it and here you can see the payment is online right because we have made the payment using online payment gway so this was the project overview and I have provided the project live Link in the description so that you can all also explore this do appointment booking website I just want
to tell you that this is the best Project to learn M Stack and a standout in the developers Community also you won't get this kind of project anywhere on the YouTube it took me more than 1 month to design and develop this awesome monack project in exchange I want you to provide th000 comments on this video so that I can bring more projects like this for free to make you a master in full stack development but not only that this project can be customized to use in your college project or personal project Purpose so let's
start the development process and build this full stack project a step by step now we are at the desktop screen and here we will create a new folder let's add the folder name prescripto that is going to be our app name now we will open this folder in vs code editor so right click and select so more options then select open with code now our project folder is open in Vs code editor here we have to open the integrated terminal so right click here and select open in integrated terminal so in this terminal you can
see we are at the prescripto folder here we will create the front end project using the V package for that simply write the command npm create V at latest after that just click okay and here we will add the project name so let's add front end after that we will select the Framework that is react then select JavaScript as you can see here in the left side we have one folder called front end now let's navigate to this folder using the terminal so simply add this command CD front end now we are at the front
end folder here we have to install all the dependencies so simply type npm install so it is installing the dependencies in the front end project after that we will install some Other packages also so let's add npm install exos react router Dom and react toasttify so we have installed these three packages after that we will run our project to run this project simply type npm run Dev now our project is successfully running on this Loc local URL so we have to open this link in our web browser so Simply open this link in web browser
now you can see our project is successfully running in the web browser now we have to clear this default project so let's come back in the sidebar open the front end folder and here we will open SRC folder and from here we will open this app.jsx file let's clear this file and here we will use the command and here we will use the snippet rafc if you are not getting this rafc Snippet then you have to install one extension that is es7 plus react Redux after installing this extension you will get this RFC snipet after
that we will save this file and we will delete this app. CSS file after that let's open the assets folder and from here delete this react. SVG after removing this SVG file let's open index. CSS file let's clear this file Also let's save this file now we will open the web browser so you can see our project is clear now next we have to update this title so let's come back to the index.html file and here we have the title tag so in this one let's remove the text and we will add our own title
so let's add prescripto after that let's save the changes and open the web browser so you can see the title has been updated after that We are going to use the Tailwind in this project so we have to add the Tailwind support so let's open a new tab and here we will search for wheat Tailwind let's open the first link and here we have the steps to add the TA BND in our project so the first step is to copy this statement npm install and these dependencies so let's copy this and we will come to
the terminal and first we have to stop this Project so simply type control C yes now just paste the command execute it now it will install the telin dependency in the project after that we will copy the second statement and paste it here then execute it so it will create one Telvin config file in our project so in the sideward you can see we have Telvin doc config.js file after that we will copy this configuration and we will paste it in This Telvin doc config.js file so let's clear it and paste the configuration that we
have just copied save the changes and come back to the web browser after that here we have the next step we have to copy these lines and paste it in the index. CSS file so let's copy it and let's open index. CSS file and paste this now save the changes next we have to run the project so in this terminal we will type npm run Dev now it will start our project in the Development mode now we have added the telin support in our project to test it let's come back to the app.jsx file and
here let's add some text so let me add testing tnd and in this div we will add the class name property and here we can use the tnd classes so let me add any tent class name here so just add text green 500 we will save the changes and open the web browser now if I open the website so Here you can see we are getting the text testing tailwind and here we have the green color it means we have successfully configured the tent support in our project now let me remove these class name and
this text also let's close this tab also after that we will insert the Assets in our project so here we have one assets folder where I have some images you will find this assets Download link in the video description so let me copy all these files then open the project folder go to front end then SRC then assets and paste all the images now let's close this and open the vs code editor now in the sidebar you can see in the assets folder we have all the images icons and we have one assets. JS file
also in this one we have imported all the images and exported it in this assets object so whenever we have to use these Images we will import this assets object and by using this we can can simply access these images in this assets file we have some data also we have added the speciality data where we have this text and image after that we have the doctors's array where we have multiple object each object is representing each doctor it has doctor name image a speciality degree experience about fees and address here we have total 15
Doctors Data that We will use to display the doctors on our front end project after that let's close this file now we will create the folder structure in our project so in the SRC folder we will create a new folder and we will name it components now in this folder we will create multiple components and we will reuse these components like navigation bar and footer now in this SRC folder let's create another folder with the name Pages we can create multiple pages in our web app now to add the multiple pages in our application we
need the support of react router Dom so first we have to add the the react router Dom support in our project so to add that let's open main. jsx file and here we will import browser router from react router Dom package now here we will remove this strict mode and here we will use browser Router so between this browser router tag we have the app components now let's save this file after adding this tag we have the support of react router Dom in our project after that in this SRC folder let's create another folder with
the name context here we will create our context for the front end project where we will manage the user login and other context data After that we will create multiple pages so in this Pages folder let's create a new file with the name home. jsx that will be the homepage here we will use the rafc snippet remove this text after creating this homepage let's create another page p and write the file name doctors. jsx here also we will use our afce after that let's create another page in this Pages folder write the file Name contact.
jsx here also we will use our af fce after that we will create about page so right click and create a new file write the file name about do jsx here we will write rce we will save this file now we have created these Pages now if we come to our web browser and here we have this figma file you will get this figma file Link in the video description so that you can Open this and see the design file here we have all the pages design that we are going to create so according to
our design we have created the pages file for home doctors about and contact now we will create the page for the user login so in this Pages folder let's create a new file the file name is login. jsx here also we will use our Afce now we have created the login page also next we have to create this page that is profile page for that let's create a new page and write the file name my profile. jsx here also we will use rce we will save this file after that we will create this my appointments
page where we will display the already booked user Appointment so let's create a new file in this Pages folder and the file name will be my appointments. jsx here also we will use rce now we have created these Pages by using this page component we will set up our routes for that let's open app.jsx file and in this div first we will add the class name property and here we will provide some margin from xaxis so let's add Mx4 and for different screen size we will add MX 10% in this div let's add routes tag
here we are getting the suggestions routes tag from react route Dom select this so it will import the routes tag from the package now close this tag between this tag we will create route tag we are getting the Suggestion so let's click here so it will import the route from react router d package now after that let's close this tag and here we have to define the path that will be slash for the homepage and here we have to mount our homepage component so let's add the element property and in this element let's add home
that is the homepage component let's add opening at home so we are getting the suggestion so let's click Here so it will import this home from this Pages folder now let's close this tag now whenever we will open the SL path it will display the homepage so let's test it so first we'll open the home. jsx file and here let's add one text that is homepage save this changes and open the web browser and let's open our website so you can see here it is displaying Homepage now if I go to other route like this
now that home page text has been removed so now the react router Dom is perfectly working now let me remove this text and save the file now we have added the homepage similarly we will add all the pages that we have created here for that let's make the copy of this line here we will add the path that will Be doctors and in this path we will add doctor's page we will select it from here so it will automatically import this doctors from the Pages folder now let's create another copy here we will add the
path that is/ doctor SL colum we will add the speciality this speciality for the doctors so whenever we will click on any specialist then a specialist doctor will Be visible here for that we will use this parameter after that we will create another copy of this and here we will update the path that is login and here we will add the element login page component select it so it will import it so it will import the login component from the pages folder now let's create another copy of this line here we will update the path
So it will be about page so let's add/ about path here in the element we will add about now let's create another copy here let's add the path slash contact and here we will add the contact page so just add contact after that let's create one more copy then update the path it will be my profile and in this element we will use My profile component after that let's create one more copy here we will provide the path my appointments and in this element we will use my appointments component after that we will create one
more page so in this Pages folder let's create a new file and we will add the file name appointment. jsx here also we will use rce after that we will use this page to Create one more route and in this page we will display this Dr appointment page where user can book a new appointment so let's create one copy of this route tag and here we will add the path that is slappointment slash then we'll add one parameter that will be the doctor's ID so just add doc ID after that we will add the element
so in this element just add the appointment page that we have just created by using all these Pages we have Created multiple routes now after this we will start building our UI components so first we are going to create this navigation bar so to create this navigation bar we will create one file in this components folder and write the fin name ne. jsx here we will use ource here we have created this Navar component next we have to mount this component so that this Navar will be visible on the web browser so we are Going
to add this Navar in this app.jsx file before this routes so it will be visible in all the pages so simply add this nav bar select it from the suggestions we will get it from the components folder close this tag now we have mounted the nav bar outside of this routes tag so it will be visible in all the pages now let's come back to the nav Bar. jsx file and hereit here we will create our Navar so first in this div we will add one image tag in this SRC we are going to use
this assets. JS file so simply add assets we are not getting the suggestions so let me manually add it so just add import cly Braes assets from double do/ assets folder SL assets file after that here we will Use assets dot as you can see we are getting the suggestions of all the images so we will use do logo so after adding this image tag we will add one UL tag in this UL tag we have going to use the nav link tag so let's add opening Arrow nav link as you can see we are
getting the nav link from react router Dom so select this one so it will import this from the react router Dom between these tag we will create one lii tag and one HR tag so let's add the lii tag between this Alli tag let's add home as you can see in my figa file in this navigation bar we have the first menu which is home then we have all doctors then about then contact after this Lite tag we will add one HR Tag now just copy and paste it for three more times in the second
option we have to add the all doctors so let me update the text it will be all doctors in the third one we will add about in the fourth one we will add contact after creating this UL tag here we will create one D and in this div we will create one button tag here we will add the button text That will be create account so let me copy the text from the design file and paste it here create account now if I save the changes and come back to the web browser now we have
added these text and image in the navigation bar next next we will add the CSS properties so first we'll add the CSS class name in this div so let's add the Class name property then we'll add the tent classes so in this class name let's add Flex item Center justify between text a small padding then margin then border bottom then border bottom color after that save the changes and open the web browser so now you can see one horizontal line and all these contents are aligned side by side after that we will add the CSS
for This image tag that is our logo so in this so let's come back hide this terminal and in this image tag let's add the class name property and here we will add width then cursor pointer we will save the changes now this logo is looking good next we will add the CSS properties for these UL tag so in this UL tag let's add the class name property here first we will add the hidden class name so This UL tag will be hidden from the phone view then we'll add the medium device here we'll add
the flex item St start Gap then font medium so it will be visible on medium screen size now save the changes so you can see this UL tag is visible now it is aligned horizontally next we'll add the CSS properties in this Li tag so select all the LI tags in all lii tags let's add the class name Property here we will provide padding y1 after that we will add the CSS properties for all these HR tag select all the HR tags here let's add the class name here we will provide border none outline none
height background color width margin Auto here we are going to use the primary color for the Background first we have to add this primary color in our Telvin do config file so let's open telin do config file here in this theme option inside this extend let's add colors that will be one object here we will Define primary color so write primary and here we have to add the color code so we are going to use this color code that will be our primary color for our website save the Changes close this file now here we
are getting this background color using this BG primary if we save this changes and come back to the web page now you can see here we are getting one underline effect in all the menu items next we have to display this underline only on the menu that page is open so for that let's come back to the vs code editor and now after this margin Auto in all the HR tag let's add the Hidden class name so it will be hidden for all the menu now in this naving tag let's add the two property and
here we will add one string so let's add the slash that will be for the homepage that we have defined in the app.jsx file so you can see the path is/ for the home component now let's open nav bar. jsx file in the second nav link we will add The two property here we will add the path for the doctor's page that will be our SL doctors now in the third one we will add the two property let's add SL about after that in the next nav link we will add the two property here we
will add slash contact after adding this two property in all the naving tag we will save the changes and open The web browser now if I click on the inspect and from here we will expand the body then this div then go to this ul and here we have multiple a tag we are at the homepage and in this first one we have the first a link we are getting one class name called active it means the homepage is active right now if I click on all Doctors when we select the all doctors now the
active class name has been removed from the first anchor link and it it has been added in the doctors's menu right in the second a tag if I click on about now it will add this active class name in this about Anor link Now by using this active class name we will add the underline effect on the active menu link so to do that let's open index. CSS file and here we will add Dot active class Name then HR tag here we will provide apply block property save the changes and we will come back to
the web browser as you can see we are at the slab path and you can see the underline effect in the about menu if I click on home now we will get the underline on the home menu so this functionality is working Fine after that we will come back to the na. jsx file now in this button tag we will add class name property and here we will provide background primary text white padding border radius font weight hidden and for the medium screen size block now this button will be hidden in phone View and in
the medium and large screen it will be visual after that we will save the Changes now we will get this button here now after this in this div tag let's add the class name property here let's add Flex item Center Gap four now in this button we will add the functionality so that when we click on this one it will redirect us to the login page for that let's come back to the vs code editor and before this return Statement we will add const navigate equal to and here we are going to use the use
navigate hook after that we will come here on this button tag and let's add the onclick property here we will add one Arrow function here we will call the navigate function after that here just provide the path of our login page that is/ login if I save the changes and if I click on this Button now you can see the path it is/ login and when we will Design the login page that login forms will be visible here after that we will click on home so we will come back to the home path now whenever
the user gets logged in then here we will display the profile picture of that user and one drop down menu so let's create the UI for that so before creating that here let's create two State variables first one will be show menu and the second one Will be token so let's add const show menu then we will add the setter function name set so menu equal to user State then initialize it with one buan data that is false similarly we will create one more State variable the name will be token and Setter function name will
be Set token equal to user State and initialize it as Boolean data true now whenever we have the token it means we are logged in when we don't have the token we are logged out so we have added the Boolean data by Default true after that inside this div let's use the turn operator so we Will check if the token is true it means we are logged in in that case we will return one div let's move it in the new line then we'll add the column and if we are not logged in in that
case we will display this button so let's remove it and past it here after this column now let's check this logic so now you can see this button is hidden because the token is true and if we make it false save the changes then again This button is visible so by default we will make it true for now so that we can Design This D so when it is true the user is logged in in that case we have to display one drop down so in this div we will add one image tag and in
this image SRC we have to add the assets do profile pick for now we are going to display This profile picture if the user gets logged in then we will display the users's picture after this image tag we will create one more image tag in this image SRC we are going to use assets. drop-down icon if I save the changes so here we have this profile picture and this drop- down icon now we will add the class name properties for this Image so first We'll add the class name in this image tag and here let's
provide width then border radius so let's add rounded full after that in this image tag let's add the class name property and here we will Define the width that will be 2.5 that is across 10 pixel now we will add the CSS properties in this div so let's add the class name and in this class name let's provide Flex item Center Gap cursor pointer group relative save the changes and open the web browser now the profile icon is looking good and here we have this drop- down icon also now we'll create one drop- down menu
so whenever we will hover on this image then the drop down menu will be visual so to create the drop down here we have added this group and Relative so after this image tag let's create one div in this div we will create one more div and inside this div we will create three P tag now according to our design file if we come to this design here we are going to create this drop- down something like this so first we have this text my profile so let me copy this text we will paste it
here then we have the my appointments Let's copy and paste it here then we have this Tex log out copy and paste it here after that save the changes so you can see all these text are visible in the right side of this image next we will add the class name so it will be displayed as drop-down for that in this div let's add the class name property and here we will Provide absolute top zero right zero padding top text base font weight text color Z index hidden group hover block so by default it will
be hidden and when we will hward on the image it will be visual save the changes now this drop down is hidden if we h on it then this drop down is visible after that we will add the CSS property in this div for that here let's Add the class name property now let's add minimum width background color border radius Flex Flex column Gap and padding save the changes now if we hover on this here we are getting these options in the drop down next we will add the class name property in these P tag
so in these three P tag let's add the class name property and here we will add hover text Black cursor pointer if I save the changes when we h on it you can see the text col is changing it becomes black after that we will add the navigate function so that when we click on the my profile then we will be redirected to the my profile page that will be SL my profile path so for that in these two P tag let's add the onclick property here we will add this Aro Function now we will
use this navigate function function so here after this addo function just add the navigate in the first one we have to send the users to the my profile path that is my Dash profile after that in the second one we have to send the user to the my appointments page for that here we will add my Dash appointments after that we will save the changes if i h on this and click on my Profile now we are redirected to the/ my profile page if I click on my appointments now you can see the path we
are redirected to the my appointments after that we will add the functionality on this log out button so that when we click on this then we will make this to toen false and this drop- down and profile icon will be hidden and here we will get the create account button again for that here let's add the Onclick property on this paragraph tag here we will call the set token function and simply provide false if I save the changes now if we h on it and click on the log out button now that profile icon and
drop down is hidden and here we have the create account button and if I refresh this one again we will get this profile icon and this drop down Menu now we have completed this navigation bar after this navigation bar we have to create the header section so let's come back to the figma design so here in this design you can see we have this header component with background color text and image so let's come back to the vs code here in this components folder let's create a new file that will be header. Jsx here we
will use ource here we have cre created this component now we have to mount this component in this homepage so let's open home. jsx file and from here let's add opening Arrow headers select this header component from components SL header let's close this tag and save the changes now let's open header. jsx file In this div we have to create two section one for the left side and another one for the right side in the right side we have this image and in the left side we have these text description button and small icons so
here let's add one comment let's add the commment text left side after that we will create one div inside this div we will create the left side of the header after that let's add one more comment here we will add the Comment text right side and after that let's create another div in this div we will display the right side content in the left side let's add the paragraph tag in this paragraph tag we will add this text book appointment with trusted doctors so let's copy and paste it here after that we will add the
BL tag to add a line break then we will copy the second line that is with trusted Doctors we have pasted it here after this P tag we will create one div and in this div we will add one image tag in this image tag we will provide assets dot group profiles that is this image after this image tag we will create one P tag and here we will add this small description so let's copy this and paste it here now let's move it in the single line and Here we will add the BR tag
to add the line break after this div we will create the anchor link and in this anchor link we will add this text book appointment so let's copy it and paste it here after this text we will add one image tag and in this image tag we will provide assets do Arrow icon so we have created the left side of structure now in the right side we will add the image Tag and in this SRC we will provide assets dot header image now let's save the changes and open the web browser so here we have
created the left side and right side now let's add the Cs properties for this header section so first we'll add the CSS properties in this div tag here we have the here we will add the class name property and in this one we will add the Tent classes so just add Flex Flex column for medium and above a screen size We'll add Flex row Flex wrap background primary rounded large padding for different screen size then save the changes now you can see this background color and we have some padding also after that we will add
the CSS properties in the left side da so just add the class Name property and let's provide medium width half Flex Flex call Item start justify Center Gap padding y margin Auto then padding for different screen size then margin bottom so now you can see the space around this next we'll add the CSS properties for this text so in this P tag let's add class name property let's provide text size then we will add the Different text size for different screen text white font semi bold line height for different screen size we will add different
line height save the changes now you can see this text looks good after that we'll add the CSS properties for this image tag for that here in this D we will add the class name property and let's provide The tnd classes so for the medium and above a screen size we will add the width 1 by two position relative after that we will add the class name property for this image tag here we will add width full position absolute bottom zero height Auto rounded large save the changes Now this image is displayed in the right
side and these text is displayed in the left side after that we will add the CSS properties for this div where we have the group profile icon and text so let's add the class name property we will provide Flex Flex column Flex row item Center Gap text White texture small and font weight now we will add the CSS Properties for this image tag so let's add the class name width 28 after that save the changes and open the web page as you can see we have this image in the left side and this text in
the right side after that that in this BR tag let's add the class name property and here we will add hidden and for a small and above a Screen size we will make it visual so just add block save the changes after that we will add the CSS properties for this button so let's come back and here in this a tag we will add the class name property here we will provide Flex item Center Gap background white padding border radius text Color text size margin Auto H effect transition all then duration 300 after that we
will add the class name in this image here we will provide the width three save the changes now here we have this beautiful button and here we have the hover effect also so now we have created this header section now let's come back to the figma design and you can see here we have some Other content so when we will click on this button Buton it should scroll the web page to this menu which is find by speciality for that we have to add the smooth scroll so in this button tag in this anchor link
let's add has a speciality now our header section is ready now whenever we will create this section then we have to add this ID in this section so whenever we will Click here it will scroll the web page to this section now let's create this section for that let's come back to the components folder and here we will create a new file and we will name it a speciality menu. jsx here we will use our afce next we have to mount this component on our homepage so let's open home. jsx file and after this header
we will Mount This component so in this suggestion we are getting this component so just click here so this component will be automatically imported now just close this tag save the changes now let's open this component file so in this component here we have to add one title one description then these menu for this menu we will use assets. JS file and in this one you can See we have added this a speciality data in one array where we have multiple objects where you can see the image and name we have exported this file so
we can use this in any component so first in this dip we will add one ID property and here we will add the ID that we have added in this button so just copy this a speciality and paste it here in this ID now in this div tag let's add the H1 tag and here in this H1 we have to add this text so let me Copy this paste it in this H1 after this H1 tag we will create one P tag and in this P tag we will add this text so simply copy and
paste it after this P tag we have to display these menu with image and name so here we will create one div and in this div tag we will use this aray so first we have to import this a speciality data so let me copy this and here we will add Import curly bres a speciality data will get this suggestion so just click here so it will be imported from this assets file in our component now in the S tag we will add the curly addes and here we will use this as speciality data then
in this one we will add the map method here we will pass one add function here let's use this a small bracket in this one we will add link Tag that we will get from the react router Dom so when we click here this link tag will be imported from the react router Dom now just close this tag now in this parameter we will take individual item and index number now in this link tag let's add the two property and here we will use template literal so to use the template literal just add the back
tick here we will add/ doctors path After that we'll add/ dollar sign curly bres and here we have to add the speciality path so simply add item dot we will select this option A speciality now in this link tag let's add the image tag and in this image SRC we will use item. image after this image tag let's add the paragraph tag and here we will add the curly Braes then add item do speciality now in this link tag we will Add the key property where we will provide index that we are getting from this
parameter now if I save the changes and open our web page so here we have this title description then we have all the items right so we have total six menu now let's add the CSS properties for this component so first We'll add the CSS Property for this div so here let's add the class name property and provide the Tailwind classes so just add Flex Flex call Item Center Gap p ping then text color save the changes so now you can see everything is in the center after that we'll add the CSS properties in this
H1 tag so let's add the class name property here we will add text 3 XEL then we will add the font Medium save the changes so this title is looking good then we'll add the CSS properties for this paragraph tag so in this P let's add the class name and let's provide width 1x3 text Center then text small save the changes so now you can see this small description is also looking good in two lines because we have added the width now we will add the CSS properties for these list that contains these image And
text so here in this div let's add the class name property here let's provide Flex for a small and above a screen we will add justify Center Gap four padding width overflow scroll save the change es here you can see we are getting all the items in horizontal line here we are getting this a scroll bar so we will make this a scroll bar hidden for that let's come back to the Index.css file here we will write double colum Dash webkit Dash scroll bar here we will apply hidden save the changes close this file now
that a scroll bar is hidden after that we have to add the CSS properties on these images so here we have this image tag so Let's add the class name property and here we will provide width 16 and for a small and above screen we will add width 24 then provide the margin bottom to save the changes so this is the perfect size for the image now we'll add the CSS properties for this link tag so here let's add the class name so let's provide Flex Flex call item Center Tex extra small cursor pointer Flex
shrink zero over Translate Y minus 10 pixel transition all duration 500 milliseconds save the changes now if I hover on any item you can see it moves up now when we click on this icon it will navigate us to the doctor's page and here we are getting the specialty menu right if I go to homepage and click on this General physician then we will come To the doctor Page and here we will display the doctors with the speciality of General physician and if I and if we directly come to all doctors then it will display
the doctors of all the speciality now we have created this section after that in this link tag we have added this two property next we have to add one on click property also so let's add on click here we will add the arrow Function and here we will call a scroll two that is one JavaScript function to a scroll the web page here we will simply add zero comma 0 so whenever user will scroll the web page and click on this menu then it will redirect us to all doctors pages and it will also scroll
the web page to the top now we have completed this menu section after that we will create the top doctor section where we will display the Top Doctors list for that let's come back to the vs code editor in this components folder we will create a new file write the file name top doctors. jsx now in this file we will add this snippet rce after that we will Mount this component on our homepage so let's open home. jsx file and here after this a speciality menu we will Mount the Top Doctors component now save this
file come back To the top doctors. jsx file and here we will create the UI so as as you can see in this figma design first we need the heading then description then doctor's profile and one mode button so let's come back to the vs code editor within this div we will create one H1 tag here let's copy the text from here and paste it in this H1 after that we will create one P tag and copy the text from the design and paste it here after this P tag we will create one Div and
in this div we will display the list of top doctors so to display the Top Doctors profile we will go to assets file and here we have the doctors aray and we are going to display these doctors data in this Top Doctors component so here we will add the curlys then at the doctors we are getting the suggestion from the assets folder assets file so just click here after that this doctors will be imported from the assets file on this one we will Use the dot slice method here we are going to display maximum 10
doctors for that here we will use the slice method and in this slice method let's add 0 to 10 after that in this aray we will use the map method and in this map we will pass one Arrow function function and here we will use the small bracket now in this parameter we will get the individual item and index number after that in this bracket we will return one Div and in this div we will display the doctor's information like name profile picture a speciality and other details now in this div we will display the
doctor's profile that contains the doctor's picture available status doctor's name and doctor's speciality now in this div let's add the image tag in this image tag we will use item do image after that let's create One D and in this one let's add another D and here let's add one P tag in this P tag we will display this Green Dot so let's add another P tag here after this p and here we will display the text which is available so let's copy this and paste it here now after this div let's create one P
tag to display the doctor's name so here we will get the doctor's name using item. name after this P tag we will add one More P tag and here we will display the doctor's speciality so just add item dot speciality after this div here let's create one button tag that will display this mode button so let's add the button text mode save the changes and let's come back to the web browser so now you can see we are getting this text then image then doctor's Information available name and a speciality next we are going to
add the CSS properties in this component so in this div we will add the class name and here let's add the tnd classes so let's add Flex Flex column item Center Gap margin text color and margin from the xais then save the changes now you can see all the text and doctor's profile are displayed in the Center now let's add the CSS in this H1 tag here we will provide text 3 XL font medium after that let's add the CSS in this a small paragraph tag so just add the class name width text Center text
a small now save the changes so you can see this title and paragraph is looking good after that here in this div we will add the class name here we will add the width full GD GD columns Auto Gap four padding Gap in y then padding X for a small and above a screen now save the changes and come back to the web page now after that here in this div let's add the key property where we will insert index that we are getting from this parameter after that in this div we will Add the
class name property here we are going to add border border blue border radius overflow hidden cursor pointer then we will add the hover effect so we will add translate y- 10 pixel transition all and duration 500 milliseconds now save the changes now you can see this B and H effect next we will add the CSS property in this image tag so here let's add the Class name in this class name let's wide background blue 50 after that we will add the CSS property in this div also so here let's add the class name and here
simply provide padding for after that let's add the CSS properties in this div so just add the class name let's provide Flex item Center Gap two text small text Center text color Green after that we are going to use this first P tag to display one Green Dot so let's add the class name here we will provide width height background green then rounded full that is border radius full now save the changes now in this background we are getting the color blue now we will create the custom tent property for this greed Columns Auto for
that let's come back to the T.C config.js file after this color let's add the comma and here we will write grid template column grid template columns then add one object here we will Define the auto property in this Auto property we will provide the custom property so let's add repeat autofill minmax 200 pixel and one Fraction after that we will save the changes and open the web page now you can see all the doctors's profile are aligned properly we have the width of 200 pixel and we are also getting this hover effect that we have
added here after that we will add the CSS properties in these P tag so here in this one we will add the class name property and in this class name property let's provide text Gray text large font medium now in the second P tag let's add the class name property and here we will provide text Gray 600 text small after that save the changes and come back to the web page now this doctor's name and speciality is looking good so after creating this Top Doctors we will Design This mode button so here we have this
button tag let's add the class name and let's add background blue 50 text Gray padding X and padding y border radius full and margin top then save the changes and come back to the P page now this mode button is looking good now when we click on any doctor's profile card nothing is happening so we have to add the navigate path so that when we click on any card we will be redirected to the slappointment SL doctor ID and on that page we can fish the doctor's information and display the doctor information on that page
for that let's come back to top doctors. jsx file and here before this return statement we will add const navigate equal to use navigate we have to import this use navigate so just click on this suggestion so use navigate has been imported now add the bracket after that in this D here let's add the on click property and in this one we will add the arrow function and just call the navigate function in which we'll add the we will add the template literal so just add the back text and here let's add the path that
is SL appointment slash dollar sign curly brushes and paste the doctor's ID that we will get from the item so let's add the item Doore ID after adding this let's save the changes and come back to the web browser now if I click on the card it will redirect us to the slappointment path and here we have the doctor ID which is Doc 2 now let's come back to the homepage now this functionality is working fine after that we will create the context so for creating context let's create a a new file in this context
Folder this file name will be app context. jsx after that here we will create the context so we can access the common Logics from this file so to create the context simply we will type export const app context equal to and here we are going to use the create context that we will get from the react package just click here so it will Import the create context from react now add the bracket so here we have created one app context after that we have to create the context provider function so to creating the context provider
function simply write const app context provider equal to and it will be one Arrow function so we have created this Arrow function in this function we will add one variable with the name value and it will be one object so Whatever we will add in this value object we can access that in any component so let's first import the doctors from from the assets so we have imported the doctors from the assets folder assets file that is one array that we are using in this top doctor component so here we have directly imported it from
the assets file now we will add this file in this context and we will try to access this File from the context for that in this value let's add doctors that we we have imported here and after that here we will return app context dot provider and with this tag we will add the curly Braes and from this parameter we will get the props and in this curly Braes we will add props do children after this we will export this app content Tex provider function for That we will use export default and here we will
use app context provider function next we have to add this value in this props so just add value and use this value object now we have added this value object in this app context our context file is ready now next we will add the context support in our front end project for that let's open main. jsx file and here first we will import app context Provider function from Context file app context. jsx after this browser router we will create app context provider tag now with this tag we will move this app component so here we
have wrapped our app component using this app context provider after adding this we will get the support of context in our front end project so now let's come back to top doctors. jsx file here we will remove this import that we are importing Doctors from the assets file and instead of directly importing this file we can use it from the context so let's add const cly addes doctors equal to and here we will use use context hook and in this one we will provide our context which is app context by adding this we will get
the doctors from this file now let's save the change changes and come back to the web browser as you can see still we are Getting these doctor list that we are getting from the context after that here we have some mistakes in this H1 tag we have to add the font medium so let me colnect this font medium so now this heading is looking good now in this mode button we will add the functionality so that when we click on this one we will be redirected to the all doctors page for that let's come back
to the vs code and in this button Tag let's add the onclick property now in this on click let's add the arrow function and here we will add this curly bres here we will call the navigate function then provide the path that is/ doctors after that let's add the the semicolon and here let's add a scroll to function so just add a scroll to and in this one just add Z and zero so whenever we will click on this more button we will be redirected To all doctor Page and it will scroll the web page
to the top after that here we have added the functionality book appointment so it is coming to this section so here we have to add the smoo smooth scroll so that when we click here it will scroll the we page smoothly and it will come to this section so just come back to the vs code Editor to add the smooth scroll in the project let's come back to the index.html File in this HTML tag we will add class scroll smooth we will collect this double quat save the changes and come back to the web page
now if I click on this book appointment it will display the smooth scroll effect and we will be moved to this section and after that we have this top doctors now after this Top Doctors we will create this Banner where we will display the text this button and this Image so to create this first we will create one new component so in this components folder we will create a new file and we will provide the name banner. jsx in this file we will use our afce now save this file now we have to add this
Banner component on the homepage so let's open home. jsx file and after this STP doctors component we will Mount the banner component Now save the changes and we will come back to the banner. jsx file and here we will create the banner section so to create the banner let's come back to the figma design file and here you can see we have this background color and here we have two sides left and right in the left side we have the text end button and in the right side we have one doctor's image so first we
will add one commment here let's add the comment Text left side after this comment let's create one div now let's copy it and paste it here it will be right side now in this left side div we will add another div and here we will add two P Tex in the first one we will write book appointment just copy and paste it and in the second line we will add this text with 100 plus trusted doctors So copy and paste it here after this div we have to create one button tag so here we will
add this text create account so just copy and paste P it within this button tag after that in the right side we will add one image tag and in this image SRC we will use assets dot appointment image now save the changes and come back to the web browser so here we are getting this text button And this image now let's add the CSS properties for this Banner component so first we are going to add the CSS property in this div so let's add the class name we will provide Flex background primary border radius padding
for different screen size then margin now save the Changes so here in the left side we have this text and in the right side we have the image and we have the background color also now let's add the CSS property in the right side in the right side in this div let's add the class name property here we will add the CSS properties so in the desktop view this image will be displayed but in the phone view this image will be hidden for that here let's add the Hidden then for medium we will add block
then we'll add the width for different screen size then we'll add the relative now we have to move this image in the right side for that in this image tag we will add the class name property here we will add width full absolute border zero right zero Max width medium now save the changes come back after that we will add the CSS properties in this left side div So here let's add the class name property here we will use flex one so it will use the available width then we'll add the padding we will add
different padding for different screen size now save the changes now you can see in this left side we have the text and in the right side we have have this image next we will add the CSS property in this paragraph text so we will add the color And size so let's come back to the vs code editor and in this div here we will add the class name property here we will add text size we will provide different size for different screen size then add the font weight semi Boldt text WI F now in this
second paragraph tag we will add the class name property and here we will add margin top for Save the Changes and come back to the web browser so here we are getting this text and here we have the button text create account now we will add the CSS properties for this button so in this button tag let's add the class name we will provide background white text small then text base then text color then padding X padding y border radius margin top then Hover that is a scale then transition all save the changes and come
back to the web browser here we are getting this button create account when we move cursor you can see this hover effect after that we will add the logic so that when we click on this button it will open the login page for that in this button tag we will use navigate function that we will get from the use navigate hook so here Before this return let's add const navigate equal to use navigate now now in this button tag let's add the on click property and here we will add this Arrow function and we will
call the navigate function and in this navigate function we will add the path so here let's add SL login path after that we have to add it in curly bres Then provide one semicolon and here we will add a scroll all to and provide the path 0 and zero we will save the changes and come back to the web browser now if I click on this create account we are redirected to the login page after that we will create this footer section to create this footer we will come back to the vs code editor here
we will create a new file in this components folder and provide the file name Footer. jsx here we will use R fce next we have to mount this component in the app component after this routes tag here we will Mount the footer component so we have mounted this footer component outside of this rout tag so this footer will be visual in all the pages next we will come back to the footer. jsx file and Here we will Design the footer so to create the footer first let's create one div here we will create three columns
as you can see if we come to homepage here in this figma file we have three columns left Center and right for these three column we will create three div So within this div let's add one comment here we will add the comment Left section after this section after this comment we will add one div similarly copy this and paste it here and provide the name Center section similarly we will paste it again and provide the comment right section now we have three sections so first we will create the left section in the left section
we have to add the logo and this Paragraph text for that we will come back to the vs code editor and in this P tag and in this left section within this D we will add the image tag for the logo here let's add the assets it will import the assets from assets file so here let's add assets. logo and after this image we will add one P tag now in this P tag we will copy this text and paste it in This P tag so we have added the text this is unsupported characters so
let me remove it and save the changes now the left section is ready next we'll add the structure for the center one so in this Center we have the heading and Four lii Tags so here let's add add one P tag in this P tag we will add this text company after this P tag we will create one ul and in this UL we will create Li tag here we need four lii tags so I'll Add lii into four in the first one we will type four so let me copy and paste it now just
copy about us paste it here now just copy contact us paste it here now just copy the privacy policy and paste it in the fourth Alli tag now the structure for the center section is ready now we'll create the right section so here we have the heading text so just copy and paste it here in this P tag here we will add the text get in touch so just copy and paste It after that we will create one new tag in this UL we will create two Li so let's add Li into two now in
the first one simply copy and paste it this is random phone number now let's copy this email ID and paste it so we have added the structure for all three columns after that we have to add one horizontal line and copyright text at the bottom for That after this div where we have created three sections so after closing that let's create another div here we can add the comment so let me add the comment text copyright text so in this div we will create one HR tag so just add HR now after that let's add
one P tag and in this P tag we will simply copy this text and paste it here after that we will save the changes And come back to the web browser so now at the bottom we are getting the image and all these text in the footer next we will add the CSS properties to design this footer so to add the CSS property let's come back to the the vs code editor and in this div we will add the class name here we will provide medium margin x0 now in this second div we will add
the class name property and here let's add Flex Flex column for a small And above a screen we will add grid then grid column then Gap then margin y then margin top and text size a small save the changes and come back to to the web browser so now you can see all contents are aligned in three columns this is the left and center and right section now we will add the CSS property for the image tag so in this image tag we will add the class name property and here we will add margin Bottom
five width will be 40 now save the changes come back to the web browser after that we will add the CSS properties for for this P tag so let's come back and here in this P we will add the class name property so here we will provide width full then width then text Gray then line height save the changes and come back to the web browser now this left section is looking good next we will add the CSS Property for the middle section for that let's come back to the vs code editor and here we
will add the class name property and let's provide text Excel font medium margin bottom after that we will add the CSS properties in this UL tag also so here we will add the class name property so let's provide Flex Flex column Gap two then text color gray Save the changes now this Center section is looking good next we have to provide the CSS property in the right section for that simply copy this class name and paste it here now for this U tag also just copy this and paste it in this U tag save the
changes now this right section is also looking great next we have to add the CSS Properties for this bottom copyright text so let's come back to the vs code editor and in this P tag we will add the class name property and here we will provide padding text small text center now save the changes and come back to the web page now our copyright text is also looking good now we have successfully created our homepage after that we will add some custom fonts to improve the UI of our Homepage so let's open the new tab
and here we will search for outfit font now let's open this fonts. goole.com website and here we will click on this button get font after that click on this get embed code after that just click here on this import so simply copy this import statement and come back to the vs code editor let's open index. CSS file and in The first line we will paste this import statement after that here we will add the CSS properties for all the elements that will be font family and here we will Define outfit font that we have imported
here after that we will save the changes and come back to the web browser so now we have updated the font in our project now our UI looks good after that we'll create this all Doctors pages so whenever we will click on this category it will open this doctors's page with this a speciality and when we directly click on this doctor from the navigation menu then it will open this SL doctors path so when we are at the/ doctors path it will display all the doctors and when we click on any speciality from here then
it will display the particular doctor with particular aspect speciality for that let's come back to the vs code Editor and we will open doctors. jsx file now in this page first we will get this parameter which is a speciality so to get this parameter we will use the use padams hooks so let's come back to the doctors. jsx file we will add con curly bres in between this we will add the speciality and after that let's add use padams hook after that we will try to log this a Speciality now when we open homepage now
we have to add one link tag on this logo also so that when we click on this logo we will be navigated to the homepage so let's come back open nap. jsx file and here on this image tag we will add one onclick property here we will add one Arrow function where we will call the navigate function and here we will provide the path SL that is the homepage now save the changes and close the file now we Will open the inspect tab then go to console and we will reload the web page now when
we go to the doctor Page using these menu now you can see here we are getting the parameter if we go to another then we are getting the second parameter from the Ur So this parameter is working fine now we have to show the doctor According to this parameter when we directly move to this all doctors then this parameter will be undefined then so in that case we will display all the doctors so let's create the UI first so to create the UI let me remove this console log and here we will get the all
doctor's data from our context for that here we will write con curly veres doctors equal to use Context and here provide the app context after that we will come to this div and here in this div we will create one P tag so let's see the design so here is the doctor space design so we have to add this text so let me copy this and and we will paste it in this P tag after this P tag we will create one div now in this div we will create one more div and in this
one we will create six Paragraph tag for this six menu that we have created here so here let's add P into 6 now in the first one we will copy copy this text from here and paste it similarly we will copy this second text and paste it in the second B tag now copy the third one paste it here now copy the fourth one paste it here now copy the fifth one paste it Here and we have added all six P tag now save the changes after that let's create another div and in this div
we will display the content in the right side where we will display all the doctors list so to display the doctors simply add KES in this div we will display the doctor's card for that we will create one more State variable so let's create it we will add Const filter doc then set function name is set filter doc equal to user State and initialize it as empty aray in this aray we will add the do doors if we click on any of this button then that a specialist doctor will be displayed in the right side
so we will display the doctor using this filter doc array now in this curly veres we will add filter doc do Map in this map method we will directly copy the UI of this card that we have already created in top doctors. jsx file so from here we will copy this do map method inner function copy till here now come back to the doctors. jsx file and in this map method we will paste the code next we have to add the doctors in this filter dock array So currently this Array is empty so if we
open our web page all doctors page here we are getting nothing right so we have to set the doctors according to our speciality for that here we will create one Arrow function so let's add cost apply filter equal to it will be one Arrow function after that here we will add the logic so here we will check if a speciality is Available then we are going to set the doctor according to this data so simply write set filter Doc and in this seter function we will add doctors do filter method after that here we will
add the doc as a parameter and here we will check if doctor specialty equal to this speciality from the parameter in that case we are going to save that doctor else we will filter out the other doctors now we will add the else Statement suppose here we are getting nothing in this speciality in that case here we will add this set filter Dock and here we will provide all doctor's list now we have to apply this filter whenever our doctor or a speciality gets changed for that we are going to use the use effect hook
and in this one we will pass one Arrow function and here we will add the dependency aray in this dependency aray we will add doctors and a Speciality now in this Arrow function if we write any statement that will get executed whenever any of this gets changed so here simply call the apply filter method we will save the changes and let's open the web browser so as you can see here we are getting all the doctors details that is available in our doctor's aray now when we click on any of this menu like General physician
now here we are Getting the doctor's list who is a specialist in general physician so here we are getting only three doctors if we click on any other category here we are getting three only so these are dermatologist now our logic is working fine and filter is also working after that here we are using this navigate function so we have to create this navigate so let's add const navigate equal to use Navigate and import this use navigate now whenever we click on any of the doctor then we will be redirected to the appointment page now
after this in this TP we will add the class name property and here we will add width full grid grid columns Auto Gap and we will save the changes now this doctor's card is looking good after that we have to display this Card in the right side and in the left side we will display these menu as you can see in this design so let's come back to the vs code and we'll add some CSS properties so first let's add the CSS in this P tag here let's add the class name text Gray 600 after
that we will add the CSS properties in this div here we will add Flex Flex column Flex row item start Gap and margin Top after that we will save the changes now you can see in the left side we have these menu and in the right side we are getting the doctor's list now we will add the CSS properties for this menu so for that in this dip we will add the class name property and here we will add Flex column Gap text small then text color gray 600 after that we will save the changes
after That we will add the CSS properties in these P tag so simply add the class name property now in this class name property here we are going to use the Dynamic class name so to add the dynamic class name we will add The KES now we will add the back tix and in this backtick we will add the class name that is width then padding left padding y then padding right then border border Color rounded transition all cursor pointer now save the changes now these buttons are looking better after that here we have to
add the flex after adding the flex save the changes and come back to the browser now you can see the Gap here after adding this we will come back to the vs code editor again and in these P tag we will Add on click property in this on click we will add the addo function and here we will check if our speciality is equal to for now here we will add this empty string and here we will add navigate function in this we'll add/ doctors after that here we will add the column and now we'll
add the navigate function and here we will add SL doctors SL so now when we click on this first P tag it will check if the speciality isal to this one General physician so here we'll add the general physician so let me copy the exact text copy and past it in this single code so it is checking if the speciality is General physician in that case whenever we will click on this one it will navigate us to doctors and we will Display all the doctors and if it is not equal then we will navigate us
to doctor /gen physician speciality so let's add/ do/ General physician that will be our speciality so let's paste it similarly we will copy this second one we will add it here if it is true it will redirect to the doctors and if it is false then it will redirect us to do/ This speciality now let me copy the third one paste it here then paste it in this navigate now copy the next one paste it in this check check then paste it in this navigate now let's copy the next one paste it here in this
turn operator then paste it here in this navigate now copy the last one paste it here and paste it in this navigate after that we will save the Changes and come back to the web browser now let's check this logic when we click on this General physician we are navigated to the general physician and here we are getting general physicians list and if I click again then it will display all the doctors because we have added the turn operator here if it is already selected then it will navigate to/ doctors so it will get deselected
now this menu is working perfectly Fine after that we will come to this class name property and here in all these class name we are going to use one turn operator using the template literal so just add dollars and curly brushes and here we will add the speciality here we will check if it is equal to and for now we'll add the empty string after that question mark we will add this empty String after that let's add the another string and here let's add BG Indigo 50 BG Indigo 100 then add text black after this
string we will add colon and one empty string now as you can see here we are using this template literal and here we have added it in all the menu here in this string we have to provide the menu text which is the general physician for first One then if it is same then it will display this background color and text in black color and if it is not the general physician in that case it will add this empty string only so let me copy this and paste it here similarly we will add the text
in other menu copy and paste it here copy and paste it in this turn operator now just copy and paste we will do it for all the menu now save the Changes and come back back to the web browser as you can see here we have selected the general physician so the color is changed if I click again then it will be deselected and if we click again it is selected so this logic is working fine similarly if we click on another one now we are getting the doctors for this speciality so now this logic
is perfectly working now this all doctor Page is ready and at the bottom we have this footer Also after creating this we will Design the appointment page as you can see here this is the appointment page whenever we will click on any doctor like this one so here we are getting this doctor's ID by using this ID we will get the doctor's data and display that on the appointment page and on this page we are going to display the booking slot option where we will display the next 7 Days right and we will display the
Timing then we will create one book and appointment button and we will also display the related doctors suppose we have opened the general physician in that case in this related section it will display all the general physicians so to create this page we will come back to the vs code editor and after that let's come back to the appointment. jsx file in this page first we have to get the doctor's ID so let's come back to the web page and if I Click on any doctor so in this URL you can see we have the
appointment SL doctor ID so we have to get this doctor ID and store this in a variable so for that that before this return statement simply add const cly says we will add doc ID equal to use padams now after this here we will get the doctor's data from the context for that let's add const KES doctors equal to use context here we have to provide app context now here we have the doctor ID and all doctors data now we have to find the particular doctor from this areay using this doc ID for that we
will create one Aro function so let's add con fetch doc info equal to and and it will be one asnc Arrow function so we will create this Arrow Function now within this function we will create one variable with the name doctor info so let's add doc info equal to and here we are going to use this doctor's aray and in this one we will use the find method here we will pass the parameter that is individual doctor and after that here we will check if the doctor doore ID is equal to Doc ID in that
case that doctor data will be Stored in this variable next we have to create one state variable and in that state variable we will save this doctor information so to create the state variable simply add con let's add the name doc info now the seter function name is set doc info and it will be use a state and initialize it with null now after finding the Doctor we will set the doctor info so simply provide doc info next we have to run this function whenever our page gets load for that here we will add use
effect in this one we will pass one Aro function and after this Aro function here we will add the dependency array now in this dependency are we will add doctor's are and Doc ID so any of these two data gets changed then this function will get Executed so in that case we will call the fit doc info function after doing this we will get the doctor information now let's try to console log it here so here let's add doc info now let's save the file and come back to the appointment page now we will right
click and inspect then go to console and here we are getting one object and in this one we have indivisible doctor Information here we have the ID doc to that you can see in this URL also now if we open any other doctor like this one so here we are getting the another object where we have the doctor about address degree experience fees image name a speciality and do ID now we have to use this data to display the doctor profile so let's come back to the vs code editor and here in this div we
will add one comment so the comment text is Doctor Details after this comment we will create one do in this div we will create one more div in this one we will add one image tag in this image tag we have to display the doctor's image so to display the doctor's image we will use this doc info data where we have this image property so in this SRC simply provide doc info. image now if I save the changes and open the web browser here we are getting the Doctor image now after this return statement we
will check if do info is available in that case only we will display this div for that here we will add Dr info and this operator after this div here in the right side we have to display the doctor's name then degree a speciality experience about text and fee so to display that here we will Create one div and in this div we will display the doctor's details like name degree and experience for that here we will add the comment here we will write doc info like name degree and experience so after this comment we
will create one P tag and in this one we will display the doctor's name so to display the doctor's name just add the curly say and we are going To use doc info. name name after that here we are getting the name after this name we have to display this check mark that is the verified icon for that simply add the image tag and in this SRC we will add assets dot verified icon save the changes here we are getting this verified icon after this P tag let me make it clear by moving in multiple
lines so after this P tag here we will create one Div and within this div we will display the doctor's degree and a speciality so here let's add one P tag we will use the curly presses and in this one we will add doc info. degree after that here we will add the space Dash curly presses we will add doc info dot speciality if I save the changes and come back to the web browser here we are getting this degree and this General physician after this P tag Here we will create one button tag to
display the doctor's experience as you can see here we have this button so in this button tag we will add the Cs and we will provide doc info. experience we will save the changes here we are getting the experience of 4 year that is saved in this data you can see the experience 4 year after this div here we will add one comment here we will display Dr About here we are going to display the about text so let's add one div in this div let's add the P tag and in this P tag we
will add one text that is about then we are going to add one image tag where we will display assets doino icon after this paragraph tag we will create one more P tag in this one we will display the doctor's about text so just add doc info do about now let's move it in the new line so it Looks perfect now save the changes and come back to the web browser so here we have this topmost section for our web page next we will add the CSS properties for this elements so let's come back to
the vs code and here in this div let's add the class name property and here let's provide Flex Flex column Flex row and GAP Four after that we will save the changes and come back to the web browser so here we are getting this image in the left side and these text in the right side and in the right side we have the name degree about text after that we will add the CSS properties in this image tag for that here let's add the class name property and we will provide background primary width full Max
Width then border radius save the changes and come back to the web browser after that we will add the CSS properties in this div so here let's add the class name property here we will provide Flex one border border gray border radius padding background color margin now save the changes and come Back to the web browser now you can see this image size is looking perfect and in the right side we have this box next we will add the CSS properties for these text and icons for that come back to the vs code and in
this P tag let's add the class name property and provide Flex item Center Gap two text size font weight and text color save the Changes so now this name is looking good and beside this name we have this verified icon so now let's add the CSS property for this icon so here let's add the class name property and here simply provide width five now this icon is small after adding this we will add the CSS properties in this div so here let's add the class name property we will provide Flex item Center Gap two text
small margin top text Gray 600 after this we will add the CSS properties on this button so let's add the class name property here we will provide padding y padding X Border text size and B radius so let's save the changes and come back to the web browser here we are getting this text and this button after that we will add the CSS properties for This about section so we will come to this P tag here we will add the class name property so here let's provide Flex item Center Gap one text small font medium
text color gray 900 and margin top after that we will add the CSS property in this P tag also so let's add the class name property and here we will provide text a small text color gray Max width and margin top after that we will save the changes And we will come back to the web browser so after creating this about section we have to display the appointment fee so after this div tag here we will create one paragraph tag and within this P tag we will add appointment fee so let me copy it from
here after that here we have to add one a span tag and in this as span tag we have to display the doctor fee so here let's add doctor info do Fees save the changes here we are getting 50 as you can see here we have this currency symbol right so we have to display this currency symol at various places on our website so for that we are going to create one variable in app context so let's add con currency symbol equal to and we will write one string and in this one just add dollar
Sign after that we have to add this currency symbol in this value object now we can access this currency symbol in any component so let me copy this currency symbol from here now let's come back to the appointment. jsx file and here while destructuring this doctor's data here we will destructure this currency symbol also after adding this I scroll down and here in this SP span we Will add one more curly reses and just provide this currency symbol so now you can see appointment fee $50 so now if you need to change this currency symbol
you have to change it in the context file and from all the pages the currency symbol will be updated so that is the benefit of creating this variable in this context file after that we will add the CSS properties for this P tag so in this P Tag let's add the class name property and we will provide text Gray 500 font medium Mar in top after that we will add the class name in this asan tag and here we will provide text Gray 600 now save the changes and come back to the web browser so
now this appointment fee is looking good now we have created this top part of this appointment page next we have to create this booking slot UI So to create this we have to get the data of the 7 days from current date and time from the current time so to get that data first we will create some State variable we will store the data in that state variable after that we'll create the function to calculate the data so let's create one state variable with the name doctors slot so just add con doc slots Setter function
name will be set doc slots equal to user State and here we Will initialize it as one empty array after that we will create one more State variable with the name slot index so just create const slot index set a function name will be set slot index equal to and here we will add use effect and initialize it with numerical value zero after that let's create one more State variable so just add con the name will be slot Time after that we will add the setter function set slot time here we will use the user
state and initialize it with empty string so here we have created three state variable where we are going to store this slot data that we will calculate using the function so to calculate the slots we will create one Aro function with the name get available slot so here let's add const get available slots Equal to and it will be one as sync Aro function so just add as sync Aro function so whenever this doc info gets changes then also we will execute this function so for that let's remove this console log from here and after
that here we will create one more use effect in this use effect we will add one Aro function here we will add the dependency at a in this dependency add a we have to add doc info so whenever the doc info Gets updated or changed then our function will be executed so simply call get available slots now in this function we will add the logic to calculate the available Slots of the particular doctor so in the function first we have to clear the previous slots so simply write set doctor slots and set it with empty
array after that here we will add one comment and here we will add the comment text getting current date let's create One variable let today equal to new date and here we are using this date Constructor after that we will get the date object in this today variable by using this variable we will calculate 7 Day from today here we have to run a for Loop so let's write for let I equal to 0 we will run it for seven times so just Add I less than 7 and I ++ now in this for Loop
we will set the date using this index so here let's add the comment getting date with index here we will create one variable let current date is equal to new date and here we will add today so here we will get the current date today and after that according to this Index we will change the date so let's add current date dot set date and here we are going to increase the date by this index suppose we will get the first value Zer it means today + 0 will be today only and if we get
index one then today's date + one so let's add today dot get date and here we will increase so let's add plus I so by doing this we will get the future 7 days from Now after that here we will add one more comment here let's add the comment which is settings end time of the date with index here we will Define the end time so suppose we will Define the end time 6 p.m. so in this slots we will get the slots till 6 p.m. for that let's add variable let end time equal to
we will create one new date after that we will add End time do set date here also we will provide today dot get date + 1 now for the different date we will get the different end time after that here we will Define the end time do set hours here we will provide the hour which is 21 after that we will add 30 for hours minute and seconds after that let's add one more Comment that is setting hours here we will check if today do get date is equal to current date dot get date method
in that case we are in the current date so here we are going to set the hours from current hour suppose the current time is like 11:00 then for the Today's slot we will not display the 800 a.m. we will directly start with 12:00 p.m. if the time is 1: p.m. then the slot will start from 2: p.m. so simply add current date. set hours and here we will add current date. get hours if it is greater than 10 then our current date and hours will get started from current hour + one else we are
going to use 10 for tomorrow if we check it should start with the 10 a.m and if we check The slot for today we will get from current time plus 1 hour after that we will set the minutes also so to set the minutes here simply add current date do set minutes here we will use the the operator get minutes if it is greater than 30 then we will set 30 lse Zero by doing this we will get the 30 minute interval after that we will add one elsea statement and here if the date is
not Today it means we are in the future date and here we will start the hours from 10:00 for that simply dat current date dot set hours 10 for minute also we will add current date dot set minutes equal to zero now after this else statement here we will add one while loop so let's add while and in this while loop we will check if our current date is less than end time that we have defined 9:00 In that case here we are going to create slot in every 30 minute interval so here we'll see
8:00 8:30 9 9:30 that's how we are going to create the slot for that here in this vile statement let's add let in this variable we will store the time as a formatted time that means something like this 8:00 0 minute and a.m p.m. for that here we will Add current date dot to local time string here we will add the array after that we'll Define our 2 digit minutes 2 digit after doing this we will get the time from here and current date now now we have to store this data in a variable so
here we will create one variable let time slots equal to an empty array and in this array we Will push the time with date so let's add the comment and here we'll add add slot to add a now here we we are going to use the time slots array do push method and in this one we will add the object where we will Define the date time that will be new date object here we are going to use date Constructor to create a date object here we will provide current Date after that we have to
save the time also so just add time and here we will add formated time that we have created here after saving the time and date we will increment the time by 30 minute so let's add the commment that will be increment current time by 30 minute after that here we have to increase the time by 30 minutes so just add current date do set Minutes and from here we will get the current date do get minutes and increase it by 30 when the while loop gets ended in that case we will save this time slots
so let's add set doctor slots and here we will pass the previous slots data and here we will end the data in previous areay so just add the are a and a spread operator then add previous and in this one we will add the time slots now our function is ready to create the slots now let's see how our Slots data get structured so to view this slots data here simply add one use effect and here we will add the dependency aray here we will add the console log where we will console log doc slots
we will run this function whenever our doc slots gets changed we will come back to the web browser we will reload this web page we will click on Inspect then we will open console here we have three arays let me open the last one here we are getting only data for two days and remaining datas are empty so maybe we have made some mistake in the code so let me inspect this so here when we are increasing the date here we have added one instead of I so we have to add I let's save the
changes and come back to the web browser now we will reload the web Page now let's open the last areay as you can see here we have seven areay for 7 days and in the first one here we have the 15 object so each object has the date and the time so the time is 1:30 so the current time is 12:44 so the first slot will be 130 second will be 2: p.m. and after that 2:30 then 3 p.m. so for the first date we are Getting 15 slots and for the second day we are
getting 22 slots that starts from 10:00 similarly in every are we have 22 slots each day so now we have to display these data as booking slots on this web page so that user can select it and book the appointment so to do that we will come back to the vs code editor and here first we will create one aray so after that let's add one are with the name days of week and in this one we will Store days in this format Sunday Monday so here we have created this aray by using this aray
we will display the date in this format like Monday Tuesday and date also to do that let's come here before this last closing div we will add a space and here we will add curly bres and we will add the comment let's add the comment booking slots after that here we will create One D and and in this di we will add the Class name property here we will provide margin left for different screen sizes so we will add this margin left and padding left then margin top font weight text color we will save the
changes so we have added the CSS properties so that we will get these booking slots data in the right column after that in this div we will add one P tag and in this P tag we will write this booking slots so let's copy and paste it Here in this P tag after this P tag we will create one div tag and in this div tag we will display the date and day so here in this div we will use the curly bres we will check if Dr slots. length is not equal to zero then
only we will display this format for that simply add and operator and here we will add doc slots do map method and here we will pass the arrow function here let's add this bracket and Here in this parameter we will get the individual item and index number here we will return one div and in this div we will add the key property that will be index number after that here we will add two P tag so let's add P into two now in this paragraph tag we will add the curly bres here we will check
if item 0 is available then we will display days of week and here we will Provide date time do kit day after that we'll add the cly Braes and here we will check if item Z is available in that case here we will display item zero dot date time dot get date now we will be able to use this get date and get day property because in this data we have saved the date object as you can see here in this date time Here we have this date object in which we have the Prototype methods
like get month get time get hours so we will be able to use the get methods on it if we save the changes and come back to the web browser so here we are getting Tuesday so so we are getting this get day that provide us number and by using this number we will access the element from this areay that we have created here that's why Here we are getting Tuesday wednessday Thursday like that after that we will add the CSS properties in this section for that first in this div we will add the class
name property and here we will provide Flex Gap three item Center width full overflow X scroll and margin top for after this in this div we will add class name property here we are going to use the Dynamic class name so let's add C Lies We will use the template literal so let's add back ticks here we will add text Center padding y mean width rounded full cursor pointer now here we will add the dollar sign curly bres and here we will check if our slot index is equal to the index in that case we
are going to use BG Prim D text white else we will add the column here we will provide a string and in this string let's provide border border color gray so here after adding this come back to the web page now you can see our index is by default zero so by default the current date will be the selected date for the booking so here we have added the logic so if the index is selected then we will provide the background primary and text white to That index now here let's add one onclick property so
when we click on these buttons then we will change the index so to change the index simply add add a function and we will call set slot index and here we will simply provide this index now let's click on this third one then it will get selected then the slot index is getting changed after that we have to display the booking time also as you can see in This object we have the date and time also so now we have to display the time of the selected date so let's come back and after this div
we will create one more div and in this div we will add the curly bres and here we will check if our do slots. length is available in that case we will use the doc slots and here we will provide the index number slot index so that we can get the time of that date After that we'll add the map method here we will pass one AR function here we will use this bracket and in this parameter we will get item and index here we will return one P tag so simply add one P tag
here we will add the key property that will be index after that here we will add the curly Braes we will provide item do time dot to lowercase so it will be converted to the Lower case now if I save the changes and come back to the web browser here we can see the slots time it is available till 9:00 p.m. if we click on this current date then the current time is 1: p.m. that's why here we are getting the slots from 2 p.m now let's add the CSS properties on this one so to
add the CSS properties in this P tag we will add the class name and let's use the dynamic class name so that we can display the Selection so in this curly bres we will add the back Tex in this one we will add the class name text small font light Flex string zero padding border radius cursor pointer we will see the changes after that we will add the CSS property in this div so here let's add the class name property here we will provide Flex item Center Gap three width full overflow x a Scroll margin
top we will save the changes so now all the times are displayed in single row we can also scroll this list by using the scroll wheel and shift and we can also use the touchpad guesture to scroll this after that we will add the dynamic class name so that when we select here it will be highlighted like this to add the effect we will come back to the vs code editor and in this paragraph tag we will add dollar sign curly Braes and let's add the turn operator and in this one we'll add item do
time is equal to slot time if it is true in that case we will set the background primary and text white else we will add text color gray border and Border color after that we will save the changes now you can see we have this border for all the time slots next we will add the onclick property so that we can set this time so let's add on Click and here we will pass one Aro function and here let's call the set slot time in this one we will set the time using item do time
next save the changes and come back to the web page now let's click on the first time so it will get selected so you can see when we change the date and select any time this time will be selected so this is how we can create this booking slot Option after that we have to create this book and appointment button so let's come back to the vs code editor and after this div we will create one button tag in this button tag we have to type the text book and appointment so let me copy and
paste it here after that we will add the CSS properties so let's add the class name in this button we will add the class name property so let's provide Background primary text white text a small font weight light then padding then border radius then margin we will save the changes so now you can see this appointment button is looking good after that let's come back to the design and here we have to create this related doctor section so to create this section first we have to create a new component so in this components folder Let's
create a new file and write the file name related doctors. jsx here we will use our fce we will save the changes now let's come back to the appointment page and after this div we will add the comment so the comment text is list testing related doctors after this comment here we have to mount our Related doctors's component and in this one we will pass the props so the first props will be Doc ID so let's pass the doc ID now the second props will be a speciality so let's add the speciality cures and provide
the doc info dot speci speciality after that save the changes and let's come back to the related doctors. jsx file in this file first we will get all The doctors from the context file so just add const cut leave addes doctors equal to use context and provide the app context so in this file we will get the all the doctors from the context file after that we will create one state variable where we will store the doctor's data for that let's add const variable name is r doc which is related Doctor then set function name
will be set ra dock set Del docs equal to user State and initialize it with empty array after that here we will destructure the props that we have passed here in the appointment page so we will copy this props and paste it here so we have D structured both props Now using this props we will filter the related doctors and store Them in this rail dock for that we are going to use the use effect hook so just add use effect inside this we will pass one addo function and here we will add the dependency
aray in this dependency aray we will add doctors and this props now any one of three will get changed then this function will get executed in that case we will first check If doctors dot length is greater than zero and we have the speciality also in that case here we will create one variable with the name doctors's data it will be one temporary variable that we are getting here so here we are going to use doctor's aray and here we can use the filter method and here we will pass the individual Doctor and here we
will check if doctor do a speciality is equal to this speciality that we are getting from the props then we are going to store that doctor in this variable here we are also getting the doctor ID suppose we open this doctor that is General physician now at the bottom we have to display the doctors accepting this One so we have to display only other two doctors because we have already open the doctor's profile for that here we'll add one more condition that is Doc doore ID is not equal to Doc ID in that case the
current doctor will be removed from the doctor's data data now we have this doctor's data next we have to set this doctor's data in this state variable for that simply add set related doctors and provide Doctors Data now we have this related doctor State which is an array now we can use this data to show the related doctors as you can see in this design so this design and this top doctor's design is almost same so we are going to copy this design so let me come back and we will open top doctors and from
here let's copy this complete do after that let's open this related doctors. jsx file and paste it here after that here instead of this doctors Do slice we are going to use related doctor so just add real doc do slice here we have to display only five doctors right maximum five doctors will be displayed so just add 0 comma 5 after that here we have to use the navigate function so let's create this navigate function so just add const navigate equal to use navigate now save this file and come back to the web Browser now
we are at this doctors's page and here we are getting other two related doctors if I click here it will change the doctors's profile here so if I click on another one that doctor will be displayed on the top so this logic is working fine but here we have to add a scroll two property so that when we click here it will scroll the web page to the top for that in this related doctors we have this on click so here let's Add curly dresses so we have added this inside this curly bres then add
the semicolon then add a scr scroll two and in this scroll to function just provide 0 comma 0 after that we will save the changes and come back to the web page now if I click on any doctor so now it will navigate us to the top part of this appointment page so in this Top Doctors also we will add this a scroll to for that simply copy this on click property from here And let's open top doctors. jsx file and replace this on click that's it so in this one now we have this SC
scroll to property now if I come to homepage and click on this doctor then it will scroll the web page to the top part of the website now this logic is working fine now we have created the doctor's page homepage and the appointment page next we have to create the about and contact page so first we are going To create the about page for that let's come back to the about. jsx file in this div let's add another div here we will add one P tag and here let's write about then we will use one
as span tag and in this one just add the text us after this div let me come back to the figma design and go to About Us section so here you can see this About Us section that we Have added now we have to create one div and where we will add the image in the left side and this text in the right side for that here simply add div tag and in this div tag let's add the image tag for the left side and here we are going to use assets do about image after
this image let's create one div that is for the right side and in the right side we will add these text so here let's create three P tag so Just add P into three this is the first paragraph tag and this is the third one and between these paragraph tag here we will add this B tag so let's add the B tag before the third P now let me copy the text from here so just copy the first paragraph text and paste it here so we have added the text in the first P now let
me copy the second one just copy and paste it here now we will copy this text our Vision just copy it in this B tag now let's copy the last paragraph text and paste it in this P now save the changes and come back to the web page so here we are getting creting this about us text then image and other description now we will add the CSS properties for this section so first we will add the class name property in this div and here let's add text Center text to excel padding top text color
gray after that in this aspan tag let's add the class name and we will provide text Gray 700 then we will change the font weight save the changes so you can see this about us text is looking good and it is in the center after that we will add the CSS property for this section where we have the image and text so here in this div Let's add the class name and let's provide margin Flex Flex call then Flex row then gap of 12 we will save the changes and come back to the web browser
now you can see the image and text are aligned side by side in the left side we have the image and in the right side we have the text next let's add the CSS property for the image which is displayed in the left side so in this image let's add the class name and provide width Full Max width 360 pixel save the changes and come back to the web browser so this image is looking good next we have to provide the CSS properties in the right section so in this div let's add the class name
property and here we will provide Flex Flex column justify Center Gap six then width 2x4 text size and text color after that in this B tag let's add The class name and here let's provide text Gray 800 so it will look good now save the changes and you can see this description in the right side is also looking good now we have completed this section now we will create this why choose a section where we have three blocks so here we have the title description in each block first we'll create this text so let me
copy this from Here and and after this div let's create another div and in this one we will create one P tag and let's add this text here we will write the text in uppercase so let's add y choose us after this y let's add the span tag and between this span tag we will move this text now let's add the class name property here and let's provide text Excel and margin y4 after that let's add this CSS Properties in this aspan so we will provide text Gray 700 font semi bold after that let's come
back to the web page so here you can see this text why choose us it looks good next we have to create this column so let's come back to the vs code and here after this div let's create another div and in this one we will create three columns so let's add div into three in the first one we will create One B tag and one P tag similarly let's copy this to line and paste it here after that let's right click and select format document now let's copy this title from here and paste it
in the first B tag now let's copy the title from the second column and paste it here now copy the title from the third column and paste it in this last B tag now let's copy the description for the First Column and we will paste it in the first P tag now we will copy the second description paste it here and copy the last description and paste it here after adding this save the changes and come back to the web browser so here we are getting this title and description next we have to add the
CSS properties so that it will be aligned Side by side and we'll get the border so first let's add the CSS property in this div so we will add the class name we will add Flex Flex column Flex row and margin bottom we will save this file so here we are getting three columns left Center and right next we will add the CSS properties for each individual column so in each div will add class name so let's Add the class name in the first one and here let's provide border padding for different sizes then Flex
Flex column Gap and text size we will add some hover effect also so just add hover that is background primary then text white then we'll add the transition all du 300 milliseconds text color gray and cursor pointer we will save the Changes so you can see this First Column is looking good and this hover effect is also looking good now just copy the class name from the first one and paste it in the second div and in the third div after that save the changes and come back to the web browser so now you can
can see these columns are looking good and this hover effect is also working on all three column so now we have completed this about us Page as you can see here we have the footer also on this aboutus page next we will create this contact page so to create this page let's come back to the vs code editor and we will open contact. jsx file in this file we will create the contact page so let's create the figma design of the contact page so this will be our contact page where we will add the title
and in the left side we will add the image and In the right side we will display these details so first we need this text so let me just copy from here and let's come to contact page and within this div we will create one div and let's add one P tag just paste this text contact us and here let's add the asan tag and within this asan tag we will move this us now we will add the class name and and let's provide text Center text to excel padding text Gray 500 now we will
add the class name in this as span tag so here let's add text Gray 700 and font semi bold we will save the changes and come back to the web browser so on this contact page you can see we are getting this title after that we have to create this section where we will create two column In the left side we will add the image and in the right side we will add the text so let's create one div and in this div we will add the image tag for the left side so let's add
the assets dot contact image and after this image tag we will create one div for the right side and in this div we will add five P tag so just add P into five after this P tag we need the button Also as you can see in this design so here we will add one button tag next we have to copy the text from here so let's copy the first text and paste it in the first P tag now let's copy this text we will copy this complete address and paste it in this second P
tag now let's move this text in same line and here we will add the BR tag to add a line break after that let's copy this dummy Telephone number paste it in this P tag here also we will add the BR tag after this let's copy this email ID and paste it here now let me copy the text from here and paste it in this P tag now just copy this a small description and paste it in this next P tag now let's copy the button text and paste it here within this button tag save
the changes and come back to the web browser so here we are getting this Image and after that we have all these description next we will provide the CSS properties for this section so first in this div let's add the class name and here we will provide margin y flex Flex column justify Center Flex row Gap 10 margin bottom and text size a small we will save the changes now you can see this image and this info side by Side next we will add the CSS properties for this image so here in this image tag
we will add the class name we will provide width full then Max width of 360 pixels save the changes so now you can see the size for this image is perfect now we'll add the CSS properties for the right section so let's come back to the vs code editor and here in this div we will add the class name property And here let's provide Flex Flex column justify center items start Gap six we will save the changes so here we have very good alignment now we will add the CSS properties in these P tag so
first in this P tag we will add the class name and let's provide font semi bold text large text color gray 600 after that in the both P tag we will add the class name property and here we will provide text Gray 500 now in this P tag we will add the class name property and here let's provide font semi bold text large text Gray 600 now let's copy the class name from here and in this P tag we will paste this now save the changes and come back to the web browser so these title
and these text are looking Good next we have to add the CSS for this button tag so let me come back and in this button tag we will add class name so let's provide the classes border border black padding X and padding y then text size we will save the changes so here we have this button next we will add the hover effect on this button tag so that when we hover on this button it will display some effect so let me Come back to the vs code editor and after this class name here let's
add hover background black hover text white transition all and provide the duration 500 milliseconds save the changes now when we hover on this button you can see this effect the background is getting changed so now we have created the homepage all doctors's page about page and contact page next we are going to create the Login page so so to create the login page first we have to click on this log out button so here we will get this create account button and when we will click on this create account it will open SL login path
where we will Mount the login form so after that let's open login. jsx file and let's open the login page design in figma so this is our design for the login page that is convertible so that when we click on this link it Will open the login form and when we click on the create account it will open this create account form so to create this design we will open login. jsx file and here first we will create some State variables so the first estate variable name will be a state that will manage the login
state set function name will be set State equal to user State and we will initialize this variable as a string where we will add text called sign up after that we will create three state variables to store the values of these input field so the first variable name will be email Setter function name will be set email equal to user State and initialize it with empty string now let's create a copy of it and provide the variable name password Setter function name will be set password now let's create one more copy and here we will
provide the name then set function name will be set name so here we have created these three state variables after that let me remove this div from here and here we will add form tag for this form tag we will create one onsubmit Handler function so just add const onsubmit Handler equal to we will create this Arrow function so it will be one async Arrow function so just add the async keyword now in this parameter we will get the event from this form so just add the event now here we are going to use event
do prevent default so when we are using this event. prevent default then whenever we will submit the form it will not reload the web page Next we'll start designing this UI so first we have to create this container for that in this form tag let's add the class name property so just provide minan height Flex item Center after that in this form tag in this form we will create one div tag and in this div let's add one p and in this P tag just add the curly bres and here we are going to use
the Turner operator so we will check if our state is equal To this T which is sign up so let me copy it from here so if this statement is true then we add the sign up state in that case it will display the text create account so let me copy this text and paste it here if the condition is false it means the state is login so in that case we will add the column and here we will display the text login now let's check this functionality If we come to the web page here
we have this message create account right and if we change the state like something else we will add login now you can see the text login so this logic is working fine we will keep it as sign up after this P tag we will create one more P tag and here we will copy this text from here and and paste it in this P tag now let me remove the sign up text From here and here we will also and here also we will use this Turner operator so let me copy it and paste it
here here we will check if our state is signed up in that case we are going to add the text sign up and if the state is login then we will add the text login to book an appointment we have to add this curly bres if I save the changes so here we are getting the text Please sign up to book appointment and when we are at the login state it will display please sign in to book appointment after that here we have to create these three input field so to create this input field after
this P tag we will create one div and in this one we will add one P tag and in this P tag we will add this text which is full name so let me copy it from here and Paste it here after this P we will add one input field so input type will be text and here we will link our state so that whenever we will update the input field then it will update the state variable so first let's add the on change property and in this one we will pass one Aro function and
here in this Aro function we will get the event e and here we will call the set name here we will provide e. target. Value after that here we will add the value property and in this one we will provide the name state so whenever we will change the input field that value will get stored in this state variable after that let me copy this div from here and paste it two more times after that let me copy the email from here we will paste it here then copy the text called password and paste it
in the third piece this input type will be Email and the last input type will be password after that in all three input field we have to add the attribute required now let's save the changes so here we are getting these input field after that here we have to create create one button so after this div let's create one button tag and here we are going to use the Turner Operator that we have created here so let me copy this turn operator and with this button tag we will add this so when the state is
signed up in the button it will create create account and when the state is log then it will display the text called login we will save the changes so here we are getting this message create account next we'll add the CSS properties so it will look something Like this so first in this div we will add the class name and let's provide Flex Flex column Gap margin Auto item system start padding minimum width we will add the minimum width for different screen size then we will add the Border rounded Excel text color text size then
Shadow save the changes and come back to the web browser So now you can see this container with border and Shadow after that we will add the CSS property in this P tag so just add the class name let's provide text 2 XL font semi bold save the changes so this title is looking good called create account next we will add the CSS properties for this div so let's add the class Name that is width full now just copy it from here and paste it in the second and third div save the changes after adding
this we have to modify this on change and value property for each input field so in the second one we will use set email and here we will provide email State now in the third one we will use set password and in the value we will provide password Now in this first input field we will add the class name we will provide border border color border radius width padding and margin and we will copy this class name from here and paste it in the second input field and third input field save the changes and we
will come back to the web browser so now you can see these input fields are looking good after that we have to add the CSS For this button so in this button tag we will add the class name and let's provide background primary text white width full padding y then border radius and text size save the changes and come back to the web browser so here we have this button after this button here we are currently at the sign up state so after this button we will create this text so user can change this signup
form to the login form so simply copy this Text from here and we will come back to the vs code editor and after this button tag here let's add Turner operator we will check if our state is equal to sign up in that case here we will add one P tag and we will paste this text that we have just copied from the figma design now we'll add the column and here also We will add one P tag and in this P tag we will add add the text create a new account after that just
add click here so when the state is signed up then we will get the first message and when we are at the login State then we will see the second message that is create a new account click here now we will add the asan tag here and within this aspan tag let's Move this text and Here Also let's add the span tag and move this text within this span now save the changes so here we are getting the message already have an account login here and after that we will add the CSS properties for this
P tag so first in this asan tag let's add class name here we will add text primary after that we will add the Underline and cursor pointer now save the changes so here you can see we are getting the cursor pointer but when we click on this link nothing will happen so we have to add the logic so that when we click on this link then the estate will get changed for that in this asan tag let's add the onclick property and here we will pass one Arrow function and here we will call set a
state Function in which we will add one string so in the first one where the text is already have an account we will add the Tex login and in this second one we will add the text sign up now save the changes and come back to the web browser now when we click on this then it becomes login and when we click again then we are getting this create account option now here we have this name input field That that is not required in this login form so here after this P tag we will add
the tary operator so just add the curly Braes and here we will check if our state is equal to sign up in that case only we have to display this div so let's move it from here and here we will add this operator and just paste this div let's format the Document save the changes now we are at the sign up a state and when we click on this login here now you can see we have the email and password field to login on this web page the name field has been removed now this login
page is ready till now we have created the homepage doctor's page about page contact page and login page Let me refresh this website so we will get this profile my appointments and log out option now we will navigate To my profile section and here we will create the my profile page so let's open the figma design so this is the my profile page design so we have to create this my profile design where we will add the two buttons so the first button will be edit so when we click on this button then these Fields
will be changed into the editable field so we can easily update our profile we can update the address phone number gender and date of birth Then we'll click on the save info so it will save the changes so to create this page we will come back to the vs code editor and we will open my profile. jsx file so in this page first we will create one state variable where the name will be user data Setter function name will be set user data equal to and here we are going to use the use State Hook
initialize it with one object here we will add the name property in this name property we will paste this name so let me copy the name from the design file and paste it here then we will add the comma and we need the image property and this image property will be assets dot profile pick after that we need the email property here we will add one email ID So let me copy this this is one dummy email ID after that let's add the phone number so let's create this phone property and copy this dummy phone
number from here and paste it here after that we have to create the address so let me copy the address text here we have two lines for this address so let's let's add address and it will be one object where We will add the line one and in the line one we will add first line of address then we'll add the line two property so we have to copy the first line and paste it here now just copy the second line and paste it here after adding the this property we will create the gender property
here we will add Male after this gender property we will add date of birth property and here let's add wor date so here we have created the object where we have stored the user data now using this user data we will display the information on this my profile page so let's come back to the vs code editor and here in this div we will create one image tag in this image tag we will display The users's image for that let's add user data dot image property we will save the changes so here we are getting
this image after that we have to display this name so after this image tag let's display the username but before displaying the username here we will create one more State variable with the name is edit so just add const is Edit set function name will be set is edit equal to user State and initialize it with Boolean data false after this image tag here we have to check so just add the craes and we'll add the turn operator if is edit is true it means we have to edit this name in that case we will
provide one input field and suppose if the is edit is false then We'll add the colum and we will add one P tag where we will display the user's name so just add user data do name property now let's save the changes so here we are getting this name now if I change this to true now here we will get this input field now in in this input field we will add the onchange property in this onchange property we will pass the event and this Aro function and here we will call set user Data then
provide the previous data by using this previous data we will modify the name property so whenever we will change the input field then it will update the name prop property so let's use the as spread operator so let's add the bracket and craes then triple do previous and in that one we will change the name property to e. target. value after adding the on change property here we will add the value Property here let's add the user data do name now save the changes so here you can see we at this input field and here
we have this value right now if I change the status false then we will get the simple paragraph text that is not editable so in this design when we'll complete the design in this edit button we will add the functionality so that when we click here the state will get Updated and we will be able to update the users's email phone number address gender and birth date for now let's make it false after this let's add the HR tag after this HR let's create one div in this div we will add one P tag in
this P tag we will add this text contact info so let me copy it from here and paste it here here after this paragraph tag we will add one more div and in this div we will Display the users's email so in this div let's add the P tag and here let's add the text email ID then paste it here in this P tag after that let's add one more P tag and here we will use the curlys and here here we will display user dat. email we will save the changes so here we are
getting the email ID and this email ID after this P tag here we will add one More P tag and in this paragraph tag we will add this text which is phone so we will paste it here after this B tag here we will will copy this and paste it here here we will add the user data do phone and here we will update phone property after that in this P tag let's add user data. phone now let's format this file and Save the changes so now here we are getting phone and this phone number
and when we will enable the edit true then this phone number field will be editable because it will be converted in the input field after that here let's add one more P tag here we will add this text which is address so just paste it here after this P tag let's add the curly Braes and here also we will check If is edit is true in that case we will add one P tag and if it is false then also we will add the P tag in the first P tag we will add two input
Fields so let's add input into two in between these input field we will add one BR tag similarly in this paragraph tag also we will add curly bres and here we will provide user data do address doline one now let's copy it And then add the BR tag and paste it again and we will update line two now if we come to the web page here we are getting this address and this address value in two lines now if we make it editable then we'll get two input Fields so we have to add the logic
in this input field so that we can update the address using this input field so here let's add the onchange property here we will pass the event And we will add this user data then provide the previous data then we will add the spread operator previous data then add the address then here we will use previous do address and in this one we will update line one e. target. value so here we have used the nested spread operator where we are updating the object that is stored inside the object after that here we will add
the value property where we will add user data do address do line One similarly we will copy this on change and this value property from here and we will paste it in this second input field here we have to update this line two and here also line two now after this div we will create one more div and here we will add one P tag here we are going to display this basic information so let me copy the text and past it here after this P tag we will create one Div and here we will
add one P tag where we will display this gender so just copy it from here and paste it here after that we will copy this tary operator and just paste it here here we are not going to add the input field instead of the input field we will use the select tag so just add select from here we can remove the ID and name property and here we will create two option Tag so in the first option tag let's add mail in both value and this option tag text now in the second one we will
add female after that in the select tag let's add the onchange property so that whenever we will change this data it will update the object for that simply add the onchange property here we will pass the add function and event and here we will call Set user data in this one we will pass the previous data and here we will use a spread operator so we'll add the triple do previous and in this one we will update the gender property and here let's provide e. target. value Val after this here we have to add the
value property and in this one we will use the user data dot Gender now save the changes so here we are getting this gender after that in sh of this name we will add gender save the changes so here we are getting this value mail now let me make this a state true if we save the changes as you can see we can edit these information this phone number name we can select this gender after that let's right click and Select formate document and after this turn operator here we will add one P tag here
we will add birthday here we will add the column then let's add the curly Braes here we will check is edit is true in that case here we are going to add one input field and the input type will be date so we will select date from here let's remove the name and ID property and let's move it in the new line so we can easily read it after that we'll add the column and add one P tag and within this P tag we will display user data dot date of worth after that in this
input field let's add the onchange property in this onchange property we can use the same format so let me copy it from here and paste it here After that here we will update this gender to date of worth and after this we will add the value property that will be user data. doob after that save the changes so here you can see we are getting this calendar to select the date and we can change the date by selecting on this calendar now let's make it false so we will get these text date of birth and
we have all the information That we cannot edit now here after this div we will add one more div and in this one we will add the Cs and we will check if is edit is true in that case we will add the button tag and if it is false then we will add the another button tag when the is edit is true then we will add the save information button and if it is false then we will provide edit button so in that case if it is true here let's add the save information Button
so just copy and paste it here and if it is true then we will give this edit option so just paste it after that in both button tag we will add the on click property here we will pass this Aro function and here we will call set is edit here in the first one we will add false and in the second one we will add true now save the changes and come back to the web browser when we reload the web page here We have this edit option till now we cannot edit it but if
I click on this edit button now we have these input field to edit the name phone address gender and date of birth and here we have this save information now all the data gets saved let's check it again if I click on edit now these fields are editable we can make it test and save the info now you can see this name has been updated and it has been updated in the object after That we will make this project full stack then we will make the API to change the data in the database also now
we have created all the structure next we will add the CSS properties to design this layout so first in this div let's add the class name property and here we will provide maximum width Flex Flex column Gap and text small now let's save the changes and come back to the web Page after that we will add the CSS property in this image tag so let's add the class name property that will be withth 36 then we will provide border radius we will save this property now this image is looking good after that we will add
the CSS properties in this name so let me reload the web page so it will reset this name after that we will add the CSS property in This input field also so just add the class name here let's provide background color gray text 3 XL font medium Max width and margin top after that let's add the CSS properties in this P tag so just provide font medium text 3 XEL text colored and margin top for Save the changes and come back to the web page so here we are getting this name Now if I click
on edit now it will be converted in the input field and here we have the background color which is very light color so that we will come to know that it is in the edit mode after that we will add the CSS property in this HR tag so in this HR tag let's add the class name property just provide background color height and Border none save the changes next we will add the CSS Property in this P tag so in this P tag let's add the class name property and here here let's provide text neutral
500 then underline margin top after that save the changes and open the web browser so here you can see the changes in this text contact information after that we will add the CSS properties in this div so let's add the class name property here we will add grid gr columns one fraction three fraction Gap and margin top text color we will save the changes now you can see when we provide Grid in the left side we have these email ID phone number address and in the right side we have the values this dummy email ID
phone number and address now when we click on this edit it will convert it into the input field after that we will come back to the vs code editor and here in this P tag let's add the Class name font medium here in this P tag let's add the class name property and here let's provide text blue 500 after that in this P tag let's provide class name property it will be font medium now in this input field Also let's add the class name property and here we will provide background gray Max width after that
let's add the class Name in this P tag that is user data phone just add the text blue 400 now save the changes so here we have the color in this email ID and this phone number also now when we click on it it in the phone field you can see the background color same as this name input field after that we will add the class name in this P tag which is address and here let's provide font Medium after that in this input field Also let's add the class name property and here we will
provide background gray we will use this gray 50 similarly in this second input field also we will add the same class name so just copy and paste it here after that in this P tag we will add the class name property and here we will provide text Gray 500 and save the changes so here we have the text color Gray after that we will copy the class name textt neutral 500 underline and margin top from this contact info and paste it here in this basic information so let's add the class name and paste this classes
save the changes so here we are getting this underline effect and text color in this basic information after that in this div we will add the class name property and here we will provide grid grid columns One fraction three fraction Gap margin top text color now save the changes so in the left side we have this gender birthday and in the right side we have the mail and this date of birth when we click on this edit button here it will be converted into the select tag and this date input field next we will add
the CSS properties for this section for that in This P tag let's add the class name property here we will provide font medium after that in this select tag also let's add the class name property and here we will provide Max width 20 background gray after that we will add the CSS property in this P tag also here we will provide text Gray 400 we will save the Changes so here we are getting the changes in this text after that we will add the CSS properties in this P tag so let's add the class name
font medium in this input field we will add the class name here let's provide the maximum width background gray now in this P tag let's add the class name property and here we will provide text Gray 400 now save the changes so here you can see the changes in this text and if we click on this edit here in the background we are getting this gray color after that we will add the CSS property for this button for that first we will add the CSS property in this div so let's add the class name that
is margin top 10 after that in this button tag let's add the class name and here let's Provide border border primary padding then border radius save the changes now we'll add the same class name in the second button so just copy and paste it save the changes here we are getting this edit button and when we click here it will display the save information button and all the P tag will be converted into the input field and if I Click on this button it will again display the paragraph text and edit button next we will
add the H effect on these buttons so here let's add hover effect that will be background primary hover text white transition all after that let's copy this hover class name from here and add the same thing in the second button save the changes now when we hover on this button You can see this effect the background is changing and color is also changing you can see the same hover on both button now we have created the UI design for the profile page also as you can see on this figma design it is ready now we
are not changing this image but whenever we will make the back end we will add the functionality so that user can edit their profile picture also and the image will get stored in the Database now we have created this profile page also next we have to create the my appointments page where we will display the already booked users appointment for that let's come back to the my appointments page and here we will create this page for that let's come back to the vs code editor and we will open my appointments. jsx file in this file
we will create this text Which is my appointments for that here within this div we will add one P tag and let me copy this text from this design file and paste it here in this P tag after this P tag let's add one div and in this div we will display the appointments but right now we don't have the appointment data so instead of the appointment data we will display the doctor data here and when we will create the back end and appointment booking system then we will display the user Appointments in this page
so here we will get the doctor's data from the context so just add const curly Braes doctors equal to use context and in this context we will provide app context here we are not getting the session so let me manually import it so just add import curly bres app context from double do/ context folder SLA Context here we have the doctor's data now Within this div we will add the curly Braes and here we will use the doctor's array to map the data so let's add the doctors dot then we will add the slice so
that we will get only two entries so just add 0 comma 2 after that here we will use the map method now in this map method we will pass one Arrow function and here we will use this small bracket Here we will create One D now in this parameter we will get individual item and index number after that in this div let's add the key property that will be index number after that let's save the changes now come back to the web browser after that we have to create this item so that we can display
the appointment so for this individual item we have to create this structure to Display the image name a speciality address date and time and here we have to create the button called cancel appointment or pay online button so just come back to the vs code editor and after this we will create another div and here let's add the image tag to display the doctor's image so let's add item. image now save the changes and come back to the web browser so as you can see here we are getting two doctor's Image after this closing div
let's add another div and here let's add 6 P tag so we will type P into six now in the first one we will display the doctor's name for that let's add the curly Braes and in this curly bres let's add item. name in the second P tag we have to display the doctor's speciality so let's add the curly Braes and we will use item dot a speciality After that in the third P tag we have to display the state which is address so let me copy it from here and paste it in this P
tag after that in the fourth P tag we have to display the address line one and line two so in this P tag let's add the clys here we will add item do address Dot line one now just copy and paste it in the second one instead of line one we will Add line two after that we will display the date and time so from here let me copy this text date and time and in this P tag we will add the span tag and within this span tag paste this text here we will add
the colum also after that here we have to add the date and time so let me copy this and paste it here after this div here let's add one More div in this div we will not add anything in this one we will add the structure so that we can make this component responsive after this div here we will add another div and in this one we will display this button so here we are going to create two buttons that will be pay online and cancel button so let's add the button tag into two so
in the first button tag let's add Pay online now in the second button tag we will add cancel upon ointment after that save the changes and come back to the browser screen so here we are getting this image details and this button next we have to provide the CSS properties for this component so here in this P tag let's add the class name property and here we will add padding margin font medium Text color then border bottom save the changes so here we have this horizontal line at the bottom of this my appointments next we
will add the CSS properties in this div tag where we have the key right so here let's add the class name property and in this class name we will provide grid grid columns one fraction two fraction Gap and we will use the flex then Gap six for different screen Then padding then border bottom save the changes and come back to the web browser so in the left side we have this image then we have this text and in the right side we have this button text after that let's add the CSS property for this image
tag so in this image let's add the class name property and here we will provide width 32 then background Indigo 50 save the changes so now you can see here this image size is perfect after that we will Add the CSS properties for this container where we have added all these text so here in this div let's add the class name property here we will add Flex one so it will use the available a space in the row so just add Flex one text small text color save the changes so now you can see we
have the image and this text and in the right side we have these button Text after that in the first P tag let's add the class name property in this class name property let's add text neutral font semibold after that in the address let's add the class name and here let's add text color font medium and margin top after that in these paragraph tag Where we have the address line one line two so let's add the class name and here we will provide size extra small after that in this span tag we will add the
class name property and here we will provide text a small and margin top after that we will add the class name in this P tag and here let's add the text a small and margin top after that in this a span tag let's add the class Name and in this one we will provide text a small text color font weight medium save the changes we will come back to the web browser now this text are looking good next we will add the CSS properties for these buttons so first let's add the CSS property in this
div so here let's add the class name property and in this one they will provide Flex Flex column Gap And justify end we will save the changes now these buttons are arranged in column now we will add the CSS properties in these buttons so just add the class name and in these buttons we will add text a small text color text Center and for different screen size we will add the minimum width padding y border and Border radius save the changes and come back to the web browser now you can see these Buttons are looking
good now in these buttons we will add the color as you can see in this figma design file so we will add the hover effect and when we will hover on these buttons it will display the color which is the primary color and in the cancel button it will display the red color so here in the first button let's add the hover property let's add the hover background primary then hover text color white then we will add the transition all and duration that is 300 Milliseconds now save the changes and come back to the web
browser now if I hover on the pay online button we are getting this primary background color now just copy this hover class name from the first button and paste it in the second one and here instead of using this BG primary we will use background red 600 now save the changes now you can see if I hover on the second button it is displaying the red Color now let me increase the slice it will be three so here you can see three entries now our appointment page is looking good let me come back to the
home page so now we have created almost all the UI part of this web application next we have to make our web page responsive so most of our component will be responsive by default but when we click on inspect Tab and click on phone bu so here we Have this profile section but here we are not getting the mobile menu so here you can see we have the menu on the main screen but for the smaller screen this menu is hidden so we will create that menu so let me come back to the vs code
editor and let's open Navar do jsx file now in this file after this Turner operator here we will add one image tag and in this image SRC we will use assets. menu icon after that save the changes so here We are this menu icon now we will add the class name property in this image tag so just add the class name and here we will provide width six after that we will add the medium size and here we will add the hidden so by adding this hidden this menu icon will be hidden for large screen
or medium screen so let me come back to the web page so you can see this menu icon is looking good now when we click here nothing happens right so here We have created the state variable with the name show menu right now we will link this state with this image tag for that we will add onclick property and in this onclick property we will add one Aro function and here we will call set so menu and we will make it true from the false so whenever we will click on this then it will update
this state to True by using this state we will display the mobile menu on this application for that After this image tag we will create one comment and here let's add the comment text mobile menu after this comment let's add add one div and within this div let's add another div and here let's add two image tag so just add the IMG into two now in the first image SRC we are going to use assets do logo now in the second image tag we are Going to use assets do cross icon now this cross icon
is for closing our mobile menu so here let's add the on click property and here we will pass this Arrow function and here let's call set so menu and here we will add false now after this div here we will add one UL tag to display the menu and in the UL tag we will create Four navlink tag so let's add nav Link we will copy this nav link for three more times now in the first one let's add home in the second one let's add all doctors in the third one we will add about
in the fourth one let's add contact now after this let's save the changes and come back to the web browser for now we are getting this menu something like this next we will add the CSS properties for this mobile menu so let's add the CSS property in this div so here let's add the class name and here we will use the dynamic class name so let me remove it and add the curly presses and back tick here we will add hidden for the medium size screen then right zero top zero bottom zero Zed index overflow
hidden background White then we will add the transition here we have added hidden for the medium devices and above size so this menu will be hidden for medium and large devices after that here we have to add dollar sign curly bres so we can add the dynamic classes so let's add the tary operator to check whether our so menu is true or false so let's add so menu and here we will add fixed width full then height Z With zero so here we are checking the condition if the so menu is true then this class
name will be added and if it is false then this height zero width zero will be added now save the changes and come back to the web browser we will reload the web page by default we are getting this icon and when we click on this here you can see the mobile menu is visible and if I click on this cross icon it will hide this mobile menu after that we have to design this mobile Menu for that we will come to this div and here we will add the class name property here we will
provide Flex item Center justify between padding and save the changes so here in the left side we have this logo and in the right side we have this cross icon next we will add the the width for these images so in this first image that is logo we will add the class name width 36 and in the second image That is the cross icon We'll add the class name and here let's provide width 7even save the changes and come back to the web browser now you can see this logo and cross icon size is looking
perfect and if I click here it will hide this mobile menu and if I click on the menu icon it will display this mobile menu after that we will add the CSS properties for this UL tags so here in this UL tag we will add class name and let's provide the Classes Flex Flex column item Center Gap margin top padding X text size and font weight that is medium save the changes and come back to the web browser now you can see these menu in the center and we have some space between these menu after
that we will add the CSS properties for this naving tag before that here we will add the two property and we will add the path so just add two Property here we will add the string and in the first one we will add slash for the home path in the second one we will add/ doctors now in the third one we will add slab in the fourth one we will add slash contact now let's save the changes and come back to the web browser here now you can see we are at the Home Path and
when we click on all doctors here the path is/ doctors now when we close it you can see we are at the doctor Page And if I click on about and close this then we are at the about us page if if I click on any menu then this menu is open we have to close this menu when we select any menu right so it will close the menu and we will be redirected to these Pages for that in these nav link we will add the on click property here we will pass the Aro function
and here we will call set so menu that is false Now save the changes and come back to the web browser now if I click on home we will come to homepage and it will hide the mobile menu if I click on contact we will come to the contactors page and it will hide the mobile menu so this logic is working fine so after that we will add the CSS properties on these menu links so here in these naving tag let's add the class name property and and in this class name let's provide Padding border
radius inline block here we have to remove this full save the changes and come back to the web browser here we are using the nav links then we will get the active class name property in these tags so if I open the about page and click on this about and inspect it so here you can see we have added these class name and here we have one extra class name called active Now By using this active class name we are going to provide a background color for that let's come back to the index. CSS file
and here we will add one media query here we will add the media and we will add the condition Max width that is 740 pixel and within this media query let's add active class name plus we will add the paragraph tag and here let's add the curly bres and in this one we will provide Apply text white background primary now save the changes now let's open now have. jsx file and here we will add one P tag also and within this P tag we will move this text here also we will add the same thing
let me copy this text from here and move it in this P tag similarly in this about also We'll add the P tag and move this about within this P tag and for this contact Also let's add the P tag and move this text save the changes And come back to the web browser so here we are getting this background color in this about text let's come back and here let me remove this class name from here they will add this class name in the P tag so let me remove classes from here and in
all these P tag we will paste the class name now save the changes now you can see this background color is looking good for this menu when we open the homepage this Home menu is highlighted if I go to all doctors page and here we have to create the filter button so that when we click on that filter button then these menus will be displayed and when we click again it will hide these menu that is the doctor's speciality so for that let's come back to the vs code editor and we will open doctors. jsx
file now in this div here we will add one button Tag and in this button tag let's add the text filters so just add filters after that let's scroll up and here we have to create one state variable with the name so filter so let's add const so filter Setter function name will be set so filter equal to user State and initialize it as false so by default in the phone view This menu will be hidden let's come back to the vscode editor and in this button we will add the on click property so just
add the on click and here we will pass one Arrow function and here we will call the set so filter and here we will take previous a state value and we will return not of previous so if it is true then it will make it false and if it is false it will Make it true after that we have to add the class name property in this filtered button so let's add the class name and here we will use the dynamic class name so just add the curly veres back tick and we will add the
padding border rounded text size transition and above the smaller screen it will be Hidden after that here let's add the dollar sign col addes and here we will provide the dynamic class name for that first we are going to use the turn operator and if the so filter is true then we'll add the background color and text white so just add so filter if it is true then we will provide the background primary and text white if it is false then simply add empty string now save the changes and come Back to the web browser
so here we are getting this filter button now if I click here you can see the color gets changed now when we click here it will update the estate and it will display the filter for that let's come back to the vs code editor and in this div we will wrap it with curly bres so that we can use the dynamic class name and here we will provide the back tick now we have wrapped this classes with the curly Braes and back practic and in this one We'll add the dollar sign curly bres and here
we can check if our so filter is true in that case we will make it visible and if it is not then we will make it hidden for that from here let me remove this flex and here we will check if so filter is true in that case we will provide flex and if it is not then we will make it hidden and for the above screen size we will add Flex now save the changes And come back to the web browser as you can see here we are not getting any filter and if I
click here we have these filter option let me select this and turn off this filter so here we are getting the doctor according to the selected filter and if we click again it will be deselected and we'll get all the doctors list now this logic is also working fine now we have created all the UI part Responsive let me check the responsiveness if we scroll down here we have this section we can scroll it and after that here we have this doctor's list that is also responsive here we have the mode button create account button
and if we click on this mode button it will open the all doctors page so this page is also responsive here we have the filter button now let's check the about page so you can see this about page is also looking good in this phone View now let's see the contact page so here we have this contact page which is looking good now let's check this profile page so in this phone view this profile page is looking good now let's go to my appointments page so you can see this appointments page is also looking good
in a smaller screen here we have this button in the right side because in this my appointment page We have added one empty div and by using this grid we have added this empty div at this place that's why we are getting this button in the right side now we have completed the front end of our website next we will create the back end for our project for that we will come back to the vs code editor and let's collapse this front-end folder and in this prescripto folder we will create a new folder and write
the folder name back End now in this folder we will create a new file and the file name will be server.js now let's close other files so right click and select close others now we are at the server.js file next we have to open the integrated terminal for back end so right click on this back end folder and select open in integrated terminal so now we have total two terminals in the first one we are Running the front end project and in the second terminal we will run the back end so first we have to
to initialize our back end for that simply type npm in it now it is asking for the package name so simply press enter again press enter for the version description then we have the entry point so it is automatically detecting the file which is server.js so you can see the server.js in the suggestion so simply press enter And again press enter for other options now you can see we have one package.json file in this back end and in this package.json we have one script that is a a start node server.js so whenever we will type
npm Run start then it will execute this command now here we will install the dependencies for our backend project so here let's add npm install then we will provide the packages name so first we will install the package express then we will install package after this we will install molter after that we will install bcrypt to encrypt the password then we will install the cloud nudy using that we can store the images on cloud after that Cloud NY we will install course after that we will install EnV and using this EnV we can use the
involvement variables in our backend project after that install the Json web token so that we can create the authentication system after that we will install node modon and using this node Monon we will create a new script here and using the a script it will restart the server whenever we will make any changes in the code file after this node modon we will install validator now press enter so it will install all the packages in our backend project now all packages has been Installed here in this backend folder we have nodecore modules folder now in
this file we will create one simple Express app so to create one Express app we have to import the Express package so just add import Express from Express package here we are using this import statement so we have to make this server as modular type so in this package.json we will type type and select module now Save the changes and come back to the server.js file so now this import will work after importing this we will import course from course package after that we will import EnV SL config after that we will get the support
of envirment variable in our backend project after that let's add one comment and we will add the comment text app Config after that we will create one app instance using this Express package for that let's add const app equal to and here we will use this Express function that we have imported here after that here we will Define the port number so just add const Port equal to process. env. Port if we have one EnV file and if the port is defined then we will use that Port else we will use one odd operator and
here Define the port number 4,000 after that here let's add one more comment and let's add the comment text middle Wares here we will add some middle Wares in our Express app to add the middleware simply add app.use and in this use function in this app.use we will provide any function That will work as middle bees so in this one let's add express. Json method so it will act as a middle we and whenever we will make any request then the request will get passed using this method after that here we will add one more
middleware so let's add app.use and in this one we will provide course function so it will allow the front end to connect with the back end after that here we will create the endpoint so just add the comment and the Comment text is API endpoint so here we will create one Endo for the testing so just add app.get and let's add the path so just add the path SL and here let's add one Aro function in this Aro function we will add the parameter that is request and response now from this function we will send
one response method so just add response do send and in this one we will add the message That is API working after that we have to start the express app so to start the express app just add app. listen and in this one we will provide the port number so just add Port variable that we have created here after that here we will add one function and here let's add the console log so just add console.log and let's add the string and In this string let's add the message server started after that let's add the
comma and here let's add the port so this port number will be printed in the console now we have created simple Express app now save this file after that here we will run the server so let's come back to the package.json here we have one script that is a start that will execute node server.js so just type npm Start now our server started on Port 4,000 now if we come back to the web browser and we will open a new tab here here we will add Local Host Port 4,000 let's collect it it will be
4,000 so here we are getting this message Api working so our Express app is working fine now if we make any changes like API working great now if I save the changes and come back to the web browser and refresh it now you can see still we are Getting the same message Api working because the server is not restarted after making changes so here we will create a new script that will be server here we will add this node Monon server.js now we are using this node modon that we have already installed while installing the
packages so see save the changes and first stop this back end so just typ contrl C now We have to start this project using this script so just add npm run server now you can see the message server started on 4,000 and if I refresh this website so you can see the updated message Api working gr now if we make any changes let's remove this gr and control s for the save now again server is restarting due to changes so it will restart our server and if I reload this web page again we are getting
the API Working so whenever we will make any changes in the server and save this file then it will restart the server now simple API is working now let's hide this terminal and now let's create the folder structure for our backend project so in this backend project let's create a new folder with the name config in this folder we are going to store multiple configuration file like Cloud NY config mongod DB config now Let's create another folder in this back end and write the folder name controllers in this controllers folder we will create multiple controller
function that that will be main Logic for the API after that let's create one more folder in this back end and the folder name is middleware in this folder we will create custom middle wees to authenticate the users and for other feature after that We'll create a new folder in back end and the folder name is models now in this models folder we will create models to store the data in the formated structure after that we'll create a new folder in this back end and the folder name is routes now in this folder we will
set up different routes for the different apis like user login appointment booking and Etc after that we will create one EnV file in this back end so just add EnV and here we will store the envirment variables so now we have created the folder structure for our backend after that we will set up the database and Cloud n storage to set up the database let's come back to the config folder and here we will create a new file and the file name is mongod db. Js here we will set up the mongod DB to set
up this mongod DB first we have to create one account on mongod DV Atlas And in that one we will get the mongod DV Ur string so just come back to the web browser and search for mongodb Atlas let's open this link mongod DB Atlas here if you don't have an account you can use this sign up button so it will create a new account I already have one account so I'll click on this sign in button after that I'll click on this Google option to login with Google here we have to provide some Answers
learn mongod DB select this first option here we will select nodejs let's select this one not sure here also we'll select this no not sh click on finish so just select this one m0 free server here we have cluster zero so we will keep it like this we will not change it here we can select any of this cloud service provider so let me select Google Cloud and after that here you have to select the nearest location after that just click on this button create Diplo deployment here we have to provide one username so let
me write greatest tack right and here we have to set one password for this user that can access the database so make sure to remember this password in this password do not use any a special color and never use Add theate symbol after that click on this button create database user after that click on this database after that click on this connect button now select drivers and from here let's copy this mongodb string so we will copy this string till here mongod d.net after that make sure you have enabled this network access in this one
you have to add 0.0.0.0 so that you can access this database from any IP address after that we will come back to the vs code editor and here let's open EnV file here we have to create one environment variable so let's add mongod DB _ URI equal to and in this one just paste the mongod DV connection a string now from the end remove this slash it should end with mongod v.net and here let's remove this password and here we will add our own password that we have added while Creating the cluster so let me
add my password after that let's save the changes and we will come back to the mongod db. JS file after that here we will type import and we will import the package so we have imported the package next we will create one function with the name connect DV so just add const connect DB equal to it will be one as sync Arrow function So just add as sync and here we will create this function after that here we have to export this function to export this function here we are going to use export default connect
DB after that here we will add a weight here let's use the do connect in this we have to provide the mongod DB URI for that here let's use the template literal so just add back tick here we will use dollar sign curly Veres then write process dot EnV dot our envirment variable name so so let's copy the variable name from here that is mongod DB so just paste it here after that we will add slash and here we will add the string pres crypto now save the changes after that here we will add dot
connection dot on and here we will add the event that is connected After that here we will create one Arrow function and here let's add the console log and in this console log we will add one message so the message is database connected by using this statement whenever our database connection will be established then we will see this message database connected and here we have added this SL prescripto so it will create a database in this mongod DV Atlas so if we go to Database click on browse collections here we have one e-commerce database that
is for our old project so whenever our connection will be established then it will create a new database with this name called prescripto at here after that let's save the changes and come back to the server.js file and here we will import connect DB function from config mongod DV file here we have to add the file name Mongod db. JS after that in this app config section after this port we will call this connect DV function now save the changes and open the terminal now you can see here we have the message server started at
4,000 then one more message database connected so now we have established the connection with the database after that let's hide this Terminal and now we will create one config file for the cloud NY storage so in this config folder let's create a new file with the name cloudy. JS after creating this file let's open the web browser and open a new tab and here we will search for cloudy let's open this website cloudy.com and if you don't have an account you can click here to create one account and I already have an account so I'll
click on this login button you can login with different options so I'll choose this login with Google I will choose my Google account then click on continue now we are logged in In This Cloud NY website now just click on dashboard now in this dashboard just click on this button go to API Keys here we have these API keys that we have used in previous project so let's click on this button generate new API Key so it will send one confirmation code on the email so let me open the Gmail account to copy the confirmation
code so here's the confirmation code let me paste it here and click on approve so now we have created a new API so let me add the name here we will add the name prescript after that we have to copy this API secret key and this Cloud name so let's come back to the EnV file and here we will create one variable With the name cloudin name and here we have to paste This Cloud name so from this web page just copy this name and paste it here in this Cloud name variable after that we
will create one more environment variable and the name will be Cloud API key again come back to the web browser and from here let's copy this API key and we will paste it here after that let's create one more Environment variable with the name cloudinary secret key so let's add Cloud secret key equal to and let's copy this API secret just click on this I button and copy this secret key and paste it here now save the changes here we have the cloud n name API key and secret key next we will use these secret
key API key to configure our Cloud NY Storage so let's open Cloud ny. JS file here we will import V2 as cloud nuty from here we will provide the package name that is cloud NY after that here we will create one Arrow function with the name connect Cloud NY so just type const connect Cloud NY equal to S Sync here we will create this Aro function after that here we will use cloud ny. config function to configure our Cloud NY in this configuration we will add one object and here we will Define the cloud name
and here we will provide this envirment variable name so let's add process Dov Dot from this environment variable just copy this name and paste it Here after that here we will add API key and let's use the process. EnV Dot and copy this envirment variable name so just copy and paste it here Cloud NY API key after that we will add the API secret property and here also we will provide process. EnV do variable name so this is the variable name Cloud NY secret key just copy and paste it here now right click and and
select format document so here we have provided The cloud name API key API secret next we have to export this function from this file for that just add export default connect Cloud n now save the changes and come back to the server.js file here we will add import connect Cloud NY function from config folder Cloud N.J file after that here we will call that function so just add connect Cloud nudy so we have configured the mongod DV and Cloud un storage in our back end after that we will come back to the models folder and
here let's create a new file and the file name will be Dr model do JS here we will create the model for the doctor using that we can store the doctor's data in our database to create the doctor model first we have to import the package in this file so just type import from then let's create a new variable so just add const and we will name it Dr schema in this variable we will store the schema so just add new do schema and in this one we will add one object here we will Define
the a schema property for the doctor data with the type so first We'll add the name so that we can store the doctor's name and here let's add the object so this name will Be a string so just add the type A String after that we will add the one more property that is required and let's make it true by doing this we have to provide the doctor name to create a doctor profile in the database so the doctor name is mandatory to create a new doctor after that let's create another copy of this line
here we will add the property name email the type is email and required True after that here we will add one more property that will be uni and let's make it true by adding unique we can create a doctor with unique email ID it means we cannot use the same email ID to create another doctor profile after that let's create one copy of this property and here we will add the property name password the type will be a string and required True after that let's create another copy of it here we will add the image
in this property we will store the URL of the doctor profile image after that let's create another copy of it and here we will add the the property name a speciality and here let's create another copy of it and here we will add the property name degree now let's add one more copy and here we'll add the property name experience now let's create one more Copy here we will add about now let's create one more copy and here let's add avable and the type will be Boolean and in this available property we will store one
Boolean data suppose we have to make one doctor unavailable then we will use this available property and we will make it false so that user cannot book the appointment with that doctor after that let's create another Copy of it and here we will add the fee so the type will be number and required will be true after that let's create one more copy and here we will add the address and the type will be object and we will mark it as required after that let's create one date property so that we will get to know
when this doctor's profile was created So the type will be numbered and we will set required true after that let's add one more property that will be slots booked its type will be object and here we will add the default value so the default will be empty object so whenever this doctor data will be created in this slots booked will be empty object and in this object we can add the doctor's appointment data so That we will get to know when the doctor slot is available and Which slot is booked to store the empty object
in any data here we have to add comma and we'll add the Cs and here we will add minimize false if we add this minimize false then we can use this empty object as default value if we will make it true then we cannot create a doctor data with this empty object now we have created this doctor schema Now using this a schema we will create one doctor model So just add const doctor model equal to let's add do model and in this one we will add the model name that is doctor after that let's
add the doctor schema so it will create the doctor model so whenever our project gets started then this statement will get executed and whenever this statement will get executed then it will create the model for multiple times so here let's add one more logic we will add do Models so here we are checking if the models do doctor is available then we are going to use that model and if it is not available then we'll create this model using this do schema after that we have to export this doctor model that we have created here
for that let's add export default doctor model now let's format this document and save the changes so here we have created the doctor model Now using this model we Can store the doctor data in the database now if I open the front end folder SRC assets and assets. JS file here you can see we have the doctor data and in this one we have the ID name image as speciality degree experience about fees and address so here also we have created the same structure here we have added this email ID and password also so that
doctor can login in their admin panel and check the Appointments here we have added this slots booked also where we can store the slots which is booked and which is free and here we have added one date property also by using this date property we will get to know when the doctor was added in the database similarly we will create the user model also so that user can save their user data in the database for that in this models folder we will create a new file and write the file name user model. JS now in
this file first we will import the Mongo's package so just add import from now here we have to create the schema so let's open dror model just copy these code and paste it here and from here we will rename the variable so it will be user schema and here we will name the user model and here we will add the models. user and here also write user and update it to user schema After that we will export the user model now in this user schema we need this name email password image and this address so
let's remove the other properties let me remove these properties we will remove this one then let's remove this date and slot and and from here we will remove this minimize false so now we have the name email password image and address property after that in this one let's add the Gender property so let's add one cly say the type will be string and here let's provide the default property that is not selected after that let's copy this code and here we will add the date of birth property that is do o so the type is
a string and the default value will be not selected here we have to add the comma after this date of worth let's add The phone property so that we can store the users's phone number the type will be string and by default we will use this number so now in this name property we have the type A String required true then we have the email property where you can see unique true then we have the password type A String required true after that we have the image type a string and required true so Let me
remove this required property and here we will add the default property so whenever a new user will be created then one default image will be provided for default user profile picture later user can change their profile picture so here we have to add one image so let's come back to the web browser and we will open a new tab and here we will search for image to database 64 let's open this website after that just click on this button and from here we will select this Image that will be our default image so select this
image after that click on this copy image and in this default just paste this code so we have pasted this data that contains our image in base 64 format now whenever a new user account will be created then this image will be the default image for them after that here we have the address property and in this one let me remove this required and here we will add the Default property here we will add one object in that one we will Define line one that will be empty string then we will provide the line two
that is also one empty string so now our user model is ready so whenever we will create one account so first we have to take the name email ID and password to create an account after that this image will be added as the default image for the new user and here we have added the default Address then we have the gender and date of birth that is not selected then we have the phone and here we have added this phone phone number and user can edit this phone number later in the profile page now save
the changes so now we have the doctor model and user model and now using these models we will create multiple apis so first we will create the API to add the doctor in our database for that let's open this controllers folder and in this Controllers folder we will create a new file with the name Dr controller.js so right click on this controllers and create a new file and the file name is do controller.js now in this file we will create multiple controller function for multiple apis after that let's create one more controller file that will
be admin controller.js if we come back to the design file You can see scroll down here we have the design for the admin panel so as you can see here in this admin panel we have two type of login first one is admin login and the second one is Doctor login now in the admin login we will add this feature add doctor so that admin admin can add a new doctor for this section in the admin panel at Doctor we will create the controller function so let's add one Comment that will be API for adding
doctor here we will create one async Arrow function with the name add doctor so just add const add doctor equal to a Sync here we will create this Arrow function in this function we are going to add one TR catch Block in this function we will get the request and response as a Parameter now in this controller function we will get the data from the request so whenever we will call this API then we will pass the after name email password image and all other details so let's open this admin controller.js file and here in
this Tri block let's add the const and here we will add the cly addes and in this one we will add name email password a specialty degree Experience about fee address they will get these data from the request so just add request. body now we will send this data using the form data so whenever we will call this API then we will add these data in a form data format so to pass the form data we need a middleware so in this middleware folder We will create a new file with the name molter DJs so
create a new file molter do JS and here we will create the molter middleware so first let's import the molter package so import molter from molter package after that here we will create the disk storage configuration so just add const a storage equal to mulle do dis storage and in this one We will add one object and here we will Define the file name here we will add one function in this function we will get the par meter like request file call back and we will create this function and in this function we will call
the call back function and in this one we will provide null argument after that we will provide the file. original name so now we have created the Configuration for the dis storage now let's create the instance of this molter using this disc storage so just add const upload equal to molter and in this one let's add one object and in this object we will add this a storage configuration so just type A Storage after creating this we will export this upload from this file so simply add export default upload next we have to create the
route Using this upload middleware for creating the route first we have to come to this admin controller.js file and here let's add export in this one we will export this add doctor function next let's come to routes folder and here we will create a new route so right click and select new file and write the file name admin route. JS similarly we will create one more Route file that will be Dr route. JS now just come to admin route. JS file and here here first import the Express package from Express after that here we will
import add doctor function that we will get from the controllers folder admin controller.js file so here we have imported this at Doctor we have to provide the complete file name admin Controller.js after that we have to add import upload from the middleware folder m. JS file now we have imported all these three files next we have to create the route so first we will create the router so to create the router instance just add const admin router so we have added the name admin router equal to express do router now we have this admin router
and Using this we can create multiple end points so let's create one endpoint so just add admin router. poost so we are going to use this post method to create the endpoint after that here we have to provide the endpoint so just add slash add doctor after that here we have to provide the controller function which is ADD doctor while calling this API we have to pass the form data so we will Add the middle we between these so just add the comma and between these Comma just add the upload do single and in this
one just provide the field name that will be image so whenever we will call this endpoint then in the form data we have to send the image with the field name image then only our middleware will process that image and form data after that we will Export this admin router from here so just add export default admin router now save the changes and open server.js file here after this comment at the API endpoints we will initialize our endpoint using the router that we have just created in this routes folder for that simply add app.use then
add the path that is/ API SL admin and here we will add the admin Router so by selecting this this file has been imported here we have added the endpoint SL API SL admin so here let's add the comment Local Host Port 4,000 sl/ API SL admin then this router will be used and at this router we have created this endpoint SL add doctor so whenever we will call this API then our AP controller function will be executed that we have mounted in this file admin Route as you can see at this end point we
have added this add doctor so when we call this API it will execute our add doctor controller function so when we create the multiple endpoints here to access that endpoint we have to use this/ API CL admin now let me remove this commment now let's come back to the admin controller.js file here we have received the information from request. body after That we need the image file that will be that will be passed using this upload do single middleware so to get the image file just add the con image file equal to request. file by
using this we will get this file in this variable now let's test this logic so to test it simply add the console log and in this console log we will add these data so just copy this object and paste it here in this console log after that In this one we will add the image file also so let's add the comma and here let's add the image file so to test this API we are going to use this extension called Thunder client now just click on new request here we will select the type post and
in this one just add the HTTP column sl/ Local Host Port 4,000 SL API SL admin slash add doctor here in this body we have to send The form data so just select form in this form data we have to send the files also so select this files checkbox and in this one we will add these fields one by one that is name email password and others so first we will add the name and let's add the tast name next we will add the email and here we will add the value test email next we
will add the password Here we will add this number After that we will add the degree then we will add the experience then about fee next we have to add the address so just add the address next we have to send one image so let's let's add the file field name will be image and we will choose one file so let's come to the project folder front end SRC assets and let's select any image so I will select this Image here we will add some values so let's add the degree value then we will add
the experience 4 years then we will add the text in about test about then we will add the fee then we will add the address and in this address we will add one object so to pass so to add the object first we have to stringify the object so just add this double code then we will add the CES here we will add the line One and in the line one let's add this text address one so for now let me send this and we will open the integrated terminal also so here we have the
integrated terminal for the back end and this is for front end so front end is also running now in this back end if I click on this send button so here you can see we are getting this console log in this terminal that is name email password a Speciality we have missed it so if we add this option here that will also get added here after that we have the degree experience about fee and address in this address we have this a stringified object after that here we have one file that we have attached here
so this is the file name original name encoding image type destination file name path and size let me click on this cancel Request here in this controller function we are not returning anything that's why this processing is continue loading right so now we are getting all these data let me add one more field name that is a speciality let's add the value like General physician and click on this cancel button and again click on the send button so here we are getting another Console log and here we have this data that we have sent from
here we can cancel this request so we are getting this data in console from this form data to our API Now using this data and our doctor model we are going to save this data in our database for that let me remove this console log from here let me hide this terminal after hiding this terminal here we will add one check so let's add comment Here let's add checking for all data to add doctor here we are going to verify that every field has some data then we can add them in the database so let's
add the if statement in this if statement We'll add not name or not email or operator then not password not a speciality not degree not experience not about not fee not Address by adding this if any of these data is missing in that case this if block will be executed so in that case we will return one response using the Json method and in this method we will add one object where we will Define the success property that will be false because any of the data is missing after that we will add one message also
that can be displayed on the UI So let's add any message so I'll type missing details if any of these data is empty in that case this if block will be executed and it will execute the function here there after and user will get one response that some details are missing if this if statement does not execute it means we have all the data so we'll continue executing this function so in that case we will validate the Email format so here we will add the comment and here let's add the validating email format after that
we will add the if statement here we are going to use the validator package that we have installed while creating our backend so let's add the import validator from validator package here we will check validator do is Email in this property we will pass this email that we will get from this request here we will add the not operator so if the email is not in the valid format then this if block will be executed in that case we will copy this return from here and paste it here here in this message we will type
please enter a valid email so if the email is not in the proper format then this return statement will return one message that is please enter A valid email next we will validate the password if the password we are getting from the request is a strong or not so to check it just add one comment that is validating strong password after that here we will add one if statement and here we will add password. length if it is a smaller than eight character in that case we will terminate this function here and send one response
So just copy this return statement and paste it here and in the message we will provide please in enter a strong password after that we have the Doctor Detail email ID and password next we have to encrypt this password and save it in our database to encrypt this password we will use the bcrypt package so first we have to import that so just add import by Crypt from bcrypt here we will Add import bcrypt from bcrypt package let me correct the spelling after that here first we have to generate one salt to has the password
so let's add the comment and here we will add hasing doctor password Here we will add const salt equal to await and here we will use bcrypt dot gen salt method here we have to provide the number of rounds so we can provide the Number between 5 to 15 if you provide the larger number it will take more time to encrypt the password so we are going to use the number 10 after that we will create the variable the name will be hased password so let's add hased password Here we will add the await then
we will use the bcrypt package. has Method in this one we will provide the users password so just add the password after that we have to provide the salt after that we will get one in encrypted password in this variable now we have all the users data and encrypted password next we have to upload this image file in the cloud NY so that we will get one image URL and we are going to use that image URL in our database For that let's add the comment so I'll add the comment text upload image to cloudin
after that here we will create one variable that is image upload equal to await here first we have to import the cloud NY so to import the cloud Nery we will use import V2 as cloud iny from cloud iny after that here we will add await cloud. Uploader do upload method in this method we have to provide our image file path so let's add the image file dot path after that we have to define the resource type so let's add the comma and curly Braes and here we will provide the resource undor type that will
be image so just add the image in double code after this a statement it will generate one response and that response will be stored in this Image upload variable now in this image upload variable we will get one image link so let's add the con image URL and in this one we are going to store the uploaded image URL so just add the image upload Dot secure URL now we have all the data like name email password and other detail then we have the hased password then we have the image URL that is our Cloud
NY image URL next we have to save these data in our Database so for that let's create one doctor data so just add con doctor data equal to curly is and simply add the name email after that we will add the image property in this image we will store image URL after that we have to add the password and in this password we will provide hased password after that we will add the speciality After that let's add the degree property then we will add the experience similarly we will provide the about then we will add
the fees then we will add address and in this address we are getting one object but in form data we have to convert it into string so we have to pass the data so simply add Json dot Parts method and in this one just provide the address so it will store the address as An object in the database after that we will provide the date property and in this one we have to store the current date so to get the current date let's add date. now that will return one timestamp now we have created the
data data format for the doctor next we have to store it in the database so first we have to import the dror model from the models folder Dr model. JS File so here we will create one variable with the name new doctor equal to we are going to use the new keyword and this doctor model and in this doctor model we will provide this doctor data that we have just created after adding this we have to save this data in our database so just add await new Doctor do save after that our data will be
stored in the database and here we will add one response using the Json method in this one we will Define the success property that will be true and after that we will add one message that will be doctor added now if we get any error in this triy block then this catch block will be executed so in that case just add the console Log and this error and after that we will send one response also so let's add response. Json here we will Define the success property false and here we will add the message property
and in this one just provide the eror do message now we have created this function now let's test it so let's come back to the Thunder C Again here we have added these field and value we have added all the data now let's open assets. JS file and let's copy this doctor data from here so let me copy the doctor name from here and open this tab and here we'll provide one doctor name now again open the assets file from here just copy the speciality and we will pay it here after that let's come to
assets. JS file then copy the degree degree is correct then we have The experience after that we will copy this about text from here and let's come back to the Thunder client and in this about section we will paste this description here we have to provide the fee then we have the address so to add the address let's come to assets and from this address let's copy this object so just copy and come back and we will paste it here so we have added all the properties Here we have to add one email ID so
let me add this name that is Richard and here we will add at theate demo after that we will choose one image so just click here and let me choose this first image and click on the send button here we have one error message it says expected property name in Json at position two we are getting this message from this address So let's come to assets folder from here we will copy this object and we will come to browser and here we will search for online Json a stringify after that let's open this site we
will paste this object here in the left side and in the right side we will get this stringified value so let me copy from here and come back to the vs code editor and in this request remove this and Paste the a stringified value now click on this send button again here we are getting another message doctor validation failed so let me open the Dr model. JS file here we have added this available property so let me remove the required true from here and here we will add the default value default will be true so
now let's come back to the Thunder client and again click on this send Button now here we are getting the message doctor added so this doctor data has been saved in the database so let me open the database we will come to mongod DB database let's click on this refresh button now here we have one database called prescripto let me click here now in this one we have this collection called doctors so in this you can see one entry in this doctor's Collection so here we have the doctor name email password so this is the
encrypted password suppose our database gets public then the users's password will not be dealed then we have the doctor image so in this image property we have this image URL that is the cloudinary image so let me just copy this URL and open in the new tab so we are getting this doctor image from this URL that is our Cloud NY URL after that we have this other informations right here we have the fee address date and slots booked data that is one object now we are able to add the doctor using the API after
that we will create the authentication system so that only admin can add the doctor in the database for that let's come back to the vs code editor and let's open. EnV file in this file we will add two new Envirment variable for the admin email and admin password so here let's add the admin email equal to we will add this email admin atpr crypto.com which is a dummy email ID now let me create one copy of it and here we will provide the admin password and in this one we will provide this password so we
have added this email ID and password next we are going to use this admin email and password for the admin Authentication so let's open admin controller.js file and here we will add one comment here let's add the API for the admin login after that here we will create one Arrow function with the name login in admin and it will be one snc Ado function so just add the const login admin equal to as sync now in this async parameter we will Add the request and response here also we will add the TR catch Block in
the catch block let me simply copy the text from here and paste it here next we have to pass this login admin function in this export object so let's add the login admin after that let's copy the function name from here and we will come to admin Route. JS and after this add doctor we will D structure this login admin and using this we will create a new route so let me create one copy of this line and here we will add the path that is SL login from here let me remove this upload do
single and remove this add doctor also and here we will use this login admin Function after that we will save the changes and we will come to admin controller.js file in this Tri block first we will get the email ID and password from the request and we will match that email ID and password with this involvement variables if it is matching in that case we will create a token using the Json web token so first here we will get the email ID and password so just add const email Password equal to request. body so just
add RQ do body after that here we will add one if statement here we will check if our email is equal to process. EnV do admin email after after that we will add this end operator here we will match the password if the password is equal to process Dov Dot admin password if both the email ID and passwords match with the email ID and password stored in the environment variable then we will generate one token and if it is not matching in that case we will add the elsea statement and in this Elsa statement we
will add one response do Json where we will add the object and Define the success property false after that we will add the message Property that is invalid invalid credentials after that here we have to create one token and send it to the user for that here we will use the JWT so first we have to import JWT so just add import JWT from Json web token after that in this if Statement we will create one variable with the name token here we are going to use the JWT do sign method here we have to
provide one data so we can encrypt that data and create a token so we will use the email plus password that will be a string we will combine both email and password then we have to provide the JWT secret to provide the GWT secret we will come to EnV file Here we will create one envirment variable that is JWT secret and it will be great stack now save the changes and come to admin controller.js file and here we will provide the JWT secret so just add process.env do JWT Secret by executing this statement we will
get one token next we have to send this token as a Response so we will create a response using the Json method here we will add one object where we will Define the success property true after that here we will add this token that we have generated here next we will save the changes and test this API to test this API let's open the Thunder client we will create a new request so just click on new request button then select the post method and Here we will add the URL HTTP Local Host Port 4,000 API
SL admin SL login after that we will select the body and here we will send the Json content so let's add one object first we will add the email property after this email we will provide the password we have added Mt string so in the first string we have to add the email ID that is saved in this envirment variable that is the admin email so let Me copy the email and paste it here in this email property after that here we have to provide the password that we have saved in this environment so let's
copy the password from the envirment variable and paste it in this password property now just click on this send button so now you can see the success true and here we have this token suppose we provide the incorrect password and click on this send button here we are getting success false Message is invalid credentials and if we provide the correct password then we will get the token Now using this token we will allow the admin to login into the admin panel after that we will create the middle Weare authentication so we can add it in
this add doctor so whenever we will try to add the doctor then we will check for the token and when we have the token then only we will be able to add the doctor if we don't have the admin Token then we can't add the doctor using this API so to add the admin authentication middleware first in this middleware folder we will create a new file with the name Au admin. JS so we will create a new file in this middleware folder its name will be Au admin. JS in this file we will import JWT
from Json web token after that here we will add one Comment and here let's write admin authentication middleware after that here we have to create one Arrow function with the name O admin so just add const or admin equal to and it will be one asnc Arrow function so just add async and create one Arrow function in this function we will get the request and response in the parameter and it is going to be the middleware so here we will add one call Back function called next after that here we will add the TR catch
Block in this catch block we will copy this console log and this response paste it here in this catch block after that here we will export this o admin middleware using export default or admin after that in this Tri block we will add the logic to verify the token so that if we get any request and in the Headed if we have the token then only we will allow the users to make the API call otherwise we will terminate that API call in this middle bear so first we have to get the token from the
headers so just add const while sending the token we will name it as a token that will be admin token equal to request do headers after that here we will check if we don't have the a token in that case we will return a response so just add Return we will add the response using the Json method in this one we will add the curly bres we will Define the success property false and here we will add the message also that is not authorized Ed login again after this if we have this a token in
that case we have to verify this token to verify this token first we have to decode this token to decode this token here we have To create the variable with the name token decode here we are going to use JWT do verify method now in this method we have to provide the token so just add a token and then we have to provide the JWT secret that we have stored in this environment variable so just copy this JWT secret variable name and in this file we have the a token after that We'll add comma process.env
do JWT secret after that we'll get the decoded token in this variable that is going to be our email ID and password so we will open the Au admin. JS file and after decoding the token here we will check if it is same as the email ID plus password so just add if and in this if statement we will add token decode not equal to we will add process do EnV do admin Email after that we will concatenate the process Dov do admin password if the decoded token does not match with this email ID plus
password in that case this token is invalid so then we will return one response so simply copy this response from here and return it here now if the token is matching with this email ID plus password in that case simply call the call back function that Is next function that we are getting from this next now we have successfully created this Au admin middleware next we have to add this middleware inside this add admin route. JS file here before this upload middleware we will add the comma and in this one let's add Au or admin
middleware so when we click here this o admin has been imported from the Au Admin. JS file now save the changes and open this thunder client here we are adding the doctor now if I try to use this API endpoint to add the doctor let me click on this send button now you can see here we are getting success Falls and we have the message not authorized login again now with this data we have to send the Au token that we will get from this API after login so here we have provided the Correct password
when we click on the send button we will get this token so let's copy this token from here and we will come to this tab so here we'll click on headers and in this one we will provide a token that is admin token and in this value property we will paste this token now let's try to add the doctor using this API so just click on this send button now you can see processing after that here we are getting one error Because we have added the same doctor using the same email ID so we cannot
use the same email ID to create another doctor profile because we have added the unique property in this email that's why we are getting this error duplicate key error collection so let me add another email ID testd demo.com and click on this send button now you can see here we are getting the success true and Doctor added so now whenever we have to access The API that has some admin feature then we have to provide the token verification for the admin now let's come back to the browser screen we will open the database and click
on the refresh button now you can see here we have two doctors with this email ID reard demo.com and here we have the another one test at demo.com now let me delete the data from here then click on this delete button so The second data has been deleted now we have only one doctor till now we have created the API to add the doctor and for the admin login now using this feature we will create our admin panel so that admin can log to their admin panel and admin can add the doctor from their panel
so let's come back we will collapse this front end and in this prescripto folder we'll right click and select open in integrated Terminal so here we have three terminals for the front end back end and this new terminal so in this terminal you can see we are at the prescripto folder here we have to create a react project for the admin panel so just add npm create V at latest here we have to provide the project name that is going to be the admin then select the framework react then JavaScript now here we have one
folder called Admin so let's move it into the admin folder so let's change the directory using the CD admin so now we are at the admin directory here we have to install the dependencies so to install the dependencies just add npm install so it is installing the dependencies in the admin panel now all the packages has been installed now let's clear this terminal So let's use this this command CLS after that we will install some other dependencies in this admin project so let's add npm install we will install the AOS package react router Dom and
react toasttify so we are going to install these dependencies after that we have to run this project but before running this project let's open open this front end folder and here we have the V.C config.js File after this plugin here we will Define the server and here we will add the object where we will Define the port number here we will add the port number 5173 for the front end save the changes now let's open the front end terminal here you can see the server gets restarted because we have change the V.C config.js file after
that we will open the admin Folder and here in this admin folder we will open V.C config.js file and here also we will Define this server in this one we will add the object and Define the port number so let's add the port number 5174 save the changes so whenever we will run the admin project that will be started on the 5174 port and when we start the front end it will start the front end on this 5173 Port now let's come to the admin terminal and Here we will run this project so just add
npm run Dev now our project is running at this port let's open this link in the web browser that is Local Host port 5174 so our react project is successfully running in the web browser after that we have to clear this project so let's come back and we will open this SRC folder in this admin from here we will remove this app. CSS file after that we will open the app.jsx file And from here let's remove all the code and here we will use the rafc snippet save the changes here we are getting this text
that is app after that we will open index. CSS file and from here we will clear this file and save the changes now you can see this project is clear next we will rename the title so let's open index.html file here we will remove this title and in this title we will Type prescripto panel save the changes and come back to the web browser so you can see the title has been updated pres crypto panel next we have to add the telin support in this admin project for that let's open the new tab and search
for tnd weight so you will get this website from here we will copy these lines from the Step two so let me copy the first line and we have to stop this project so just add contrl C yes then paste this so it will install the dependency in the admin project so this dependency has been installed after that we have to copy this command from here and paste it here after pasting it we will get one Telvin do config file here so here you can see we have post css. config.js then telling config.js After that
we have to copy this configuration from here so let's copy and come to telin Doc config file which is in the admin folder and here remove this code and paste the code that we have just copied now save the changes after that we have to add these three lines in the index do CSS file so let's come back and go to index. CSS file and paste it save the changes next we have to run this project so just copy this command npm rund Dave And paste it here so now our project is running successfully on
this port number 5174 so to verify the tent installation let's open app.jsx file and in this div let's add the class name property in this class name let's add some telent classes like text green 500 save the changes and come back to the web browser now you can see here we have this text in the green color it means the tnd is successfully Configured with our admin project now let me remove these classes from here and remove this text also after that we need the support of react router Dom in this project for that let's
open main. jxx file and remove this strict mode from here and here we are going to use browser router tag we are not getting the suggestion for this tag so here we have to import it manually so just add import CES browser router from React router Dom package now save the changes close this file next we have to create the folder structure for our admin panel so first in this SRC folder we will create a new folder called Pages after that in this SRC we will create a new folder with the name components after that
we will create one context folder so create a new folder with the Name context so we have created this folder structure next we have to insert the admin Assets in this assets folder to insert the assets let's come back to the desktop screen and here we have one folder called admin assets you will find this folder download link in the video description now in this folder you can see we have some images icons for the admin panel and there's one asset. JS file also so let me copy all The file and open our project folder
then go to admin folder SRC assets and in this one we will paste all the images now let me close this and come back to the vs code editor in this file we have one assets object where I have exported all the icons so using these icons and images we will create the login page for the admin panel to create that first let's come to Pages folder and in this Pages let's create a new file that will be login. Jsx so right click and select new file and write the file name login.jsf here we are
going to use our afce after that we have to mount this component directly in this app.jsx file so let's Mount the login component after that we are going to set up the context for the admin panel so in this context folder we will create three files that is admin context app context and Doctor context so right click here and select new file and first we will Create the app context. jsx file after that here we will create the context so let's add export then create one variable name after that here we will add the variable
using the const keyword and write the variable name app context equal to create context after that here we are going to create the context provider function for that we will create the arrow function so just type Const app context provider equal to and it is going to be a arrow function in this parameter we have to take the props here we will create one variable with the name value and that is going to be an object so we'll add const value is equal to CES after that we will add the return statement in this return
we will return app Context. provider method after that between these tag we will add the curly Braes and we will provide props do children after that in this tag we are going to add the value property and in this value property we will add this value object so whenever we will add any variable or function in this value object then we can access that in any component using this app context File after that we have to export this app context provided function for that let's add export default app context provider so here we have created
this app context file now we will create one more context file for the admin where we will add the logic for the admin login and admin token so to create that file in this context folder we will create a new file with the name admin context. Jsx now from this file let me copy the code Cod and paste it here in this admin context in this one we will change the name so just add admin context and here also update admin context provider here also we will update admin context. provider after that here in this
export we will provide admin context Provider by adding this we have created the structure for the admin Context now we will create one more context for the doctors where we will store the logic for the doctor login and token for that in this context folder we will create a new file with the name Dr context. jsx in this file we will paste the same code so let me copy this and paste it here here also we will update the variable name so it will be doctor context after that we will update this provider function that
is Doctor context Provider then update this tag Dr context. provider Now update this export so let's add doctor context provider function so now we have created the structure for the doctor context next we have to add this context in main. jsx file so that our admin components can access these context file so let's open main. jsx file after this browser Router we will add the admin context provider after this browser router tag here we will provide the admin context provider tag so just add the opening Arrow admin context provider and with this we will add
this app component after this admin context provider we will add the doctor context provider so just add doctor context provider and between the these tags we Will move this app component similarly within this doctor context provider we will add the app context provider tag so just add the opening Arrow app context provider select it now between these tags we will add this app component right click and select format document so you can see this structure we have added the admin context then Doctor context then app context and all these context provider function has been imported
and between these texts we have mounted the app component now we can access all these context in our app so now we'll design the login form so let's open the login. jsx file and in this file first we have to import the assets file that we have created here in this assets folder so let's add import card lies assets From here we will provide double do/ assets folder SL assets file so assets has been imported in this component after that here we will create one estate variable with the name State and by using that state
we can manage the admin mean login or doctor login so just add const and the estate name will be estate and set a function name will be set a state here we will add the user State and initialize it with admin so whenever We will open the login page by default the estate will be admin that's why we have added admin after that let me remove this div from here and here we will use the form tag now within this form tag let's create one div in this div we will add one P tag within
this P tag let's add a span tag and here we will print the estate name that is admin so let's add the curly presses and we will add the state Variable name that is a state after this a span tag let's add login save the changes and come back to the web browser if I refresh this web page then we are not getting anything here so let me come back to the vs code and open app.jsx file here we have to import this login component so let's add import login from Pages / login so we
have imported the login component save the changes and come back To the web browser and refresh this web page still we have some ISO let's inspect this web page go to console and here you can see we are getting this export name does not exist so here we have the spelling mistake for the assets so let's come back to the web browser so let me come back to the vs code here we have added assets so let me correct this as spelling save the changes and refresh this web page now you can see the console
is clear and Here we have the message admin login after that we will come back to the vs code editor and after this paragraph tag we will create one div and in this div we will will add another P tag and here we will add the text email after this P tag here we will add the input field input type will be email after that we will add required attribute so we have to provide the email ID to submit this Form after this div we will create one more div so so let me copy the
same div copy and paste it instead of this email we will add the text password and the input field type will be password and it is also required after this div we will create a button tag in this one we will add the text login after creating this button tag save the changes now you can see we are getting this text Admin login then input field for the email then input field for the password and then login button after that we will add some CSS properties for this component for that let me come back to
the vs code and in this form tag let's add the class name property and in this one we will provide mean height of ATV Flex item Center and save the changes after that we will add the CSS Properties in this div so let's add the class name property and in this one we will provide Flex Flex column Gap margin items start padding minimum width then provide the minimum width for different screen size then border border radius text text color and here we will add Textra small and sadow large save the changes and come back to
the web browser so you can see some changes in this login form it is displayed in the center where you can see these input Field and button after that let's come back to the vs code and in this P tag we will add the class name so let's provide the delin classes we will provide text to XEL font semibold margin Auto after that we will open this telin config.js file and in this file here we have this extend object so in this one just add colors and in this colors we will add One primary color
of our project so let's add the primary here we will provide the color code after that we have to add the hashtag save this changes and come back to the login. jsx file here we will add the class name property and here let's provide text primary now save the changes and come back to the web browser so now you can see this text in color which is admin right right so you can see the complete Text admin login now just come back to the vs code and here in this T we will add the class
name width full now in this div also we will add the same class name width full next we will add the CSS properties in the input Fields so in this input field let's add the class name property and here let's provide border then border color then rounded width full then padding and Margin from Top save the changes so you can see the first input field is looking good after that let me copy this class name from here and paste it in the second input field save the changes come back to the web page so this
second input field is also looking good after that we will add the CSS properties for this login button so just come back and in this button tag we will Add the class name property here we are going to provide background primary text white width full padding border radius and text size save the changes and come back to the web browser now this login button is also looking good after this button here we have to add one option so that user can switch between admin login to doctor login for that after this button tag here we
have this div so before closing this div we Will add the tary operator and here we will check if our state is equal to admin in that case here we will add one P tag and in this P tag we will type Dr login after that we will add one span tag and let's add the text click here after that if the estate is not admin then we will add the colum and P tag and here let me copy this line p P it in this P tag and provide The text admin login in both
P tag let's add the question mark now save the changes so here you can see we are at the admin login and here we have the text do login click here now in this asan tag we will add the on click property here we will add one Aro function and in this one we will call call the set estate Setter function in the first one we are at the admin estate so it Will change the state to doctor so let's add doctor and in the second one we are at the doctor login so we have
to set the admin save the changes and come back to the web browser now if I click here then you can see dror Lo Lo in and if I click again you can see admin login after that we will add some CSS properties for this aspan tag for that in the first aspan tag Let's add the class name property and here let's provide text primary underline and cursor pointer now just copy this class name name from the first asan tag and paste it in the second one save the changes and come back to the web
browser so now we are getting this color and cursor now we are at the admin login and here we have the option for Doctor login Click here and if I clicked here we are at the doctor login page and here we are getting the option for admin login click here so now this logic is working fine and we have created the UI design for the login page after that let's come back to this context file and in this admin context we will create one state variable so that we can store the token in that state
variable for That in this admin context. jsx file we will create one a state variable so just add const we will provide the name a to that is admin token then we will add the setter function that is set a token equal to and here we will add the user State and in this one we will add the initial value so we will initialize it with empty string after that we have to add this a Token and set a token in this value property so that we can access it a state in any component so
just add a token set a token after that we will create one environment variable in this admin folder so in this admin folder we will create a new file and write the name do EnV in this environment file we will create some environment variable so let's create one envirment variable with the name backend URL so to create the envirment variable in V project we have to use the prefix called V so just add Vore then add the name back endore URL equal to and here we have to add the backend URL that is HTTP column
sl/ Local Host Port 4,000 now save the changes and come back to the admin context jsx file here we will create one variable with the Name backend URL in this backend URL variable we will add this environment variable value so to add the value from environment variable we will use import do meta dot EnV dot here we will provide the involment variable name so let me copy the name from here V backend URL and we will paste it Here after that in this value object we will provide this backend URL make sure you have added
the comma after every variable or function name in this value object now save the changes and come back to the login. jsx file here we will add cons curly Braes and here we will do a structure set a token to get this function we have to use the use context hook in this hook we have to provide our admin context file So just add admin context select it from the suggestion so it has been imported after that now we have the set a token function next we will destructure the backend URL for that let's add
comma and provide backend URL so now we have this Setter function and backend URL by using this we can call the API in this page so before calling the API we will create two State variable to store the email ID and Password for that here we will create the state variable with the name email and the setter function name will be set email equal to user State and initialize it with empty string now just create one copy of it and the a state variable name will be password and the setup function name is set password
so we have created the email ID and password State variable now we have to link it with This input field so in this input field just add the onclick property in this one we will pass one Arrow function here we will use the setter function that is set email and from this parameter we will take the event and here just provide event. target. value after that we will add the value property and in this one just provide the email estate variable now just copy this on click and this value property From here and paste it
in this second input field now instead of this set email we will use set password and in this value property we will use password now whenever we will update the input Fields then the data will be saved in these State variable now we will create the function for this form so that when we submit this form then that function will be executed so let's add the function with The name onsubmit Handler so just add const on submit Handler and it will be a asnc Aro function so just add asnc and create a Aro function in
the parameter we will get the form event after that come to this form tag and in this one just add the onsubmit property in this property let's provide the onsubmit Handler function in this Function we will add the event. prevent default so that when we submit the form it will not reload the web page after that we have to do one API call so let's add the TR catch block in this Tri block we will do the API call so to make the API call we are going to use one if statement and here we
will check if our state is equal to admin in that case this block will be executed and in this block we will add the logic to log in the Admin then we'll add the else statement and if the state is not admin it means we are at the doctor State then this else block will be executed and here we will call the doctor login API for now in this if block we will call the API for that we will use the exos package so to use the exos package first we have to import that package
so just add import exos from exos after that in this if statement we will Add cons curlys here we will do structure the data that is the response that we will get from the API call here we will add equal to await exos do Post method in this method we have to provide the backend URL that we will get from this backend variable after that we have to concatenate the API endpoint so let's Add plus and here we will use endpoint that is/ API SL admin / login that is the end point that we have
already created so here we will add one object and in this object we will send the email ID and password from this input Fields after that here we will add the if statement and we will check if our data. success is true in that case we will get one token so we will try to console log That token so let's add console log and provide data. token let's save the changes and come back to the login page here we will provide the admin login email ID and password so let me open the back end and
EnV file copy the email ID paste it here we are not able to paste the text so let me check the login. jsx file here we have added on click Property we have to add on change property save the changes now we can paste it and here we will add the password now let me open the console now if I click on this login button we are getting this token let me clear the console and click on the login so here we are getting this token next we have to save this token in this estate
variable which is a token so we have destructured this set a Token function so that we can save the token using this Setter function so instead of this console log just add set a token then data do token before that we will store this to token in the local storage also so that when we reload the web page then the admin will be logged in using the local storage token so just add local storage do set item in the key name we will provide a token and in the value we will provide Data. token now
save the changes if we click on if I click on this login and we will open the application Tab and in this local storage we have this a token and this token value so this logic is working fine after that if we try to login with incorrect password so you can see Let Me Clear the console we are not getting anything in the console but in the response we are getting the message that Is invalid credential so we have to display that message using the react toasttify toast notification to use the react toasttify let me
open a new tab and here we will search for react toy open this npm website scroll down here you can see we have to import a statement just copy these lines and open the vs code editor then open app.jsx file and in this file we will paste this import Statement after this login component we will add toast container now save the changes and open the login. jsx file and here if the data. success is true it means we are getting the token and we have stored the token in the local storage after that we will
add the else statement if means it means the success is false so in that case we will display the toast notification so just add toast so we are Getting this suggestion toast from react to5 package react toasttify package so it is imported here now in this one we'll add the type so just add toast dot error here we will provide the message that we will get from the data do message now save the changes and come back to the web browser now if I provide the incorrect password and click on login so now we are
getting the message in valid credentials it means the toast Notification is also working fine and if we enter the correct password now we we don't have any error and in the background it will create the token and the token will be stored in the local storage and it will also store the token in state variable next we will add the logic so that if we have the admin token in that case we will hide this login page and we will display rest of the pages for the admin for that let's come back to the App.jsx
file and here we will add cons curly presses and here we will get the a token that is the state variable and we will get it from use context then app context file after adding this in this return statement we will add the Turner operator so let's add a token so if the a token is available in that case we will display these TXS if we don't have this a token then add the colum and here we will add this Bracket and in this bracket we will add one fragment and within this fragment let's move
this login and toast container and from here let me remove this login page and we will keep this toast container tag now this structure is looking like this let's open the web page p and if I try to login now we are not getting anything so let me come back to the vs code editor here we have added one mistake we have imported this a Token we have to import this a token from the admin context so we will provide the admin context and we can remove this app context import now save the changes now
you can see the login page has been removed if I try to reload the web page again this form is visible because we have the token in this local storage but we are not using this after reloading the web page our estate variable is getting reset Right so we will add the logic in this admin context. jsx file so whenever we are initializing this variable using this empty string so here we will check if the local storage Dot get item and here we will provide this a token if this local storage has this a token
then we'll add the question mark and we'll provide the value of this token from the local storage and after that if it is not Available in the local storage then we will provide the empty string now save the changes and come back to the web browser now you can see when we reload the web page still the login page is hidden because we are already logged in now if I delete the token from the local storage and refresh this web page again you can see the login page and if I click on this login button
now we are logged in that's why the Login page has been removed and here we have the token in the local storage now the login feature is working fine next we have to create the dashboard UI design for the admin for that let's come back to the vs code editor and in this components folder we will create a new component file with the name Navar so in this components folder let's create a new file with the name Navar do jsx and here We will use ra Ace here we have created this Navar component next we
have to mount this navard in the app.jsx file so let's open app.jsx file now in this app.jsx file here we have this div so in this one we'll add the class name property and here we will provide the background color so just add BG and this color code now save the changes so here we have this light Background color after this toast container here we will Mount our Navar so just add Navar so we are getting this suggestion Navar from components folder so just click here and the Navar has been imported after that save the
changes and open Navar do jsx file next we will create the structure for this Navar so in this T let's add one and in this one we will add the image Tag in this image SRC we will use assets dot admin logo after this image tag we will create one P tag and in this P tag we will use Turner operator so first we have to get the a token from the admin context so just add const curly say a token equal to use context in this context we have to provide our admin context after
that in this P tag we will Add the curly Braes and here we will check if we have the token available in that case we will provide this text admin and if the a token is not available in that case we will provide doctor after after this tab here let's create one button for the log out so in this button we will add the text called log out after that save the changes and come back to the web browser now you can see we are getting This logo then we have the text called admin then
log out button next we will provide the CSS property for this component so let's come back to the vs code editor in this div we will add the class name property and let's provide Flex justify with item Center padding border bottom and background white save the changes and come back to The web browser now you can see this image and text in the left side and the logout button in the right side now let's come back to the vs code editor and we will add the CSS properties for this div so in this div we
will add Flex item Center Gap text size extra small save the changes and come back to the web browser here you can see this image tag And in the right side we have this admin text after that we will add the CSS properties in this image so just add the class name and provide width cursor pointer save the changes so now the size for this logo is perfect after that we will add the CSS properties for this text which is admin so let's come back here in this P tag we will add the Class name
property and here let's provide the border and text color so that it will look good so just add border padding rounded full border gray we will provide the text color gray 600 save the changes and come back to the web browser now you can see this admin text is looking good with this border next we will provide the CSS properties For this logout button so in this button tag we will add the class name property and here let's provide background primary text white text small padding and Border radius save the changes and come back to
the web browser now this logout button is also looking good after that we will create a function so that when we click click on this button then it will Execute that function and the admin will be logged out from the website for that let's create one function with the name log out so just add con log out in this function we will call this set a token Setter function so we have to destructure it from the context so just add set a token and here in this log out function we will check if we have
the a token in that case we will call the set a Token and we will set it with empty string after that we will check if the a token is available in that case we will call the local storage. remove item and here we will remove the a token now let's connect this logout function with this button so just add the onclick property and provide this log out function now save the changes and come back to the web browser if I click on this log out Button now we are logged out because the token has
been removed from the a token state and local storage and if I click on the login button we are logged in so this login and log out feature for the admin is working fine after that let's come back to the vs code editor and here we will use the use navigate hook so just add const navigate equal to use navigate after that in this function we will call this navigate function and Here we will provide the path of our homepage that is slash so whenever user will click on the log out button then the user
will be redirected to the slash page now save the changes after that we will create one more component so let me open our figma design file so in the left side you can see we have a sidebar so we will Design This sidebar so in this components folder let's create a new file with the Name side. jsx here we will use our afce after after that we will come to app.jsx file in this file we will add one div after this never in this div we will Mount our sidebar so just add sidebar after adding
this in this div let's add the class name property and here let's provide Flex items to start save the changes and come back to the web browser so here we are getting this sidebar text from this sidebar component after this sidebar we will create multiple routes for the multiple Pages for that let's open the pages folder and in this Pages folder we will create a new folder called admin and in this admin folder we will create all the pages for the admin and in this Pages folder we will Create one more folder called doctor after
that we will create multiple pages in this admin folder so you can see in the design in the admin panel we will add the dashboard appointment add doctor and Doctor list so we will create these Pages for the admin panel so let's come back to the vs code editor and we will open this admin folder and in this admin folder we will create different pages so right click and Create a new file and write the file name add doctor. jsx after that here we will use our afce we will save the changes after that create
a new file in this admin folder and let's add the name all appointments. jsx here also we will use RFC save the changes now create a new file in this admin folder and write the name dashboard. jsx here also we will use R A Fce similarly we will create one more page and write the name doors list do jsx here also we will use our afce we will save the changes here we have created four pages now let's open app.jsx and here we will set up the routes for our Pages for that here we have
to use the routes tag that we will get from the react router Dom with this routes tag we will create one route Tag when we click here this routes and Route has been imported from the react router Dom package after that we will create one Path property and provide this slash here we will add the element in this element we will add one fragment so in the homepage at this path we will not display any UI if the doctor and admin is logged in after that we'll create one more Route so let me create one
copy of it and here we will add the path slash admin dashboard and in this element we will use dashboard page component so we have added this route for the dashboard. jsx file similarly just copy this line and here we have to collect this spelling dashboard after that in the second path let's add/ all Appointments and here we will add the element that is all appointments now let's create one copy of it here we will update the path it will be add doctor and here we will update the element that is ADD doctor component now
let's create one more route so just copy and paste it here we will add the path that is/ doctor list here we will use the element that Is do list component so we have imported all these four pages for the admin and we have created the path for these pages so whenever we will open these path then we will see these Pages after that we will create this sideb and we will add this naap links so that when we click here it will update the page so let's open sidebar. jsx file and remove this text
from Here and in this sidebar component first we have to import a token from the admin context so just add con say a token after that here we will use the use context in this use context we will provide admin context so we have the a token from the admin context after that in this div we will add one turn operator so just add this curly Braes and here we will check If we have the a token in that case we will return one UL tag in this U tag we will create this sidebar entries
like this dashboard appointments at doctor and doctor's list for that here we will use the nav link tag that we will get from the react router D so just add the opening Arrow nav link we are getting this suggestion if I click here the nav link has been imported after that between this tag we will create one Image tag so just add the IMG and in this image SRC we will provide this icon so just add assets do home icon after this image tag we have to add the text in P tag and in this
paragraph tag let's add this text which is dashboard so we have to create other copy of this nav link so just copy and paste it for three times after that in the second one we will Provide appointment icon as you can see here here we will use assets. appointment icon after that in the third one we will update the icon that will be this plus icon which is add icon so just add assets. add icon and and in the fourth one we have to provide this users icon or people Icon so let me add assets.
people Icon after that we will update the text also so let's copy this appointments From here and paste it here then copy this add doctor then paste it here after that we will copy the fourth one which is doctor's list and past it here now save the changes now you can see we are getting these sidebar next we have to add the two property in this nav link so in the first one we'll add the two property and in this one we have to add this code and in this one we have to provide the
route path of this dashboard Page so if I open app.jsx file here you can see the path is/ admin dashboard so let me copy it and open sidebar . jsx file here we will paste it similarly in this nav link also we will add the two property here we have to provide the appointment page so let's open app.jsx file and from here we will copy this path and let's open sidebar. jsx file and paste this path here in the code after that in the next one we will add the two property we will open App.jsx
from here we will copy this path and we will come to side word. jsx and paste the path in this code now in the last nav link we will add the two property let's open app.jsx file and copy this path doctor list and open side. jsx and here we will add the code and paste it now save the changes and come back to the web browser now you can see we are at the homepage That is SL path and we are not getting anything else because for this slash we have added this fragments after that
if I click on dashboard as you can see the path is/ admin dashboard here we are getting the text dashboard if I click on appointments then you can see the message all appointments if I click on ADD doctor here we have this message add doctor and if I click on Doctor list here we have the message doctor List so when we click on the sidebar elements then it is displaying the page it means the page is getting mounted on different route now we'll add the CSS properties for the sidebar so let's come back we will
open sidebar. jsx file here we have this div so in this one just add the class name property and here let's provide the minimum height screen background white and border right save the changes and come back to the web browser now you can see these Items are displayed in the left side only and in the right side we have the page name so if I click on dashboard it is displaying dashboard after that let's come back to the vs code editor in this UL tag we will add the class name property and here we will
provide text and this text color then we will add the margin top save the changes and come back to the web browser now you can see we have this Text color next we will come to this naving tag and here let's add the class name property and here we are going to use the dynamic class name so just add the curly say and in this one we will pass one Aro function and in this Aro function we will pass one object where we will get is active property so if our na link is active it
means the is active will be true and if this nav link is not active then this property will be False so after that here we will return one text so just use the template literal so just add the back Tex in this backtick we will provide some class name so let's provide Flex item Center Gap three padding minimum width cursor pointer after that we will add the dollar sign craes so that we can use the dynamic class names and here we will check if our AG active property is true In that case we will provide
some class name and if it is false we will provide one empty string so if it is true we will add some class name so in the first code let's add the background color then we'll add the border right then border color that is primary save the changes and come back to the web browser now you can see here we have selected this dashboard that's why we are getting this background color in This first item now let me copy this class name from here and we will paste it in all three naving tags so in
this second one we'll paste it then in the third one now in the fourth one now save the changes and come back to the web browser so now the sidebar is looking good if I click on this you can see the background color is moving from one to another element now we are at the admin Dashboard so that's why this is highlighted with background color and right side border now if I change the page this highlight color is changing so this logic is working fine now we have created the sidebar next we will Design the
add doctor Page first because we have created the API to add the doctors so we will create this page so let's open the add doctor. jsx file in this file we will remove this div and here we will add the form tag in This form tag we will create the paragraph tag after that let's come back to the figma design here you can see first we have this text add doctor so let me copy this text and paste it in this P tag after that we will create one div in this div we will create
another div in this one we will create one label tag so just add the label and in this one we will create one image so in this image We are going to use this image for the upload area so here in this SRC let's add the curly Braes here we will use the assets so first we have to import the assets so just add import Li asss assets from double do/ double do/ assets folder SL assets file after that in this SRC we will provide the assets dot upload area now save the changes and come
back To the web page here you can see we have this image and this text after this label tag we will create one input field and the input type will be file and here remove this name property in this ID property we will provide doc image that is Doctor image after that we will come back to this label tag and this and in this HTML 4 we will provide this ID that is Doc IMG so just copy and paste it in this HTML fod after that in this input field we will add hidden so this
input field will be hidden after this input field we will add one paragraph tag and in this one we have to add this text upload doctor picture so just copy and paste it in this P tag and after this doctor we have to add the BR tag to add the line break save the changes is So now you can see this upload doctor and when I click on this image it will open a window to upload a file after closing of this div here let's create another div and in this one we will create another
div and here let's add one more div in this one we will create the paragraph tag and in this one we will add this text your name so just copy it from here and paste it in this P tag after that we Have to create one input field and the input type will be text then we will add the placeholder in this placeholder let's add the name and we will add required so we have to provide this input field value to submit the form after this div let's create the copy of this div so just
copy and paste it now in this P tag we will add the text Dr Email here also we have to add doctor name in this placeholder simply add the email and change the type to email now save the changes and come back to the web browser here we are getting dror name and input field Dr email and input field after that we will create one more copy of this div so let's copy and paste it in this div we have to add the doctor password so just copy the text and paste it here in this
P Tag and the input type will be password and in this placeholder we will add password after this div we will create one more div and this one is for the doctor's experience here you can see we have the select tag to select the doctor's experience so let me copy this text called experience and in this div we will add the P tag and within this P tag we will add this text after that we will create one Select tag and in this one we will add different values so just add the option tag and
here we will add the value and text so let's add one year and in the value also we will add one year that will be displayed on the web page now we will create other copy of this option tag so we will create total 10 options here we will add the value 2 years 3 4 5 6 7 8 9 10 so we have provided the experience option after this select tag save the changes and come back to the web browser here we are getting this drop down selection after this part we have to add
this fee option where you can enter the doctor fee so let's come back to the vs code and after this div we will create a copy of this div so just copy and paste it input type will be numbered and here We will add the placeholder text fee we will save the changes come back to the web browser here we have this input field for fee so we have created the input field for the left side name to fee then we have to add the input field in the right section so after closing of this
div we will create another div in this one we will add one another div And within this we will add the P tag and here we will add a speciality after this P tag we will add the select tag and in this select tag we will add different options so let's add the option tag we will add option into six so in the first one we have to add the value so let me come back to the front end project here we have these different speciality so let me copy the first one from Here and
we will paste it here in this vs code editor in this value and here in this text also similarly we will copy other speciality so just copy the second one paste it here now just copy the third one paste it in the value and option text now copy the next one like this we will copy all six specialities after that we will save the changes and come back to the web browser So here we are getting the drop down option for the speciality after this div here we will create one more div for this education
detail so let me copy the div from here and paste it here here after this select tag here we will update the text in P in P tag so just copy and paste it in this paragraph text in the placeholder we will add education and here in the input type we will type text after this Div we will create another div for this address input field so let's add one div then one P tag and here we will add this text address after this P tag let's create one input field input type will be text
and the placeholder will be address one here also we will provide required now let's create one more copy of this input field and we'll add address two after this div we have to create This About Me section where we can provide the about text about the doctor so just come back and here we will copy this div from here and paste it in this P tag just add the text about doctor and after this spe tag we will update this input tag here we will use the text area in this text area we will add
place placeholder that is write about doctor so we have added write about doctor now we will provide the row Property and in this row we will provide value five now remove this type text save the changes and come back to the web browser so here we are getting this text box next we have to create this add doctor button for that after this div we will create one button tag in this button tag we will add the button text add doctor so just copy and paste it from the design file right click and select format
Document now if I save the changes here we have this add doctor option next we have to add the CSS in this add doctor page for that in this form tag we will provide some CSS properties so in this form let's add class name property and provide the tnd classes like margin 5 width full after that in this P tag we will add the class name and here let's provide margin Bottom text large font medium save the changes come back to the web browser so here we are getting this text add doctor after that let's
come back to the vs code editor and in this div we will add the class name property here we will provide background white padding border border radius width full then we'll Define the maximum width and Maximum height then overflow bya scroll save the changes come back to the web browser so here we are getting this container in white color where we will add the doctor details and we and here we have the add doctor button here we are getting this scroll bar so we have to hide this scroll bar for that let's come back to
the vs code editor we will come to index.css file and in this file we will add double Column Dash webkit Das a scroll bar here we have to add atate apply hidden now save the changes and close this page now just come back to the web browser so now you can see the scroll bar is hidden after that let's come back to the vs code editor and after this div in this one we will add the class name property and we will provide Flex item Center gap for Then margin bottom text color gray save the
changes now in the left side we have this upload image then we have the text in the right side after that we have to add the CSS properties for this image tag so in this IMG tag let's add the class name property here we will provide the width background color border radius and cursor pointer save the changes so now the size for this image is Perfect after that we will add the CSS properties after that we'll come back to the vs code editor and in this div let's add the class name property and here we
will provide Flex Flex column large Flex row items start Gap 10 text Gray 600 so here we are using the flex column for the small device and for the large device we are using Flex row now let's come back to the web Browser and in the left side you can see we have this section dror email name and in the right side we have these option Education address and a speciality after that let's come back to the vs code editor and in This Ti we will add the class name property and here let's provide the
WID full large Flex One Flex Flex column Gap four save the changes now you can see here we have sum Space now just come back and in this div we will add the class name property and here let's provide Flex One Flex column Gap one save the changes now you can see the width of this input field now just come back to the vs code and copy the class name from here and we will paste it in other div also so let's add it here similarly in the next One in this one also We'll add
the same class name then in this div also where we have added fee after that we will add it here in this div where we have added the speciality then in this education div and after that in this address div save the changes and come back to the web browser let's come back to the web Browser here in this div we will add the class name and here let's provide width full large Flex One Flex Flex column Gap four let's save the changes and come back to the web browser now you can see the alignment
for these input field is looking good it has same width for left side and right side from here let me remove the saved password after that we will come back to the vs code editor and we Will come here in this div in this input field we will add the class name property and here let's provide border rounded padding save the changes so you can see the first input field which is Doctor name is looking good after that we will copy this class name from here and we will paste it in other input Fields Also
we will paste it in the next input field then paste it in this select tag we will add the same class name after that in this input field where we have added the fee after that in this select tag where we have the speciality then in this input field where we are adding the education then in this input field where we we have added the address one and address two save the changes now you can see all the input fields are looking good after that we Have to add the CSS properties for this text area
where we can enter the about so just come back to the vs code and here in this P tag let's add the class name property and here just provide the margin top and margin bottom after that in this text area just provide the class name here we will add width full padding border border Radius save the changes now this about doctor input field is also looking good next we have to add the CSS properties for this button so just come back to the vs code and in this button tag let's add the class name property
here we will provide background primary padding margin top text white and Border radius save the changes so now this add doctor button is Also looking good so now we have created the UI of this add doctor Page next we have to make this functional so let's come back and here we will create some State variables where we can store these data so before this return statement we will create some State variables so first we will create the state variable to store the image file so just add const doc IMG that means do Image seter function
name will be set doc IMG equal to user State and initialize it with false after that let's create one copy of it and here we will add the name seter function name is set name and it is one empty string now let's create one copy here we will add the email Setter function name will be set email and it is also empty string now let's create one more copy here we will add the Password seter function name will be set password after that let's create another copy here we will add the experience and the seter
function name will be set experience now let's create one more copy here we will add fee and just add the seter function name set fee now let's create another copy here we will add about and then add set About now let's create one more copy here we will add a speciality here we will add set a speciality after that let's create another copy here we will add the degree and the setter function name will be set degree after that let's create one more copy and here we will provide address one Setter function name will be
set Address one let's create one more copy here we will add address two and set address two so here we have created all the state variables that is required to link our input field and text area after that here we are using the select tags so whenever we use the select tag then we have to initialize the value with first value of the select tag so in this experience section we have to add one Year so in this experience let's initialize it with 1 year similarly in this one where we have added a speciality we
have to add the general physician so let me copy the text from here we will paste it here in this state variable initialize it with General physician save the changes so we have created all the state variables next we have to link these State variables with our input fields and text area for that first we Will start with this image tag so we will come to this input field where we have the type file in this one we will add the onchange property and in this on change let's pass one Aro function in this Aro
function we will pass this event as parameter and here we will call this set doc image Setter function in this one we will provide e. Target do files then index zero after that save the Changes so whenever we will click on this image and select any image then that image will be stored in this state variable that is Doc image after that we have to preview that image that we have selected from the image select window for that we will come to this image tag and in this SRC we will check if we have the
doc image available in this state variable in that case we will use that image to display on web page and if it is not available Then we will display this assets upload area so after this question mark before this colum we will use URL dot create object URL and in this one we will provide doc image so it will create one temporary URL for this image using that we can display this image on the web page so save the changes and come back to the web browser so now you can see the selected image is
Getting displayed here so you can see the preview now let's click again and select the another doctor you can see the preview of that doctor that is stored in this doc image State variable after that we have to link this doctor name input field with our state variable for that come to this input field and in this one just add the onchange property in this on change let's add the arrow function here we will pass the event and here we will call the set name Seter function in this one we have to provide the input
field value so just add e. target. value after that we will add the value property and in this one just provide the state variable name which is name now just copy this on change and value property from here and we will paste it in this second input field where we have the email after pasting it we will use the Set email Setter function and in the value we will provide email after that we will add the same property in this input field here we will update the setter function it will be set password and in
the value property we will provide the password State now in the select tag we will paste this on change here we will use set experience seter function and here in the value we will use experience So whenever we will select any option tag then this value will be saved in this state variable similarly in this input field we will paste it and we will use the set fees and in this value property we will use fee now in this select tag also just paste this on change here we will use set speciality and in the
value we will use the speciality state after that come to this input Field and here we will paste this on change and value here we will use the setter function set degree where we can save the educational degree then in this value property we will add degree State now for this address let's add the same property in these input field we will add the on change and value so in the first one let's add set address one and and in the second one we will use set address two now for the Value just add address
one and address two now for this text area let's add the same on change and value property here we will use the setter function set about and in the value property we will use about now in this button tag we will add the type that will be submit now save the changes and come back to the web browser now if I try to type something you can see we can write The name email ID we can add the education and these data will be saved in our state variables after that we will create one function
so that when we click on this add doctor then that function will get executed so let's scroll up and here after adding all the state variable here we will create one function with the name on submit Handler so just add Con on submit Handler it will be one async Arrow function so just add as sync and create the arrow function now in this parameter we will get the event that will be form event and after that we will use this event so just add event. prevent default so that when we submit the form it will
not deload the web page now in this form tag we will link this function so we will add onsubmit Property and in this one simply provide onsubmit Handler function that we have just created so save the changes so we have linked this on submit Handler function with our form now in this form we will call our API so that we can add the doctor to the database from this admin panel so let's come back to the vs code editor and before this function we will get the backend URL from the context and We will also
get the admin token for that let's add const curly Braes we will add the back end URL then we will add the admin token equal to we will use the use context hook and here just provide the admin context we are not getting the solu for this admin context so let's open the admin context. jsx file and after opening that let's open add doctor. jsx File and here we will add admin context now we are getting the suggestions so just click here so it will automatically import this file now we have this back end URL
and a token that is coming from this admin context now we can make the API call using this data so to make the API call in this function We'll add the TR catch Block in this Tri block we will add one check so we'll add the if statement and here we will add the condition if we Don't have the doc image then we are going to display a toast notification that is return and we'll use the toast dot we are not getting the s for this toast so we have to import it manually so just
add import cly says toast from react toasttify package after that here if I add dot then we can use error and in this one we'll add the message that is image not selected so just add text image not Selected now save the changes and come back now in this form we will add some dummy text and click on this add doctor button here also we have to add the input field now you can see we are getting this message image not selected because we have not selected the image and if I select the image and
click on this add doctor then we are not getting any error message after this check we will create One form data in that one we will add these data for that let's create one form data so just add con form data equal to we will use new operator we will use form data Constructor after that we will add the details of the doctor in this form data so to add that simply add form data dot append method and in this one first We'll add the image so just add the field name and Then we will
provide the doc image a state variable so when we created the back end to store the image we are using this field name called image that we have created using the molter so we have to use the same field name then only it will store the image in the back end after that let's create one copy of it and here we'll add the field name name and in this property let's add the name State now let's create one more copy here we will add the email and here let's add email State let's create another copy
here we will add the password and here we will use the password State let's create one more copy here we will add the experience here we will add the experience State let's create one more copy here we will add the Fee and here we will add the fee state it will be one number so here let's add number and in this number we will provide this free state so it will convert it from a string to number now let's create one copy of it here we will add about here we will use the about estate
now let's create one more copy here we will add the speciality and here we will use the speciality State now let's create One more copy here we will add field name that is degree then provide the state degree after that let's create one more copy here we will send the address so to send the address we have to create one Json format so here let's add one craes and in this object we will Define the line one property and in this one we will store the address One similarly will add another property that is line
two and in this one we will store address to State variable here we can send only a string in the form data so we have to con convert this object into a string using the Json stringify method for that let's add json. a stringify and inside this we will move this object so it will stringify this object and whenever we will try to save our Data in the database then it will be converted into the object using the Json do Parts method now we have this form data now let's check this form data so we
will console log this form data we cannot console log this form data directly for that we have to use the for each method in this form data so let's add the comment and here we will add console log form data after that we will add form data Dot for each and inside this we will pass the arrow function in this parameter we will get the value and key name here we will console log this details so just add console log here we will provide a template literal so first we are going to add the curly
Braes with dollar here we will add the key then add the column then again add dollar sign curly veres and in this one we'll add the Value now save the changes and come back to the web browser we will reload this web page and let's open the inspect go to console so now select the doctor's image here will add the doctor's name test name in this email we will provide any dummy email so test at demo.com in this password let's provide this password then in this education We'll add this Mbbs then we will add the
address one so just add Main stet and in the second address we will add second Road after that we'll select the fee then add the text in this text area about doctor text and click on this add button now you can see in this image we are getting one object file that is one image and in this name property we are getting the name then we are getting the email password experience so you can See we are getting all the values that we have entered in the form so now the form data is perfectly created
close this terminal and here now we can make the API call to the back end to save the doctor's detail on the database so just add const cly says data equal to here we are going to use a weit after that we will use the exos we are not getting the s for exos so first we have to import it so just add Import exos from exos package now here we will use exos dopost method in the post method we have to provide our backend URL then we we have to concatenate the end point for
the adding doctor so the endpoint was / API SL admin SL add doctor so here we have added the Endo after that we have to Simply provide the form Data after this form data we have to add one header and in this header we have to provide the admin token so that this authentication will get completed and our form data will be stored in the database so in this curly Braes just add headers and in this headers we will add one object where we will add a token when we provide this a token then it
will get converted into the a smaller case so here we have provided the a token With t Capital but when we call the API it will be converted to the smaller case similarly in the back end we have added the a token in a smaller so there will be no issue let me open the middle beare file or admin here we are getting the a token in a smaller case you can see the t is a small after that we will get the response here in this data proper property so let's try to console log
this Data so to console log this data first we'll check if our data do success is true in that case we are going to as toast. success where we will provide data. message and if the data do success is not true then we'll add the else statement and in this else statement let's add toast. eror and here also we will add data. message now save the changes and come Back to the web browser let me come back to the vs code and we'll open the front end folder SRC assets assets. JS so in the previous
test we have added this Doctor Detail for the doctor one now we will add this dat that is for the doctor to so let me copy the doctor's name we will paste it here then let's select the speciality so we'll select this here after that we Have to add the degree we will add it here then we have to select the experience 3 years then we have to add the about text so just copy it from here paste it in this text area now we will add the fee that is $60 then add the address
so just copy the line one paste it here then copy the line two paste it here here we have to provide one unique email ID for this doctor so simply Use first name of that doctor and this email ID then we'll add one part password after that we will click on this add doctor button so you can see we are getting the warning image not selected so select the image we will select this doctor 2 after that let's click on this add doctor button now you can see the message doctor Added so let's open our
mongodb Atlas website so we will search for mongodb Atlas we will login to see the data we will click here browse collections then go to prescripto then doctors now you can see we have second entry here that we have just added you can see the same doctor's name then email ID here we have the doctor image that is uploaded to the cloud NY so Let's copy the address and paste it in the new tab so you can see the doctor image and here we have other details about this doctor like address fee date of creation
slots booked so now we have added the doctor in the database so this logic is working fine after that we have to clear this input field and this image also so that we can add another doctor for that let let's come back to add doctor. jsx file and in this if Statement after we get the data. success true here we have to reset our data so first we will reset the image so just add set doctor image and here we will provide false after that we will add set name here we will provide Mt string
let's create copy here we will add set password let's create copy we will create set email next we will Add set address 1 again create a copy and we will add set address two after that let's copy and here we will provide set degree after resetting it we have to reset the about so just add set about after that we will set the fee so just add set fees so we have reset all these input fields and image input field here we are not going to reset The select tag here we have added the experience
and this a speciality we are not going to reset it after that if any error occurs in the tri block then the catch block will be executed in that case just at the toast. error here we will provide error do message after that we will add console.log in this one we will display eror now we have created the add doctor page as you can see if we try to add this doctor again Just click here now you can see the message duplicate key error because we are trying to create the doctor with same email ID
so let's add The Taste at this email ID and click on this add doctor now you can see the message say doctor added and all the input fields and image tag has been reset so this logic is working fine let me come back to the mongod DB and click on this refresh button here you can see we have total Three entries so the last one is this one which is test at prescripto so let me delete this data now here we have to add the remaining doctors that we have added here in this assets. JS
file so here we have total 15 doctors so we are going to add these doctors one by one using this admin panel in our database now I have added all 15 doctors in the database as you can see here We have total 15 entries now let's come back to the figma design file here you can see this is the all doctors page in the admin panel so here we will display all doctors and here we will add one checkbox using that we can enable or disable booking for particular doctor so if we uncheck that one
then the doctor will be unavailable for the booking to create this page we will come Back to the vs code editor first we have to create the API to get all the doctor's data from the database so let's right click here and select close saved after that we will open admin controller.js file and in this file here we are going to create an API controller function to get all the doctors's data for that let's add one comment here let's write API to get all doctors list for admin Panel after that let's create one Arrow function
with the name all doctors it will be one asnc Aro fun function so write asnc and create the arrow function in this parameter we will get request and response after that here we are going to add the try catch Block in this catch block let me copy this console log and response and paste it in this catch block now in this triy block let's add Const doc doctors equal to await here we are going to use the doctor model do find method and just provide one empty object after that if I come back to the
database here you can see we have this password property right so I don't want to add this password in this response for that we have to exclude that property so simply add dot select in this one just add the single Quote and write Dash password so it will remove the password property from this doctor's response after that we will create the response so just add response. Json and here let's add the object where we will Define the access property true with that we will also send the doctor's data next we have to add this all
doctors function in this export now save the changes and we will come to routes Folder admin route. JS file in this file here we will create one copy of this line and here we will add the part it will be/ all doctors and here we are going to use that function that is all doctors that is coming from the admin controller.js file so you can see it will in import so it will import this function from admin controller now in this API also we have to add the middleware so that we can authenticate the admin
to access this API so simply add Au admin as a middleware now let's test this API so to test this API we will open Thunder client we will create a new request here we will select the method post after that here let's add the HTTP Local Host Port 4,000 SL API SL admin SL add doctors in the header we have to add the authentication token so just add a token here we have to add one token so Let me open the previous request from here this is the login request click on the send button so
now we will get the token so just copy it close this request and in this one we will paste the token now if I click on the send button here we are getting the API not found let me come back and the route is all doctors right so here let me collect the route it is/ admin SL all Doctors now let's click on this send button so let me save this request so just press crl s so it will be saved in the left side after that click on this send button so now we are
getting the response and in this response you can see success true then we have the doctor's property that includes one add and in this one we have all doctors detail like ID name email image a speciality degree experience about available fee address date and here we Have the slots booked so total we have 15 Doctors Data Now using this API we will display the doctors on the all doctors page in the admin panel so let me come back to the vs code again close this request let's close these files also and now let's come to
admin folder and we will open doctors list. jsx file here we are going to create the UR I for all doctors List so in this page we will add the doctors profile and available button for that we have to get all doctor's data so to get the data we will call the API that we have just created so let's open admin context. jsx file and here we will create one function with the name get all doctors so let's add const get all doctors it will be one async Arrow function so write async and create the
Arrow function inside this function we will add one Tri catch block now in this TR block we will call the API to get the doctors's data before that here we will create the state variable where we will store that data so just add const doctors Setter function name is set doctors equal to use State and initialize it with empty Array after that in this Tri block we will add the const here we will D structure the data that we will get from the API response here we will add a weight and exos we are not
getting this suggestion for the exos so we have to import it manually so just add import exos from exos package now here we will use exos dopost method we have created the last API with The post method that's why we are adding post then we will provide the backend URL in this one we will concatenate the API endpoint so let me copy the endpoint from here API admin /all doctors so let's copy and paste it here after that we are not sending any data in the body so just add empty object and again add another
object and here we will Define the headers and in this headers We have to send the admin token that is a token now we will get the data so first we will check if data. success is true it means the API call is successful and we will get the Doctors Data so in that case we will call the set doctors function and in this one we will save data do doctors that is an array and if the data do success is not true it means there is some error in the API call so let's add
the else statement and here we will add the toast Notification so just add toast so first we have to import the toast for that here let's add import cly veres toast from react toasttify package after that let's at toast. error and in this one let's provide data. message after that in this catch block we will add a toast notification with the type error and here we will add error do message now we have created the function to get all doctor's data next we have to Call this function whenever we will open this doctor list page
for that let's come back and here in this value property we will provide this doctors then we will add get all doctors function now save this file and open doctors list. jsx file here we will destructure the data from the context so just add const we will get doctors and we will get the all doctors after that we will get a token then we will get get all doctors Function so we have added these things then equal to we will use the use context and here we have to provide our admin context where we have
defined doctors a token and get all doctors after that let's use the use effect book and in this one we will pass the arrow function here we will add the dependency array in this dependency are we will add admin token after that whenever the admin token will get updated then it will Execute this function and in that case let's add the if statement and here we will check if we have the admin token then we will call get all Doc function after setting this data in doctor's State let's add the console log and provide data
do doctors so that we can see the Doctors Data in the console save the changes and let's come back to the web browser and click on inspect tab open console log here you can see we have one aray with 15 Elements and in this ele element we have the data of individual doctor and here we don't have the password that we have removed from our back end after that we have to display the doctors as a card for that let's come back to the vs code editor in this div let's create one H1 tag and
in this H1 tag simply add this text which is all doctors so just copy it and paste it here after this H1 tag let's create one more Div and inside this div we will add the cures and here we will use doctor's aray and on this aray we can use the map method in this one we will pass one Arrow function and here we will use this bracket here we have to return one div now in this parameter we will get individual item and index number here we will add item and index now in this
div let's add the key property where we will add index in this div we will create some Structure like this so first we need the image tag so just add the IMG and in this SRC we will use this item that we will get from param metered and in this item we will get this image property so let's add image after that save the changes and come back to the web browser so now you can see we are getting images for all the doctors after that we will add one div tag and in this div
tag we will display The doctor's detail like name as and availability so let's add two P tag P into two so in the first one we will display the doctor's name so just add item. name in the second one we have to display a speciality so just add item Dot and let's copy this property a speciality paste it here now save the changes and come back to the web browser now you can see here we Have this doctor's name and a speciality for all the doctors next we have to display one checkbox so when it
is checked the doctor is available for the booking and if it is unchecked the doctor is unavailable for the booking so let's come back and after this P tag let's create one div and in this div we will add one input field and in this input field the type will be checkbox after that let's add the Checked property so in this checked we will add the item do available property you can see we are getting this available true so let me copy this property from here and let's add item dot available so if the item
do available is true then it will be checked and if it is false then the checkbox will be unchecked after that let's add one P tag and in this paragraph tag let's add this text available now save the changes now You can see we are getting the image name a speciality and this checkbox and text available next we will provide the CSS properties for this page so let's come back to the vs code and in this div let's add the class name property and in this one we will provide the Tailwind classes that is margin
Max height overflow y Scroll after that let's come back to the Web page and here you can see sum space because we have added the margin next we have to add the CSS properties for this text that is all doctors so in this H1 tag let's add the class name property and here we will provide text large and font medium save the changes so this all doctors text is looking good after that let's add the CSS properties in this div tag so in this one we will add the class name and let's provide flex and
flex Wrap so first We'll add width full Flex Flex wrap Gap then padding top then Gap from y AIS save the changes now you can see we are getting two doctors in one row if we decrease the size of this card then we will see multiple doctors in single Row for that here in this div let's add the class name after that in this class name let's provide border border color then border radius then maximum width overflow Hidden cursor pointer and group now save the changes and come back to the web browser now you can
see we have total five doctors in one row after that we will add the CSS properties for this image tag so here we have the IMG in this one let's add the class name and let's provide the background color then we will add the group over then we will change the Background color we will add the transition and duration save the changes so now you can see if I move cursor over this image the background color is changing you can see the primary background color so this effect is looking good after that we will add
the CSS properties for these text so let's come back to the vs code and in this div let's add the class Name property and here let's provide the padding for after that we will add the CSS properties in the is B tag so just add the class name in the first one where you can see we have added name so in this one just provide text neutral 800 then text large then font medium similarly in this second P tag we will add the text color then a small text size save the changes so now these
text are looking Good after that we will add the CSS properties for this div where we have added the input field so let's add the class name and in this one we will provide margin top Flex item Center Gap and text size small save the changes now our cards are ready and here we have total 15 doctors after that we will add the custom font in the admin panel for that let's come back to the index.css File and uh then come to web browser and here we will search for outfit font let's open the first
website which is fonts. google.com we click on this get font then click on get embed code then just click on import and copy this import statement after that in this index. CSS file we will add one CSS properties for all the elements that is font family here we will add outfit and after that in the first line We will paste the import statement that we have just copied from Google font website save the changes and close this file after that let's come back to the web page and reload this web page so you can see
the updated outfit font on this website next we will add the functionality so that when we click on this checkbox then it will change the available property in the doctor's Database so the available property will be false and we cannot book the appointment with that doctor so let's come back to the vs code editor and we will come to backend folder and in this backend folder we will open admin controller.js file then we have this Dr controller.js file so let's open Dr controller.js and in this file we will create one Arrow function in this file
we are going to create One controller Function with the name change avail ility so let's add cost change avalability equal to we will use the snc and we will create one Arrow function in this parameter we will get the request and response after that here we will add the track die catch block here we will add the functionality in doctor's controller because we need This functionality in both admin panel and do dashboard that's why we are adding this functionality in Dr controller.js file after that if any error occurs in the tri block then this catch
block will be executed so let me just copy the code from this cat block and paste it here now we have to export this function so just add export and in this one provide the function name now in this Tri block we will add The logic so that we can update the available status from the database so first we have to get the doctor ID so whenever we will make the request we have to send the doctor ID so just add const cly veres and here let's add the doc ID equal to request do body
after that we have to find the doctor's data using this doctor ID so just add con do data equal to a Wait here we will use doctor model so it will import the dror model from Dr model do JS file after that we will use find by ID method and in this method we have to provide our doctor ID that we will receive from the request body so we have provided the doctor ID after that here we will change the doctor data available property so just add await doctor Model then we are going to use
the find Y idid and update method in this method we have to provide the doctor ID after this doctor ID we will add one object and in this one we are going to declare which property we are going to update so let's add the property name that is available and here we will make it true if it is false and if it is already false we will make it true for that let's use this doctor data so let's add Not doc data dot available property after that we have to send one response so to send
the response just add response. Json and here let's pass the object where we will add the success property that will be true after this success property true we will add the message property here we will add the message that will be availability changed so now we have created the logic For the change availability Control Function next we will create the route so to create the route let's open admin route. JS file and let's duplicate this line and here we have to provide the end point so let's add slash change availability here we are going to
use this Au admin here instead of this all doctors replace it with change availability so it has been imported From Dr controller.js file next we have to save the changes next we have to add this logic in the this doctor list page so that when we click here it will change the available property so let's come back to the vs code editor and close these files and let's open admin context. jsx file and here we will create one Arrow function to change the available property using the API for That we will create one Arrow function
so so let's add const change availability and it will be one asnc Aro function so just add asnc and create the arrow function in this parameter we need the doctor ID after that we will add the TR catch block and in this Tri catch block let me copy the toast eror from here and if the error occurs in the tri block then this catch block will be executed and it will Display one t not notification to the admin after that in this Tri block we will call the API so just add con curly say and
here let's add the data so we will D structure the data property from response after that let's add the await exos here we will use the post method next we have to add the backend URL then we will concatenate the API Endo so the API end point is going to be/ API SL admin SL change Availability after that we have to send this doc ID in the body so let's add the curly bres and provide doc ID after this doc ID here we have to add the headers so in this object we will Define headers
and in this one we will add curly addes and let's add the admin token so now we have created the code for the API call next we have to check if the data do success is true so just add if Data. success and if it is true in that case the operation will be successful and the available status will be changed so let's add toast notification so just add toast dot success and in this one just provide data. message after that if the doctor's available data has been updated then we have to update this doctor's
estate variable Also for that simply call this function get all doctors so it will update the data for us so after this toast do success we will call this function get all doctors after that we will add the else condition if the data do success is false so in this case we will display one toast notification with the error message so just add toast. error here we will provide data. message so we have created the change Availability function next we have to pass this function through this context value so just add ch change availability in
this value now save the changes and come back to the doctors list. jsx file and here we will D structure that function so just add the function name change availability after that we will come to This input field here we will add the onchange property after adding the on change property we will pass the arrow function here and in this one we will add this function after that here we have to provide the doctor ID so to get the doctor ID just add the item that we will get from the map method and in this
one we will use doore ID property now save the changes and Come back to the web browser if I reload this web page and click on this check box so here you can see one notification availability changed now the checkbox is unchecked after that let's open the database and click on this refresh button and here you can see in this data the available property is false again if I click on this checkbox so again it will become checked and if I refresh this Database now you can see the available property is true so this functionality
is also working fine so till now we have created this add doctor Page then doctor list page after that we will come back to the front end project and we will integrate this API in our front end for that let's come back to the vs code Editor we will close these files and let's open front end folder and in the front end folder we will create one envirment variable so right click on this front end folder and select new file and write the file name do EnV in this file we will declare the backend URL
so let's add V backend URL equal to http Local Host Port 4000 we will save the changes after that in this front end folder we will open context then open app context. jsx file in this file we are going to call the API and we will get the doctor's data from the API for that here we will import the exos package so just add import exos from exos package after that we have to get the Backhand URL from our environment variable for that after this currency symbol let's add const backend URL equal to here we
are going to use input do meta do EnV dot we will provide the environment variable name so let me copy the name from here and past it here we backend URL after that here we will create one add function where we will call the API For that let's add the const function name is get Doctors Data equal to and it will be one async Arrow function so just add as sync and create this Arrow function here we will add the TR catch Block in the TR catch block we will call the API so to call
the API in this Tri block let's add one variable so just add const data and we will get the data from the API response using exos so let's add equal to a Wait we will use the xuse package dot get method after this we have to provide our backend URL here we have to add this equal to after this backend URL we have to add the end point where we have added the doctor list API so just add/ API SL doctor slash list after calling this API we will get This data so here we will
check if our data do success is true in that case we are going to save this data in a estate variable let's create one estate variable with the name doctors so just add const doctors Setter function name is set doctors equal to user State and initialize it with empty aray here you can see we have imported This doctor's data from assets so now we don't need this so let me remove this import from here and we will provide the doctor's data using this estate variable now when we receive the doctor data from the API call
then we will save the details in this doctors State variable so just add the setter function set doctors and provide data do doctors after that save the changes and come back to the frontend here you can see we don't have any doctor data Because we have created this function but we didn't call this function so to call this function here we will add the use effect in this use effect we will pass one AR function and provide the dependency array and in this function we will add get doctors's data function and this function will be
called whenever we will load the web page after that if we get any error in the tri block then this catch block will Be executed and here we are going to add the console log error so we will console log the error after that we will display one toast notific notification also so to give the toast notification we have to set up the react toasttify in the front end project so let's come back to the web browser open a new tab and we will search for react toasttify here we will get this react toasttify Npm
page scroll this and here we have two import a statement so let me just copy it and come back to the vs code editor and now open app.jsx file and in this file we have to import it after that here in this div we will add toast container tag we will save the changes now the react toasttify has been set up now we can give the toast Notification from this page so first we have to import the toast method from the package so just add import cly bres toast from react toasttify package after that in
this catch block let's add toast do eror and here we will provide error. message now if we get data do success is true in that case the doctor will be saved in this state variable and if it is false in that case we will add the elsea statement and in this elsea Statement we are going to display a toast notification so just add toast. error and just provide data. message that we will get from the back end after that we will save the changes and come back to the web browser let me close this tab
here we are getting request failed so if I refresh it again we are getting request failed with a status code 404 we are getting this error because we have not created this API till now so First we have to create this API so let's come back to the backend folder and in this backend folder we will open doctor controller.js file and here we will create one function so that we can get all doctors list for front end for that let's create create a function with the name doctor list so just add const doctor list and
it will be one a sync Aro function here we will add the tri catch Block in this TR catch block we will add const doctors equal to here we will use a weight doctor model in this doctor model we will add do find method and in this one just add the curly bres so we will get all the doctors now from the doctor's data we have to remove the doctor password and email property so we will not get the email and password in the front end API so let's add the select tag and in the
Select tag let's add the array and here we are excluding multiple properties that's why I have added the aday and in this one just add the dash password then add comma and in the second code we will add Das email so we will exclude the email and password and other data will be saved in the doctor's variable next we have to create the response so just add response. Json here we will add one object where We will define success true and after that we will add doctors that we will get from this response that we
will get from this statement and after that if we get any error in this triy block then the catch block will be executed so just copy this line from here and paste it here after that we have to export this function so just add doctor list function Now save the changes and come back to the dr.js file here we have to create the route for the doctor so as you can see in this app context we have added this API / doctor /list so we will create this API endpoint so let's come back to the
Dr route. JS file in the backend folder first we will import the Express package so just add import Express from Express package after this Import here we will create one router instance so just add con and write the name Dr router it will be equal to Express dot router function now we will get the doctor router and using this we will create multiple endpoint so first we'll create the endpoint to get all doctor list so just add Dr router dot we will use the get method and inside this we will add the path that is
SL Doctors slash list and after that we will add the comma and here we have to add our function that is Doctor list in this function we have to add the parameter also that is request and response save this file and come to dror route. JS file and here we have to import that controller function so just add import doctor list so we are getting this suggestion so just click here after that here we have to add Dr Controller.js after that we can use this function here doctor list now we have to export this doctor
router from this file so just add export default doctor router Now using this doctor router we will create the endpoint that will be/ API SL doctor so let's come to server.js file in the backend folder and in this file we will add one App.use in this one we will Define SL API SL doctor after that we have to add the comma and we will add the doctor router we will select it from the suggestion so it has been imported you can see in line seven now save the changes and come back to the web browser
if I reload this web page now we are getting the doctor's data From the API now if I click on the first doctor so we are getting this doctor details here we are at the appointment page and here we have this doctor ID we can click on any other doctor so you can see the another doctor profile page after that we'll create the functionality of user authentication so that user can log in and log out from this web page so let's come back to the vs code editor and in this one we will close these
Files now we will open the backend folder in this backend folder we will open controllers folder and in this controllers folder we will create a new file that is user controller.js so just add user controller.js in this controller function we will create the API Logic for the users like login register get profile update profile book appointment displaying the booked Appointment and cancelling the appointment and we will also add payment Gateway so let's create the API controller function to register a new user using the email name and password for that let's add one comment here we
will add the comment text that is API to register user after that we will create the Aro function with the name register user it is going to be a a sync Aro function so just add a sync and create The Aro function with parameter request and response inside this function we will add the tri cat Block in this try block first we are going to take the username email ID and password from request. body here we will destructure the property so just add const and we will add the craes we will add name email and
password we will get these details from request. Body after that we have the email name and password first we have to check if any of this property is empty in that case we will terminate this function and return a response so let's add the if statement in this if statement let's add the condition not name or not password or not email if any of these property is empty or undefined then this if block will be executed and it will return a response Using the Json method here we will add the success property where we will
add success Falls then we will add the message property and in this message we will provide a message that is missing details after this if statement we are going to validate the email if the email is correct or not so to verify that we are going to use one package which is validator so first we have to import that package so let's add the import Statement we will add validator from validator package here let's add the if statement and in this if statement we will add not of validator is email property and in this one
we will provide the users email if the user email is correct then this validator do e email will provide true and if it is not valid Then it will provide false and if it is providing false we are using the not operator so then this if block will be we execute it and in this one we will display the message so let's add the return statement so just copy it from here and paste it here here we will update the message so here let's add enter a valid email after that we have the name password
and a valid Email now we will validate the password so next we'll check if the password length is minimum 8 character for that let's add the if statement and here we will check if the password do length is less than it in that case this if block will be executed and here we will return the response so let me just copy and paste it here here we will add the message enter a a strong password now we have the name password And email we have validated the email and password next we can add this user
in the database to add the user in the database first we have to has this password it means we have to encrypt the password using the bcrypt package so first let's import that package so just add import bcrypt from bcrypt package so we have imported this bcrypt now using this bcrypt we will has This password so to has this password we have to add one comment and here let's add the message hassing user password let me add the comment here also that is is validating a strong password Here we will add the comment validating email
format after that here we will create one variable that will be salt so to have the password we need the salt So we will generate the salt using the bcrypt package so let's add equal to await bcrypt dot gen salt function here we have to provide the number of rounds so we can provide the value between 5 to 15 so let me add the value 10 now we have the salt and password now we can has this password using this salt so just add one variable so just add const hased password equal to a wait
here we will use bcrypt package Dot has function and in this one we will add user password and salt by executing this statement we will get the has password next we have to save this has password in the database for that let's create one object with the name user data so just add con user data equal to curly veres here we will add the usern name email that we will get from the response then we will add the password and in This password we will not provide the original password instead of that we will provide
the hased password so just add colum has password now we have this user data next we have to save this user data in the database as you can see when we open the user model so here we have the name email password word then the image property by default we have provided this image then we have the address gender date of birth And phone so here we are adding these three details these details can be edited from the my profile page that we will create later so after that here we have to save this data
in the database so just add the user model so let's add cost new user equal to new we will use the new operator then the user model just click on this one so it will import this user model from the Models folder user model. JS in this user model we will provide this user data after that we have created a new user using this user model next we have to save this new user in the database so just at const user equal to await we will use new user do save method by doing this the
user will be saved in the database after that in this user object We will get one underscore ID property and by using this property we are going to create one token so that user can login on the website so let me remove this comment and here we will create one token so to create the token first we have to import the JWT package so just add import JWT from Json web token package after that here we will create create one variable with the name token here we are going to use JWT do Sign method in
this one we will add one object as a data and in this one we will Define the ID property that will be user doore ID after this object we have to provide one JWT secret so that encrypt this token so in this EnV file we have added this JWT secret as you can see here so we have to provide this environment variable after this Object so let's add process dot EnV dot JW tore Secret so here we have added this JWT secret next we have the token also now we can generate the response so that
we can send this token to the user so just add response. Json and this one we will add the object and in this one just add the success Property true after that here we will add the token that we have generated here using this user ID so we have created the controller function to register a user now if we get any error in this Tri block then catch block will be executed so here we will console log the error and with that we will send the response also so let's open Dr controller.js file just copy
this Statement from catch block and paste it here after that we have to export this function so let's add export then we'll add the object and in this one we will add the function name that is registered user Now using this function we will create one route so to create the route in this routes folder we will create a new file and the file name will be user routes.js so let's add user route. JS here first we will import the Express package from Express after that we will import the function that is registered user that
we have just created so just add import addes register user from controller folder user controller.js after this line we will create the instance of the router using this Express so just add const user router we have added the name user router then we will use the Express Package Dot router interface after that we will create the API using this router so we will create the endpoint to register the user so just add user router dot post method and the end point will be/ register after that here we will provide the registered user function next we
have to export this function so just add export default user Router after that we will use this user router in this server.js file so let's open this file and after this line we will add app.use here we will add the endpoint path that is/ API SL user after that here we have to provide the user router so we will select it from the suggestion so it has been automatically imported now save the changes and we will test the API that we have just created which is registered User that is mounted at this/ API SL userregister
so we will test this API so let's open the Thunder client here we will open a new request that will be post and let's add the address that is HTTP Local Host Port 4000 SL API SL user SL register next here in this body we will add the Jon and in this one we will pass one Email ID password and name so let's add the name property and let's add the name that is great stack that's our YouTube channel name after that we will add the email property here we will add the email that is
user. grest tack at gmail.com after that here we will add the password property and let's add this password after that let's save this request so it will be added in the left Side now if i crl s it will be saved and it will add one entry in the left side now let's click on the send button so you can see this success true and here we are getting this authentication token now if I click on the send button again here we are getting this success false and here we are getting the message duplicate key
error collection prescripto do user index so it is saying we have already created One account using this email so we Cannot create another account so we have clicked the send button that creates the account on the database and if we try again with the same email ID we will get this error now let's try with another email so here let me add the email ID we will use great a stackd atgmailcom and click on this send button now you can see we have created another account with this email ID and if we try to login
again and if we try To create another account by clicking on this send button we will get the error now let's try to create one account with demo gmail.com here we will provide password 1 2 3 now click on the send button here we are getting the message enter a strong password because we have added the condition the password length should be minimum eight corrector so we cannot create an account with password length is less than 8 character now let's Provide the correct password like password of eight character and in this email we will remove
this at theate and click on the send button here we are getting enter a valid email because it is not a valid email type so it is validating the email also so this logic is working fine so this API is for user registration next we will create the API for user login so let's come back to the user controller.js file and here we will Create another Arrow function after this function so just add the comment the comment text is API for user login and here we will create the arrow function with the name login user
so just add const login user equal to snc and in this parameter we will get request and response here we have created this AR function now now we will add the try catch block and in this catch block we Will add the same code just copy and paste it here now in this Tri block we will get the user email and password from the request so just add const cly addes email password equal to request. body so here we need the email ID and password to login the user after that using this email ID we
will find the users's data so just add const user equal to Await here we are going to use the user model do find one method in this method we will add the object and we will provide the email that we will get from the requestbody after that we will get the user data in this variable so next we have to check if the user exist with this email ID or not so just add the if statement and here let's add not user so if we don't have any user with this email ID then this block
will be Executed and here we will return the response so let's copy this response. Jon paste it here and in this message we will add user does not exist after this if statement if the user exist in that case we have to match the password that we have saved in the database and we will get it from the user login Form so to match it here let's add one variable with the name is match equal to here we are going to add await here we have to use the bcrypt package so just add bcrypt do
compare function in this method we will add the password that we will get from the request. body and after that we will add the user password that we have hashed and saved in the datab datase so just add user dot Password after that here we will add the if statement and here we will check if is match is true in that case our password and user password is matching so here we will create one token and set it to user so that user can login in the web app so just add con token equal to
here we are going to use JWT DOT sign method then add the object where we will Define the ID property where we will Provide user doore ID after that here we have to provide JWT secret so just add process Dot EnV dot JWT secret after that here we will create the response so just add response. Json here we will add the object where we will Define the success property that is True after that we will add the token that we have generated in this statement if the password does not match in that case we will
add the else statement and here we will generate one response so just add response. Json and here let's add success fals after that we will add the message property in this message property we will add the message that will be invalid credentials we have to add this success and message Property in one object so that we can send it as a response so wrap it with CES so we have created the login user controller function now we will export this function so here let's add login user now save this file and let's come to user
route. JS file here we we have to D structure that function so just add comma login user so we will get this function now we have to create this route so let's create one copy of it and here we will Add the path SL login and here we will provide the login user controller function so we have created the login API next we have to test this API so here we have created created One account using this credential as you can see on the screen so here we will change this register path to login path
we have added the login API endpoint then remove this name property now just click on this send button so here you can see we have Called this endpoint using this email ID and password we have used the same email ID and password to create an account so you can see we are getting success true and token so now we can log in using this API suppose we provide the wrong password we have added nine and click on this send button now it is displaying the response inv valid credentials now if I provide incorrect email ID
so let's add user gmail.com and click on the send button here we are getting user us does not exist so our API is working fine next we have to integrate this API in our front end for that let me close these files from here make sure all three terminals are running admin backend and front end so here in this backend terminal we are getting the error in this user controller .js file so let's open this File line number 63 here we are checking if the user is not available so we are sending the response so
here we have to add the return statement so that it will terminate the function here after sending this response now save this file so it will restart our server now it will resolve this issue now close this file hide this terminal next we have to integrate the login and registration feature with our Front end so let's collapse all the folder and we will open the front end folder then go to SRC pages from here we will open the login. jsx file as you can see here we have these State variable that store the input field
values Now using these State variables we will call the API now whenever we will login or sign up then we will receive one token so to save that token we will come to context Folder and open app context. jsx file and here we will create one state variable with the name token where we can store the user authentication token here we will create this state variable just add const token seter function name is set token equal to user State and initialize it with empty string here we have to provide the token and set token in
this value object so just add token and set token Next we have to place this value after this function so let me move this we will remove it from here and paste it after this function after that in this value property we will pass the backend URL that we are getting from the environment variable now save the changes and come to login. jsx file and here we have to destructure the Token State set token function and Backend URL variable so just add const then add this object and here we will provide backend URL token and
set token function equal to use context hook and here we have to provide app context file so this file has been imported here now we have the backend URL token and set token function next we need the exos package so that we can do the API call so just add import exos from exos Package after that we can make the API call in this function so to make the API call first we will add the try catch Block in this triy block we will add the if statement here we will check if our state is
sign up then we are going to call the registered API and if the state is login then we will call the login API for that in this if statement let's add the condition if the state is equal to sign Up S will be Capital here in this if statement we will write const curly bres data equal to a wait here we will use exos do poost method in this one we have to provide the backend URL and then we will provide the end point path that that is / API SL user SL register after that
here we have to pass the body so in this body we will pass the object with name password and Email after that we will get the response so we will check if the data do success is true in that case we have successfully created the account and we will receive the token so let's add the local storage do set item here we will save the token in the local storage as well as we will save the token in state variable so first let's save it in the local storage so we have added local storage. set
item and The key name will be token and we will save data. token after that we have to save this token in the estate variable also so just add set token and in this one we will add data. token now if the data. success is false in that case we will add the else statement in this else statement let's add toast notification so just add toast so it will import the toast from react toasttify package then add toast. error here we will provide data. Message after that this logic is for the registration and if the
state is not equal to sign up so in that case just add the elsea statement and here we will call login API so let me just copy this line from here and paste it here here we have to remove this register and we will provide login path and remove this name we will send only password and email for the Login rest of the logic will be same for both and if we get any error in this try block then the catch block will be executed so in that case we will display one toast notification so
just add toast dot error and here just provide error do message here we have to link this function with our form tag so whenever we will submit the form then this function will be executed so just add onsubmit property in this form tag and here just provide onsubmit Handler Function function that we have created here after that in this button tag let's add type and we will provide submit now our page is ready now save the changes and after saving this file we will come to components folder navb bar. jsx file and from here let
me remove this Tok that we have created for temporary use Save the changes now we will get this token and Set the token from the context API so just add const cly addresses token set token equal to use context in this one we will provide the app context now we will get the token and set token function so next to log out the user here we have created this P tag where we have added this text log out so here you can see to log Out the user we are removing the token from the state
variable but while logging the user we have also saved the token in the local storage so to to create the log out functionality here we have to create one function so just at const log out and it will be add a function here we will set token with empty string and after that we will add the local storage do remove item and in this one we will add key Name that is token next we have to link this log out function with our paragraph tag so in this paragraph tag let me remove this and here
we will provide log out function now insteed of this empty string we will add false now save the changes and come back to the web browser now you can see we are at the homepage we are not logged in we will click on create account button so it Will open this form here we can create a new account we have already created One account so let's go to the login form and here we can add the email ID and password so this input is not working so let me come back to the login. jsx file
here in this input field we have added this e. target. name so here we have to add the value e. Target. value same in this one also we have to add e. target. value and in this password also we will add e. target. value so by mistake we have added the name property so we have added the value property so whenever we will add the dat in the input field that data will be saved in the state variables now save the changes and come back to the web browser now we can write something in This
input field so let's add the email ID user. grest gmail.com and after that here in this password field let's add the password that we have used to create the account 1 128 and click on the login now you can see the create button has been removed and here we are getting is drop- down menu if I click on inspect and just go to application then in this local storage you can see we have the Token that we have created while creating the account as you can see in this local storage we have the entry with
token and in this one we have one token value so after that when we are logged in we we are still at the login page so we have to solve this issue so let's come back to the login. jsx file and after this function here we will add one use effect and in this use effect we will add the arrow Function in this Arrow function we will add the dependency aray in this aray we will add the token state so whenever our token token gets updated then this function will be executed so here we will
check if we have the token in our login page in that case we will send the users on the homepage so we have the token it means we are logged in so user will be redirected to the homepage from the login page for that here we will add Const navigate is equal to use navigate hook after creating this in this use effect we will add navigate and just provide homepage path that is slash save the changes now you can see we are redirected to the homepage still we are logged in and here we have the
token now if we reload the web Page again we are getting create account and we are logged out because we have stored this token in the local storage but whenever we are reloading the web page our estate gets recreated and in this app context here we have to add the logic so whenever we will reload the web page so it will check the token from the local storage and if it is available it will save the token in this state for That remove this empty string and here we will use the turn operator so just
check local storage dot get item if it has a token property then we are going to provide the value of this token so just copy it and past it here after this question mark and if it is not available then we'll add the colon and initialize the value with bullan data false now save the changes reload the web page now you can See we are still logged in because it will fetch the token from the local storage and it will use it in the token State now if I try to go to login page by
adding SL login it will again redirect us to the homepage because we have the token in the token estate and if I click on the log out button it will remove the token from the estate variable as well as from the local storage you can see the local storage is Clear after that we will login with our account so let's add the email ID user. greatest tag at gmail.com then we will provide the password 128 and click on login so we are logged in in the web page after that if I come to my profile
page so this is the static profile page so now we will get the users detail from the API and display the users data here so to get the users detail from the API for first we have to create the API for for that just close all these files and come to backend folder and here we will open controller folder user controller.js file so after this here we will create a new controller function to get the users's profile data here we will add one comment that is API to get user profile data after that we will
create one Arrow function with the name get profile so just add const get profile is equal to S Sync and here just create one Arrow function in this Arrow function parameter we will get request and response after that here we will add the try catch Block in the try block we will get the user's ID and by using that user ID we will get the users data and we will provide that user data to front end so we will get the user ID using the authentication for now let's add const curly veres user ID equal
to request do Body we will not get the user ID from the user user will send the token and by using that token we will get the user ID and we will add the user ID in the request body so that we can access it in this function now to change the header into the user ID we are going to create one middleware with the name Au user.js so let's create a new file with the name AU user.js here we have created au admin. JS file That is authenticating the admin so let me complete code
from here and paste it in this Au user.js here we will make some changes so let me add the text user authentication middleware and name the function Au user here also we will name the function Au user we will get the token in headers so here remove this a it will be only token instead of a token we are adding token here also remove the A so here we will get the token from header and here we are checking if we don't have the token then we are sending one response and if the token is
available then we will decode that token so here also we will provide token process . env. JWT Secret After decoding this token we will receive one object if we see the user controller.js file while creating the token we have added the Object as a data in which we have the ID property and it contains user so we will get the user ID from this token decode and we will provide that user ID in body for that here we will write request do body dot user ID equal to token decode do ID by doing this we
will get the user ID from the token and it will be added in the request. body and we can use this user ID in our controller Function after that save the changes and we will come to user controller.js file and here after getting the user ID from request. body we have to find this user so to find this user we have to get the users data so to get the user data we will use the user model for that here we will create const user data equal to await and here we will use user model.
find by ID method and provide user ID then we Will add select Das password so it will remove the password property from this user data after that we will create one response so just add response. Json in this one we will pass success true and user data property here in this response we are sending success true and and we are adding the user data and in this user data we have excluded the users's password if we get any error in this triy block then catch block will be Executed so let's copy this statement from catch
block and paste it here now we have created the get profile function now we will export this function using this object so let's add comma and provide get profile now by using this controller function we will create one route under user route. JS file so let's open this file in this file here we will create a new route so Just add user router Dot and the route type will be get here we will add the endpoint path that is/ getet profile after that we will add the controller function that is get profile we are getting
this suggestion so just click here so it will import this here to get the profile here we have to add the all user middleware also so you can see the O user middleware has been imported now whenever we will call the API then we will provide the token in header and then we will be able to get the user profile details now save the changes and test this API to test this API first we will open Thunder client and from here we will open this last request that is this one/ API SL user SL login
if I click on this send button here we are getting this token right so let me copy this token so select it and crl C for copy Now let's create a new request the type will be get and here provide the endpoint address Local Host Port 4000 API users SL get profile after that click on this send button here we are getting the message not authorized login again now let's go to head here we will add token and in this value paste the token that we have just copied from this request you can copy this
token from the Local storage also after that click on the send button now you can see when we provided the token we are getting the user ID name email image that is this default image after that we are getting the address gender date of Worth phone so our API is working fine let's close this API request and close these files now let's open user controller.js file here we are getting this profile next we will add one more Controller function so that we can update the user profile for that let's create a new controller function so
in this controller function we will add one comment API to update user profile after that here we will create one Arrow function with the name update profile so just add cost update profile equal to it will be asynchronous Arrow function here we will get request and Response in the parameter here we will add the TR catch block let's copy the code from the catch block and paste it here to update the profile first we need the datas from the request so just add const curly bres and here we will get the data like user ID
name phone address date of birth gender we will get these details from request. Body so just add request. body so while calling this API we can send the name phone number address date of birth and gender this user ID will be added from the token using the middleware that we have created here or user middleware we will also receive one image in this file using the molter so just add const image file and in this variable we are going to store the image so let's type request. File we will get this file from the request
if we have to update the image then we have to send the image file and if you don't want to update the image then we will not send the image file in the API call after that here we will check if we have the name phone address date of birth and gender property then only we are going to save the data else we will throw one message that is data missing for that in this if statement let me just copy and paste it Here in this if statement we will add the condition not name or
operator not phone or operator then not date of worth then OD operator then not gender we are going to check name phone data of worth and gender after that if any of this property is not available then we will send one response so just add return a statement and in this return a statement we will create one response using the Json method in this method we will add one object where we will define success that is false after that we will add the message here we will add the message data missing if we have all
these properties then we will update the user data using these properties for that we will add a weight user model dot findy ID and update in this one we will pass the user ID after that we will add one object where we will provide name phone then provide address so whenever we will get the address using the form data then the address will be converted into string so here we have two pass it so that we'll get the object from that string so just add colon we will add json. pars and in and in this
one provide this Address property after that we will add one comma and here just provide date of birth comma gender right click and select format document here we have provided the user ID so this function will find this user ID and update these properties using these values after that we will check if we have the image file also in that case we will upload this image to the cloud NY and the URL of that image will be saved in the users data image property for that let's add the comment we will add the comment text
upload image to Cloud NY after that we will create one variable so just add const image upload equal to here we are going to use the cloud package so first we have to import that package so scroll up at the top here we will add import a statement V2 from cloud package and and here we will import V2 as cloudin after that let's us scroll down and come to our controller function and here we will use await we will use the cloud NY dot uploader dot upload method in this method we have to provide our
image file path so just add image file. path After that we have to declare the resource type that will be image after that we will get one response where we will get the image URL and then we will save the image URL in one variable so just add image URL equal to we will use this image upload do secure URL that we will get from this variable so after executing this statement we will get the image in the Cloud NY and in this variable we will get the cloud NY image URL next we have to
save this image URL in the users data for that just add a wait and here we will use the user model do find by ID and update method here here we have to provide the user ID then we will update the image property so in this object we will add image property and in this image property we will save the image URL so Just add colon image URL by adding this we can save the image in users data after that let's create one response so just add response. Json and in this one we will add
the success property that is true after that we will add the message property and in the message we will add profile updated now our controller function is ready to update the user data next we Will use this controller function to create one API endpoint so before that here in this export we will export this function so just add update profiles save the changes and come back to the user route. JS file and here we will D structure that function so just add update profile now using this controller function we will create the API out so
here we will write user router dot here we will use the post method and the Endpoint path will be/ update profile after that here we are going to use use the form data and in the form data we will send the image also so before that we will use the multer middleware so just add upload we are not getting the suggestion so let's open m. JS file after opening this file if we write upload now we are getting this upload from middleware SL multer DJs file so you can see upload has been imported After so
that we will add dot single we are using the single method and in this one we will add the field name in which we will send the image so write the field name image we will send the image in this image field name after that we will add the comma and here we will add the update profile controller function now if I come here we need this user ID in this function that we will get from the Au user Middleware using the header token for that here before this update profile controller function we will add
the comma and between these comma we will provide Au user middleware so here we are using two middleware first one is for passing the form data and the second one is for authenticate the user and getting the user ID now we have to use this upload Middleware before this Au user middleware so that our image will get passed after that we will authenticate the user now let's save the changes and let's open the web browser we will open the mongod DV Atlas page here we will open open database after that we will click on this
browse collections here we have this prescripto let's open It in this one we will open users collection here you can see we have two users that we have created earlier so here we have this user email ID user. gr@ gmail.com and in this one we have one address then we have gender not selected date of birth then phone number now we will try to update these data using the API so to update the data we will come to thunder client and here We will open the last request get profile where we are sending headers token
now now we will change the method type post and here we will add the endp point update profile after adding this we will open body tab then go to form and here we have to provide the data like name phone date of birth and gender so let's come to request tab here we will add the name and let me update The name so here we have the name greatest tag so here we will provide another name that is tast name so in the name we are providing test name after that we need the phone number
so let's update it we will add the phone and in this phone property we will add the number after that we need date of birth so here we will add date of birth and here in this value property let's add one Value after that we need this gender property so let's add the gender in this one we will add property mail so here we have added this update profile and here we have added the token in the headers and in the body we have added the form data and in the form data we have these
data save this request and click on send button here we are getting this message undefined is not a valid G because here we have added this address Property where we have to provide one object as a string so let's open a new tab and here we will search for Json two string online let me open this website Json for.org here we will add one object and in this object we will Define line one property in this one we will provide the dummy address like Main Street after that we'll add the comma and add line two
property here we will add dummy address second road now wrap this line one in the quote and in this line two also in the quod now just copy the object from here and paste it here so here we are getting this object now click on this send button now we are getting this response success true and the message is profile updated let's open the database Click on the refresh button so here you can see the name has been updated then the address you can see the address object has been updated in the line one we
have the main State then we have the line two where we have added second road then the gender has been updated then the date of birth has been updated and we have updated the phone number also So this update profile is working fine next we will update this image also here we have this base 64 image so we will replace this image with the image file so let's select the image and here we will choose one file let's open the front end folder SRC assets and from here let me select this profile image and here
we have to add the field name that will be image and click on the send button now you can see success true and Messages profile updated after that we will refresh this database now you can see the user details here we have the test name and in this one we have the image property and you can see in this image we are getting the URL of cloud image let me copy the image and paste it in the new tab so you can see the image has been uploaded to the cloud n and it is saved
in the image property for the user so this image upload is also working Fine now let's close this request from here next we will integrate this API to get profile and update profile with our front end for that let's close these files and after that we will open front end folder we will open SRC context app context. jsx file in this file we will create one state variable where we will store the user data so here let's add const we will name the variable as user data set user data will be set function And equal
to user State and initialize it with false next we will create one Arrow function using that we will get the user data and we will save the data in this state variable for that here just add con we will add the function name load user profile data equal to async and here we will create this Arrow function in this Arrow function we will Add the try catch block first we will copy this console log and toast error from the sketch and paste it here after that in this Tri block we will add con curly presses
data equal to await here we will use the exos dog method here just provide the backend URL after that we will concatenate the end point of the API address so just add SL API SL user SL get profile after that here we have to add the Headers for that let's add curly Braes and provide headers and in this headers we will add one object and in this one just provide token so we have added the headers also now we will receive the response data and in this data we will get the users profile data so
first We'll add the if statement and here we will check if the data do success property is true in that case we will write set user data and in this one we will provide data do User data suppose the data do sucess is false in that case we will add the else statement and in this else statement we will add toast. error here we will add data do message so our function is ready next we have to run this function whenever the user will be logged in so for that we will use the use effect
hook so after this use effect we will add one more use Effect in this one we will pass this Arrow function here we will add the dependency are and in this one we will add the token in this use effect we will add the if statement here we will check if we have the token in that case we will call load user profile data and if we log out then we don't have any token in that case we will add else statement now when We logged out from the website then the token will be unavailable
in that case we will add the else condition and we will clear our profile data state so just add the else statement and in this one just add set user data here we will provide Boolean data false now we are getting this user profile data in this estate variable after that we will add this user State and set user data in this value property so that we can access it in any Component so just add user data and set user data after that we will will add this load user profile data function so just copy
and paste it here in this value object now we can use this function in any component after that let's come to Pages my profile. jsx page here we are displaying the data using this user data State variable right now just remove this from here and here we will get the date from the state Variable that we have created in the context file so just add const curly veres user data after that here we will add set user data equal to use context in this one we will provide the app context now we can remove this
assets from here that we have imported earlier just remove it and after let save the changes and come back to the web browser so let's open the front end website and here you can see we are at The my profile page right now we are getting these data from our database using API if I reload this web page here we are getting one error so let's see the console here we are getting property undefined this error is coming because when we are reloading the web page then this user data is not in initialized this user
data is coming after the page load to solve this problem here after this return just add user data and this Operator so if we have the user data in that case it will be visible and if it is not available then this UI will not be visible now save the changes and come to the web page and if I reload it you can see it works fine now we have to create the function so that we can update the user data if I click on edit you can see we can edit these input Fields so
let's try to edit the phone number here we'll add the tri0 save the information now these changes are Locally saved if I reload the web page again we will see the previous data it is not updated in the database so now we will add the logic so that if we edit any of these data and click on the save button then the changes will be saved in the database also for that first let's come back to the vs code editor and after this state variable is edit here we will add one more State variable we
will name it as image set image equal to user State And initialize it with false after that we will create one Arrow function with the name update user profile data so just add const update user profile data equal to snc here we will create this Arrow function in this Arrow function we are going to call the profile update API for that we need the token backend URL and load user profile data so we have to D structure these state from the context File so just add token back end URL after that we will add load
user profile data so we are getting the token backend URL and this function by using these we will call the API to update the profile Data before that here we have these fields to update the name phone number address gender and date of birth but here we don't have the option to update the profile image so first we'll create the logic so That we can update the profile image and if we change the image then we will store the image in this state variable that we have created here for that here after this TI we
will add one Turner operator here we will check if our is edit is true in that case here we will add the label tag if it is false here we will add the column and here we will return one image tag so let's place this image tag after this Colum save the changes if I click on this edit button you can see the image has been removed and if I click on the save button if it is again visible now just come back to the vs code and here within this label tag we will create
one div and in this div we will add two images tag so let's add first image tag and after that we will add one more image tag after creating these images tag after this div we will create one Input field with a type file after adding this here we will add the ID property that will be image now remove this name property from here after this ID property here we will add hidden so when we add the hidden attribute then this input field will be hidden now in this label tag HTML 4 we will add
the same ID that is image so whenever we will click on this label then it will access the Input field and we can select select the image after that in this input field we will add the on change property here we will get one event so we can pass this event in this AR function and here we will call the set image function in this function we will add e. Target do files then provide the index zero so we can access that particular Image after that in these images tag we will remove this code and
add the craes and in the first one we will use the tary operator here we will check if our image state has any image in that case we will convert that image into one object URL and we can display that image in this image tag so just add url. create object URL and provide this image State suppose the image is not available in this image state in that case here we will provide the user image so just add User data. image similarly let's copy this turn operator from here and paste it here in this image
tag here if we have the image in this image state in that case we will return one empty string and if we don't have any image in this image State variable in that case here we will provide one image from our assets so first we have to import the Assets so just add import cly bres assets from double do/ assets folder SL assets file now after this column we will provide assets dot upload icon now save the changes and come back to the web browser now if we click on edit button here we are getting
this image from this IMG tag now if I select any image let me select the image from the project Folder front end folder SRC s sets we have multiple images so let me select this image for now so here we are getting the preview of this image so this logic is working fine if we are selecting the image then the image has been stored in this image State variable and we will be able to display that image preview using this create object URL if I reload this web page and click on this edit button here
you can see this image tag is added here that is not visible because of the white background so we have to hover this image on this image so that we can see that we are at the edit mode for that we will come back to the BS code editor and here we will add some class name property so first we will come to this Div and here let's add the class name property and here we will provide inline block relative cursor pointer after that we will add the CSS properties in this image tag so just
add the class name property and here we will proide the width rounded op width rounded and opacity 75 after that we'll add the class name property in the second image so here just add class name and let's Provide width absolute bottom and right save the changes now you can see if I reload the web page we are not in the edit mode and if I click on the edit button here you can see we can upload one image so if I select any image this image will be be previewed here after that we will add
the logic so that if I click on this save button then It will get saved in the database so now we are able to add one image in this state variable next we have to make this API call to make the API call first we will link this function update user profile data with this button tag where we have added save info so here we have added the save info in the first button so let's remove this set is edit from Here and here we will provide update user profile data function after that we will
come to this function and in this function we are going to make the API call to make the API call first we will add the TR catch block so just add it in this Tri block first we have to create one form data for that just add const form data equal to new after that here we are going to use this form Data here we have created one form data next we have to insert the data from our user data State variable to the form data because when we are changing the data from here in
this edit mode then the data gets saved in this state variable and when we click on this save info button then we will get the updated data from this user data state so first we will add the name from this user data to this form data so just Add form data dot append method and in this one we will add the field name name then we have to provide the usern name so just add user data do name property let's create one copy of it and here we will add the phone so the field name
will be phone then we'll add user data. phone after that let's create one copy of it and here we will add the address and address will be one object so here Let's add user data do address now we know that the address is one object so we have to a stringify this object for that let's wrap this data in small bracket and here we will add json. a stringify after that let's create one copy of it here we will add field name gender and here we will provide user data do gender similarly let's create one
more Copy of it and here we will add date of birth field name and here just provide user data do dat of birth so to update the user profile this image is optional in that case if the user want to update the image then they can update the image and if the user does not want to update the image they can skip it for that we will add the image State and here we'll check here we'll add this end operator and here just add the form data. appin Method and we know that the we have
to send the image in the image field name after that we will add the image State now if we change the image suppose we reload the web page in this image State we have this data Falls and if we click on this edit option and if we edited these data not the images then this image will not be added in the form data and if we update this image Then in this image State we will store the image then this image will get added in the form data after adding this image we have all the
data now we have to make the API call to update the user profile data for that let's add const curly Braes data equal to a wait here we are going to use the exos package so we are getting this suggestion so just click on it so it Will import it here we are going to use the post method so just add poost here we have to provide the backend URL after that we will concatenate the API endpoint in this API endpoint we will add / API SL user SL update profile after that here we have
to add the form data so just add it here after that we have to add the Headers so just Define the headers and in this one we will add one object and here we will provide token that we are getting from the context API now after this here we will add one if statement here we will check if our data. success is true in that case we are going to display one toast notification so just add toast. success here we will add data. Message after this toast notification we will Reet our user data by using
this load user profile data function so here we will call this function after this toast notification here also we will add a wait after calling this function here we will add set is edit false so we will come out of the Ed mode after that we will add set image function and here we will set False now if the data. success is false in that case we will add the Elsa statement in this one we will add toast. error in this one we will add data. message in this process if we get any error then
this cash block will be executed in that case we will add console log and we will log the error after that we will give one toast notification also so just add toast. error here we will provide error. message here we have added all the logic So let's test it save this changes and reload this web page when we click on this edit button we can rename this name so let's add the greatest T here we will update this phone number so let me add another dummy phone number then let's update the address so let's keep
it main straight and fourth road then we will update the date of birth also so let me select anything 10th January 2000 then click on this save info you can see the message profile updated so the profile has been updated and if I reload this web page you can see we still have these updated data now let's try to update this image so we'll click on this edit button we will select one image from here for now let me select this image then click on this save info so now you can see the profile has
Been updated that we have just uploaded if I reload this web page still you can see the updated image that is uploaded in the cloud NY if I open this image in the new tab you can see the cloud NY link so now we have successfully created the profile page right now you can see we are getting this image we have to display this image in this navigation bar for that let's come Back to the vscore editor and here we will open components folder navb bar. jsx file in this one here after this token and
set token we will get user data from the context after that scroll down and here in this image tag where we have provided the assets. profile pick so we will add the turn operator that will be user data. Image so we have provided user data. image here we are checking if we have the token then we are displaying this div with token we will add the user data so if we have the token and the user data then we will display this drop down menu now let's come back to the web browser here you can
see this image that is the users image let's update this image click on this edit button upload the image we will upload this image click on this save Info now you can see we have the profile updated message and you can see the image has been updated in the navigation bar also that we have just updated from the my profile page so this my profile functionality is also working fine now we will add the logic so that we can book the appoint ment with the doctor and the data will get saved in the mongod DB
database to do that we will come back to the vs code editor and here we will Close this front end folder and we will open backend folder in the controllers folder we will open user controller.js file in this file we will create the logic to book the appointment with the doctor to to book the appointment first we have to create a new model so let's open the models folder and in this one we will create a new file with the name appointment model. JS in this one we will create the Appointment model where we will
describe the appointment schema so just add import from package after importing the here we will create the variable with the name appointment schema equal to new and we will use the DOA Constructor in this Constructor we will add one object and here we will Define our appointment schema structure so first in this model we have one property that is user ID so just add user ID then the type will be a string and here we will add the required property that is true after that we will add the doctor ID then type is a string
and required is true then we have the slot date where we will add the type string required true After that we will add the slot time here we will add type A String required true then we will add the user data where we will store the user data the type will be object and here we will add required true after that we will add the doctor data type will be object here we will add the required true then we will add amount where we will add the type number we will set required true in this
amount Property we will save the amount of the booked appointment after that we will create one more property to store the appointment date when it was booked so just just add date type number required true after that we will add one more property that will be cancelled so if the user cancel the appointment then we will make this data true so just add cancelled property type will be Boolean and by default value will be False after that we will add the payment property so if the user pay the amount online then we will make it
true and if the user has not paid the amount then the payment will be false so just add payment type will be pulan and the default value will be false after that we will create one is completed property so that when the appointment gets completed then doctor can make this is true so just add is completed type will be Boolean and the Default value will be false so we have created the schema for appointment now we will create the model using this SCH schema so just add const appointment model equal to mongus do models do
appointment then we will add the or operator here we will add do model here we will provide the model name that is appointment then we will Provide the schema that is appointment schema so we have created the appointment model next we have to export it so just add export default appointment model so we have created this appointment model using the user id dror id slot date slot time user data doctor data amount date cancelled property payment property and is completed property so whenever the user book an appointment then we have to send the Doctor ID
slot date and Slot time and the rest of the data will be generated in the back end and the user ID will be shed by middleware using the authentication token so our model is ready next we will create the controller function to book the appointment for that let's add one comment here in the user controller.js file add the comment API to book appointment after this comment let's create one Arrow function with the name Book book appointment so just add cost book appointment equal to a sync Arrow function in this parameter we will add request and
response in this function first we will add the try catch Block in the catch block we will copy this statement from the previous catch block and paste it here in this Tri block first we will get the user ID that we will get from the Au user middleware after that we need the doctor ID slot date and Slot time so we will D structure that properties from request so just add doc ID slot date and Slot time we will destructure it from the request. body after that here we will get the doctor data using this
doctor ID to get the doctor data using this doctor ID just at Con doc data is equal to await here we will use the doctor model we are not getting the suggestion of that model so let me open that file Dr model. JS and again come back to the user controller and here just add doctor model so now we are getting the suggestions just click here so it will import this doctor model right after that here we will add do find y ID method in this one we have to provide the doctor ID so just
Add doc ID in this one we will add do select and we will remove the password from this doctor data so just add Dash password after executing this statement we will get the doctor data using this doctor ID and in the doctor data we have removed the password property using this select where we have provided Dash password after this statement here we will check if the doctor is available or not to take the Bookings for that just add the if statement and here we will add not doct data do available property if doctor is not
available to take the bookings then this block will be executed Ed in that case we will return one response so just add return response. Json in this one we will add one object where we will Define the success property that will be false after that we will add the message Property that is Doctor not available if the doctor is available to book the appointment then our function will be executed and here first we will get the slots booking data from this doctor data so here let's add let slots booked equal to Doc data dot slots
booked and in this one we will get the all slots booked in this Variable in this one we will check if on this date and this slot time is available or not for that here we will add one comment and here let's add the comment checking for slots availability here we will add the if state statement we will add one condition and in this condition let's add if slots booked and inside this we will provide the slot date if it has this entry inside it we will Check if this slots booked slot date do includes
slot time here we are checking if the slots booked has this date already then we are checking if this time is included so if this time is already available in the slots booked data then we will return the response so just copy this return statement and paste it here here we will make the success false and In the message we will type slot not available after that we will add the else statement and here what will happen if this slot time is not available in that slots booked data in that case that slot is free
then we can book that slot so just add slots booked then add slot date and in this a we are going to push this slot plot Time and suppose if we don't have that date available in the slots booked it means nobody has booked the appointment on the particular date so here just add the Elsa statement and here we will create one slot date and in that date we will create one slot time for the booking so just add slots booked slot date equal to one are and after that here we will add slot booked
slot Date dot push and in this one we will push the slot time so here we are checking if this slot is available then we are going to book that and if the slot is not available then we are sending one response where the message is slot not available after that here we will get the doctor data and we have booked the slot then we will get the user data using this user ID so just add const User data equal to await here we are going to use user model do findy ID method here we
will provide user ID that we will get from request. body after that here also we will add select and in this one we will add Dash password Here we will get the user data here we have created the copy for slots booked so now we can remove this slots booked data from the doctor data so just add Delete doc data dot slots booked we are removing this property from here because when we save our appointment then we are going to save the doctor data and we don't want the history of the slots booked that's why
we are removing this this property from this doctor data after that we will create one variable with the name appointment Data it will be one object first we have to add user id dror id slot date slot time user data do data so let's add it so here we will add user ID then add the doc ID after that we will add user data that we are getting from the user model next we will add the doctor data in this doctor data we have removed the slots booked property after that we will add the amount
property in this amount property we have To provide the doctor fee data so just add Dr data. Fe after that we will add the slot time then slot date then we will add the date property and here we have to provide the current date time stamp so that we will get to know when the appointment was booked so just add date. now it will provide the time is time of current date and time so we have created the appoint appointment data now we have To save this data in the database to save this data in
the database we will add const new appointment equal to new keyword and here we will use the appointment model and in this model we will provide the appointment data that we have created here now we have this new appointment M next we have to save this new appointment in the database for that just add a Wait new appointment do save method by adding this statement our new appointment will be saved in the database after booking the appointment next we have the updated slots booked data so we have to update the do data slots booked property
using this slots booked variable so first we will add the comment that is save new slots data in doctor's Data so just add await here we will add dror model dot find by ID and update method in this one we will provide the doctor ID after that here we will add the card Braes and we will provide slots booked variable so it will update the doctor slot using this variable after that we will create one Response using the Json method in this one we will add the curly addes and let's add the success property that
is true after that we will add the message property in this message property we will provide appointment booked after that we have created this function to book the appointment so now let's take the preview we are taking this data from the request after that we are finding the Doctor and if the doctor is not available to book the appointment then we are sending the response and if it is available then we are creating a copy of slots booked data and in this slot we are checking if this slot is available for this date and this
time then we are going to book that slot and if it is not available then we are returning one response after that here we are getting The user data then we are deleting the slots booked data from the doctor data because we have to save the doctor data in the appointment data also and in the appointment data I don't want to store the unnecessary data that's why I'm deleting this slots booked from the doc data after getting all the data here we have created the appointment data where we have provided all these details Right next
we have saved the appointment in the database so after booking the appointment we are updating the new slot data for the doctor after that we are generating one response where we are sending the message appointment booked next we will pass this book appointment controller function in the export so just add book appointment now using this book appointment controller function we will create the API endpoint to create the API endpoint we will come To routes folder user route. JS file to create the API endpoint first we will D structure the book appointment controller function after that
here we will add the user router do Post me method in this one we will add API endpoint that is book appointment after that here we will add Au user after this middleware we will provide the book appointment controller Function now save the changes now let's add this API in our front end so let me close these files we will open front end then Pages folder then open appointment. jsx we will come to appointment. jsx file and here we will add the logic so that we can book the appointment before that let's come to app.jsx
file and here we have added this Doctors in this value object so here we will add get doctor's data function we will save the changes and come back to the appointment. jsx file here first we will get the backend URL token and get doctor's data function from the context so just add backend URL token and get doctor's data function so we have the backend URL and token so we can call the API to book the appointment for that here we are going To create one Arrow function with the name book appointment so let's add const
book appointment it will be one asnc Arrow function so just add the snc keyword and create the arrow function in this Arrow function first we are going to check if user is logged in or not for that simply going to add the if statement and in this one just add not token so whenever the token is not Available then this block will be executed and here we will terminate the function and give one warning so let's add toast Dot warn that is for the warning here we will add the message that is log to book
appointment after this toast notification we will add the return statement and we will redirect the users on login page so that user can login and book the appointment for that here we Are going to use the navigate function so scroll up and here we will create the function using use navigate hook so just add const navigate is equal to use navigate hook we have to import this use navigate so if I click on the suggestion so use navigate has been imported from the react router Dom package after that come to book appointment function and in
this return statement just add navigate Function and in this one b it will provide the path of the login page so so let's add/ login next we have to link this book appointment function with this book appointment button so let's scroll down here we have created the button so in this button we will add the onclick property and in this on click we will provide book appointment function after that save the changes now we are logged Out and if I click on this button then we are getting the alert login to book appointment and we
are redirected to the login page now let's click here and we will login with our account that we have already created so just add the email ID then we will add the password and click on the login button now we are logged in on this website and open this doctor and now if I click on this button we are not getting any Warning so let's come back and here in this book appointment function after this if statement we will add the TR catch block so let's add TR catch now we will store the selected date
in the variable so let's add cons date equal to Doc slots after that here we will provide slot index so we have one areay with 7even Date so if I select the first one then the index will be zero and we will get the date in this one we have to access the date so let's add the zero so if I click on the inspect tab in the console log in this array in this object we have two properties in the first one we have the date time and in the second one we have the
time after that to get the time here we will use date time property so that We will get this date now we have the date now we will destructure this date so that we will store the date month and year in different variable for that here we will type let day equal to here we will use the date dot get date after that we will create a second variable with the name month here we will add date dot get Month now when we try to get the month we will get the month index starting from
zero if it is January then it will provide the number zero so let's add + one so it will give 1 for the January for February it will give two after that here let's create one more variable with the name Year we will get the Year from the date so just add date dot get full Year after getting the day month and year we will create a different format for that let's create a variable this variable name will be slot date here we will add day then we will concatenate one string and write underscore again
we will concatenate this month after that we will concatenate one more string with underscore then we will add concatenation and here we will add ear now let's try to console log this Slot date save the changes and come back to the vs code editor let's reload the web page if we select the date and time and click on this book appointment here we are getting this date in this format after that we will come back to the vs code and remove this console log from here now we can make the API call to book the
appointment for that just add con curly Braes data equal to here we Will use await after that here we will use the exos package so let's select the exos so the exos has been imported from exos package here we will use the post method so write do Post inside this post method we have to provide the backend URL and a API end point for that simply provide the backend URL that we are getting from the context after that we will concatenate the string where we will provide path that Is/ API SL user SL book appointment
so we have added the API endpoint after that we will add the body so we'll add the curly addes and in this one we have to provide the doctor ID slot date and Slot time so just just add doc ID after that we will add the slot date then slot time after that we have to provide the headers so let's add comma CES and in this one we will add the headers in this Headers we will pass the object and in this one just provide the token now after this we will add the if statement
and in this one we will check the response is success or false so just add data. success if it is true then we will display one toast notification to the user so just add toast. success in this one we will provide message from the response so just add data. message after this toast Notification we have to fix the doctor data again so that the slots will get updated so just add get doctor's data after that we have successfully booked the appointment now we are going to send the users on my appointment page for that here
we will use the navigate function and in this one we will provide the path that is SL my appointment now if the success is not true in that case we will add the the Elsa statement and in this Elsa Statement we will display a toast notification with the type error in this one let's add data do message that we will get from the back end after that if any error occurs in this triy block then this scatch block will be executed so in this catch block we will console log the error and after that we
will display one toast notific ification with the type error in this one we will provide error. Message now we have created this function so let's test it so just come back to the web browser close this dep tool now if I select the date and select this time 10:30 a.m and after that I'll click on this book appointment here we are getting the message appointment booked and we have one more message get dog data is not a function so let me correct this our appointment is booked successfully but we have one error here We have
added get docs data so it says it is not a function so let's come back to the app context. jsx file here we have passed this doctor let me save the changes and again come back to to the appointment. jsx file here we made the spelling mistakes so let me just collect it get doctor's data and in this function also we will collect get doctor's data save the changes reload the web page and we have already booked the appointment on this Date at 10:30 a.m. and we have received the message so if we tried to
book the appointment on same date and time so you can see the message slot not available if I select the another time like 11:00 a.m. and click on book an appointment button so now you can see appointment booked and we are redirected to the my appointments page right now these are dummy data so we'll create this page later but if I come back to the mongod DV database Page open this Appointments here we have two appointments for 10:30 and 11:00 a.m. after that if I open doctor's collection and in this one if I open this
doctor so in this slots booked you can see we have one entry right with the current date in this one we have the time 10:30 and 11 A.M so these appointment is booked for this doctor so this logic is working fine Now by using this data we have to hide the booked slot From the website so this both slots are booked so it should be removed from here if I click here you can see slot not AV level so we have to hide this option so that user cannot click on this one so next we'll
add the logic to hide the entries that is already booked so just come back to the appointment. jsx file after this formatted time we will create three variables for day month and time so let's Add let day is equal to current date dot get date method after that we will add one more variable that is let month is equal to it will be current date dot get month as we know the index start from zero so we will add + one after that we will add one more variable with the name year and it will
be current date. get full year now in this while loop we have created this variables so whenever our Current date will get changed in that case here we are going to check if doctor has booked any slot on this date or not if in this date an user has booked the slot with this doctor or not if it is booked in that case we are not going to push that date and time in the time slots aray for that first we have to construct a date using these variables for that let's add con slot date
equal to day and we will concat the string With underscore after that we will add the month we can remove this and we have created the structure here so let me just copy it and we will paste it here now we have the slot date next we will create the variable with the name slot time and it is one formatted time that we have created here so here We have the slot date and Slot time now we will check the doctor data and if we find any slots is already booked then we will not push
that entry in this time slots array so just add one variable with the name is slot available here we will use doc info that is doctor info here we will use slots booked in this array first we will check if with this slot date any entry is there and with that Let me just copy it and paste it here and with that here we will check if it includes the slot time in that case here we will make it false if any of this condition is false then we will provide True to this varable aable
is slot available let me correct the spelling is slot available so here we are checking first We are checking for the slot date if any entry is there with that date then we are going to check if with that date this slot time is already booked or not if both of this statement is true in that case we will not add the slot time that's why we have provided false and if any of this statement is false then we know that slot is available that's why we have provided True to this variable after that here
we will add the if statement in this one we will provide is slot available in this one we will remove this statement and paste it in this if statement now save the changes and come back to the web browser and if I refresh this website now you can see here we are getting 11:30 because the 10:30 and 11:30 option has been removed let me book The 1230 appointment so we have booked it let's open this doctor again so you can see so now you can see 12:00 p.m. is there and 12:30 p.m. has been removed
because it is already booked again you can see 1: p.m. 1:30 p.m. so this logic is working fine so now we have successfully created this appointment feature next we will come to my appointments page right now you can see we are getting the dummy Appointments so next we will display the actual appointments from the database so first we have to create the API for that so let me close these files and after that we will open backend folder user controller.js file in this file we will create One controller function to get all list of appointments
that user has booked so first let's add the comment API to get user appointments for front end my appointment Page after that we will create the arrow function so just add const list appointment equal to a Sync here we will add the parameter request and response so now we have created this Aro function in this one first we have to add the TR catch block in the catch block first we will copy this line from the previous catch block paste it here now in this Tri block first we will get the user ID from the
request so just add const curly Braes user ID equal to request. body after that here we will create one variable where we will store all all the appointments of this user so just add const appointments equal to a wait then we will use the appointment model do find method and after that in this find method we will add one object and here we have to provide user ID so when we have created the data as you can see in this appointments Collection we have added the user ID property so by using this user ID property
we will find the appointments for the particular user after executing this statement we will get the aray with all the appointments with this user ID after that we have to send this appointment data using the response so just add response. Json in this Json we will add the object where we will Define this success Property that will be true after that simply add this appointments array now our logic is ready next we have to pass this function in this export object so just add list appointment now using this list appointment function we are going to
create a route so let's open user route. JS file and here after this book appointment we are going To add the list appointment function Now using this function we will create one route so let's add user router dog method in this get method we will add the path that is SL appointments after that here we will add the list appointment function now in this list appointment function here you can see we are getting The user ID right so we are not going to send the user ID directly we are going to send the header and
from the header we will get the user ID so just add Au user middleware now the API is ready save the changes and come back to the front end folder here we will open the pages and my appointments. Js file in this page we are going to use the API to get the user appointment data for that let me remove this doctors from here and here we will Add backend URL then token by using this backend URL and token we will make the API call and display the appointment data after that we have to create
the state variable to store the appointment data so just add const and the estate variable name will be appointments then the setter function name will be set Appointments it is going to be use State and initialize it with empty array now remove this doctors do slice from here here we will use this appointments array that we have created here after that here we will create one Arrow function with the name get users appointment so just add const get user appointments it will be one snc Arrow function so just add the snc key word and create
the arrow function in this Function we will do the API call so just add the TR catch Block in this Tri block we have to call the API so just add const curly say data equal to a weight here we are going to use the exos package so when we clicked here the exos has been imported here after that we will add the API type which is is get then provide the backend URL and in this one we will concatenate the API Endo so the API endpoint is SL API SL user SL Appointments after that
we have to add the headers in the headers we will add the token by executing this statement we will get the response after that we will get the appointment data in the response so first we'll check the response so in this if statement just add data. success if it is true in that case we are going to store all the appointments Data in this appointments state so just add this set appointments in this one we have to provide data dot appointments now we will get the appointments in reverse order it means the recent appointment will
be displayed at the bottom so to get the latest appointment on the top we will add reverse method so the new appointment will be added on the top if we get any error in This dry block then this catch block will be executed so in the scatch block just add console log and log the error with that we will display the toast notification so just add toast. error in this one we will provide error. message next we have to run this function whenever the my appointment space gets loaded so just add the use effect in
this one just pass the function here we have to add the dependency aray in the dependency aray We will add the token so let's add token and in this function here we have to add the if statement here we will check if we have the token then only we are going to get the user appointments so just call the get user appointments function now after setting the appointment in this estate variable let me console log that appointment also so just add log data. Appointments now save the changes and come back to the web browser let's
open this my appointments page here we are getting the error that is cannot read the property of undefined before that we are get getting the array in this array you can see we are getting all the appointment data of this user so next we are getting this error because we have mapped the doctor data On the web page and these item. image and item. name is not available in this current appointment data right so we have to modify these entry so first in this image tag we have to provide the doctor's image as you can
see in the browser we are getting the image of the doctor in Doc data image property as you can see here so here we will add item dot doc data do image after that we have to provide the Doctor name so here also we will add item do docdata do name here we have to provide the speciality so just add item do doc data do speciality we will add the same thing for the address here we will add item dot doc data do address. line1 here also we will add item do do data do address.
Line2 after that here we have to provide the date and time so in this response you can see we are Getting the slot date and Slot time so you can see the slot date just copy it and here we will simply add and here we will remove this date and just add the curly reses and write item dot slot date after that here we have the time so let me remove it here we will add the curly Braes and here also we will provide item do slot time now save the changes and come back to
the web browser so now you can see we Are getting these doctor image then if we come to homepage and from here if we book the appointment with this second doctor so now you can see the appointment page we are getting the another doctor so in the first doctor we are not getting the address because while adding the first doctor we have added the doctor profile using the Thunder client and in that we have not provided the address so we can edit that details from Here also let's open the doctor's collection and here you can
see we can edit this detail so just click on this edit icon from here we have we have to make it an object after that let's add line one property here we have to add the data for the line one address so just add 24 Main Street after that we will add one more Line line two it is optional if you want to edit you can edit or you can leave it as it is now update this data so now you can see document updated and if we come to the web browser then now let
me book the appointment with the first doctor again now we are getting this address also now Let Me Clear these appointments so just come back and delete this appointments Collection so we have deleted it now if I reload the web page here you can see the appointment page has been cleaned now let me book the appointment again so you can see we have booked this appointment now if I come back to the design file here you can see in this page we are getting this date in this format 25 July 2024 so here we are
displaying the date with underscore separation right so we have to use this data to create the date In this format so to create that let's create one variable with the name months in this one we will add the aray and in this aray we will add all the months from January to December after that here we will create the arrow function with the name slot date format so just add const slot date format equal to it will be one Arrow function from the parameter we will get Slot date that we are getting from the API
data after that we will create the variable with the name date array in this one we will use slot date do split method here we will split it using underscore now we will get three elements that is day month and year now we will reconstruct this data so just add return statement and here we will add date array index number zero that will be our Date then we will concatenate the string with this space after that we will concatenate the month's aray and in this month's aray we have to provide the month number as you
can see we are getting the month number like eight here we will add the month number so just add number interface and in that one we will provide date are index number one after that here we will concatenate One a string with single space after that let's concatenate the year so just add date array index number two so now the function is ready it will convert the date in this format that you can see here 25th July 2024 now just come back to the UI part here we have added the slot date just remove it
and here we will call the slot date format and in this one we will provide item dolot date save the Changes and come back to the web browser here you can see we are getting the September but this current month is August so let me just correct it so just come back and here we have added this areay and the month starts from January and in this number we are getting the number from one so to solve this error we can simply add one empty string here in this array now save the Changes now it
will correct the error so we are getting the correct date and time if we reload the web page we are getting this appointment data now let's book one more appointment go to homepage let's click on this doctor select this date and time book an appointment now you can see our appointment is booked and we are getting the appointment details here with time and date after that we'll create the cancel appointment functionality so that User can cancel the appointment for that let's come back to the vs code editor we will close these files from here let's
open the backend folder user controller.js file and after this controller function we will create the logic to cancel the appointment so first we will add the comment so just add API to cancel appointment after that here we will create one Arrow function with the name cancel Appointment it will be one a sync Arrow function in the parameter we will add request and response here we will create the Aro function in this function we will add the TR catch Block in the catch block let me just copy this line from above catch block and paste it
here after that in this Tri block first we will get the user ID and appointment ID from the request. body so just con Curlys user ID and appointment ID equal to request. body now we'll get the appointment ID from the users request body and we will provide this user ID with authentication middleware after that here we will get the appointment data using this appointment ID for that just at const appointment data equal to here we will add await then we are Going to use appointment model dot findy ID method in this method we will add
the appointment ID that we will get from this request now we have the appointment data next we have to check this appointment data used user ID is same as this user ID then the user can cancel the appointment so just add the verification so just add the comment and here we will add verify appointment User here we will add the if statement and in this if statement we will add appointment data. user ID if it is not equal to user ID that we are getting from the middleware in that case we will add the return
statement it will return one response so we'll create the response with Json here we will provide success Falls and in the message we will add the message called unauthorized action now if the user ID is matching then we Will continue this execution so we will find this appointment and we will Mark the cancelled property true so if I come to the database then if I refresh this web page in this one you can see appointments here you can see we have the cancelled property which is false so we have to make it true so that
this appointment will be cancelled so just come back to the vs code editor and here we will add Await here we are going to use the appointment model do find by ID and update method then we have to find the appointment using this appointment ID and in this appointment data we have to make changes in the cancelled property so just add the object here we will provide cancelled and we will make it true so it will make the appointment cancelled after that if the appointment Get cancelled then this slot time will be available right in
that case case we have to make the changes in the doctor's slots booked object so when we cancel the order then that entry will be removed from here so let's come back and here first we will add the comment that is releasing doctor slot here first we have to get the doctor ID slot date and Slot time from this Appointment data for that let's add const curly Braes doc ID slot date and Slot time we will get this info from appointment data after that we have to find the doctor data using this doc ID property
so just add const doctor data equal to await here we going to use do model do find by ID method in this method we will provide this doc ID that we are getting from the Appointment data so now we have the doctor data also next we we will extract the slots booked data from this do data so just add let slots booked equal to we will get the slots booked data from the do data dot slots booked so we have created the copy of this dror slots booked data now we will make the changes in
this data so first let's add slots booked and in this One first let's provide the slot date and it will be slots booked slot date here we are going to use dot filter method in this filter method we will pass the individual slot here we will check if e is not equal to slot time then we will store that and if this slot time is matching with the slot time that we have Cancelled then we will remove that slot time from the data after that we have to update the latest slots booked data with the
doctor's data so just add await doctor model dot findy ID and update method and here we will add do ID and in this one we will provide the latest slots booked data that we will get from this variable after that the slot will get Released from the doctor data then we will create the response using the Json method and here we will provide the object just add success true and here we will add the message property that is appointment cancelled now we have created this controller function next export this function so just add the comma
and this function name that Is cancel appointment now save the changes and come back to the user route. JS file here we will destructure that controller function so just add comma cancel appointment now using this controller function we will create one route so just add user router. poost method in this one we have to provide the path for the API so the path will be cancel appointment after that we will add the Au user middleware after that we will add cancel appointment controller function so now our API is ready next we have to integrate this
API with our front end for that let's come back to the front end folder we will open the my appointments. jsx file in this one after this function we have to create one new add function with the name cancel appoint ointment so just Add con cancel appointment equal to a sync in the parameter we have to get the appointment ID so just add appointment ID and create this Arrow function first we will add the try catch block BL in the catch block we will copy this statement and paste it here in the tri block we
have to call The API so first we need this appointment ID that we will get from the parameter so here let's add console log and we will console log this appointment ID we will come back to this button where we have added the text cancel appointment so in this button we will add the onclick property here we will add one Arrow function in this Arrow function we will call the cancel appointment function and in this one we have to provide the Parameter that is appointment ID so to get the appointment ID simply add item doore
id now save the changes and come back to the web browser let's refresh this web page and click on this cancel appointment button here we are getting one appointment ID of this appointment if I click on this one here we are getting different appointment ID for the second appointment so now using this appointment ID we will cancel the Appointment using our API for that let me remove this console log and here we will make the API call so just add const curly braces data equal to await then use the exos do Post method in this
one we will provide the backend URL and in this one we will concatenate the API end point that is /i/ user SL cancel appointment after adding this end point here we will add the comma and here we Will send the body in the body we have to send the appointment ID after that we have to send the headers so just add the C Braes headers and here we will provide the token after that we will add the if statement and in this if condition we will check if the data do success is true in that
case here we will provide the toast notification with the type Success and data. message after that we have to update the users's appointment data also so let's add get user appointments function after that we will add the else statement suppose the data. success is not true in that case we will provide the toast notification with the type error here we will provide data do message after that just save the changes and come back to the web browser now if we open our database go to appointments Collection here we have two appointments you can see the
cancelled property is false for the first one and in the second one also cancelled property is is false now let's click on this button cancel appointment you can see the notification appointment cancelled and let's come back to the database page and here we will refresh this data here you can see the first one is cancelled false and in the second one You can see the cancelled property is true so the second appointment has been cancelled with the time 11:00 a.m. so you can see this appointment with 11: a.m. has been cancelled but here still we
are getting this cancel appointment button right so we have to hide this cancel button when we have already cancelled the appointment for that just come back to the vs code editor and here we will add the curly Braes and we will check if item dot cancelled property is not equal to true in that case we will display this button so just add the end operator and after this end operator we will add this button so let's cut this button from here and paste it here after this end operator now save the changes so now you
can see we have cancelled the appointment and you can see the cancel appointment button has been removed from The first appointment once the appointment has been cancelled we can remove this pay online button also so let's come back here we have this button here we will add the curly Braes we will check item do canell is not equal to true in that case we will display the button so here we will add the end operator and just cut this button from here and after this end operator we will paste the button save the changes now
you can see We are not getting any button the pay online and cancel appointment button has been removed in the first appointment because we have cancelled it so after cancellation here we have to display another button where we will display the text that this appointment is cancelled for that let's come back to the vs code editor after this button tag and curly bres here just add the another curly bres in this one we will check if item do cancelled is true it Means the appointment is cancelled in that case we will return one button tag
in this button tag we will write appointment cancelled now in this button we will add the class name property here we are going to provide some tent classes so just add minimum width padding border then border color then rounded text color red now save the changes and come back To the web browser now you can see we have cancelled the appointment for the first appointment and here we are getting the button appointment cancelled now let's click on this button cancel appointment for the second one so now here also you can see appointment cancelled notification and
here we have the appointment cancelled button so this logic is working fine now if we open this doctor and here you can see this 12 pm slot is available let's select it and Book an appointment now you can see we have booked the appointment for the 12:00 p.m. now let's open the doctor again from here you can see the 12 p.m option is removed because we we have already booked this appointment now if I come to my appointments page and from here if I cancel this appointment so you can see appointment cancelled let's come back
to the doctor again if I reload this web page you can See here you can see we have received the 12 p.m slot again so here we have to reload this web page to see the updated slot to fix that just come back and here we will add the Logics so that when we canell the appointment then this slot data will be updated automatically for that here in this my appointments. jsx file we will D structure the G doctor's data and after this get user Appointments we will call get doctors's data function save the changes
now let's try again we will reload this web page for homepage we will open one doctor we will select the 12:30 p.m. so appointment is booked now let's come back to the same doctor again you can see the 1230 slot is not available here now let's come to my appointments page let's cancel this appointment here we are getting get Doctor data is not a function we have to correct the spelling we have to add doctors we have to add s here also we will add s doctors save the changes now let's try it again we
will open this doctor book the appointment at 12:30 then here you can see appointment for 12:30 let's come to the doctor again you can see the 1230 slot is not available now if I open the my appointment page let's cancel the appointment so you can See appointment cancelled now just go to doctor page again and you can see the 1230 slot is again available so this logic is perfectly working now we can easily book the appointment we can cancel the appointment we can update the profile after that when we open any doctor and book the
appointment we will create this pay online option so that when we click on this pay online button we will be able To pay the appointment fee online for that we will come back to the vs code editor and we will come to user controller.js file in the backend folder here we will create the logic to make the online payment for appointment fee here we are going to use the razor pay as payment method so first we have to install the razor pay in our backend project for that let's open the terminal go to backend terminal
stop this terminal Using contrl C then we will type npm install rer pay so it will install the reserve pay package so it has been installed after that let's run our back end again so just add npm run server now we can hide this terminal after that we will add one comment in the user controller.js file so just add API to make payment of appointment using razor pay after that we will create the arrow Function with the name payment rasure pay we will add request and response in the parameter and create the arrow function in
this Arrow function we will create the logic to make the payment before that we have to initialize the Reser pay instance for that we have to import the raser pay package so scroll up here we will type import eraser pay From eraser pay package after that I scroll down here in this file we will write const RoR pay instance equal to new raser pay and here we have to provide one object where we will Define the key ID then we will Define the key secret so we have to get this key ID and key secret
from the raser pay website For that I'll come to web browser and search for raser pay we will open this website Razer pay.com we will click on this sign up button and create your account it required the kyc document to complete your account after that you will see the Razer pay dashboard where you can find the key ID and key secret so you have to store the key ID and key secret in the environment Variable you can also directly provide it here but I will suggest you to store the key ID and key secret in
the environment variable here so here we will add the razor pay key secret and key ID so let's create two environment variable so we will write razor pay key ID equal to we will provide the razor pay key ID that I have copied from the razor pay dashboard after that we will provide the razor pay key Secret so let me create the variable razor pay key secret and in this one we will add the laser pay key secret you have to add your own ID and secret key for Reser pay after that let's come back
to the user controller.js file in this key ID let me remove this a string and here we will provide the key ID from the envirment variable so let's add process. EnV dot provide the name of the variable So just copy it from here razor pay key ID and paste it here similarly here we will provide process.env dot here we will provide the RoR pay key secret so let me just copy it and paste it here so now we have added the deser pay key ID and key secret now the deser pay instance is ready we
will use this to create the payment for our appointment so we will come to payment Reser pay function and Here we will add the logic so that we can pay the appointment fee online so to book the appointment with online payment we need the appointment ID so here we will add cost appointment ID and we will get it from the request so just add equal to request body after that we have to get the appointment data using this appointment ID so just add cost appointment data equal to await and here we will add the Appointment
model do find y ID and in this one we will add the appointment ID after that we will get the appointment data in this variable after getting this appointment data first we check if appointment data is available if it is available then we will check if the appointment is not cancelled if it is already cancelled then we are not going to create the payment for that appointment so here we will add the if statement and here we Will check if we don't have any appointment data or our appointment data do cancelled property is true in
that case we will return the response using Json method and here just add the object where we will define success false after that we will add the message property in this message property we will add the message appointment cancelled or not found now if we have the appointment Data and the appointment is not cancelled then we will proceed further and we will create one comment and here let's add the comment Tex creating options for razor pay payment so first we have to create the option where we will Define the amount currency receipt number and data
for that let's add the comment creating options for razor pay payment now if we come to EnV file so here we have to create one envirment variable For the currency so in this EnV file we will write currency equal to INR my Razor pay account is created in India that's why I'm using the Indian currency that is INR now just close this file and here in this file We'll add the options for the Reser pay so simply add con options equal to curly bres and here we will create the property that is amount here we
have to provide the amount of the Appointment so here we will use the appointment data do amount property so that we can get the amount of that booking after that we will multiply it by 100 so it will remove the two decimal points after that we have to provide the currency property in the currency property we have to provide our currency from the envirment variable so just add process. EnV do currency after that we will add the desp So just add receip and in this receip property we will provide the appointment ID now the options
is ready we have added the amount currency and Reed property now by using this options we will create one order using razor pay for that let's add the comment and here we will add the comment text creation of an order here we will add con order equal to Await then we will use the razor pay instance do orders property. create method and in this method we have to provide the options that we have just created here after that here we will add response. Json and in this one we will provide success true and with that
let's add order that we have created here here we have to wrap it in the TR Catch block so let's add the TR catch block let me just copy the statement from the previous catch block and paste it here now we will move these codes we will move it and paste it in this Tri block so we have created the controller function to make the payment using razor pay let's right click and select form a document after that we have to pass this Razor pay controller function in this export object so just add payment Razer
pay now save the changes and let's come to user route. JS file here we will D structure that function so just add payment Reserve pay now by using this controller function we will create the route so to create the route we will use user router. post method and in this post method we will add the API Endpoint so the endpoint path will be slash payment razor pay after that here we will add the O user middleware then we will add the payment Reser pay controller function so we will save the changes after that let's come
to my appointments. jsx file in this page we will create one Arrow function to make the payment of the appointment fee so here let's create one Arrow function so just add the cost and the Function name will be appointment treasure pay it will be a sync addo function in this function p parameter we need the appointment ID so just add appointment ID in the parameter after that we have to link this function with our pay online button here we have this pay online button so in this button tag let's add the onclick property and here
we will pass this Arrow function and here we will call Appointment Reser pay and then provide the appointment ID so just add item doore id after that here we will add the TR catch Block in this Tri block we have to do the API call so let's add const curly Braes data equal to await and here we will use the exos dopost method in this one we have to provide the backend URL and in that one we will Concatenate the API endpoint that is going to be/ API SL user SL payment razor pay after that
in the body we have to send appointment ID after that here we have to add the headers in the headers we will add object and here just pass the token after that we will check if data do success is true in that case we will receive one Reser pay order Data so let's console log that data so just add data do order we will save the changes and let's come back to the web browser here we will open the web page refresh it and let's open the console now if I click on this pay online
button here you can see we have received this data in console where you can see the amount amount due amount paid created at currency entity order ID re status and we have all these Properties Now by using this order property we have to initialize the Reser pay payment for that we have to search for razor pay web integration in this page we will scroll this and here we will get this option integration steps web integration so let's open scroll down here you can see now we are at the Reser pay docs in the Payments and
here in the left side we have the payment Gateway web integration integration steps here you can see we have one a script so let me just copy this a script after that we will open the vs code editor now in the front end folder we have to open index. HTML and after this div we have to paste this script next we have to save the changes and close this file so we have added this Script and here you can see we have this options we are receiving this options from the back end so by using
this options we have to create the payment now we can close this file from here and come back to the vs code editor by using this order we have to create the options so to create the option before this function we will create another function with the name init pay so just add cost init pay equal to and in the parameter we will get the Order that we are getting from the API response so so here we have to call this init pay function and in this one we have to pass the data do order
now we have passed the data. order in the init pay so now we will create this init pay function in this function we will create the options using this order so just add con options equal to curly bres and here we will add the key property here we have to add the razor Pay key ID that we have added in the backend so if I open the back end and go to environment variable we have key ID and key secret for the Reser pay so let me just copy this razor pay key ID which is
the publicly accessible so we can use this in front end also but we don't have to pass this secret key in front end so just copy this razor pay key ID from here and we will open the front end folder EnV file and here we will add this Vore we will paste this razor pay key ID so we have created this V Reser pay key ID for front end environment variable now just copy this name and here in this key we will add import dot meta Dot en andv Dot and paste the environment variable name
after that we have to add the amount so let's add the amount here we will provide the order do Amount after that we will add the currency in the currency we will provide order. currency next we have to add the name in this name we will provide appointment payment after that we will add the description in the description let me add the text appointment Payment we will add the same text in the name and description so now we have created the key amount currency name and description property then we have to add the order ID
and receip so just add order uncore ID in this order ID we will provide order. ID after that we have to add the reip in this reip property we have to add the order dot receip here we have added all these Properties then we have to add the Handler property in this Handler property we will add one snc Arrow function so let's add the snc Aro function in this Aro function we will get the response so just add the response in this parameter in this function whenever the payment will be executed successfully then we'll get
the Response in this Handler function so let's try to log this response using console log and provide the response after creating this options here we have to initialize the payment so just add con then create the variable with the name rzp for pay is equal to new window dot razor pay and in this one we have to provide options that we have created here After that here we have to open the Reser pay as popup so just add Razer pay dot open so now we have created all the Logics save the changes and come back
to the web page if I reload this web page and click on this pay online button now you can see here we have this razor pay payment popup here we have to Prov the phone number so let's add the dummy phone number then click on proceed button after that we will select the Card here we have to provide the tast card number so let's open the new tab and search for Razer pay dummy card let's open this website from here we will get this dummy card number so let me just copy the card number from
here and open our payment page and paste the card number then in the expiry we will add the any future date then in the card holder name we will provide greatest stack then add the CVV then click on pay now button here we have two option pay and Save card pay without saving card so let me select this one pay without saving card here it is asking for the OTP we can bypass this OTP by clicking here complete on Bank page now we can simulate the success or failure so let's click on success when we
clicked on the success button you can see the message payment successful redirecting in 3 to 1 Seconds now we have the response you can see we have the Reser pay order ID pay payment ID razor pay signatur so in this Handler function we have address this console log and in this console log we are getting these properties Now by using this property we will verify the payment in the back end and after verifying the payment we will mark this payment status to true so whenever we will make the Payment property true it means we have
paid create the appointment fee online right now you can see still we are getting this pay online button so now we'll create the logic so first we have to come to backend and open user controller.js file and after this controller function we will add one comment let's add the comment text API to verify payment of Razor pay after this comment we will create the controller function to verify the razor Pay payment so just add const verify razor P it is going to be a sync Arrow function in the parameter we will get request and response
and here we will create this Aro function now in this one we will add the tri catch block now in this Tri block first we will get this razor pay order ID from here as you can see in this console we have the razor pay order ID so we will get this order ID from Request so just add const curly bres just copy this property name paste it here we will get it from request. body after that we will get the order info by using this order ID so just add con order info we have
created this order info variable where we will store the order data so just add await then we are going to use Reser pay instance dot orders dot fetch in this method we have to provide The Razer pay order ID so we have provided the Razer pay order ID in this one after getting the ordered info we will add the console log and in this console log we will add this order info that we are getting from this Reser pay instance orders fetch method now let's console log this data to console log first we have to
create the API endp point so let's copy this function name and we will add it here in this Export now save this file and come to user route. JS file here we have to create a new route so we will add user router. post method in this one we will add the endpoint name that is/ verify Reser pay after that we will add the O user middleware then we will add verify razor pay when we click here on this Su it has been imported right now save the changes and we will Test this API endpoint
so to test it we will open the Thunder client and we will open the terminal also we will come to this backend terminal where you can see the these messages now click on new request select the post and here we will use the Local Host Port 4000 SL API SL user SL verify razor pay in this one we will add the body and in the body we will add one property that is Raisor pay Order ID so just copy it from here paste it here in this one we will add this order ID value that
we are getting from the response so just copy it from here and we will paste it here now just click on this send button here we are getting not authorized login again so in this headers we have to add the token also in the token value we have to add the token so let's open the application Then go to Local Host and here we have the token so let's copy the token from here now let's open the console here we have to paste this token then click on send button now here you can see we
got the console log in this one we have the ID entity amount amount amount paid we have paid this amount using the razor pay so the due is zero and here we are getting the status Paid now we will use this status to verify our payment here you can see we are getting this receipt also and in this receipt we have added the appointment ID so when we come to user controller here you can see in the re we have added the appointment ID and here here also we are getting this recept now what we
will do here in this verified as a pay we will check if the status is paid in that Case we will find the appointment using this appointment ID and we will Mark the payment true for that let's add the if statement in this if statement we will check if our order info dot a status is equal to paid in that case we are going to find the appointment using the appointment ID and mark the payment true so let's hide This terminal remove this console log here we will write a wait we will use the appointment
model Dot find y ID and update method in this method we have to provide the appointment ID that we will get from order info. reip after that we have to update the payment property and we have to make it true so just add payment true so now we have made the payment Status true then we have to generate the response so just add response. Jon and in this one we have to add the object where we will define success property true after that here we will add the message that is payment successful suppose the order
status. info is not equal to paid in that case we will add the else statement and here we will send the response so let's copy the response from here and paste it Here here we will make it false and in the message we will provide payment failed so after that let's copy the line from this catch block and we will paste it here here in this cash block now save the changes our controller function is ready now let me close this request tab Also let's open these files now just go to my appointments. jsx file
here we will create the Handler Function in this Handler function first we are going to add the TR catch block because here we will make the API call to verify the payment so just add const cly Braes data equal to here we will use await xos package dot post method in this one we have to provide backend URL and in this backend URL we are going to concatenate the API end point so here we will add the path SL API SL user SL Verifi desert pay after that here we have to add the body and
in the body we have to pass the response so simply pass this response after adding this response we have to add the headers so just add the curly Braes and here we will provide headers and here we will add the object and provide the token after that we will add the if statement and here we will check if the data do Success is true in that case we will call get user appointments and after that we will navigate the users on my appointments page for that first we have to create the instance of the use
navigate function so just add con navigate is equal to use navigate we have to import this use navigate from react router Dom package so just add import use Navigate from react router Dom after that scroll down come to the Handler function and here we will add navigate and provide the path of the my appointment page so right SL my Dash appointment if any error occurs in this Tri block then the catch block will be executed so we will console log that error and with that we will display one toast Notification so just add toast do
error in this one we will provide error. message now we have connected the Reser pay verification API with this Handler now let's test it and come back to the web browser we will reload this web page now just click on on this pay online button now we are getting this razor pay payment popup select the card then we have to add the card number add any expiry date then add the card holder name we will add the CBB Number click on the pay now button we will select pay without saving card then click on complete
on Bank page let's simulate it with success now we are getting the message payment successful now the Handler function has been executed and here we are getting the latest appointment data so in this appointment data you can see we have the payment true so we have made this payment Successful that's why this payment is true now when we made the payment true then in that case we have to hide this pay online button and we have to display a button called paid so just come back to the vs code editor and here we will open
my appointments. jsx file and we will come here after this one we will create one new button so that we can display it on web page whenever the payment gets completed for that here we will add curly reses and here we Will check if our appointment is not canell so we will add item do cancelled then we will add one more thing that is if our item dot payment is true then only we will display that button so here we will add one more end operator we will add the button tag in this button tag
we will add the button text paid and in this button tag let's add the class name property and provide some tent classes so we will provide minimum Width padding y border rounded text color stone 500 then we will add the background now save the changes if I come back to the web page here you can you can see this paid button once we make the payment online we have to hide this button which is pay online so let's come back here we have added the button pay online right here we will add one more check
so after this and operator we will Check we will display this button when the item do payment is false after that let's add one more and operator save the changes now you can see this paid button and pay online button has been removed now let's open a new doctor and book an appointment at 12:30 p.m. now you can see the notification appointment booked now we'll click on the pay online Button here we will select the card then add the card number then provide the future date now we will add the card holder name and provide
the CBB click on pay now click on complete on bank's page click on success now the payment is successful once we completed this payment here we are getting the paid button and the pay online button has been removed so this logic is working Fine after that let's go to the my appointments page here if I cancel this appointment now you can see appointment cancelled and here we are getting the appointment canell button and our paid button has been removed till now we are able to pay a online for the appointment we can cancel the appointment
we can book the appointment from the appointment page so now we have completed all the Functionality of our client website which is the patient website next we will add the functionality in the admin panel so in the admin panel we have created two pages add doctor and doctor's list that you can see here next we will create this appointments page where admin can see all the appointments for all the doctors and in the dashboard we will display some latest appointments and some other data so let's create the appointments Page for that we have to create
the API so let me close these files now we will open admin controller.js file from the back end and here we will create a new controller function so first we will add one comment that is API to get all appointments list after that we will create the controller function with the name appointments admin so just add const Appointments admin it will be one asynchronous Arrow function so just add a sync and in this parameter we will get request and response then create this Arrow function in this one we will add the try catch block next
we have to get all the appointments so we will create one variable with the name appointments here we will use the await and appointment model we are not getting the suggestion For the appointment model so let me open this file appointment model now just come back and here we will add appointment so you can see we are getting this suggestion just click here so it will automatically import this now just come to this code again here in this model we will use the dot find method and in this one simply provide one empty object so
this statement will provide all the Appointments from all the doctors and user and it will be saved in this appointments variable after that we will generate one response using the Json method and here we will add the curly Braes where we will define success true after that we will add the appointments array that we are getting here after that let me just copy the statement from here and we will past it here in this sketch block now we have created the controller Function to get all the appointments for the admin panel after that we have
to export this appointments admin in this export object so just add appointments admin now we have to create the API endpoint using this controller function so just open admin route. JS file and here we have to D structure that function so just add appointment admin controller function by using this Controller function we will create one route for the admin so here just add admin router. get method and in this one we will add slash appointments so the path will be SL appointments then we will add the Au admin middleware then we will add appoint appointments
admin controller function now save the changes now we have created the API next we will come To admin folder SRC pages and in this Pages we have the admin then open all appointments. jsx file here we have to make the API call to get all appointments data so we will add the logic in the this context so open context and admin context. jsx file here after this function which is change availability here we will create a new Arrow function with the name get all appointments so just add const get all Appointments it will be a
sync Arrow function after that here we will add the try catch Block in this drive blck we will make the API call for that just add const curly presses data equal to a weight here we will use the exuse dog method because we have created the API with the G method so here we are using the G then provide the backend URL And in this one we have to concatenate the API endpoint path so just add/ API SL admin SL appointments after that here we have to provide the admin token so we will add cly
bres we will provide headers and in this headers we will provide a token after that we will get one response and in that response we will get all appointments data so to store that appointment data we have to create one a state variable so scroll up and After this doctor's estate we will create one more State variable that is appointments seter function name will be set appointments equal to to use a state and initialize this value with mty ar after that scroll down and in this function we will add the if statement here we will
check if the data do success is true in that case we will call set appointments function and here we will provide data. appointments If the data. success is not true in that case we will add the Elsa statement and here we will display one toast notification with the type error and provide data do message after that let me just copy this line from catch block and paste it here now we have created this function get all appointments next we have to export this function using this value object so first we will add appointments then we
will add set appointments and Then we will add the function that is get all appointments so we have added the state variable set a function and this get all appointments function now save the changes and come to all appointments. jsx file here we will get a token appointment and get all appointment ments function using admin context so just add con curly bres a token appointments get all appointments Function equal to use context hook in this one we will provide admin context after getting it we we will add the use effect in this use effect we
will add addo function here we will add the dependency array in this dependency array we will add the a token after that here we will add one if statement and here we will check if we have the a token in that case only we will call get all appointments function Now we are getting all the appointments data in this appointments aray next we have to create du UI where we will display all these appointments for that just remove this text in this div first we will create one P tag and in this P tag we
will add the text all appointments after this P tag we will create one div inside this div we will create one more div inside this T we will Create seven paragraph tag so just add P into 7 in the first P tag we will display the serial number in the second one we will display the patient name so just add the patient and in the third one we will add age after that we will display date and time that is the date and time of the appointment slot after that we will display the doctor name
then we will display the Fee then we will add the action by using this structure we will display the data in a table format if I save the changes we are getting these data on the web page next we will add the CSS properties for this format so first we will add the CSS properties in this div so in this one just add the class name property here we will provide width full Max width 6 XL and margin 5 save the changes now we are getting this Space after that we will add the CSS properties
in this P tag so let's add the class name property here we will provide margin bottom text large and font medium after that we will add the CSS properties in this D here we will add the class name property and here we will provide background white border rounded texture small Max height overflow y Scroll now save the changes now we are getting this container in white color after that we will add one more property here we will add minimum height and provide this value 60 pH save the changes now the container height has been increased
next we have to formit this paragraph tag it will be displayed horizontally for that we will use the grid so in this di we will add the class name property and we will provide Hidden for a small and above screen size we will use grid and grid columns and use this flexon after that we will add GRE flow column padding border bottom save the changes now you can see we are getting this table format next we have to display the appointments data in this format so first let's come back to the admin context. jsx file
here we are Getting this data that is the appointment data here we will add console log and just Pro provide data. appointments so that we can see the data in console so let's click on the inspect menu then click on Console now you can see we have total seven appointment data in this aray so in each appointment data we have the amount doctor data user data and other information so we have to display these information in this table format for that let's come back to the All appointments. jsx file and here let's add a space
and here we will add curly braces appointments do map method in this method we will add the arrow function here we will use this small bracket in this one we will return this div in this parameter we will get individual item and index number next we have to add this index in this div tag so just add the key Property and provide this index after adding the key property in the index in this div we will add the paragraph tag and in this paragraph tag we will add the curly veres here we will provide index
+ one save the changes now you can see we have total seven appointments so we are getting the series 1 to7 after this serial number we have to display the patient detail where we will display the image of the paent and we Will display the paent name for that after this P tag here we will create one div in this div we will add the image tag and in this image SRC we will provide item do user data do image after this image tag we will display the usern name so just add the P tag
and in this one we will add the curlys item do user data do name save the changes now we are getting The profile picture and users's name you can see here we are getting the name and image next we have to provide the CSS properties for this P tag and in this div first we will add the CSS properties in this div where we have added the index so in this one we will add the class name now provide the tent classes Flex Flex wrap for the smaller screen and then we'll use the grid for
The larg screen so just add Flex Flex wrap justify between then we will provide Max small then provide Gap two then grid grid columns and this fraction then add the item Center text Gray 500 then padding y padding X and then we will add the Border bottom and hover effect now save the changes now when we h on it the background is changing after this we will add the CSS Properties in this P tag here we will add the class name and we will make this paragraph tag hidden for the smaller screen so let's add
Max a small hidden after that we will add the CSS properties in this div so just add the class name here we will provide Flex item Center Gap two save the changes now you can see the image and the name is aligned side by side after that we have to add the class Name in this image tag here we will provide the classes width eight rounded full so it will be displayed as Circle now you can see a small size and it is displayed in circular style so this data is looking good after that we
have to provide the age of the patient so we have to calculate the age using date of birth for that we will create one calculate age Function to create that we will open app context. jsx in this one we are going to create one Arrow function with the name calculate age so just add const calculate age equal to here we will create this Arrow function in this Arrow function parameter we will get date of worth from the parameter and here we will create one variable with the name Today using this new date after that we'll
add one more variable that is worth date equal to new date here we have to provide the date of worth so simply provide date of birth from the parameter now you can see we have created today and birth date and in initialized this date with date of worth after that here we have to Get the difference in the year for that let's create one variable with the name age and it will be today dot get full year in that we will subtract the birth date dot get full year so that we will get the age
of the paent after that we have to return the age that we have calculated here so now we have created this calculate age function next we have to Provide this function in this value object so that we can access it in any component after that we will come back to the all appointments. jsx file and here we have to D structure that function so just At Con curly Braes calculate age equal to use context hook in this one we will provide app context so just add app context so when we click on this s it
has been imported after that let's scroll down and here after this div Tag we will create one P tag and in this P tag we will provide curly bres we will call the calculate age function in this one we have to provide the item dot user data dot date of worth now save the changes now you can see it is displaying the age 24 after that we have to hide this age property in the small screen so in this P tag let's add the class name property and here we will Provide Max a small hidden
after that we have to display the date and time of the appointment so after this P tag we will create one more P tag and in this one we will add curly presses in this curly we will add item. slot date next we will add the comma and then we will add the card addes to display the time here we will add item dot slot time after that save the Changes now you can see we are getting this date and time but if I open the figma design we need the this date and time in
this format so we have created this logic to format this date in the front end so we have to copy the logic from there so let's open the my appointments. jsx file in the front end folder from here we will copy this months and this slot date format Function so let's cut it from here we paste it here now just copy these two items months variable and this slot date format function now just come back to the app context. jsx file in the admin and here we will add this logic so that we can use
this function in any component after this calculate age we will pass this slot date format save changes and we will come to all appointments. jsx File here we have to D structure that function so just add slot date format we have to use this function so in this P tag let me remove this item. slot date and here we will add slot date format and in this one we will provide item do slot date save the changes and come back to the admin panel now you can see we are getting this date in this format
and here we have the time after that we have to display the Doctor's detail here so to display the doctor's details after this P tag we will copy this div from here and paste it here we are using the user data so instead of this user data we will add doc data that is Doctor data so we are providing item. do data. image and here also we will provide item do docdata do name now save the changes now we are Getting doctor's image and doctor's name now in the background of this doctor we have to
provide the color because these images are transparent so in this image tag we will provide BG grade 200 save the changes now these doctor profile image is looking good after that we have to display the fee for that after this D we will create one P tag and in this P tag first we have to display the currency so so to display The currency first we have to declare the currency symbol so let's open app context. jsx file here we will create the variable with the name currency and in this one we will store one
string with this dollar sign after that we have to export that currency in this value object so just add currency now just come back to the all appointments. jsx file after this slot date format we will D structure the Currency now scroll down and in this P tag we will add the currency after that we will add one more curly brushes here we will provide item do amount let's save the changes and come back to the web browser now we are getting the all these data now in this accent we will add one cancel button
so if the admin BS to cancel the appointment they can simply cancel it from this button so just come back and here after this P tag we will add one Image tag and in this image SRC we will add assets we are not getting the suggestion so we will open assets. JS file from the admin now in this all appointments. jsx file we will type assets so we will select the suggestions after that we have to provide assets. cancel icon then we'll add the class name property and in this one we will provide width and
cursor Pointer now save the changes and come back to the web browser now you can see we have this cancel button next we will create the logic so that when we click on this cancel button then the appointment will be cancelled and here we will get the text cancelled so if I click on inspect then go to console in this appointments data there are some appointments where you can see canell true because we have Cancelled these appointment so in that case we have to display one text called cancelled for that here we will use the
Turner operator so after this P tag we will add the curly bres we will check if our item dot cancelled is true in that case we are going to add one P tag and if it is not cancelled then we Will display the cancel button so just add the column and after this column we have to provide the cancel image so just paste this image after this colum so now if the status is cancelled then it will display one paragraph text so we will add this text cancelled after that we will add some CSS properties
in this P tag so here let's add the class name property here we will Provide text red text extra small and font medium now save the changes now you can see we are getting all the appointments with cancelled and this appointment is not cancelled so that's why we are getting this cross icon to cancel this appointment next we will add the API to cancel this appointment from admin panel for that just come back to the vs code Editor then open the backend folder admin controller.js file and here we will create a new controller to cancel
the appointment for admin so let's add the comment that will be API for appointment cancellation after that we will come to user controller.js file and let me just copy the function of cancel appointment from here after that we will come to admin controller and paste the same Function here we will rename this function so just add appointment cancel after that we will remove this slash verify appointment user after that we will remove this user ID also now save the changes next we have to pass this appointment cancel function in this export object so here just
add appointment cancel now just copy this name from here and save the changes next we will open Admin route. JS file after this route we will add another admin route so just add admin router dot post method and here we will provide the endpoint path that is SL cancel appointment after that we will add the all admin middleware then we will provide this appointment cancel controller function first we have to destructure it so just add comma and add the appointment cancel text now we have created the API for Cancel appointment using admin panel next we
have to link this API with the admin panel so just come back we will come to all appointments. jsx file here let's open admin context. jsx file F in this context we will create the function to cancel the appointment for that let's create one Arrow function so we will write const we will name the function as cancel appointment is equal to Snc then we will create the function and in this function we have to take the appointment ID using the parameter so just add appointment ID after that in this function we will add the try
catch Block in the catch block we will add this toast. error and in this Tri block we will make the API call to cancel the appointment for that just add const cly says data Equal to await then we will use the XU those. poost method here we need the backend URL and in that one we will concatenate the API endpoint that is/ API SL admin slash cancel appointment now in the body we will add the object where we will add the appointment ID after that we have to add the admin tokens so just add the
clys then we will declare the headers and in This headers we will pass one object with a token after that we will add one if statement and here we will check if our data do success is true in that case we will display one toast notification with the type success and here we will provide data. message after cancelling the appointment we have to Fitch the latest appointments detail so just add get all appointments now if the data. success is Not true then we will add the else statement and here we will provide toast. error in
this one we will provide data. message so now we have created the function for cancel appointment now we will add this function in this value object so that we can access this function in any other component so just add cancel appointment save the changes now just open all appointments. jsx file here in this image tag we will add the On click property here we will add that cancel appointment function so first we have to get that function from the admin context so just add cancel appointment from admin context now just a scroll down and here
in this on click we will provide one Arrow function then call the cancel appointment function and in this one we have to provide appointment ID so just add item doore Id now save the changes if I click on this cross icon now you can see we have the message appointment cancelled and here you can see the text cancelled so this logic is perfectly working now let's create the dashboard page for the admin to create this dashboard first let's come to the vs code editor and we will close all these files now just open the backend
folder And go for admin controller.js file to display the data in the dashboard we have to display the total number of doctors and number of appointment for that we have to create one API in the admin controller.js file so here just add the comment API to get dashboard data for admin panel after that we will create one Arrow function with the name admin dashboard so just add con admin Dashboard equal to S Sync here we will add request and response after that we will create this addo function in this add a function first we will
add the try catch block so just add the TR catch block and after that we will just copy this console log and response from the catch block and paste it here now in this triy block we need total number of users and total number Of appointments and we will also fetch the latest five appointments so just add con doctors equal to here here we will use a wait doctor model dot find method in this find method we will add this object so that we can access all the doctors after that here we will add const
we will add a variable name called users equal to here we will use await user Model we are not getting the suggestion for the user model so let's open the user model. JS file after that if I type user model so we are getting the suggestion so just click here and then add the dot find method after that we'll add the empty object after that we'll add one more variable with the name appointments so just use const appointments is equal to await here we will use appointment model doind method and In this one also we
will add this empty object by adding this we will get all doctors users and appointments data after getting all these details we need the number of doctors number of users and number of appointments and latest appointments for that we will create one object with the name Dash data so so just add const Das data equal to here we will create one object in this one we will add doctors property where we will Provide doctors. length we are not sending any doctors detail we are just sending the number of doctors using this doctors. length after that
we'll add appointments in this one we will add appointments do length similarly we will add patients in this one we will add number of users dot length after that we will add latest appointments so we have added latest Appointments property and in this one we will add appointments and after that we will add the here we have added reverse so that we will get the latest appointments in the first position in the aray after that we'll add the slice method and in this one we will provide 0 to 5 so it will display only five
latest appointments now now the dash data is ready next we will create the response Using this Dash data so just add response. Json in this one we will add the object where we will provide success property true after that we will provide the dash data that we have created here now our admin dashboard controller function is ready now we'll pass this in this export so just add admin dashboard now just save this File after that we will come to admin route. JS file here we have to destructure that function so just add comma and here
we will provide admin dashboard function by using this function we will create a route so just add admin router dot get method and in this one we will provide the path that is/ dashboard then we will add the Au admin after that we will add admin dashboard now our API is ready next we Will use this API in the admin dashboard page so let's come to Dash w. jsx file under this admin folder from here we will remove this text here we are going to display the dashboard data so if I open the UI design
in the figma here you can see in the dashboard we have doctor's data then appointments then patient it is displaying total number of of doctor appointment and patients and latest five Appointments so let's come back to the vs code editor we will open admin context. jsx file inside this file we will create a new estate variable so just add const we will name this variable as Dash data set Dash data if equal to use State and initialize this with Boolean data false so whenever we will call the API that we have created here/ dashboard in
that case we will save the data in this state variable so let's Create a new Arrow function to get the dash data from the API here we will write const get Dash data equal to snc here we will create this Arrow function here we will add the TR catch block because we are going to deal with apis then we will add the const curly bres data equal to await here we will use exos dog method in this one we have to provide the Backend URL then we will concatenate the API endpoint so our API endpoint
is/ API SL admin SL dashboard after that here we will add the curly Braes and we will Define the headers in this one we will store one object where we will provide the admin token so just add a token after that here we will check if data do success is true in that case we are going to set Dash data and here we will Provide data dot dash data suppose the data do success is false in that case we will add the elsea statement and here we will add the toast notification with the ER type
here we will provide data. message if any error occurs in this triy block then catch block will be executed so just copy this toast error and paste it here so that we will get the error in the toast Notification here we have to add the curly addes now it is correct now we have created this function get Dash data next we have to provide this function and a state variable in this value object so just add Dash data then we will add get test data now just copy this things from here save the changes then
open dashboard. jsx file here we will D structure the admin token get Dash data function cancel Appointment function Dash data State variable in this component so just add cardly say we will provide a token get Dash data cancel appointment function then Dash data State we will get these things from use context hook and here we will provide the admin context now we have this data after that we will create one use effect effect and in this use effect we will pass this Aro function here we will add the dependency Are and in this are we
will add admin token after that in this we will add the if statement and here we will check if we have the admin token in that case only we are going to call get Dash data function so we have to collect this AR function now the use effect is ready if I open the admin context. jsx file so after setting this data we will console log this data so just provide data do- dat now save the changes and come back To the web browser if I select inspect and go to console refresh this web page
now you can see we are getting one object and in this one we have the appointment 7 doctors 15 and here we have the latest five appointments then we have the total number of patients so we have created two patients accounts on this website that's why we are getting pents 2 now let's come back to the vs code Editor dashboard. jsx file and here we will create the UI and we will display these data in the UI so first after this return we will add Dash data and operator so that when we have the dash
data then only we will return this div first in this div we will add the class name property and here we will provide margin five after this div within this div we will add one more Div here let's add another div in this one we will add the image tag in this image SRC we will add assets so we are not getting the assets suggestion so just open assets. JS file from the admin after that if I type assets now we are getting the suggestion assets so select this one then add dot do icon after
this image Tag here we will create one div and in this div we will create two paragraph tags so just add P into two in the first P tag we will display the number of doctors so we are going to use this API data where we have doctor's property so just add Dash data do doctors after that here in the second P tag we will display text that is Doctors Now save the changes and come back to the web Browser now you can see we are getting this doctors's icon then 15 then doctors after that
let's create three other copy of this div so just copy this div and paste it for two times in the second one we will provide assets dot appointments icon in this P tag we will use dashboard data do appointments and here we will remove this text and here we will type appointments save the Changes now we are getting this appointment icon and seven appointments after that in the third div we will add assets dot patient icon and in this P tag we will use Dash data. bent after that here we will remove this text and
we will type patients save the changes now you can see we are getting two patients Right after that let's add the CSS properties for this component so in this div let's add the class name property here we will provide Flex Flex wrap and GAP three save the changes now can see it is aligned side by side after that we will add the CSS properties in this div so just add the class name property here we will provide Flex item Center Gap two then background white then padding minimum width rounded then border two and Border color
then we will add the cursor pointer then we will add the hover effect where we will add the scale then we will add the transition all save the changes now you can see the changes in the first box you can see it is same as we have added in the figma design now we will add the CSS properties in this div and in this div also so let's copy this Class name from here and in this D we will add the class name property and paste the same classes save the changes now you can see
it is looking good next we will add the CSS properties for these image tag so in this image we will add the class name property here we will provide width 14 let me just copy It paste it in this another image and in this first image also save the changes now the size for this image is perfect next we will add the CSS properties for these text you can see the number text is large and these text are a small so just come back to vs code here in this P tag we will add the
class name property here we will provide the class name text Excel font semi bold text Color gray 600 now save the changes now you can see we are getting the text in big size now just copy this class name from here and we will paste it in another P tag and in this P tag also save the changes so these text which is 15 7 and two is have bigger font then we will provide the CSS properties for these text which is doctor's appointments so in this ped tag we will add the class name Property
here we will provide text Gray 400 now just copy this class name from here paste it here in this P tag and paste it here in this P tag where we have added patients save the changes now you can see this dashboard is looking good after that if I go to console in this object you can see we are getting this latest appointments so we have to display this latest appointments in this Format so let's come back to the vs code editor so after this dip tag here we will create another div in this one
we will add one more div in this one we will add one image tag and the image SRC here we will provide assets dot list icon after this image tag here we will create one paragraph tag and in this paragraph tag we will write latest bookings Save the changes here we are getting this icon and this text now we will add the classes so first in this div we will provide the class name property and here we will provide background white after that in this div tag let's add the class name property let's separate it
in this class last name we will provide Flex item Center Gap 2.5 padding X and padding y margin top rounded top and Border after that we will come to this P tag and here we will add the class name property and here we will provide font semibold save the changes now you can see we have this latest booking section and now we'll display these booking details to display these details after this div we will create One more div in this div we will add some classes so just add class name here we will provide padding
top then we will add the Border then we will add border top zero in this D we will add the curly bres and here we will add Dash data Dot latest appointments property that contains one AR with Five Element so just copy and paste it after that we will use do map method because it is an array and in this one we will pass the arrow function in this one we will return one div from the parameter we will get the individual item and with that we will take index now we will add the key
property in this div so just add key equal to Index now we have this div in this div first we will display one image tag and in this image SRC we have to display doctor image so to get the doctor's image we will use item do doc data do image after this image tag we will create one more div and this div we will add two P tag so let's add P into two in the first P tag we will display the doctor name for that let's add curly Braes and in this One we will
add item dot doc data dot name after this paragraph tag in the second P tag we will add slot date so to display the slot date here just add the curly bres then add item Dot slot date after this div here we have to display this cancel button and if it is cancelled then we have to display the Cancelled text for that for that let's come to this appointments page as you can see here we have the action and in this acction we have cancelled so we have to copy the logic from this page so
let's come back we will open all appointments. jsx file from here let's copy this curly bres so just copy it from here and we will open dashboard. jsx and here we will paste the code right click and select format document save the Changes now if I come to dashboard page here we are getting the doctor image name this booking date we are getting cancelled because we have already cancelled this appointment you you can see the same thing in appointment page now we will add the CSS properties in this component so first we will add the
CSS properties in this div so here we will add the class name let's provide the classes Flex item Center padding Gap three then hover effect background color gray 100 after that we will come to this image tag here we will add the class name property and here we will provide rounded full width 10 after that we will come to this div here also we will add the class name property and here we will provide Flex one then text a small after that come to this P tag here We will add this class name property here
we will provide text Gray 800 in this second P tag we will provide text Gray 600 and in this first P tag we will add font medium save the changes let's come to the dashboard page now you can see we are getting this effect and here we have this cancelled text now just come back to the database page and we will delete all the previous appointments So all appointments has been deleted now we will make some fresh appointments so let's click on this doctor select the date and time click on booking now if I come
to this page and refresh it now you can see we are getting the latest bookings and if I open this appointments here you can see we are getting the patient data doctor's data age and date and time but in this dashboard here we Are getting the date in another format so we have to use the function that we have created under app context. jsx file slot date format so just copy this and we will come to dashboard. jsx file and in this page we will add const curly addes slot date format equal to use context
and inside this we will provide the app context now just a scroll down and here we have provided this slot date so just remove it and here we will use slot date Format and inside this parameter we will pass item. slot date save the changes now we are getting this date in correct format so now we have created this dashboard page for the admin and from here we can see all the appointments here we can add a new doctor and in this doctor's list we can see all the doctors and we can use this checkbox
to Mark the doctor as available or Unavailable now we have completed the admin dashboard next we have to create the doctor dashboard so these menus are for the admin we will create the separate dashboard for the doctor for that let's click on this log out button now we are logged out as you can see here after that we will click on this doctor login and here we will create the logic so that we can log in the doctor also for that we will come back to the vs code Editor and we will close all the
these files now just open the backend folder and in this one we will open do controller.js file now in this file we will add the controller function so that we can allow doctors to login so first we will add the comment API for Doctor login after that we will create one Arrow function with the name login doctor so just just add const login doctor equal to create one async Arrow function in This parameter we will take request and response then create the arrow function after that we will add the TR catch block and in the
catch block we will paste the same statement from the above catch block so just copy and paste it here after that let's open Dr model. JS file here you can see while creating the doctor using the admin panel we have provided the email ID and password so now we will use this email ID and Password to authenticate the doctor so in this triy block first we will get the email ID and password from request so just add const curly addresses email and password from request. body after that we have to find the doctor using this
email ID so just add const doctor equal to await here we are going to use the doctor model so let's import it here we will add doctor Model then we will use do find one method in this method we will add this object and in this object we will provide the email ID that we are getting from the request after that we will get the doctor and if the doctor is available with this email ID then we will add one check so let's add the if statement and here we will add the condition if we
don't have the doctor with this email ID in that case we will return one response So just add the return statement and here we will add response. Json and in this one we will add the object where we will provide success property and here we will make it false after that we will add the message also and in this message property we will add invalid credentials suppose we find any doctor with this email ID then we will check the password that we have received from the body is matching with the password saved in the Database
for that here we will add const we will create one variable that is is match here we will use a wait and after that we will use the bcrypt package so first we have to import the bcrypt package just add import bcrypt from we will provide the bcrypt package after that in this function we will add await bcrypt do Compare here we will compare the password so first we will provide the password that we are getting from the request after that we will provide the hased password from the database so now we have this doctor
from the datab so in this doctor we will find the password property so just add doctor do password so this is the password saved in the database now if both passwords are matching then in this variable we will get true and if it is not matching Then it will become false so here we will use the if statement and here let's check if this variable is true it means password is correct in that case we will provide the authentication token so just add cost token equal to now we will use the JWT to create the
token so let's import the JWT so just add import JWT from Json web token package after that we can use the JWT do sign method and in this method we have To provide the data so in the data we will provide one object where we will Define the ID property and in this ID we will save the doctor's ID so just add doctor doore ID after providing this ID we have to provide the JWT secret we have created the JWT Secret in this EnV file you can see here so let's use it here so just
add process. EnV Dot JWT secret now we have the token after that we will generate the response and in that response we will send this token for that here we will write response. Json in this one we will add object where we will add the access property true and after that we will add this token if this is match is false then we will add the elsea statement and in this else statement we will send one response so let's copy the response from Here and paste it here in the message we will provide invalid credentials
now we have created the login doctor controller function now export this function so just add login doctor in this export object now save the changes and come to doctor route. JS file after this doctor list here just add the comma and we will destructure the function that we have just created which is login doctor by using this controller function We will create the API out to create the API route we will write Dr router Dot and the method will be post and in this method we will add the path that is SL login after that
here we will add login doctor controller function we will save this file and after that we will taste this API to test this API let's open the Thunder client click on new request we will select the post method and here we will Add the endpoint so just add Local Host Port 4,000 SL API SL doctor after that we will add slash login now in this body we have to provide the email ID and password so just add the curly veres first we will add the email property and in this email property we have to provide
the email so while adding the doctor from the admin panel here we have provided individual email ID and Password for doctors so we will try to login with that doctor email ID and password so let's open all doctors let's try to login for this doctor so let me provide the email that is Richard at prescripto Doom we have used this email while creating the doctor profile now we will add the password and in this password property we will provide the password that we have added while creating the doctor's profile after that Click on this send
button here we are getting invalid credentials uh here we have used the incorrect email ID let me correct it Richard at demo.com so now the response is Success right if I go to database you can see the email ID is reard ATD demo.com so when we have provided this email ID and password and click on the send button we will get the response with success true and we will get token so this login API is working fine Now go to admin folder and in this one we will go to login. jsx file in this file
we will add the logic so that we can allow the doctors to login into dasw for that let's open do context. jsx file and here we will create one a state variable in which we will save the doctor authentication token for that here first we will create one variable with the name backend URL we will get this backend URL from The envirment variable if I open this envirment variable file here we have the variable name so just copy it now here we will write import. meta dot EnV dot then paste the variable name V vacant
URL now we have the vacant URL to make the API call after that we will create the estate variable with the name d token this estate variable is for storing the doctor authentication token Now we will add the setter function set D token that is Dr token it will be user State and initialize it with empty string after that we have to provide this D token and set D token State variable in this value object so that we can access it in any component so just add D token and set D token after that we
will add the backend URL also now save the changes after that again come back to the login. jsx file from the admin Project and in this file we we have created the else statement so here we are checking if the state is admin then we are going to hit the admin login API and if the state is not equal to admin then we will hit the doctors's login API so in this else statement we have to add the API call but before that you can see we are getting set a token and backend URL from
admin context similarly we have to get set D token Setter function from from Doctor context so let's add const Curly veres we will add set D toen equal to use context in this context we have to provide the doctor context so we are getting this Su just click here so doctor context has been imported now we have this doctor token here we will add the logic so that we will hit the API and we can allow the doctors to login into dashboard so just add const data equal to await here we will use the xuse
dopost method and in this one we will provide The backend URL and then we will concatenate the API endpoint that is SL API SL doctor SL login here we have to pass the email ID and password so just add the object and provide email and password after that we will get the response where we will get the success property so let me just copy this ifls statement from here and paste it here here we have to make some changes so instead of a token we will use D Token so just add D token after that
here we are using set a Tok to so instead of that we will add set D token which is do token now we have added the logic for the doctor login API and using this we can allow the doctors to login on the web page and we will save the token in the D token State variable and we will also save it in the local storage after that let's come back to the admin context. jsx File you can see we have initialized this Val varable with local storage also so we are checking if the local
storage have one entry with this a token key then we are using that a token value right and if it is not available then we are using empty string so we will use the same logic so let me just copy it and we will open do context. jsx file and in this estate variable remove this double quote and paste the same thing instead of a token we will check with d Token so let's write d d token and here also we will add D token now we have added the logic for the doctor login so
now whenever we will reload the web page then we will get the D token from the local storage now save the changes and taste this logic so let's come back to the login. jsx file and after setting this token we will add log and in this console log we will provide data. token so that we can see The token in the console log so let's open the web browser go to admin panel just click on the log out button now we are logged out now we will switch this login page this is the admin login
page and if I click here it will display dror login page now we are getting doctor login now click on the inspect button now click on this console here we are getting this data so let me just clear this data from Here now we are at the doctor login we will add the email ID for the doctor so the email ID is reard at demo.com then add the password 128 and click on this login button now we are getting this token in the console so this form is working fine and once we click on this
login button we are still add the login page because when we come to app.jsx file here you can see we have added if we have a token then we are Going to display these tag and if we don't have this a token then we will display this login page and toast notification so similarly we will get the D token in this page so just add cost car says D token and here we will get it from use context then provide doctor context now after this a token we will add the or operator and provide D
token now save the changes now you can see we are Redirected to the dashboard here we are getting crypto dashboard panel and it says doctor now let's save this password so we can easily login now we don't have any sidebar because if I open the sidebar component here we have added the logic if a token is available then we are displaying the sidebar but here we don't have the a token when we login with the doc Credentials so now we have the doctor authentication token so we will display different Navigation V in the left side
for that let's open doctor folder and in this doctor folder we will create multiple Pages create a new file with the name Dr appointment jsx here we will use r a f c snippet save the changes after that create one more file and write the name dror Profile do jsx here also we will use R Ace now let's create one more file with the name Dr dashboard. jsx here also we will use our afce snippit save this file now we have created three files do appointments Dr Dashboard Dr profile in the admin we have four
pages that is ADD doctor but we are not adding this page in the doctor Dashboard in this do appointments. jsx file we will display all the appointments of this a specific doctor in this doctor dashboard we will display the data like total earnings total number of patients and latest appointments similarly in this doctor profile we will add the profile logic so that doctor can edit their address or any other basic information before that let's open app.jsx file and for these Pages we will Create the routes so after this let's copy this routes doctor list paste
it again and so here we will add the comment so that we can differentiate between the admin route and dror Route so just add admin route in the comment and here we will add one more comment we will add Dr route so here we have created one copy of this route here we have to change the path so remove move It here we will provide do dashboard in this element we will remove this doctor list and here we will provide dror dashboard so we are getting this Su do dashboard from Pages folder select it so
this doctor dashboard has been imported now create one more copy of it and here we will provide the path that is doctor appointment ments in this one we will remove this doctor dashboard here we will Provide doctor appointments so here we are getting this component doctor appointments click here so it has been imported next we will add one more route so let's create one more copy of it here we will add the path do- profile after that we will remove the component here we will add doctor profile component so we are getting the suggestion just
click here so the doctor profile will be imported so now we have created three route for this three Pages now we will come to sidebar. jsx file and here let's copy this tary operator just copy it from here and we will paste this same after that we will get the D token here so just add const curly presses D token equal to use context in this one we will provide doctor context now in this second tary operator we will remove this a token and we will Provide D token after that as you can see we
have this dashboard so we need this dashboard in the doctor Page here we have the appointments we need the appointments also in the doctor dashboard now remove this add doctor feature so remove this nav link then we have this doctor's list so instead of this doctor's list we will add Profile so we have added profile now we have updated the name dashboard appointments and profile after that we have to update the path so in this two property we have added admin dashboard so instead of that we will add do dashboard in the second one we
will add doctor appointments now in the third one we will remove this doctor list here we have to add doctor profile Now we have added the two property and this path that is for the pages of do dashboard save the changes and come back to the web browser now you can see we have the dashboard appointments and profile here we are getting doctor appointments and in the dashboard we are getting dror dashboard so our routes is perfectly working now we will create the appointments page and here will display all the appointments of logged in doctor
So suppose we have logged in with this Richard account then we'll display all appointments booked with this particular doctor for that we have to create the API endpoint so let's come back to the vs code editor we will come to backend folder so let me close all these files come to backend folder in this backend folder we will create one middleware so that we can authenticate the Doctor so before creating the controller function we will create the middleware so using this middleware we will authenticate the doctor and then we will add the access in controller
function so let's create a new file in this middleware folder here we will add the name O doctor. JS after creating this file we will open Au user.js file and just copy all the code from here and we will come to O doctor. JS file paste it All here we will make some changes rename this comment it will be do authen tication middleware after this here we will update o doctor and here we are getting the token so instead of that we'll take D token here we will check if we don't have any D token
then we will return this response now if we have the D token then we will verify it using JWT verify Method here we will provide D token and in this D token and after this D token we have to provide the JWT secret now in the request do body we will not add the user ID here we will add doc ID and after decoding this token we will get one doc ID so we will save that in request. body using doc ID property after that we have to export or doctor so now we have created
the Au doctor middleware so that we can authenticate The doctor using token now just close these files let's open do controller.js file and here we will create One controller function to get all the appointments of a specific doctor for that here we will add the comment so let's write API to get doctor appointments for doctor panel after that we will create one Arrow function with the name appointments doctor so just add const appointments Doctor equal to a sync and in this parameter we will take request and response after that we will create this Arrow function
in this function we will add the try catch block and just copy this statement from the previous catch block and and paste it here here we have to add the logic so that we will get the appointments of a specific doctor so just add const curly bres and we will Provide doc ID from request. body so you can see we have created this o dr.js we will provide the doctor token and it will convert the token into doc ID using this doc ID we are going to find the appointments of this doctor for that we
will create one variable with the name appointments here we will use a wait after that we will use the appointments model we are not Getting the suggestion of the appointment model so let me open the appointment model. JS file after that if I type appointment now we are getting the suggestion appointment model just click on suggestion so it will automatically import the file after this model we will add do find method in this find method we will add the curly presses and here just provide The doc ID that we are getting from the request do
Body by executing this statement we will get all the appointments in this appointments areay of this doctor so now we have the appointments next we have to create the response and in the response we will send this appointments data so just add response. Json here we will add the curly Braes in this one we will define success property and then provide true after That we will add this appointments so that we can can display the appointments data in the doctor panel now we have created the logic for this single doctor appointment now we will export
this function here so here just add appointments doctor after that let's come to Dr route. JS file and here in this file we have to D structure that controller function so just add appointments doctor after that we will create a new Route so just add doctor router. getet method here we are going to use the get method and in this get method we will provide the endpoint name that is/ appointments after that we have to add the O doctor middleware we are not getting this suggestion for o doctor so let's open that file now come
back here and if I type O doctor now we are getting this Su just click here it will import this file after that we will add the comma and Here just provide appointments doctor controller function now the API is ready Let's test this API to test this API let's come to admin folder context folder and Dr context. jsx file here we will call the API and when we will get all appointments data we we will store the data in a state variable so let's create one state variable so we will add con we will add
the variable name Appointments set appointments equal to user State and initialize it with mt array now we have the state variable next we have to create the arrow function with the name get appointments so just add [Music] const get appointments equal to and it will be one asynchronous Arrow function after that we are going to deal With the API so we will add try catch block now in this Tri block we will add cons curs data equal to we will add exos we are not getting the suggestion for the exos so we have to import
it so just add import exos from exos package after that let's type exos dot now we are going to use the get method here we have to add the await keyword in this get method we have to Provide our backend API so we will add the backend URL and we will concatenate the API endpoint that is/ API SL doctor SL profile after that we will add one object and here we will Define headers in this headers we will add one object and in this object we will add D token now we have added this D
token after that we will get one response so let's add the if statement and in this if statement we will check If data. success is true in that case we will receive all the appointments and we will save that appointments in this appointments estate for that here we will write set appointments then provide data do appoint ments dot appointments is an array so we are going to use dot reverse method so that we will get the latest appointment in the first position of the array so now if the data do success is false then we
will add the elsea Statement and here we will display a toast notification so first we have to import the toast from react toasttify package so just add import curly brushes toast from react toasttify package after that here we will add toast. error and in this one we will provide data. message now our function is ready next we have to call this function whenever We load our appointments page for that we have to pass this function and a state variable in this value so that we can access it in any Pages or component and before that
in this catch block we will add the notification so here in this one we'll add console log dot console log and error then display the toast notification with the error type in this one we will provide error. message now let's add this get appointments Appointment estate and set appointments function in this value object so let's add appointments set appointments after that we will add the G appointments function after getting this data let me just copy it and we will add the console log also so that we can see the data in console so just add
console log data appointments reverse method save the changes and uh we will come to doctor Folder doctor appointments. jsx file in this file before this return a statement we will get the state variables and function from Doctor context for that we will add const curly say here we will add D token appointments State then get appointments function we will get these from use context and in this use context we will provide doctor context now we have these data now we Will add the use effect and in this use effect we will pass this Arrow function
after this AR function we will add the dependency aray and in this one we will add D token so that so that whenever the D token will be updated then this function will be executed now here we will check if we have the D token in that case we will get appointments in this state variable using this function so we are calling This function now just come back to the web browser here we are getting request failed with a status code 404 so let's come back to the Dr context. jsx file here we have to
provide SL API SL doctor SL appointments now save the changes now if I reload this web page now we don't have any error let's click on this inspect and go to console now in this console we Are getting one add a with zero element because we don't have any bookings for this doctor so let me reload this web page click on this doctor select the date and time and book an appointment now you can see we have booked the appointment with this Doctor Richard and if I go to doctor panel refresh this web page so
now you can see in this console we have one add with one object where you can see the Appointments details now you can see we have total two appointments and for this doctor we have only one appointment at 11:00 a.m. and if I open this doctor panel go to console we are getting only one appointment that is for particular doctor at 11:00 a.m. now if I login with another doctor then we will get the data of another doctor so our logic is working fine now we have to Display this data on web page in table
format so that doctor can see these details in the doctor dashboard for that let's come back to the vs code editor and here we will create the UI part of the Dr appointments. jsx file so let me remove this text and within this div let's add one P tag in this P tag we will add all appointments after this P tag we will Create one div inside this div we will create one more div and inside this div we will create 7 P tag so let's add P into 7 now we will use this div
as a table and in the table we need seven columns to dis playay seven details so first we have to display the serial number of the booking then we will display the patient details so just add pent after that we will display the payment Status where we will display the payment is cash or online and in the fourth P tag we will add the patient age then in the next P tag we will display the appointment date and time after that we will display the fee then we will add the action so that doctor can
cancel the appointment after this St we have to structure our response data so let's come back to the vs code again and before that we will add the CSS properties for these content so first we will add the class name property in this div tag here we will provide width full Max width then margin five after that in this paragraph tag we will add the class name property and here we will provide the margin bottom text large font medium after that we will come to this div here also we will add the class name property
and here we will provide Background white border rounded text as small Max height at VH overflow y scroll with that we will add the minimum height also that is 50 VH after that we will come to this div here we will add the class name property we are going to display this table header for for large and medium screen and for a smaller screen we will hide it so just add Max a small hidden so it will be Hidden in Mobile screen after that we'll add grid grid columns then use this template in GD columns
after that we will add the Gap padding y padding X then we will add the border from bottom now save the changes and come back to the web browser now you can see we are getting the table structure that is looking good and if I come to smaller screen then this header is hidden after that you can see the text In the left sidew is not looking good for a smaller screen so we will optimize this UI design for the smaller screen so let's come back to the sidebar. jsx file and here in this P
tag let's add class name property that is hidden and for medium devices we will make block so let's copy this class name from here we will paste it here in this P tag and in this next P tag and in this other P we will add the same classes so for all the P tag in the left Side where we have added that class name now you can see in the smaller screen we will get only icons and if I increase the screen width we will get the icons and text also now let's display the
appointment details on this page so just come back to the Dr appointments. jsx file we have created the table Header by using this format we will display the appointments data for that we will add the curly bres and in this curly bres we Will use the appointments State this appointments is one aray so we can use the map method and in this one we will pass the arrow function here we are going to use this blacket so that we can return one div and inside this let's add this div and here in this parameter we
will get individual item and index number in this div we will add the key property and in this key property we Will provide this index after that let's create one paragraph tag in this paragraph tag we have to display the index number so here let's add the curly Braes index and index starts from zero that's why we will increase it by one so just add index + one after this P tag we will create one div and in this div we will add the image tag where we will display the users Image so in this
SRC we will provide item dot user data do image so we will get the users image after this image tag we will create one P tag and in this P tag we will display the patient name so let's add the item. user data do name after this div let's create one more div in this div we have to display the payment status for that we will create one paragraph tag in this Paragraph tag we will add the curly reses and here just check if item. payment is true in that case user have made the payment
using online payment method so just provide one a string and write the text online suppose if this item do payment is false it means the payment is not made through online mode then we will add the text cash so that the doctor can see the Payment has been made or not after this div we will create the paragraph tag and in this P tag we have to display the patient age so let me come back to the web browser and in this we are getting this user data and in this one we have the date
of worth property but by using this date of birth we have to calculate the age so we have already created a function in this app context. JX file you can see calculate age function so we Have to use this function so we have to import this function in our doctor appointments component so let's open this file Dr appointments. jsx here we will add const curly Brees calculate age we will get it from use context then provide the app context now we have this function now in this paragraph tag where we have to display the age
here let's add curly Bres and in the curly bres we will call calculate age function and in this one we have to provide item. user user data dot date of worth after that save the changes and come back to the web page now you can see we are getting the user image name payment type cash and here we are getting the age 24 after the age we have to display the date and time of the appointment for that we will create the paragraph tag And here we have to display the date and time so to
display the date in the app context you can see we have created one function with the name slot date format so we have to use this function so let's come to this page Dr appointments. jsx and after this calculate Age We Will D structure slot date format function after that come to this P tag and here we will add this curly veres here we will call slot date format and in this one we will Provide item dot slot date after that we will add one comma and here we will add the C SS and display
the time so just add item do slot time now save the changes now you can see we are getting date and time after that we have to display the appointment fee for that let's add one more P tag here we need the currency symbol so We will get the currency symbol from this app context so just add currency and after that in this P tag we can use the cures currency save the changes now we are getting the dollar sign after that we will add one more curly veres and in this one we have to
provide item do amount save the changes so now we are getting The amount $140 after this P tag we have to create the accent button so that we can allow the doctors to cancel the appointment or complete the appointment for that here we will add one div in this div we will add two images tags so let's add image into two in the first image tag we will provide curly presses then we will use the Assets so when I click here the assets file will be imported here in the first image tag we will provide
the cancel icon so just add dot cancel icon now in this second SRC we will add the curly Braes assets dot tick icon that is check mark icon now save the changes now you can see we are getting this cross and check icon now we have all the data next we have to provide the CSS Properties for this section so let's come to this div here we will add the class name property here we will add the classes for a smaller screen so just add Flex Flex wrap justify between Max a small Gap Max a
small text base if I save the changes now you can see all contents are aligned in same horizontal line now for the medium screen and above We will use the grid layout so just add smaller screen grid grid columns this fraction after that provide the Gap item Center text color gray 500 then provide the padding then provide border bottom now save the changes now you can see we have the Border bottom also after that we have to add the H effect on this div so here let's add hover property and We will provide the background
gray 15 save the changes now you can see the background color is changing ing when I move cursor after that we will add the CSS properties for these text and images for the smaller screen we will hide this index number so in this P tag we will add class name property here we will add Max a small hidden if we reduce the screen now we don't have the index Number after that we will add the CSS properties for this div tag so let's add the class name property here we will provide Flex item Center and
GAP two after that in this image tag we will add the class name property here we will provide the width and rounded full save the changes so the size for this patient image is is good after that come to this P Tag here we will add the class name property here we will provide text extra small inline border and Border primary color then we will add the padding then border radius save the changes now you can see this text cast is looking good with this border and radius after after that we will add the CSS
properties for this age we have to hide this age for Mobile screen so let me just copy the class name from here and we will paste it here in this P Tag after that we will come to this images tag in these image tag we will add the class name here we will provide width 10 cursor pointer save the changes after adding this class name in this div we will add the class name here we will provide Flex save the changes and open the web page now you can see this table is looking good and
if I reduce the screen Size so you will see this format in the Mobile screen let me increase the width now let's book one more appointment with same doctor we will select the time we will change the date and click on book an appointment now you can see we have successfully booked the appointment with this doctor now we have two appointments for this particular doctor now if I open the admin panel then go to appointments page So here you can see we are getting two appointments the first one is for 23 August and second one
is for 25 August so this logic is working fine after that here we have to make the logic so that we can cancel the appointment or we can mark the appointment completed from the appointment page for that we will come back to the vs code editor let's close these files from here then open Dr controller.js file then we will add the logic so that we Can mark the appointment completed for that first we will add one comment here API to Mark appointment completed for Doctor panel now we will create one Arrow function with the name
appointment complete so just add const appointment complete equal to snc then add the Aro function here we will add the TR catch block let's copy the statement from the previous catch block just paste it here In this Tri block we will get the doc ID and appointment ID from body so just add const doc ID comma appointment ID equal to request. body we will get this dock ID from the O doctor middleware where we convert the token into doctor ID and we will pass this appointment ID in the API request so first we have to
find the appointment data using this appointment ID so just Add cons appointment data equal to then we will use the appointment model dot findy ID method in this one we have to provide this appointment ID that we are getting from the request after that we will create the appointment data here we have to add the await after that we will get the appointment data in this variable now we will add one check here we will add if and we will check if we have the Appointment data and with that we have the appointment data dot
doc ID is equal to Doc ID that we are getting from the O doctor middleware in that case we can authenticate the same doctor has logged in with whom appointment is booked after that in this if statement we will come back to the database if I open the appointments here we have one property called is completed so we have to make This property true for that just add await appointment model dot find y ID and update method after that first we will provide the appointment ID after that we will provide one object where we will
add is completed property and we will make it true after that we will make one response so we will write return response do Json in this one we will add the object where we will Define the success Property true after that we will add the message that is appointment completed after that if we don't have the appointment data or the doctor ID is not matching with the doctor ID received from the middleware in that case we will add else condition and return the response so just copy this return statement and paste it here here we
will add success Fals and in this message we will add Mark failed now the controller function is ready next we will create the copy of this controller function from here and paste it again we will make some changes in the second one so that we can create the logic for this cancel for that we will change the comment here we will add API to cancel appoint M for Doctor Panel and we will name this function as appointment cancel after that we will get this doc ID and appointment ID then we will get the appointment data
using this appointment ID now in this statement we will add the same code after that here we have to make changes in this is completed so instead of this is completed we will make changes in cancelled property if I open the database here you Can see we have the cancelled property right so instead of this is completed we will add cancelled and we will make it true so whenever we will call the cancel API then we will change the property cancelled true and here in the message we will add appointment cancelled after that in this
Elsa statement we will add the message cancellation fied after that we will export these functions appointment cancel and Appointment complete using this export object so let's add appointment cancel and appointment complete now save the changes and come back to the Dr .js file here we will destructure both functions so just add appointment complete and appointment cancel by using this controller function we will create the routes here we will write Dr router. poost method in this One we will add endpoint address that is SL complete appointment after that we will add the middleware that is O
doctor middleware and after that we will add appointment complete controller function now just create one copy of it here we will add endpoint address cancel appointment here we will add the controller function that is appointment cancel controller function now the apis are ready next link this API with the doctor panel so let's come to admin folder then go to Dr context. jsx file in this file before this value object we will create the function to Mark the appointment as completed for that let's add const complete appointment equal to then add s Sync here we will
create this Arrow function inside this function we will Get the appointment ID as parameter so just add appointment ID in this function we have to make the API call so that we can mark this appointment as completed so just add try catch block and let's copy the statement from this catch block and paste it in this catch block now in this Tri block we will add const curly Braes data equal to await after that we will use exos dopost method in this one we will provide the backend URL and after that we will add the
API endpoint that is SL API SL doctor SL complete appointment after that here we have to add the body and in the body we have to send the appointment ID after that we have to add the headers so let's add headers and in this headers we will add this object where we will provide the doctor token so just add D token after making the API call we will add The if statement here we will check if the data do success is true in that case we're going to display a toast notification so just add toast.
success and in this one we will provide data. message with that we will update all the appointments data so so let's add get all appointments get appointments and call the function after that if the data. success is false then we will add the Elsa statement and in this Elsa Statement we will add the toast notification so just add toast. error here we will provide data. message now the function is ready to Mark the appoint appointment as completed after that we will create one more function to cancel the appointment for that let's create the copy of
this function we will change the function name it will be cancel appointment here also we will get the Appointment ID and instead of this API endpoint we will add the cancel appointment endpoint rest other things will be same so we have created two function first one is complete appointment and the second one is cancel appointment now we have to pass these functions in this value object so that we can access it in any other component so just add complete appointment and cancel appointment function Now save the changes and come back to the doctor folder Dr
appointments. jsx file here we will destructure the functions so just add complete appointment and cancel appointment next we have to link this function with these image tag where we are displaying cross icon and check icon so in this cross icon in the first image tag we will add the onclick property and here we will add the arrow function and in this one we will Call cancel appointment function and here we have to provide the appointment ID to get the appointment ID just add item _ ID in this image tag also we will add the onclick
property and here we will pass the arrow function here we will call complete appointment function and in this one we will provide Item doore ID that is our appointment ID now save the changes now come back to the web browser Here let me click on this check icon here we are getting network error let's check it in console let me try it again we are getting the same error so let's try to solve it we will come back to the vs code let's open the terminal so in this backend terminal you can see we are
getting request is not defined so this error is coming from appointment complete function in the doctor controller so let's come to Backend then open dror controller.js file here you can see we have missed the request and response in the parameter so just add request and response in both functions as a parameter request and response now we have added this parameter in both function now save the changes and hide this terminal and let's open the web browser reload this web page now just click on this tick Icon here you can see the notification appointment completed let's
click on the second icon here also you can see appointment completed to check this let's open this response in the console and if I see the appointment data you can see each completed property is true by using this property we will hide this accent button whenever this is completed is true and instead of these icons button we will Display one message called completed so that the doctor will get to know this appointment is completed so just come back to the vs code editor and come to do appointments. jsx file here after this P tag we
will add one curly addes and here first we will check if our item dot cancelled property is true in that case here we will add the question mark and add one paragraph tag suppose the Item do cancelled is not true in that case we will add this colon and in this one we will add nested tary operator so we will again check if the item dot is completed property is true or not so let's add is completed if it is true in that case we will add the question mark and in this one we will
provide one P tag and suppose this property is false in that case we will add this colum and after this column we will add This div so let's remove this div from here and paste it here after this colum let's right click and select form a document now first we are checking if the appointment is cancelled then we will provide the message in this P tag so let's add cancelled we will add this cancelled text and after that we will check if the appointment is not cancelled then we will check for is our appointment is
Completed or not if the appointment is completed in that case we will provide one message in this P tag so here we will add completed and if the appointment is not completed then we will display two accent buttons now you can see after making the changes we are getting the message completed because we have already completed the appointment by clicking on the check icon now let's create one more Appointment go to homepage open any doctor let's select this doctor at the appointment let's add the appointment for this Dr Richard so let me open this doctor
and book the appointment because we are logged in in this Richard dashboard so let's come back to the do dashboard we will refresh it now you can see here we have a new appointment at the bottom so we have to dissolve it so let's Open do context. jsx file here we will come to get appointments function from here we will remove this do reverse we will save the changes and let's come to Dr appointments. Js file and before this map here we will add do reverse now you can see the new appointment is displayed on
the top now if I click on this cancel icon You can see the message appointment cancelled and here in this accent tab we are getting cancelled next we will add the CSS properties for these text so let's come here in this ptag we will add the class name property and here we will provide text red 400 after that we will add text extra small then font medium after that in this second P tag we will add the class name property here we will provide text Green 500 then add the class name text extra small font
[Music] medium save the changes and come back to the web page now you can see the cancelled text in red color and completed in the green color now it is looking good now doctor can easily Mark the appointment completed or doctor can cancel the appointment now our Appointment page for the doctor dashboard is ready if I open this web page in Mobile screen you can see in the Mobile screen also it is looking good after that we will create this dashboard where doctor can see total earnings total number of patients and total number of appointments
so let's come to Dr controller.js file and after this function we will add one comment that is API to get dashboard data for doctor Panel here we will create one Arrow function with the name doctor dashboard it will be a sync Arrow function and here we will add the request and response after that we will create this Aro function in this function we will add the TR catch block now let me just copy this statement from here here and paste it here in this catch Block in this Tri block first we will Get the doctor
ID from request so just add const curly bres doc ID from request. body after that we will add cost appointments equal to equal to await by using the appointment model we will get the appointment data of this particular doctor so let's add appointment model do find method and in this one we will add this curly Braes and Doc ID so we will get the appointments of This particular doctor after that let's create one variable with the name earning in this earnings variable we will initialize the value with zero Now by using this appointments we will
calculate the earning of this doctor for that here we will write appointments do map method and in this one we will pass the AR function in this Aro function we will Pass individual item and by using this individual item we will calculate the earnings for that first we will add the if statement here we will check if the appointment is completed then we are going to use is completed property or we will add if the item payment is done it means the item payment is true if any of it is true appointment is completed or
the payment is made through Online then we are going to add the payment in the earnings so let's add earnings plus equal to item do amount after that we will get the total earning of the doctor now let's count the number of patients so just add let patients equal to initialize it with empty aray after that here we will use the appointments dot map Method to calculate the total number of unique patients so let's add the Aro function and in this Aro function parameter we will add the individual item then we will add the check
using this if statement here we will check if patients dot includes here we will provide the user ID of the patient so just add item. user ID we will add the not operator after Adding this not operator here we will add patients do push and in this one we will add item. user ID here we are checking first if with this user ID any data is available in this patient are then we are not going to add that appointment user ID in this patients are and if it is not available then we will add that
user ID in this patients so that we will get the total number of unique patient ID in this patient array Now we have the earning patients and after that we will create the dashboard data for that let's add con Das data equal to first we will add the earnings after that we will add the total number of appointments for that let's add appointments column appointments. length after adding the appointment's number here we will add total number of unique Patients so just add patients colum then provide patients. length after that we have to provide the latest
appointments so just add latest appointments then provide appointments do reverse after reversing this array we have to display five latest appointments so just add this slid method and in this sides method we will provide index 0 and five now the dash data is ready next we Have to send this Dash data using response so just add the response using the Json method in this one we will add the curly Braes where we will add the success property and we will make this success true after the success true we will add the dash data that we
have created here after that we will add this do dashboard controller function in this export object so here we will add do dashboard in this export save the Changes now just come to Dr route. JS file here we have to D structure that controller function so let's add doctor dashboard by using this controller function we will create a new API inpoint so just add Dr router do get method after that we have to provide SL dashboard and after adding this endpoint path we have to add the O doctor middleware and after that we will provide
the controller function that Is do dashboard now we have created this API endpoint next we have to integrate this API endpoint with the dashboard page so whenever we will open this page we will get all the data for that let's come back to the vs code editor and we will open we will come to admin folder Pages folder then come to doctor folder and we will open do dashboard. jsx file here we have to display the UI of the doctor dashboard before that let's come to Doctor context. jsx file here we will create the estate
variable where we will store the dashboard data of the doctor here here we will write con Dash data set Dash data equal to we will use the user State and initialize it with Boolean data false now we will create the arrow function to call the API and save the response data in this state variable so let's scroll down and before this value object we will create one addo function So let's add CST get Dash data equal to snc and create the arrow function in this one we will add the TR catch block let's copy the
statement from the previous catch block and paste it here now in this triy block we will add const curly braces data equal to a wait then we will add the exuse dog method here we have to add the backend URL After that we will concatenate the API endpoint that is SL API SL doctor SL dashboard after that we have to add the headers so just add the curly BS we will add headers and in this one we will add the object where we will add do token which is D token after that we have to
add the if statement and here we will check if the data do success is true in that case we will get the dashboard data from the API and we have to save that data in the a State variable so just add set- data and in this one we will provide data do- data suppose this data. success is not true in that case we will add the else statement and here we will display one toast notification with the type error and we will provide data do message so we have created the state variable and this G
Dash data function now we will add this function and state variable in this value object so that we can access it in any component so here We will add Dash data set Dash data and we will add get- data let's copy it from here and uh we will come to Dr dashboard. jsx file here before this return statement we will get this state variables and function in this component for that we will add const curly bres then provide Dash data set Dash data get Dash data then add equal to use context hook and in this
one we will provide the Doctor context now we have these State variables and functions now we will call the use effect here we will pass the Aro function and provide the dependency areay in this dependency are we will add the D token we need the D token also so just add D token and comma Now in the dependency areay we are providing D token and in this Arrow function we will add the if statement here we will check if we have This D token then only we will call get Dash data function so we will
add the function name so it will call this function after that here in this return we will add if we have the dash data and we will add this end operator so whenever we have the dash data then only we will display the UI part if we don't have this Dash data then we will not display the UI now we have this Dash data and we will display this on the UI before that we have to console log this Dash data so here we will come to Dr context. jsx file and in this one we
will add console log data do- dat so that we can see the data in the browser console so save the changes and come back to the web browser if I reload this web page here you can see we are getting data with earnings at appointments three here we have three appointments Then we have the payent one because we have booked the appointment you can see we have booked three appointment but we have booked all three appointments with the same patient that's why we are getting patients one and if we log in with a new account
and make an appointment with this doctor then it will display the patients to so this logic is working fine after that we have the latest appointments where you can see three Appointments suppose doctor have more than five or six appointments then we will get only five appointments now we will display these data in this UI for that let's come to Dr dashboard. jsx file and here we will add the UI components so as you can see in the figma design in the admin also we have created the same UI so let me just copy the
same UI design from the admin page so just open admin folder and go to Dashboard. jsx file and from here let's copy this div where we have these three elements so let's copy it from here and let's come to Dr dashboard. jsx file here in this T we will add the class name property here we will provide margin five after that we will paste the div that we have just copied right click and select format document now in the first Div we are using assets so first we have to import the assets so just add
import curly bres assets so that the assets will be imported now in the first image tag we are using assets so we will add assets. earning icon in the second one we will add assets. appointment icon then in the third one patients icon so now we are replacing only earning icon after that in the first one we will add Dash data Dot earnings let me collect the spelling here we will add the text so just add the text earning now we have added the text earnings we will use this property Das data. appointments and here
also we will leave it dashd dopents save the changes come back to the web page in the dashboard you can see we are getting three cards earning appointments and pents Here we have to display the currency symbol also so that it will display like1 80 so we need the currency symbol so just add const curly presses currency and we will get it from use context and here we will provide the app context after that before this earnings we will add the curly bres and we will provide the currency save the changes now you can see
this earning with currency Symbol now we will add the space now it is looking good after that we have to create this UI part so let me just come back to the dashboard. jsx file in the admin folder and from here let's copy this div just copy it and we will open Dr dashboard. jsx file and after this div we will paste this div that we have just copied here we are getting the data in The latest appointments so it is correct if we save the changes here we are getting some error slot date format
is not defined so we have to import this function so let's copy the name and here we have to import that from App context so just provide it here slot date format after that if I reload the web page now we don't have any Error now we are at the doctor panel here instead of the doctor we have to display the patient's name and date of booking and patients image so let's come back here we will remove this doctor data and we will use the user data do image we will add the same thing here
user data do name save the change is now we are getting this paent image and Name here you can see we are getting cancelled completed but here we are getting this cross icon so we have to collect this logic so let's come back we will open Dr appointment. jsx file let's copy this tary operator from here and we will come to Dr dashboard. jsx file and remove this tary operator and paste the code that we have just copied now if I save the changes here You can see we are getting completed completed and cancelled the
same that you can see here so this logic is working fine now in this page also we have provided this cancel appointment and complete appointment function so we have to get this function from Doctor context so here we will add the comma and just add complete appointment and cancel Appointment now save the changes now the dashboard page and appointment page is ready after that we have to create this profile page so that doctor can see their profile and doctor can make changes in their profile info so let's come back to the vs code editor we
will come to Dr controller.js file and here we have to create a controller function to get the doctor profile and another controller function to edit the doctor profile so first let's add the Comment that is API to get doctor profile for Doctor panel so let's write cons doctor profile equal to snc in this parameter we will add request and response here we will create this function first we will add the TR catch block let's copy the line from here here and paste it here in this triy block we will add const doc ID we will
Get the doc ID from the request so just add request. body after getting the doctor ID we will get the doctor profile data using the doctor ID so just add profile data equal to await and and here we will use the doctor model do findy ID method and inside this we will provide the doc ID after that we will add the select method and in this one we will add Dash password so it will remove the password Property from the doctor data and we will save that in this profile data now we have the doctor
profile data so now we will create the response using the Json method here we will add object we will Define the success property true and after that we will add the profile data also that we are getting here so now we have created this doctor profile controller function after that we will create one more controller Function to update the doctor profile for that let's add one comment that is API to update doctor profile data from Doctor panel here we will create the arrow function so just add const update doctor profile equal to a sync and
here we will add the parameter that is request and response and create the arrow Function now we will add the try catch block and copy the same statement from the previous catch block and paste it here in this dry block we will add const after adding it we will add the curly braces and here we will D structure the doctor ID fee address and AV Lael property using request. body so doctor can update these properties doctor can update the fees address and Available status after that we have to make the changes in the doctor data
using these variables here we are going to use await doctor model do find by ID and update method first we will provide the doctor ID after that we will add one object where we will add fee address and available property by executing this statement it will update the doctor data with latest fee address and available Property after that we will create one response so just add response. Json and in this one we will add the object where we will define success property true and after that we will add the message property that is profile updated
now we have created this two controller function to get the doctor profile and to update the doctor profile next we have to add this function in this object so that we can create the Routes using the controller function so in this export object let me move it in different lines so that you can see all the exported function name now here we will add the comma and we will add the function name that we have just created so we have created doctor profile and update doctor profile function right click and select format document now we
have exported these Controller function Now using this controller function we will create apis so let's come to dr.js file and here we will destructure the controller function that is doctor profile and update doctor profile here we will create a new route so let's write Dr router dot we will create the API using this get method and the end point will be/ Profile then we will add the O Dr middleware after that we will add the controller function that is Doctor profile now let's create one more route we will use the Dr router. poost method in
this one we will add the path that is/ update profile here also we will add the O doctor middleware then we will add update doctor profile controller function Now save the changes next we have to integrate these apis with this do panel profile page for that we will come to admin folder then open context and Dr context. jsx file here we will create one state variable to store the profile data so write the variable name profile data Setter function name is set profile data equal to use a state and initialize it with False after that
we will create the arrow function to fetch the profile data from API so here we will write const get profile data equal to a sync and create this AR function inside this addo function we will add the try catch block let me just copy the a statement from the previous catch block and paste it here after that in this Tri block we will add con curly where say data equal To await and here we will use exuse dog method here we will add backend URL after that we will cont cenate the API Endo that is/
API SL doctor SL profile after that we will add headers then we will provide the object where we will add D token which is Doctor token after that we will add the if statement and here we will check if the data do success is true in in that Case we are going to set the profile data and in this one we will provide data. profile data that we are getting from the API response after that we will add console log and in this console we will provide the same thing that is data. profile data so
that we can see the response in console now this get profile data function is ready next we have to add this profile data set profile data and this get profile Data function in this value object so here let's add profile data set profile data after that we will add get profile data function now save the changes and we will come back to the dror profile. jsx file here in this component first we will get the estate variable and function using the doctor context so here we will write const curly presses and here we will get
D token profile data set profile data get profile Data using use context hook and in this one we will provide doctor context after adding it here we will get currency and backend URL from use context and app context so now we are getting these data from Doctor context and these data from App context after that here we will add the use Effect and in this use effect we will add this Aro function here we will add the dependency areay and in this dependency areay we will add D token and here we will add the check
if we have the D token then only we are going to call get profile data now let's save the changes and come back to the web browser now we are at the profile page and here in this console you can see we are getting the response and it is the profile data of The currently logged in doctor so now we have to display this data in this profile page so let's come back and after this return statement we will add the check here we will add the profile data if we have the profile data then
only we will display this UI and if this profile data is not available then we will not display any UI component now in this div let's add another div and in this one we will add one more div and here we will Add the image tag in this image tag we have to display the doctor's image for that we are going to use profile data. image save the changes now you can see we are getting this doctor's profile image after this div we will add one more div in this one we will display the doctor's
information like name degree and experience so we will add one comment doc info name degree and Experience after this comment we will add the paragraph tag and in this paragraph tag we will display the doctor's name so right curly Braes at profile data. name after this paragraph tag we will add the div and in this div we will add the paragraph tag here we will display doctor's degree and Doctor speciality so let's add the curly wies then add the profile data. degree after that we will add one Das here we Will add the curly VES
and we will add profile data do specialty if I save the changes we are getting the name and this speciality and degree after that we will add one button tag in this button tag we will add the doctor's experience so let's add the curly veres and here we will provide profile data. experience now if I save the changes here we are getting four Years so now we have added the name degree and experience after that we will add one more comment here we will add doctor about here we are going to display the section where
we will display the doctors about text so after this comment we will add one div inside this div we will create one paragraph tag and this paragraph tag we will add the text about and after this paragraph Tag let's add one more paragraph tag and in this one we will add curly veres then provide profile data do about now if I save the changes and come back to the web browser you can see the about text for this doctor after this du we will create one P tag in this P tag we will add add
one text that is appointment Fee then add column and then we will add the asan tag and in this asan tag we will add the curly braces and here we have to display the currency so just add currency and after that we will add the curly presses and here we have to display the current fee of the doctor so let's add profile data. fee save the changes so we are getting appointment fee $40 after this paragraph tag let's Create one div inside this div we will add the paragraph tag and here we will add the
text address and after this P tag we will create one more paragraph tag and in this one we will add the curly veres here we will add the doctor's address so let's add profile data. address dot line one after that let's create one more copy and paste it Here here we have to provide line two within these lines we will add the BR tag so that it will display the address in two lines now we are getting the address also in two lines after that here we will create One D and in this D we
will display one checkbox so that doctor can mark them as available or unavailable so let's add the input field and the type will be checkbox after this input field we will add one Label tag in this label tag we will add the text called available save the changes so now we are getting this checkbox and here we have the text called avilable after that here we will create one button tag here we will add the edit so that when we click on the edit button then we can edit this information and update the details like
address fee now save the changes and you can see we have this Edit option now we have added all the information on this profile page next we have to provide some classes to design this web page so first We'll add the class name in this div and here we will provide Flex Flex column Gap 4 and margin 5 save the changes now we are getting the margin after that we will add the CSS properties in this image tag so in this image tag we will add the class name Property here we will provide background primary
transparency 0 then we will add the width full Max width and Border radius save the changes now you can see this profile image is looking good with this background color and size after that we will come back to the vs code editor and in this div we will add the class name property here we will provide Flex one border border a stone 100 then we will add the Border radius padding and background White save the changes now you can see we are getting one container in white color and in this one we will display these
details now let's come back to the vs code we will come to this P tag where we have added the doctor's name so let's add the class name property here we will provide Flex item Center Gap two text 3XL font medium text Gray 700 save the changes come back to the web Browser so you can see this doctor's name is looking good with this font size and font weight next we will add the CSS properties for these a small text that is degree and a speciality so here we will add the class name property in
this one we will provide Flex item Center Gap two margin top and text color save the changes so this degree and speciality text is looking good after that we will add the CSS properties in this button tag so here Let's add the class name then provide padding border text extra small then border radius full save the changes so you can see this experience is looking good this border and round corners after that we will add the CSS in this B tag so here let's add the class name property here we will provide Flex item Center
Gap one text size a small font Medium text neutral 800 then margin from the top save the changes so now you can see the text called about is looking good after that let come back to the vs code and in this P tag we will add the class name property and here we will provide text a small then text color then maximum width and margin from Top save the changes now you can see the about text is looking Good now we will come back to the vs code editor and here in this paragraph tag we
will add the class name property here we will provide text Gray 600 font medium and margin top save the changes now we have some space above this text and the color has been updated for this text after that we will come to this span tag and here also we will add the class name property here we will provide text Gray 800 next we will come to this div tag here also we will add the class name property here we will provide Flex Gap two and padding y save the changes now we are getting this address
and in the right side we have this address value in line one and line two after that we will come to this P tag and here also we will add the class name property here we will provide text a small save the Changes so this text is looking good after that let's come back to the vs code editor and in this div we will add the class name property here we will provide Flex Gap one and padding top to save the changes now we are getting this space above this avilable text next we will add
the CSS properties for this edit button so let's come to this button tag Here we will add the class name property here we will provide padding border border color then text size and Border radius and margin top save the changes now you can see this edit button is looking good after that we will add the hover effect on this button so let's come back and in this one we will add hover then we will change the background It will be background primary then hover text white then we will add the transition all if I come
back to the web page and move the cursor over this edit button you can see the background color is changing and the text color is also changing so we have created the UI part of this profile page this profile page is looking good after that we will add the functionality so that doctor can edit their profile Data like address fee and this available status when they click on this edit button to make that let's come back to the vs code editor and here we will create one state variable with the name is edit so let's
add const is edit set function name will be set is edit equal to user State initialize this variable with bullan data false now we will use this state Variable to add the edit functionality on our profile page before that here in this input field we will add one checked property here we will provide profile data doav level now save the changes you can see this check box is checked because this check data is coming from the doctor's profile data that we are getting from the API if we make it false from the Database then it
will be unchecked now we will make this appointment fee editable for that in this button tag we will add one on click property and here we will provide one Arrow function and here we will call set is edit we will make it true so when we click on this edit button then this estate will become true and using this estate we will display One input field instead of this P tag so that we can make the changes in appointment fee so let's come back and in this paragraph tag we have the appointment fee so to
make this field edit table here after this currency in this curly Braes we will add one turn operator so here we will add if is edit is true in that case here we will return one input field and if it is false then we will Return this data so after this question mark and before the column we will add input field and the type will be number after that we have to add the on change property so let's add on change and in this on change we will pass the arrow function and here we will
pass the event here we will call set profile data function and in this one we will use a Spread operator in this seter function if we reload this web page you can see we are getting the profile data and in this one we have this fee so by using the setter function we have to update the fee only for that we are going to use the spr spread operator so in this Setter function first we will get the previous estate now here we will return one object where we will use the as spread Operator so
just add triple do previous after that we will update fee property and in this fee we have to provide the value that we will enter in the input field so just add e. target. value after that in this input field let's add the value property and in this we will add profile data. fee now let's save the changes and come back to the web browser if I click on this edit button here you can see we are Getting one input field and now we are able to update this data as you can see we can
change this data after that let's reload the web page and after that let's come back to the vs code and here we have this P tag where we are adding the address so here in this curly Braes we will add if is edit is true in that case we are going to add the input field and if it is false then we will return this Address here we will add the input field and in this input field the type will be text and here we will add the onchange property in this onchange property we will
pass the arrow function and here we will call set profile data function in this one we will pass the event of this input field after that if we come to web page and open this response you can see the Address is an object and in this one we have to update the line one for that here we have to use the nested spread operator so let's add previous here we will add this braet and in this one we will add the object where we will use the spread operator so just add triple do previous after
that we have to update the address property so let's add address and in this address we will again use the a spread Of operator so just add CES triple. previous do address and in this one we will add the comma and here we have to update the line one property and in this one we have to provide the input field value so just add e. target. value by adding this we can update the line one property of the address using the nested spread operator after that in this input tag we will add the value Property
and in this one we will provide profile data dot address do line one now let's copy this from here and we will paste it here let me remove it and paste it now in this one here we have to update this one which is line two here also we will add line two and here also we will provide line two right click and select format document after that we have this checkbox Here in this input field let's add the on change property in this one we will pass the Aro function and here we will check
if is edit is true in that case we are going to set the profile data so just add set profile data and here we will take the previous data from the parameter and here we will return one object here we will use the spread Operator after that here we will add the available propert Y and we will make it true if it is already false and if it is already false we will make it true for that we will add not operator previous dot available as you can see so here we have added this logic
after that here we have this button that is for enabling the edit mode after that we will create one more button so let me Create a copy of this button here we will use the Turner operator so let's add the curly Braes here we will check if is edit is true in that case we will provide this button so let me remove it from here and paste it here if is edit is false then let's add the colon and just remove this second button and paste it here after this colon now if this e edit
is true in that case we will provide this Button where we will add save and here we will provide set is edit false now let's remove these space now save the changes now you can see we are getting this edit option and if I click here we are getting save option now we can edit the address as you can see we can type anything in this input field we can update the fee also and we can change this available Status now if I click on this save button now we cannot edit these fields and we
cannot change this available property so whatever changes we are making like if we make it 400 and click on Save then it is saved in the local variable if I refresh this web page it will be reset so now we'll add the API so that if we make any changes in this profile data then the changes will be stored in the database for that let's come back to the vs code editor And in this page here after this estate variable we will create one Arrow function with the name update profile so just add const update
profile equal to S sync and here we will create this as sync Arrow function in this Arrow function we will add the logic so that when we click on this save button then it will save the changes in the database For that here we will add the TR catch block after that let's attach this update profile function in this button tag so from this button tag where you can see the text is save in this one we will remove this add function here we will provide update profile function after that we will create this function
in this Tri block we will create one variable with The name update data and it will be one object where we will Define the address property and in this address property we will save profile data. address so here we are getting the updated data from this state variable and then we are storing the data in this variable so that we can send this data in the API call in the body part after that we will add the fee property and here we will provide profile data. Fee after that here we will add the available property
here we will provide profile data do available property if I open our doctor controller.js file we are able to update the fee address and available property so we have to provide these three things in this update data after that here we will make the API call so let's add con curly Braes Data equal to await here we will use exos so we are getting this suggestion just click here so it will import the exos package after that we will use the post method and in this one we will provide the backend URL after that we
have to concatenate the API end point that is SL API SL doctor SL update profile in the body we have to send this update data that we have created here after adding it here we have to add The headers so let's add it here headers and in this one we will add the object where we will provide D token which is do token after that we will check the response so here we will add if statement and we will check if the data do success is true in that case we will display a toast notification
so let's add toast. success and in this one let's provide Data. message after that we will call the set is edit and we will make it false after that we will call the get profile data function so that our profile data state will get updated if the data do success is false then we will add the Elsa statement and in this one we will add the toast. error and here we will provide data. message if any error occurs in this Tri block then this catch block will be Executed so here we will display one toast
notification with the type error and in this one we will provide eror do message with that we will add the console log and here we will provide error now save the changes and come back to the web browser now we will test it so let me reload the web page let's click on the edit button after that we will make the appointment Fee $50 and click on the save button here we are getting the error request failed with a status code 400 4 request failed with a status code 44 so to solve this problem let
me come back to the vs code editor and here we have added the backend URL API doctor update profile we are getting this back end from app contact so we have to get the backend URL from the doctor context so we will paste it here remove this back End URL from this and context now save the changes and come back to the web browser now let's reload the web page click on this edit button and let me change the appointment fee $50 click on the save button here we are getting profile updated false is not
defined so let me come back here we have to connect it we have to correct the spelling false now let's save the changes click on this button so now now we have Profile updated now the edit mode will be disabled if I reload this web page you can see still we have the $50 because this changes has been updated in the database if I click on this edit button and let me update this address so here we will write 10 Clause Road and click on the save button now you can see the message Prof file
updated and if I reload this Web page you can see the updated address so this changes has been stored in the database now we can edit the doctor profile also so now we have created the dashboard appointments and profile page as you can see here our appointment fee is $40 and two appointment is completed and here we are getting $80 and from front end if I reload this web page here we have this appointment cancelled and for other appointments we have marked it As completed from the doctor dashboard but still it is displaying pay online
and cancel option right so we have to correct it so to change it let's come back to the vs code editor and let's close these files and we will open front end folder then go to pages and go to my appointments. jsx file a scroll down we will come to this section here we have to make some changes here after this end Operator we will add one more condition that is not item dot is completed after that one more and operator so if the is complete property is true in that case our appointment has been
completed then we will not display this paid button or this pay online or cancel button so we have just added not item is completed similarly in the second one we will add same thing not item dot is completed And then and operator now in the third one also let's add not item dot is completed then and operator similarly in the last one we will add not item dot is completed and and operator save the changes now you can see this appointment that we marked as completed here all the options has been removed like pay online
cancel appointment has been removed next we have to display one More entry that is appointment completed for that let's come back and here in this vs code editor here in the last line we will add turn operator here we will add the curlys and here we will check if the item dot is completed is true in that case here we are going to return one button and within this button tag let's add the button text called completed after that in this button tag we will add the class name Property here we will provide main width
padding border border color green border radius then we will add the text color green 500 save the changes now you can see here we are getting this completed button now if we login with this doctor account so let's come back to the dashboard then click on log out after log out you can see right now You can see the logout feature is not working so we have to fix it so let's come back to the vs code editor and here we will open admin folder components and na. jsx file here we are taking this a
token and set a token after that here we have to take the doctor token also so just add D token set D token equal to use context and here we will use the doctor context so we are not getting the Suggestion for Doctor context so let me open this file and after that here we will type doctor so we are getting the suggestion doctor context click here so it has been imported so now we have the D token and set D token and here you can see we have the loog out function so in this
one we will check if we have this D token in that case we will set D token and here we will provide empty String after that again we will check D token if it is available in that case we will remove this token from the local storage so just add local storage. remove item and in this one we will provide D token now save the changes now if I click on this log out button now we are logged out now let's try to log in with another doctor account so while creating the account we have
added this email ID for this Doctor so let's add the correct email ID and then click on the login here we have invalid credential because we are at the admin login so we will click here for for the doctor login now click on the login button still we are getting invalid credentials so let me enter the password again click on login button let me go to database we will go to doctors and here we have to find the correct email ID so you can see this is the correct Email ID for the doctor so this
is the correct email ID let me just copy it from the database and paste the correct email ID and add the password now click on the login button now we are successfully logged in in the doctor's account now we'll click on the profile here we are getting the profile information if I go to appointments so here we have the Appointments you can see the patient name then payment cash age 24 here we have the date and time fee and action if I open dashboard you can see the earning is zero and we have one appointment
and one patient now if I make it completed then appointment completed after that you can see in the dashboard the earning is $60 so the earning has been added and if I come back to the my appointments page Reload this web page so here you can see we are getting the completed message in the right side so this logic is also working fine so till now we have integrated the apis with the doctor panel now let's click on the log out and again come to admin login and here we will add the email ID and
password for the admin and click on login button and if I go to dashboard you can see some of the appointments are completed but still It is displaying these buttons as you can see we are getting these cross button to cancel the appointment so we have to update this so let's come back to the vs code editor and here we will open admin folder after that in this admin folder in the admin project we will open all appointments. jsx file then we have to use the nested tary operator so here we are checking if the
Item is cancelled then we are displaying this message cancelled and if it is not cancelled in that case we will check one more thing so here we will write if item do is completed suppose it is true in that case we will add one paragraph tag and if it is false then we will return this image tag let's arrange it in proper structure right click and select format document now it is arranged so here we have the Ned tary Operator if this is completed property is true so in this P tag we will add the
text completed and in this P tag we will add the class name property here we will copy these class name from here we will paste it here here we have to update the color so let's add text green 500 save the changes now you can see we are getting this completed message after that we will copy this Turn ady operator from here and we will come to dashboard. jsx file in this admin folder and remove this curly veres and we will paste the code that we have just copied right click and select format document save
this changes so if I come to dashboard here also we are getting this message completed and here also we are getting this completed message after that if I come back to the Doctor panel just click on log out then go to doctor login form then we will enter the doctor's email ID and password and click on login now if I open this profile we are not able to change this if I click on this edit now we can change it as unavailable now we can uncheck this one and click on save button so now this
doctor is unavailable for the booking if I go to the front end part if I open this doctor let me reload this Web page now we are at the appointment page if I try to book this appointment you can see the message doctor not available and let's come back to homepage we will make this available text to the not available because this doctor is not available we have changed the status from the doctor's dashboard for that let's come back to the vs code editor let's close these files And we will open top doctors. jsx file
first we will make the changes here here in this P tag we are providing this dot icon using this paragraph tag here we will use the dynamic class so let's add the curly Braes and here remove this double quote and we will add the back tick so we have wrapped these classes with the CES and backtick now we will use the template literal so let's add the dollar Sign curly Braes and in this one we will use the turn operator so here we will check if our item dot have label property is true in that
case we will provide this background green so let's add single coat and we will place this class name background GRE 500 and if the item dot available is false it means the doctor is unavailable for the appointment then we will add the colum and here we will provide the string and where we will add Background gray 500 save the changes now you can see the gray color of dot for this doctor next we have to make the changes in this text also so to to make the changes let me remove this text available and here
we will add the curly brushes and here we will check if the item doav label property is true in that case we will add one string and here we will Provide the text called AV Lael and if it is false then just add the column and add one string here we will add not available after that if I save the changes now you can see we are getting not available but the text color is still green so we have to change the color of this text so you can see we have added text green 500
so we will make this classes Dynamic using this cures and we will add the back tick so we have wrapped all these classes With clys and back ticks and here we will add the dollar sign curly bres so we can use the template literal and in this one we will add the Turner operator here we will use item do available if it is true in that case we will provide the string and in this string we will provide this class name text green 500 so let's remove it and paste it here and if it is
false then we will add the column and here we will provide text Gray 500 save the changes So now you can see not available after that we have to make these changes in this related doctors also for that let's copy this entire div from here and we will come to related doctors. jsx file and in this one let me remove this div and here we will paste the div that we have just copied right click and select format document and save the changes so if we open any other doctor so here you can see in
this related Doctor we are getting this doctor with not available text now we have all doctor section so here also we have to update this logic you can see available so we have to update it so let's come back we will open doctors. jsx file and from here remove this T and here also we will paste the latest div save the changes now you can see the not available status right if I come to this doctor's profile page click on edit button and make it available and If I Reload this web page now you can
see the available status so this logic is also working fine after that we have completed all the uip part and with that we have created the doctor panel where doctor can see their details and doctor can see the appointments and doctor can update their profile if I click on this log out button and if I provide the admin email ID and password and click on login button so now we are logged in as Admin here we have this dashboard that display all doctors then number of appointments and total number of patients then we have all
the appointments then we have the form to add a new doctor so we can add a new doctor after that we have doctor's list from here also we can make it available or not available so this logic is also working fine so finally we have completed this website where we can book the doctor's Appointment using this website we have created this admin panel also and we have created the doctor's dashboard also once you complete this project do let me know in the comment section by writing completed and if you want to deploy this project online
then you can follow the deployment tutorial I will provide the tutorial Link in the description I hope this video will be helpful for you if you have any question Question you can ask me in the comment section please like and share this video and also subscribe my channel greatest stack to watch more videos like this one thank you so much for watching this video