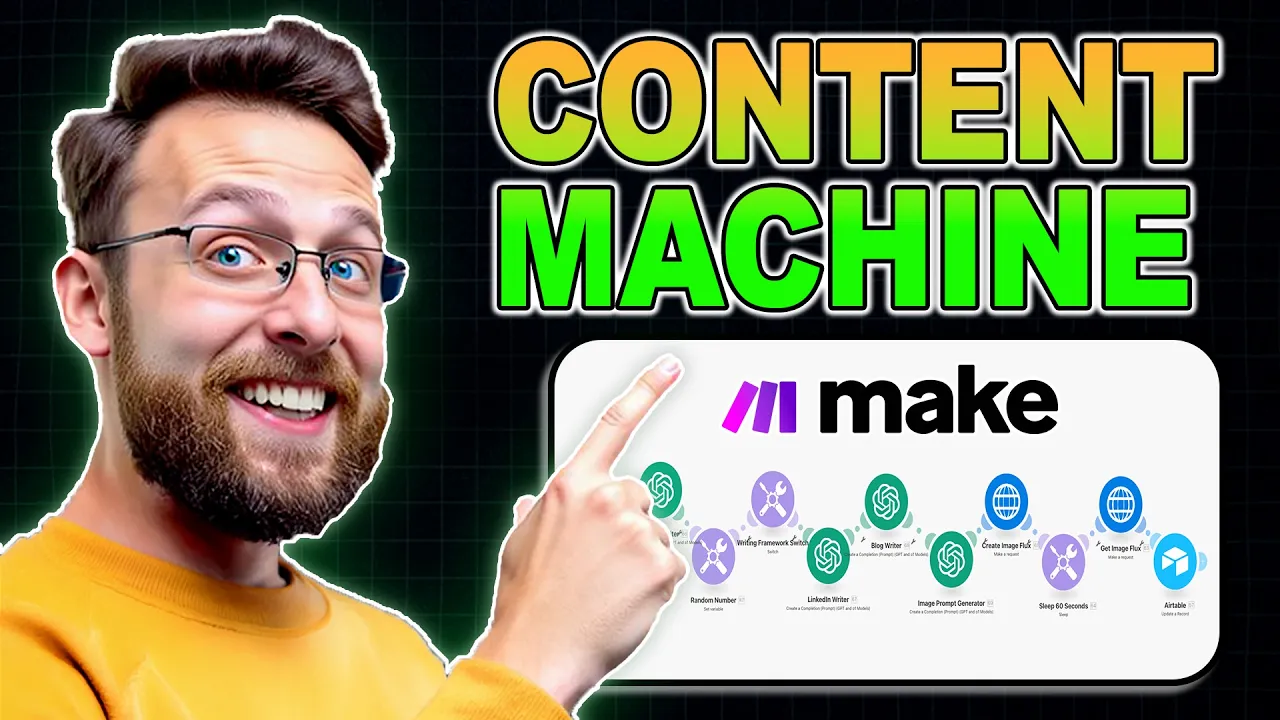
what if you could build a Content machine that creates a month's worth of engaging social media content in just 30 minutes today I'm revealing the exact AI automation system that's helping small businesses pump out viral content across platforms without hiring a social media team just this month I actually built this exact system for a client and you could easily charge $2,000 for a system like this now imagine if you did that for 10 clients every single month this system recently helped my client who's a solo entrepreneur transform his content workflow before he spent 15 hours every single week on social media now all he has to do is click a box to approve his topics and AI is going to generate platform specific posts automatically since implementing this system his engagement has doubled while his time investment has dropped to just two hours a week most businesses are still creating social media content the old way manually writing each post copying pasting between platforms and hoping something sticks in this video I'll show you my proven content machine that automates 90 % of your content creation process in this video you're going to learn how to set up your a table content Hub configure AI to write engaging posts and automate everything with make. com stay until the end for my exact automation template that you can copy today to make content creation effortly if you haven't seen part one of the series where we built an automation that scans the internet for Relevant content in your Niche uses AI to analyze and summarize it and organizes everything into a clear manageable database it's going to pop up on screen somewhere up here and I'll leave a link in the description and I suggest you watch that video first because in this video today we're going to be building off that foundation in part one we built our content Gathering system today in part two we're turning those raw articles into scroll stopping social media posts I'm going to show you how to use AI to craft unique engaging content specific to each platform this is going to be content that feels personal not automated by the end of this video you'll have a system that writes better posts than most social media managers without you having to do much of anything at all so here here's a social media system that we're going to be building out today and let me walk you through exactly what each one of these modules does and then we're going to go ahead and we're going to sit down and build this together from scratch so basically this is the air table database that has all of the news articles that we want to be creating our social media posts from every single one of these has the headline a little oneliner topic a summary of the article and the body of that article itself from here we're going to be using this make. com automation to use AI like chat gbt to create specific posts for Twitter LinkedIn even a Blog article and last I'm going to show you how you can actually generate AI images all from within make.
com completely automated what's great is that you can set this automation to run on a schedule and so once a week or every single day you can have ai generate completely new social media posts for you so let me walk you through this Automation and then we'll build it so basically everything starts in our air table database and this is where you have as much or as little control as you want basically last time we built out a step that allows you to approve certain news articles for publishing and so the way this works is basically you would open up any one of these articles you could read the summary you can read the topic and if you want to create social media posts based off of this all you have to do is click this check box and the AI Automation and make that cob will get to work for you you can do this for one five 10 articles however many you want to create sofo content for it's up to you so basically all this first module is doing is it's searching our air table database to find out if the posts are approved so basically for every post that it's approved the first op is this Twitter writer and it's going to go ahead and it's going to create a Twitter post that's really specific and optimized to the Twitter platform what it's going to do it's going to create a Twitter post for you based off of the Twitter best practices from here I'm doing something that's a little bit more advanced but it's actually not as tricky as you think first I'm generating a random number and then based off that number I'm selecting a certain writing framework to use for LinkedIn so with LinkedIn there's all sorts of different styles that convert and you don't want to be writing the same type of post over and over again so you can use one of these four different Frameworks to get a different variety in your post and so this is a what so what now what framework and this one up here is a Insight impact recommendation framework and so they're just kind of like different ways of structuring your post so that you get different results every time to create a little bit more variety in your content so from here based on that framework we're going to write a LinkedIn post and then it's going to come over here we're going to write a blog article next we're actually going to use the content of the article to generate a prompt for an AI image generator and here I'm using flux and I'll show you exactly how you can set this up making an HTTP request we're going to generate the image completely hands-free using AI we're going to grab that image and we're going to store all of this in air table so that at the end when you come into air table you basically see all of this the original news article the original Source summary etc etc but you're also going to now have your LinkedIn post your Twitter post and your AI image and your blog article already to go right here in your database we're just setting this up for part three where we're going to take everything that's in this database and we're going to post it to social media on a schedule that you set I even have a couple extra modules in here in case you want to create posts for Instagram and Facebook so we're going to be building everything in make. com and if you don't already have a make. com account I'll leave a link in the description where you can sign up completely for free and all you want to do is you can come in here and click create new scenario I'm also going to leave links in the description to my gumroad page where you'll be able to download These Blueprints so all you have to do is come in here and go to import and you can select the blueprint and import this and basically everything's just going to pop up so you can follow along or you can come with me and build this from scratch so I'm going to come in here and I'm going to click create new scenario and if you remember the first thing that we do is we're going to grab this air table module and all we want to do is search for records so if you haven't connected air table to make.
com before you should have done it if you're following along in part one but basically you just click add come into connection type air table token or key and if you pop over to your air table here you can come into your little profile icon go to the Builder Hub come into the personal access tokens and create a new token so I've already have this set up so I don't need to do this again uh but it's really simple if you want to set it up I'm sure you can figure it out I always tell people that troubleshooting is a huge part of Ai and automation so being able to figure out stuff on your own and being able to troubleshoot is really going to be helpful to you in the long run so next I'm just going to connect it to our topics database that we built earlier and the table is going to be this table one and we'll select all the output fields to output and let's just come in here and grab the formula that we're using so I'm just going to go ahead and copy and paste this formula in and I'll tell you exactly what it does so basically what this is looking for is this is looking for that we've approved the source so remember that check box is looking to make sure that the source is checked and that there isn't anything in the Twitter copy field which means we actually haven't already generated social media content for this post so in order to set this up you have to type and all caps parenthesis bracket this is the name of your field and in here you can see we have our field name is this Source approved for social and so this is Source approved for social equals one which means true which means the checkbox is checked and so it's looking to make sure that the check boox is checked we've approved it and that we don't have any content in the Twitter copy field which we actually haven't set up yet uh but we can just go ahead and set that up now and I'll just go ahead and click right click and I will go ahead and create this long text and we'll just call this Twitter copy so now that this exists and so at the end once we have our Twitter copy created is actually just going to store it right here in this field and basically the limit is 10 and you can set this as high as you want uh if you have 100 posts that you're doing every single day set this to 100 right this is basically just seeing how many articles do we want to return and I'll just say 10 so we can just go ahead and run this once and so you can see what we have here is we actually only have one bundle because the only thing we've approved is this one article right here so we can set this to three we can checkbox three of these we can come back in we can run this again and now you can see that we actually have three different bundles for each of those three different articles so this is the beginning of the entire automation the next thing we want to do is we want to connect this to our Twitter writer so in order to do that you just click the plus and you wanted to search for chat GPT and come in here and we'll go to create a completion and I already have this set up so I'm just going to paste this here and I'll show you exactly how I've set this up so we have the select method create a completion the model we're going to be using chat gbt 40 and basically the first thing you want to do is you want to create a system message you know what I'm actually going to delete all these so we can set this up from scratch so basically this is what it's going to look like when you have a blank chat GPT uh module and you just click add a message and you select developer system and basically this is the system prompt this is just how you want this chat gbt to behave we're just going to say you are helpful and intelligent Twitter writing assistant and we're going to add a second message which is going to be a user message this says act as an informed Twitter expert in the cryptocurrency investing industry and so for us we're going to say instead of cryptocurrency investing for me I'm going to say artificial intelligence if I could spell and you should basically just change this to whatever your Niche is whatever you want to create your posts on you'll be provided with a piece of content this could be an article a summary a LinkedIn post Etc you will create one optim Twitter post based on that content incorporating Twitter posting best practices and using the structured outline below here's the prompt so it's telling you to read the following content and create one engaging tweet keep it concise use this format hook explain question and hashtags out of space your output must be a maximum 240 characters etc etc this Bron will be included in the blueprint and I'll also include this on the gumroad in kind of like a separate package for you we can download all the prompts that I use in this automation today and the last thing we want to do is we just need to add one more message here which is another user message which we want to make sure we're grabbing the summary and the source body so I'm just going to come in here I already have these deleted and we're just grabbing this from the original layer table and this is the source summary and we're just grabbing the source body so basically this is taking the summary that we generated earlier and the actual uh body of the article so we can come in here and we can do this and I'm just going to change this to one so that we can run through the system once uh and so while we're testing you know we don't have to have a whole bunch of uh iterations running and so there is a little filter here that I set up and this is just checking to see if we actually have content approved and the reason I did this is that if we have this set on a schedule to run like every morning or something and maybe I didn't get to it the night before maybe I didn't check any boxes like there's nothing approved I just don't want this system from run and so I'm just going to come in here and change this to total number of bundles is greater than zero and I'll cck save and you can kind of set up this filter just like this and make sure you're in these uh numeric operators uh down here uh which is right here in these numeric operators so these are equal uh greater than zero we have multiple bundles to use we can just go ahead and we can run this once the Twitter writer is going to get to work uh basically the article that it's scraping is this open AI debuts browser integrated AI agent operator here's a summary for the article and then in the body we have this whole article uh which is like the full text of the article and so basically this trt module took all that into consideration and it created just like a little tweet for US Open ai's operator let's AI navigate web browsers autonomously simplifying online tasks yet usability and security need refinement for broader adoption this a $200 a month cost Justified for you so this is great like we can setep this up and this will get posted to Twitter and hopefully you get some engagement from it what's really cool is that because we're scraping these RSS feeds which we set up is basically we're always going to be creating our social media content based off of like current relevant trending articles and so we always know we'll be talking about whatever everybody else is talking about so now really this is kind of the basis for the entire system and once you understand how to do this first part right here you understand a lot of how this system works the next thing we want to do is we're just going going to create this LinkedIn writer here so I'm just going to go ahead and copy this module and then I'm going to show you how these writing Frameworks work so I'm just going to paste this in and really this LinkedIn writer is set up largely the same to how the Twitter writer is set up so remember we're going to create a new chat gbt completion we're going to say you are helpful and intelligent LinkedIn writing assistant and I also told to use single dashes in place of bullet points because every time I like I was outputting bullet points I was getting like a whole bunch of weird like stars or asteris and so I just want to use like single dashes it's a lot cleaner uh and then this is going to be output of the writing Frameworks or I'm going to show you in one second and then the roll another user prompt and basically again we want to include the summary and the body of the article so that it knows what to be talking about and I'm just going to call this social post Creator make sure you name everything I'm just going to go ahead and click save this is fine and I'm going to show you how these two Frameworks work so I'm just going to copy these over and paste these in here uh these are really really powerful I have a whole video on my YouTube page just about writing for LinkedIn I'll leave it up here for you somewhere you can go ahead and watch that full thing just to learn how to create really unique uh really unique posts for LinkedIn so I will unlink this I'll drop you in here and I'll drop you in here so basically what this is doing is every time you run this this is all this is doing is generating a different random number so right now it generated number one I'm going to run it again and you can see here it generated number four so basically there's a formula that you do and this is the formula I'll leave this in the description too the only caveat that got here is you want to make sure that you're actually using the functions like the multiplication and addition function which can be found uh over here in this math tab uh as well as this random here uh because otherwise the formula won't work probably you can't just type this in but basically what this is doing is it's just generating a random number between one and four and if you wanted a number between one and 10 you can just change this number here to 10 uh but since we have four writing Frameworks that we're using we're just going to generate number four though this is the little bit more like this is probably actually the most advanced concept in this entire video it's this kind of switch module and basically what this switch module is saying is yeah I'm going to close these output Fields down so you can say it's actually really simple if you think about it it's saying uh if you see the number one do this output if you see the number two do out do a different output if you see number three do this third output uh and if you see something else in our case it's going to be four output this and so basically what's happening is it's just looking for whatever number the random number is generating and is basically going to Output a different writing framework for every single number right if the random number generator is generating number one it's going to Output the Pas framework so the problem agitate solve framework if the random number generator generates number two it's going to Output this Insight impact recommendation framework and so all it's doing is basically randomly selecting a different framework for writing that we're going to use in this LinkedIn writer chat gbt module so every time we write a post for LinkedIn we're going to get a different style of post I'll cck save and basically all we need to do is we just need to connect this back up uh to that framework switch so I'm just going to delete this here and basically I just need to grab the output from the switch here and really this is this is all we need and I'm going to go ahead and click save and so I'll Auto align this and I'll just run this once more uh so that you can go ahead and see what we're creating here and so again we're grabbing the article from Air table where creating our Twitter post now we have a new Twitter post here we're generating a random number in this case it was one which means we're probably selecting the uh pas framework here we're now piping in the Pas framework into our LinkedIn writer uh and basically now we're getting this output which says imagine your browser doing the boring stuff for you filling forms ordering groceries and more that's the promise of open ai's new tool operator however like any Tech Innovation comes with this hurdles and then we have a couple bullet points we say okay yeah but there's hope and here's a couple more positive things and then kind of like a CTA what intrigues you the most about AI tools share your thoughts and so again we're going to store this in the air table database and when we want to go to publish LinkedIn to LinkedIn later uh we're going to have this all ready to go so if we come back here and we reference the original automation the next thing we have here is our blog writer and I'm just going to go ahead and copy this and paste this in here and I'm going to connect this up and what we're doing is again largely the same thing and I will leave a link in the description to gumroad where you can get all the prompts that I use uh throughout this entire automation as well as a link to the blueprint so you can just go ahead and import these in so we basically have the same three prompts we have the developer and system prompt you're helpful and intelligent blog writing assistant uh a user prompt so please create a long form blog post based on the provided article content and we're telling you to write in markdown format which is the popular format uh that most blog platforms understand you say this post should be around a thousand words if you want this to be shorter 500 Words 300 words whatever just go ahead and change this in here and then I say the post should follow the following formula uh make a conviction statement write a personal body with some sort of personal anecdote and then have a learning moment where the reader gains something of value from the post and then end with an emotional closer in the form of either a who what where why when or how question so in this way we'll indirectly encourage engagement uh just kind of a couple things about formatting like title and headers don't use any Emoji I like to mix up paragraph and bullet point structure so that we create a little more variety in the post and again this is totally customizable to you like if there's a way that you like writing like come in here change this prompt round you don't have to follow what I'm doing if there's a different way you want to do things this is the place to do it and the last thing again is we're just piping in uh the summary from the article and the source body itself and so we're going to go ahead and we're just going to pipe in the body here and click save and so I'm just going to run through this one more time just so we can see everything working the Twitter writer the random number generator let's see uh we generator one again this time probably next time it be something different so new post using the Pas framework here we go again uh and then at the end it's going to take a couple seconds to write the blog article because it's a thousand words so it's going to be a little bit longer so we're just going to let that complete and now we have a new blog article ready to go and here's the result uh open AI is operator pioneering the future of autonomous web browsing in the rapidly evolving field of artificial intelligence open AI has taken a significant leap forward with the introduction of operator so now you have something you can go and you can post this to to a Blog so again this is all being done for you so you have content that you can put out every single day based off of like current events and current news in your Niche and this way you can hit people on multiple platforms LinkedIn Twitter Instagram uh you know and and your blog right and so this is a really great way for you to start building and following and figuring out which type of content works on which platform okay so I may have lied when I said that the writing framework switch was the most advanced part of this really maybe the most advanced part of this is actually generating an AI image to go along with all of your posts but it's maybe not quite as confusing as you think and so the first thing we need to do is we actually need to generate a prompt for the image generator so in the same way that you would prompt chat tvt like if you're using an image generator like mid Journey or dolly or in our case we're using flux which is kind of a really high quality video generator like you need a prompt for it you want to say like a cute monkey eating a banana right like that's the prompt so we just want to generate a prompt for the image based off of the content of the article and I'm using flux in this but actually a really simple ways you could just use dolli straight inside of this chat GPT module so I'm just going to go ahead and copy this module in and I'm going to paste this in and we have a very similar story here and so we're going to go ahead and we're going to see the promps that I'm using for this uh again using chat GPT create completion the model is chat GPT 40 I say you are helpful and intelligent mid-journey image prompt writing assistant do not include any quotation marks or F formatting like colon semicolons Etc in your outputs do not include any line breaks or Extra Spaces so I gave it kind of like this extra Direction because I found that it was like putting things in quotes and directly pulling things from the article and when I added quotes into the image prompt it was messing up my requests to flux the AI image generator uh and so I wasn't I was just getting an error message and I wasn't getting an output so I want to make sure that I don't include that just the prompt then I have this user prompt that says analyze the article summary to identify key elements a primary subject an unexpected environment mood atmosphere and any unique details then I say use the extracted information to fill in this mid Journey prompt I know I'm saying mid journey I could just say AI image generation prompt uh primary subject in environment with the mood and atmosphere and any unique details and in my case this is kind of like the style that I want like a photo realistic it's 8K it's really clear uh but again if you want something more like fantasy or mystical like you could change these kind of like style prompts here to be whatever you want that kind of fits uh you know the content that you're creating for here's uh examples I say always end the prompt with this uh I gave some examples for the prompt and at the end all we have to do is kind of pipe in uh the source summary again and so now it's taking the content of the summary and it's creating uh a mid Journey or AI image prompt for me so here I'll just copy and paste uh this and you can basically come in here and I can right click and say run this module only I can paste in the summary and I'll just go ahead and click okay and now you can see we have an auton autonomous AI operator using a futuristic web interface inside an ancient overgrown forest with Innovative Synergy holographic data streams weaving through towering trees and glowing mushrooms photo realistic AK Clarity I'm curious how that would come out actually because some of these themes uh like data streams and glowing mushrooms is maybe a little more uh fantasy than it is photo realistic but I'm pretty confident we'll still get something cool so the next part is actually making this request in my case to flux so I'm just going to go ahead and I'm going to copy these three modules right here and I'm going to walk you through these and so what this is doing is this is making an HTTP request and if you want to set this up from scratch you're just going to click the plus here and type in HTTP and make a request this part does get a little bit complicated uh if you're unfamiliar with making API requests um but once you do this a couple times like you'll actually see how easy it is uh and that a lot of services use this type of HTTP API request uh so the more you get familiar with this the better off you're going to be building your automations because not everything has like its own nice little uh module and make. com like chat TPT does so being able to make these HTTP requests is actually really beneficial if you're trying to build like an AI agency and book client and things like that and so I'm using go API and again I'll leave a link in the description to where you can sign up this is just go api. ai and this is my dashboard here and basically they're just kind of like you can do uh video models or image models like mid joury or flux I'm just using flux uh in this case and basically all you need to do is if you come down here to API Keys uh you're just going to want to go ahead and create an API key here uh and you're going to need to grab that and bring that over into make.
com so if you come over here into the API docs for go API I know that's confusing but this is kind of the the information you need for the text to image generator and this is going to tell you everything you need to know in order to set this up properly so first is this we're making a post request which means where like contacting flux telling it we need you to do something for me and this is the URL that you actually need to make the request to and then the other important thing is you need these headers which is basically it just needs to know your API key so that I can access it I have like $ doar loaded onto my go API account and like every generation costs like you know one or two cents like if if not less like it's incredibly cheap to use the other thing you need to just be aware of is this example which is kind of like the body for your request and this is going to come in handy because this is exactly how you need to format everything in order to get your request to process properly so here we are back inside of make. com and up top remember we copied that URL so here's the URL I told you the method is post and so we want to set this to post and then here uh for the name basically you're not you're not going to have anything at first when you see headers and you're just going to want to add a header and it's got to be this x- API key and it needs to be all capitals it needs to be formatted exactly like this so make sure you type this in exactly as it's shown here all capitals with these es between X and key and then for the value you just want to paste in your API key from go API from there the body type is raw the content type is Json application Json and again remember I showed you that example so you just want to go ahead and copy and paste that example directly in here and this prompt is actually going to be empty uh when you paste it and I'm going to show you what I did here that's really important basically what we're doing is we're going to use replace in these text functions here and I'm saying replace the result I'm searching the result of the image prompt generator for Anytime there's a new line so sometimes it'll accidentally insert like new line breaks uh and then I'm just replacing that with with nothing I'm saying like just remove it completely uh and again this is really important because otherwise if you send it uh if you send off the request with these line breaks like you're going to get an error and you're going to be kicking yourself because you're not going to know why this is likely why uh and then the width and height is 1024 by 1024 so I'm just doing a square you can change this to whatever you want uh and again all this information here I'm just copying straight uh from this little example box here and when you go to paste it in instead of just hitting command V uh hit shift command V and you're going to paste it in uh with all this nice formatting here so it kind of looks the same as the example otherwise it's just going to come out on one line so I'm going to go ahead uh and the last thing you want to do is make sure you just check uh you know yes to parse response I'm going to go ahead and click save the next thing I did is I just added a 60-second sleep timer uh because it's going to take a certain amount of time to actually uh for flux to actually generate that image I don't actually know how long it takes I figured a minute was long enough this has been long enough for me every single time maybe it only takes 30 seconds but again if you just kind of set this up to run every single morning like you might be asleep when this runs so waiting a minute is like not a big deal uh so I just have this wait a minute and then what I'm doing is I'm just getting um the image from flux and so I'm making a request to this same URL that we used before and the only thing that you need to add to it is uh this task ID so I actually need to run this once uh in order for uh to in order for the right information to populate so I'm just going to run this once and I'm just going to use the result uh from the image generator prompt from uh from chat TPT and so now we have all the information we need and so basically you can see this link up here and all you want to grab uh from this is if you come into data and data and task ID you just need to pipe in this task ID at the end here uh and instead of post we actually want to make a get request because now we're receiving information from flux we're not making a message to flux we're receiving the information oursel come in here paste in your API key uh this is no longer my API key so it's not going to work for you uh so don't kind to steal it uh and then body type raw content type Json and you actually can delete everything that's in this body here so in order to uh set this up you can either clone this module or make a new one and again parse response going to go to yes so this is really all done uh we pretty much have everything so we are searching the air table for our new source we're writing a Twitter post we're randomly using uh LinkedIn writing framework we're writing our LinkedIn post we're writing a Blog we're generating an image F and we're using flux to generate that image using Ai and so the last thing we need to do uh to round out this system is we just need to store everything back in our air table database so we're just going to come in here and I'm going to click the plus and I'm going to click air table and what we want to do is we want to update a record and we just go down here and I'll come into my news topic database right here and the table we're going to use is just table one and the record ID is if we scroll down here we just want to grab the record ID uh from that first air table search records module and we haven't set up all the fields yet um inside of our air table so let's pop over to air table and we're going to go ahead and create the rest of the fields uh in order to store all this information so basically what we can do is I can just duplicate this field a couple times I'll say Twitter copy going to duplicate that and come in here and I will call this LinkedIn copy duplicate this again I will call this log copy and we need the image prompt uh which is just kind of nice to see what the prompt was that you that you Ed to create your image uh you may not need it but it's you know we created it so we might as well store it and the last thing I want to do is I want to create one more field and this is going to be an attachment field and this is just going to be image and so what's really cool here is basically I I love air table uh I'll leave a link in the description where you can sign up again totally for free you can have a th000 entries per workspace and I don't know what the limit is on number of workspaces so it's kind like I've like never had to pay for a thing on air table uh so again if we come back into this update records and I'm just going to go ahead and ref refresh this table we can come in here we already have the headline topic summary and body already populated but all we have to do here is come down here pipe in the result for the Twitter copy pipe in the result for the LinkedIn writer same thing for the blog writer and the image prompt we're going to pipe in the result from the image prompt here and the source URL I'm going to need to run uh this get image request one time and so I'm just going to run through this whole scenario for a second just to see this run once but so let's run through the system to make sure everything's working and I'm going to set this limit back up to 10 uh because remember we have basically three articles ready to go that are all approved uh and so this should do this for all three of them so let's run through the system once I'm going to go ahead and run this basically we're grabbing the news article from table we're using the summary and the source body to write a Twitter post we're generating a random number uh see it's number four to figure out which framework we want to use in this case we're going to be use using the um what so what now what framework for our LinkedIn post chat TBT is w a LinkedIn post for us and you can see this here uh next we're going to the blog writer and we're writing a complete blog article uh complete with markdown format using paragraph and bullet point structure then we're creating an image prompt to be used inside of flux this is a futuristic humanoid robot interacting with a holographic web interface uh we're sending this off to flux we're making request to generate an AI image for us we're going to sleep for a minute to give flux time to process that request we're going to grab the image from flux and basically we're going to store everything inside of our air table database once it's finished so I'm going to wait a couple seconds I'm going to come back when this is all done and I'm going to show you what air table looks like once this whole system has run so the last thing we got to do now is we basically just got to store the image that's being generated from flux inside our air table database so if we come down to the bottom here into this image field basically all you need to do is grab the file URL which is inside of the get image module and you come into Data you come into output and you grab this image URL here and go ahead and click save so we're just going to save this scenario so I'm just going to come into the search records and we had this set to one and it was only grabbing uh one article for us I'm going to set this back up to 10 because I know we have a few that are checked so I'm just going to let the system run and I'm going to come back in a second uh once this is all done and show you the results cool so the system is done running and if we come back into air table you can see now that we have all these fields populated with our Twitter post our LinkedIn post our Blog the image prompt and even an AI generated image so if we pop this open here now you can see where the original article came from now if you come down here you can see all the stuff that our make. com scenario generated using AI totally hands off you didn't have to do anything if you come down here all the way to the bottom you can even see that we generated this nice image here that we can go ahead use when we go to post these to Social and if you want to go ahead you can scroll through the rest of these and we have another image this humanoid robot and the forest and the last one this guy on a typewriter it's only half a robot but uh I still like this image anyway and what's really cool about the system is that once you go to post if you're unhappy uh with the copy or with the images like you still have total control over this we haven't posted anything yet so if you want to make edits to the Tweet go ahead and here and and change it right like change whatever the copy says and if you want to upad a new image if you're playing around with AI on the side you generate a better image you can just delete the image that's in here and replace it with a new one what's so cool about these systems is that they can run completely on your schedule and so the way that these are intended to work is that they all work together so basically once you're ready you can turn this switch on and you can set this through every week or every month or every day this make.