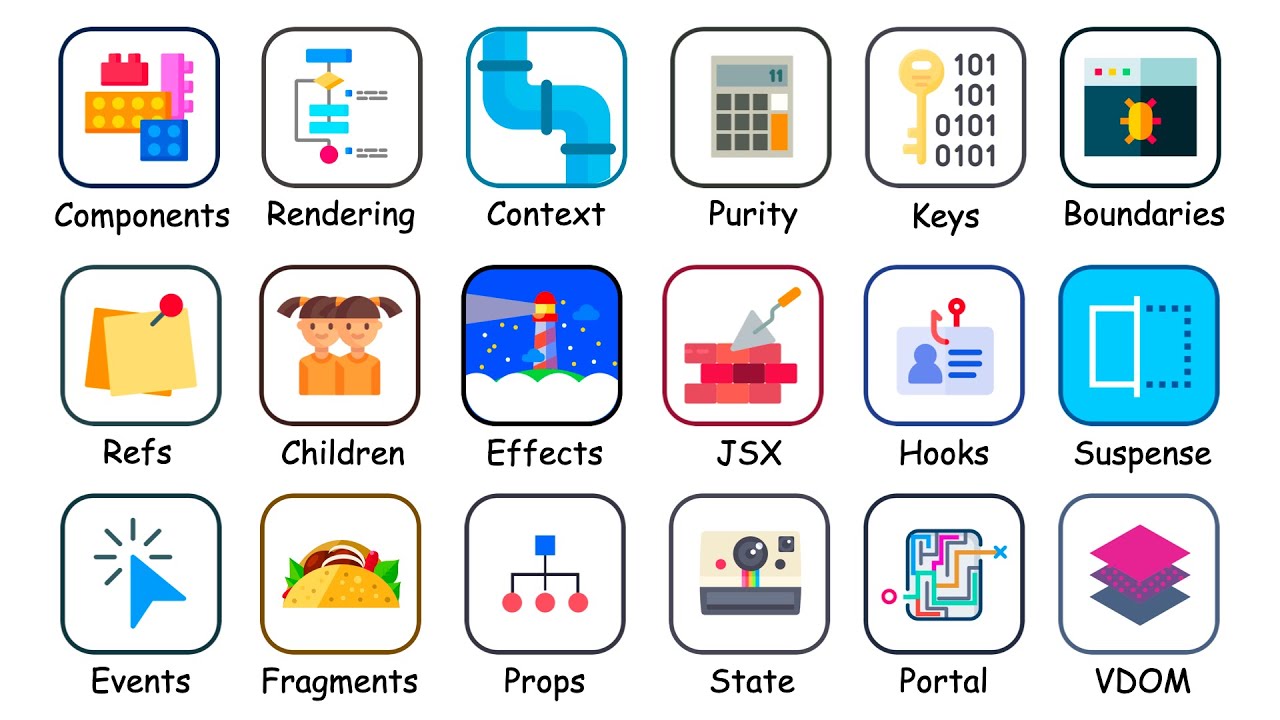
Hey everyone welcome to the video so in this particular video we are going to cover each and everything that you need to know to start your react just journey I created this video in such a way that even if you don't have any idea on reactj then this will be a perfect start for you now before discussing the curriculum just one thing I want to mention if you like this video please give a like comment down and also Subscribe to the channel because these kind of videos take a lot of effort to create and I
highly appreciate if you like and also please comment down my target is to come complete at least 10K like and 1,000 comments for this particular video so now let's see what are the things that we are going to learn so first uh what I notice is that in YouTube there are a lot of react tutorials but in most of the tutorials the es6 key concepts are not covered and I will highly recommend to start your journey from here because it's very important to learn es6 key Concepts before starting your rexist journey so let's see if
I go here right so these all are the things that we are going to cover so we'll be having logical and and logical or template literals object and array destructuring default parameters spread operator R parameters and all the es6 methods like maap filter find every find index includes and at the end we'll Finish with asnate API call because these all the things that we are going to use in most of the times while covering all the react Concepts then we'll move to react fundamentals and here we are going to learn how to install a react
app now in this particular video we are going to use V but I'm also going to show you how you can do that using react react app and then class and functional components styling react apps State and set State Method the concept of props life cycle methods list and keys and conditional rendering so this will cover all the react fundamentals then we'll move to react essential Hooks and here we are going to cover use State use effect data fetching managing loading state context API and Global State management using use context and also complex State management
using use reducer once we'll cover this then we are going to create our first simple to-do app using Material UI then we'll move to our form section and here I'm going to cover event handling creating forms from scratch form submission and also Dynamic form creation without using any third party Library package after this uh we'll learn react router Dom so here we are going to cover the basics of react router D version 6 creating routes navigation link component navigating from one component to another component or one page to another page nested Component and Outlet component
overview Dynamic Pages handling use params use Locus and hook and also use routes Hook Once we'll cover react router Dom then we'll move to custom and Advance hooks here we're going to create this use Fage and use window resize custom Hooks and then we're going to to learn use ref and use callback and use memo and how we can do some performance improvement in our react application after that we will cover react hook form we are also going To learn how you can uh handle validation and everything using this and then we'll move to react
query here we'll be learning the very basics of react query how you can do data fetching and also data mutation using react query after this we're going to create our second project this will be a shopping cut so here we are going to use the concept whatever we have learned far so we'll apply use context and use sorry use context API for this particular and Also we going to implement react router do then we'll move to react Firebase Au so this will be also a very simple authentication app and you are going to learn how
you can use Firebase in your application after that we're going to move to Redux toolkit we learn the basics of Redux toolkit and we will create another project using this Redux toolkit then we'll move to react with justand because justtin is also another very famous uh State Management so that Is the reason I covered both of this so it's up to you whatever you want to use you can use that and then we'll be moving to react testing now this module also I noticed in YouTube most of the videos it's not there so I added
reist testing from scratch so we going to learn lot of things we use both just and react testing Library we are going to learn the concept like get by text get by test ID how you can test data fetching how you can test any gum Elements how you can test uh props or basically passing data from one component to another component and also we going to cover or create a project where we will be testing a context API and at the end we'll finish with this monack application where we will be creating a a task
management tab uh basically there we are also going to implement authentication JWT authentication and with this we will finish this so there are lot of things That we will cover in this particular video so that's all about the intro and I'm pretty sure that you'll learn a lot of things and again I'm repeating please please cover this es6 key Concepts before jumping into react fundamentals because this is not only going to help you to learn all of this easily but also going to help you in for interview purposes so that's all for the start now
let's get started and good luck all right everyone so let's start our Journey as I already told you that this section is going to be extremely important and I will highly recommend to go through this particular section because this will not only help you to start your journey on react but these section is going to help you in your interview uh clearing interview also because sometimes in react just interview you might face some queries or questions from JavaScript E6 so first we'll start with logical and and logical Or so let's see with example so we
have logical and all right and then we have logical or so first what I'm going to do right I will take two variables so variable let's say a which is true and then I I have another one variable B which is also true and what this logical and will do right so it basically checks if both the values are true then only it will return true or else if one of the value is false it will return false so let's see with one example so I'll just Simply do console.log a and and B save it
so you can see that you are getting true here because both are true now I'll make one of them is false so now this will be false but there is a catch and that is very important see because what is happening here it will always check if the first value is true or not so in this case it is true if it is true then only it is going to check the second value and this is very very important if the first value is false Right so it will never check the second value so it
will always return the false here now let's see with another clean example so what I'm going to do right I'll take a function and this function will return a name so I'll take a name here so this will take a name as input and simply it Returns the name okay now what I'm going to do right here instead of passing B I'm going to call this name function gate name function and here I'm going to pass my name now let's save it And let's see or basically guess what will happen see it will return false
now you can see what is happening right because the first value is false it is not checking this function only this is very very important so it is returning false immediately but if I just make this one true and save it now in this case you can see that we are getting my name here all right so what you learn is that and will check both the values if both are true then only it will return True if one of them is false it will return false and another thing is that if the first variable
so here if it is false it will never check the second value for or it is completely opposite so first we'll see like if I do A or B that means or means either of the value has to be true so in this case what is happening right so let's say a is true B is true so it will return true now if I'll make the a as false and B as true it will still return true so what is Happening even if it is false it is going for the second value and it is
checking this value whether this is false or true if I make both as false obviously this will false so now again here now see instead of calling this B if I call this gate name function and again do the same thing so what will happen here a is false now will it return false or what exactly it will return so you see that it will return my name because for this or right whether This is false then also it is checking the second parameter here so in this case it is rning the name so this
is very very important so because this and and or operator we are going to use in most of the times in your application also now let's move on to the next one all right so next one we are going to learn what is template literals and this is also extremely helpful and very good so see uh this is basically used to manipulate any kind of string with some Dynamic values so let's see one more example so I'll give one name one so I'll give name one which is my name all right and then I'll take
some different name and I'll have a name two and let's say I will have another name here now what I need to do right so I need to basically merge these two values and then I need to create one single string so normally how we will do right we'll do Console.log and then I'll do here do name one because this is a dynamic value this value can be anything I'll do plus then I need to give a space so I'll give space and then I'll pass the name to now let's save it now here in
this case we are getting joho this is fine now how we are going to simplify this thing although this is absolutely correct to do this one but here using this template literals this will be much more simpler way you will be basically writing so to Use a template literals you need to take this back ticks and then here to pass a dynamic value so this is the dynamic value right name one and name two both so you need to give this dollar sign and then you have to pass a cly bracket now once you pass
this see you can see it's basically telling that you need to pass expression so here you need to pass this name one which is a dynamic value now for space you just give a simple space so this will take as a space and then Again you will take the same dollar and C bracket and you'll pass the name to and if you save this you will be basically getting the same result all right and this part you will be using most of the like lot of times in your react project so that is the reason
it's very important to learn template literals also now let's move on to the next one all right everyone so now next one we are going to learn and that is stary operator and this is also is very Very important so let's see how we are going to do that so we have some scenario like let's say we are rendering some list of recipes and we have a particular flag and if the flag is true we are going to return recie one if that flag is false we are going to return recie 2 so here I'm
going to take a flag and I'll do that let so recipe one okay so this is false now here I will be having two functions so one function will return so it will return get recipe One name and it will take the recipe name and then I will be having one more function which will return let's say recip 2 name now these all are hypothetical scenarios now this is not going to use in real scenarios that you'll be using get recip one for the different function like that this is just for explaining purposes okay so
now what I return this will simply return the recipe name same this will do this Will also return the recipe name now normally what we are going to do right so we'll do that we'll take a if that so recipe one if this is true so what we going to do right we simply console loog or return whatever we do console log and then I'm going to trigger this get recipe name get recipe one name and here I'm going to pass let's say pza Okay else I'm going to console.log and I'll do like get recipe
name two and this will return let's say Whatever Coke now if this is the case if I save this so what we'll be getting we'll be getting Coke here the reason is because this is false so it's going to the else block so if I make this one true save it now we'll be getting pza so now using this if and else this is absolutely fine but how we are going to do this on using Turner so Turner basically will tell that you give the condition if this condition satisfied so This is like satisfied then
you'll pass statement one or else you'll pass statement two now here again see if you compare both right this is nothing but your condition correct then you're telling if this condition is true you render this statement one or else you render this statement two so how you're going to do that you'll tell that if this s acp1 if this is true and also let's do one thing let's make this one const and then we we will tell that if This is true then simply log this that we are going to render the first recipe or
else you will be render the second recip and I'm going to comment out this part let's remove it now if I save this and what we'll be getting we'll be getting the same result now what will happen if this is false so if this is false right so it will go to this block okay and let's see if I do false here save it and you can see that you will be getting the same result so this Is one way and I'll I'll not say this but you'll understand when you watch this complete video that
how many times we are going to use this this is extremely important so that is the reason whatever concept that we will be discussing in this particular section all are directly related whatever we will be doing in the video now let's move on to the next one all right everyone so now next we are going to learn uh how we can Implement Destructuring in in objects and also in arrays so what we going to do right I will take some variables here so let's say I have a ID of one then I have a product
name of let's say product Apple watch and then I'm going to have a rating here which is let's say five for this particular product and here what I'm going to do right so I'll be creating the product so I'll do product And here I'm going to pass that ID is ID then then I'll pass product name is the product name that we are having and then I'm going to pass the rating with this rating so this all right so now if I just log this product save it so what we will be basically getting that
we will be getting the key name and the value so this is the key name and this is the value correct but here you can see that we can use a sand property and that is Whenever very very important whenever you have a key name you can see key and value with the same name here right product name is nothing but your product name rating is this rating so key and value name basically are matching so instead of rewriting it like this so you can do right you can simply directly pass ID so what will
happen this will automatically take from this right and here also you can do like this so I'll pass product name and this will be my Dating so this is called sand property name so here you all will be basically getting the same result right this is also very very helpful now how you can do uh destructuring in object and also in add so let's uh try to do that all right everyone so now let's see how we are going to uh use this D structuring concept so what I'm going to do right I will create
one more product here and I'll give this one name is product two and this product uh will have some Different property like it will have a description and this will be my product to description and it will also have some other properties so let's say it will have a ID and also it will have a title not title a product name and also it will have a rating so this all will it will take from here now my task is I need to basically get this description and then I need to log it so what
I'll do I'll do const get product to Description and what you'll do you'll do simply product two and then you'll do Dot and whatever you need you need to log it so I need the description now I'm going to log this get product to description and save it so I'm getting product to description this is fine but instead of doing like this what we can do right we can destructure all the properties from this particular product to and then we can basically achieve the same result so I'll just comment out from here and then what
I'll do right I'll do con and you need to basically give the CI bracket because this is the object and you need to specify that from which object you need the property so you need from product two and here inside this if you type control space in vs code this will give you all the options so now you need description so now what we can do right you can simply just log this description save it and it will basically give you The same result okay this is also very very important because whenever we'll be learning
the concept like State props in react application we are going to use this uh this this structuring from objects now let's how we going to do using array so let's I'll take another array here so I'll do const array and this array will have 1 2 three these values now I need to get this first second and third all the values so normally what we'll do we'll do con get Array uh first value and you will do array of what we need to do Arrow zero because this is a zero element then I will do
const get array second value and we'll do array of one like that now here then I'm going to call this gate array first value and gate array second value save it and we will be basically getting one and two so how we going to destructure then this one in shortcut so simply we can do like Const and we'll give a bracket uh sorry square bracket and from which array we need so we need to give array name which is array here this array and here we need to basically tell I need the first array element
so we do array first element and then we'll do array second element so basically you're telling that give me the first element of this array from this particular Del and if I just log this and you will be basically getting the same Result oh sorry this will be ar second element save it now you can see that you are getting the same result and here you can also do the third element because because it has a third element also so this will be third element right save it now you will be getting one to three
but what will happen if you give one more now see these all are very important interview queries or questions also fourth element if you try to log here it will give you undefined because This element doesn't exist right in the AR only have three elements so you need to give here let's say four then only it is going to render 1 2 3 4 so this is how you need to implement D structuring using uh in your objects or in arrays now let's move on to the next one all right so now next let's learn
about default parameters spread operators and rest operators so default parameters how we are going to learn so I going to take a Function and this function will give me the multiplication of two numbers so I'll do multiplication of two numbers I'll give off two numbers okay so this will take a number one and this will also take number two what this is going to return return this is going to return num one into num two now what I'm going to do right I'll just simply log this that call this multiplication of two number function and
pass two and three save it I hope you already know we will be getting six but what happen if I don't pass anything here save it we are getting not a number because obviously you are doing a mathematical operation here but you are not passing anything and if I just log here this num one and num two so what you will be basically getting you'll be getting undefined so here this default parameter comes into picture what happened let's see if you don't you forgot to pass something here But you given some default value to this
num one and num two so what will happen if you don't pass anything it will take the value from that default value so let's say I'll give this num one default value as one and num two default value as two so that means you were basically telling that okay if I forgot to pass anything take from here save it now you can see that what will happen you getting one and two here and the multiplication you are getting two but In case very very important in case you passing something that time it will override that
so let's now I pass 10 comma 20 save it now see it is going to overwrite that both values and it will give me 200 if if you don't pass only one so let's you pass the num one value which is 10 and you are not passing the num two value then also it will take from the default so now num one will be 10 and num two will take from here so it will be 10 comma 2 which will be 20 save It you'll be getting 20 right similarly if you don't pass anything in
the n one it will take from there if you if you pass in the n two then it will over it so as simple as it if I try to explain very simply default parameters is nothing like when you will be passing any parameters it will always overwrite the default value if you don't pass anything it will take from the default value that you have provided for the arguments of that function now next is Spread so let's say we have another array here so we'll do const array two and I'll give this one 2 comma
3 comma 4 now to spread these values what we can do right we can basically use this triple Dot and then you can pass the values of that particular object or function that you want to spread save it now you will be basically getting 2 comma 3A 4 now if you want this one in form of array so you need to Wrap this inside this square bracket save this and now you will be basically getting another array all right now let's say I'll have another array here which is array three and this is 10 comma
11 comma 12 so now I need to Marge both of this array so what can do right you need to basically give a comma and then you need to spread this array three also here so I'll spread this array three now this will give you another array with both the array values Combined now if you pass if you let's say you want to add any values here you can also statically add let's say in the first I want to add 9.99 right so this will be automatically added here so now you can see that you
are getting a 999 similarly for B2 also you can add let's say 90 you want to add and at the last you want to add add 10,000 save it so all of these will be added so 999 90 and 10,000 okay now let's see about the rest parameters so again I'm going to take Another function uh let's say which will return some correct and then uh I'm going to return let's say return something not some I'll say some info so get info and it will basically return some for now I'm going to return some name
I just want to give some example first so now what I'm going to do right let's say this function will receive lot of parameters and you will be basically doing certain operation here and if Those operation is done then only you want to return this name so here what I'm going to do right I'll just simply log get info and then I'm going to pass 1A 2 comma 3A 4 comma 5 five now normally how you will do you'll take five arguments a comma B comma C comma D comma e right because we passing five
so we'll be getting five here now let's log this so I'm going to call a comma B comma C comma D comma e save it what it receive Receiving 1A 2A 3A 5 all of these now here what you can do right let's say you have 100 of arguments you need to pass right so you are not going to write F comma G comma and then 100 times right so what you can do right you can basically spread the AR arents here whatever you will be passing so let's say first I need to pass a
comma B and rest of the arguments I need to spread it what we can do right so for example here I just Need to do the spread operators that we have learned and we need to pass this C that means I'm telling that okay give me the value of one which is a value of B which is two and then spread the rest of the arguments whatever is left so 3A 4A 5 it will automatically spread and that you will receive as a form of array now let's see how this is happening so save this
now see you're getting 1 comma 2 and then you getting 3A 4 comma 5 as a array now you add how many you want it Doesn't matter so what it will do right it will always spread all of these see it is spreading all of these if you remove one let's say A and B you remove B right what will happen it will automatically include the B also here save this now see two will also will be included but very important thing is that you need to pass always this spread or rest of Buton at
the end you can't pass it at the first see what will happen if I just do the opposite so I'll Pass the C first and then I'll do a see you're getting automatically the rest parameter must be late last in the parameter list right so you can't do that so this will be at the end okay so now you learn about the default parameters St parameters and spread operators now let's move on to the next one now next we are going to learn some of the es6 array methods which are extremely important you almost every
time you will be using those all Right so let's learn like map filter find then we have some then we have every then we have includes then we have index of and also we have find index lot of so first I'm going to do I'll create array here and this will be my persons array right now this will be ARR of object and here what I will have I have a name which is person one then I will have a age of that person which is let's say 10 or not 10 let's do this on
30 and I think this is fine so now and also know let's take a city or country so we do country which will be let's say USA I'll copy this and paste it three times I think three will be more than enough and then I'll do this one two and this I'll do 40 and this I'll do 50 this will be person three this I'll make let's say Russia and this I'll do India what I need to do right so I need to create a new array and that array Will consist only the name of
each and every person that we need right so now how I'm going to do that so to map all right so see here this Maps uh comes into picture so you need to map each and every object of this particular array and then you have to go to each and every object you need to get the name and then you have to return it so now we'll do const get all names and then I'll do person array do map now this map will give you a this map is nothing but A call function okay so
this will give you the value this value is nothing but the object it also return an index means each and every object you are having three right so index will start from zero so first index will be zero then this one will be 1 2 3 something like that so here what I'm going to do so this will return each and every value which is nothing but your single person so each and every object is a single person right so we do single person and Also it is going to return a index all right now
here what we are going to do simply we'll just do return and you'll tell that I need the single person name so you do single person dot see you're having all the properties so you need the name that's it now what I'm going to do I just simply do console.log and I'll do get all names I'll save it so let's see what we getting we are getting person one 2 and Three now we can also log this here and I'll show you that what exactly we getting so do single person and also the index save
this and you can see that you will be getting each and every object so first object start with index zero second one start with one third one 2 3 4 like that it will go on if you want age you just pass age let's say I want both name and age both what you can do now you can apply the concept of template literals Right so we'll take a template literals and we'll pass this single person do name and then we'll do ages and I'll do here single person. age so that means person one AG
is 30 person 2 AG is 40 person 3 age is 50 right so this is about map you can also add the index right everything you can do manipulation whatever you like next let's learn about the find so find is basically nothing but it will always check any condition which is satisfying So let's say you want to check person who is from USA so whenever this condition will satisfy it will immediately return that object okay that is find filter filter what it does it will check all the things and whatever condition it will satisfy let's
say there are one more person with Country USA so it will return both the person name so we are going to see that so first I'll do let get person from USA and here I'm Going to do person array and I'll use find again this find will also give you the predicate which is basically your value single person and then also it will going to give you the uh index also so here also I'm going to take single person this will be my index and I'm going to tell that okay return if single person do
country if the single person country means if the person is from USA then only return me this so I'll copy this and I'll just log it here save It so you can see that we are getting only one result because we are having a person one who is from USA if I just make this one India save it so now you will be getting the third person who is from India but what will happen if I just add one more person here let's add here so do person one one or 01 whatever and then I'll
add here 45 and this person is also USA now you will see the trick save it now see and also I'm going to do this one Instead of India I'll do USA so go here right and you can see that you are getting a person one 01 who is from us very very important so you are getting only this object you are not getting this one so find that's why I mention that find will always return this first uh the condition which will satisfy and it will immediately return that okay that is the reason you
are getting this the filter is completely opposite so it will return all the Objects and also it will return array so for find filter what will happen because there are two person both are from USA so it will return return two object objects so I'm going to do get all persons from USA and I'm going to do person array. filter and here again this will give you the single person and also it will give you the index and I'm going to do the same thing that I'm telling that okay return me single person dot country
is USA or not and then I'm going to log this so let's log here so get all person from USA save it so now see what is happening so for find you get only one result but for filter you are getting both the person so both the person are from USA all right so this is about the filter next we are having sum and every so sum is basically we return a Boolean flag based on if any condition will satisfy every as the name suggest is completely Opposite so every will return true when all the
condition will satisfy and we are going to see that see I'll do here that uh check some example some array method example or else it is confusing so just check some array method with example see here what I'm going to do right I'll do person array very very important I'll do sum and here I'm going to pass single person and what I'm going To do right I'm telling that let's I want to check here what I need to check that if there is a person whose age is equal to equal to 45 okay or let's
say greater than 35 so if you noticed here right we have all the person so one one's age is 45 one is 35 sorry 30 40 and 50 now what I'm going to do right I'm going to do if some person's age is greater than 40 then only return me either it is true or false Okay so so let's see how we are Going to do that so here let's simply return and it tell that tell me single person. AG if it is greater than 40 or not right and I'm going to log this and
I'm going to check some arrrow with example now here there is a person whose age is greater than 45 so what it will return so you can see that here if I go right determine whether the specific call function return true for any element of an ARR for any element this is very important so I'll save it I'll go here you can see that it's returning true that means there is one person or two person whose age is greater than 40 now if I just do right if there is any person whose age is greater
than 60 you can see we don't have any person so it will return false so I'll go here and just do 60 now you can see that this will return false every is completely opposite every will check all the ma all the elements or all the objects and if all the objects Satisfy that condition then only it will return true okay first let me do this on 40 and now I'm going to Sol I'm going to do the ex every example so do check every array method with example and I'll do person array. every and
you can see what is determines whether all the members of an array satisfy the condition or specified test right so I'll return return single aray Person and and I'm going to return return that return me if single person. age greater than 40 that means we are telling that tell me that if all the persons that are available all everyone's age is greater than 40 or not so I'm going to log this and then I'm going to copy this and save it now see what will happen it is rning false the reason is because there are
some person whose age is less than 40 right but if I now just go there and just make it Greater than 25 and and save it now see what will happen it is returning true because that every person age is greater than 40 25 so that is the reason it is returning true so this is the difference between sum and every some will check if any of it condition satisfied every will check if every object condition satisfies now next we are going to learn some more like includes includes is another one like let's say I'll
have some uh fruits Array right and here I'm going to do like Apple banana oh sorry and I'll do orange and then I'm going to check whether apple is present this apple is present in this array or not so I'll do simply log and I'll do fruits array do includes now you can see that it will basically return that true or false if this certain element is present in this array or not so here I'm going to pass Apple save it so it is returning true right because this is present if I just change this
one and give my name save it and let's see what is happening so it is returning false okay this is one and then you are having index of so index of basically Returns the current index of that element right and if that index if that element doesn't exist then it will return minus one so here what I'm going to do right I'll simply do that tell me that fruit array El uh fruit s do index Of banana that means give me the index IND of this banana so what will be the index are index start
with zero so it will be one save it so we are getting one but if I again give my name here we'll see what is happening you getting minus one minus one it will return if that element doesn't exist so obviously my name is doesn't exist here so it is returning minus one now last one we are going to learn and that is called index of uh Sorry find index that is also very very important and we are going to use use lot of the times for manipulating AR and everything in react so what I'm
going to do right I need the index of that person who is from Russia so that I'm going to do that so see how I'm going to do so look let get index of person who is from Russia now don't love because I'm giving this name this is just for explaining purposes so what I need to do right I'll do person array do find index okay so this will again return that if that element present then it will return true or else basically it will return the index or else it will return minus one so
again this will give me single I person and then I'm telling that okay give me that person whose country is Russia okay and now let's log this save it what will happen see we we Are getting okay we are getting minus one oh I think we haven't returned it so we need to return this one now let's save it now let's see so we getting two because this is the person so you can see that we have zero one and two but let's say there is no person is from Japan so I add Japan here
save it so we'll be getting minus one so if I go here right we'll be getting minus one so this is how you need to use find index All right now learn all all all the things now let's move on to the next one and then we will be covering with some more example and then we'll start our react Journey all right so now let's uh end with this uh so what we going to do right we will be fetching list of uh some products from this API inpo because we are going to do some
API interaction throughout the video so I think it will be better if you learn this one also so First what I'm going to do right I'll take one uh D here inside our HTML and I'll give a class name of a list of products so let's save it so now I'll go here and then first I'm going to get this so first get that list of products element so what I'll do right so here I'll do document do query selector and I'm going to give this one as a list of products let's copy from there
okay now here what I'm going to do I will be creating a math me here so We'll do F list of products now let's create this method so we'll do as sync function fet list of products and here what we are going to do we take a tri block and catch so in the catch we'll just log error and here what we going to do right we'll simply do const and we're going to do API response which will be Aid Fage and then here we are going to take any URL so we copy this we'll
pass it here and then we going to pass a method which will be a g method right and then after this we'll do const result which will be AIT API response. Json because we need to convert to a Json and then we are going to log this r result let's save it so now let's go here and let's see so you can see that we are getting products So these products we're going to render so simply we can check if this result do products do length if this is greater than zero so I'm going to
create a method which will render the product so I'll do render products which will be result do products okay so now here I'm going to create these methods so this will be function render products and this will receive the gate Products and what we are going to do this get list of product element that we have taken so we'll do get list of product element so let's do this element and here I'm going to do dot inner HTML so here what we going to do right simply look get products do map so we already learned
map so we'll give you single product item and here what I'm going to do right so I'll simply return a paragraph and then I'm going to return We'll take turn so we'll do single product item do title all right so now let's save it so now let's see what is happening so you can see that also we need to do one more thing we need to join this so we do dot join with comma oh sorry not comma we need to join with space okay now you can see that we are getting all the list
of products here right so this is how we have done so This is not about rendering the product this is about learning how we have done this we've taken as sync method we taken a try and then we have taken a f API passing the URL method we have passed and then we are just rendering the result now in react this process is exactly same and then we are basically going to learn how we'll be storing this data in state and everything but for now I think for this particular section I think this will be
enough now let's Start our react journey and I hope that you learn a lot of things again I'm repeating if you like this video please give a like because these kind of videos take a lot of effort believe me or not especially in the editing part so it will be very helpful if you like this comment out and also please share this video with friends let's get started and good luck all right everyone so let's get started so basically uh there are two things that we are going to do to Install a react app from
scratch so there is a create react app and the one that we are going to use throughout this particular video and that is using V but it is also important to know how we can basically create a react app using this create react app command now what basically this does this will create all the configuration that is required to create a react app and then you can run that project in your locally you don't have to do any configuration by your own So let's see how we are going to do that so what I'm going
to do I will be creating in both the ways but we are going to use using VD so let's see how we are going to do that using Create react okay so now if I go back so you can see that I already created a folder I'll just copy this and let's go to our command line and then here I'm going to paste this path now here what you need to do with Need to use this npx command and there I need to give create react app and the name of the app that you want
to give now here you can give any name you want so for example I will give this one as react JS ques using Create react app because we are not going to use this create react app we will be doing everything using VD so so that is the reason I'm giving some random name and I'm going to delete this One later now once you will do this you'll hit enter and this will automatically run the command now obviously uh you need to install npx if you don't have npx installed globally in your application so if
I go here you can see that uh that if you already created this one globally then you need to basically use this npm install minus G create react app so this you need to do and you can see this will take couple of minutes once this is done this will Basically install all react react Dom and react scripts whatever is required and after that we'll be moving to our vs code and we are going to discuss about the folder structure once that is done then we are going to implement our project using or basically create
another project using VD and the same one we are going to use throughout the application so let's wait for some time once this is done uh we will discuss about the folder structure all right Everyone so this is now completed so now what going to do right so we'll go to this folder so let's go reactjs course using Create react app and then I'm going to open this one in vs code and now let's discuss about the folder structure that what are the files that it has created okay so I'm going to zoom it out
a little bit and then then the first thing you'll Notice that it has a package.json now this file is basically will keep a track of all the dependencies that is recorded for your project all the scripts and then some other information then let's go to our node modules so node modules is the basically contents all the dependencies and the sub dependencies for your particular project and you don't have to change anything here so let's say if you're using installing a new dependency So it will be basically added in your node modules and the package.json will
keep a track of that particular dependency next you are having a public folder and then the main is our source folder now notice one thing because this will be kind of a practical project so whatever things we are going to learn we will be learning using by some example or basically by creating some project so that is the reason I'll not go into much more theoretical perspective so that it Will be easier for you to learn by implementing some projects and the same way you will be learning all the concepts so let's go through all
the files uh very quickly so the first thing is that you'll notice that is index.js file now this is basically the single page which is getting uh served whenever I'll run this project in the browser now first of all to run this one let's go to our terminal open a new terminal and here uh what you need to do We need to basically start using npm start command now this will automatically run in our uh browser now here after this you can see that we are having some index. CSS file which is basically the root
CSS file for your project then we are having the app. jss now before that you'll notice uh you can see in this index.js file we are rendering the app uh file and in this app file whatever content you are having that you be able to see in your browser Okay so this is now loading uh now you can see that this is little slow and the same thing you notice whenever I'll be installing using this vit it will be very faster so that is the reason it is also recommended to using uh this vit uh
for your development purposes so now here you can see that we are having this content and this content is coming from this app.js file now what I'm going to do right I'll minimize this on little bit and then I'm going to remove all of This from here and I'll write here uh let's take H1 now these all are HTML tag so we give hello react from create re uh create react app save it now go there you can see that we are getting this one so that means you'll understand one thing is that this app.js
we are rendering in index.js but from where this is getting rendered what is this root so this is your basically the application or project route if I go to This public folder and let's go to our index.html and you can see that if I scroll down there is ID with root so this is the single page that is getting served what is happening if I go and do inspect and let's go to our elements and you can see that if I expand this body there is a ID rout and inside this route you're having this
class with app and then you're having the H1 now this is basically so this route we are rendering Here so you can see that we are doing document. gate element by ID route and in this route we are rendering this is a uh method and here you are rendering the app file and this app file is nothing but this content that you are currently seeing in the browser so this is the concept of the single page application so this is the single page that is getting served and for this one you are creating a single
root and whatever components or pages we will be writing That we are going to learn later that is getting served in your browser so that is all about this particular simple folder structure using Create react now in the next part what we going to do we will be basically start learning some of the very basic concepts but for this one we are going to install another project and that will be using VD so let's do that in the next part all right so let's create another project so to create a v project what we need
to do we need to Basically use this command which is npm create V at the late latest now here V will basically give you lot of options that template presets that you will be able to use so for example let's say if I use npm Cate V at theate latest then the name of the app then hyphen hyphen template and then you have to basically give that for which one you want to create this template either it will be a view template react angular something like that all Right so here because we are creating a
react one what I'm going to do right instead of creating using a template let's do this one from scratch so I'm going to copy this one now okay first uh I'll create another one because this one we are going to delete we not use create react app so I'll again open my command line and then let's navigate to this folder and I'll go here and let's copy this okay now I'm going to paste It and you can see that this will ask some of the queries so you can see that this is the project name
so I'll give this name as reactjs Concepts hit enter now it is asking that uh select the framework that you want to use we have vanila view react P react SW solid or something others so I'm going to use react now here because as I already mentioned this will be very simple beginner level course I'll create Another separate course for the advanced level of react but because this video is created in such way that so that it will help each and every beginners who don't have any knowledge on react so that is the reason I
am going to use JavaScript and this is the only reason because I know some of you will comment that why we are not using typescript although it is a standard the only reason is that as a beginner when I started my reist journey it is actually a little bit Tricky to learn react just with typescript because of the interface type checking and lot of things so that is the reason I will also suggest you please start with plain JavaScript then once you'll get some idea then move to typescript so I'm going to use JavaScript and
now you can see that it is asking that okay now you your project is already created so here if I go here right this will have some config V config and other things so Now I'm going to do I'm going to navigate to that folder so this will be react JS Concepts then I'm going to either let's do one either we can do NP install or we can open this one in our vs code so I'm going to open this one in vs code okay now I'm going to close this one from here and let's
open another terminal now what we need to do we need To do npm install so you can see that we are having npm installed and to run this project you have to use npm run da so I'll do NVM install now this will install all the packages that are recorded or basically all the node modules and once this is done we are going to run this project in our browser all right so this is done now I'm going to start this one using npm run Dev so you can see that how fast this is right
so now I need to go to this local Host and then you can see that this project will be running here okay now here also I don't have to explain the folder structure once again this is the same thing so you can see that we having a main. jsx file where they're creating the root first using document. get element by ID then they're rendering the app component this is similar to create react app all right so this is done now what exactly Next Step will be what exactly this jsx means so jsx is Basically the
file extension that you need to write or basically create whenever you need to create a react file or basically any components so GSX is nothing but it's not a HTML and not also completely JavaScript but it is basically in between something and what exctly does whatever code you are writing this will be basically getting converted to a plain JavaScript using processor and the pre-process that is called the Babel okay so whatever you're Seeing this div and everything this will be basically converted to a react. create element and there whatever content and the child components that
you are having that will be automatically converted to a plain JavaScript and the same basically we are basically seeing here now the first thing what you need to do whenever you will start your react Journey so first you need to understand the basic of components now there are two types of Components in react one is the class based components and the functional components now obviously class based components are not used anymore at all and it is 100% functional components everywhere so it is also highly not recommended to class Bas components although I'm going to give
a very basic idea but you'll notice that whenever you will create any project you need to use functional components or basically the hooks so let's start by creating very Simple class Bas and functional components and let's see how we are going to use those components in our application all right so the first thing uh let's do one thing I'm going to just minimize this one and keep it like this so that it will be easy to understand okay all right now here I'm going to remove all of this whatever you are seeing here all right
so I'm going to remove from this div And and I'll give this one a div here and I'm going to write some H1 and give give reactjs Concepts 2024 and remove all of this because you'll not be able to understand what is happening here so you're getting reactjs Concepts I believe there are some styling will be applied here that is the reason you are seeing this One so let's see okay so we having the place item centers here so I remove all of this okay so now first uh let's see how we are going to
create uh simple classs and functional components whatever components that you will be creating you need to create inside this Source folder all right so all the components logic or application logic will stays inside the source folder so here what I'm going to do Right I'm going to use or create a components folder and then I'm going to create either you can create a file or a folder let's create a file first so here I'm going to give this one name is class based component dot now again you need to basically give a extension as I
already told you to create a react file you should give the jsx extension so this is your class base Component file now how this will works so here class Bas components will start with the class keyword and here basically you need to give the component name so I'll give this one name as let's say class based component now this will extend the component library from react so here we need to basically import the component now again these all are very old this is not used anywhere in any company if you go they don't use classb
Components anymore also what they're currently doing most of the companies are migrating from old class based component to functional component so this is just to give a very basic idea I will highly recommend never use classb components anymore because the support is also very less you need to use functional components only all right and here what you need to do this will render the jsx and the jsx whatever we'll be rendering the same we'll be Able to see in our browser so how this will render so this will give you a render method okay now
this render method will return the jsx so let's say here you need to return the code that you'll be writing for example here I'm going to return a div and I'm going to return a A3 and I'll give this this is my class bits component okay now save it and now you'll see that whether you are able to see this class based component here no Right and the reason is because your application doesn't know there is a classb component so somehow you need to basically inform this app.jsx that okay implement or show the content of
this file but how we are going to do that now to use this component in this app.jsx you need to export this component so that you'll be able to import it here and to export it what you can do we'll do simply export default and this will be my class based component which is the Component name that we are having here so this is the now you exported this component me means you will be able to import these components anywhere you want okay not just only app.jsx but you can import this component any component or
the parent component that you want to render I'll save it now how we are going to use this component here because remember at the end this app is getting rendered in the root so that means whatever child component that you are Having you need to basically pass that in your app.jsx to import the just need to use this uh component uh this I don't know what the tag starting tag probably and this will be your class Bas components you're getting already the result I'm going to import it so you can see that this imported from
your components and then you have to close this like this so that means what you're telling that okay I'm importing this component in my App.js I'll save it now see we are getting the class B component here correct so that means you learn one thing is that whenever you'll be creating a component you need to export it and then again you need to import it in your main app. GSX then only you'll be able to see that one in your browser if I now go and inspect this and let's go here you can see that
we getting this H3 let's go here and change this one to Let's I'll change This one to H4 save it now you can see that you are getting H4 here okay so this is how you need to to create a Class B component I'll again repeat one more time so first this will start with a class keyword then you need to give the name of the component which will extend the component library from react this will return a r sorry this will render the jsx so that means we need to use the render method which
will return the jsx and here you need to write all The component logic so that's all about how you can create a very simple class based component now let's understand how to create our function component the one that we are going to use throughout this particular video all right everyone so now we know that how we will be basically able to create a class Bas components now let's understand how we can create a functional component so again let's go here and inside components I'm going to create another File and this I'll give this one as
functional component. jsx so to create a functional component as the name suggest so this will start with the function keyword so either you can create normal functions or you can use uh using ES Arrow functions so let's see so we'll give here function and then you need to give the name of the component so I'll give this one as let's say functional Component and it is much more simple and here what you need to do this will basically return the GSX so here you notice that it is doing the same thing here but the only
difference is it's taking a render method which is WR written in the Js X for functional component you need to directly return the jsx so here I will write a div and let's say a what will given H for so let's use the same so do H for and then I'll give this one as functional Component save it now again we need to use this component in our app.jsx right so to use this one you need to import it and this is the same concept so the first thing you need to export this component so
you can give export default and the name of the component which is functional component so now we have exported it so now we need to import it and now I hope you'll be able to do it so again you need to basically see where is your component so this is the Functional component or you can also manually import it so let's say I'll remove this one from here so I'll do import functional component from so you need to go to component and then functional component and then you can use the same here and now let's
save it so you are getting functional component here so this is how you need to create a functional component now let's say uh You need to use this one or create this one using Arrow function so this is the same thing so I'm going to comment it out so here uh you need to take Arrow function so this will start with con and then the name of the component again so we'll give functional component and now this will again return the same thing so here I'm going to return this jsx here and this is the
exact same thing what you are doing here the only Difference we are creating using Arrow function so now let's save it and you will be basically seeing the same result so this is the very simple and the basic concept of how you can create two components one is the class based component and the functional component and to use this component you need to basically import it in your file wherever you want to import it so that will be your parent file it doesn't has to be always F because let's say there Is another component where
you want to use this component right so that we are going to see in the next part which is called the nexted uh nexted components and then uh again the one very important point you need to export this component that is mandatory because if you don't export it you will not be able to import it and then re use this comp component so that's all the very basic part now let's understand how you can basically uh create nested components and also how You can pass data from one component to another component now in this concept
section we are going to learn only those things that are absolutely mandatory to learn so that we can directly jump into project and then we are going to learn all of these by implementing uh very simple project and then we'll move to the complex one all right so now we know that how we can create class based and functional component now let's understand uh what is nested components And also how you can pass data from one component to another component or basically communicate between two components or multiple components so for this one what I'm going
to do right so let's do one thing let's create one folder here so let's say you have a task like uh there is a products uh project that you are creating or eCommerce project where you need to render list of products here okay now obviously all of these will be DED about this is just to Understand all the concepts so what I'm going to do right inside this components folder I'm going to create a folder and that I'll give this our name as products and here I'm going to create index. jsx okay now what I'm
going to do right I'll close these two and also I'm going to comment out these two component from here now I'm going to create a component so I'll give function and this will be product let's say product List and here I'm going to return a div and this I'll give this one name as H1 or let's take this one as H3 and I'll give this one name as Ecommerce project now let's export this so I'll do export default product list and I'm going to use this component here in our Ro app.js file so I'll do
this one as product list save it so you're getting e-commerce project okay now the task is That you need to basically render list of products here okay so now what I'm going to do right so let's say uh we'll create some dummy data for now so I'll give const uh dummy product data and here I will be having let's say uh three products so one will be product one then I'll be having product two and then I'll be having let's say product three okay now what I'm going to do I Will be having another uh
component which will basically keep a track of each and every individual product okay and that is let's say our product item component so now let's save it and let's go to our components inside these products I'll create one Moree folder and this will be my components now these components is the sub component of this product folder and here I'll create another file and this will be my Product item do jsx okay so now let's create so here I create function and this will be my product item and I'm going to return let's say for now
simply return a div and I'll return a paragraph and this is I'll give this on name as product one okay and now I'll export this so we do export default product item so for now what I'm going to do Forget about this Nami product data for now we need to basically import this product item in our product list and at the end this product list is already imported in this so you can see that this is a kind of a chain so you have a parent component which is your app then you have a child
component of this app which is your product list and then again the child component of this product list is your product item so this is a chain so what I'm going to do Here so in this component I'm going to import product item so now you can see that this is the nested component that we are doing so this is a child component of this product list and if I now save this now you can see that you're getting a product one okay so that means we are having three chain so we have f app
here so that means this is your app component then you're having the product list Component and then you're having the product item component correct so this is how then again you can have some multiple other component also so some other component here okay so just giving example so let's see this one also so I'll go to product item right so here let's say I'll create another component here so get a function this is our button component okay and this let's say we return return a button and this will be Let's say click so now this
button component I want to use in this product item now you notice one thing because both the component are in the same file so in that case you don't need to export it because you will be able to use this one directly here so now again I'm doing a button component here and if I now save it you can see that you're getting a button here you can see that this is a button so now there is a chaining that You are having a app component product list product item and then again you are having
a button component here and the list will goes on so this is all Ned components and these all are child or parent to one another so this is a child of this component this is a child of this component and this is a child of the main root component okay so this is how the concept of this nested component works okay so now next thing what we are Going to do right so we have learned all of this now we need to basically understand how we are going to render list of data and how we
can pass data from one component to another component so first start with the list of data so let's say I need to render this dummy product data which is a array of products obviously this is Ramy data now we need to render here so what we are going to do right we need to basically use the map method of es6 so for now I'm Going to comment it out here and now let's say what I'm going to do so whenever you'll be writing some Dynamic logic you need to start with this cly brackets so cly
bracket means you are telling that okay I'm writing some jsx which can be a dynamic value okay so you can't use some random value here because this is already wrapped into C brackets if I now save this you will be basically getting error so if we go here right you're getting error that this is not Defined so that is the reason first you need to take a c brackets and for now what I'm going to do right so I'll take a UL because these all are HTML Concepts only so this is a list and inside
this I'm going to do that I want to render this dummy product data so here I'm going to use a map so this will give us a product item and here let's say I just want to render a Ali and here I want to render this all these items so what I need to do I need To basically render this item here okay now save it you can see that we are getting product one product two and product three if I go here right you'll see that there will be one warning and that we need
to check and you can see that each child in a list should have a unique key prop you can see that this is a list right and here there is a key prop is missing now what this key is does whenever you are rendering a list of data react will basically keep a Track of each and every individual item and whenever there is update on that list it will only render only those that you need to update or basically you need to render so here this will give us a key prop and this key prop
or index so we'll take this one as index because map will give you a index here correct so you can see that this is the index and also it will give you the optional array also so here what I'm going to do this will give a key property that you can Use and I'm going to use the index as a key so now let's save it I can see that if I now refresh this you are not getting that error and let's go here and you can see that this will B basically now a keep
a track of this keys that okay this is the first item second and third now although there is a very important interview question is that why you should not keep these indexes as keys that we are going to Discuss later there is a reason but this is how you will be simply able to Rend a list of data so what we've done we are having the data array here and then I'm going to doing a map and then taking the item and the index and just rendering the simple AI here all right so this is
all about the dummy list of datas that we need to render now let's say there is a scenario is that currently this is hardcoded in this component dummy product data Correct now let's say you will be receiving this data from your app.jsx file from your parent file so that means somehow you need to pass this data from this app.js to index.js so how we are going to do that so to communicate between two components there is a concept called props so Props is a way to pass data from one component to another component currently this
is in the same component so you'll be able to easily do it using map but this is not The case in a real project either you'll be receiving this data from a API call or you need to pass this data from one component to another component so let's see how we going to do that so to pass a prop what you need to do this component that you are rendering here this is the product list in this component you need to pass a prop data so for example let's say I need to pass my name
here so first you need to give the prop name so here this will be my name so this is the prop Key name this is very important so this is the key name and then you need to give the value so this is my name I'll give here so this is a prop you are passing so you are telling that okay I want to pass this name prop from to this component from this app do JS so this is the key name and this is the value save it now because you are passing this prop
from this component to this component so you need to somehow able to receive this prop to receive this prop you will be Receiving this one as argument in this function so this will be your props and if I now log this props here let's go to our console and you can see that you are getting object so Props will be object and in this object you are getting the name and you're getting the uh value which is a key name prop name and the name or basically the value now let's say I want to pass
another Prof here what we can do let's say I'll pass here CT so I'll pass CT as ABC save it are getting two one is name and one is the CD now you'll be able to render this easily so let's I want to render the name and City here so what you can do right you can destructure this on here so we'll do I'll destructure name and C from props correct and then I'm going to do here let's let say I'll take H4 and then I'll do name is now again because this is the dynamic
value as I already told you whenever there is a dynamic Value you need to take this C bracket and then you need to pass this name so you're telling name is name and he or she is belongs to this city and then I'm going to pass the CT here so these both the things are Dynamic value so you can see the name is suum and here C is belongs to the city ABC go here and change this name to let's say what we can do Roxy save it I can see that this name is getting
changed and the city is same Because we haven't changed the so this is how you need to pass the props and then you will be receiving it here you'll be able to destructure and then render it now there is a shortcut that let's say you don't want to do this St here you'll be able to directly dis structure easily here so what you can do because these props will be always the object so here you'll be able to destructure directly here and then I'm going to take name and City okay and Then you can remove
this one so what we are doing we are directly taking the name and the city as a form of a object here now let's save it and you'll be getting the same result okay so now you understand that how you'll be able to pass this prop from one component to another component now let's say uh what what we need to do now this dummy product data that we are having here we want to receive this from our app.js jsx now you'll be able to easily Do it right so what we can do let's I'll cut
it from here currently if I now save it it will give a error the dummy product data is not defined now we go to app.jsx now here let's say I'm going to pass it here as a prop so what you need to do you need to give the key name now key name can be anything this name that you are giving here and this will be what we can do this Dy product data so that means this is our Key name and this is the value that we are passing save it again we'll be getting
the error because we need to receive this as a Prof here so what we can do we have already learned so you need to pass this dummy product data here which we are passing from here save it now you're getting the same result as I already mentioned that this key name can be anything so let's I give this one name as list of products because we are giving list of Products here if I save this you'll be getting error because it is not getting that because here we are using the name as jummy product data
but this is not the key name the key name is list of products now this is very confusing for beginners this is the value this is not the key name you have to basically get the prop based on the key name that you are giving Which is list of products so here now you need to receive list of products and then I'll pass a list of Products here save it now we getting the same result here okay so that means we have learned the very basic concept how you will be able to pass data from
one component to another component using props now let's say what I want to do right instead of rendering this UL Ali what this AI here I want to basically use this product item correct in this component and then I'm going to pass each and every individual item as a prod to this product item and I want to Render that so let's see how we are going to do this one all right so now let's see what we are going to do so here now instead of rendering this AI what I'm going to render I'm going
to render this product item component and I will pass each and every individual product item as a prop to this component so what we can do right we can remove this part from here and then we can basically import this product item and then I'll pass a single product So because we are already doing map right so we'll pass single product item so this is my uh props key name and then the value will be this item that we are having here okay and then what we can do we can also pass the key as
this index okay so now let's save it let's see what is happening so you can see that we are getting product one click product one click product product one click now you might think that why this Is happening the reason is because list of products has three products and we are calling this product item component and passing each and every individual product so total three products we are passing so we are getting three times result but each and every time we are getting a static result the reason is because in this product item component we
are basically rendering a static data so now instead of rendering this product one multiple times what we need to do we Need to render each and every product and because of that we are already receiving this single product item as a prop here and now instead of rendering this product item what I can do I can pass this product uh single product item as a uh value there and then also you can receive this key here so let's I'll pass it here and then pass this key as this key if I know save this now
you can see that we are getting product one product two and product Three and for each and every product there is a button because that is fine because we had passing this product button component here all right so this is how you need to basically render list of data and then you'll be able to pass the data from one component to another component all right so this is done now next thing what we are going to do now we will be learning some very basic way how we can do styling react jss so now there
are many ways that we we are going To learn for example how we can do some CSS libraries like or Frameworks like material UI then we are having an an design then you are having Tailwind CSS set and uh UI a lot of others for now let's see two ways that we are going to do the first one will be to create a simple CSS file so for example let's say inside these products I want to give some styling to this each and every product item so what I can do I'll create a file so
and this will will it Sem my style. CSS and now I will go to my main product list component so this is my product list and here what I'm going to do I'm going to Simply render or import my style. CSS save it now let's say in this e-commerce project I need to give some uh style so I need to increase the font or color or anything so what we need to do so in normal HTML CSS we usually give class but in react J you need to use Class name and the reason is because
for class based component we also use class keyword so that it doesn't conflict with this class CSS class and that class component so that is the reason we need to pass class name and here I'll give let's say uh title the class name now I'll copy this let's go to our CSS now this is normal way of writing CSS and here here I'll give a font size of let's say 5050 PX I'll give font weight of bold and now Let's save it and you can see that this is getting applied here all right so now
I'll not go into much details the reason is because these things you should already know like for react it's not like it's a completely different way of writing CSS at the end you have to use the same CSS properties and everything and you will be able to import it so this is one way and that is to create a simple style do CSS file and then you import it and pass the class name the Second way is that you can also create CSS modules so let's say for this product item so I'll go to components
and inside this I have product item. jsx so we also can create CSS module so I'll give this one as product item dot you need to give module do CSS okay now here what I'm going to do let's say I need to give some style to this button okay so I'll give here dot button style and I'll give a background color Of black font weight I'll give let's say Boulder font size I'll give 18 PX okay save it now nothing will change because we need to apply so we'll go to product item and here I'm
going to import uh let's do styles from so product item. module. CSS now these Styles will give you a object now Here what we can do simply we can use the class name and now here we'll do style and then we'll do dot so you can see that we are having button style so you can pass styles do button style save it now you can see that we are getting this one the style let me just do the color as white okay so you can see that this is getting changed also if you go here
and then log this Styles right and let's see what is happening so inspect here go to Console so you can see that we getting a object and here you're having a button style and there will be a class name so you can see this is the class name that is getting applied so if we go here this it will automatically create a unique class name and this is the class that we have written here okay so now for each and every time let's say I need to give some class name to this single product item
so I'll give here do product Title uh let's give a font size of 20px and color I'll give uh let's use some random color save it now you can see that if I go here right this we are having two now so we'll copy this product title go here here and then here we can do class name so this will be my styles do product title save it now I can see that the color is getting applied here okay so we have learned two very simple way of doing one is to create uh CSS file
and Then CSS modules now then there is inline Styles now what exactly inine style is so here for each and every element that you are using you also able to use inline style so you have to give style property here and this will be object now let's say uh I'll give a padding of 20 PX and I'll give a border of 2 PX solid red save it I can see that you are getting for each and every item correct Also let's give a margin of Margin bottom will give of 10 PX or 12 PX so
you can see that you're getting margin so this is inline way of writing now this is also can be helpful in some cases where you need to give some Dynamic values and everything or you need to overwrite some values so in that case you can use these inline Styles okay so now we know three ways one is inline ways you can create CSS modules or you can create simple style. CSS and Then import it and then use those as a class name all right so now in the next part now we will be moving to
some very very important things like how you can use tary operators or conditional statements how to manage State and then we'll be learning very basic of life cycle methods in class based components and once we learn that then we'll be moving to functional components and that is hooks so let's start all of this one by one all right so now we are going to Learn three more things so first one will be how we can write conditional statement uh statements and then uh we are also going to learn how you can manage state in a
class based component although we are not going to use State Management in class based component because we'll be creating everything using hooks but I think it's always better to know how you can do those in class based component also in case your project is in class Based components also we going to learn how some basic life cycle methods in class based components so first we'll start with conditional statement uh statements so what is basically conditional so let's say uh you're managing some kind of state and there is a flag now based on that flag value
you need to either render this particular text here or jsx here or you no need to render it so that means this render of this particular H4 element is depends on Some kind of statements so let's see how we are going to do that so for now we because we haven't started the State Management 28 so for now I'm going to do uh I'm going to uh basically show you this particular example using some static value but I'm going to show you multiple ways that you basically do the same thing again and again so first
I'll take a flag here and this flag is let's say true okay now if this flag is true so I want to render this text here or Else I want to render something like Hello World okay so how we are going to do that so to do this one we are going to use the tary operator now again when you are writing tary you need to give a curly brackets because this is based on some Dynamic value so we will basically check here if this flag is true so in that case you render this H4
tag here or else so this is in the else block you render hello world okay I hope you're getting so now If the flag is true so it's Sol already true now so it will render this so you're getting this one let's make this one as false save it so we getting hello world so this is very simple way of writing now there is nothing like uh very complex logic in this conditional this will be same for each and every scenario that you'll be writing but how many ways that we can write that now there
is another way that you can write and that is you can basically create a Simple function okay so let's say I'll create a fun function here and this will be function render text block so this will be my function and this function I want to return this GSX now why this is important so for now currently this is very simple so that is the reason you're writing it let's say your logic is very complex and in that case you want to keep this return block as simple as possible or readable for other users so in
that case it's always Better to create some kind of function or components and then you you basically render the same so here this will receive a flag so this will be G flag and then we are going to do the same thing so I'm going to return that if this gate flag is true so I'll render this H4 or else I want to render the hello world okay now this function I want to render instead of all of these so I'll remove all of this again you need to Take K bracket and then I'll do
render text block so this is the function name and you have invoke this and you can see that this will receive a flag what flag is that so this flag is nothing but this flag that we are having here so I'll pass that flag as argument and I'll save it and you can see that we are getting the same result if I make this one as true and you're getting this value so now what we are doing instead of writing the just logic here we have kept this Logic separated and then based on that we
are rendering this so this is another way and what is the third way now there is another way that you can write so write this so let's say I will take a uh value here so now I'm going to comment it out from here okay and I'll take the same like render text block and I'll do this one as or keep this one as null now what I'm going to do right so We will do or let's do this one as const and directly write it that if flag is true then render this okay or
else render this so this is kind of you are keeping this one in a variable now you don't need to invoke this because this is not a function and then you can simply render this here so render text block so you can see that this is rendering a jsx element because we returning a we are Writing a jsx here save it and you'll be getting the same result so this is another way now there is one more way that you can write and that is using IF else but I will highly not recommend I think
it's not better not to write and use Turner as much as possible but it's also not wrong so let's I'll keep this one as late render text block I'll keep this one as null and I'll do here if the flag that we are having if this is true then I'm going to Return this GSX see if you see here right this is the same thing again and again so I'll comment it out so if flag is to return this GSX else [Music] return this okay so this is one more way sorry I think we have
done some mistake instead of rning because we're not writing in a function right we need to do this one like this so if flag is true then render block will be this jsx if flag is false Then render text block will be this jsx and again you have to render it here save it and you'll be getting the same result make this one as false save it now you're getting hello so you can see that we have learned multiple ways of writing jsx element either you can write inside this block only or you can create
a separate function I will suggest like whenever you are having very complex and very lengthy code then you can keep the that Logic in a separate function in that case you'll not get some kind of sonar issues also all right but if it is simple then simply write it here okay and also you can able to write using this like you can take a variable and then you can also check the same or you can also take or use of eils and and you'll be getting the same result all right so this is all about
the conditional now let's start learning some very basic concept of State Management in a class based component so you already have a class based component created right here so now here what I'm going to do I'm going to commentate this product list for now and I'm going to basically only keep the class Bas component save it so we are getting class based component here now let's go here here I'll close everything else okay so what I want to do anyway I think every tutorial uh like instructor Will do the same thing and that is start
with a very basic example so we'll keep a uh button and then on click of this button I want to toggle this text very simple one so here I'm going to do a button and I'll do toggle text so on click of this button I want to toggle this text or hide and so vice versa so what we can do right here first you need to take a state so you need to take the state and that is take a state this State will be object as simple as that and then here I'll be showing
like so text so this is your state variable this is the variable name and the value will be let's say false okay now how we are going to access this state because we are in a class environment so you need to take a log and to access this state you need to take this do state see what will happen if I just do state here save it you'll be getting error correct so we go to Console you see the state is not different because it's not getting the instance of that state so we'll do this
do state save it so you're getting a so text is false so now to access this so this will with these do state DOT so text you can see already it's showing the sest okay so this is how you can define state and this is how you can access the state two things now another way that you can do and that is you can Take a Constructor here which will take a props you can pass the super and then here you can also take this do straight right and then do the same thing so I'll
copy this and then I'll comment it out here save it and you'll be getting the same result but I I actually prefer writing simpler ways I'll keep it like this so we have a state and then there is a so text what I want to do right on click of This button I want to make this one from false to True from True to false vice versa so to do that what we need to do we need to basically click on this button right we need to click here so that we need to do or
basically change that so to do that we need to take a event and that is because we're clicking so we need to take a onclick event so we'll do on click and now here we need to basically take a method and that will be we will Create a method so let's const handle click sorry we don't need to take con because we are in a class so we need to take handle click and this will be Arrow function the reason we are taking Arrow function because we no need to bind this if you're taking normal
JavaScript functions then you need to bind that function inside inside Constructor or else it will basically not get that instance again so here if I over write it is so in classb component. handle Click so that means this is the method of current class which is this class component so we are having a handle click now again you can't take directly handle click like this you need to take it always with this do handle click okay then only you'll be getting the instance so now if I now go handle click and let's say log here
button click save it okay now I'll go here and click so You can see we getting button clicked okay so now what we need to do we need to basically change this or toggle this text so how we are going to do that so to do this one we have a method and using that method you need to basically manage your state in class BAS component and that is called set State method now you can't do like this if you do this. state do s text is not equal to this do state do s text
means you are basically Toggling this is not at all recommended and this is also a very important interview query and that is the reason what will happen if you directly mutate the state so you're directly mutating the variable right it will not rerender the component so this is not recommended okay so what you can do you need to take a set State method so this do set state so what this method does this will update your uh State variable and Here this will also take a call back that that is optional so it will take
any state so for now we are having this so text correct so what we going to do we do so text is equal to not equal to this do state do s text that means we are toggling this state and now see what will happen if I now save it and let's open our console we having object is false I'll click here this is now true click here this is now false true false true so This is struggling so now what we can do we already learned the tary right so you can basically check if
this this do state do so text if this is true then only r render this or else it will be null null means we don't want to render anything so first time you don't see click here rendering this one click here it's hiding correct so this is how you can manage your state in class based component now there is a shortcut that You can use you can basically first destructure this s text from this do state and then you can basically pass this directly here okay this is much more organized way and the same thing
you can do here let's say first you'll do const is equal to this do state and you'll take the S text and instead of doing every time this do state do s text this do state do something else you can directly pass it here save it and it will be the same Result you can see okay now let's say I we do another very simple one so what we can do let's say we are having another uh State here and that is change color what I want to do when I'll show this text right that
time I want to change the color from uh let's say currently we are having black to Red something else so what we can do here basically so whenever I click on this Button again we'll take this change color and then I'll do change color will be not equal to change color okay so that means again we are changing color of the variable from false to true true to false and then again we'll take this on here change color and now what we'll do here you remember we have learned one more style property right so here
I'll check if this change color so if this is true or sorry here We need to take the color so I'll take the color property so we'll check if this change color if this is true I'll make this on to red or else this will be black save it now see what we doing if this is true this should be red and at the same time we should show this click here it's getting changed to red and if I click here you not able to see that is fine but it's will be now basically black
so this is how you can use inline Styles and also you can see that we are basically changing the state and based on that we are doing some operations so this is very basic of how you can manage state so you need to take a state object you you will basically take a event and based on that you'll access the state in your render method and based on that you'll be manipulate your jsx now let's move on to the next one and next we'll be learning some very basic life cycle methods and that will be
it for our Class Bas components after that we be start our journey on hooks because there are a lot of things to learn okay so now uh let's understand some of the very basic life cycle methods uh in class based components so first we are going to learn uh what is called component deed Mount then we are having component dided update and then we're having component will Unmount so component it update so here we'll take comp component did Mount so you can see that so this will run for the first time whenever you will load
this page all right so here you can see that if I over here call immediately after the component is mounted and here if you want to set any state this will uh trigger the rendering of this particular component so if I now log here so like this is called first time on page load save it now let's say What will happen and you can see that if I refresh this and you can see that we getting this is called for the first time on page load and now see what will happen I want to do
something right so instead of clicking here and then showing this and changing the color I want to do this on page load so how you are going to do that so to do this one on page load you can do right I think it's already Mentioned that if you want to set any state this will trigger a rendering so you can simply do a this. set State here and then I will do so text this will be not equal to this do state do s text and then I'll do change color will be these do
state not equal to this. state do change color if I now save this what will happen here noticed so I'll save it and refresh this page see first time only you are getting this because this is changing the state and if I then it Is struggling right refresh this page this is color is getting changed and this s text is now true the reason because we are changing this one from uh in component did Mount on page load now what kind of things that you can do you can call any API on page load and
you can do lot of other things Whenever there is a requirement that you need to do some kind of extra logic or basically some side effect on page load you can use component Mount then you are Having component update so component need update is basically we check whenever the component will be getting updated or any props or state value changes okay called immediately after updating occurs not called for the initial render because obviously for initial render we are already triggering this component in Mound so this will only trigger Whenever there is a change in props
or state so this will give you two argument one will be the previous Props and previous state so now let's log both and and let's see what is happening previous props and previous state save it I'll go here go to console so you can see that props we don't have anything and for the first time previous state is now true and true the reason is because here you can see that we are changing this one to true and true right so text and change color so that is the reason now if I go here And
click you'll see this is getting changed now correct line number 37 now this is here you can see that this is true true if I click here again this is false false so this is showing you the previous props previous state not the current state so now I'll remove this previous props and now you'll see what will happen if I compare this one with previous props to New U previous state to New State so I'll do previous state And then new state and now see what will happen so first time you can see that we
are getting true true so refresh this page okay let me remove it from here now see okay refresh this so you are having false false first time then it it's getting changed to true true click here now it is the previous prop was true now the current is false so that means here you'll be able to trigger it now let's say I want to do something else if I will have a Button right another button and that is my count button and I want to increase the counter value now when the counter value will reaches
10 I want to render a text only when it will be reach 10 so let's see how we are going to do that so here uh what I'll do right I'll take uh take another state and this will be my count and keep this one as zero and then here I will take another button and I'll I'll do increase Count value okay and then I'll do here on click and I'll do this do handle count I'll create this method here so I'll do handle count and here what I want to do right I'll do these
set state so here uh first I'll deure these do state whatever state is there and then I'm going to change the count Value will be these do state do count plus 1 so every time I'll click on that button I want to increase the count value and at the end I'm going to render it so I'll render count is so I will take here count and I'll render it here so we need to take cly brackets and I'll render the count save it I can see that if I increase this count is getting changed now
what I want To do I will check whenever the count value will be 10 I want to let's say what we can do right for example we will make this we'll change the color and the font size both okay so now I will do something like uh change count style and this will be let's say false now when how I'm going to do that so to do this one I need to basically manage the or basically keep a track of The previous state and the current state and where where we need to do that we
need to do that inside component dat update so here what you will check right if very very important previous state and then previous state do count is not equal to equal to these do state. count that means we are checking that previous count is not same as current count and we'll check this do state do count is equal toal to 10 that mean Whenever the count value will be 10 what we will do we'll take this. set State and then we'll first this structure the original uh existing state and then I'll change change color style
will be not equal to these do state do change color style I'll explain again what I'm doing save it now see first time uh this component did Mount will be getting called then we'll be clicking on this button right so it Will become one 2 3 4 5 6 like that so here we are checking that if the previous count is not equal to same count current count and the current count is 10 then I'll make this variable from false to true so now here or let's make this one as true only I don't want
to toggle this so change count style will be true now see what will happen if I now log this change count style here save it see what will happen we Getting false now I'll change this value so we do one it is false 2 3 4 5 6 7 8 9 now we click one second it become true right because this is happening here in the component update so now it is very simple I'll CH if style so I'll do color so I'll do if change count style is true I'll make the color as let's
say Brown let's make this one as blue or else I'll make this one as black and then I'll also do the font size Uh I will do if the change count style is true I'll make this one 30px or else I'll make this one 12x save it now let's see what is happening refresh this page I'll change now this is 12 PX you can see that show 1 2 3 4 5 6 7 8 9 and now 10 this is getting changed and the color is getting changed okay so this is how you can do
side effects or manage side effects now just now this is uh regarding your previous state you have Done the same behavior will be previous props so let's you are receiving some props and that props also you will be able to check it here that if the previous props is not equ to to current props and then you will do something like here any kind of side effect and then at the end you're having another one I'll not go much into details so this component will unmount will log when the component will be getting unmounted or
destroyed component is Getting unmounted okay so these three are more than enough to know to the life cycle and then you are having the render method I think this we have already discussed so that's all for this particular section in the next section we will be starting very very important and I think you have to be very careful and please learn these hooks we are going to use throughout this particular video so now let's start uh with our Hooks Journey so what are the hooks that we are going to learn so first we'll start with
use State then we'll learn use effect to manage any kind of side effects then we'll learn use context very very important then you learn use reducer these four are mostly used then you're having use ref use callback use memo these three are for performance Improvement use rep not for performance Improvement use rep is to manage your Dom elements but then we'll be learning To use callback and use memo that is the performance optimization hook so mainly we'll be covering in this particular video use State use effect use context react context API and use reducer all
right and after that we'll be start uh creating our project I already mentioned that I'll be creating another separate video for react Advan topics and also react with JavaScript and react testing but for now for this one I want all of you so that you guys Have some very basic idea and we'll be creating some basic to intermediate to advanc level of project also so let's start with our first hook and that will be used St okay so now we will be start our hooks Journey so the first one we are going to learn and
that is called UST State hook so UST state is basically used to manage the state or basically the component state so for this one what I'm going to do right I'll just uh Comment it out and then I again I'm going to remove the comment from this product list save it so you're having the product here and noticed one thing in the if I go to the product list component so here you can see that we are having a dummy flag and based on this flag we are basically rendering a text block uh conditionally so
what I want to do right instead of keeping this flag as static I want to manage this uh on form of a uh state so there will be a Button and then again I want to do the same thing that we have done in the classb component the reason we are taking simple one so that it will be easier for understand believe me or not when you'll start from simple it's it's a matter of time that you only will be able to do any kind of complex you will have so many ideas all right if
you start with very complex it is very very difficult to understand also so the first thing is that what you need to do Right so here we need to basically take a state now here you can't take a state like this like your classb component it doesn't work like that so first we'll start with our US state hook so how we are going to write a use State hook so first we need to take a con and this use state will basically give you a state variable so in our case let's say I'll give this
flag as our state variable I'm going to remove this so this is your state variable and then There will be a set State method if if you compare with the class based component State Management you'll see some similarities not not exact see the first step here also you have taken a state right and here also you're taking a state variable so these all are nothing but your state variables only then you're having a method which is updating the state similarly here also you will be having a method that will dispatch a acction which will basically
Update your state so it's always better to start the name of this method with set so that you'll be able to understand okay I'm uh setting this state here and because the variable name is flag so I'll give this name as set flag okay and now you need to take usate so UST State you need to import from react now here this will basically take a initial value and this will return a stateful value and a function there will be to update it now which function so this is the Function that is updating it okay
so here this is the initial value now this value can be anything it can be a null it can be empty array it can be object it can be string it can be number or it can be a Boolean so in our case we'll keep this one as a Boolean so we have a variable we have a method we have a hook and then the initial value or initial state so this is your initial State you can also take it like this so we are having initial State and here you are having let's I'll give
this one name as uh what we'll do flag value so this is this is the false something like that okay this like that also you will be able to take okay or you can directly take it like this because currently we having only one so we give initial value is false or initial State and then I'm going to pass this initial State here okay if you're using typescript then you need to give Type and everything here that this will be a Boolean something like that so here you are having a state now let's say log
this okay so for now what I'm going to do right I'm going to render it here that if remove this okay if flag is true so flag is nothing but this flag the state variable I'm going to remove all of this for now keep this one clean so if the flag is true I'm going to render a H4 and I'm going to render the Name and the c or else I'm going to render hello something like that save it now you're getting hello now what why that is the reason because the initial state is false
if I make this on true and let's refresh this so you having Roxy and ABC okay now let's say there is a button and on click of that button you want to change this from false to true and vice versa or True to false so let's take a button here so we'll do so or we'll do toggle text again same process what you need to do you need to take on click event so I'll take onclick and this will be handle toggle text now here you don't have any this concept right because this is not
a class so here you can do you can take a simple function like this or you can also take Arrow function like Const okay but I'll take like simple function only so do function handle toggle text now how you're going to update the state right so what you need to do right you need to take this flag or method so this is a dispatch uh you can see that react. dispatch set St uh set State acction and Boolean now why this is the bullan because this is this is the current state if I make this
one for uh let's Say string right see what will happen so now it's dispatching a string if I make this one a array this is dispatching array something like that okay now what you need to do just need to flag uh you need to basically toggle this flag so what you'll do do not equal to flag as simple as that so what you are doing we basically making the flag from two to false false to True something like that save it and now you see that if I click On toggle text it's changing click it's
changing all right so this is a very simple example of how you are going to manage State now the only thing is it's not about doing so many example the main objective is to understand the concept very clearly how you're going to do that so first you need to take a variable which is your state variable then you'll be having a method then you need to take the U State and the initial State now this initial State can be anything it Can be object or whatever you need to do and based on that you need
to do certain operations for now we'll keep this one very simple because we are going to use this use trate thousand times in this whole video and by the end of this particular course you will definitely able to understand each and everything very clearly so now we'll move to the next one and that is extremely important like very very important and that is called the use effect hook so use effect Is similar to this component did Mount that we are having here this component did not Mount component did update all or it also behaves similar
way like component it mod so we are going to see how we going to do that so the first thing is that use effect is basically use to manage any kind of use man any kind of side effects in your application so what you need to do first you need to take a use effect from react and this will give you a call back so you can see That this is the effect call back and here this will take a dependency array so here you can see that react dependency this is very important what will
happen if there is a dependency is present this use effect will only activate if the value of the dependency will change we are going to see that if you'll keep this dependency empty so we don't have any dependency here right so this is this will only run on page Load once because we don't have any dependency so that means what is this equivalent in the class Bas component you remember in class Bas component component did Mount only run first time similarly in use effect if you keep the this dependency as empty you don't have any
dependency empty array this will also run only once log here and I'll do run only once page load save it now let's go here So refresh this page so you can see they run only once on page load I think this is coming two times because in the main.js we have a strict mode Let's me remove this okay run only once on page load correct so that means this will only run once now see see remember we have done this logic right on page load we are changing this one so similarly we can change this
state also so let's say I want to currently uh we are seeing if I Ref this page on first name we are seeing Roxy do and ABC the reason is because this initial state is true and if this is true we are going to reenter the name and City what I want to do right on page load I will make this one from True to false so that you'll be able to see Hello World see how we going to do that so we do the same thing we'll do set flag as let's make this one
as not equal to flag save it see we are getting hello on page load you're Getting hello and if you click here then only this is changing so first time from True to we are making false in the use effect so this is how you do side effects now this is when you keep the keep the dependency as empty now let's say you want to manage some kind of side effects like for example the similar example that we have taken here that you have a button so here you have a button right and there is
a count whenever you are increasing the count and the value Is going to 10 then only you are doing something similar example we are going to implement here okay so let's see how we are going to do that all right everyone so now we know that how we will be able to run use effect only once on page load so you have to keep the empty dependency now let's see one simple example with uh dependency so what I'm going to do right again I'm going to replicate the same example that you have done in the
class Bas components so let's take a const I'll take a count method this I'll give set count and here I'll give this one as U state of zero so this is the initial value okay and then let's after this let's take a div and here I'll take a paragraph and I'll render count is and here I'm going to render the count okay so we'll be getting this one as zero okay then there will be another Button so I'll take a button and this will be increase count now again uh what I'm am going to do
right so let's say once the count is zero so that time what I'm going to do I'm going to change the background color of this button and also the color of this button okay so now see so here we need to take a on click and this will be our handle count uh let's give handle increase count copy this and let's create this method so l Handle increase count and I'm going to do set count will be count + 1 all right so that means each and every time I'm going to increase the count by
one so click here this is getting increased okay so now let's say whenever this count will be 10 I want to basically increase uh sorry the change the style right so how we are going to do that so in that case one thing we can do like there are multiple ways that you can do for example you can You can directly check here when the count is 10 then only I want to do that but let's do this one in a different way so I'm going to take here like change style and I'll do set
change style and this will be use state of false now again what I'm going to do I'm going to now take another use effect now obviously you can take multiple use effect no problem with that so we'll take a use effect here now here you need to keep the dependency now here comes Comes the trick so now here you need to basically check that which dependency you need to keep to make some side effects so in that case because we changing the count value so here the dependency will be this count so that means Whenever
there is a change in the count this us effect will be getting rendered so here I'll keep the count as a dependency right and let's say I log here count changes right so I'll save this Uh let's open inspect and see what is happening so I'll click here see count changes is coming click here again so this will be every time there is a count changes this use effect will run also let me just quickly I think we are logging some in some other component I think we are logging some style right so let me
just remove that from here I think yeah let me remove this Styles Uno okay so now what we are going to do so We'll simply check that if the count value that we having if this is 10 so that means once this is 10 I'll change set change style to True okay so now first log this change style and I'm going to remove this console from here and see what is happening so now see I'll click here 3 4 5 6 7 8 9 and now click here now it's true okay so what we can
do simply go to this button and then in this case take a Class name H sorry I think you can take a class name or else let's do this one using style only so I'll do background color so here I'm going to check if the chain style is true I'll make this one black or else this will be white and then I'm going to change the color so color I'm going to keep opposite if the change style is true I'm going to make this one as white or else I'm going to keep this one As
black and here I'm going to take color and I'm going to do the change style is true so I'm going to make this one let's say white or else I'm going to make this one as black save it now let's refresh PR this I'll say increase 4 5 6 7 8 9 change this is getting changed right so this means we're maintaining a side effect here based on this count now you can keep multiple dependencies and based on each and every dependencies you can do Certain operations so this is very simple way that how you
can run us only once on page load and based on some dependencies and then there is another one and that is this user effect will basically return return a call back and this is basically work as a dis dis structure so this is similar as uh this component will unmount so whenever component is getting unmounted you can do certain operations inside this call back okay so here this component is Getting destroyed component is unmounted so you can do some side effects here also okay so now all the things are done now let's start with our
first API integration using use effect so what we are going to do right uh we will be implementing a simple API callor fetch request on page load and also we going to do on button click so what I'm going to do I'm going To use this dumy Json API and here let's say I'm going to render some users for example let's see what else where have users so I'm going to get all the users here okay so let's do here and let's create another component sorry folder and I'll give this on name as users and
I'll create index. jsx close everything else and create a function here written a div H1 and this is users List I'll Give All user list and here we can directly export this on so export default function users I'll go to our app.js and I I'll comment it out from here and then I'm going to render the users so we will be getting all user list okay now we are going to basically what your task is you need to render the list of users here and you have to fetch it from a API so this is
the API and this will give you all the list of users and then you want to render the first Name the last name uh the email phone number and let's say the birth date so how we going to do that now the two things you need to do whenever you'll be fetching the list of users you need to store that user in some state right so you need to take a state first so I I think we already discussed that how we are going to take state so we need to take a use state so
here what you will do right we'll do users let's do users list we'll do set users list and this Will be used St and here what I'm going to do right this will be array AR of object so I'll keep this one as Mt for the first time so initial state so now your task is you need to render the list of users on page load so how you are going to trigger a page load uh side effect so you need to to take a use effect I think this we already discussed and you need
to keep the dependency as empty so this is will run on the first Time now here what I'm going to do right first thing you need to basically uh take a method here so I'll do F all users so this will be a method that I'm going to write so this will be ASN method because we are doing Asing operations we'll be facing the list of data so I'll be giving Asing function this will be fetch all users and here what we are going to do right we will take a tri block catch Block so
this catch block will handle any kind of error so we log here log error for now now what we need to do right we need to basically first call the API now you can basically use any kind of like AIO third party Library is any hook but we are going to learn first very simpler way so we do const uh here we can do API response and this will be AIT phage and here you need to basically give the URL Or the input so in this case I'm going to copy this URL from here you
can keep whatever API you are using and paste that URL here okay and then you're going to do const result so you need to convert this one to Json to we'll do API response. Json and I'm going to log this result here okay save it and let's see what you're getting so you're getting object we are Getting the total how many users and how many users we are having so here what you can check let's say you need to get this data now here we are giving this example that's why we are checking users for
example you are using some API some different API endo and there you are having some different key so based on that you need to change it so here what I'm going to do right I'll do if this result do users is true so in this case I'm going To set the user list in this method the user list this AR of objects so we'll do result do users so this is what we getting right here that's it else if there are any issue so we'll do set user list as empty save it and now I'm
going to log this user list here so you can see that we immediately got 30 users correct and if I refresh this page we will be getting the 30 users notice first time for some time we are Getting empty and then we are getting because it's taking some time to face the data from API so now what we are going to do right here we'll take a UL I think this we have already done so nothing but we are rendering list of data so you can check if this user list and then user list. length
is greater than zero so we are going to render now again we are doing tary here and this is what you will be using most of the time so we do user list do map this will be My user item and here I'm going to render AI the first thing what you need to do you need to give a key here and it's always better to give some unique key so we are having this ID right each and every ID is different so we'll use this user item do ID as key and inside this let's
say and if there are nothing right if the user list is not greater than zero so we Going to render H1 that no users found please try again if you want you can also render null here but this is also fine now here I want to render let's say the username user item DOT first name space and I'll give here user item do last name this is what we are having now let's save it and let's see what is happening so you see that we are getting the list of data refresh this page see For
first time we getting no user found please try again and there is some problem that we need to check Let me refresh this one second okay I think there is some problem with my network okay now we are getting because there are some Network so refresh this so you can see that first you're getting no user F because it's taking some time to render so in that case for better user experience what we can do so here we can basically Manage some kind of loading state that the data is getting loaded please try uh please
wait for some time something like that so here to manage a loading State what you can do see every time you'll be managing some kind of state you need to take a state variable so I'll do here loading or let's do pending whatever so we do pending and do set pending and this will be use state of false and when we'll be calling the API Right here so here we can do set loading set pending as true and then if the result is present so we'll do set pending as false and if there are nothing
we also do set pending as false now here first time we can also do this one as true that is also fine so now what we going to do right if the painting is true so before this we'll check if pending is true so I'm going to Return uh let's return return H1 and now in this casee we'll show uh use uh fetching users please wait save it now see what is happening refresh this see getting fishing users instead of no user found and then you'll be getting the list of users okay so this is
how you need to basically manage the loading state so this is what you have done and uh this is how you need to call the now Let's say your requirement is that instead of calling the API on page load you need to call it on but button click so very simple what you can do simply create a method so let's say we're having a button here right so I'll do a button and I'll do Fage users list and then create on click method here I'm not discussing all of these because we have done multiple times
till now this on C method so we'll do handle Fage list of users And then create this [Music] function and then simply call this method here okay so now let's save it I'm going to comment it out for now now you can see that in this case we getting fetching users please wait so I think better in this case will be we'll make this one as false now that is just to show you so now we're getting no Users found please try again now see click on this here here now you're getting the all user
list click here you'll be getting the data so in this case what we are doing instead of fetching the data on page load on button click we are calling the same method now if you want you can also directly call this on button click right you no need to call so let's if I click copy this fet all users so this is a extra step so I'll just comment it out and instead of Calling that handle F list of user I'm directly call this F all users this one okay save it and now refresh this
so now I'll click here so you'll be getting the same result okay so now we have learned uh quite a few things that how you can use use state for state management how you can use use effect for side effects how you can call Api data on page load using use effect keeping the dependency as empty and also how you can call Api on some other uh Functionality like on click of button let's say you are having an input and on type of input you also can can face the data it is always the same
concept again and again you just need to practice little more so I think that's all for the basic two very important hooks now let's move on to the two more uh important hook that you need to and that is called the use use context and react uh context API and the use reducer so let's say how we are going to manage Some kind of global State using react context AP and believe me or not this is one of my favorite topic of react uh the use context and I actually really love the concept of this
concept uh context AP that reacting has created it's actually really really really impressive and good all right everyone so now we are going to start two very important things and that is use context and the react context AP along with we also going to learn another hook that is Called use reducer for managing complex state but the first uh step you need to understand why actually you need a context AP or use context hook so in react there is a concept that we called here prop drilling okay I don't know how this will be so
this is called prop drilling I know this is very bad but I'm going to try my best to explain so prop drilling is basically when you have a multiple nested components so let's say I have a component here component a then I have a component B component C and component D so this is my component a this is my component B please uh check this one very carefully this is very important interview questions also and this is component d [Music] so now here these all the components although these component is interconnected with so a is
connected to B so that means B is a child of a c is child of B and D is child of C but Somehow you need to pass data from this a component to D component but the problem here is you don't have a direct connection between these two so in that case how you're going to pass from this component to D component so here the concept of prop drilling is so let's say you have a value X so you will pass this value X as a prop to component B then again from component B
you will pass this x to component C and then from C again you'll pass this to component D Although this is a very simple example although you might think like okay this number of times you need to pass but there are some very very complex scenarios also where you don't have any connection a at all so in that case you don't have any options only to pass the data so in that case we came into one conclusion is that you need basically some kind of global state where you'll be able to manage the state from
one place so this context what it will do Right this context AP so here you'll be having one main Global State here so this will be your Global State and then whatever child components that you are having let's say this is a component one more so these is all your child components and then you're having your app.js or index.js which is your main root component so this is your root and these all your child components all the child components although it can be possible that these components are not Connected with each other that is fine
what we'll do we'll wrap this root component into a provider that context will provide and whatever State Management that you'll be doing you'll be doing inside this context so what will happen because your root component is a combination of all the child components that you are having now once you'll wrap the context in your root component you will be able to access this state any Component you want you don't need to do prop drilling that means let's say you need to pass data from this this component so you don't have to pass to this this
this like that it will not be chaining directly you will be able to access the data from your context let's say you need something else in this component so you'll be able to access the data directly from context so this is the concept of uh managing Global State now in Redux also it is almost same the only difference is that context API react will provide for Redux you need to install a separate package and your store will be completely different so that we are going to discuss later but this is why you need the global
state or basically context AP in the first place now first time this will be a little tricky so we are going to understand this one with a very simple example or else I'm telling you This can be little tricky first time okay so you need to understand all the step by step what are the things you need to do so what uh we are going to do right first uh we'll learn how you can create a context and how you can wrap your context in your root component so this is the first two steps you
need to do okay now first I'll go here inside source I'll create a folder and I'll give this on name as context and here I will create index. Jsx so what will be your first step First Step will be you need to create the context so here we'll do const let's give this one name as Global context to create a context you have to use create context from react what it will do so you can see that this will create a context that components can provide or read and here you need to give the default
value or the initial value and Here you can keep any value you want for now I'll keep this one as null so this is your first option now second what you need to do because you are going to use this Global context in everywhere whever you need that you need to export it so I'm going to export this one now this is accessible throughout the application Next Step you need to create the global state that receive Component as a children okay so here you will create so we do export or let's create simply function and
here I'm going to give this one name as Global State what this will does right this will receive the children now what this children you might ask this children is nothing but all of these components that you are having so each and every component is a children of this context that you'll be receiving because in the root component you'll be wrapping the Context right and root component is nothing but the combination of all the nested components that you are having so here what this will do this will return a provider so what this provider it
does so This Global context if I click dot here you can see that there is a provider there is a consumer and there is a display name which is optional this provider is provide as the name suggest this will provide the state and then there will be a consumer consumer will Consume the state so one is this will provide the state and from component you need to consume or basically you need to get that state so here you need to pass this children now this will give a value which will be your state value so
for now I'm going to pass this one as Mt object now what we need to do we need to export this we'll do export default Global State save it so now this is done so this will create a context but will This work obviously not because as I already mentioned you need to wrap this context in your root component so which is your root component your root component is main. jsx where you are wrapping this app so you can see that here so what you can do right we can simply cut it from here and
now here I'm going to call this Global State and I'll see This Global state will receive a children right children is nothing but all the components that You are having and that components logic holds this app component so that means what you have done you just wrap this app component inside Global State This Global state is nothing but the context which will provide the state to all the child components in this children is nothing but this children that you are passing here okay so we have learned three step first create the context give any sell
value export the context then create a global State using Global context. provider pass the children and pass a value now here you need to pass all the state that will'll be checking and then very very important you need to wrap this Global state in your main root component okay now what we are going to do right so first I'll go to our app. app component so I'm going to comment it out from here now let's say uh what we going to do right I'll create two different component see we'll keep this on very Simple ORS
uh this will be little tricky so in one component I'll be having a button okay and then there is another component there I'll be having a text on click of this button I want to change the text of the uh color or basically font size of the text but what I'm going to do right those two will not be interconnected that means there is no connection between those two components so here I'll create uh let's give this one as context uh context concept Something like that create two components so I'll create a button do jsx
and I'll create another one and that will be text. JX see I'm keeping everything very very very simple okay you'll understand why I'm keeping this one simple the way we'll be moving from simple to complex at the End by this by this video we be understand that how much complex things that we are going to create so here uh in this button let's Create a component so we give this on context button component so what this will does this will return simple button and this will be like change theme something like that and I'm going
to export this so export default context button component and I'll copy this and I'll paste it here so this will be my context text component and here I'll be having simple H1 and I'll do Change text or something like let's give my name only okay now let's go to our app.js or main. jsx no not here app.jsx and here I'm going to import context button component and context text component so we are having change theme and then here you notice one thing that We don't have any connection between so from this component or button component
I'm going to click here but I'm going to change the color in a different component not in the same component now you might ask me okay why we are creating context for that you can do the same thing in this app and then you can pass it yeah you can do that but it's a simple one right when you'll be having very large application like let's say you creating e-commerce there you're Having 10 pages you can't manage all the state in this app and then pass it to all the components and it's become messy so
that is the reason you need to have some kind of centralized version of State Management where you'll be able to do that so here I'll go to my context now what I'm going to do right so let's say I'll create a uh theme state so this will be my theme and I'll create a set theme please learn this one very carefully and here I'm going to Keep a use State and I'll keep this one as light so by default and here you can notice I'm doing this one in the global context so I taking a
state and I'm keeping the theme as light for the first name now let's say I need to get this theme variable in this text component okay how I'm going to consume that so to to consume this state first you need to provide where you will provide you'll provide in the provider so here you can see that in the value you'll be passing All the state so in this value inside this object now again this has to be object here we will be passing the theme so passing the theme here and also you're passing the set
theme now whatever like whatever you'll be passing as a value in this context you will be able to consume this in your child component so for example button is your child component text in is your child component so now I need to get the theme value Here so how we going to do that so here first I'll log here it we do get state from Global context so to consume the state you need to use the use context hook so this is the advant this is the uses of use context to to consume so you
can see that what it will do this will accept or consume a context object and then it will return the current context value Correct so here you need to pass what you need to pass the context now you might think what is our context so that is the reason we have created the context here and we have exported so this is the context name that you Global context so here we need to pass the global context if I now log this right see what will happen get state from Global context save it and see what
we are getting if you go here you're getting object and Inside this there is a set theme method which is a dispatch method and then there is a theme light awesome right now you see you don't have any connection so from Context you are reading the theme now what we are going to do we'll take a style here and we'll do like do the font size so we are going to for example we'll do if this theme this theme what is that theme so get state from Global context do team so we should not do
like this that is the reason what we'll do Right we'll always destructure from this context so you can directly destructure here because this is object right so you can destructure and then pass take the theme so here I'm going to take if the theme is equal to equal to light so I'll make the font size as 50 PX or else I'll do if this is dark I'll do 100 PX same uh what else we'll do we'll do a background color if the theme is equal to equal to light I'll keep this one as uh white
or Else I'll keep this one as black Also let's take a color so color again I'm going to do if the theme is equal to equal to light I'm going to change the color to let's say uh what we'll do right we'll do blue or else we'll do yellow okay so we're using what else we using we're using font size color and theme okay now if I go here right so we getting blue color the reason is because currently the theme is light we are Getting blue but what we need to do right on click
of this we need to toggle this from light to dark dark to light so how we are going to do that see to do that two ways I'm going to show you again you need to basically get the set theme state which will update the right in this button component so how we going to do that again the same process it'll destructure the set theme from use context and then you was the global context okay and then what you can do Simply make take a on click and do here set theme now we also can
take the theme here so this will give you that if theme is equal toal to light if this is light make it dark or else make it light save it and let's see what is happening click here see font size color and background color click here again getting changed right awesome so that means see that you don't Have any connection between these two component but using a global State you are managing the state globally and then you consuming that state and you can do another thing right let's say you don't want to do this set
theme here you can do this logic in this context I'll show you so here what you need to do create a method in this context so I'll do handle change handle change theme on button click and here instead of passing this set theme you can pass this function Only see I told you right whatever you'll be passing that you'll be able to receive so now you are getting this here instead of set theme because we are passing handle change theme on button C in of set them so I'll get it here and then what I'm
going to do right so I'll cut it and then I'll pass this handle change theme on button click but if I click here nothing is changing the reason is Because uh you need to basically do it here so now whatever you are doing set theme you are doing in this component okay and now you'll see that if I click here this is changing so if it's a simple one you can directly take the set state in this component only and do that or else let's say you need to make this one reusable and you'll be
using this one in multiple components so create a function here pass that function into the context consume that And then pass that in the on click and here we don't need the theme so I'll remove this one so I hope that uh this is now clear that how you're going to create a global State how you can wrap this in your main main do or index.js file how you can consume that using use context and also how you can provide that using this provider so I think that will be more than enough for context because
the main project that I'm going to create right that is the admin Dashboard for this one we are going to use Global context only or basically context API then there will be some other projects there we are going to use Redux toolkit also now next we are going to learn another hook that is use reducer and after that we'll start our journey of creating projects all right so till now we have covered use State use effect and also the use context hook now let's learn another very important hook and that is called use reducer so
Use reducer is another you can say like a state management hook only that basically helpful for complex kind of State Management so what this does this will take a state and there will be dispatch method which will dispatch a particular accent and based on the accents that you are dispatching you will be having a reducer this reducer will receive a state and accent and based on the accent type it will do certain operation and it will return you The updated state so for this one I'm going to do a very simple example let's go here
and let's say uh I'm going to create another file and let's give this one name as use reducer example. jsx close everything else for now and I'm going to create function and this will be used reducer Example return the jsx we'll have a button this will be a count button okay uh or let's do a different thing so here first button will be to hide text second there will be another button that will be to show the text there will be a third button that will be change text Styles something like that so we'll be
having three button now we are going to do Export default and I'll go to our app.jsx and I'm going to comment out both of these and let's import use reducer example so you're getting three buttons here now what we are going to right so let's say we will be having a text so this will be use reducer hook example and here I'll give this one as H3 now what I'm going to do on click of this I want to hide this text on click of this I to show this and on click of this I
want to change the Styles so let's see how you're going to do that using use reducer so the first thing what we need to do we need to basically take a state variable or object and there will be a dispatch method this method will dispatch accent that we are going to see so now we need to import our use reducer use reducer will take a Reducer that we need to create and also it will take a initial State okay so if you go here right we are having the initial argument and then there is a
init but we mostly need these two now in the initial State we'll do initial State then I'll be having here uh like a so text flag this will be false and there will be another uh state which will be change text Styles flag so both the things that We'll be having so this will be our initial State and now I'm going to create a reducer so reducer will be a simple function so here I'm going to create reducer this will receive two things one it will receive the state and also the acction now what it
basically does it will see at the end the uh main objective is to return the updated State as simple as that but there has to be some scenarios or condition that it will Basically check that what feature or basically which xtion I need to execute and based on that I need to return the updated state so here because we can have multiple accents let's say 10 15 it's always better to write in switch statement instead of writing in eills and the key that we will be having and that is accent. type so each and each
and every accent will have a type and this is mandatory based on this type it will execute that case and then it will Return you the updated State as simple as that and in the default it will always return you the state so now let's see what we are going to do basically so for now what I'm going to do right so let's give some value here random value and for now I'm going to return the state only we not do anything now I'm going to show you that what exactly we are getting in this
state so I log this and I'll check here let's go and if you See we are getting object and in this object you're having these two things change Tex Styles flag and so text flag this is nothing but your initial State correct so now what I want to do on click of this button I need to hide this text that means I'll keep this one show text flag as false on click of this I need to show the text that means I'll make this flag as true and on click of this I need to change
the text Styles so in that in that case I'm going to make This one as true okay or let's make this one as toggle text Styles okay so now let's say how we going to do that so here I'll create on click method this on click method will dis patch now this will dispatch a accent this accent will have a type this is mandatory and this in this type you will basically mention that what functionality you are doing on click of this button so you can see it's clearly mention that we are hiding the text
so Here I'll give a hide text correct so this will be my type now this is a unique type what we can do right we can also create these types here it always better to keep this in a separate file but for now for understanding purpose this is so we having a hide text correct then we'll be having const uh so text now the only reason we are doing because here we don't have any human error in this case right if we do some Typing mistake and everything and here we'll do change uh text Styles
style okay these three access so you need so here instead of passing like this you going to pass the hide text so this is the type now this type it will receive here correct so here I'm going to give hide text okay now you can keep this one also that is fine just to show you like and then I I'll create two more case so one Will be to show text and one will be to change text style so s text and there will be another case this will be so s text Styles so what
I'm going to do right on this so text button on click of this again we need to take on click and here I'm going to dispatch again here I'm going to dispatch a type and I'm going to do so text and for on click here I hope you're already getting that we need to dispatch another Type and in this case this will be your change text style so three dispatch we are accent we are basically dispatching here now here if I come right so let's see what we getting in this state and the accent save
it now see if I go and click on this there is a line number 14 you can see 15 there is a state so this is the state that we logged here and that you can see there is a type right height text and This case is basically matching here okay you can we can also do this one like this this will also work so if I click here right we are getting the same and let's use the same here so I hope you're getting that based on this type we we are basically able to
access the state now whatever things we want to do we'll be able to do that so on click of height text what we want to do we want to make this so text flag as false so what uh we can return so we Return here the existing state that we are having and then we'll do uh so text flag and this will be false because this is what we want to do right when we want to show the text in that case we want to return return the existing state and then we'll do show text
flag as true because we are showing the text and when we changing the text style in that case we want to toggling right so what we can do we can simply return the existing state and then we'll do change textile Flag will be equal to not equal to state do change Tex stle flag because you're getting this one so you're toggling if it is false it will be true true false if it is false it will be true I like these things we already discussed in some other Concepts right so that's all about the reducer
that we need now notice one thing what will happen in this state so I'll just remove this console from here save it see we are getting so text flag false and this Notice if I click on so text this should be true click here this is now true if I click toggle text style this will be true so both are true again if I click it will be false now if I do hide text now this should become false click here now it is false so you I hope you're getting that it is returning you
the updated state so now what we can do simply we can check here right that if the state DOT uh so text if this is true Then I want to render this or else this will be null now let's go here now it's hi text click on S text we are getting hide text and this is working fine now change styles again so here I'll take a style and I'll simply let's add some background color for now so background color I will do if if this state do change text this is true so I'll make
this one as black or else I'll make this one as red save it now see if I click Here this is now red correct and then if I click here okay so we need to toggle this right this is red but this should become black here so this we need to check what is happening change text style flag is still false ah okay this is not working that's why I'm thinking I think it's not refreshed yet okay now let's see if I show text click here this is changing right yeah so now it's struggling we
are showing this on on click it's hiding so click toggle see The main thing is not about doing the simple exam main thing whether you able to grab the concept or not so you'll take a state here there should be a dispatch method take use reducer create a reducer reducer is nothing but your state acction based on the acction type it will check that which case you need to execute so let's say it's getting this one so it will execute this state and return you the updated State as simple as that and whatever Functionality that
you are doing let's say clicking button handling input you need to dispatch a type and this type has to be there this is mandatory so that's all about this use reducer and I think with this we have almost completed the very basic concept now there is one thing we have we haven't done and that is like how we can do how we can create form uh manage on change event on input select the reason why I'm not going to create a very simple form because we Will be doing this form example multiple times we are
going to learn different different ways how you can create form how you can create reusable form also like you don't have to create forms multiple times you'll be creating a simple input or usable input and that you are going to use throughout the application you just have to pass some config and based on that config it will dynamically create those inputs so that is the reason I'll keep this one keep This section at the end because when we'll be creating some of the our main project that is the mon stack there we are going to
learn how you can create advanced level of form error handling and those things but with this we have completed the very basic level of react because we know how we can create components how to pass data using props how to do State Management both in class Bas and functional component how to do uh like life cycle methods in class Bas Components hooks use State use reducer use effect and use context these for are main mainly used there are others but for now I think it's time to start our project Journey so let's start with our
first project so in the first project we are going to use material UI and then we will be basically rendering some list of notes it's kind of a to-do app and each and every project that we'll be creating right each and every project will be Associated to a Particular concept that we have learned so far and that is the way and I think that is the best to learn and practice all the concepts so that will be the first project then second uh we will be having some shopping cut so for that we are going
to use context because you have already learned context API third uh we are going to create a kind of like Notes application for this one we are going to use very simple basic level of dedu toolkit so that you'll get some Idea how to use Redux toolkit and with that project also I'll create the project in such way that you within that one hour you'll be able to understand each and everything that you need to know on Redux toolkit and I forgot to mention in shopping cut project also we are going to learn react router
down because we are going to use the re router know in that project once we'll complete all of these then we'll be moving to mon stack and there will be Two projects user application and the admin dashboard so this is what exactly we are going to build in next couple of projects so let's start with our first project which will be a simple uh kind of Todo application all right everyone so now it's our time to start our first project and for the first one we are going to create a simple to-do list where we'll
be fetching list of data and then on click of each and every to-do item we are going to open a simple Dialogue with some information nothing else and for that we are going to use material UI uh for the UI and so let's started so you can see that I already created a brand new project using VD I think I already discussed how you can do one and I will highly suggest that please try to do or basically install the project by yourself so the first thing uh what we going to do let's go to
app.jsx and I'm going to remove all of this and Then uh let's uh you can also delete this app. CSS and here I'm going to return a div with H1 and I'll give this one name as Todo app using material UI and let's give this one name as simple or else you will see that why this is very simple not much complex so that is the reason I added simple to do app using material e okay now we need to change couple of styles so index. CSS uh we'll remove this from here and also this
one okay so this is fine also let's go to our uh I think for now this will be fine so what we are going to do right whatever things we have learned so far like simple use State and use effect we are going to apply all of this and also how you can pass data using props everything we have learned right so first uh we will go to our material UI and we need to install this Material UI emotion and also styled I'll copy this and I'm going to open another terminal and I'll paste it
here okay and then inside of the source we are going to create a components folder so do components and here we need couple of uh components but first uh what we are going to do right so we need uh we need to basically face the list of todos from this API in point so you're going to use this uh where is todos there will be Some another more todos so you can see that so we do get all toos so this is the API that we need now you'll notice how we going to approach each
and every project so it's not for you or for someone it might be very simple one but if you are a complete beginner what you should do right you should basically try to apply all the concepts that you've learned so far and that is the only way to get better over time okay so first thing what you need to do so first thing Whenever you will face a list of toos you need to ask yourself that I need to store that toos in someplace right so that means you need some kind of state so for
this one the first thing you need a state now these things you need to figure it out or else it is difficult so here I'll give a to-do list then I'll be having a set to-do list you'll see each and everything we have learned so far how I I will be applying each and every topic in every project that we are going To build not in this one this one is very simple now what will be to-do list so to-do list will be array right so this is your initial state next this concept also you
learned so far that when the to-do will be getting faced so as a user you will give a better user experience right so for that one you need to have some kind of loading state or pending State this also you have done uh let's write it here so Lon Loading set loading and this will be use state of false so for now we need these two State correct all right now you need to F the list of toos and we need to render it here what we going to do so now second thing you have
to think okay how I'm going to face the list whether it has to be on page load or it has to be on click of any button or it has to be something else so in this case it has to be on page load right so that Means what we need to do we need to basically take a use effect right and then what you need to keep you need to keep the dependency as empty this is what we learned that if we are keeping this one as empty so in that case we'll be fetching
the list of data on the page load correct another thing I'll do quickly I'll go to here and I'll remove this stick mode from here now let's give a proper name so what we going to give right we'll give This one as Fage list of todos now let's create this method so we do asnc function I'm doing each and everything little slow so that it will be easy for all of you if you think this is little slow you can increase the playback speed I think there is always option we'll take a tri block we'll
take a catch block take a log also you can take another State and that will be to handle any kind of error right so we'll do use state of null so so here if it is coming in the cat block so we show some error message like what we going do we do some error occur right and this you can render so inside Tri block the first thing what you need to do so first thing you need to basically set this loading State as true and then we are going to fch the list of todos
from the API so Lo const API response equal to AIT Fage and let's go here copy this and then I'm going to do const result we'll do AIT API response. Json and then first I'm going to log the result save it and let's see what we getting so we are getting object and there is a todos so now we'll be able to see if the twoos length is greater than zero so we going to set these todos in our state so we're going to do if this Result do toos and if this result dot todos
do L greater than zero so I'm going to do Set uh loading set too list as result. toos and I'll do set loading as false once again else if something else goes wrong so we'll do set too list this will be Mt again and then I'm going to do set error sorry Set uh loading as false also you're going to set the error message as empty Okay here also you can make this one as empty only because there is not that much ER if you're getting any particular error you will be able to set it
for now we keep it like this so now save it and we need to basically render the list of toos correct and for this one let's do one thing let's use some CSS modules so we have already learned that how we'll be able to do using CSS modules so that is the reason what we can do right let's keep create another Like styles. module. CSS and the same I'm going to import it here so we do import classes from uh we'll do style. module. CSS okay now here uh what I'm going to do in this
one I'm going to take a uh class name so for this one let's give this one name as uh we'll do like Header title so what we can do let's give uh like font size I'll do a little less we'll do 30 PX and here I'm going to do class name and this will be I think you already know so this will be classes do header title okay so this is this is the classes save is okay we are getting some error I think I think we have done oh okay this Has to be Styles
so now this is getting fine or we should increase it little bit let's make this one 40 let's see okay now I'll L on this is fine now here I'll take another class name so I'll do classes do main wrapper and here we'll do rapper I'll do a padding of 50px okay now next uh what I need to do we need to basically render the list of todos correct So for this one I'm going to create a components and here I'll be having one component and this will be my to-do item where I'll be have
rendering each and every individual to-do item and here we'll do index. jsx and inside this component I'll be having another folder and that will be my to-do details okay now in the app.js what we can Do uh we will take a div and here I'm going to check if the to do okay to-do list and then to-do list. length is greater than zero so in that case I render to-do list do map so this will be my individual to-do item and in this case I'm going to render this to-do item component so this is one
component I need to create so do Function to-do item and let's return for div and I'll do here this is my single to-do item so now I'm going to render this Todo item okay let me import this I don't know why this intelligence is not working okay so I'm going to render the to-do item and if there are nothing so in this case I'm going to render Null save it and let's see what is happening refresh this page some error okay I think we haven't exported right yeah so we'll do export default to do item
okay now let's see awesome so you're getting all the two items here now because currently this is static so how we are going to render so We need to render the single to-do right so let's do one thing we are going to pass the single to-do it item as a prop here so we do Todo which will be my Todo item that's it so now I'll be receiving this too as a Prof here and let's log this and let's see what we receiving so you can see that we receiving the object and here we are
having all the details okay now here what I'm going to render I'm going to Use some of the inbuilt components of material so the first thing I'm going to render a card from Material UI okay and inside this uh we will be having a card content and now here in this card content I want to render a text now for text there is a uh component that we can use that is called typography and here what I want to render I want to render The to-do title so if you see right we are having this
Todo and here having this title so render Todo do too and here we need to give a variant that which component element we want to render so I'll give this one as H5 and I'll give the color as text Dot secondary if I now save this see what will happen refresh this okay so you can see that we are getting All of this now another thing we need to do that we are going to do later and that is we need to show some kind new loader so refresh this you're getting now we need to
give some style in this card component for this to pass a props in this material you can use this SX property okay so this will be object and this will normally receive uh any CSS properties that you want to pass for example uh Max with I want to give 345 350 let's give and I'll give a Display of flex then I'll do Flex direction as column and I'll give justify content we'll do space between save it okay this is fine now next thing what we need to do uh we'll render some more things so here
after this card content I'm going to render another component that is called card Accents and here I'm going to render uh a button component so import button from Material UI only and in this button I'm going to do something like so details and in this button let's use some property so we do ASX we'll do background color as black then I'm going to do a color of white then we'll do a opacity of 0.9 and here uh I want to show something in Hover so here we can give hover Property and on H I want
to do opposite all let's do one thing let's both use both s and I'll do opacity of 0.1 sorry full one and let's make this one 75 save it so you see that if I H this is working for it let's make this one only details okay now we need to use some style to make this uh look proper so for this one Uh what we can do simply let's go to our main component which is our main app.js and here now obviously you'll be able to use this or do this styling using material UI
also the only reason I'm doing so that here we are using combination of material UI and CSS module so it will give you some uh more idea how you can incorporate multiple CSS along together okay so here what I'm going to do I give a class name and I'm going to give here classes Dot this will be our to-do list wrapper so let's copy this go to our Styles and here I'm going to do display as grid we do gap of 15 PX and we'll do grid template sorry and we'll do grid template columns we'll
do repeat 4 1 a okay now this is breaking so this part we need to check to do item uh this will be Flex Direction awesome so now this is looking Nice andr this page we getting the data what I want to do next right on click of this I want to open a model and then I want to render some different thing like let's say I want to Rend the ID of this and also the text so let's say how we are going to do that all right now next what we are going to
do right on click of this we want to face the list or details for each and every individual too and then I want to open a dialogue and then in that Dialogue I want to render something so for that one we'll go to again app.jsx and we need two more uh State here so the first one will be and let me check one more thing okay so now here I think there is some problem is happening with this let me open and close this let's see yeah so I'll take two more state so one will
be our to-do details and we'll do set to-do details this will be use State and we'll Keep this one as null and I'll take another state and that will be because we are going to open a model or dialogue so I'll take another state here and this will be open dialogue set open dialogue and this will be used state of we'll keep this one as false okay so now what we need to do on click of this details button we need to basically fet the list of toos correct or sorry The details of that particular
too so how we are going to do that so for this one first I'm going to create another method and that will be s sync function fetch details of current to-do okay and if I go to this right so let's go to single to-do so you can see that we need to call the same API but for each and every individual too we need to pass that current too ID so that means somehow we Need to receive the current to-do ID in this argument so we need to get current Todo ID now here you might
think that how we are going to do that so for this one the first thing is because this button that we are having here that is in to-do item component so I'm going to do one thing I'm going to pass this method as a prop in this component okay so this is one way of doing there are multiple ways you can do that so I'm passing this one in The to-do item this so that me I'll receive this one as a prop Here and Now what you can do right so whenever I'll click on this
particular button I need to pass that ID so let's say if I click on this one so I need to pass four if I click here I need to pass the two so we'll take on click and here what we can do right we'll simply call that fetch details of current to-do and here you need to pass the to-do do ID so what will happen if I Now save this is go to app.jsx and if I log this current too here right so you can see that if I go here click here you're getting one
click here you're getting three four and this is working fine so now what we can do we can call this API so copy this and then I'll cck it so let's take another try we'll take catch for now I'm going to log the Error and we'll do const API response this will be AIT Fage and here you need to paste this I'll take this one as template literals now you might think why the reason is because this one value will not be static this will be the current to-do ID that you need to pass so
when I click on the 10th to-do I need to pass here 10 okay and now I'm going to do const result is equal to AIT API response. Json and let's log this result Here save it go to console click here see you're getting the details click here here you're getting the details and this is working fine okay so now what we are going to do right we can set these particular details so we are having the set to do details correct so we can simply check that if the result is true so we'll make the
set too details as the result let's give this One name as details uh what else let's give I think let's give details only so do set to do details as details and once we'll get the details then only I want to open the model so now what I'll do right set open dialogue as two then only I want to show else we will do set to do details this will be null and we'll do set open model as false okay now save this now what we are Going to do we need to create this too
details component and here I'm going to open a model or dialogue whatever you can say so function will do to-do details and now what this will receive right this will receive two prop can you guess so the first prop will be it will receive this open dialogue and also it will receive this Todo details these two things so copy this so it will receive too details and also it will receive open Dialogue now we are going to return and another thing we I may forgot to mention and that is in jsx we can use this
fragment this will basically use to wrap multiple components into one because your jsx can have only one single parent right so here this will basically create that wrapper so this is another component uh that you can use the reason is because let's say if I do something like this I return return a paragraph and after this I'll return Return another div right so it will give you error that jsx expression must have one parent element that means you need to wrap both into one element so that is the reason we'll use this fragment to wrap
it and then we'll do a dialogue from Material ey and inside this dialogue I'm going to render the dialogue title and here I'm going to render this too details that we are having dot too and then I'll be having dialog Accents and here I'm going to import a button and on click of this button I want to close okay so here in this dialogue you need to basically tell that okay open the dialogue so there will be a open prop that it will receive and for based on what so we are having this open dialogue
that we'll be receiving from the parent component that's it and then uh I think for now this is fine now let me just Export for this save it go to app.jsx and I'm going to import it here so we do to do details now it will receive the open dialogue this open dialogue will be this open dialogue that we are having and also you need to pass the to-do details so we do open dialogue and also need to pass to-do details which will be to-do details now let's save it see what is happening F let's
say click here see It's opening and click of this close now we need to close this so how we are going to close this so to close this one we need to make this open dialogue from True to false again so we need to pass this set State method so here I'll pass this set open dialogue as a prop then we'll go to our to-do details and I'll receive this one here now this open dialogue also receive another one that is on uh I think on close and here I'm going to make this Set open
dialogue as fall second and same for button click so on click of this button two things we need to do I'll tell you what so the first thing we're going to make this details that we are having right this set to do details so this also we going to make as null every time we'll close this so save it and we'll receive this one I'm not going to to again explain all of this in details that why we are receiving this props because this already you have Discussed how you can pass data from one component
to another component and so on click of this button first I'll make this set to- do details as null again and I'll close this open dialogue so this will be false save it now let's see so if I see if I click on outside it's closing click here watch a documentary close now it is closing click and you see once the data is getting faced then only it is opening the dialogue Awesome now last thing that we need to do here I'm going to do another thing and that is the data till the data is
getting F I want to show some kind of skeleton loader so here we can basically render very simply that if loading is true uh then return skeleton from Material e and here you need to pass a variant I'll give this one as rectangular let's use a width I'll use this one as 650 let's say and height I Will do 650 save it now this is happening very fast see that you are getting right if this is taking some in case this is taking sometime right so in that case this loader will so and now everything
is working fine close this awesome and I think with this our first project is done now obviously this will this is a very simple one that we have done now later we will be doing some Shopping cut using context and also we are going to implement another project using Redux tool gate then uh we also going to implement two mon project one will be a simple user management app then there will be our main admin dashboard so that's all for this particular uh project now let's move on to the next one all right everyone so
till now we have completed the very basic concept we also learned how we can work with context and also have created A very simple project right now before we will start with our second project which will be a shopping cut using use context so we want to basically complete the event handling and also how we can work with forms now for this particular section we are not going to use any form third party Library like react hook form the reason is because uh at the end of this particular video we are going to create a
uh simple to mid level monru project also and in that project we are Going to use react hooks form and uh the reason why I'm not going to use any third party Library package because this particular section is going to help you for interview purposes also so normally in interview you might get some queries from forms and also how you can do some kind of very basic form validation and for sure in interview they will not allow you to use any third party Library package so that is the reason we are going to learn everything
from Scratch so the first thing what I am going to do right so let's go here and uh we will do one thing let's create a component and I'll give this on name as form and inside this I'm going to create index. jsx now we will start with very simple one and then we'll be moving to uh some uh complex like how we can create Dynamic form controls and those things so here I'll say simply do function let's give form Component and here first we'll do export default form component and I'm going to return let's
return a div with H1 and this will be form now obviously we need to import in our app.jsx so I'll just comment it out from here and let's use our form component awesome so now normally in form so you can have different kind of inputs so if you're already aware of Like HTML elements like uh input select text Stud and those things so here we are going to start with a very simple input that how we are going to work with input how we can manage State how we can manage values and those things so
first thing I'm going to take a input element here right and and now uh let's say what I want to do WR this I'll save this so This input whenever I'll type something let's say this value I need to send uh to a server and then I need to save this Particular value to a database so what we need to do somehow let's there is a button and on click of this button we need to do the same functionality so somehow we need to store this value in some State correct so that is the reason
the first thing what we need to do right we will give some uh we'll take some state to manage this particular in inut element now here input will take some properties that you need to pass so the first one is the name so this will be The name of the input so let's give this one name as uh what we'll give uh let's give name only then we'll give ID so this will be also name then I'll give a placeholder and this will be enter your name okay so you're getting some erer oh sorry here
we have done mistake so now if I remove so we getting placeholder here now also we need to give some value here so let's I give a value and I'll give my name here now see what will happen save this so you can See you're not able to edit this and this value actually it's taking the initial value and if I go here and inspect this you are getting this value here correct let's change this to something else if I save it you can see this value is getting updated so that means what we understand
that whenever I'll do some change here that means I'll be typing currently this will not work I'll type see nothing is working uh so we need to basically store that updated Value in some particular state so that is the reason I will take a state here let's give this on name as name value now obv you should give like name here but I'm giving name value so that it will be easy to understand and I'll give here set name value and then we'll take a US state and we'll pass empty string so this is our
initial value okay and this name value you need to pass as a value here so that means first time this value is empty Correct now still nothing is working the reason is we need to basically tell this uh react that okay I when I'll type something or basically when the value will change we need to update the or basically we need to store the updated value so to do that we have different different events right so just like on for button we have a click event so for input we have a on change that means
Whenever there is a change I want to do something now here I'll do like Handle input change right so this is my event this is the name of the function now here we'll create this function but how we are going to get this value that whatever user will be typing how we are going to get it here so this input will give a event property and let's log here this event save it and let's see what is happening see I'll type something Here oh sorry let me remove this part from here see we are getting
a event and here we'll be having a Target and inside this target you are having a value correct so this is your value basically so this value need to update so that means we usually get this value from so we do const and destructure the value of this from even. Target just how we show so this will be your value now what we need to do we need to set this value in this set State method so that whenever We'll be typing something this value will be updated or this name value will be automatically updated
so now what we can do simply we'll do set name value is the value of this now there are multiple way you can do that so let's say this is the for me I think this is like much cleaner way so here if you want you can directly pass it like this so let's I'll do set name value will be event. target. value so this will also work so that is the reason I'll suggest like you keep This on much cleaner way and do like this if I now save this now see what will happen
so I'll just go here and so notice this value here I'll type something see this value is now getting updated because the reason is because every time you're doing a on change you're changing the value you're setting the updated value from the event. target. Val so this is how you need to handle any kind of uh input change now the point is here this is only not only For input this is applicable for any kind of other input elements also like select text area checkbox and everything so now what we are going to do right
I'm going to show you one very interesting thing and that is how you are going to create Dynamic form elements so for example let's I'll give one example here so you creating a form and in that form you're having 10 inputs or five inputs and five selects now normally how you will do you write this input 10 five Times right so you'll copy this and let's say paste it five times something like that right and if you do something obviously it will changing because we have given same that is fine the reason is whenever the
number of inputs will be more how you are going to manage this so there actually see there are multiple ways you can do that but I will show you one way that I actually like so now before that we need to also understand Another concept and that is how we can basically work with forms so now what I'm going to do right I'll save this now inside this I'll take a form element so I'll take a form now whenever you'll be creating a form you need to wrap that particular jsx inside form element I'll cut
it from here and then I'll paste it here so now this input inside this form element and this form element uh here I'll have a button so this button will do what this Will do on submit this will store this particular information whatever we'll be typing in a database correct so now how we are going to do that so that means whenever I'll submit I need to someh get this particular value and I need to do a API call and then I need to save this particular value in your database if I know sub submit
this one you can see this page is getting refreshed now this is a normal default behavior of form so what we are going to do do right this Form first of all whenever you have a button inside this form so we'll give a button type these all are normal HTML JavaScript Concepts I'm not going to explain all of these so you will give a type of submit and then this form will have a on submit method just like for input you have on change so this will have a on submit method and here you will
do handle submit okay so this is my method name so now I'll create this so do function handle submit now again this Method will give you another event and here what we need to do we need to do event. prevent default so that means we want to prevent the behavior of the browser normal behavior that whenever I'll just refresh this page or do sorry click on this button this page doesn't refresh if I click here right nothing is happening because we have actually using this prev default we have stop that VAV here now simply what
we can do we can do we can Call the API here right call Api here and then pass the name value that means let's say you want to store the this name value in your database if I just simply log here this name value that's it so now if I now save this and let's say I'll do here like name value sorry I'll give my name suum and then I'll just do submit and you can see we are getting my name here in this handle submit so now it's very simple so you'll be able to
get this value and then we Can do like you want to store it in your database you want to API call whatever you want to do that you can do so what we have done basically you need to wrap this form uh input inside a form you need to take a on submit method you need to stop the browser default Behavior using ev. PR default and then once you'll have the updated value of your input or select or text or whatever then you just pass those value or do the manipulation inside your handle submit Method
okay so this is how you can work with simple forms now you you can have multiple inputs that is also fine so we are also going to see that one then only we will uh go to this Dynamic form uh control creation so how we are going to work with multiple inputs so let's say you have a name and then you have an email right so I'll copy this or let's create another one so I'll do input and I'll give here type so this type will be now Email then I'll give a name so name
I'll give email id id I will give email placeholder placeholder I will give enter your email and then we also need to take a on change now I'm going to show you multiple ways that you can do that okay one by one so first I'll create another separate method and this will be handle email change so for input we have given handle input change for email we have given handle email change Now I'll simply create this method again the same process this will give you another event now just like you have taken for name value
I hope you're already getting so you need to take it another for email value so I'll do here email value and I'll do set email value again this will be US state of empty add now here we're going to pass the value so value will be your email value correct so now we have already done this So now in this handle email change again we will do the same thing so you get this and then simply do set email value because we are setting the value of email and this will be email sorry this will
be value event. target. value that's it so now let's say on submit I want to store the name as well as I want to store the email and let's see if this is working or not save this so let's give my name and I'll give my Email and then I'll do here submit so you're getting name and email both so now I hope you're getting that whatever or how many inputs you will be having you can wrap those inputs inside form and and then you can do certain operations or whatever you want to do but
uh just what you need to do you need to basically manage that on change you can use some use r or something like that but we will not go into much advanced level this is a very simple Beginner level so that is the reason I'm explaining in much simpler way so so this is one way that what you have done you have basically created separate separate method see for name we have created a separate method for email we have created a separate method method sorry this one let's say now you have a 10 inputs here
so you'll be creating 10 separate methods that is not the best way right so how we are going to do this one in a common way Correct so that in one method we are going to manage both so let's see how we are going to do that so now I'm going to create another method now okay so this will be function and this will be handle will give form elements or let's do handle on change and this will give you a event now what I'm going to do right I'm going to pass this handle on
change in both the places so that means I'm only creating single method instead Of creating multiple methods but how you are going to do that that means how reactor browser will understand that when I'm typing here this is I'm typing for name and when when I'm typing here I'm typing for email so now to understand that again this on change will give you this event right and here I'm going to show you one interesting thing and that is I'll just log here event. target. name now you might think from where this is coming so see
what Will happen if I go here right let me refresh this page first now see I will type in this name notice what will come see we are getting name if I type here we are getting email so from where this is so now you understand that okay use browser will be able to understand that if I type here this is I'm typing in name for email I'm typing in email and this is coming because you given this name property here so this is the name property from Where this is taking event. target. name so
now it is very very simple so what we can do right we can destructure two things so first I'll destructure the name and also I'll destructure the value so and this I'll destructure from event. Target because both will be provided from event. Target so we have a name and we have a value see now what I'm going to do now I'll create a common form state so I'll give this One as form data notice what I'm doing so I do form data and this I'll do set form data and here I'll take a use State
and I'll give object because we have two two elements so we have a name and then we have a email so I'll give your name this will be empty now again very very very important you notice what I am giving here this name whatever the key name I'm giving this name is same as this name property that I have given here that Means for this one I'll be giving email and this email is nothing but this email name that I have given here okay so this is my initial form correct so this is now what
I need to do whenever I will be typing here in this name I need to update this name whenever I'll be typing in this email I need to update this email property so how we are going to do that so in this common on change we will call this set form data so we call set form Data and then we need to basically get the previous form data now I'll also give you the example why that is and that is we are basically destructuring the existing form data so this form data now you might ask
me why the reason is because if we don't do this one let's say for some reason I'm only updating the name and if we don't keep the email name as it is so email name will be vanished correct so that means whenever I'll be typing on name I need to keep This email email value as it is whenever I'll be typing in email I need to keep the name value as it is so that is the reason whenever first thing what we are doing we deuring the existing form data and then we will be updating
the corresponding value so how we are going to do that that means how we how this method will understand that I'm typing name and here I'm typing for email so this name property will give and here we need to pass this square bracket name so This will be the Dynamic Property that we are passing so whenever I will be typing this name here this will automatically take the name property means this one when I typing on this email this will take the email property and this is coming nothing from event. target. name so this is
the square bracket of name so this is the dynamic value and this will be equal to Value see this value correct so now let's see what what is Happening if I just log here form data and also we need to pass now the value will be can you guess so value will be form data do name because this is doing for name and here value will be let's cut it from here and this will be form data. email save it so first time name empty email empty I'll type something here so name is getting updated
now if you notice if I type on email the name value will be as it Is correct so now see what will happen if I now remove this part from here this D chure save it now see if I just do something here see only name is getting updated email is now vanished because we are not keeping the old data and if I type something here now the email is email value is there but the name value is vanished now you understand why we are doing d structuring means we are keeping the existing data and
based on that we are updating so now if I type Something here right both name and email value is there so this is one way or I will say this is the best way how you can basically create a common method and from there you'll be able to manage all of these now this is one way now I'll show you another way so you will be able to do this on in line also inline means instead of creating a separate method you will be able to do that here only so I'll comment it out and
now see what I'll do so I'll do Onchange so this will give us a event right and here we'll do set form data see what we are doing we are doing this line here this line nothing but this line so here we're doing set form data and we'll dis chure the form data and then we'll do event. target. name correct so for this one event. target. name will be name will be event. Target do value simple and the same we can do for here also so I'll Comment it out so event. target. name is email
so that means instead of creating a method but I will not suggest I'll tell you not to do like this you can create a separate method so that you don't have to do this things multiple times instead we'll be doing in one time this is just for swing purpose and now if I do some value right this will work as it is right so this is uh multiple ways how you can manage Or create forms now let's move to the next part now here now I'm going to show you how you can create Dynamic form
controls or basically reusable form elements and then you will be able to use that in anywhere in your application so let's say you working on a very large project and there you need to work with forms many times so in that case what you can do right you can create a common form and that common form you can Basically use in multiple places so so that we are going to see how we will do that okay all right so now we understand that how we can create forms and how to works with forms so now
let's understand how we can create some common form elements and create Dynamic uh form so for this one uh what I'm going to do right so inside this I'm going to create another folder and I'm also share this particular repository so that you all can practice using this so this is all For Concepts and everything so let's create a common form here okay and I'm going to give this one as index. jsx now let's say uh we have for example uh two different pages so currently we haven't started react rodom but that is fine so
let's say we have a two different pages or two different components and in both the components in one component you need to render let's say a signin form and in another component you need to render a login for something like that so for This one what I'm going to do right for now so inside these components I'm going to create a login page let's consider this one as components for now I'll do index. jsx and then I'm going to do here a register so this will be index. jsx see now what we going to do
right so first here I'm going to create the component so I'll do register component Let's return a div H1 and this is our register page or component whatever copy this and then I'll paste it here and I'll give this one name as login component now let's go to our app.jsx and now I'm going to take a div oh sorry I'm going to take a div here and then uh we are going to first let's render the login Component and then render the register component for now we'll use some inline styling like we'll give a display
of flex and we'll give a gap of let's say 10px 20px so we having two component now now what I want to do I want to create a some kind of common form logic so that let's say currently we are having only two component let's we need to implement form in 50 components so that we'll be able to easily pass only that we can Only tell that component that okay create this particular form for me so that I no need to create each and every element every time so we are going to do the same
now in this common form so let's see how you're going to do that so I'll do a function I'll give this one name as common form let's return now what this will return this will return return a form right now here I'm going to do export default and we'll do common form now This form will receive or basically this form needs to render all the input select all the elements inside of this but that will depend on some props that what kind of props that we are passing from this this component let's say for this
register we need to render three form elements for this login I need to Reg I need to so two form elements so both will differ so that means this will receive some kind of Prof from parent component and I will Give this one name as form controls now this logic we are also going to do implementing later projects also because this is a very very useful logic that you can basically Implement now this doesn't matter whether you you you are using your own custom form or you're using some third party Library like react hooks form
or formic something like that so this form controls you be receiving I'll give a initial value of empty array all right now see how we are Going to do this one now I will be having some common elements also so for example I will have a common input so I'll do index. GSX then what else uh so first I'll create this one so let's do a function common input let's do export default common form common input what this will return return right this will return return let's Say uh what we can do we return a
div and I'll return return a label here and this label will be I will be receiving a level from the pattern component so this will be my level so this level I'm going to receive from here sorry as a prop then I'm going to render an input now this input will have the certain things it will have a name this name I'll receive from props then it will have ID this ID also I'll receive from Props then it will have a placeholder this also I'll receive from props or else we'll give some random like enter
value here okay and then we also going to pass a value property that I'm going to receive from props and what else we need to pass we also need to pass on change and this also I'm going to receive from props so these all the things it will receive from props also here let's uh give For sorry we need to give HTML for and this will be our name so now this name I'll receive so we'll do unchange Name ID value and placeholder so that means all of these I'm going to receive from this props
now what I'm going to do right now see how we are going to implement this one now we'll go to our first s start with our login page so go to login page now in this page in this page what we are going to call we are going to call The common form this form right so now we are going to call a common form now this will receive the form elements or form controls see how we are going to do that normally you should create a config or let's do that let's create a config
only so we'll go to our source we'll create a config folder and let's do index. JS so here I'll do export const and we'll do login form controls or elements whatever you can give this Will be array now here what you need to do right you need to basically pass all of these property that you need now obviously not all value and onchange we are going to pass later but we need label we need name we need ID and also we need the placeholder so now we'll go here and we'll pass a name so let's
say for login I want to render email ID also will be sorry this will be small so this will be my email ID will be also email Placeholder so we'll pass enter your email also you're going to pass a label and this will be also email now what else we need to pass we need to pass another very very important point because we need to tell this common form element mement that what kind of element we want to render if it's a input element we will render from common input if it's a select element we
will render from a common select component if it's a text area we'll Render a text area so that is the reason we need another property here and that will basically tell us that component type so this will be a input so now I'll copy this and I'll paste it one more time now here I'm going to pass this one as password also we need to pass another thing sorry we need to also need a type because this should have a type so type will be either you'll pass the type or this will be Text okay
so here we also need a type so I'll pass a type so for this one type will be email for this one ID will be password this will be enter your password label will be password component type will be input and type will be password so now we created all of this right so now we'll go to our login form and here we need to pass our form controls now what will be the form Controls this will be nothing but this login form controls so this is first but now this will break because we also
need to pass some other things okay we need to pass the value and onchange so this will receive a form controls this form form element it's common form also it will receive a form data and also it will receive a set State method which will basically handle the one change I think this we already Discussed so these three things it will receive so now we'll go to our login form here and here I'm going to create a state and this will be my login form data and set login form data and this will be used
of now see I think we have already discussed right so what we can give we can give based on this name so for this one name is email for this one name is password so here we'll pass email empty And then we'll pass the password empty so now this login form data we need to pass in this common form so we pass form data which will be login form data then we'll pass the set form data which will be set login form data so now these three things we are already passing here now we need
to go and save it obviously nothing will come because we need to render it now see what we are going to do so inside this form now I'm going to map this form controls because This is a array so I'll do here if this form controls and and form controls or you can do something like this form controls. length or else I will do null so here I'll do form controls. map so this will be my single form element item now what I'm going to do right I will create a helper function here so that
will so I'll create another function so let's create a function and this will be render form Element so this will receive the current element and here I'm going to call this render form element so I look render form element and we'll pass this for single form element item so what exactly we are doing here see so it's simply doing like so first it will check that we have a two elements so it will map then we are passing the single single element here oh sorry single single element in this function and this function will return
So now see what we'll do we'll take a Content which will be null and now here we'll take a switch now the reason why we are taking switch because this can have multiple use cases now based on what this will render now see now we have this component type so this component type will tell if it's a input then render the input if it's a select render select it's a checkbox render checkbox if it's radio render radio if it's a text area render a text area so This component type we can switch so we'll do
here get current element do component type so this if this is input now if you want you can do some types here so we do const form types so this will be if it's input so render input put select render select you would text idea so this will be text idea okay so here I'll do if it's form Types do input so I'll render input if it's select I'll render select if it's default I'll render input only so now what we going to do right if it's satisfies so I'll take a content and this content
will be nothing but the common input so you create a common input right so what we doing that means we're telling you to say input type render the common input now this will receive quite a few properties that we need to Pass so receive a label which will be gate current element. label receive a name which will be gate current element. name it will receive a ID which will be get current element. ID now these all are coming from this ID placeholder and everything it will receive a placeholder which will be G current element do
placeholder and also it will receive so let's pass this form data and set form Data right so here what we can do simply so now this will receive the G form data in this functions we do G form data and get set I think we don't need to pass this one I think if we don't pass then also it will work so here what we can do simply we'll pass the value so what will be the value now see if I go to login see form data will have a name this email and password correct
and this email and password is Nothing but the same name or ID that we have given here see name is email name is password and this is matching with email and password so what we can do we can simply do form data that will be receiving of this gate current element. name so current element do name will be email so we are basically passing that form data of email for second one it will be form data of password okay and also you need to pass the on change so on change will Simply do it will
give a event I think this we have already discussed then we'll do set form data and we'll dis the form data and then what we can do right simply we will do to event. target. value is equal to event do sorry event. target. name equal to event. target. Value okay and at the end we are going To return this content awesome right we're getting email and password the name and everything is working fine I'll I obviously again repeat because this might be a little confusing this part and if there is any default use case that
means if you're not passing any case then also you're going to render input by default so we copy this and we default we render the input only so now see what will happen if I Just go here and change this let's say label from email to my name suum save it see this is getting changed to some so that means you no need to change in that place that is a usable component you are changing the config and based on that it will automatically create the input and also you notice one thing is that if
I go to login and then I log this login form data this will also work so I'll just log here login form Data go to console so you can see that email empty so I'll type something here see email is getting updated if I type on the password password is getting updated so from where this is working so this is working nothing but from in this part so you have a common form right so we are doing this logic here so this is how you need to do now let's say we should have a button
here also because on click of this button we Need to do certain things so simply see how simple logic this is so just now we'll take a button so we'll take a div style let's do a margin top of 15 PX 12 PX and then we'll do a button and here I'm going to just do if we are getting a button text from a parent component as a prop so we render that all else will always show the type uh submit and type will be always submit okay now save it so now we are Getting
some error okay button text we need to pass as a prop so we'll take the button text so currently it is coming submit because we haven't passed now if I go to login and here I'll pass button text so let's I want to show that instead of submit I'll show login so I'll save it so now this will basically change to login now next thing what we need to do this form should also have a on submit right because when you submit this login You need to basically get these values so it will also take
a onsubmit method and this will be handle submit now this also will be receiving from parent component because you need to manage something from here right the reason is let's say you are using this from login page and register page so for login page you need to call a different API for register page you need to call a different API so that means you need to have the control in your pattern Component so that means this handle on handle submit let's keep on handle submit so this you'll be receiving from props and then you'll be
passing it here so we'll do on handle submit this will be will give the same name on handle submit and I'll create this method here so do function on handle submit this will give a event now what we need to do see if I save it and let's say type something Here so you can see the page is getting refreshed also one more thing that I'm noticing here in the common form we need to pass the type correct so that is the reason it's not because if I type here password is not s the so
we pass a type here and this will be get current element. type so now it's in password format do the same thing here let's do it here okay so now we need to basically refresh uh the page Refresh is happening right so that we have already discussed we need to do event. prevent default and then here we can do certain things so let's say I want to pass this information in our database so now if I go to inspect go to console type my email and password and do login so you're getting the value Here
okay now let's say you want to do another thing like whenever you will uh submit this form you need to reset this value now to reset the value it is pretty simple what you can do right you just need to make the email and password as empty so it's always better you keep inial State uh manageable so we do initial State and then I'll pass this email and password value here and then instead of calling this from here I'll call the initial State okay and then Once I submit that means in this submit I'll do
the API logic and let's say you do some database logic and then simply we'll do set form data set login form data will be initial form initial state or let's make this one initial form data that means we just resetting the value so here pass initial form data save it now say if I do login this value is getting reseted correct so this is how you need to do now let's say you need to Implement the log register feature now I'm pretty sure you'll be able to do it so what you need to do first
go to our index then I will copy this then instead of login I will do register from elements and instead of name email password this would have also name person name so it it should have also name so enter your name level will be name type will be text and component Ty Will be input okay now see how it will be simple we go to our register page so first what we'll do first we'll take out initial state so con initial state so because this will have a name also it will have a email and
also it will have a password and here I will do const register form data set register form data and this will be US State of initial register form data so I'll pass it here okay now I'm going to call common form and we'll pass form controls so this will be register form controls form data which will be register form data set form data which will be set register form data also we'll pass a button text and this will be let's say uh Register save it see name email password you already got now you can also
pass on submit handle submit so this will be let's say handle register on submit again the same process so do function handle register on submit it will receive a event so we do event do prevent default and then I'll just want to Let's log this register form data and then I'll do set register form data initial register form Data means I'm just resetting exact same code now you see if I just go here right if I do my name and register see click on register we got the value all of this and this form is
getting reseted now you see both are different different but we are not reusing or rewriting all of this again and again right instead we created a common form this common form is basically checking that what kind of component I need to render if it's input Render the input it's a select render a select so that's a homework for you so create two more elements uh so basically here I created a common input right so you create a select and also create a text idea and then you will check here that if this form types dot
select then you render the select component if it's a text area you pass you render the text area component okay so this is how you can do so I think that's all for this form section and I Think we have learned a lot of things and I'm pretty sure this will basically clear a lot of Concepts regarding that now in the next part or basically in this section we will do another very very important thing and that is custom hooks so custom hooks is basically a concept that basically use to reuse your component logic as
simple as that so custom hooks there can be any number of custom hooks so there I'll give some simple Example so see nor in normal application you'll do some kind of API call right so in the API call either you will use what you'll do you'll do a use effect then you'll do API call now let's say you need to do API call in 100 components so what we can simply do obviously we can use some third party Library package like react query use Sr but we can create our own custom hook right and that
what advantage that will give so That means if we create a custom H we will be able to reuse that particular logic in only one place and then we can use that hook in all the places in our application so that means we no need to write that API call 100 times in 100 components so let's see how we are going to create our first custom hook and that is called use Fage and that is very very popular and also one of the most asked interview questions so for this one I'm going to Use this
dumy JM API to face some list of something like data or anything so let's see how we are going to implement that one all right everyone so now I think in the previous section we have also understand how we can use uh or create forms how to submit forms and also how you can create Dynamic forms controls now in this particular section we are going to learn react routing custom Hooks and some other Concepts all right so the first thing what we are Going to do right we will be creating very very simple application and
then in that particular application we are going to try to apply the concept or the logic of custom hooks all right so first thing what we need to do so I already created a project and I will add all the project repository in the description so you all can basically take reference from those now here I'll do npm install react router Dom now although in the coming projects Also we will be discussing the routing Concepts but still I thought that it will be better if I give you very basic idea all right see routing is
nothing but whenever you react is a single page application so whenever you'll go from one page to another page right so you need to basically change the path of this route so for example let's say you want to go to A to B page so here you need to basically tell react that okay what once I'll go to the a a route or Basically in this B route I need to render the B component when I I will be in this a route I need to render the a component okay and that we are going
to for this function we will be using this react router Dom now first thing what I'm going to do so whenever you will be applying the routing functionality in your project first you need to wrap your component uh inside this browser router so that is a main wrapper component that react router don't provides Okay so first I'm going to just cut it from here and we'll use browser router and inside this we need to um pass the app component so that means what we are doing we are this is kind of a provider that we
have we will be learning in the context uh chapter also that you are creating the context provider and inside of that you are passing all the child component so similarly this is your main browser router or rapper class and then you are Basically passing your app component which is nothing but is the combination of all the sub components that you will be having in your application so once you'll do that let's say you can have multiple pages so now for example uh here I will create pages and let's say I will have one page uh
where I will be rendering the list of recipes okay and then I will be having another Pages uh where I'll be rendering the list of comments something like that So now uh I'll create first the components we'll do index. jsx and I will do function this will be let's say recipe list and here I'm going to render a H1 and this will be recipe list page save it I'm going to copy this and I'll paste it here so for this one this will be comments comment list and this will be comments list page let's make
this on comments Okay now how I'm going to so what I need to do so if I go to my app. jsx right and you might think that okay now what I'll do I'll just render this uh recip list component and then I'll render the comment list component but if I do that then both the content will come along uh like same time right but I don't want to do that once I'll go to this recipe route I want to render this recip list once I'll go to the commments Route I want to render the
commment list page but how you can do that this this thing so to do this one react router will give you this routes component that you need to import this routes is nothing but a switch component so in the previous version of react router Dom we usually use switch so this route routes component will basically help you to switch from one component to another component and that will render the branch that matches the current location Okay so now these routes will combine multiple individual routes okay so so in this case we are having only two
pages sorry so here we are going to basically use a route and here I'm going to pass a path so here in this route first we need to import this route from R router Dom and then we need to pass a path here okay and now I'm going to tell that okay once I'll go to this re V list page I want to render this recipe list component okay and then I'll create Another route and then I'll tell that okay once I'll go to this comments list page I want to render the comment list component
okay so how we'll do that so here this will also take another prop which will be element that which element you want to render so in this case I want to render this recip list component and in this case I want to render the comment list component okay now let's save it now see we are Not getting anything here now if I go to recipe list so we're getting rece list page and you notice this part is always common that is fine because we are not rendering this inside our routes and if I go to
the comments list page so this will render the the comment list page awesome so now what I want to do right I will be having two button and each button so if I click on one button it will go to the comment list page and if I click on another button it will go to the receip list page so let's see how we are going to do that so here I'm going to create two button so one will be navigate to recipe list page and I'll take another button and this will be navigate to the
comment list page okay now this react uh so we having two buttons here let's give some style for this one so we do style and we'll do background as black and we'll do color as White let's paste it here so now what I need to do this react router will give you a hook so the first hook that we are going to learn and that is called the use navigate so that will basically help you to navigate from one page to another page so I'm going to import use navigate okay so you can see that
this is basically you can also use Link so that we are going to see but now what I'm going to do this navigate so in this button I'll take on click and I'll Tell that okay once I'll click this recip list page navigate to so here you need to pass the path that in which path you want to navigate so I want to go to the re list page page so I'll go to this path recipe list right and for this one I'll take another on click sorry this will be on click and here I
I will tell that okay navigate to the comments list page so we do comments list page now let's save it now let's see What we're getting okay so this will be comments list now see if I click here it's going to the Reb list page if I click here it's going to the commment list page okay so this is one way of navigating one component to another component all right so now we are going to see another way of navigating so I will take another div here right and inside this I'll render something that is
called link component so this also you can use and that this will be Alternative way of navigating now although I'll highly suggest use this one whenever you need to do some uh dynamically navigation you can use this nav or basically this use navigate so here this is also very simple that you want to navigate to the alternating way of navigating navigating to RP uh list page okay so here very simple first import it from Rome and then just pass a two property here that okay I want to go to the recipe list page as Simple
as that save this now if you see click here it's already in the recip list page I'll go to the comments page and then I click here it's going to the reci Leist page see both way you can do that so you can click on this use navigate and also you can go to the or you can use the link also okay now second thing what we are going to do now we will be learning another very interesting thing is that how we are going to manage Dynamic routing in react Router Dom so Dynamic routing
is nothing but let's say you are having having 100 list in this recipe list page correct and now each and every recipe whenever you will click you'll go to The Details page so there will be recipe list SL let's say recipe 1 then you have recipe 2 recipe 3 recipe 4 that means these value is always different so this is a dynamic value correct so how you're going to manage this so to manage a dynamic uh routing what I'm going to do Right first I'll do I'll create another page here and this will be recie
details okay and I'll create our index. GSX and we'll do function and this will be recipe Details page now here I'm going to render recipe details now I need to render this recipe details whenever I'll go to this route let's say I have a recipe list and then I have a recipe one then I have a recipe 2 Reb 3 reci 4 5 like that so first you need to go to the app.jsx and you need to to write all of this inside your routes folder only inside this routes component only so here I'm going
to create one more route okay and now the trick is in this path so what I will tell that okay go to recipe list and then you need to basically go to a dynamic page so how you will tell react router you need to give this colon whenever you you'll give this colon that Means this is a dynamic route and you need to give this ID so that means I need to go to race recip list and then the details of the recipe and there I need to import this recipe details component or recipe Details
page okay so now see what will happen if I try to go to recipe list /5 hit enter it's going to the recipe Details page if I go to 500 it will be in the same page so if I give 5,000 here this will also will be going to the same page so it doesn't Matter whatever value you'll be passing you will be always going to the recipe Details page only very very important all right so this is how you need to give you need to tell this colon and then you you have to give
this value and this also you're going to see now the point is I'm I'm in the Reb Details page so let me go here and let's give H1 so we give H1 let's save it okay now what I need to do I need to get this value from this URL this param so to extract this value what we going to do we'll be using another hook that is called so do const params and use params and then I'm going to log this params here let's save it and let's see what we getting so go to
console so you can see that you're getting object and there is a ID of 5,000 if I make this on 50 now you'll be getting ID as 50 so this is coming because you given this ID As the value so that is the reason this is your key name and this is the value name so now what you can do you can simply go to recipe Details page and then I'll extract this ID from params and then I'll do recipe details of recipe item and then I'll pass the ID so now let's save it now
you can see that it's now 50 so I'll change this one to 123 so now this will be 123 so what you can do that you'll get this value and you can Do certain operation like you can do some API call and those things all right so that is the reason this is very very important now two more uh uh things I want to show one more and that is how you can get the current location so let's say I will go to the recip list page and I need to get this path so we
can go to First the Reb's page and here I'll import one more and that is called location and this is another hook that you can use that is called use location And if I just log this location let's see what we getting so we're getting object and here you're having a has there is a key and you can see that there is a path name now there is also a search and a state that you can pass search is nothing but let's say you're having something after this so let's say name is suum so I
enter so you can see that now you're getting a path which is recip list and you have a search which is name is suum So now you'll be able to get this searge value and then you'll be you will be basically able to split it with this name and with this uh equals and then you'll be able to get this value correct so this is another very very important hook that you will be able to basically get it if you want to get the current path name now next thing we need to know how you
can render a phone for or not found found page okay so what I'll do right inside Pages I'll create Another folder and I'll do not found and here I'm going to do index. jsx and here I'll do function not found page and here I'm going to return a div and I'll show that uh we'll do H3 that this page does uh doesn't exist and then what I'll do I'll give a link component and I'll do go to recipe list page okay and here I'll give a two and I'll give slash recipe slash sorry SL recipe
l so now to use this not found page what We need to do we need to again go to our app.jsx and then I'm going to import this another route and here I'm going to pass the element as not found page and the path the catch is in the path we need to pass this start okay so now this will always go to this not found page save it now see what will happen if I give any route which uh which doesn't exist so this value and hit enter see what we're getting we're getting this
page doesn't Exist so go to Reb Details page now if I give any other let's say my name so this page also doesn't exist so it's going to always this page so this is one way of uh this is one way of implementing the not found page all right now another thing we are going to learn and that is how you can create a common layout using react router n there is a component that is a really cool feature that is called Outlet so that also we are going to see so for example let's say
you are Creating a component where you have a header component which is always common in all the use cases so that means if you're importing the same component again and again in all the pages that doesn't good practice right so what you need to do you need to create a common layout and in that common layout you'll be using the header component so that you will be able to you will be using that in one place and you no need to import the same component again and Again so the same features we are going to
implement so what I'll do right in this recipe list page and this comments page in both the pages let's will be having a header okay so let's see how we are going to do that so to implement that first I'm going to go to the components uh sorry source and I'll create a component folder now again I'm repeating all of this I'm going to again explain one more time in the next projects also all right so that it will Be like uh much easier for you for revision purposes so here I'm going to create create
a folder and I'll give this one as header and let's create index. jsx so this will be my common header component okay so we keep this one very simple we'll do a header and then I'm going to return a header component and let's I'll do a div and I'll do this one as homepage oh sorry homepage and here I'll Be having a UL then AI then I'll be having recipe and then I'll be having another another lii which will be uh let's do this on comments recipes and comments okay as simple as that now let's
save it now let's say I need to use this one in a common component so how we are going to do that so now what I will do right in these components I'll create a layout page let's say which will be our common Layout and here let's create index. jsx and I'm going to create layout so this will return a div now see what I'll do so here you need to use the common component so because this will be a common layout throughout your application and here I'm going to import our header component okay now
learn this one very very carefully this is very important and after this right what I'm going to import I'm going to import a outlet component from react router Dom This Outlet is nothing but it will automatically render the child r out element if there is one all right or else it will be null and let's see how we are going to use that so this will be our structure I'll go to our app.jsx very very important now what I'm going to do right first I'll take a route okay and here inside this route so now
you can see that whatever I'll be passing here that will be the children right so now I will be cut all of this All three route and then I'll paste it inside this so that means this recipe list comment list and then recipe list by ID all of these are children of this route element and in this route element what I'm going to do I will give a path so let's say this is our home correct so that means this is our common homepage and in this page I'm going to render the element which will
be our layout element so if I save this now see what I'm telling that okay whenever I'll go To the homepage so I'll go to the SL SL home noticed I'll go to slome so you can see that it's getting rendered the homepage and the recipe and the comments this is nothing but the header component okay we'll give a style here so we'll give display as flex but it's not about the styling let's understand the concepts okay so here we are having the recipe list and also you're going to give a gap of 20px and
we'll do list Style as none so we are having our homepage and then we are having our two links which is common for all the pages see and that is coming in this home component but as soon as I'll go to slome and then I'll go to slash recipe list because now this is the children of this home now see this header component will be getting rendered as well as the content of the recipe list see now the recip list is getting lended if I go to the comment List so go to comments list so
now comment list is getting rendered and this header is always common and this is happening because of this layout component so we rendering the header always and in the outlet outlet is nothing but this children of this route component so whenever I'll go to the route it is rendering the corresponding child element if I go to/ home/ re/ one then it will render the recipe details of recipe item one if I Make this one to 100 it will be 100 all right so this is how you need to basically implement the uh child routes in
routing I think now this will give the pretty much idea of the basic concept because we learn how you can create routes how to navigate from one page to another page how you can extract the patterms how you can get the current location and also how you can uh navigate dynamically using this use navigate hook all right and also we Learned that how we can render a not found page and also how you can render a child or nested routes okay so now let's move on to the next one which is our custom hooks so
what I'm going to do right in this uh component only I'm going to do certain things so there are two hooks that I'm going to implement so the first one is use Fetch and then we are going to implement another one that is called use window resize but before that we need to understand what exactly Custom Hook is okay so let's get started on that particular section hey everyone before for uh starting the custom hook right so I remember one more thing that we need to discuss that there is one more way you will be
able to basically create the routes in react router Dom so let's see so we have a used routes hook that uh this uh react router Dom will provide so let's see how we are going to do that so to do this one right we'll create a function and I'll create a Routes here okay so this will be a function and here uh what you need to do you will be creating the element so I'll do const element and this will be use routes okay from rect router Dom and inside this you need to basically pass
a route object which will be array so I'll pass array and here each and every route we need to pass so let's say I'll go to the path and here I'll give slash so I'll give slash home and in this home I need to render so I'll do element and this element will be our uh this layout element okay so let's format this okay we are getting some error oh we need to give colon so this is our first element which is home now here your home element will have a children so you can pass
a children property here so in the children we will be passing again so in this home I will be having Three children so recipe list command list and this recipe list of ID so those I can pass so let's I'll do path again I'll do SL so we'll do recipe list and I'll pass element will be our recipe list then I'll pass path and I'll do comments list then I'll do element will be comments list okay then I'll do another path and I'll do here let's say recipe list slash and then I'll give the slug
Which is the ID and then I'll pass the element and I'll pass the recip details page okay so this is one and then at the end we'll create another path so which will be path will be our star and then in the element I'm going to render the not found page so now this you already created your routes so now what you can do right here instead of using all of this logic you can comment out this part and simply create use these custom routes we'll do Custom routes something like that so that it will
not conflict and then you can pass this custom routes as a component and now let's save it now I think we are getting submitted let's see what is happening go to the homepage okay it's not coming so this part we need to check okay I think we need to give routes only here let me just see this oh sorry no no no not routes what I'm doing This is correct only I think we need to return the element we haven't return anything sorry so we need to return the element and I think we can remove
all of this okay now let's save it now I think this would work so we getting home home page now go to recipe list page so we'll be getting recipe list oh we are getting recipe list as doesn't exist this will be recipe list so we'll give recipe list something we are doing wrong see what I'm doing sorry so this each and every will be a object that is the problem here so this will be object and this also will be object and here this also will be object you can't use we can't use all
of this in one so we have a recip list command list and recip list of ADD now we'll be getting sorry I'll again explain I think that I mistake so Now command list we getting and if I go to recip list of one I'll be getting ACB details of ACB item One so I'll again explain what we have done right so instead of using this we created a custom hooks component where we'll be using this use route hook and this will be each and every route will be object now again we are having a object
with path element and then children children again will be a object so ad of object and each an AR each and object will be again path element so again let's say you are having some children so you'll be again giving Children here something like that okay and then for the not font page we created another object and then instead of using these routes here we just use this custom routes that we have created so this is another way of creating routes okay so this is just I want to explain now uh we are going to
discuss what exactly um custom hooks are see custom hooks are nothing but what basically custom hooks are do that will increase the the reusability in your Application for example let's say in these two component I'll go to recip Details page comments page in both the pages right okay so here something is going on if I just refresh this oh sorry we need to also change the path that is the reason so this will be now slome SL reci list and this will be also slome SL uh recipe list and this will be slome SL command
list okay now let's see click here it's going okay so Now custom hooks is basically for example in this two component in this recipe list we are fetching list of recipes and in the command list we are fing list of commments all right now in both the places places we are doing some kind of API call so now normally how we have learned that how we can do API calls so we'll use use effect hook and then based on that we need to create a method and that method will face that list of data from
our API and that will Store in our state custom hook we'll do right so we'll create a custom reusable hook where we'll be keeping the logic in one place so that we no need to write the same logic every time we will be doing the API call in both the places that means there will be a custom hook with use use fet and in both the component it will basically face the list of data from a API but we are keeping the logic in one place and then we are reusing in all the places okay
so This is what custom hooks are so now what I'm going to do right I you will be creating a custom the first custom hook and that is very very important you will get this query also in your interviews and that is called use f so what I'm going to do right here inside source let's create our hooks folder and here I'm going to create use f. jsx and we are going to learn this one step by step that how we are going to do that all right so let's see how we Are going to
create our first custom hook that is use Fetch and we are going to learn everything from scratch step by step so first thing this will be a simple function so we are going to create a function and I'm going to give this a name as use fch okay now what are the things that it will receive that we are going to learn but before that first whenever you will create a custom hook first you need to understand that based on what reason you are creating that for Example here I'm creating a face uh data fetching
hook where I need to basically pass the URL that from which UR I need to get the data and also if there are some other options if it is required then I need to pass it so that means this will definitely receive a URL and also it will receive some options so here it will also receive options which will be empty object right so this is the first thing after that we are going to basically just do export default use Fage now this use fet let's say we want to call the API here and we
need to return the return back the data to the component from where we will be using this custom hook correct so that means here we need to manage some kind of state so first state we are going to do here and that will be our data and then we will be having our set data and here I'm going to take U state of null okay and then I'll be taking another one and this will be Loading set loading and this will be US state of false and we'll take one more and that is to manage
any kind of error and this will be set error which will be US state of we'll do null okay so now what we need to do so here whenever we will be having this URL we will check on page load that means here in this component we will take use effect and here we are going to take empty Dependency not empty dependency we'll keep this UR as a dependency right so we can basically check if this URL is present then only we are going to do the API call here and now here what we'll do
we will do fetch fetch data so that means we're basically telling that whenever I will be calling this hook I need to provide a URL options can be optional but this hook will be getting triggered on this use effect Whenever there will be URL and it Will basically call this F data now here what we'll do we'll create this method so this will be async from function and F data and here first thing we'll going to make we'll do set loading as true okay then we will take a try block here and I'll take a
catch block so first we're going to log this error here and also here we're going to make the set loading as false okay here we are going to also set the Error so this error will will be this error that we be receiving okay now in this try block what we're going to do first we'll do our response we'll do con response which will be Aid we are going to use our fetch then we are going to pass the URL from which URL we are fetching the data and then we are going to destructure if
there is any options okay now here first thing we're going to check that if not equal to response. okay so what we going to do right we'll Throw a new error and here we're going to return response. status text if the result is already available that means we are getting the data so do const result or final result whatever we a response. Json okay and then what we need to do basically we'll do set data will be our result we'll do set error if there is any we'll make this on null and we'll do set
loading will be false once again Okay and also you can do it using this uh inser this if block that's it so now what this is doing so basically this is calling this use effect if there is a URL face the data if you're getting the data back then just sa the data and now what you need to return so we'll simply return here we'll return data we will return loading and also you're going to return error so let's save it so now we created Our first custom hook but we need to use this custom
hook to F let's say we are going to use this API URL so let's use some uh so we go to docs so we going to use this list of recip end point let's say this one so now I'll go to the recipe list page so we have a recipe list and from here I need to call that all right so how we going to call that uh custom hook so do const data will do something like uh res We'll do result from Custom hook custom use fet hook now again I'll change this this is
just for explaining purposes so I'll do use fet and now what this will receive right it will receive a URL and if there is options okay so now here what we're going to do we'll pass this URL that we want to get the recip from so copy this and we don't need to pass the options for now and now we are going to see what we are getting in this result from Custom hook save it Now see I'll go there go to console click on recip page what we getting see we are getting data first
time data is null loading is false data is null loading is not true that means data is getting faced from API and then we are getting the data back and in this data we're getting our recipes error is null so there is no error and loading is false I hope you're getting so now what we can do see all of this logic that we Have done so far we were doing in this component previously but now we just have to write this line of code and all of this will be handled in this common component
so now what you can do right so you can simply check that if loading sorry uh again one more thing we need to destructure so this this is I just explain you so I'll remove all of this and I'll just destructure what I'll destructure data I'll destructure loading and I'll destructure error and I'll check here that if loading is true so I'm going to return H1 and we do fetching recipes please wait okay that's it and then we are we will be basically getting our list of recipes so here I'm going to do so this
this will be our data dot recipes dot length if this is greater than zero so we going to render or else this will be null so here I'm going to do data do Recipes do map so this will be recipe item and here let's return a div let's WR image we'll keep the source so let's see the what is the response that we are receiving here so we will be receiving some image okay this is the image so we'll return this one so we'll do recipe image do image item do image and also I'll be
receiving I think some name so let's take a label and I'll render recipe item do Name save it and let's see what is happening there we are getting all of this right see now if I refresh is like go to comments page and come back first time we getting fing recipes please wait awesome and then we getting the list of recipes see go back come back and we are getting all of these data here it's not about see the CSS I know it's looking very bad but I just want to explain the functionality how this
is working so now It will be like a piece of cake for you like if you want to explain uh sorry if you want to uh implement the same in the comments page what you need to do so go to let's say another URL here so let's say com commments and just call this API end points I'll copy this right and let's I'll go to our commments page so let's go to commments list page and here now I'll do the same thing so I'll destructure what from use fetch I'll pass this URL and then I'll
Need data loading and in there any error that is fine now let's copy this and and I'll paste it here and instead of this I'll do fing comments please wait and once we'll get the data back so I'll just copy from here the same logic and instead of the data recipes I think we need to do data do comments and let's I to the body and the likes okay body and the likes so I'll do data do Comments so I'll render the body and also I'm going to render the uh we'll do comment item do
likes this will be comment item and I'll do this on comment item let's save it now let's go back so now let's go to the comments page fing comments you're getting all the comments here go to the recip list page you're getting all the list of recipes okay so now this is how you need to basically create a Custom hook so you're creating a custom hook you're managing all the state and everything there and you're just returning the data so that you will be individually called that custom Hook from the component and it will basically
see how much clean this component is looking because all of this logic you have moved to a separate component all right so that's all about our first hook now we are going to implement another one and before that I'll just explain You another hook that you can use that is a third party Library package but I'm not going to implement but I'll just explain that this you can also use so this is called s SWR okay s SWR react if you search that you'll get this so how this works right this is exactly same see
if now it will be very easy for you to understand so that is the reason first I created the use Fage so they have also have a use S SWR it is also taking a URL and there is a feter now See what this fetcher is doing right this is nothing but the fet API so here it passing all the arguments and then it is returning the data back and once you will do this logic it is returning the data it is returning the loading State just like we have done and error so if there
is any error so we show the error if there is any loading you show loading State and then you just render the data here exact similar like it's a carbon copy from whatever we have done so far All right so this also you can try and try to implement the same using this aswr now I'm going to create one more hook and that is called use window deze so let's say there is a requirement that every time you just resize this window okay you need to basically get the current window resize width and height and
for that one the requirement is you need to implement that in in the whole component in all the components in your application and your application is very Big so what you decided and your team that instead of implementing that in each and every individual component you are going to create a custom hook and that hook you going to use in all the components whever it is required so let's try to implement that all right everyone so let's create our second custom hook so I'll go here and create one more file and let's give this one
as W uh use window window Resize do jsx so now here what we need to do we need to basically return the current width and height okay so here we'll do function we'll give use window resize and here what we are going to do this will receive nothing so we need to basically take a state which will be which will take the current window size and that will set the current window side also so this will be window size and here we're going to take a u State And I'm going to take width will be
zero and height will be [Music] zero now here uh let's export default this so do use window resize now what this will return so this will basically return the window size at the end but how we are going to get that so here we can use use layout effect so that is another hook so use layout effect and use effect almost same but there is a slight difference so the difference is Use effect will run once all the Dom will be Dom elements will be rendered in your browser or basically after the paint process okay
but use layout effect will run before all the Dom elements will be rendered in your browser okay so that is the main difference so here I'm going to take the use layout effect now this is actually same so you can see that this signature is almost identical to use effect but it's fire synchronously after the Dom mutations All right and prefer see here it is saying that you can prefer the standard use effect when possible to avoid blocking visual updates now the reason is it's showing that to avoid blocking visual updates is because use effect
will run as I already told you after the paint process see here you can see that before the browser has a chance to paint right so before the browser will paint that process all the Dom elements this used layout layout Effect will be getting uh rendered and for use effect it will be after the paint proc uh paint process okay so here we you can use use effect this will also works and or use layout effect okay so here uh I'm going to take a call back and we are going to take a empty dependency
now here what I'll do right I'll add a new event listener so whenever I will be resizing this so I need to resize this browser window right so this I'm resizing so now I will do Here window sorry we do window. add event listener and I'll do resize and I'm going to call here handle resize that's it and then I'm going to call this handle resize here and on cleanup we're going to return and we simply basically do window do remove Adent listener and I'll remove this resize and then just remove this handle resize sorry
now I'm going To do uh sorry asnc I'll create the function so do handle resize and this will simply just do set window size so this is nothing but this hook and here I'm going to pass the width so width will be your window so you're having the window dot inner width okay and then you will be having the height so height will be window do inner height as simple as that so now let's save it now let's I want to use that in the recipe list page and Here I'm I'm going to render the
current window size and the window height so let's go to our uh recipes page and then I'm going to use this so do const then we're going to call use window resize and this will give you the this will give you the window size right so it will give you window size and then I'm going to render here so after this we'll take A3 and we'll do current window size width we'll do width e then we'll do window resize do width And current height is window resize window size. height save it and let's see what
you're getting so you can see that this is 1056 and this is the height so I'll decrease the height see height is getting updated this part here and if I decrease or increase the window so you can see that the width will be getting increased so you see width is getting updated this part so now using this value you need to You can do lot of things so let's say I want to check whenever this WID will be less than 760 I want to change this color uh to Red so what you going to do
simply just add a style here and then I'll do color and I'll check that if the window size do width is less than 768 so I will do here uh a red or else I'll do here black so now let's save it so now let's see if I just decrease this Right see now it is red so once it will be more than 760 it will be black now it is red so these things you can basically do using this so this is all about creating custom hooks now I will give you some of the
homework like you can create custom hook the following so you can create something like use local storage okay oh then you can create use count counter then you can create use sess Storage then you can create use ID so these will return a custom unique ID so these kind of uh things you can also do then you can do use outside click okay so these things you can uh do as a practice but for now I think in this module whatever you have learned we learn how we can Implement routing how to navigate from one
page to another page and also we learn how we can create custom hooks so now let's move on to the next one all right everyone so now in This section we are going to learn how you can use react hook form to create form okay so react react hook form is one of the most popular library that you can use to implement validation and form handling in your react application now before starting I just want to make it very clear that we will not go into much advanced level because what I'm thinking that this tutorial
is already getting very complicated and there are lot of things that we are learning so I'm I'm Giving you my word that I will be creating another part two of this react react video where I will be explaining all the advaned level of Concepts okay so in this part we will be creating a very simple form and then we are going to learn how you can do a basic implementation of react hook form so for this one first thing what I'll do right first let's close all of these and inside Pages I'll create one more
and I'll give this one as react Hook form example let's create our index. jsx now I'm going to do fun function and this will be react hook form example page and let's return a div and here I'm going to return H1 and this will be react hook form so now let's go to our app do jsx and I'm going to create another route here so I'll give here path which Will be SL react hop form and the element I'm going to pass react hook form example okay so let's go to this path so you're getting
deact hook form okay and I'm going to comment out all of this for now let's comment it out these common things that whatever we are having any I will be adding all of these in the the repo so you'll be able to use okay so in this one right first we need To install react hook form so here I'm going to do npm sorry npm install we'll do react hook form so now let's go to our react hook form component and then I'm going to create a simple form so here I will take a form
and then let's take a d we will take a label and I'm going to take a name and I'm going to take a Input and here we are going to give a name which will be name and type I'm going to give this one as text all right and let's create one more and I'm going to give here password let's do this on email instead of name and I'm going to do this on email type will be email all right and here this will be password name will be password and type will be Password all
right after this we will take a button and I'll do this one as submit and the type of the button also will be submit so you're getting a form password and there is a button all right so now how we are going to create a basic form so the first thing what we need to do react hook form Library will provide a use form hook that you need to use so that will be your first step so first we need to get something from use form hook So use form is the hook name so this
is again a custom hook okay just like we have learned now this will provide a lot of properties that you will be able to use okay so you can see that if I just check there is a errors control form State gate field State gate values handle submit register reset property set values and lot more so now what we need the first thing is that we need to get the register so register is basically a function that provided by The use form hook what we can do we can assign this to a each and every
input field that we will be having so that react hook form can track the changes on that particular input value okay then we are having this handle submit this is basically called when the form will be getting submitted and then there is a errors currently we will be checking all of these errors is a nested property that will be provided by this form state so from here where you will be able to Implement the uh error functionality also now it's always recommended to use this react hook library with some Library like Jord this is very
very popular but we will not cover this in this particular tutorial so now here we need the register method we also need the handle submit and also we're going to get the error so error is a n properties we'll get it from form state so from here we'll be getting errors okay so these three things we Need let's save it so now the point is how we are going to basically register each and every element here that we are having or basically the input so as I already told you here what you can do right
we can register this input so we'll do we'll dis structure and pass this register and here you have to pass the name so because I'm doing this on for email so I'll pass a email property here so this will automatically register this input and the same thing we can do It for here so this will very simple so what you going do simp simply do register and then pass the password as simple as that so now this will automatically register now what we are going to do right we will simply call a onsubmit method on
this form so that means because there is a button type submit whenever I will be typing the or submitting the form I need to get this values from email and password right so here you'll pass on Submit and this will be our handle submit and here I will be creating a method so you need to give a method which is your submit Handler okay on valid so I'll give here on submit form okay now what will happen this onsubmit form will give you a data property property so here you will be getting a data as
a argument and if you log this right data and let's give this one as form data so do form data save it now let's see what is Happening go to console now see I'll type something here so I'll type uh John do one
[email protected] I'll give 1 2 3 4 5 6 click on submit you are getting the value here it is very very very simple and it is very effective okay so what we' have done simply we first we get the register method handle submit and errors from use form hook and then what we
have done we are registering each and every input here you can see each and every Input are registering and then there is a on submit method on this form correct and this on submit method will give you this form data and using this form data you will be able to do anything you want for example let's say you want to store this data in database we'll be able to send this data okay so now how we are going to do the validation correct now in this register that where you are registering this so here you
will be able to pass some extra options So here you can see that there is a field values that you'll be able to pass which is your register options so here what I'll do I'll simply pass a object and I'll pass the required will be true that means this is a mandatory field okay so this is what we are passing and for this password I will pass like that reord this will be definitely true and also you're going to pass a mean length of five so that means or let's say eight so that means there
has to be minimum Eight password eight letter password or eight characters should be there okay but the point is now how we are going to render the errors correct so to render the errors so you can see that we are already getting the errors from here so what we can do simply here we'll take a let's say we'll take a c bracket and we'll check here errors. email because this is the field name that we have registered and then errors. email. type okay this is equal to equal to reord Because this is the type that
we have given so we are going to render something so what we can do like we'll do email is required or else this will be null correct and then I'm going to give a color like let's give a style so we'll give color as red and we'll do font weight as Bolder okay and let's give a margin of uh 20px so this is one thing the same thing what you can do right so here uh we'll Come back in this after this password and then we'll check the same thing that if errors do password and
then errors. password. type if this is required then we are going to render the same thing so I'll copy this and orse this will be null and I will do this one as password is required so this is one of the validation now you can see that you have multiple validations so we can do again the same thing and that is if errors. password And errors do password. type if this is equal to equal to what this is equal to equal to mean length so this is the type so mean length in that case what
we going to do we'll return the same thing and here I will do that password should be at least eight characters please verify the password that you Entered let's save it now see what I'll do I'll give this one see automatically getting right if I give more than eight it's fine if I remove all of these password is required awesome right and even if I give let's say remove this so email is required it's coming now you can also give like email validation like this type has to be M so for that one you need
to give some rex or pattern that you can try but see it is working so I'll give one now you are getting that password should be at least eight characters 2 3 4 5 6 7 8 now it's not getting remove getting so this is how you need to basically verify uh or basically validate your form so this is the very basic idea of how you can do uh form validation and form some Mission using react hoop form all right so now let's say one more thing how we can reset this form so to reset
this one it's very simple you just Have to import reset and then once you'll submit just call this reset so obviously you need to do certain functionality let say you are saving your data in API or database once that is successful then only you'll be calling this reset method so now let's say I'll give some less here and submit so you're getting error and I'll give proper data and then I'll do submit you can see this form is getting reseted and you are getting that information also All right so I think for now this will
be more than enough I'll give you also in the later video in the last video where we will be implementing the mon stack that I'm going to also show you how you can use react hook form with set CN UI okay so two times we'll be doing so that it will give you much more experience and based on that you need to practice more and more projects all right so now let's move on to the next section hey everyone so now we have Almost completed most of the theory concept we also learned some projects so
now let's understand some three uh more react Hooks and two of them are basically use for performance Improvement so we are going to learn use ref use callback and use memo okay so here what I'm going to do right first uh let's go to our pages and I'll create some one more page and this will be some I'll give this one as hooks only and let's give This one as index. jsx or let's uh yeah I think index. jsx is fine okay so now I'm going to create this one as hooks and let's return div
and here what I'm going to do right I'll return H1 I'll do use R use callback and use memo hook okay now let's go to our app.jsx and I'm going to render this so I'll do path this will go to/ Hooks and I'll do element which will be our hooks component so now let's go to this so we go to hooks okay so first thing is that what is actually use ref hook see us ref is basically a hook that lets you reference a particular value which is not needed for rendering so what will happen
so us is very helpful to accessing your Dom elements to manipulating your Dom ele elements and also what will happen this will always return a mutable object There should be a current property and using or basically accessing that current property you can do lot of things now I know if I tell you more Theory it will become little complicated let's try to understand using some very simple example okay so what I'll do right let's go to Hooks and the first thing we can do we'll take a count value property and to use a use ref
what we need to do right we need to use use R From react now if I over here you can see that this is a mutable reference object this returns object whose current property is initialized to the Past argument or basically the initial value all right so now whatever you will be passing inside of this that will be the initial value of this mutable of this particular variable that you are using where it will always returns this mutable reference object and their current property will be able to access And now that we are going to
see so give it zero and now what I'm going to do right I'm going to take a button and I'll do click me and here I'm going to take a on click and this will be handle click and now what will do I'll create a function and I'll do handle click and now what I'm going to do right simply I'll do current value and now here what I'll do dot current so there is a current property And I'll do Plus+ and now what I'm going to do simply just log this count value do current save
it now see if I go here right if I click see we are getting the updated value here okay now next thing what we are going to do let's say there is a input property that we need to do or we need to access a Dom element so you have a div and you want to do something using that div so I'll have a Div here and then I have text some random text so do some random text now what I need to do I need to get access of this particular div correct so how
we are going to do that now to do this one the first step will be you need to give a ra property to this particular element so I'll give a ref here which will be your ref that you will be creating so I'll be creating a const let's do a div element R so here I'll give use ref okay and This ref element we are going to basically pass here so div R element what I need to do right so I'll take a use effect now so on page load I need to basically get access
of this element so here what I'll do basically simply do const we'll do get div reference and what you'll do simply just access this div element now what it will give you it will give you the current it's very important this will return return the current property and now if I Just log this G div reference and save this see this will be getting called and you're getting the complete this see you're getting the element of this so now once you pass a reference you will be able to basically get access of that corresponding element
and you can do certain things with that okay for example let's say I want to give uh we'll do get de reference uh do style do color I'll do this one as red let's save it let's see what is happening see Getting changed to red right and now you can take a set timeout and what I will do so I'll take a two seconds of timeout and then I'll make this one G div reference. style. color I'll make this one to Green save it now see what will happen wait for 2 seconds it's changing to
Green awesome right so now this is how it will work now again you can take a set time out here also now I'm just giving example don't do something like this so here Inside this you can take another call back and I'll do one second more and I'll pass a blue here so I'll do a blue now save it now see what is happening so it will be blue green and then it's becoming blue refresh this page so it is red now it is green now it is blue okay so this is how you need
to basically access all the elements now let's say I have another element so I have input element and here I have a name which is my name and uh I also have something Like some placeholder or anything like enter your name and now what I need to do basically here I will give a ref and this will be my input ref element okay so I'll do con sorry I'll just use this so I'll do con input ref element will be use ref of and now what I need to do so basically I will call this
on page load so I'll call this input R element do current and I'll just do focus and if I Save it and refresh this page see this is currently in Focus mode right so it's basically targeting this particular input element and it is basically focusing on it so this is what exactly you need to do now this is very very helpful for accessing your Dom element and also you can manage your forms also using USF all right so now let's move on to the next one which is another two very important react hooks one is
use callback and second one is Use memo all right so let's learn two more uh hooks so one will be use memo and one will be use SCB see both the hooks are basically used for performance Improvement all right and memory optimization but if you are not aware so I'll give you one update so in the latest version of react 19 I think that is also in beta phase now so when the stable version will be out so react team I think they have already developed or I think it is in progress so they will
Created a like awesome features that is called react compiler so what that will do right so in that case you no need of this use memo use call back or react memo those components because react will automatically memorize or do the performance Improvement internally all right but that we are going to do later because I'll be creating another video on react 90 but still I think I thought it would be better if you you have already working on any project where you Need to do some kind of memorization in that case you can use this
use memo or use call back so what I'm going to do right in this use memo remember we have a use fetch custom hook right so I'm going to use this get products endpoint to fetch list of products first I'm going to do that so what I'll do WR const so I'll do use fet and then I'm going to pass this URL and this will give me what this will give me data and also it will give me a loading state so Here what I'm going to do simply do if loading then return H1 loading
data please wait or else I'm going to render this so I'll just do here or next uh let's not render first let's see what you're getting here in the data save it so now let's go to use memo oh sorry so if I go here right we'll be getting a object so refresh This loading data and then we're getting products what I need to do right so let's say I need to render each and every product wherever the price is greater than 50 or let's say price is greater than 10 and that I'm going to
render so for that one what I'll do right I will basically create a function here so I'll do function and this will be filter product by price and here what I'll do simply let's Say I want to pass the gate product so I'll pass the products as argument and then I'm going to simply just return gate products do filter so this will give me what single product item and here I'm going to read return me those products where the price is greater than 10 okay so this is one thing now also what you can do
right you can simply just do like this we can also check if this uh sorry we can simply do like if the length is greater than zero Then only I want to render or else not we'll do length is greater than zero so I want to render this or else I'll simply return empty AR okay and now what I need to do basically I will take a ul and now I'll call this filter products so this will take what this will take our gate product so gate products will come from data. products so we'll do
data do products and here I'm going to do map And then simply it will mean return item sorry this will give me item and then I'm going to take a Ali and I'm going to return item. title so let's save it see we are getting this many items right so this many items where the price is greater than 10 now what I will do right so let's say I have another state here which is my internal State here so this is let's take this one as flag and set flag and I'll do this one As
e state of false and I have another button so let's I have a button here which will do nothing but this will just toggle the flag so we do toggle flag and I'm going to do on click and simply I will just do set flag which is not equal to flag what I'll do right simply I'll take a style and I'll check if the flag is true sorry if the flag is true so first I'll take a color Here and I'll take the if the flag is true then I'll make this one color red or
else I'll keep this one as black okay let's save it but this is not the point the point is so this is changing what is happening right so for now currently this is okay you have only 30 products and out of which you are rendering only 20 let's say you have let's one laks of data so if I go here and in this function if I just simply log this function right that this Function is getting rendered save it so the point will come here if I go here first time this is getting rendered this
is fine click here this function is getting rendered click here this function is getting rendered and the reason is because the problem is this we are changing the state of this text here but this function is getting rendered every time right so now what our task is we need to tell react that okay don't render this uh function or This data every time when we are just updating the color of this text means there is no direct connection between these two so how we are going to do that so here this use memo will comes
into picture so use memo is basically we return return a memorized version whenever one of the dependency will change so this use memo will basically memorize a value on the other side use call back as the name suggest will memorize a function or it will Memorize a call back so let's say how we going to do that so to do do this one so first we are going to use or basically create a memorized version of this particular function this function that we created so we'll do memorize version and then here we need to take
use memo we need to import it and then here what we going to do right simply we will call this filter same method so we do filter products by Price Right and here what we are going to do We will simply pass the data and here basically we need to tell that based on what dependency we will rerender this particular function and if I over here right you can see this will only recompute whenever the memorized value of this one of the dependency will change so here this data is nothing but sorry we need to
pass data do products so we do data do products and here I'm going to pass data do products as a dependency so now what I'm going to do Right I'm basically telling that okay don't render this function every time just uh just basically render it whenever this data do products value will change correct now instead of calling this what we can do right we can call the memorized version of this so we are calling this function here save it so we'll be getting the same result if I refresh this right refresh this first time we
will be basically getting this that is Fine and now if I click here see what is happening this is fine this you are getting the data but that function this calculation that you are doing here in this function this is now getting memorized so this function will not be getting called right so now if I toggle this you can see that is not getting called the reason is because you are not updating these products when there will be change in the this data do products then only it will basically Update or basically call this function
one second so this is all about use memo now let's move on to the next one where we'll be learning the same thing but how we are going to memorize a call back using use callback all right so let's understand now use callback with a very simple example so you can see that first let me go to that page now here what I'm going to do right so here inside this I'm going to create another child component so which will be my counter This is counter. jsx now let's create this so we'll do counter and
here we are going to basically what we going to do right we will render the text or basically the count value and also there will be a button so this will be like click right so both this count value and the on click we are going to receive as a prop from the parent component so this will have on click which is nothing but This on click prop that we will be receiving so now in this call back example what I'm going to do I'll take uh two state so one is count one and we'll
do set count one and let's give this on as count one so this will be U state of zero similarly let's I'll have another one right so this is Count two and this will be my set count two now what I'm going to do right I will be calling that counter component that we have just created So here I'll call this one two times and now I'm going to pass the count value which will be count one very very important and now in this on click what I'm going to do right because we updating the
value count one so we'll be increasing the count one of using the set count one so do set count one which is count 1 + one similarly I'll copy this and paste it here so this will be my count two and this will be set count to save it obviously this will work that Is fine okay here we are doing something wrong I think count value we are updating set count oh sorry we need to do count two my mistake okay so now let's refresh this so we're getting one and this will also be 1
2 3 4 that is not the point the point is here we are going to log this and we'll do this is getting rendered and I'll render the count value save it so now let's go Here refresh this first time it will be getting rendered two times that is fine now I'm going to increase this is getting rendered one although we only increasing this value but both the instances or basically both the time these component instances getting rendered and this is the trick here right because you might ask okay I'm updating this component but why
this component is is getting rendered so this we need to stop so to stop that what we Can do right whatever function that we are passing so one way is that there are two ways so you can either wrap this in memo and then whatever prop you're passing from the parent component you need to wrap that method inside use call back and that is the important so what you will do here right so do const we'll do memorize uh we'll do count one we'll do set count one function and this will be use call back
and here you are basically Telling that okay do the same thing that increasing the count one + one but this time you keep only the count one as a dependency that means when this count one will change then only you run this don't run it when the count two will change right similarly do for this one so you do count two and here you do set count 2 which will be Count 2 + 1 and keep count two as a dependency means when I'll increase the count two don't Update the first instance and here instead
of doing this you'll pass the memorized version of function one and here we'll pass the memorized function of function two save it all right so this is done now next thing as I already told you so if I go here right so let's uh increase this you can see that this is still getting rendered so what we're going to do simply wrap this component in memo right and here now what we'll do we Also log this on click so that we it will be easy to De work now let's refresh this okay first time set
count one and two both are getting rendered now I'll click on the first one this is getting rendered one only set count one is getting rendered click again first one and now click on the second one so only see second one is getting lended right so here the reason is because you're also updating this Count value in this component right so you need to wrap it not only wrap it whatever prop you are passing or the event that also you need to wrap it in use callback and also you need to tell the dependency this
is very important that based on what dependency you need to run this particular function so this is the key difference between use callback and use memo so use memo will memorize a value on the other side use callback will memorize a callback so I Think with this we have completed our part on V router Dom custom Hooks and also some ADV advaned performance Improvement hooks now let's move on to the next one hey everyone now in this section we are going to learn how we can use stand query or react query in our react application
so the first thing we are all only going to learn the basic things so first we will basically install this on soide copy this and then install in our Project and for this one you can see that I already created One path and uh this is where I created a component all right so first thing what I'm going to to do right so I'm going to create a dummy API here so inside react query I'll create a folder and I'll give this one name as API and here I'm going to create index.js so first thing
what I'm going to do I'll be creating some uh like let's say product list here so I'll give Product list and this will be this product will have a title product one and also it will have a ID which will be one I'll copy this and paste it let's say five times three four and five and I'm going to do this on two this will be two 3 4 and this will be five now this will basically give us two method here I'm going to create so first one will be to fetch all the products
so We do export const fetch list of products so this will be as sync method and here what we are going to do right because we are creating a dummy API so I'm going to just create a promise here so a it create new promise so I'll just resolve this after 1 second so I'll take a set time out all right and here simply we can simply pass this resolve and I'll pass 1,000 okay and once after 1 second simply I'm Going to return the list of products that I having so which is my product
list okay so this is the first one and second one I will be creating a new product so I do export const add new product and this will be as sync and it will receive a product name as argument and here what I'm going to do right again I'm going to create a promise for one second and once this is done then I'm going to create a new product so we Do newly uh we'll do newly created product which will be ID will give product list. length + 1 so if there is three product already
or five product so next product will be ID of six and then I'll be having a title which will be my product name that I'll be receiving and then simply post this newly created product. sorry not newly created product the product List dop and I'll create the newly created product and then I'm going to return the newly created product here okay so these two will be my method this this will face the list of products and this will add a new product so the first thing to create or reuse react query or t query in
your react application just like we have learned like we have learned for context and Redux that we need to basically wrap our app component inside A provider so that we will be able to use those Concepts or those features in our whole application similarly in this react query we need to create a query client provider so that we need to do it in main. jsx here so what we're going to do right so here I'll create a const let's create client provider or let's give this one name as query client and this will be new
query Client okay and now what I'm going to do right we need to wrap this app component inside quiry client provider okay you can see that what this will receive this will receive a client and also it will receive a children which will be a react element so here I'm going to cut it and paste it inside and here you need to pass this client which is nothing but your query client here so this is the first step okay now this app component will have all the components you'll be Able to use all the react
query like methods Hooks and everything inside your application so now I'm going to go to this qu react query demo so the first thing what we are going to do right we will be fishing this list of products whatever we are having so let's see how we are going to do that so the first thing this react query will give you a query that is name use use Query so that you need to use so I will just do here const query and we need to do use Query This is very very important now this
query will basically take main two things one is the query key so this query key is nothing but to use to identify that what exactly we are doing so here I'll give this one name as product list that means this query is providing this is the key name of this particular query and here you need to pass a function that which function you want to run to F the list of products so it will take a query function and here What I'm going to do I'll call this fet list of products that we have created
from this API here okay and this I'm going to call now I think that's it so these two is needed so if I now log this query right first and let's see what exactly we are getting save it and now I'll go here you see that you're getting object and inside this you are getting lot of things okay these all are the methods and properties you see first thing You're having a data and inside data you're nothing but the array of products right as simple as that so what we can do we can simply destructure
the data here and also we can destructure e loading now here you can give like something like product list and then what I'm going to do I take UL sorry I'll take a ul and I'm just going to render if this product list do length is greater than zero so I'm going to render or else I'll render A3 And I'll do no product found so here what I'll do simply we do product list. map so this will our single product or let's give this on given multiple times single product product item let's give only product
and this will only return Ali and here I'm going to renter product do title and here let's give a key also so we'll be having product do ID now here you see that this will also give you e loading which is basically nothing but Fetching state that we have learned so far so here it will be Inu so you can simply check if it is is loading so I'll just return H1 and I'll do loading loading list loading products please wait save it and now let's see what is happening see I refresh this you're getting
loading products for one second and after that you are getting the data awesome right now this is can be your real API or let's say you interacting With database whatever the feature is same so now what I need to do I will be having a text box and I'll be typing some product name and once I'll add that I need to add that product name here actually or in alternative way what I'll be doing I need to do some kind of data mutation so what I'll do right I'll take a div here and here I'm
going to take a input or let's not take div yeah I think div is only fine let's Do that and I'll take input and also I'm going to take a button and I'm going to take a type of button and I'll do add new product here I'll have a name uh which will be let's give this one as product or what we can give we can give name only placeholder will give enter product title and now I'm going to take a state here so do const so here I'm going to do name or let's do
Product title set product title and this will be US state of empty so now what I'll do simply I'll pass a value property here which will be my product title and I'll also pass on change which will be set product title event. target. value that's it so now what I need to do basically I need to somehow whenever I'll be typing something I need To save that before that also let's give a disable property here that if this product title Tri if this is empty then only this will be disabled okay so now what I
will do right we need to use another Hook from react query that is called use mutation so I'll do const and take something from use mutation now this will give you two function one is mutate and the second One called mutate as sync now here both are fine the only difference is that this will work with ASN operations so here we are going to use muted as sync and here use mutation we take a mutation function that you need to pass so here what we will pass right mutation function here will be if I go
here we have this add new product so this is my function so here I'm going to pass add new product okay and now what I'm going to do right I will basically give some Name here let's say give handle handle add new product mutation anything you can give now what I'm going to do right simply I will create so here we can create a method so let's create on click handle add new product and now what I'm going to do I go there create this method so this will be ASN function handle new add new
product and here what we are going to do we are going to call this M Asing this function here so I'm Going to call this Aid and I'll do handle Asing sorry handle add new product mutation and here you need to pass the variable now if you go here right this will take a product name so I'll pass this product name is nothing but whatever product title the user will be typing here so I'll pass this product title sorry product title and then I'm going to just do set product title will be empty all right
so once we set this empty right now what we need to WR we Need to also revalidate this query here because every time we'll add a new product we need to refetch or basically face the updated list of product and to do that what we are going to do right here we have created our main query client so these we need to use so first what I'll do I'll do const get query client and this will be this will give us another hook that we called use qu client okay now what I will tell this
mutation function that okay once this is Successful that time you need to do something like this we'll do get query client and this will give you invalidate queries so I'll tell that once this add is successful here please invalidate this query key so that I will get the latest list of products and here you need to basically pass the key name and this key name is nothing but the square key that you have given which is product list and here you need to pass it right so that's it so every time you do a Mutation
you need to pass on success and then you'll just do invalidate queries and you have to tell that which query you want to revalidate that's it now let's rephrase this we'll be getting now I'll add another new product so do product six let's add here we getting product six after 1 second We'll add one more product 7 add we are getting product s and also this is getting reseted okay so this is all about the very basic of React query so first we have wrap everything in our query client provider then we use this use
Query which will take a query key to identify that or basically this is kind of identifier and based on this identif you have to tell that this query function will run which method and to mute it you need to use use M use mutation hook which will again take a muted function and on success you are just doing nothing but invalidating the queries of this particular query key All right so that's all for this particular section now let's move on to the next one all right everyone so now we are going to start with our
second project and that will be a shopping cut in this project what we are going to do right whatever Concepts that we have learned so far all the concepts that we will be applying in this particular project and also we are going to learn how you can do basic routing using react router Dom so let's get started so Obviously we going to use VD and also for this one we are going to use T in CSS so let's uh create a project first so first we need to use this uh command that npm create with
latest than the project of the name of the project and then the template will be react all right I'll copy this and then okay first uh I'm in this particular folder I'll copy this uh open Comm line and then I'm going to Paste this folder path then I'll go here and copy this and I'll paste it here okay now one thing that we need to do sorry I think we have made one mistake let me just quickly delete it I think this is not what I want to do I'll delete uh this part let me
just copy one more time I think we need to change the name of the project right so that also you need to do so here I'll paste it then I'll copy this paste it here now Here what you can do right we can basically change this one to shopping cut now hit enter now this will create the project and everything now you can see that uh now we need to navigate to this project we need to install all the dependencies then we need to install the TA in CSS so first what I'll do right first
I'll go to CD shopping cut so navigate to that folder so I'll do CD shoping cart then I'll do npm install now this will take some time uh once this is done uh we'll open this one to vs code and then we'll start implementing okay now I will also suggest like if you don't know what twiin CSS is because obviously we not going to uh explain each and every properties of T and CSS I highly suggest please go to go through the official Doc or can also watch uh some already existing videos on YouTube I
think there Are quite a few good videos that you can see all right so once this is done right we are going to install Tailwind CSS post CSS and autofixer we are going to install or initialize the Tailwind config file we need to pass the content like what kind of content that we will be writing based on so for example we will be having jsx or TSX and then we need to import the base utilities of the TA and CSS in the main uh or Global CSS in our folder And then we are going to
do npm run Dev okay so these things we need to do I think these will be done now now let's do one thing let's open this one in our vs code now let's open this okay I'm going to increase this one a little bit Yeah and then I'll do side by side and I think this is good to make sense because it will be easy for us to understand Also I'll do the same for this one no sorry that's it so now uh let's open a terminal let's copy this from here so this will install
as a DA dependency this is done now I'm going to initialize the tailin config file so you'll notice one thing right it will basically create a tawin config here we paste it hit enter see there will be a config do jss uh that will be created and also there's a post CSS config file so go to tell in Config and then what we'll do right uh inside this content you can see this you need to specify the content so here I'm going to copy this part from here and then I'll paste it here and the
last step will be then you need to copy all of these utilities and you need to go to our base CSS or Global CSS which is our index. CSS and here I'm going to paste it and this will be done now I'm going to run npm run div So now let's open this let's go to I'll close all of this let's go to app.jsx and I'll change this color to let's say give a background color to button so I'll give a class name and let's give BG black okay save it so this is getting changed
let's give a text white font bold oh sorry and this is working F all right so now this is done now second thing what we need to do right so what will be our functionality so we will be Having a product listing page we'll keep this one very simple and we are going to learn each and everything step by step as I already mentioned multiple times in this particular video is that all of these I'm creating from a beginner's point of view if you already know react I think these things can be easy for you
but if you don't know then step by step doing will be very very helpful this is what I believe all right so now uh let's do one thing first I'm Going to install our react router Dom now there is I think the latest version is the version six now we are going to learn multiple ways how you can create routing or Implement routing so there are basically two ways that we use one is using like there is a create browse router method and normally using routes component so both we are going to see so in
this particular video we'll start from very basic and then in the later videos or next projects we going to Implement the routing in a different way so now here I'm going to do npm install react router Dom hit enter this will install now we need to also specify the uh our project architecture or basically what kind of pages that you will be having so you'll be basically having two pages so one will be not two three pages one will be a product listing page then product Details page and then in the product Details page if
you're adding a particular product to cut page it will Automatically go to the cart component or cart page so there will be three pages so now I'll go here inside this Source first I'll create uh let's do here pages also I'll create our components so we'll do components now inside Pages uh we need uh let's do one thing we'll do here product list something like that product list and then we are be we will be having another page that will be our Product details okay then we will be having another page that will be our
cart list you can give any name you want it's up to you always I mention in my all the videos that you don't have to exactly copy paste or write or follow me whatever I'm writing here you need to implement your own idea and whatever I'm doing try to do something different so that only you'll be able to do the projects in interview or in your company It's not like whatever I'm doing you are doing the same thing probably there is a much better way of doing the things so I'm just giving you the idea
and then you have to graas it and then you have to apply your idea on top of it so here I'm going to create index. jsx here also I'll create index. jsx and in in this also I'm going to create index. jsx now let's quickly create all of this so first I'll create with a product List so I'll give this name as product listing Or List page and this will return a div and this will be our product list page save it copy this we'll go here now this will be our product Details page so
this will be details and this will be product details dets and then we'll be having our card page so here I'm going to let's write it so do cart page cart list page and let's return da so this will be Card list page so now you have three pages now see react is a single page application right so every time you want to navigate from one page to another page you need to tell react that okay now whenever I'll be in this let let's say this product uh product list page I need to render the
product list uh component whenever I'll be in the product Details page I need to render the product details component whenever I'll be in the cart list page I need to Render the cart list component but how you will be basically doing or how you'll be switching from one component to another component right so the first thing is that what you need to do right just like in the context you have learned that context is basically will provide a provider or basically a global State and then you need to wrap that state in your app do
sorry in your main index.js file then only you'll be able to pass the state from one component to Another component or basically in your child component similarly to implement react routing functionality in your react application you need to wrap your app component inside something that will be a main wrapper main wrapper component of react router Dom that react router Dom will provide and that component called browse router browse router so I'll just cut it from here then I'm going to first import it so this you need to do so browser router is the Component name
so if I over here you can see that this is a router for in your web browser and now what this basically will do right this will receive the children and everything similar to it will basically work as a rapper component and then whatever you'll be writing inside of this all the routing function right you'll be able to access the reason because we have W you have wrapped your app component inside browser router so this is the first step And then I'm going to use our app component okay now because I already wrapped it so
I'll be able to implement the routing so now I'll go to our app.jsx now see here what I'm going to do right I'll just cut it all of this remove this one now also Let's uh remove this app. CSS also don't need now I'm going to use let's use a fragment here and now first we need to import routes From react router. now routes is basically work as a switch component so this is the container for a nest tree of routes so you can have multiple routes and that will render the branch the best matches
the current location see very very important so this routes inside this route you can have single route elements and that can be multiple let's say you are having 100 pages so you will be having 100 Route elements but whatever location you will be giving Based on that location it will only render that particular routes which matches the B that that will be bestas match so for example here I'll take one route so this is a single route and Route will take a path so this is the path right and here I'm going to say like
let's say once I'll go to the product list page so this is the route name or path name product list so that time I want to render the product list component so This will also take a element property so this will be react node and here I'm going to pass product list page now I hope you're are getting right that means I'm telling this router that okay whenever I'll go to this route I need to render this element save it now see what will happen if I go to this route product list so you're getting
product list page this is happening right so that means also we need to do something I think Let's go to our index. CSS and I'll remove all of this from here we keep these two that's it now you're getting a product list page because you're in the product list component similarly now it's your task that implement the same for product details and card page but product details will be little tricky the reason is because see product details is a dynamic page now what exactly Dynamic page pages so in Your uh product list page you can
have multiple products right let's say you're having 100 products and each and every product for whenever you'll click this you'll go to this product list product Details page for that particular product so this will be something like this so you'll go to product Details page SL then there will be the product ID so product ID is nothing but each and every product ID now this product ID can be a dynamic value so it Can be anything so it can be one it can be two it can be three so now you need to tell that
okay product Details page will be a dynamic route and this value can be anything so how we are going to do that so to do this one again you need to take another route here because each and every page will be each and each and every route and here you'll give path now see here you need to tell that okay I want to go to the product Details page product details but I need to Basically tell this route that this path will be dynamic so to mention a dynamic you need to give this score and
you need to give the ID that means this value is a dynamic value now this ID is nothing but each and every product ID okay and now here you'll be passing element and this will be product Details page now save it now see if I refresh this right so you're getting product Details if I change this value let's say I'll give 500 then also it will be getting rendered if I give five then also it will be getting rendered whatever value you be giving here every time this product details will be getting rendered because you
are telling that this value can be anything and here every time this value change for this path I want to render the product Details page okay now next thing what we are going to Do we need to also Implement another for card list page now I'm pretty sure you'll be able to do it so for card page what we can do can take another route and then you'll take a path so I'll give card list or let's give this on product only not product list so it will be products and this will be card and
here I'll give element and in this element I'll give the cart page card list page so if I now save it and let's go to the cart Page so this card page will be getting rendered okay all right so I think this is done now now next thing what we are going to do right first we'll start implementing our products page so we will be fetching the list of products from API and then we are going to render it and then uh we will be start implementing our details and the card page all right one
so first what we are going to do right first we'll F the list of products so for this One I'm going to use this dami Json products API link so before that as I already told you that we already have discussed the context uh Concept in the previous lecture so we will be implementing using context so that it will also give you some hands-on experience so what is the first step of creating the context so first we'll be creating a folder folder inside source let's give this on name as context and here I'll create index.
Jsx all right so I think we already discussed right so first you need to create the context then you need to provide the context or basically provide the state to the context WP context in root component and then you consume the context using use context correct right so first we'll Create the context and also because we are going to consume the context using use context so we need to export it I think this already we have already discussed so now it's time for you to practice all of this and also you need to do handson
or else it will be tricky I'm telling you okay so you need to Implement all of this by your own so we'll give this on name as because we're doing uh shopping cut so let's give shopping cut Context and here I'll give create context and then we need to pass the initial value right so all default value I pass this one as null for now now we need to provide the state to the context so before that we need to First create our provider or the global state so what we going to do right here
we'll do export or let's do function we'll give this one name as shopping card provider and this will receive a Children the children of components and then I'm going to do export default this will be shopping cut provider now what this will return this will return the shopping cut context do provider and then here you need to pass the children right so this is we have done now we need to wrap our context in the root component so what is our root component in main.js side so r or root component or the app component so
here I'm going To import shpping cut provider and this provider will receive a children so this children is nothing but your app component this is done now next what we need to do first now I'm going to close everything else now we need to create some states and then we need to pass a value property here right so for now we'll pass a empty object as value now I'm going to create some of the methods so first we need to fetch the list of Products so we need some state right to store the products so
we'll create a state and this first one will be a loading State let's say and we'll do set loading and this will be use state of false then I'll do cons we'll do list of products set list of products and this will be US state of Mt Okay so these two we need now how we are going to fade sheet so we already discussed right we can use use effect because we need to do it on page load so that means we'll take use effect effect use effect will give us a call back and now
here what dependence we need to pass pause the video and try to guess so because we are doing on the page load we need to pass empty dependency now here I'll do a method That will be Fage list of products so this is my method name now this will be a as sync method because we need to do a API op so we do async function Fage list of products now here we will do const API response this will be a here we'll pass Fetch and then let's copy this Okay then we'll paste it and
then we will do const result this will be a AP response. Json then I'm going to log this result so let's save it let's see what we getting so go to console see we're getting a result on 18 and here we getting the products see here we are getting the products so now we can do if result and then result do products is present so what we're going to do right We'll do set list of products will be raal do products means if the products is present we are saving this products data in our state
in the set list of products let's copy this list of products now in our context save it okay first time this is empty and then we are getting this one correct 30 products now what we need to do correct because this we are rendering in our Context we need to render it in our product component so we'll go to our products so in this component we need to render so that means somehow we need to consume this state from Context to that component so what we need to do first first we need to provide this
state in our context value so we'll copy this and we'll pass it here so this is our list of products now we need to go to our products page so let's go to our Products page and then we need to consume it how we are going to do it so first I'll do const get context value I'll just log it so that it will be easy and I'll do here what use context and what use context will take it will take a context now these all the things I have discussed previously and what is the
context name this context is nothing but your shpping cut context so I'll get it from shopping cut Context and now let's log this get context value save it what you're getting list of products ARR of 30 this list of products is nothing but this object that you're passing here in this object you're having list of products right so now here what you can do simply just destructure this list of products and then log it here you're getting 30 data correct so that means this is working fine so now we need to basically render This list
of products in this product list component okay so first uh let's do one thing what we're going to do right in this component we will be rendering the list of products and then we'll not render the each and every individual item for that one we are going to create a separate component so that it will be reusable so here I'll create product item okay now let's give product tile item of tile anything is f let's give tile and here I'm going to create index. Jsx so I'll create a function and this will be our product
tile let's return a div and this is one single product item or TI correct so now let's render it in this product list component now what I'm going to do right remove all of these now let's take a section now we take a class name so we'll do py of 12 again I'm not going to discuss all of this py means padding top you need to Have some idea we do BG white for ASM I'm going to do py of 16 and for large I'm going to do py of 20 inside this I'm going to
take another div and then we'll do class name PX of 4 we do MX Auto for ASM I'm going to do PX of 6 for large we'll do PX of 8 and we'll do a Max w means Max width we'll do 7 XL which is 1280px you can see that okay and inside this I'll take another Div we'll take a class name here we'll do Max with MD MX Auto and we'll do text Center here I'll take a H2 and we'll do our featured products let's take a class name so we do text 3 XEL
font we'll do extra bold and what else we'll do text Gray 950 and for SM we'll do text 4 Xcel save it okay so you're getting this One now after this da we are going to take another div and here we're going to render all the products so we do class name so here I'll do grid grid Columns of two okay gap of let's do five margin top of 10 for large we'll do margin top of 16 for large we'll do gap of eight and for large I'm instead of showing two tiles we'll show four
so we do breed Columns of Four okay now inside this we'll check that if this list of products and then list of products do length and then list of products do length greater than zero I think here only we can do this one so here I'm going to Rend a list of products do map and this will be our single product tile and what we need to do we'll call this component that we've created right so we'll call this product tile so we'll Do product tile or else if there is no product we'll simply show
A3 that no products found okay now let's save it see okay it's taking some time so obviously we can manage this so what we can do right simply we'll go to our context and then we'll simply this set loading right this I'll make this one as true and then what I'm going to do first once we'll Get the data back that time I'll make this set loading as false and then I'm going to pass this loading also in our context so we copy this and then we'll pass this loading here also along with this list
of products now we'll be getting the loading also so get it loading Here and Now what we can do simply you can check if this loading then you can return H1 and we can render a message like Loading data please wait something like that now let's save it refresh this page see now we are getting loading data and then now if you want you will be able to change this loading data with some icon with some component it's up to you I'm just showing you the way you should you should do it you need to
improvise on top of it okay instead of showing a text what you can do right you can create another component here using in CS and Give some nice loader on on middle of the page so now you're getting single single product here so now what we need to do we need to refresh uh sorry replace this text static text with the product tile so that we are going to create all right all right so now let's uh start creating our product tile component so we go here now this product tile what this will receive right
this will receive a single product tile as a prop so I'll copy this and this will Receive here and now I'll remove this one now first uh we'll take a div we'll take a class name we'll do this one relative group we'll do border uh we'll do border let's do 600 700 we do p of six and cursor pointer sorry cursor pointer awesome now inside this we'll take another Div we'll take a class name we'll do overflow hidden we do aspect W1 and we'll do aspect height one now inside this we are going to render
the image so here we'll need to pass the source now Source will be this single product tile that will be given here will receive a thumbnail so that will be our image alt uh we will give uh let's give the title so we'll give single product tile do title title will be the Alt obviously this will not work because we need to pass this single product tile as a prop we'll pass single product tile which will be single product tile okay now here also we need to pass a class name so we do class name
we'll do object cover we'll do W as full height as full we'll do Transition sorry transition all we'll do a duration of 300 and we'll also do a group over and We'll do a scale of 125 save it so you're getting all of these images awesome now next after this we'll take another div now here we'll take a class we'll do a flick we'll do item start justify between margin top of four and we'll do space X of 4 here uh we will take a h Three now inside this uh we'll take a p and
we'll do here single producti do title now let's take this one as a div we'll take a class name so we'll do text I think we'll do first font bold we'll do text Gray 900 for SM we'll do text SM normally we'll do text Xs and for MD we'll do text base now here uh what we going to do we need to also give some ellipses so We do a class name so we do with fixed as 100 PX we'll do overflow hidden we'll do text as ellipses this and we'll do white space no app
okay so it will be coming like this so this is done now after this div we'll take another div now here uh we'll give a class name of text right we'll take a p and we'll render the price of that product so we'll do single producti do price And here I'll give a class name so we'll do text TS font bold text Gray 900 for SM we'll do text SM for MD we'll do same uh let's do one thing for end you will do text of 14 PX awesome okay once this is done so after
this so let's go here here we are going to render a button and we'll do view Details and let's give a class name so L PX of 5 Mt of five W full p y of 2 we'll do rounded none BG will do black text will do white font will do bold and text we do large so let's do this one as bold save it so now we getting all of this now let's refresh this page we getting loading data please wait and after that only we are getting all Of this data now next thing
what you're going to do on click of each and every button we need to go to the product Details page so for this one we need to know some kind kind of react router functionality so that we'll be able to navigate to that particular page so let's start working on that part all right everyone so now on click of this we need to go to the details page so let's see how we are going to do that so now to do this one we are going to keep Take one click event on this and we
to handle navigate to product Details page but now somehow when you create this method we need to basically get the ID of each and every product because when I click on this particular product so we have to go to The Details page and we need to get the ID of this product so how we are going to do that so first we need to pass that ID as a parameter in this method and this will be able to Easily get it from this single product tile this will have a ID property so from here we'll
be able to get it so now let's log it here so do function handle navigate to get Details page and we'll do get current product ID now let's log this first get current product ID save it let's make this one below see if I click here we are getting 1 2 3 means corresponding ID we are Getting if I click on the last product we'll be getting 30 now what we can do right so we can take this method and that is called const navigate from use navigate react router now let's log this navigate also
here so paste it save it go to console and now click on any product I can see that this is a function and it will go to a path that you need to give like in which path you Want to go and there are some certain options that you can pass so where I want to go I want to go to navigate I want to go to the product Details page but how we will understand that so if I go to our main app.jsx so here you can see that we have given this product details
and then ID so this is the path name of that product Details page so now here what I can do right I'll paste it now instead of this ID what I need to pass I hope you're getting this Dynamic Value right so this value I need to pass so if I pass it here save it I'll remove this console see what will happen if I click on the first product notice this URL click here it's going to product Details page and ID is now one if I go back click here now ID is two so
now from here you'll be able to get the ID of this product if I click on this product three if I click any other product we are getting 14 right so now what we need to do whenever I click on This go to this page in this page I need to face the API of this particular information with this ID and then I need to render right so let's start working on that particular section all right everyone so now we are going to face the list of uh product details basically for each and every individual
product so for that one the first thing first we need to get this Dynamic value right so first let's go to our context and then here what I'm going to do right so we create Another state here and let's give this our name as product details set product details and this will be use state of I'll give this one as null all right now here what we will do simply first I'll pass or both in our uh context value and also we are going to pass I think we are already passing loading so let's pass
the set loading also let's save all of these now uh we will go to Our product Details page so this is our product Details page now here see first as I already told you that we need to get this value so for this one we can use one of the hooks that react router D provides so first I'm going to use this use params okay now let's log this params and let's see what we getting so go back okay and then let's go to console now I'm going to click on this Details see we are
getting ID of one now see from where this ID is coming this ID is coming from this app.js where we have basically given the route name and here you can see this is the value this is the ID or basically the key and this is the name so go back click here now see we are getting ID to so that means what we can do simply we can simply destructure this ID from this params and now if the ID is present then only I want to call the API so I think how we Are going
to do that so to keep as a dependency see what I'm trying to do here whatever Theory Concepts that you learned so far I'm trying to apply all of this right so this is how you need to do so first you need to take use effect and then you need to keep what you need to keep this ID as a dependency that means if the ID is plac and then only this use effect will run right so this is what we have learned and now here simply what we Going to do simply call Api like
fet product details right so this is what we doing now this we are going to create this method so let's do as sync function let's copy this and now I'm going to do const API response will be a it Fage sorry this will be fet now let's go to our API so we need our single product so this is the API that we need so copy this and here I'm going to pass It now what will be this one value this is the D Val this is the ID value so here I remove this and
pass simply this ID that's it now what we do const result and this will be AIT AP response. Json and then I'm going to log this result here now let's save it now see what we'll be getting so go here see we are getting a details and this details is for the product of id2 because this is what we are currently having so id2 let's go back and then I'll click on This let's say 3 4 fifth product click here now you're getting details of id5 and this is working fine right now what we need
to do basically we need to get our set details so we need to set this value in our state right go to context and then we have this product details and set product details so both the things we need so we'll copy this and then we'll pass it here and then from where we'll be getting from use context of shopping cut Context and then simply you can check that if this result is true that means we getting the result so we do set product details will be this result here now let's save it and now
I'll cut it from here and then we will be basically able to get these product details so log here product details so getting object and let's go back let's click on this first product so we are getting this ID with one so this is what exactly we are Getting so now uh what we can do right simply let's render all of this data so first I'll remove this from here so we'll take a div and then inside this uh we'll take another div take a class and we'll do p of 6 large will do Max
W7 XEL we'll do Max W 4 XEL and we'll do MX of Auto inside this I'm going to take another div let's take a class name we'll do Grid we'll do items Center we'll do GD Columns of one for large we'll do GD Columns of five we'll do gap of 12 all right and then we'll do some sad let large and we'll do p of six all right now inside this we will take another div now here uh what we can do right simply uh let's take a class name so we'll do here large sorry
so for large uh we'll do Column column span of three then we'll do W of full for large we'll do sticky we'll do top zero and we'll do text Center okay now inside this div we will take another div we'll take a class name PX of 4 we'll do py of 10 we'll do rounded Excel and also we do some sad sadow large and also you're going to do Relative inside this I'm going to render the image so we'll take image first we'll take a class name so we do width of 4 by five we'll
do rounded and also I'm going to do object overover here we are going to pass the source what will be the source so Source will be your product details that you are having here dot thumbnail then we do alt which will be product details dot title save it so you're Getting this one here so you can see that I think for the first one let's do one thing let's make this one as uh where is that shadow so I'll do here Shadow let's do small yeah I think this is fine okay so this is done
so now after this what we're going to do right so now here if I now log this product details you will be noticing that we'll be getting some images here so see this is the Images so these all are the small small images that we'll be having so this image data that we are going to render here okay so after this uh we will take a class name here uh we'll take a margin top of six let's take this one as Flex Flex wrap we'll do justify as Center gap of six and MX of Auto
here what I'm going to do I'll simply do product details do Image uh I think it will be images do length this is true so I'll do product details dot images. map we'll do image item and here if there is nothing then we'll simply ROM null so here I'm going to take a div okay let's use a key key I'm going to use this image item only and inside this I'm going to take another image and here I'll take a source which will be my image item okay this is fine Now alt uh we will
keep this one as let's do one thing something like um we'll do product secondary image secondary image something like that now here uh we will also take a class name let's do a width of 24 and we'll do cursor pointer also in this main deal I'm going to take another class name so we'll do rounded Excel we'll do p of four and we'll do Sadow M let's do medium and let's see how this is looking let's save it so we should have only one image fine right so now let's go back now let's say click
here okay another thing we can do and that is we will take this set loading here okay and then once we'll get the data we'll make the set loading as false so we do we'll paste this one and then we'll do set loading as false and then here what we going to do right we'll Check if this loading is true and we need to get the loading first so we get the loading from our context and we'll return a H1 that fetching or do product details loading we do please wait okay now let's go back
let's click here we will be getting very fast and now you can see okay now this is fine now next thing what we can do simply we need to render some couple of things okay I think it is Finishing here okay after this we'll do okay so after this we'll take another diff take a class name we'll do for large we'll do column span of two inside this we'll take a H2 and I'm going to render product details. title let's do a class name so for this one I'll do text 2 Xcel font extra bold
sorry we'll do font extra bold and also we do text let's use some different Color so it's coming here okay now after this we will take another div so I'll take a class name we do Flex Flex wrap gap of four and margin top of four now here I'm going to take a p and I'm going to render the product price so do product details dot price now here we'll take a class name we'll do text SM and we'll do font bold let's see how this is looking Let's make this one Excel okay awesome now
after this uh we'll take another div and we basically uh need to keep one we can keep two buttons one will be for like something like add to cut and one is some dummy button buy now but I think for now we'll keep only one we keep this one simple so button and this will be add to cut okay and here we'll take a class Name so let's do something like this so we'll do uh let's do a mean width of 200 PX then we'll do PX of 4 py of three okay we'll do border
we'll do border this color that we we have used this one we do BG transparent all right and we'll do text ASM font we'll do semi bold and we'll do rounded okay and also we give a margin Top margin top of five awesome and I think this will be more than fine okay so now I think this will be fine to keep everything simple now we'll go back and let's see if everything working or not so here let's click okay now another thing that what we can do right whenever we'll change this path we can
basically reset this set details see it's taking some time so that we can do as a Improvement now we'll go back let's click another one okay we'll click this one let's see okay and now let's refresh this okay I think this is fine now first uh we try to complete all the functionality so first what we need to do right on click of this first we need to navigate to the card page so that is our first task so I think that we have already done right so what we can do simply when you'll click
this one first we'll change The path to card now this is a kind of homework that you can do all right so now let's do one thing first uh we'll create on click and we'll do handle go to cut see this is just I'm showing you that how you will be basically learning this concept like how you're going to apply all of these so we'll do handle go to cut so you click here and then where is that function okay so here what we have learned that We have another hook that we can use right
so that is navigate and that is called use navigate and here what you need to do you need to pass the path so I'll just pass here that on click of this button I want to go to the cart page simple as that so click here going to the cart page go back and let's click any other but uh here so let's do this one and then I'll click here add to cut and we getting this one so this is fine now next thing This is one of the task that I want you to do
now we need to start working on the functionality so now for functionality there are a couple of things that we need to do first we need to add to cut means let's say I'm clicking on this button so first you need to store this button information in a state and then once it is added then only I want to navigate to the card page not immediately okay so this is not like I click here I'll go to the card page But how I'm going to store this information so first when I click here first I
need to store this information somewhere then I want to go to the card page right so the for this one first thing you need to do you need to basically create a state go to context and then create another state and that is to store the cart items we'll do const and this will be cart items and we'll do Set Card items and this will be US state of Mt okay and now see very Very important thing that because we are managing everything here so I'm going to create some method here so the first method
will be to add to cut so handle add to card okay now what I am going to do very very important please see this one very carefully like see when I'll go to this when I'll click on this button right that time I need to basically get this product information in our context that means in this method so how I'm going to do that so first you need to Pass this method as a value to your context so this is the first step so I'll save it now we will go to our product Details page
so let's go to our product Details page and then here this method that I just now passed I will get it as a value from your context now what I'm going to do right in this handle go to cut method I'll remove this one that is just for showing purpose so now I'm going to click create A method and I'll call this handle add to cut now what I need to do I need to pass this product information in this method that we have created so here what I'm going to Simply I'll pass this product
details as a argument in this method now this method we are calling from Context but you can see that we are calling this method from this file and then doing the manipulation here so this is the advantage of using a global state or your context when you're managing a State from one place so that means you're passing this handle ad to card calling this and then passing the product details the current product details I'll save this I'll go here right now this will receive a info which info it will receive it will receive the G
product details we do get product details and then I'll log this get product details so I'll do log do get product details save it Now see what I happen if I go here and click on Console you're receiving from where you're receiving from your context so here you can see you getting this information like the product right now let's go back and then let's say click any other item now I'll noticed I'll click here now you're getting the ID with eight so this product information you're are receiving here so now whatever you want To do
you will be able to manage so see first thing what I will do right first I will copy my existing state so I'll do here let copy existing card items so first I'll destructure and take these card items so the only reason what we doing right we are not directly mutating this straight variable that's it and then what I'm going to do right first I need to check That whether this product is already added in cart or not very very important right because if this product is already added then why I need I will give
permission to user to add this product again so user will not be getting that permission right very important so now first I need to check the index of this item that whether this item is present in this array or not so I'll do const find index of current Item and this will be copy exit listing card items do find index okay now here what we need to do simply we'll do card item and then here I'm going to do card item. ID is equal to equal to this get current product you're getting right this do
ID okay and then I'm going to again log this index now if this item is not present what will be receiving we'll receiving minus one okay now see So I'll click here you're getting minus one so if there is minus one means this data is not added sorry if you're getting any kind of noise I think that is because of my friends are chatting so that's why probably will'll be getting some background noise so sorry for that so here what we'll do right if find index of current item is equal toal to minus1 then in
that case I'm going to push this current item that means this item is not present so post copy Existing current items and this will be dot push correct and then what I will do right simply I'll push the current item which is my get current product details and here I'm going to pass quantity as one very very very important means this is one quantity I'm adding for now because from cart page we we will be basically able to increase the quantity so that is the reason first time quantity will be always one and then also
I'm going to Pass a total price here so what will be the total price so total price will be this gate current produ details do price so this will be my total price okay so now if this is post obviously if the product is already existing then we also need to do else but that we are going to do but before that let me just do one thing first I'll log this get copy existing card items so do log copy existing card items save It okay now see if I do add to card you see
copy existing card items you're getting and here you're getting all the information you're getting quantity one and also you'll be getting a total price see this is the total price so this is first time now what I'm going to do right I will just do set cart items will be copy existing cart items so I'm setting this in our state and then also what we're going to do we store this one in our local storage so we do local Storage. set item and we'll give this one name as cart items and we'll do Json do
stringify and we are going to stringify this copy existing card items that's it save it now what I'm going to do right in this list of products I'm going to log this cart items so save it so we'll see that cart items will be getting as empty 54 now I will add this one now you can see that here you're getting this information but what will Happen this item is already added currently now see if I try to add something nothing is changing it's always one the reason is because now the item is already existing
that means fine index is coming as zero okay so this is not coming in the else block this is coming in the sorry this is not coming in the if block this is coming in the else block so that means if this item is already added next time when we want to increase the quantity we need to do Something in the else block correct so if I log here right it's coming here so do it's coming here save it so I'll click first time you're getting this one I'll see if I click once again see
it's coming here means it's coming in the else blog because the item is already added this is very very important now this we are going to do later for now we have already P this item and also set also is stored in the Local storage now what I'm to do right I'll pass this card items okay save it now another thing what we need to do very very important once we'll save this in our cart then only I will navigate user to the cart page so we already I think we don't have so let me
just take so L const navigate equal to use navigate and then I'm going to just simply do here do navigate oh sorry we'll do navigate and I'll just pass this user to card Page now see what will happen so I'll just click here now it's going to the cart page okay now we need to render the cart items here so let's start working on that so let's go to the cart page first let's close everything else so what we'll do simply first take our cart list so this cut list is coming from your context this
cut items sorry this is cut items not list so cart items this will Beal to use Context of sing cart context okay now let's start working on the functionality so first I'll take a div take a class name so we'll do Max w 5xl and what else we'll do MX of Auto then we'll do Max MD and we'll do Max W XEL and also we're going to do py of 4 here I'll take H1 and I'll do my card page here we'll take a class name so We'll do text to Xcel we'll do font bold
we'll do text Gray 800 and also we do text Center okay save it so getting this on here now after this I'm going to take div so we'll take a class name we'll take G we'll do MD grid Columns of three we'll do gap of 8 and we'll do Mt of 12 inside this I will take another Div we'll take a class name we'll do MD of column span of two and we'll do space y of four now here we need to render the card items that we are going to do and after this we'll
take another div we'll take a class name so here what we going to do right we'll do BG gr of 100 we'll do rounded SM P of four and height we'll do Max and after this we'll take a A3 and we'll render our order Summary so we'll take a class name we'll do text Excel we'll do font extra bold see this I'm just giving some casual it's up to you if you want to look the want to make this on like it will look little nicer so you need to change the styling and everything this
is looking very basic you might say but again I'm not uh focusing much on the CSS but so we'll do pvf2 save it so getting Ordered sumary here awesome now after A3 we will take another ul and here what we'll do right do class name we'll do text Gray uh 700 we'll do margin top of four and we'll do space y of two now here I'm going to take another P now I'll take a class name we do Flex Flex wrap we'll do gap of four text ASM and also do font bold and here I'm
going to R the Total and total will be we need to basically render our total we take a span and we need to render the total so that we are going to do okay so once this is done so after this e uh we will keep another dummy button like let's say you want to go to the checkout page so we'll give a class name to margin top of five space y of two and then I'm going to take a button and then we'll do like something like Checkout and we'll take another button and we'll
do continue spping something like that so here we'll give a class name L text ASM PX of 4 py of three will do BG black text white font extra Bold and the same I'm going to use it here also let's copy this okay uh I think this is fine but let's use some Flex gap of two okay now in this case I think this will be fine I think We can remove this space part yeah okay so now this is done now we need to render that total if I click on continue shopping page will
go to the products page from here right so let's Implement that one I think now you should be able to do it so what we need to do you need to do navigate and this will be use navigate and then what you'll do simply take a on click now inline also you can write so we do on click and then I'll simply do navigate And let's I'll go to the products page simple I'm taking navigate so if I click here right it's going to the products page now this is fine now next thing first we
need to render the cart items in this page okay so let's start working on that part so first we'll go here so where we need to render this we need to render it here so we'll simply check if this cart items do length is true or else what we Render we'll render like uh no card no items available in cart page in Cut we do please add some items okay now here what I'm going to do I do cart items. map so this will be your single cart item and here I'm going to create another
component so let's go to our components so here I'll do something like card cart tile and I'll create index. jsx And here we'll do function and I'll give this some name as card TI now what this will receive again this will receive your single card item right and then I'm going to return a div for now simply return this now I'm going to call this cart tile and we'll pass this single cart item as argument here so now we don't have any items go to continue spping now let's say click here view Details okay what
happened if I click on view details click on add to card so you're getting one card item go to continue shopping click on view details add to cart now we getting two cart items but if I refresh this page this will be gone so obviously this we need to do because we need to get it from Storage but first let's create this C tile page component all right all right so let let's start working on the card tile page so let's remove this one Take a div all right so here uh we'll take a class
name we'll take a grid grid Columns of three let's take item start and we'll do gap of four let's do five okay now here we'll take another div class name we do column span of two we do Flex item start and gap of four now here we're going to take a div we'll take a class name we'll do width Of 28 height of 28 we'll do Max ASM we'll do width of 20 and also you're going to do a srink of zero BG will do gray of three 500 let's do 400 let's do p of
1 and we'll do rounded as here I'm going to take a image so here we'll do sours so this will be our single card item so this one we need to take dot thumbnail okay and also we'll Take a class name so here we'll do width of full height of full and we'll do object content okay this is fine this will definitely not work because that is not stored now after this we'll take another div all right so here we'll take A3 and we'll render this single card item do title take a class name so
we'll do this on text base font bold text gr 8 900 okay and then after this we are going to take a button so let's take a button and then we are going to do this one as let's remove that we want to remove that item and here uh we will use the same this style I think this is looking nice so let's copy the same so copy from here and then I'll use this same here okay so first now let's see what is happening go to continue shopping now click here And then I'll do
add to cut so you're getting this one right and this is for remove awesome now after this what we are going to do right so here we need to also render the price so we take a div do class name do AML Auto and here I'm going to take H3 and I'm going to render so you remember we have rendered this total price that we have added in the context while adding the item right so this is the total price that we have Added so here what I'm going to do right I'll do single card
item dot total price and here I'm going to do two fixed so only two decimal number I want to S so this is one thing now here I'm going to take a class name for this also so let's do something like text large and we'll do font bold and we'll do text Gray 900 so here okay awesome now after this we'll take a Button now here uh what we can do right we can basically take two buttons so one button will be for minus one will be for plus minus will be to decrease the quantity
and plus will be to increase the quantity something like that so we'll take another D here let's take and here I'll take a button and we'll keep minus if you want you can keep some icon also here and we'll keep this one as plus so you see we're getting minus and plus now here what we going to do right So let's do let's use a class name here we'll do border and we'll do border this one okay and another thing we can do we take a class name do margin top of three same we can
do for this one also I think that will be more than fine all right and now I think everything is done now let's do one thing okay uh I'm going to do one more thing I'll wrap this one in a fragment paste it here and then I'll Take a HR okay and then I'm going to basically divide this one each and every item so class name I'm going to do border gray of let's do 500 so we'll get a divider now go to continue shopping now let's I'll do view details and then I'll do add
to card so we'll be getting two items okay now if I refresh this page obviously this is not working so this part we need to do and now if you notice one more thing like we Already have stored this in our application local storage so go to local storage here we are having two items what we need to do whenever user will refresh this page we need to get this data from our local storage and we need to set in our state that's it but how we are going to do that so to get in
our first time on page load you can take in your use effect on empty dependency so what I'm going to do right I to set cart items because this is the method name to Store our cart items and here I'm going to do json. parts and we'll do local storage. gate item and I need what cart items because this is the key name that we have given so we have uh card items okay so if this this is present okay or else this will be empty so now let's save it see we are getting two
data because this is now storing or getting from your local storage even if I now go to continue shopping and let's say I'll do This product here add to cut this product is now add added refresh this page so this will be always present right because this we've added in our local storage and on page load we are getting from local storage so this is to get then we doing a parts and then we are setting that in our state Set current items this one so now this is done now next thing what we need
to do first we'll start with this remove now there are two type Of remove so first is this remove this remove will basically increase or sorry not increase this will remove this item totally from your shopping cart and this what it will do right let's say you're increasing this class so the quantity will increase if you decrease this class this will decrease once you have at least minimum one quantity we need to disable this here so this part we are going to do so first thing what we can do right we'll create another method Here
and that will be just like handle add to card we'll add another one that will be handle remove to remove from Cut okay so handle remove from Cut and now here I'm going to get the get product details means which product I need to remove and another another argument we need to pass here what we need to pass we need to pass see as I already told you that we have two type of removal either you remove the complete item or you only decrease the Quantity so either you can create two separate method for this
but I'm going to use only one one single method and then I'm going to check if we have passing a flag that fully remove something like that any name then I'm going to do this functionality or else I'm going to do this one okay and now what I'm going to do right here I'll do something like is fully remove from from card all right so now here what I'm Going to do right first again we'll do the same thing that will copy existing card items and the this will be our cart items then what we
need to do again the same thing you need to first check that whether this product is present or not obviously this will be present because we are doing from cart page but we need to still check it so look const find index of uh current cart item which will be copy existing cart items do find Index we'll do item and we'll do item do ID equal to equal to this get product details get sorry this will be get product details. ID okay now what we are going to do right first we'll check if is fully
removed from card that means you want to completely remove this item from card if this is the case then what you will do simply will do copy existing card item then we going to splice it so we splice based on what based on this index so From this index and how many items we want to remove only one that you completely remove this item okay else what we need to do we need to basically update the quantity see I'll give you one example I think this might be tricky so let's say you having this item
you added one quantity you click on plus this will be changed so there will be two quantity then again click three quantity 4 5 6 7 8 now when you click on this minus so let's say 10 are already Added so it will be 9 8 7 6 5 4 3 2 1 once it will be one that time I'll disable this because you can't remove so then in that case what I'll do right I'll do copy existing card items of this F index so that means we're taking the current item and then first we'll
destructure this content of this item and then what I'll do write quantity so we have a quantity right so this will be copy existing card item of find index do quantity what I'll do minus one that Means we removing one quantity let's say 10 quantity is added so if I click this will become nine 8 7 six like that and what will be the total price so total price will be your copy cart existing cart items of that fine index do quantity so here you are having the quantity minus one so we decreasing the quantity
minus one into we are going to multiply by unit price means let's say one item price is $9 so two will be1 18 3 will be 27 so when you do minus so that means let's say that are three quantities added now click on minus it will become two so that means what will be the total price so it will be two into base price base price is 9 so it will be 18 so this is what we doing so copy existing cart items minus one into copy existing cart items of f index dot price
so that means we multiplying by price so this is what we need to do now once All of this is done we need to do two things first we'll update our local storage we'll do do set item then we'll do cart items and we'll do json. stringify and here we'll pass this copy existing cart items also we need to update our state so we do set cart items will be copy existing cart items and this is done now let's save it now see what is happening click on this remove it will not work obviously very
funny because we need to Use this in our method so sorry in our components we'll pass this method here in our context now where we need we need to get it in our cart tile so first we'll do something like this so we'll get it here so we do const handle remove from cart so this will be use context of soping cart context so we are getting it from here now what we'll do so you're having remove right so we'll do on click and you'll call this method and two Things you need to pass what
will be the first thing the first thing is if I go here right first thing is you need to pass the current item and also you need to pass that whether you want to fully remove this item or not so obviously yes when I click here I want to fully remove so here I'll pass the single card item and this will be true okay but when I'll do this quantity one this one that time I don't want to fully Remove so in that case what I'll do here I'll paste this so instead of this handle
remove from this is fine so this will be false save it now see what is happening refresh this click on remove this is removing if I refresh this I'll be getting only one sorry two remove here refresh this remove we don't have any item and here also you're not getting any item now let's go to continue this one click on View details and now I'll do add to cut now let's say I'll click here minus so this part we need to disable so how we are going to do that now see this is very simple
so we can go here and then we can give a disable property and I check simply if this single cart item do total sorry if this quantity if the quantity is equal toal to one that means there is only one item is added so that time I'll make this one disable and for disable pass a property Here so we do opposite as 65 see now this is disabled see you can't do anything okay so if I show you here so this is disabled now correct all right so now this is next thing what we need
to do on click of plus also you need to do something now if you remember here in this part we have else so when I'll click on this Plus right so that time I need to do something so first we already have this handle add to card so this I'm Going to take it here in this card tile component so I first get it handle add to card and then here in this plus icon what is the plus icon this plus icon I'm going to do on click and then I'm going to pass this handle
add to card and then I'm going to pass this uh single card item now let's save it first we are going to see what is happening because I'll go to context and let's say I will come here in this handle add to Cut now go here console see what will happen if I click here right you'll see we are getting zero the reason is because this item is already added now so that means it will never come in this so what we need to do we need to come to this else block but what are
the things we need to change can you guess so when this item is already added if I click on plus we need to increase the quantity by one so that means one item is already added click on plus this will become two And at the same time the total price will be the quantity into your unit price so if it is $9.99 into 2 if it is 3 9 into 3 something like that and that is pretty simple how you can do that right so we do the same logic so here you can do copy
existing card items of that find index of current item so we'll get copy existing card items of f index we'll do quantity and quantity will be what simply get the copy existing card items of f index do Quantity plus one because we are increasing by one and then what will be the total price so total price will be copy existing card items of f index of current item do quantity plus one so first we doing plus one into here we'll do copy existing card items of f index do price so let's format this so WRA
this here this okay now let's save it now let's see what is happening now see here if I Click on plus increasing right awesome and here if you see now this quantity will be two if you want we can also show the quantity let's do that I think that will be easy so after this I'll take another p and I'll render this single cart item dot quantity okay and then let's give a class name we'll do margin top of two margin bottom of three and we'll do a font bold and we'll do text of let's
say 16 PX so you're getting two also you can do something like like quantity two Okay click here Plus 3 4 5 6 click on here minus 3 2 1 now this is disabled awesome now if you click here completely it will be completely disabled sorry removed we need to update the total right and this is very important now to update the total this is very very simple you just need to do the reduce so we go to the cart list and Here we are having the total so in this total simply what we can
do we'll take a dollar and we'll do this cart items do reduce so we'll do the current item and then simply just do this plus current item dot we have the total price and then we'll pass the zero as the initial value and now here what we going to do right we'll do two fixed we also want to fix it by two save it so we don't have any item now this is zero go To continue click on this add to cut now this is $9.99 click on plus this is updating go to here click
on this item add to card I'll update this one you can see this is updated I'll decrease this is decreasing one and now let's say if I remove let's do this on 19 so remove here both are same this is working fine now can you Guess what else we need to do so let's go to this essal muscara what is the product whatever so you're having this uh this one right now see this product is already added in the card but here still we are seeing this as so we need to disable this correct so
how we are going to do that that is pretty simple we need to check that if this item is already present in this cart items array or not so we can go to a product tile and then here we are having the add to Card I think oh no no no not this one we need to go to the product details huh here so now the first thing we are going to get the uh we no need this one let's remove this so we need to get the cart items okay now here what we'll simply
do that in this add to card we'll add a disable property and we'll check if this cart items. F index of item if this item. ID is equal To equal to the current product details do ID and if this is greater than minus one now minus one always means the product is already added so now here what we can do simply take a disable and we'll make the opacity as 60 65 save it this item is added now you can't add it awesome right go back let's click here this item is not added so click
here now if you go back now this item is added we can do another very interesting thing and that is let's we Also can add the function that we'll be able to add this product from this page also so let's do that one also so go to product and then uh we will create another button let's I want to do add to cut from here also okay and then I'll use the same style and but uh I think this is let's say how this is looking yeah now what we can do simply uh we will
get our handle add to cut method from where From our context so we do shopping cut context now till now you should be able to do all of these I think now it will be very simple so now what you'll do simply take on click and then call this method and then pass what you need to pass the item now what is the item your single product tile okay also you can do the same disable functionality like copy all this part and then paste it here now you need the cart items and you'll get the
cart Items from here your context and then simply add again oh sorry then simply add again here the disable property that you add the disable property and make this one opposite as 65 save it we're getting some error let's see product details is not defined awesome okay this from here we need to make this one as shipping single product details. ID see now these two product are already added to cut right so it's now you'll Add to cut from here it's added now go to this page see this is added if you refresh this event
still this will work view details okay now here we are getting some more error cannot read product ID of product Det details do ID okay so that means it is not getting the product details so in that case what we can do we'll simply check if this product details is present then only check it or Else make the disable as always false yeah that's it so now if I add to cut here this is added now go back refresh this page this is added if you go back here again this is now disabled let's click
here add to cut go back now click on view details now we'll be able to also add from here increase the quantity now let's remove all of this remove remove remove Remove awesome another thing you can do right we can do some interesting thing like let's say there are no items are added so make this checkout button as disabled so we'll go to our cart uh cart page card list and we'll simply do here disable and we'll do if the cart items. length is zero and then we'll add the again the same disable property so
we do a opacity of let's do 60 60 60 this time so now this is disabled go to this one have to to card Now this is enabled okay if you remove this is disabled awesome now this project might look simple but see here you almost will get lot of idea on how you can use main idea was actually to apply all the pro all the concepts that you have learned so far so for example use State mainly use State use effect and then very very important use context and also some of the basic concepts
of react router D all right so I think that's all for this particular project Now let's move on to the next one all right so welcome back to a new section so in this particular section we are going to implement authentication using react and Firebase so as I already told you multiple times in these particular vide is that we are going to basically Implement multiple projects and each and every project will be Associated to a particular concept so that you will basically get a overview of most of the important topics that are associated With react
so now the first thing what I have done I already created a project and here in this Firebase I'm going to create another project for this now I already have some projects that I already created for my practice purposes if you uh I can use the same but I thought that it would be better if I create a simple project from scratch so what you need to do just search for Firebase console in your Google and then you'll basically come to this particular Page you need to create a new project and then I'll give this
one let's say react Firebase YouTube o 2024 okay so let's remove this part let's click on continue I'll keep this enable click on continue you need to select account so I'll select my default account and then I'll create project now this will take Some time and before that let's do some of the cleaning so I'll remove everything from here and then uh let's do one thing let's install react router Dom because that is what we need so we do npm install react router Dom okay this is done now let's click on continue so now here
basically you need the configuration and based on that you need to basically Uh create your Firebase config so that uh Firebase will be able to understand that you have a account and using those credentials you will be basically interact with your Firebase database before that we also need to install Firebase and I don't know why but this will take some time to install so here uh you can see click on this web and here you can give any name uh let's give my web app anything and then click on register app Now here you can
see that it will basically give you all the steps that you need to install the Firebase that we have already done and then you to initialize Firebase with this so you need to First install the initialize app the analytics and this is your Firebase config now again I'm repeating please don't use my credentials okay please create your own project so that it will be easy now this fire config you need to pass or basically initialize with this Initialize app method and here you will be basically will be able to create your Firebase app from here
so this is very helpful this actually we need all right so the first thing what we are going to do basically we will create a file and that will be our fireb config so inside source folder uh let's give a file name I'll give this one as Firebase config.js okay so what are the things that we need so First we need import something from so we have Firebase SL app and this will be our initialize app right now next thing we also need another uh method and that is the O method so uh get o
method because we will be dealing with authentication so we also need to get that so we'll do fire with is SL and this will be o and here it will basically give you gate o method now we are going to create our Firebase config so const Firebase config and here you need to basically copy all of this from here and then simply paste it here okay this is done now what you need to do you need to basically create the app so how we are going to create so we create using this initialize app and
then you need to pass it Firebase config so do const app so here we'll do initialize app and then pass the Firebase config and then we're going to create our Au so Const o and this will be our gate o and this gate o will take the app so you can see that this is take the Firebase app and this app is nothing but this app just now we have created so this will be the app and then we are going to do export default and we'll do o so now this will create our firest
config very simple now what we are going to do right we need to basically set up our pages so how the uh this uh architecture will look right so let's Open some whiteboard okay so see first what we are having so let's say these are the following Pages we'll be having so we have a private route so this route is a private then you're having a login page and then you're having a register page so this is your login page and this is your Reg register page so now how authentication will work is basically you
will be able to only access this private route if the user is authenticated obviously if not so user Will be redirected to the login page and from this login page we will have another link or button so they'll be able to switch to the register page and vice versa something like that okay now if the user is already authenticated and they try to access the login page so what will happen they will redirect back to the profile page or basically the private route because the user is already authenticated so there is no point of showing
this login page and the Register page so this is the simple architecture how this will work so that means we need to basically create some of the pages all right every so we'll start with creating all the pages so let's do one thing s so we'll create one Pages folder here and then I'll create a login page then we'll create a register page then uh we also need a profile page and also you need a private route now one more thing everyone that I'm not Going to focus much on CSS because this is not a
CSS course right so like if you're expecting like very special kind of like CSS fancy design so this will this might not help you because our Prime objective will be to focusing on the functionality first so that you'll be able to understand or basically gaps all the knowledge of different different areas and then you'll be able to create your projects from sketch so each and every uh page will Create our index. jsx right so let's copy this paste it here here and here okay let's quickly create all the pages now I highly suggest that because
we have already learned so many things right so now what you should do basically you should try to implement all of these while watching this video only okay so let's create our function and let's will give login page and we'll do export default login Page now we do return let's return a div with login page okay let's copy this and paste it here for now I'll give this one as private page uh or we can give like AU route let's give o component o page okay then this will be our profile route so we'll give
profile page and then we are having the register page okay so now we have created all the Pages so now next thing what we will do basically will uh we need to wrap these all the pages in our main root component so we need to go to our main. jsx and here we need to wrap our browser router so here I'm going to import browser router from react router Dom and then here I'm to pass the app component save it now we will create all the routes so go to our app.jsx and here we need
to create all the routes so the first thing we need we don't need all of This remove and now here so let's take our routes so first we'll take our routes from Route uh react router Dom and then here individually we need to create the routes so the first will be our route let's give path so here sorry we need to import so do path let's give SL login and also you need to give the element so we'll give here SL login Page next we have a route so we do path SL register and element
will be r register page next now the here the point is we need to basically go to the profile page right but profile page has to be authenticated page so how we are going to do that so we'll take another route here and let's give a path as SL profile and element what we will do right see Here we will basically first import the Au page that we have created and now what we going to do this Au page will receive a children now whatever children it will be receiving all of this will be authenticated
page right so how we are going to pass children so inside this we are going to pass the profile page as a children okay so that means this profile page is a children of this o page now this function we are going to do for now This will not work but that is fine because first uh what we need to do we need to create our login page login page structure Reg page and lot of things so because we will basically need to keep all of this logic in one place so what we going to
do right so let's Implement a context so here I'll create a context close everything else so we have already done context so let's give this one name as o Context Mr Global context so we'll do create context and this will be null and here uh what we'll do we do export default function so do Au State and what this will receive I think this we have already had a discussion right so this will receive all the child component so this will receive the children and it will return the Au context do provider right because this
will provide the state to your child components and from your child component We will be able to extract that uh State using use context hook so this will pass the children and that's it so this is a very simple context now will that work so obviously we need to wrap that in our main component so we'll go here and wrap this app component inside of that of state and we'll pass this app component here that's it so we have also created the context function okay next uh what we are going to do right so let's
implement the login page And the register page first so we'll start with uh register first okay so let's go to our register page okay so first we'll simply create the structure so let's take so I already installed the Tailwind s so we going to use the same so so here we're going to take a w full and also let's go to this register page right so we go to/ register now this is coming and this is coming because we need to uh change some Of the style from here so these all the things are not
required we'll keep the mean width remove and this to will remove yeah okay now we'll take W full we'll do Max W Asm we'll do MX as Auto then what we'll do uh we'll do rounded LG sadow let's do medium now inside this uh we'll take another div we do a class name we'll do PX of Six py of uh we'll do py of five and inside this we'll take another H3 and let's give this one name as something like welcome back okay and now here uh what we going to do so after this let's
take another p and this will be our register page right now remember that what we have done we have created uh we have learned this form controls the dynamic form controls creation and uh so we also learned that how we are going to to use React hooks react hook form but in this particular project we are not going to use any third party library but still we are going to learn that how we going to implement the same using creating our own custom elements so let's do one thing let's create a folder here inside source
uh so we'll create a components folder right and here uh what we are going to do so we'll do each and everything step by step so that it will be easy to Understand so here uh what we can do we can create a common form okay so what common form will receive this will receive the form elements that what are the form elements that you need to render let's say I need to render a input then I I need to render a select or text area something like that and then each and every element that
you are creating let's say input or select or text area all of this will be a single single reusable component so let's say How we going to do that so here I'll give this name as common form now again you can give any name you want and here I'll create index. jsx also I'm going to create another one and this will be common input and let's give index. jsx now here uh we'll do function let's give common input now let's do export default we do common input okay so this Is the first step now these
things are very very important because see the reason it's it's not all about learning fancy libraries because I already seen in uh YouTube like many YouTubers are creating projects like using multiple different fancy libraries believe me or not whenever you go to any big product based companies or any companies they try not to use so many libraries you need to create everything from scratch or let's say you are creating or using a Library so what they will suggest that create your own Library without using any third party Library package as simple as that so that
is the reason you should not use like fancy libraries because you just need to sew it it's not like that try to use as less as possible only whenever it is absolutely required then only you should use third party Library packages okay so this is from my own personal experience and this is exactly what ien it's not like you're Creating a project in let's say in companies like Amazon or something and they will use 1003 libraries to make the website better because at the end the main objective will be to make the website faster or
the performance efficient now here what we will return simply right so uh let's return we'll keep this one very simple we'll return input for now and now this will receive a type right now see this part we have Already discussed that how we are going to create a common so it will either receive a type and if the type is not there so it will be text by default same placeholder so again this will receive a placeholder or else this will be enter value something like that okay next it will re it has to receive
a value then it has to receive a on change correct and here we also can give a class name so either you receive a class name Here or else you'll give a customer class name so let's give like we'll give W full block PX of 5 py of 2 margin top of two okay let's do text black we'll do border rounded large and I think let's keep only this okay now obvious we need to receive all of this from props so it will receive a type it will receive a Placeholder it will receive a value
it will receive a on change and it will receive a class name so now this is your common input okay now similarly for this particular project because we only need input so I'm going to create input now I give a home homework for all of you what you can do right create two three more uh like elements like create a common select create a common text area something like that at the end the logic Will be exactly same so now you already have a common input so now we'll go to our common form and here
I'm going to create a form element so function common form and we'll do export default common form okay so now here uh what we are going to do is we'll return return a div uh let's return return a form and in this part this will basically receive a form elements form elements or form controls so form Controls basically say like whether you need to render input select text area and based on different different type you will be basically using those components so that means this will receive a form controls now again here also you need
a button so here I'll receive a button text let's give button text or else this will be like something like submit type this has to be always submit will give and this will also receive a Button text so now what we are going to do right simply so here I'm going to render form a elements see how I'm doing all of this again if you want you can do all of this inside this only but I'll create a separate function so render form elements will be a function and I'll create a render form elements now
this will receive the form controls so here I'm going to pass the form Controls okay now here what we are going to do simply so we'll keep a cont content the content is null okay or let's do element not content so we do element is null then we'll take a switch and here we have this form controls right or let's do one thing I think we can make this one little simpler so what we going to do we do render form element so single element we're going to do and we single reive get form controls
and instead of Doing like this what we going to do right we'll do form controls do map and this will be single form control and here this will basically do render form element and we'll pass the single form controls okay so that means let's say we are receiving something like this that we are going to see like we are receiving a input that we need to render a input Element then we need to render a select element then text area something like that so uh what we are doing basically we are mapping all of this
and each and every single form element will be receiving here and then we are going to check that if this element sorry this gate form control that we are having the current form control so let's do gate current form control so if this gate current form control is input then render this common input if this is Select then render the select if this is nothing then render default something like that so here what you're going to do is to get current form control dot so this will have a property that called component type now these
all are very very important now component type can be value of input right so here we'll do something like this we'll create const and we'll do element form element Types and here uh let's do so we'll do here input this will be equal to input then we having select this will be equal to select then we are having text area this will be equal to text area so now I'm going to check if this equal to form elements. input then render input correct now here because we don't have currently we have only common input we
Don't have any like select or text area so it's up to you just create two more elements like that and then then take two more case I'll show you so you need to take two more case here and just do if this is Select then you return or return or so select element right if this is text area then you s text area something like that so for now we have only input so what we're going to do we'll simply do content or sorry element and now element What will be element so element will be
common input see and now in this common input this will receive this many properties correct so now I'm going to pass all of this so we'll do first type so this will be get current control. type then I'm do placeholder so this will be get current do placeholder then I'll do value now value we can do right so we can basically receive so inside this common form we Receive a form data so this form data will basically give us the value so here I'm going to also pass the form data as input so now here
I'm going to receive get form data and this get form data will give me the value so this will be G form data of this get current form control. name now this part we are going to see then we are having a name so name Also we need to pass here so we look get current form control. name and also we need to pass a on change and this will be what we can do right uh let's do one thing let's pass this one here only soate current form control do onchange and what else we
need to pass so we're passing type placeholder value unchange class name so class name we don't have anything means it will automatically take the default one now This will basically give you the common input correct and then it will break then it will check if there are any other cases or not and in default so default what you're going to do right default also return the common input only for now so now this will basically give you the element and at the end what this function will return so this will return the element so it
will return the element Okay and that's it so this is done so now let's see what is happening so now we'll go to our register p page now another thing this will receive right very very important this will also receive a on submit method now this onsubmit method we need to pass here so this will take a onsubmit and this will be on submit that will be receiving see now what will happen I will basically import the Common form and now here we need to pass the form controls first so let's uh pass the form
control I'll create another folder here inside source I'll create a config folder and I'll create index.js so do export const register form controls another thing we forgot we need to also pass the name right so we Receive a name and here we need to pass a name which will be equal to name okay so here see how this will be so this will have a name so name will be our name property so register will have three uh three Fields right so first one will be name second one will be email and third one will
be password so first we have a name then we have a placeholder and this will be enter your name then we'll have a component type You remember so this will basically tell us if if this is a input or not something like that then it will have a type so this will be text and what else that we need so we have a type value name on this is fine so now let's copy this and let's paste it two more times so next we have a name sorry let's give this on name name this will
be our email so this will be enter your email Comp type will be input and type will be what email right then we having the password so do password this will be enter your password component type will be input and type will be password so this is what we need and another thing what we can change right so this on change we can basically just like we are receiving a set form data we will basically receive another prop that will be set form data so this Will basically update our values so here we'll simply pass
this so we'll take this will give us a event and then we are going to do set form data so we do set form data and this will return the form data and then we are going to do get current form control. name will be event. Target do value and the same we'll pass it here Also all right now we need to do couple of things so common form we start one by one so common form will receive these these props it will receive a form controls it will receive a button text right it will
receive a form data set form data that means the set State method which will update the form values and then it will on submit method so now let's do one by one so first we will go to our context and then we are going to create Our first state so here I'll create const register form data set register form data and this will be US state so here what we need to pass we need to pass the field so name then we are having email and then we are having password right these three things we
be having all right so now we are going to pass these values here so Copy this and we'll pass this on as a value and this will be these two then we also need to create another method and that will basically do the register of that user and save the user information in our database in our Firebase database so create function register on submit something like that so this will receive the form data I think we'll be able to get it from here only Directly and we'll pass this one here so that means we have
three methods sorry we have a form data so register form data we have a set State method and then we are having a onsubmit so when you will submit that time we need to call this method so now what we're going to do right we'll copy all of this now see step by step how we are doing now go to register now we need to get it from our context so how we are going to do that we'll use use context right this Part we have already discuss that we will do use context and then
you need to pass the context name so what is the context name Au context see now what we need to do we can pass all of these so first we'll pass the form controls so what will be the form controls form controls is nothing but this register form controls so we'll say that render this input render another input render another input so we do register form Controls then we pass the form data which will be register form data sorry register form data then we need to pass set form data which will be set register form
data correct and then we need to pass on submit which will be register on submit then we need to also bu button text so button text will keep this one as uh we do save something like that now see what is happening let's save it awesome right see automatically this Created all of these so now if I go to elements so this created a type of text this created a type of email this created a type of password awesome right and this also change to save forget about styling and everything just learn the functionality first
that how we are creating all of these using a custom without using any third party Library package okay so now you created a common form now how this can be Beneficial now you now see you can also create or keep this one logic in your let's say working on organization and you can create this part whatever you have done this common form as a common module so that each and every team will be able to use that obviously you need to add some more logic like you need to implement the error handling and those things
but this is how you can do it so now common form will do all of this now let's see if this uh value is updating Or not so we go to register so here we'll do register form data and I'll log it here so save it now let's see so I'm getting name email and password fine now I'll just type my name here here you see then I'll give some name email this is getting updated and also password is getting updated here okay so this is fine now what we need to do see what will
happen if I now save it the page is getting refreshed Right the reason is because this the submit is basically having inside form so what we need to do this register on submit will give a event here and now here we need to do event do prevent default now these are are JavaScript Concepts now what will happen if I now click on see okay I'll remove all of these so save it see nothing is happening so that means this is working fine so now we have created a common form okay now what we need to
do we need To basically uh save this uh uh user now once we save this user that time what we need to do we need to basically navigate this user to the profile page correct so that we are going to do but first let's see how we are going to create this user using email and password that user will be basically entering here all right so this register on submit here what we're going to do right we will simply return a method that Firebase will Egypt and The method is create user with email and password
simp simple as that okay now here this will receive the O okay sorry we need to import it why this is not working okay let me do it and we still do import from fireb SL so we'll do create okay now see this will receive three things so it will receive a o it will receive the email of that user and also it will receive the Password okay now if it is successful then it will basically create the user account simple as that so what will be the O can you guess so o is we
already created this o here so this is our o using the fireb config so here we need to pass the O right and then you to receive the email and password so what is email and password so email is this email and this password so what we need to do we'll simply do uh so let's do one thing here Right so D structure we do from register form data and we'll destructure this email and password and we'll pass this here so we do email and password let's save it see now what is happening here we
go to network so give some name here Tom we'll do Tom at gmail.com and we'll do 1 2 3 4 5 6 click on Save okay we are getting some 400 so we getting configuration not Found so we need to do some kind of H sorry I think after this part we haven't done anything so let's go here and then we need to go to authentication right so we need to basically start or configure this so click on this get started and here we'll do email and password and we'll enable this and let's save it
so now this should work let's see awesome so this is done right so now This is basically registered so what you can do right if you want you'll be able to add other users also sorry other user information so this already you are getting here so if you want you can add new provider here so more than any provider that you can add like additional provider like o provider phone passwordless logic and all of these so now you're getting this data right this ID token and everything so the point is we need to basically Redirect
this user to the uh this if this is successful we need to redirect to the profile page so that is one thing and also we need to basically store the current user information so how we are going to do that okay so the first thing let's go to this page so I think what we can do right we need to do couple of changes so the first thing is once user will submit this one let's go to a register so I'll just Do here function in this register page I'll do handle uh register form submit
so we'll do couple of changes register form submit okay so here I'm going to change this on a little bit so I'll do event instead of doing that that is just to show you so here I'll do event. PR default because once is getting stored in the Firebase if that is successful after that we need to do couple of logic so first we will do event. prevent default here and this Part we can remove this one because we will not call this method so here we just return this okay if the user is successful or
not this method will tell us and then what we are going to do basically we'll create another method here and that will basically update our user information all right so this will return so I'll save this one from here now see here I do EV default now what I'm going to do right so this register on submit we are already on let's do This on register with Firebase pass it here then I'll receive it here and instead of passing this one I'll do handle register on submit and now once user will submit so I'll call
this Reg dist fir method okay and this will be a promise so we do dot then now here this will basically give us the result and in this result we will be able to basically update our user information okay and then we are going To navigate the user to the profile page so here first uh we'll just log your result and let's see what is happening and if there are any errors we do catch and simply log the error okay so let's see what is happening so I'll give this on here Tom [Music] 1 Tom
[email protected] [Music] 1 2 3 4 5 6 click on Save okay so you can see that here you will be basically getting this information so obviously this is successful so now here what we are going to do right we are having a user and here you will be basically able to see that whether the user display name is there or not so how we are going to get that so you'll get a name property here I think uh so we are getting display name Ah sorry that's what I forgot so this uh this will basically
give us update profile method from Firebase so that we need to use so what we can do right simply so here we will be basically check that if this result. user if this is exist so I'm going to basically update this display name here see you can see display name so what will be the display name can you guess display name is nothing but this stor one name that we have given here because this is still Exist in our form so how we are going to do that so we'll simply check that if result dot
user if this is exist so we'll call this update profile method from Firebase o right so this is the thing that we need and now this will basically see we need to pass the user so user is nothing but result. user so this user here and here you need to tell that I need to update this display name so here you need to pass the result do user and then you give that I Need to pass the display name see it's already coming so display name is nothing but your register form data do name so
this will update your name and once this is done then I need to navigate the user to the profile page so how we are going to do that so that is pretty simple so we do const navigate and this will be use navigate so here I'm going to do navigate and I'm going to pass the user to profile page this is Done okay now once this is done you can also reset this form so set register form data you can reset all of this data that you are having so how we going to do that
so simply just do here what you can also do it here but I think that is fine that is not that much important first we need to see whether this is redirecting or not and once it will go to the profile page then also we need to render the information but how we are going to do that before that we Need to do couple of logic and because the reason is let's say once you register it will go to the profile page there are certain concept that you need to understand when I refresh this page
again that time I need to some store the state somewhere right so that I'll be able to understand whether the user is authenticated or not that means if I'm already authenticated and somehow let's say I uh refresh this page I still need needs to be on the Profile page I cannot go to the register or the login page so how we are going to do that so to do this on every time the user will register this page I need to store this user information and for that this uh this Firebase will give us another
method that we can basically check so let's go to our context and this is very very important this is applicable to any application that you're building that every time user will refresh the page you need to check That whether the user is authenticated or not so we'll take this on like uh do current user something like that and set let's do user only we'll do user and set user and we do use State and we'll keep this one as null okay now we'll take a use effect because we need to check on page load and
here what we are going to do right we'll take a method check o State and this will give us on o State changed okay and here you need to pass the O see in you need to pass the Au and this Au and then this will basically give you a current user information so here you'll be able to check if the user is present or not so set user is nothing but your current user okay so this is automatically will Set if the user is authenticated and then every time the component will unmount you need
to basically unsubscribe from this so you simply return this check off State that's it so now see what will happen if I just log this user here so currently user is coming null so now what I'm going to do right so first I need to store this information so let's do another thing I'll do Tom two then I'll do Tom Sorry Tom
[email protected] and then I'll do 1 2 3 4 5 6 just click on save so it's going to the Au page sorry profile page I refresh this page okay this is still coming null
so this part we need to check why this is n not coming oh see we haven't passed this on o change only how this will work so we need to pass on o State change and inside this only we need to pass all of This something we have done wrong right let me just do it so we'll do on o change this will take a o current user and here we are going to Simply do set user will be your current user that's it save it okay now let's go to our register page first I
need to check whether this is saving or not so we do Tom 3 Tom
[email protected] 1 2 3 4 5 6 okay so we are having some user information we are getting o and everything now refresh this see we are getting first time this will be null that is fine we can manage some going loading State and immediately you are getting the user information like if the user is authenticated access token and everything so this you'll be able to use so this is working fine see I'll refresh this page see it's coming right so now
this is working so now what is the thing so if I go to register pay here it's still going to the register page right but the user is already authenticated so this part we need to check so how we are going to do that so because of this we need to do couple of logic okay so the first we'll go to our private route and see if I go to this app.jsx This private route is basically or the Au page is receiving this profile page as a children so this will receive a children first and
here we need to do couple of logic so the first thing we need to basically check that if the user is present or not so user will be able to get it from our context and this will be Au context and here we can simply check that if the user is present so simply Return the children right or else if the user is not present means user is not authenticated still you are trying to access the private route that is not possible so you will basically navigate to where you'll be navigating to the let's say
login page right so this is how this will work so that means you are returning the children if the user is authenticated or else you are returning back to the login Page because you are not authenticated okay so now another thing we need to do we need to go to our register page and here we also will be do the same thing that first we'll get the user and then we'll simply check that if the user is present so every time I refresh this page if the user is present I will navigate to the profile
page so I'll do if the user is present then simply navigate to the profile page as Simple as that or else you return this save it see what is happening so I refresh this okay this is not working so this part we need to check if the user so user is currently actually present I think we have done some mistake here so this part we need to check current user okay let's go to the profile page first okay something is going on going wrong here it's going to the login page okay if I go to
the profile page So that means this is not taking the user here okay so what we can do I got it the reason is because first time this is coming null so you can manage some kind of loading State here so we do const loading set loading and this will be will give us state of false and here uh what we going to do let's make this one true and then once we'll get the Information that time we'll do this one as false now this will work so now we'll pass this loading as it State
here okay now we'll go here and receive this loading and we'll simply check that if loading is true then simply return H1 that loading please wait okay and the same thing we can also do in our register page so we'll receive the loading and we'll do here the same thing that if Loading then please wait so now let's see what is happening so do profile all right everyone so after spending some time the issue is basically why this is not working so in the context you can see we have set this current user right but
we haven't passed this user value here so that is the reason it is not getting the user information so now if user is present so it will Return the children so let's see so let's see if I now go to register page so it's going to the profile page right so this is working fine all right so now this is fine so now what we need to do in the profile page we need to render some information and also we need to have a log out button but before that we need to implement our login
page because you haven't done that so let's do one thing let's open our login page And here I'll close everything else let's open our register page and also our config so first uh we will quickly create our config so we do export const login form controls so here I'll copy this uh I think we can copy this instead of rewriting so let's copy because we'll only have the email and password for this that's it now now uh let's copy this part from Here so remove this one so we do div let's paste it here and
inside this we'll take a class name so we'll take this padding part then we'll have a H1 and then we'll do welcome back then we'll take a p then we'll do login page then what we need to do we need to do common form right so we'll do common form and we need to pass all of these so first we'll do form controls so this Will be our login form controls okay then uh we need to go to our context just like we have created our register form data so for login also we need to
create another state and that will be a login form data so Lon login form data set login form data and this will be US state so here we need email and also need the password okay so let's pass uh both of These see we need to pass this in our context if we forget this this will not work okay now uh we will basically destructure all of this from our context so need login form data and say login form data and this will be use context of au context so here we need to pass our
form data which will be login form data then we'll do set form data which will be set login form data then we have a button text and this will give this One as login so what else we need form controls button text on submit also you need to pass so we'll do onsubmit and this will be handle login and we'll create this method here so do function handle login save it so now let's go to our login page and let's see how this is looking awesome so you're getting login page now again the same thing
same process once user will login it will go To the profile page and if the user is authenticated that time if you try to access the login page you'll not be able to access it correct so for that uh what we are going to do right we need to go to our context and we need to create another method and that will be function login with Firebase so this will basically give us our email and password this will be our login form data and then here we we need to return This sign in with email
password so this is the method that we need to use here again you need to pass the Au you need to pass the email and you need to pass the password now we'll pass it here so this method we are passing in our context we go to our login page now here what we going to do right first so handle login on submit let's do and this will receive a event So first we're going to do event do prevent default and then we are going to receive this login sorry uh we need to get this
login with Firebase so receive this method and again we need to do the same thing so we'll do login with Firebase do then so again this will basically give you the result same process and we can simp simply basically First uh let's log this result and let's see what is happening save it now uh let's uh log something here we do result 1 2 3 4 5 Okay so let's say I'll give some value here so we do Tom
[email protected] 1 2 3 4 5 6 login so you can see that we are getting a
user information right and that means this user is now authenticated so what we can do right simply we'll take a const so we do Navigate and this will be use navigate and we can simply if user is true we'll navigate this user to SL profile page so this is First Step again when we'll refresh this page that time also we need to navigate the user to the profile page so that I think we have already done so we'll take this user and the loading from our context and we'll do simply if loading is true so
we'll return H1 like loading please Wait and if the user is present we'll simply navigate the user to profile page all right so now let's see if I refresh this it's going to the profile page right try to access the register page is going to the profile page awesome so now we'll go to our profile page sorry we'll go to our profile page so this is our profile page so we will get our user information here so Use context of au context and here I'm going to render we'll take A3 and we'll render the user
do display name right and also let's render user. email okay user. display name is not coming what is the name that we have given here let's log this user okay display name is coming null okay we need to check this part but Before that let's do one thing let's first implement the button and we'll do a log out and here I'm going to just do on click and I'm going to do handle log out now log out is pretty simple so we get this from our context this is the first step we go to our
context and then simply create this method so let's create function handle log out and here what we going to do right So simply we return sign out from Firebase o and then we'll pass the O here that's it so if I click here it's going to the profile SL login so this part we need to check I think we there are some problem with this private route so let's go to the login page first so I'll do Tom
[email protected] 1 2 3 4 5 6 click on login ah okay now this is working fine But
here the problem is I think we need to uh let's start from start I think this display name is not registered so we'll do with a new user so I'll give a name like let's say Terry Terry gmail.com and 1 2 3 4 5 6 save okay still the display name is not coming so this part we need to check H display name is coming but here it is not rendering this is very weird actually I think in the context we have Done some mistake let's go to our profile page all right on I think
I check that I don't see any issue so let's uh do the same process again let's see where I'm doing something wrong so I'll register with another user right so I'll give my name suum
[email protected] copy this 1 2 3 4 5 6 Also let's give here that if user is present then only I want to display all of this okay so let's see if I just do Save okay this is not coming second time this is coming first time this is not coming right so this part we need to check but if I just
do log out and then go to login page click login again that it is coming okay but if I go to register and then I'll just register with another user suum [Music] one then if I just do save that time it is not Coming but here it is coming coming this is very weird actually so this part we need to check why this is happening all right everyone so after spending lot of time so I also actually got confused that why it is not updating first time so the problem is happening actually here so let
me show you some of the things that we need to do so what is happening right till the time this update profile is updating the display name we are basically navigating to the Profile page immediately and here also we are doing the same and that is the reason when it is going to the profile page for the first time until unless we refresh the page this update profile is taking some time and if you over here right so you can see that this is this will return a promise so here we need to do couple
of changes so the first one is that we will not immediately redirect here so this is the first step and the same we'll do in the login page Also okay and we can remove this loading also so couple of changes we need to do so I'll remove this two part from here then then also go to the this page and also remove this loading now what we will do right so this will update this profile uh display name then it will give us a uh promise and here basically we can check so we'll do console.log
au. currentuser do display name so you can see that so here so not Redirect immediately and we'll see that what is coming here so let's let's log this and now if I just open console let's go to register P I give some different names so let's say dummy dumy gmail.com 1 2 3 4 5 6 save it see now here it is coming dummy so what we can do so there is multiple ways we can do that so one of the ways that we can simply check here that if this Display name is present then
only I want to navigate to the profile page okay so this is one way so now uh second thing so first let's check this one so give dumy one let's give dumy one and I'll give save see now it's coming immediately right but if I refresh this let's say go to the register page now because we have removed that logic so it will be still in the register page so this we can do in our context So in the context what we can do right we can simply take another use effect and here we'll keep
this uh let's do one thing we'll keep the user as a dependency and we see if the user is true then only I will navigate this user to the profile page and this will happen every time you refresh the page because this context will be getting called so here I'll take another const navigate and we'll do use navigate here Okay and if there are any loading state so we'll simply return H1 that loading please wait and we can also do a couple of things uh something like when we are doing this register this time we
can make this set loading as true and also same we can do for login time and on page load this will be Auto I think it's already true so now we can pass the set Loading now let's take this set loading and let's go to a register page we receive it here and then uh first here we can make this set loading as false okay now it will basically go to the this P I'll go to the login page let's go to the profile page right and same thing we can also do for login I
believe so we go here and let's receive the set Loading and here it will be simple so simply just do set loading as false and navigate to the profile page now let's log out now I'll go to the profile page so it's going to the login page I'll try to login it's going to the profile page Log out let's go to register page so I'll give dummy 3 oh sorry copy then RI
[email protected] 1 2 3 4 5 6 click on Save now see it is taking some time but It's actually updating so if I
refresh this page now it will be getting the updated data let's check one more time so we'll go to the register page so we do dy4 dumy
[email protected] so I'll copy this I'll check the login also so I'll save okay now it's taking some time and that time it is basically updating this if I log out and now let's see for dummy 4 1 2 3 4 5 6 this is for login Click on login so you're getting this one and if I go to now login page it's going to the profile page if I
go to register page it is going to the profile page if I click on log out and then try to access the profile page it's going to the login page and this is working fine so the catch is basically till the time register here we need to basically because this will return a promise until unless this is present then only you Will be navigating this one all right and I think that's it for this particular project now let's move on to the next one all right everyone so till now I think we have almost completed
the very basic and some intermediate level of Concepts in react and also learn how we can manage or avoid prop drilling using the concept of use context now it's time to learn two of the most famous uh State Management library that is Redux toolkit and zand now both are Basically used to manage any kind of global state in your react application now I'm not going to go into much Theory details because whatever things that we are going to learn we will be learning using practical examples all right so you can see that I've already created
a project and obviously we we are using V and now for both the projects right again I'm repeating again and again I'm not going to touch much CSS part if you want to use CSS I already use Tailwind CSS or side CN UI or material UI it's up to you you will be able to use those libraries just install and basically you uh whatever you want to do or you want to make that website look better so please use those all right I'm I'm going to focus much on CSS all right so first thing what
we need to do right see first uh the uh point will come that why you need something like Redux or zustand now uh see first thing is that see react is a Single page application right now in your application if your application is very large you will be having multiple Pages multiple components and now there might be a many scenarios where your components are not connected uh with each each other basically but somehow you need to communicate with one component to another component so that means somehow you need to pass data from one component to
another component although there is no direct connection Between those components so in that case what we need to do right we need some kind of centralized state where we will be managing state in one place and from that place we will be able to consume the state all right so for this one the first thing what we going to do right first we need to install two things so the first one we are going to do npm install and then we will do at theate Redux JS and then SL toolkit so this is the first
and then uh to connect your React application with Redux because Redux is a stand loone Library you will it's not like you can only use Redux with react you will be able to use Redux with any other frontend framework like view angular W anything you want so here we need to somehow connect our react application with Redux and to do that we need to use this react Redux so these two things we need what I'm going to do right first we will uh see one very simple example and Then I'll be creating kind of like
a Blog application something like that okay all right so this is done now I'm going to minimize this one I'll remove all of this from here remove this part from here and let's return here let's do a div so I will do here uh let's take a H1 sorry we will do H1 and then I'm going to do here let's Say Redux toolkit okay also you need to remove some of the stylings so let's do one thing let's go to index. CSS and we'll remove all of these I think we don't need these two will
be fine now what I'm going to do right so let's say just think of this scenario that you have a button and then you have a count value but both the components are in a different component so there Are let's say there are some some uh scenario like those two components are not connected with each each other so what I'm going to do right here if I click on this button I want to manage this count value somehow so let's say how we going to do that so first I'll what I'll do right inside this
Source I'll create a counter example folder so do counter example and here uh let's create let's keep this one very simple so I'll create Two component so one will be my counter button do jsx and also I'll create another file and let's give this one name as counter value. jsx all right now first let's quickly create these two components so we do counter button and here uh what I'm going to do so here we'll return a simple button and then I'm going to do here like let's say uh we'll do Increase count save it go
to our app.jsx now we are going to import this counter button component okay now let's go here oh sorry I think we have done in the opposite so we'll cut it from here and we'll paste it here and we need to import it from that component now let's give some uh style here I'll give a style of let's say background color I'll give Black and uh here what I'm going to do I'll give a color as white also I'll do a font white as bold that's it all right so now we'll go to counter value
now let's quickly create this so we do counter value and here uh let's return simply a p and then I'll do like counter value is 10 now let's import this one also here so we'll do counter value all right so now what I want to do I want to manage a state value here this is the value right this is our state value what I want to do right so I need to manage some kind of state here now there are multiple ways we can do that so we can manage the state in this component
this app component and then we can pass as a props but this is possible because currently there are only two components what will happen you have any number of components so you need some kind of store or state where we will be Keeping all of this logic and then from that store or from that state we will be able to consume that state whenever it will be required so for this one let's quickly create one very simple store here so inside the source right I'll create a store and here we'll take our main index.js so
this is our main store so this store will keep all the Logics that will be requ all the state logic so what this store will take right this will This store will take the reducers all right so you will be able to basically pass multiple reducers here and then what it will do it will basically combine all of these reducer and create one root reducers something like that now this Redux tool kit will have a concept of creating slice now what exactly slice mean so I'll give you very simple example and it will be very
easy to understand let's say you creating e-commerce application and you are Having multiple Pages like product listing page then you have a product Details page then from product Details page uh user will add something then they'll go to the cart page and from cart page once user agrees they will go to the checkout page so each and every page you can create those Logics as each and every slice so that means you have a product slice then you have a product detail slice cut slice and checkout slice and then all of this combination Will give
you the complete state of your application so here inside this uh store I'll create slices all right so here what I'm going to do right I will create a counter. JS so this is your counter slice okay now what I'm going to do right here so here you need to basically create the slice so first I'll do export cons so here we'll give this one let's say counter slice and then here I'm going to create a slice using this create Slice okay now this slice will take a name so this name you need to pass
okay this is the slice name now here I'll give this one name as counter okay next you need to pass a initial State okay see remember we have done UST state so UST state will have initial state right something like that so here also you need to give a initial state so here I'll create initial state so we'll do initial State and here I'm going to give this one as counter or Let's give this one as count value so that it will be easy so count value is zero so this is your initial State and
then inside this you need to create your reducers so reducer will take all of this logic whatever accents you will be creating and based on that acction we will be able to communicate with or react with Redux but we are going to see this one in ax and or else it will be difficult so these reducers here you will be doing all of your logic for Example let's say on click of this button you need to increase this count value by one so here you'll be creating a method like increase handle increase count and that
method you need to call from your react application okay now once this is done after this what we going to do right so here we'll do export const and then here you will be basically exporting all of your acction so for examp let's I'll create our first acction which is what I want to do on Click of this button I want to increase this count value by one so here I'll give handle increase count accent something like that okay and this will be a method now obviously we are going to see what this will give
us as argument but here what we are going to do right we'll just export it and then here I'm going to just do like our counter slice Dot and you can see that we are having this accents and in this accent you will be Passing this value so this is your accent value so this is the accon value okay so that means the first step will be you need to create the slice you need to give a name to the slice you need to pass a initial State now initial State can be anything so let's
say you are having multiple values inside of this and then you need to create a reducer and inside reducer you can have multiple accents like you have any number of accents and this accent I'm just Exported here later we are going to see what we will do and now here what we will do right simply do export default and then I'll do to-do oh sorry we'll do counter slice Dot and here I'm going to just export it the reducer now let's save it now what I'm going to do right so here I'm going to create
our store store will basically take the reducers and then it will basically configure the store and after that we need to connect Both our react with Redux so here first thing we'll do const store and this will be your configured store from Redux toolkit okay now here you can basically pass lot of things like the tong your middleware and everything but for now you need to pass the reducer which is a mandatory property okay and here you need to do for now we'll just simply pass our counter reducer okay so let me just quickly import
it so put Counter reducer from slices counter okay and here I'll pass counter reducer so this is your reducer that we have passed now what I'll do I'll just do export default and I'll do store okay but is this works well no because although you have written all of this logic but we haven't connected our react with Redux St now remember when we have worked with context we have actually wrapped the global state in our Root component right remember here we have done this one similarly to connect your react with Redux that is the reason
we installed this react Redux package okay so what we are going to do go to our main do jsx I remove all of these and I'm going to import something that is called provider and here I'm going to now wrap our app component that means again we are doing the same thing so This is we're wrapping our main Provider from react Redux which will connect your react application with Redux store and here you need to pass the store now what is the store this store is nothing but this store we have just now created so
here I'm going to pass the store and that's it so the configuration is now done so now what we need to do right whenever I I will click on this count I need to somehow increase this value but the now point will come like You will think how I'm going to call this handle increase count XM method from our component so we have this component right counter button so from here I need to give on click to this button and I need to call this method so to do this one again this react Redux will
give you a hook that is called use dispatch so here I'm going to just use you dispatch and this will be use dispatch what this does right this will dispatch Accent to the Redux store and this will automatically whenever you call this method from here it will automatically call this particular method it will do certain operation and then it will give you the updated State back so this dispatch what I'm going to do right here I'll take on click and simply I'll do handle uh handle click something something like that you can also do the
inline but that is fine we'll create a function do handle Click and now here what we'll do right we call this dispatch and here I hope you're getting we need to call this method so that is the reason we exported this one so we'll do handle increase count action and that's it so that means this will automatically call that now if you go here this will give you two things first it will give you state and also it will give you accent okay and this accent will have a payload type payload and Also it will
have a type and these both we are going to see so I'll just log here and log this state and we'll do accent save it and now see what we're going to do so we'll go here and let's bring this one below we click here so you can see that we are getting a type and this type is counter SL handle increase count accent this is nothing but the name of this accent payload is undefined the reason because we haven't passed anything from Here so for example let's say we need to pass some value some
argument so let's say we'll pass here in object that we need to pass ID one and also we need to pass a name which will be let's say my name so let's save it now and now if I click here you can see that inside this now we are getting a payload this value that whatever you have passed okay so that means see it's not always the case that you need to you no need to pass anything there might be scenarios that You'll be facing you need to pass some values from here so this is
how you need to pass it and this you will be receiving in this accent. payload so I'll just log your accent. payload right and now sorry if you're getting any background noise okay I think some people are talking outside and here if I click on increase count so now you can see that you're getting in the accent. payload now this state what it will do right this will basically you'll be able To access all of these State variables here so let's say I want to increase the count value so what we'll do simply do state
do count value okay and then we'll just increase by one that's it okay so that means we just increasing the count value by one this is what exactly we need to do and now let's say click here nothing is happening because we are rendering the static value so now what we need to do so we need to somehow get this count value in this counter value Component correct so how we are going to do that so to get the updated state from a Redux Ro we need to use another hook that we called selector okay
so I just get here State and this will give you EU selector and this will give you the updated state so we do here State and now I'll just simply log this state here save it and I'll see you'll be getting count value already is coming three now refresh this first time it will be zero I'll see that I'll increase 1 2 3 4 so that means you're getting the count value here now what you can do simply D structure count value and then we'll get it from our state and then simply pass this count
value here instead of 10 save it so now this is working right so this is how now noticed one thing that both the component are not connected with each other but we are managing this button Click from this component and we are getting the updated value in a separate component so this is how you need to manage all right so now this is a very simple example now what we going to do right we'll move to a little intermediate level of project and there I will be creating a very simple blog application so let's start
creating that particular project all right everyone so now I think we have very basic idea of how Redux toolkit works now let's Quickly create one very simple example uh with some kind of blog application okay so first what I'm going to do right so inside source let's create another folder and I'll give this on name as blog app and inside this we will be basically having uh one page where I will be able to add a Blog and then I'll be having another another component not page where I'll be able to r a list of
blogs okay so I I'll take two components so one Will be blog list do jsx and second will be add new blog. jsx all right so here let's quickly create this so we'll do blog list and let's return a div and I'll simply return H1 and I'll give this one name as blog list okay and also what I'm going to do right I'll comment out both from here And then instead of DX tool kit I'll do blog list okay let's do blog list here only blog list app okay now uh I'll remove this part from
here we don't need then we'll be having another component and this will be add new blog and here I'll be creating our component first let's uh import both of these so I you will be having add new Blog then I'll be having blog list component okay and let's comment out This part from here also all right so now the first thing what we will be doing let's quickly create the UI first so in the UI so first thing in this add new blog so I will be having let's say two input one will be blog
title and one will be blog description okay so let's take a form and here I will take a div and inside this let's take a label and I'll give this one name as enter Blog title and then I'll be having another input and here I'll be giving a type I'll give this one as text name I will give title placeholder I will give enter blog title and what else also will give a ID of title save it okay now let's copy this and paste it one more time and I'll Give this one as blog description
or whatever okay so this will be description type will be text name will be description ID also will be description all right and after this we will be having a button and this will be let's add new blog and the type will be of submit as simple as that that's it so now what I need to do first first thing I need to manage this state of this Particular form right so because we are doing Redux toolkit so let's try try to implement all of this using Redux toolkit only or basically using our Redux to
so first thing what we will do uh I think we already have a store right now let's do one thing uh I think what we can do simply we can use the same store here now you notice one thing we already have slices so I'll create another slice okay so here now I will give this one name as Blog slice let's say or blog do I think it's it will be better if you give blog slice [Music] .js okay now here what we are going to do we will be creating our slice so we'll do
export const we'll do blog slice this will be our create slice and here the first thing what we need to give we need to give the name so I'll give this one name as blog okay then we need to pass a initial State see whatever we have learned so far we are basically repeating the same thing so that it will be easy for a beginner to understand so we take a initial State now what we need to do in the initial State let's we need to manage both of these form data so you need a
title also you need a description so I'll take a form data as a uh State variable and here I'll take two things one will be our title which is our blog title and then I'll be having a description which will be our blog description okay so this is our form data I'll pass this initial State here okay and then what else we need to do we also need to manage our reducer or basically our accents correct so we'll take our reducers and now the first thing what we need to do we need to handle this
both of these Input correct so we'll create one method here and this this will be handle input change okay and now here here what we are going to do right simply we'll create a method and later we are going to see all of this now I'm going to first do export so this will be our blog slice. accents and here I'm going to pass our first acction which will be sorry we need to do const this will be our handle input Change okay so we do handle input change and at the end we'll do export
default and we'll do blog slice do reducer that's it okay now you might think okay so we have we now have two slices but here we should have one reducer so we can have multiple slices so how we are going to do that now see this reducer will basically Redux tool kit will automatically combine multiple reducers you don't have to do anything although you can explicitly use combined R Serv but here what we can do we can keep this one as a object and now let's say you having a counter reducer now we are having
another one which is blog reducer then you can have a cart reducer you can have a product reducer product details reducer n number of reducers what you need to do here you need to give this as a key value so for example I'll give my first key which is counter and for this counter I want to use counter reducer I hope you're getting Then I'll use another one which will be my blog and here I want to use my blog reducer so do blog reducer from and here I'll do slices SL blog slice correct because
this is the name now I'll give here blog reducer so what we are currently doing we are telling this configur store that okay combine both of these individually and create one main reducer or root reducer okay this is done now see what will happen if I go to my add new blog here and then I'll try to access my state so I'll do state which is use selector correct and this will give us a state or updated State and if I log this here right see what we getting save it so you're getting object and
here you'll be getting both notice very very very important see the key name counter and blog so the reason is because this key name is coming because we have given key name as counted here if I give my name here suum save it now see what will Happen so now you can see we getting suum so this value is depend on the key name that you'll be giving here then you're having the blog and inside blog we having what form form data correct so this is exactly what we what we are having here so now
what we can do simply so let's do this on count only okay let's save it so now here so now what we going to do right whenever I will be typing something or basically changing this input I need to update this state Value here or basically this form data I need to update so if I'm typing on title I need to update update the title if I typing on description I need to update the description value although because this we are managing here you will be able to easily manage this one in this component also
so there is no problem with that okay so now what we are going to do right so first thing in this input I will take a onchange now see notice what we have doing so on change will Give us a event correct and here what I'm going to do I will dispatch something now let's do this on not in line so that it will be easy so handle on change input we give on change input okay let's copy this and also we going to paste it here so function on change input will give us event
and now what I want to do I will first take our dispatch right so we take const dispatch and this will be use Dispatch so now what this method will dispatch so this will dispatch this method handle input change correct so here I'll call handle input change and now I'm going to pass something see what I'm going to pass whenever I'll be typing on title I need to pass the key key name as title and the value will be whatever I'll be typing here when I'll be typing on description I'll be passing the key value
as description and the value will Be whatever I'll be typing here so how we are going to pass both key and value see noticed this event. target do value I think this part we already discussed sry not value the name will give me what this will give me the name of this so this is the title and this is the description correct and here I'll do event Dot target. value so that means here what I'm doing I'm passing the target name which is title and the value if I'm typing on description I'm Passing description and
the value we'll see that easily so go to blog slice and what this will give this will give me two things well one will be State one will be accent now let's log the accent here so do accent save it now see type something what we getting we getting our type which is this and inside payload we are getting title is s so title is the key name and this is the value if I type on description now what we'll be getting We'll be getting description and the value here correct I hope you're getting so
now what we can do simply we'll simply do here something like this instead of directly mutating although you can do that but I will not suggest so we do copy uh form data which will be our H sorry this will be our state do form data and now what I'm going to do right do copy form data first I will destructure already existing values and and also I I explain This concept also why you should do that if you don't do this one let's if you're typing on title it will only update the title if
you're typing on description it will remove the title value and then only keep the description so that is the reason you should always destructure the existing values and now what I'll do I'll simply d or accent. payload now you might think why because this payload will give me the key name description and the value so here basically I'm Updating the description and the value is what I'll be getting here okay let me close this so now what I'll do right simply I'll just do here accent. payload okay and now what I'll do I'll update this
do state. form data will be our updated copy form data because this is what we are having save it this is done so now we'll go back and what I'm going to do right in this add new block you can see that in this state what we getting we are getting two value because We are having a count reducer and a Blog reducer so I only want the blog reducer so what we going to do is simply destructure the blog here I hope you're getting so now I log this blog only and then we getting
a form data which is empty both now I'll say type something so you can see blog data will be updated title is getting up they give something in the description description is getting updated so what we can do right simply we'll pass the Value also so we pass a value property and value property will be your blog do form data right dot title Also let's get tary here and here I'll be giving this one as word description so now if I go here right value is updating and if I type here you can see that
value is getting updated for this one also it will be getting updated awesome so now we are getting both the Title and the description correct now what I'm going to do on click of this add new blog I want to create a new blog I want to render that blog also I want to uh basically what I'll do reset this form so let's quickly start working on that but so first I'll do right I'll go to my blog slice and I'll create another method and that will be to add the to-do so to handle add
too okay now this will also give us State and Accent and I'm going to pass it here okay now we'll go to our add new blog and in this form first I'll take a on submit and and I'll do handle to do submit okay and now let's quickly create this method so these all our simple Logics we do function handle to do submit we'll take event and we'll do event dot event default this also have discuss this is to uh uh prevent the default Behavior okay Now we'll see what will happen so I'll save this
and I'll simply dispatch what I'll need to dispatch I need to disp this handle add too method so we do handle add too that's it so now let's save it will this work obviously it will not work because we haven't manage any state but this is just to dispatching that okay so now if I go here let's go and let's log this accent also everyone till now if you're Liking this video please like and share with your friends you can see how much effort and I usually give to create all the videos for all of
you right and if you like and comment down and also subscribe to the channel I'll get more motivation and I'll create more videos Okay so let's see I'll type something here and I'll click on this add new blog so you're getting payload we don't have anything that is fine so you're getting a Blog handle add to do which is nothing But this method so now what I'll do right first thing I will take another state and this will be my blogs blog list correct so this will be first time empty okay now what I'm going
to do simply here we'll simply do state do log list dopus and what I'm going to do right here I'll PST ID now this react native will give you this Nano ID okay so this will to create ID and then I'm going to pass a Title and this title will be let's do one thing let's only this structure this state. form data that's it okay now let's save it now if you see I'll go to blog list okay and here I need our state so we do const blog this will be use selector State and
I'm going to log this here save it so now you can see that we're getting six blog list is is now zero so let's destructure this blog list also okay so We do const blog list from blog and let's remove any console from here okay now I'll do my first to-do or let's see blog and this will be first blog click on add new blog we are getting one data awesome so there is a ID we have a title and we have a description and now we need to reset this but let's I'll type Something
else and add one more so you're getting now two correct and both the ID will be different now it's a piece of cake so what you can do is simply log this right so we take ul and I'll just do blog list do length is greater than zero then we'll render ORS will render like no blog added please add one so do blog list do map so we do Single blog item let's return a div and here I'll do a key so key I'll be taking single blog item. ID and I'm going to take simple
h31 so we'll do single blog item do title and I'll do here single blog item do description okay so one more thing we need to check so add something Here it's coming two times ah sorry it's the title and the description wow man I'm thinking why it's coming two times so let's give a style here or it's looking bad one PX solid trade and there is a reason why I'm not doing CSS in this part because this CSS will become very boring for me seriously I don't like to write M CSS and also one more
thing we need to do we need to reset this form right so that we can very simply do so what we can do When we are dispatching this handle add to do so either you can dispatch from here or you can also make this uh State form data is equal to or reset this right so we can simply do like uh we'll do state. form data will be title uh will be empty and then we'll do description will be empty so this also you can do so let's say I'll do something here and add this
is getting reseted add one more so so adding now see there is one more way I'll show you that is so this is one way and then second way will be this add new block you just dispatch correct so you need to basically dispatch both the things so what we can do right so we'll do uh we do handle input change but I will not suggest to do this one okay you should not do this so do title is empty and we'll do description and is empty so this also will work so we do add
and add new block so you can see that this is also working Right awesome but I think let's keep the previous one so keep it like this that's it all right so now we are able to add at this now what I'm going to do so we can also store this in our local storage right and then we can basically fet it so let's do that one also so what I'm going to do uh let's do here so here we'll do simply local storage. set item and we'll do blog list and I'll do json. Stringify
and we'll do what do state do blog list okay so I'm setting in my local storage now when I'll go to this blog list that time on page load I need to because see if I add something here right so let's say first blog first blog add here if I refresh this I need to get this value from my local storage and also I need to store this in my state so how we are going to do that we'll do simply use Effect and in this use effect we are going to take a empty def
because this will learn on the page load now what I'll do right simply I'll do dispatch so let's Okay we don't have dispatch so first we'll go to blog slice and then what we going to do we'll do set blog list okay and initially initial load set blog list on initial load something like that and and here this will also take a state and Accent and here what I'll I'll do simply I'll do state. blog list will be our accent. payload and in this payload I'm going to pass this list of blogs from my local
storage so let's pass this one in our here now we'll go here right and then first we'll take this uh let's do cons dispatch this will be our dispatch used dispatch and I'm going to dispatch what I'm going to dispatch that set blog list on initial load and here I'm going to Pass so let's do one thing let's do here uh we'll do accent. payload dot initial or we'll do blog list simple we'll keep this one simple so this is the key name so now accent. payload bloglist means here I'll pass blog list and this
will be what this will be json. parts then we'll be doing local storage. getet item and we'll get it from our storage so this will be either this or else we keep this on MTI okay so now see awesome we are already getting Okay now I'll do second blog and then and I'll add here refresh this page so you're getting both so again I'll explain this one this might be little tricky first thing what we have done right so we created a method okay or accent not method these all are accents so here what I'll
do on page load I'm setting this blog list with the blog list that I'll be getting from the local storage and in this page on use effect empty dependency I'm just Dispatching this method or ation and here I'm passing this blog list which is nothing but I'm getting from my local storage just paring it that's it okay so this is done now what I'm going to do right this each and every block list will have two buttons so one will be to delete and one will be to edit so I'll do button and let's do
this on edit blog and then I'll take another one which will be delete Blog okay so now let's start working on that part all right every so now we'll start with our edit and delete functionality so the first thing let's start with the delete one because this will be pretty simple okay so first thing what we are going to do right so whenever I will be basically clicking on this delete blog I need to get the current ID of this particular blog item in my slice correct so first thing what we going to do right
Simply create a method so I'll do a handle delete blog and here it will also receive a state and accent now let's log this accent first save it and then I'm going to pass it here okay now we'll go to our add new blog and then uh here sorry in the blog list so here we are having delete block so we'll take on click now see in this time right you also will be able to do Do it very very easily so what I'm going to do right I'll create a on delete method again I'm
repeating you can also do this on inline this is I'm just doing to explain so we do on delete blog and what I need to pass as I already told you we need to pass the current ID so we do single blog item. ID and I'll create this method on delete blog so we do fun on delete blog get current blog ID and I log this get current blog ID so go here and let's go to console and I'll do delete blog so getting ID click here we are getting ID now this ID we need
to pass to our slice so I already created a method which is handle BL delete blog so simply just call dispatch we'll do handle delete blog and if I go here right we're getting let's pass this one as ID so here I'll be passing in the payload which will be payload here I'll be passing the current blog ID okay now What will be current blog ID this is nothing but this get current blog ID if you want you can change this whatever you like this key name now I think I already logged it here in
the accent so let's do accent. payload and let's go here and then I'll do delete blog we are getting a current blog ID and this is the ID if I click here we are getting this this so now what we can do we can simply delete this so simply You first copy the existing one so do copy uh blogs so we'll do state. blog list let's do copy blog list and now I'll do copy blog list will be copy blog list. filter uh blog item so we do single blog item and then this will be
single blog item. ID is not equal to equal to what will be so this will be this current blog ID so let's destructure first so we'll do const payload from accent and Then we'll do const current blog from payload okay you can also do like accent. payload this will also work but I like to do like this and here I'll do if this ID is not equal to equal to this ID so I'm just filtering that nothing else okay state do blog list will be the copy blog list the updated one okay so this will
delete but also we need to update our local storage so we do set item and this will be our blog list and this will be Json Do stringify this will be copy blog list that's it now this will delete okay so let's see what is happening so go here let's delete deleting refresh this page we'll be getting only one also you'll be able to see from here go to application so getting one let's delete and if I refresh this page okay I think there is some value you're getting some weird value I don't know what
is this okay I think there is some different project that I have done Okay whatever so let's create one let's create one more let's see so let's refresh this okay here now it's coming okay and then I'll just do one more okay it's coming now I'll do delete deleting delete it's deleted so this is working fine all right now next we need to do edit now for I know for some of you edit might be little tricky but I will give you very very basic idea and also I'll try to explain it very simply so
that it will be easy now see how edit Function it will work right see when I'll add a new blog when I'll do edit what I need to do so I need to populate these values title and description here because I will be typing something right so I will be changing this s SD GSD whatever to something else let's say my name and also this AFA to something else so I need to someh populate these values here so this is the first step second I also need to keep a track of which blog I am
currently editing so if I click on This edit blog I need to store this ID of this particular blog in my slice now let's I'll create another blog let's I'll give my name and I'll add new blog so here when I edit blog I need to basically get the ID of this blog so you need one more state right see how step by step I'm doing so we do current edited blog so first time this will be always null okay so this is one more state so now whenever I will basically edit or click On
this edit I will store this ID here in this so that means this is my current edited blog okay so this is the first step now next uh what we going to do so first let's complete this part so here I'll do Set current edited blog ID I think we are doing blog let's do ID okay so this is my method so we are having Set current edited blog so this will give me a method now again I'm repeating believe me there are multiple ways you can do that so don't think like this is The
best way there might be some other much better way also you can do that I'm also might not aware of so okay so there are many ways you can do that so this is one of the way here I'm going to log accent and I'm going to pass the Set current blog ID here also okay okay now I will go to my blog list and here I will create another so this will be my on click and here I'll do on edit blog and I'm going to pass single blog item. ID Okay so this is
the blog that I'm editing so create this method so L function on edit blog late current blog blog ID okay now here first thing what we need to do first we need to dispatch Set current blog ID and this will be if I go here so let's pass here the same current blog ID so passing current blog ID here all right so now I'll go here and I already logging this accent so let's log accent. payload so let's Save it and now let's see what you're getting so go to console now I'll do edit blog
we are getting current blog ID if I do edit blog we getting current blog ID correct so simply what we'll do right state do current edited blog ID is this one so I'll just copy this from here and I'll set this on to current blog ID so that means whenever I'm editing this one and there is a value in this current edited blog ID that means I'm in a edit state so in that case what I'll do right whenever I'll click on edit I'll change this text from edit new blog to edit add new blog
to edit blog and that is very simple what we can do write simply so go to this blog and this blog will give me so I think where we are using this blog okay so this blog if I go here and simply check that if this blog sorry if this blog Dot current edited blog ID if this is true so what we'll do we do edit blog or else we'll keep add new Block okay so now here see I'll click on here see it is changing okay so that means there is a value so I
click here this is changing to edit new block so two things we have done now next what we need to do right whenever I click on edit new block I need to get both of these value and I need to set in this two input and that is also very very simple so what I'll do right in this blog list on this edit blog sorry here what I'll do I'll simply do Dispatch and I'm going to dispatch here handle input change and here I'm going to pass two things so first I need to pass the
title and then also need to pass the description correct these two things so what will be my title so my title will be my block blog dot so this will be my blog dot form data do title okay sorry no here what we need to do we need to basically get the current edited Blog so that value we need to basically store so here what we can do right I think we need to make some changes I think we are getting here G current blog ID instead of odd on edit blog we'll pass the single
blog item that means what we'll do we'll pass the whole information instead of only passing the ID so we'll pass here the single blog item so we'll be getting this value from here so here we'll get the current blog and we'll do this one as current Blog do ID and in this we need to pass get curtain blog. title that means we are basically passing this value the title and the description value and this will be get current blog do description okay let's save it refresh this page now click on edit see here we are
getting right if I click on this edit now this value is changing click on this edit this value is changing so it's Setting all of this so now what we need to do right we need to basically let's I'll type something else here once I'll edit quite a few things we need to do first let's say I'm editing this so I need to update this value from SG D to something else then we need to reset this form then we need to again make this edit blog to add new blog and also we need to
reset this current edited blog ID sorry this one this current edited blog ID to null because once We'll edit that time the edit state will not be there again it will be converted to add new blog State okay so here I'll do one more so we'll do something like we'll do handle edit block okay so I'll take Again State accent and here what I'm going to do I'll pass this handle edit blog now we need to go to add new blog now this part is also very very important see because we are manipulating the same
button so the same Button we using for adding also and the same button we are also using for editing so that means because in this method we are doing this functionality so we need to somehow check that if we are currently we are editing a blog or currently we are adding a Blog how we going to check that so you'll be able to check that using this current edited blog ID now you can see how these are connected so if this is not null that means very very important we are editing A Blog and if
this is null that means we are adding a new blog correct I hope you're getting so copy this current edited blog ID and we'll get it from our blog State correct cor and then we'll simply do we'll check here that if current edited blog ID is not null so that means we're editing so dispatch handle edit blog else what we'll do else will do handle ad blog okay and once this is done after this we Need to again reset something so first we'll reset the Set current edited blog ID so we'll make this on to
null and also we'll reset the form Valu so we do handle input change and we'll make the title as empty and also make the sorry also make the description as as empty okay so now uh if I go to my blog slice now we will see what will happen so we'll go here and I'll do call uh sorry I'll log something so we do Handle edit blog is called and I log save this and let's go here and here I'll do handle add too is called why we have done handle add too anyway this is
fine so now you'll notice what will happen if I just do add a new blog click here okay we are getting something cannot destructure properties current blog ID we are not getting okay so okay I got it so here we need to do it so if so we check if the current blog ID is not null then only we Will reset this or else not okay now I think this will work so let's one more okay so now you can see that handle add to is getting called but if I do edit and that time
I'll click on edit blog okay again we are getting current blog ID is undefined Set current blog ID is undefined oh sorry we need to pass again I'm mistaking here we need to pass so Set current blog ID we'll take this current blog ID right so we need to pass current blog ideas now the format is wrong okay so now you'll see if I go to click on let's say I want to edit this second blog and click on edit now edit blog is getting called okay and also you'll see these both are getting changed
so I'll do edit and click on edit resetting this is changing to add new blog but the value is not changing so that part we are going to create so You go to blog slice and now we have a handle Ed block now first we'll do let copy sorry blog list and here first I'll get state do blog list and then I'm going to take the index of current find current index we find index of current blog current blog item so how we'll get it so copy blog list do find index we'll do blog single
blog item and we'll do single blog item do ID should be equal toal to what current Blog item ID so this will be state do current edited blog ID so if this is same that means so we do if this obviously it will be same because this value will be present so in that case first let's log this find index of current blog IQ save it I'll go to console now click on this edit blog okay now I'll click on edit blog here you can see that we getting zero so that means this is the
first blog I'll click on the third one and Click on edit Blog then I'm getting two okay so now we getting the index so now simply what we'll do simply we copy blog list of find index first I'll destructure whatever value that we are having and then what I'll do simply I'll destructure the state. form data now form data is basically let say if I'm editing this and changing the value so this updated value will be getting from this form dat data correct and then I'll do state do copy blog sorry state do Blog list
will be copy blog list that's it so we are updating and then again we'll do local storage. set item blog list will be jsn do stringify and then I'll do here the copy blog list okay save it and now I think everything is done so let's see what is happening I'll try to do change this and now let's I do Raj or whatever edit see this is changing this is also changing to add new blog and if I refresh this so you'll be getting updated change this one to Let's say YouTube whatever click on edit
now this is changing and also let's say again I'll change this one to Twitter so now this is getting changed awesome right this is working so now I hope that you already got some idea that how you will be able to use told and I'm pretty sure because this kind of simple projects if you're doing handson this is not only help you to create big projects believe me or not but these also help you to cck interviews because in Interviews you will not get hard questions you'll get simple questions but there will be minimum time
so you need to complete all of these okay so that is the reason these kind of questions is very very important for for practice purposes okay so now I think we have already learned how we can do Redux tool gate now next part we are going to use Justin and not not sure how to pronounce that but I think it's uh just stand or something so that is also Another very useful State Management Library so that we are going to implement in the next video all right so in the previous section we have discussed that
how we can manage our Global State using Redux toolkit and also how we can connect our react application with Redux in this section we are going to learn how we can basically manage Global State using justtin now see justtin is actually very different from Redux in terms of how we Basically use it so it's very simple and the main advantage is that justtin will not or doesn't wrap your app component in content providers just like we have done in Redux toolkit so what we have done we have created a provider we created a global store
and then we need to basically wrap our application or app component inside that provider and that is mandatory if you don't do that you will not be able to connect your react application with Redux On the other side just and you can see that your state is nothing but a hook so you will be basically creating simple Hooks and then you will be able to basically use these hooks all the methods and everything in your application all right now without going into M Theory so let's start with the counter example only and I'm pretty sure
that will be very easy to understand okay so first I will just copy this from here let's copy This and I'll install okay now here uh let's do one thing so go and then let's create again the I'll do counter okay counter app something like that now here I'm going to create index. JX or let's do this on count value right this is something like that we have done so counter value. jsx and also I'm going to create another one where we will be managing our counter so we do manage counter now you can give
any name you Want it's up to you now see and let me minimize this one a little bit so create a function and sorry component and I'll give this one name as count counter value let's return and this is our counter value counter value is let's say I'll give 100 I'll copy this and I'll do here like manage counter so this is our manage counter Value as usual I'm going to import this both so we'll import manage counter and also we're going to import counter value all right so both we are getting now see in
this manage count counter let's use a button I think we don't need this let's do a button only and we'll do handle counter value also I'll give some style here so we'll give a margin bottom sorry margin bottom of 20px I'll do a background of black and also I will do a uh color of white do a text or do font size let's write in PX and also do font white we'll do Boulder awesome now what I want to do again the same concept if you noticed that we have two different component so this handle
counter value I want to handle from this component but I want to Update the value in a different component so how we are going to do that so let's uh create our store now this store will be pretty simple so inside the source I'll create a folder named store and here let's give this one so as I already told you that each your store is nothing but your um nothing but a custom hook so I'll create here use counter so this is my hook okay now here what we are going to Do right so this
uh zust and we have a create method okay so that first we need to import so let's do let's give this a name as const use counter and then I'm going to import create now this create will give you a set and this will be a basically nothing but a call back okay so this is a call back function and here what we going to do right so this will basically return all the information that is needed so it Will return all the state variables all the accents or basically what whatever the things that you
want to manage as simple as that so let's say I want to return account value here of 5,000 so this is your state see it is very very simple okay now what I'll do I'll just do export default and then I'll uh uh export this use counter so this is your custom hook we are not using the set method for now so this method is basically used to update the State variables for now is simply returning the state okay so we returning a account variable which is 5,000 what I want to do here in this
count value in rendering this 100 I want to render that counter value okay so how we are going to do that so to do this one first we need to basically use that use counter so we'll do counter which is nothing but use counter right so this will import and then this will give me a state and then first Let's log this state and let's see what we getting so just log this counter or let's do this one like State value save it now let's see what we getting so we go to console we're getting
object sorry and here we are getting a count of 5,000 I'll go here and let's I add another one which will my name I'm just giving you example that how you will be able to do the very basic things so that advanc one will be pretty simple like it will be Just a piece of cake the reason is because you should always start from basic example even let's say currently we are having only two component even it's a 100 components also right the concept will be always the same as simple as that you need to
create the uh hook you need to return the state you need to do the manipulation and then those values you need to use in your component now you're getting name also now it's pretty Simple so now let's say I want to use the count value from state right so what I'll do I'll simply destructure so I'll do const count and from State value and also you can do something like that let's say do count state do count and this I will render it here that's it so now we getting 5,000 okay so this is how
you need to consume the state values so let's say again you you need The name so again you'll get the name and then you'll render but for now I'll just remove it all right now what I want to do I need to create a method so let's say this method that whatever count value I increase this button is record in 50 pages 50 pages we need to do so that means you not create the same method 50 times right so that is the reason we will be creating the method here in this hook that this
hook or basically this will return also a method Which will handle increment count so this will basically do the uh incremental changes for this particular count value now here what we need to do we need to use the set method now this set method will give a state and here what I'm going to do right simply so we'll do this count value that we are having so count will be state do count sorry plus one simple as that okay okay so just setting this value and then we're increasing the Count value by one so this
will automatically update your State uh value for this count now what I need to do basically I need to use this method in my component so that on click of this button I can use that so how we are going to do that okay so here what we can do simply so let's go to manage counter I think spelling we have given wrong but that is fine so we do const do state value again I'll do use count counter and then I'll do state and I'll Do stra then I want to log this one one
again so that it will be easy I can see that you are getting a function so now what we can do right so we'll do increment increment increment count and this will be your this method and then we just call this method here so Lo click and then pass this sorry you need to pass this increment count not that okay now let's save it now let's see what is happening See value is getting updated correct so now I'll go here and let's I give initial value of zero we getting zero see how simple it is
so create you just created a method and then you just have in the Met now let's say you need to do it a uh decrement so you do you can create another method but this will work right this is working so this just to give you a very simple example how you can do that now how you're going to do API call Using this uh justment right so that also we are going to see so let's say we have a dumy a call so I'll use some URL okay so dumy Json or something all right
every so let's say I want to render this list of products in this page so how we are going to do that so first again what I'll do I'll create another method here and that will be let's say Fage list of products okay now here is simply create a async method it is very very simple and then you'll do the API call here so Let's I'll do con API response will be AIT Fage and then here I'm going to call this sorry now I'll do const result will be a API response. Json and here what
I'm going to do right simply I will take another one so this will be my list of product so this is my another state see this is almost now if you think like this is almost similar to Redux toolkit only so in Redux toolkit You you are creating a slice you give a name initial state so this is nothing but your initial state or state variables but here what you're doing is simply creating a hook as simple as that okay and you are not you don't need to create reducers you don't need to create Global
store you don't need to provide that store so it's very very simpler but that doesn't mean the uh doesn't mean that Redux tool get is bad because in top companies we basically use Redux Toolkit only or Redux only but zustand also is a really good alternative okay so we have a list of products so we getting this result so now what you need to do see whenever we'll set something we'll call the set method and here you will simply pass this uh what is that this list of products so will be list of products list
of products will be this result that we having dot products okay so this will fet the products now let's say you need to call This somehow in your component so on page load you need to call this method so how we going to do that so we'll go to counter value let's say here or let's create another one that I'll uh do something like I'll create another so these will be products and I'll give index. jsx and I'll give products so this will be my list of products and I'm going to import it here let's
Say after this so now in this component I want to use that on page load so how we'll do it so first again so here I going to take our state value see every time I'm console loging if you notice this one right the reason is see again the naming con naming is different like use counter but you can give any name you want here so just to give you example so that is the reason I always console log everything so that it will Be easy for beginners to understand so now if I go here
right so I'll be getting another F list of products correct what you can do simply so first you'll get this uh do F list of products let me just copy that copy it so this will be state. fet list of products so this will be fet products something like that and then what we'll do simply just do use effect right and then we'll just call this on page load so we call this method on page Load okay so this will automatically see if I go to network Tab and save this right see there is a
product I think this is getting called two times the reason is we have a strict mode I think let me remove that okay so now see the products is getting called right we are getting the API code but we need to somehow get the products so products is also very simple right what you can do simply do cost product List so use counter now here you I'm doing multiple times that just to explaining purposes you can use some destructuring and everything but I I think this is also a good way of doing so if what
you can do simply just call this list of products here and this product list will give you the products data and now you can think why this is happening because because in this line number you setting the list of products from the result that you are getting From API so we are getting 30 and now if I go here right and let's say I'll take a e and I'll just do product list and and or let's do aary do length greater than zero so we'll map it or else I'll do something like no products available
okay so here I'll products s. map single product item so I'll do a div take a key and Here I'll do single product item. ID and let's say I will render a the product name so single let me see what what we getting here so have a title and then we have a thumbnail okay so we render title and also I'll take a image and I'll do source and this will be my single product item do thumbnail getting right all of these uh we can give some styling also but that is not the important part
here [Music] so refresh this we're getting the data here right awesome so this is how you can basically do a API call also so just created a hook create all the methods and now I'll show you another very interesting way or basically simpler way to do it okay so what you can do right simply you can uh group all of these Accents in one object so something like this so I'll take accents here and then I'll put both this Fetch and This handle inside this and then what I'll do right simply I'll do export const
and I'll create another method so this will be use accents and here what I'll do so this will be method and simply I'll do use counter so I'll do state and then I'll do state do accents so that means we're just passing all of these in one object in grouping so that it will work obviously this will break so now what we Need to do first we can simply D destructure it so just go to our this here so first we'll do const then we'll destructure and call this use ACC just now we have created
and then we'll pass this F list of products here because we're getting and then we can simply directly call this okay also the same thing we can do here so let's go to our count value not value I think we need to go to The manage counter so I'll copy this and then this handle increment count I will call so that means you're are not doing this directly you're getting and then I'll call this here now let's save all this is not let's save it I think we need to import it I think this use
accents that's it so now you're getting all of the same data and this will also work okay okay let's do this one plus Instead of this okay so what I've done I just group all of these acction so that it will it will be in one place and then we just uh create another method kind of and and then we basically calling this state. accents and from here we are just destructuring the with the accent name this accent name that we have given okay so this is very basic idea of using your uh uh zustand
with react all right everyone so now welcome to a new section So in this particular section we are going to learn how you can do basic uh unit uh testing using G and react testing Library although this will not be a very advanced level but we are going to learn very basic things all right using some practical example okay so the first thing I already created a project now I'm going to install some of the dependencies that we need so you can see that first we need some of the Babel preset also we need to
install just and All of this we are going to install as a de dependency we need the testing library of react we need the just Dom and also you need this just environment JS Dom and uh user event so I'm going to copy all of these and then let's paste it here and install all of these okay so now once this is done then we need to do a couple of things okay so first thing is that uh let me first clean up some of the code from here so I remove this one from here
and let's give this one as div And here I'm going to return return H1 and I'll give this one react unit testing tcodes something like that okay save it now let's remove this part also and also I'll go to our main index. CSS and I'm going to remove some of the styling from the body okay so this is done see now first thing what we need to do right we need to create a uh first we'll go to package.json I think all of this is done so we'll create a script first so I'll Create a
test script and I'll pass G so this will be my first step okay next thing we need to create uh two files so one we I need to create a Babel config file so we do dot Babel RC okay and here we need to basically add some preset so we'll take a cly bracket and I'll do here presets so in this preset you can see that I already added two dependencies so we have this Babel preset so this I'm going to pass okay here okay so we need to take Like this and after this we'll
take a array and then we have this preset of react we'll copy this and then we'll pass it here and here what I'm going to do I'll pass a run time and here I'm going to pass this one as automatic so this will be our Babel file now second thing we also need to create a just config file so here I'm going to create gist Do config do CGS and here we'll do module. exports and here I'm going to pass test environment and here I'm going to pass this one as jsd okay because this we
have already installed so these all the things that we need to do and I think we also have all the packages installed now what I'm going to do right we will be learning very very basic things so let's say uh there is a text in your component how You're going to test that particular test uh text then you have a button on click of that you are doing some you changing some count value or doing handling some event how you are going to handle those kind of Click events okay then let's say you are having
a child component that you are using in a parent component and you're passing some props so how you'll be able to test some props value and after all of this is done then we are going to learn uh we'll create a Very simple example with context and then also you're going to learn how you can teste some context also okay so first thing what we need to do right we'll go to source and here I'm going to create a test folder so we'll give like this we'll give tests and inside this test folder I'm going
to create all the test cases now here inside source I'll create another folder and I'll give this one name as components now let's create our first Component which will be a counter let's create first hello world so we'll do hellow world. jsx okay now I'll keep this one very simple so let's say we have a Hello World component and this component will reach on a div and there will be H1 and I'll be having a hello world text now what my task is that I need to basically somehow test whether this text Hello world is
present in this component or not so this one I need to test it so now I'm going to go to our app.jsx and and then let's import this hallo World component here let me just close this and this I'll be having here now what I'll do I'll just close everything else and let's go to our test folder and here I'm going to create a hello world test file Now to create a test file you need to give this do test so I'll give hello World. test. jsx okay so just will automatically detect this one as
a test file and it will automatically pick the test cases from this particular file so now let's say first we need to create a test cases now see to create a test case you can either use this test keyword or you can also use this it both will both will work and both we are going to see so first thing what I'll do I'll create my first test case so test case will be So here you need to take this test which will take a message or this is basically let's say you can say as
a test identifier that what exactly you are doing with this particular test case Okay so let's say you are checking like uh render hello world text so we do render hello world text something like that anything you can give now this will give you a call back now here the first thing what we Need to do right because we are doing this component testing so first we need to somehow render this component in my test file so that we will be able to check that what whether this component has this hello hello world text or
not correct all right so to get to render this one we need to use something from our testing Library react so that will give you a render method so here what I'm going to do right so I'm use this render you can see That this render method will give you lot of parameters that you will be able to use here okay now let's say here first you can see it will take a UI which will be a react node and then you'll be able to pass some options so first I'm going to render my Hello
World component so I'll import my Hello World component here okay so now this component I'm rendering so in this component I need to check whether I'm having this text or not all Right so now here what will happen right so we will be able to basically use some properties so you can see that we have lot of properties and each and every property will basic basically do certain functionality so here what I need to check that I need to check whether this text is present in this component or not so this will give you this
gate by text method so you can see that then you having this get by test ID so this also you're going to see this have get by Test so I'll take or basically get this method and now what I'm going to do right so let's give con check hello world text okay so I'll check here that get by text this should have a Hello World text in my component all right and then I'm going to do expect that but I'm expecting this check hello world text to be in the document right so what exactly we
are doing we are basically telling that J That please check whether this text by this hello world should be present in the document okay save it now to run this test what we need to do because we have already added that script npm run test so if I do npm run test now see what will happen this will automatically run the test here so it is running this text and let's see what exactly we getting so we getting failed okay so you're getting the document is not Defined so we getting something from this JS Dom
test environment so this part we need to check all right every so after checking quite a few time the problem is there is a spelling and this mistake so here D will be small see what kind of mistake is that and also there is a n missing here okay so this is first and also we need to import this uh package that is the just Dom from the testing Library so this also will copy and I'll paste it in this test File okay so now this should work so we'll do npm run test oh sorry
this will be at the rate so if now this will basically get this text so now test is basically passing now what I'm going to do right I'll go here and then I'll do hello world then I'll do one now let's do the same test again so now what will happen because this will check the exact text whether you'll be having or not so it will basically give You that error okay so that there is a mismatch so this is how you need to do it and if I just remove here and then just add
this one here you'll be getting the same result so test will automatically fail and also it will give you from where this test is failing and what is the mismatch and everything okay so let's see what is happening here we are getting unable to find an element with this text correct all right so this is one of the way now we can B basically Also do this gate by uh so there is another method right so we have G by test ID so if I go down this test ID this is very helpful so let's
see one more example with this so we have learned one very simple example now what I'm going to do right let's do one thing that we will have a or I will do one more thing right so we'll do I'll take another paragraph here and this will be I'll give my name and here what I'm going to do right We will be basically adding one property and that is called the data test ID okay so we'll take data test ID and here what I'm going to do I'll give like some name so this is the
Taste ID of this paragraph now what I want to do I want to check the same that whether this text is present or not okay from this by this test ID so now let's save it what we going to do right so go to our test file and then uh let's say I'll create another test okay and I'll do That check uh Name by test ID something like that and then again the first thing we need to basically render this so we'll do const this so I'll do render so we render the hello world and
I will simply do here get by test ID okay now what I'll do basically so first if I hover here right so this will Basically get ID or which will be the matcher matcher is nothing but the name of this test ID so this in this case this is name so first I'll do first I'll get like const sorry we do const get element first I'll get the element which will be get by test ID and then the name will be this will be name the reason is because this is what we've given here okay
so now what I'm going to do simply I will check that expect this gate by test ID sorry get Element Dot and you can see that this will give you all the properties that you'll be able to extract uh or basically check so do test text content because this is what we are having this is the text content of this element and this so what we can do simply we will do 2b so this has to be and then I'll give my name here and this will be I'll copy from here exact and I'll paste
it here that's it now let's save it and I'll run the test Again now let's see what is happening okay one is failing okay so this is failing right so this we need to change hello world okay this will be hello world fine now I think both should pass so now if I run the same again right so you're getting getting passed now what will happen if I just come here and then let's give name one so obviously it will not find that particular element by this test ID so The test will faill so that
means whatever you will be basically giving the match that this has to be same so here you can see that you're getting here error so something like that and believe me this is very very helpful this gate by test ID so what you can do you can simply give it data test ID in that element and then you'll be able to get that element using this get by test ID and this element will give you all the properties that you want to access And based on that you'll be able to check the value all right
so now this is done now next let's do one more thing I'll create one more component here insert this and let's give this one name as counter. jsx now what I'll do here let's create a simple component this will be my counter now this component will have a if this component will have a count so we do count is colon and here I'll give this value So I'll take a count state so do const count set count this will be US state of zero and after this we will be having a button and this will
be like click and what I'll do I'll do on click I do handle click so this is my method I'll create this method so do fun handle click and here I'll do set count will be count + one simple nothing we are doing and here I'm going to render the count okay now let's go to our app. jsx and I'm going to import the counter so this is getting uh we are increasing this correct now what I need to do right I need to basically check that whether this click event is working properly or Not
That means every time so I'll refresh this page and every time I click currently it is zero so I'll click one time this becoming one I'll click again this becoming one from two so that means every time we are clicking we are increasing this by one okay so this is The same test we are going to do so let's go to our test and I'll create counter dot test. jsx now let's import all of these first we know need to do so I'll copy all three I'll paste it here and I'll take a test sorry
we'll do a test and I'll do test counter logic something like that again you can give any suitable name you want here this is just to basically give you the description that what exactly You are doing with this particular uh test test file or test logic and here what I'm going to do right first see I'll show you two ways how you can do that one will be using the um G by test ID uh this is what we have done this gate by test ID and one will be G by text both we are
going to do so first I will do like const first what we need to do I think we have already learned right we need to render and we're going to render our Counter component because this you need to always do because this is where you are doing or testing all the logic and here I'm going to do get by text now what I will check right I will check let me close both I will check this noticed one thing like we are having this count is Count I will check this count value here that count
value so if I'm clicking the button one what will be count value become one if I click this uh click one more time it Will become two then it will become three so if we can check that this text is coming properly that means three time I clicked if this count is three that means this function is working fine so you're doing backwards I hope you're getting so let's say I'll click on this button five times so we'll check this if this count is five available in our Dom count is five that means this button
click is working fine correct so we'll do here count and then what I'm going to Do right so first I will check const get text we look get counter text and this will be get by text and what I'm going to do right I'm going to copy this exact thing now see and pass it here pass it here and what will be the first time value so count will be zero see notice this part if I refresh this right count is zero so this is exactly where what we are passing that first time initial time
this should be Available in the Dom correct now what I'm going to do right I will do const get button element by text so to get by text and then what is the text in the button we doing click see now we are not using uh this test ID we are doing using this text so we check this click so this will give me the button element and now what I want to do right I need to click on this button so if I click one time this should be one but how I'm going to
Trigger a click event from this test file so this will give us this fire event from testing library from react so this will automatically trigger a element first you need to pass so in this case what will be our pass so obviously first what we need to do we need to tell this fire event that what exactly I want to do so if I do dot you can see that we are having lot of properties like drag copy double click drag duration whatever you want to do Right so I want to click on this button
so I'll do click and here what I'll do I'll pass this gate button element by text so that means what we are doing we are clicking on this button I hope you're getting now what I do I'll do expect and here I'm going to pass this get counter text Dot and here I will do text content and I'll do 2b and what will be so this will be count is very very important This part one that means initially count is zero clicked on this button one time count will be one so if I click here
this is becoming one right so this is exactly what we are checking so let's save it and let's run this so all are getting passed now see what will happen if I just do count is 10 here save it run the test [Music] again one is getting failed so it is telling that expected is count is 10 This is what we have given but received count is one because that is what because if I click here it is we are changing only one time so this should be one right so that is the reason it
has to be one now let's say you click on this button again so I'll do fire even click now what will be so count is one count will be two I hope you're getting so now this count will be two so we click two times so based on that we are checking now if I run this Right okay so getting ped all right let me just clear this and run it one more [Music] time okay all right so now you hope that how we are going to do a event uh checking okay now next thing
what we going to do right so let's do something like this so we'll do another logic where we will be having two components so one will be having a parent component and one will Be having a child component and then we'll be passing some simple text as form of props okay and then we are going to check that all right so let's go here and then let's create another component and this will be our child component let's give child. jsx so that it will be easy and now here what I'm going to do right I'll
create this component so this is my child component here let's return a div now this will receive a count value from the Parent component as a props and then we'll simply take a p and then I'll render this count simple as that and also I'm going to give a data test ID and I'll give this on name as child count value something like that now I'm going to use this child component in this counter component so I'll import this child and what I'll do I'll simply pass the count which will be this count value Here
so now let's I think this is fine now you can see the that in both the places we are updating but this child component I need to test okay so now I'll go here and then let's create another test file here so we do child dot test. jsx now let's go here let's import some of the things that we need we'll copy all of this and paste it here now first thing what we need to do basically so we'll take another sorry we'll take Another tast here and we'll do oh sorry and we'll do here
check props value this will give us a call back and here what I want to do first I will get this child count value from this test ID and how we are going to do that I think we have already learned this one that we will do using this so first we'll do render and then what I need to render I need to render the child component because this is what we are checking and here I'll do get by test ID Because this is what exactly we are giving here now what I need to do
right in this child component because we are passing data as a prop from this counter very very important so I'm going to pass a count value as a Prof and I'm going to pass a uh static value so 500 now see why I'm I'm giving focus on this part very very important because whatever you're passing so let's say here currently I'm passing four click here so five so that means this five value I'm Passing so whatever I be passing in this child component that Valu should be present in the document of that component all right
so now I'm passing 500 so if I pass 500 so this will become 500 right so let's say if I go here and let's say I'll pass 500 here save it so we are getting 500 right so now here what I'll do simply so getting get by test ID and then I'll get the con get element and this will be get by test ID And then we'll go here so I'll copy this and then I'll pass it here and now what we're going to do simply we do expect this gate element do text content to
be what it should be because we're passing 500 this should be 500 correct as simple as that so now let's run the test again so do npm run test okay all the test case are passing right what will happen if I just do here Pass 50 but we are passing 50 but expecting 500 so this will fail so one is failing right we are expecting 500 but we received actually 50 because if we are passing 50 as a prop it should be 50 so here we'll do 500 and then it should work again so now
let's do one more thing let's try to let's we'll do one more practice right so we'll create one functionality in this component which will be a theme and then we'll be changing the theme from Let's say true to false and false to True something like that so let's Implement that uh feature so here this is just for practicing purpose I'll do I'll create a theme and then I'll create a set theme and this will be use context oh sorry not use context this will be use State and then I'll take this one as false then
here I'll be having a button so we'll do a button and we'll pass a data test ID here Also and I'll do this one as let's say toggle button right so we'll do toggle and after this I'm going to take H1 and here again we can take a data test ID here also so do data test ID and this will be like what we can do we can do like toggle text and I'm going to check here that if this theme that we are having if this is true so I'm going to render true or
else I'm going to render false and the same Thing we need to do so on click of this again we'll take on click and I'm just going to toggle so do set theme is not equal to theme so we are changing so it's true false true false now we have already practiced this example so I want you to write uh this test Case by yourself so what you need to do I'll give you the idea first you need to get this button by the test ID right then you need to trigger a fire event and
every time We'll do a fire event let's say the current value is false so you will be expecting false you click the button it will become true and vice versa so let's try to implement so pause the video and try to implement by yourself all right so let's let's do it so I'll create another test and here I'm going to give like check toggle text okay now here what I will do right so first I'll Do const so I'll do render and I'm going to render our child component and let's pass this count property as
100 for now and we need the gate by tast ID so first I will get the button so get button toggle button element so this will be G by tast ID and let's let's get it from here so we having toggle text no sorry toggle Button and also you need the toggle text element which is this H1 so you're having toggle text so I'll copy this so the const get toggle text element which will be get by test ID with this okay now initially if I go here initially this is false notice one thing so
if it is false so we should have false first time so if I refresh this page right so false first time on the element so what we'll do first first Time we will not do any trigger so we'll do expect get toggle text element. text content to be what it should be false correct and now after this we are going to do a fire event do click and then I'm going to pass get toggle button element so we clicking if we click one time that time what will happen this expect get toggle by text element.
text content become true I hope you're getting so first time it is false we clicked on the button so Click here it become true so this is exactly what we doing now again we'll click one more time and then what will happen so it's already true so it will become false right so now let's test this okay so all are passing right awesome so now this is done now next what we going to do we are going to do a API testing also and I think that is very important so let's create another component here
and I'll do here Like AP I testing. j6 now let's quickly create this component so function we'll do API test API call test so here let's return a div so first I will take two states so one will be my users set users and this will be used state of empty array and also I'm going to take a loading state so do const is loading set is Loading which will be used state of false and here what I'm going to do on page load I'm going to page the list of data so I'll do use
effect and these things we've already done so that's I'm not explaining any details so we going to do fet users something like that fet users okay and I'm going to create this method so do asking function f users so do a try block and then a catch block so in the Catch I will get error and I'll do console.log and we'll do error uh we'll do error and then we'll simply pass the error here that's it and in this try what we'll do simply do const response will be AIT Fage so we are going to
use the Json placeholder https so do Json placeholder dot typ Code.com users and then here what I'm going to do to const data equal to AIT response. Json and after this we are going to do set users will be our data and we'll do set loading as sorry set loading as false and first time let's make this one true so now let's log this users and loading and let's see what we are getting we also need to import this Right so we'll go to. JS and I'll import API call test so we getting list of
data so now let's render all of these so we'll take a div and here first I'll check that if is loading is true right so I'm going to render that let's return H1 and I'm going to render loading data something like that okay or else we are going to map this so we'll take ul and we'll do users do Map we'll do user we'll do Ai and then I'm going to render user do name so this one so do user sorry I think oh we need to do it this on outside so this will be
user.name also give a key which will be user. ID so let's save it let's see what we're getting so we're getting 10 data so this is all about a very simple API call now we need to create our test cases so first we'll go go here and then I'm going to create another file and then let's give this one as API testing. test. jss okay so how we are going to test API call because we need to get the data and this will be Asing operation right every time you'll be doing so now I'm going
to show you a different way how we are going to write test cases also so one way we have discussed that using test keyword now what we can do right we can also use this it keyword to create a Test and now let's say you are having multiple test cases you want to group all of this into one main one use case Okay so that is the use that is the thing that you need to do so it's not like you need to create separate separate test cases that whatever you have done so what you
usually do right so let's say you have a file and in this file you need to write 20 test cases and you need to combine all of this into one so that it will be inside a group and it Will be easier for other developers also to understand so to do this one what we'll do right we'll use this describe now this will be basically use to describe that this is API testing file something like that so this is your main test case and inside this you can have multiple test cases so this will also
give you a call back now you can have one test case and then you can have multiple test case here right so you have one then you can Create two three four whatever how many you want something like that okay and also we can use this it keyword so now what I want to do right so I want to use this it keyword now instead of test because test we have already used and I want to check sorry I want to check that uh check list of users fing something like that this will also give
you a call back now how you're going to test so first thing if I go to This component right API testing so here using this fet so first you need to mock this fet method of JavaScript so how we are going to do that because if you don't do this one this will this is returning a promise and once this response is satisfying then only we are getting the data and setting it so this same behavior we need to replicate or else it's not possible to do that so to do this one to mock this
one we can create a fet method so do global. Fage Right and this will be so to create a function in Js so we can create this just do function okay so this will be a function and here what I'm going to do what this exactly is returning if you're noticing as I already told you so this is returning a promise right so this function this global. F will be a just function which will return return a promise so I will do promise. Resolve sorry promise. resolve now what this will return so this will return
a list of users in which format again very very important in Json format so here I will do this will be Json and here what I'll do simply this will again return promise dot resolve and here this will be returning the list of users so for example I'll have a ID of one and name of let's say my name whatever Right then I'll have a ID of two and then I'll have a name of joho so first I mock this so what I've have done I created a global fetch which will be G function which
is returning a promise once this promise is resolved this return a Jon which will give you the data okay this data is nothing but this data that you're having here so this is the first step now once this is done okay let me check okay after this I will do I Render so we need to render so let me import it first we need to render the API call test component okay now here what we can simply do we can do like expect now this react testing Library will give you another thing that is called
screen so we need to also import it so we do screen and this will give you again all the methods that whenever first time I'm rendering what I need to expect now here You need to little bit understand this part so if I refresing right if you noticed before this data is getting loaded we are getting this is loading sorry this loading data this text right so if I refresh this noticed getting for some time and then we getting so first time you'll not be getting the list of users immediately very very important so that
means in the first time you will be having this loading data in your Dom and that is the thing that I'm doing so do Screen. get by text and I will check that this loading data should be there so copy this from here pass it and what I'll do simply we'll do 2b oh sorry this be to be in the document okay and now after this what I will do I will wait for some time because we need to wait for the component to finish the rendering of That API call once the API call is
done then only will be getting the list of users so how we are going to do that to do this one we'll take AIT and here we need to this react testing Library will give you this waight for method okay so this this will wait and once this is done then what it will return this will basically return the list of users also we need to do another thing we need to convert this one to async Method so as sync now here what this will return this Will return the list of user that means whenever
this is done see what I have done this should be inside another object so once this is done then this will return return so I expect so what I'll expect that screen doget by text right so here this my name so this name should be there in the document so this name is nothing but the user's name so I'll do get by text and my name and this will be 2B in the document Okay and also we'll copy this paste it here and also this joh will be in the document all right so after this
once we'll check this one that we'll got the list of users so we can optionally also check one more thing and that is that first time if I go to that component right we are having this loading data so once we'll get the data back so this should not be there so that also we can check so after this what we can do right we'll Do expect we'll do screen dot we do query by text and we'll check the same that this should not be there so do dot not that means it should not be
there in the Dom and then we'll do Tob in the document okay let's save it and now let's run the test case so we'll do npm run test okay one is getting Failed two we oh sorry we need to import that JS Dom also okay let me just do that so I'll do import first I'll import react from react and also need to input this uh testing Library just Dom okay now let's see now this would work okay so now let's recap everything first what we're doing so first we basically mock this F API so
which will be basically nothing but a function which will return a promise once the promise Is getting resolved it will return return the data as a Json format and this data I'm expecting okay because we're rendering the name right here so I took an ID and name then I'm rendering the component and then I'm importing this screen and this again will give you the same methods that we already used so first I'm checking that when the data is not getting loaded this loading data should be present in the document then we are using this wait
for okay so this Will wait and then it will you can see that it will in the call back it will return a promise it is because you're doing a Asing operation and once the promise is getting resolved what we expecting we're expecting that these names so each and every individual users's name should be there in the document and this is exactly what we are doing that my name and this John do should be there and once we get the user information back that time this loading Data should not be there okay so now I
think we have already covered the basic things of testing now let's do one thing what I'll do right I already created a simple context project so I'm not going to write the uh project code because I already have written this one what I'm going to do right will'll be writing the test cases for those so let me quickly just uh uh like copy P the code that I've already written and on top of it we are going to start writing the test Cases for that particular project all right everyone so what I've done right so
I created a simple project so I'll just give you the overview so project is nothing but we are managing this strle theme from a context okay so you can see that we are having a context so what this is doing so we created a context and then we are consuming this context from using this custom hook which will return the use context and then we have pass this theme context then we we are Creating our Global state or basically our provider of the context so we have a theme provider which will receive the context these
all of this we already discussed so we have a state which is basically our initial theme is light and then we are toggling this theme so if the previous theme is light we are making this on dark and vice versa and then we are providing this to our uh context value then we have a button component where we are toggling this and Then we have a theme component where we are rendering this theme Here and at the end in our main. jsx we are uh wrap this theme provider inside this app and here we are
having all of this so for now I'll just comment out all of these right so only keep these two this theme toggle button and the theme content so let's start creating our uh test cases so first thing what I'll do right inside this theme I'll create one more folder I'll give this one name as context or uh Context test and then I'm going to create our context dot so here I'll do context. test. jsx so first thing in the context so what test you need to do see context will receive so let's go to the
main. jsx so context will receive a app component which is a children right and this app component is a combination of these two comp components so first thing you need to test that whether this Context is receiving the child component or not and then if it is receiving any child component or children it needs to render it so let's get started so first I'll import some of the things so we need react then I'm going to import our G Dom so let me just copy it from here okay now what I'll do right I'll give
a describe I think this we have already discussed and I'll give this on name as That test theme provider right and inside this first we need to check that whether the provider is rendering the children or not children is nothing but all the sub components that we are having in that context so in that case we having two component one is the button component and one is the uh text component where we are basically rendering the content now although Currently we are having only two components it doesn't matter if we having 100 components the concept
will is still same so here what I'll do right I'll give a it and sorry and here I'll render like renders children with initial light theme value because that is the initial let me just close all of this and I'll open the context it will be easy so you have initial value of light so it should Render the children so these children see I'm explaining step by step so it it will rent the children as well as that should be the value should be light so this is what exactly we are checking and here what
I'll do right this I'll do const and then I will use render from testing library and what this will render this will render the theme provider correct and here I'll do get by text and here I can pass any content like because this is a children right so I'll do this is a this is a child component so this is what exactly we are doing so inside this theme provider we are passing a dummy child component so now what we can do simply we can check that expect this get text sorry get by text and
here what we need to check basically this child component so this content so this content should be there in the document so means what I'm trying to explain here is that whatever component We are passing inside this theme provider that content should be there here so for example if I copy this right and let's go to our main. jsx and after this I'll pass this if I save it so we are getting a child component right so that means we checking the same thing that if we are passing something inside this that content means this
content should be there in the document I remove this one it is not required just for explaining Purposes and here what I'll do simply I'll do that this is a child component this is 2b in the document so we do 2b in the document so this will be our first test now what I'll do right let's say I think this is fine now let's copy this relative path so I'll do copy relative path and I only want to run this test so I'll do npm run tast and I'll paste that path so let's see what
we getting if we are getting any error so that we need to Check uh sorry we need to give the pattern right to test corresponding uh path so we haven't said that have but for now let's do npm run test only so it should pass all the test so let's see what is happening awesome so all the test case are getting passed and here also this is getting passed right so that means this is working fine now I'll just simply do like children child to children and let's see this is just to Give you the
idea that it will fail because this will be this will be a mismatch and it will not get this content so the expect and the actual result will be different so the test will fail so we are failing one test right so here okay but if I just change this on to children and let's save it let's run awesome so now this is fine now next thing what we need to check we need to check whenever I will be clicking on This button toggle theme it should change the theme from light to dark and then
like dark to light vice versa so this part we are going to test so let's see how we are going to do that all right so let's go to our context and then what I'll do I'll create another test case so I do it and I'll do here that uh top theme between light and dark value on click off Button this will give us a call back and here what we are going to do right so for this one I'll create a dummy component here so let's create a component so I'll do const I'll do
toggle let's skip consumer and here I'm going to read turn a div and this should have a button and then I'll give a roll as button there will be on click and I'll do here Const I'll do theme and I'll do set theme sorry not set theme let me see the name so I have uh toggle theme I think toggle theme Here theme and toggle theme so this from this context from this use theme that we have created this one we are going to extract so do theme toggle theme from where so from use so
we have a use let me check the name use theme so we do use theme okay so this is the reason we have created this custom hook so this will Give us the this two value that we are passing in the context so we having theme and toggle theme and on click of this button I'm going to pass this toggle theme because this is exactly what we are doing right this toggle theme we are calling in this button if you noticed right all are connected with with each other so here what I'll do I'll give
a name like toggle theme all right and then after this I'm going to pass Our theme content component okay that's it now let's save it now what we are going to do right so here inside this second use case first we will render so we'll do cons then we'll render what we need to render we we need to render the theme provider first because inside theme provider what will we will pass we pass this toggle consumer component that we have created so we'll do toggle consumer okay and now here what I'll do I'll take two
things we'll do get by text and another new thing I'm going to show you that we have added this Ro in this button so we have another method that we can use that is get by ro okay now here what we can do simply we'll do const get toggle button by roll and here we'll do get by roll so this will be a button correct and then we're going to give a name property here so name will be here so slash the name Is togle theme so this is the matcher that we are passing okay
so this by this toggle theme if I go here we have a toggle theme so by this we getting the button first once you'll get the button so in that case what we going to do right first time when the context will load what will be the value so first time value will be light so what we can do we can simply do expect and then we'll do Get by text and here what we'll do that light theme let me see the value so we have a light theme if I go to the theme content
right let me go to the theme content so we are showing this light theme if the theme is light we'll show the light theme because this is exactly what first we are sh so we'll we'll tell that that first time this light theme this text to be in the document correct this should be there after this what I'll do I'll do simply Fire event do click and then I'll pass this get toggle by button uh sorry get toggle button by roll so I'll click this and then what I'll do I'll do expect I think this
we have already done and then I'll do get by text and then I'll do what should be there if I click so dark theme should be there right because we already clicked on the button so expect get by text Dark theme should be in the document that's it now let's save it and Now let's see what is happening so let me run this awesome so passing all the test cases I will explain one more time what exactly we doing so created dummy component now the reason is because this is kind of scal and you can
see this is what exactly we are doing here also that on click of this we have a method there is a button there is a role this is the text and this is the content that what we are rendering so now whenever first I Render this component get by text and get by ro we are using if you want you can also add the data by test ID that we have done that will also work correct and then after this so let's I'll show you uh let me just add data test ID sorry I think
this will be data test ID and this I'll give toggle button right so here we can get like get by test ID and we can simply do I'll copy this comment it out and I'll do here get by test ID And then I'll do toggle button save it and this will also work awesome so it's working right so it's up to you you can use this get by rooll or get by test ID now once you'll get this so first time initially light them should be there and then we click and then then it should
change to the dark thing now if you want you can do one more thing like let's say if you click one more time then it should be again from dark to Light okay now let's run it again that's it all right so this will basically test our context but now we need to individually test this uh theme component and also the button component so let's start with the button component first all right so now let's go ahead and create one more file here so we'll give this on name as button what is the name of
the component that we have given okay button we are having button only so We give button dot test. jsx now first let me just copy some other things so we need this two we'll copy okay first what we need to do right so we'll do describe we'll do test button component so here we'll do first it should render that but render uh toggle buttons right because the buttons should be there in the document so that we are going to check so how We'll do it right so simply uh what we can do so so let's
go to this component first we'll go to button component and here we'll give a data test ID and we'll give this one as toggle button okay and then we'll do const gate by so let me first render it and we'll do toggle theme toggle button this will be get by test ID then we'll do gate toggle button Which will be gate by test ID and we are going to give us tole button so this is what we are having and then simply we'll do that this button should be there so we do expect get toggle
button to be in the document that's it so now let's run it okay there is a fail let me check what is oh sorry sorry I think we have done a mistake we need to wrap this inside our provider okay that is the reason got it So we'll do theme provider and inside this we need to wrap it or else it is basically not getting that now I think this should work let's see awesome all right and the click one I think we have already covered this in our content text test so here we have
already done this click one right so on click of this this thing next uh what you're going to do will just test the render uh sorry the text theme content component so this Component where it will render this and this will be also very simple so let's go ahead and create one more test file so we do theme do test. JX and let's go here and let's copy these two thing first then we'll do describe and we'll do test toggle content we'll do it and here what we going to do we'll do render content based
on current theme Awesome now here we'll do const we'll do get by text but before that we'll do render and then we're going to render the theme provider and inside this we're going to pass the theme content and here we'll do G by text now we'll do expect get by text and then we'll do light them because first time we'll be having light them right and this this will be to be in the Document as simple as that now let's run it again awesome so now everything is getting past so now I think with this
we have completed our testing uh lesson or testing section we learn how you can do basic uh test cases like how you can test the text in your document how to test button click props context all right now with this I think now see how you are going to master testing is that you have to practice lot more because You are going to face lot of issues and that is the same way that I also learn all right so that's all for this particular section now let's move on to the next one all right everyone
now we are almost at the end of your video now in this particular section we will be creating a full Mar application using react Express so what exactly m is right so it stand for Express react and node so let's say you have your front end which is your react Application now whatever data that we are dealing in our front end we need to store those data some place right there should be something so we should have different some kind of database where we will be able to store the data in our database so now
here you can choose any data database you want like for example mongodb MySQL SQ light post anything but here we are going to use mongod DV and the reason is that because this is a beginner level project and I'll try to Keep everything very simple and also I'll explain each and every step how you will be creating a full step uh react project from sketch so to interact with your front end with your database you need some kind of back end or basically which is your server now here we will be creating our API routes
so those API outs will be connected to our front end and then we will be communicating with our front end with our Express uh like server and then we'll be storing the Data in our database right so first thing what I'll do right I already have a blank project everything I'm going to create from scratch and here in this I'm going to create a new project and let's give this our name as react YouTube codes M I'll suggest to create your own task manager app and here I think we'll do application and then we'll do
next create project so now you need to Create create cluster so create and I'll keep this one free and we'll keep like this and create deployment okay and here I'm going to use a password so I'll give 2023 and I'll do create and here for now I'll close this now it will create this will take some time another thing what I'll do right I'll go to network access and I'll add the IP Address and I'll do allow access from anywhere for now if you want you can add your own IP address sometime this will give
you error so that is the reason I'm adding the any any IP address here now second what we going to do you can see that I have a blank so here first uh let's open our terminal so I'll do npm create V at theate latest now here first I'm going to create our project so I'll give this one Name as client we'll do react JavaScript then I'll do CD and go to client folder and I'll do npm install so this will install all the packages okay now second what I'll do I'll create another folder here
and this one I'll give this one name as server I'll open this in our terminal now what I'm going to do right I need to create a package. jsn so package.json will keep the details of all the dependencies that you will be Needing for this particular your back end site so here I'll do write npm init and I'll do minus y if you don't do minus y you need to give all the things manually so I'll automatically generate so npm init minus y if I keep enter so you can see that a package.json will be
created here right and what are the things that you're having you're having a main you're having a script and everything now obviously we need to set up something but before that let's go to Our client and let's install all the packages that we'll be needing there okay so I think package installation is done so first thing what I'm going to do we will be using this set CN with Tailwind for CSS so for this one first I'm going to install our Tailwind CSS I think Tailwind will be no it's not there so I'll copy this
and in our client folder so this is inside client I'll install This all right now we need to create our tnd config so I'll copy this and hit enter now this will create a Tailwind conf file so you can see that also we need to give the content that is fine but before that another thing we need to do we need to create a JS config okay so I'll copy this so let's go to our client and here I'm going to create so do Json config sorry JS config do Json and this one Whatever I
copied I'll just paste it here and second what you need to do right we we also need to change something in our V config so here so we have a plugin and then we are going to use this resolve so this will basically resolve the path so I'll copy this and paste it here and also need to import the path so I think this will be import uh okay one minute we'll do import path From path so this is what we need and I think everything else is fine so I think we already have defined
config path from path react we have already I think Rea react is already there awesome and I think that's it now you need to run this npm set and uh at theate latest in it so copy this and then I'm going to open and then paste it here now this will ask some query So keep this on no default slate so we have inside our source so we have sorts slash then we are having index. CSS so we have index. CSS so this is asking where is your global. CSS file located so have Source inside
source we have index. CSS enter yes uh ta prefix fix custom no and uh where is your Tailwind config.js file located so it's located in Tailwind doc config.js file I'll keep it like this configure correct and this is also Correct server components are we Using no and now it will basically create a component. Json file so you want to create obviously yes so I'll keep y now it will automatically create a component. JSM component. JSM and you can see that there is a component folders is basically created so now what we can do we can
add any component that will be uh will be uh needing to add that one so that will be automatically added in our component folder so this is all about our client Side configuration for we need now we also need to use some other packages like react router Dom and something like that so let's quickly do that also so we're going to do npm install react router Dom also you need react hook form and then what else we need we also need axus because we will be calling our API using axio and I think that will
be more than fine also you need to install this Hook form at theate hook form SL I think resolvers so now we need this four for now because routing we need to do to navigate from one page to another page for our form creation we'll be using react H form for API calling we'll be using AOS these three and then now we'll start working with our server site uh installation so we already have created our package.json now there are quite a few things we need To do so first thing we need to install decrypt JS
ypt I think this will be JS then we need the cookie Purser then also we need CS we need Express so Express will be using as a middleware not just middleware to create all the API routes and everything controllers and uh routing then we need joy for validation we need Json web Token we need mongus to interact with our database mongus will help us to interact with our database and also to run our server uh simultaneously or or else we no need to run this on every time what we can do we can use this
node mod and these all the things that we need so hit enter now once this is done now we need to do a couple of things we need to add some scripts in our servers I think this will take some time let's wait for some time all right so this is Done now let's go to our package.json here I'm going to now minimize this part okay we keep this one like this so in the script I'm going to add two more scripts so one will be my start script so in the start I will be
doing node and which is our entry file our entry file will be index.js so I'll create a file called name index.js so this will be my entry file okay so here I'll give index.js if you give any other name that name you need to give and to Run the Dave server what I'll do I'll do Dave and I'm going to start here with node Monon because node Monon we already installed and we'll pass that which file we need to run so we need to run the index.js file also we need to add one more thing
and that will be you need to add a git ignore so we do git ignore and here what we going to pass right so for now we are going to ignore the node modules so we do nodecore modules all right now next thing what we Have to do we have to start our server so now let's see how we can create a server from scratch so first thing what we need to do basically let's go to our index.js I'll close everything else and here we need to start everything step by step I think till now
this will be also done let's go to our database and let's see yeah cluster is ready so now here what will happen right you'll get a connect option so if you click here you'll be getting different options like How you want to connect so we'll be using this mongod for vs code all right so the first thing what we need right here we need our Express so we'll do const Express and we'll do require so you need the express so this is the first thing we have done now here here uh next thing what we
need to do basically we need to create our app which will be our app component here not component but to run our server we need to create app so this we need to invoke This Express right if I over here right so what is this is a it's kind of a express application only and this is the top level function exported by Express module once this is done now this what we are going to do right we need to basically tell that in which endpoint we need to run our API so here we'll do app.use
so this is a method now here you need to basically pass all of the properties so whenever I'll pass any API I want to use this API endpoint now here again you can give any endpoint you want but I'll give APN point now this will give a call back now in this call back you will be getting two properties one will be a request and one will be a response now here what I'll do I'll send a response do status and I'll pass it 200 and then I will just do Json and I'll do something
like hello sorry here I'll do message and I'll do hello Express right so this is our endpoint now what we need to do right we need to run this uh server in some Port Local Host so to run that we will use this listen Okay this will basically return HTTP do server you can see that so here listen here I'm going to pass 5,000 as a report again this will give you a call back and here what will run right so simply we do console.log and we'll take and we'll do app is now running at
V 5,000 correct so now let's save it now this is done now what we going to do right simply I need to run this so go to server and here what I'll do right npm run Dev because this is the dev script that I have added here Dev which will run node modon index.js which is nothing but our index file correct so now here we'll do npm run Dev now let's see what is happening awesome so it is running the index.js file and you can see that you Are getting this app is now running at
5,000 now see every time you will do some changes right it will automatically run this now you see it's changing the data sorry we'll do is save it now see it's automatically running correct so now our backend server is now ready what we need to do first first we we are going to create our database connection right so here inside this I'll create a folder and let's give this One name as database so here I'll create index. jsx not jsx JS we are doing lot of jsx That's So first I need the m mongus here
so I'll do reel so you need mongus sorry right and simply it's very very simple we'll do mongus doc connect and here you need to pass the URL so I'll go here and then I'll copy this and then you need to copy this from here this is the URL you need and I'll pass it here And inside this password I need to change the password so password what I have given password was my 2023 okay so this is the password now what will happen right this connect will give you a uh promise return so connect
will return a promise right here so I'll do then and here I log something like database database connected mongod DV connected connection successful do catch and here I'm going to log the Error so we do console do llog and here we'll do error orur and we're going to pass the error here save it so now what we need to do right we need to basically call this method in our server because every time we will interact with our front end and we will do certain operation we need to uh we are going to store all
the information in our database right so we need to somehow connect this database in This our server so that it will it will be able to basically interact with database so how we are going to do that it's extremely simple you simply just do reord and then you'll do so here it will go to database and that's it now you see what will happen if you save this right awesome you're getting right mongod connection successful and this is done so now that means our application is able to connect with this database okay this is done
so now what we need to Create so first thing is that I I think I already uh showed you the demo that we'll be having a login page we'll be having a register page so user will be able to register and login once the login is successful or registration is successful so we will be going to the task page user will be able to create task right now for example let's say I need to create a uh user right so to create a user there are some process that we need to follow so how this
will Work right so so we have our main server so this is our main server so s we we will be having basically different different controllers so for example we'll be having a user controller then we will be having a let's say task controller now let's say we having some different projects controllers so you will be having different different controllers where you'll be writing your logic that how you are going to interact with Database and what are the things you are going to store then you'll be having different different routes so routes is nothing but
for example I need to create a login API lout so there has to be some URL right so that URL I need to access that's why each and every controller will have a different different route file or routes and then I'll be having different different model schema model schema means let's say I'll be having a user schema I'll be having a task schema So user schema is nothing but it will tell that user object will be consist of what so user will have a name it will have a email it will have a password let's
see it can have any number of properties so that is the reason each and every uh thing will have a model and that will be your model so first we'll start with our creating our first model and we're going to see how we going to do that so first let's go here and inser server and to create another Folder and let's give this our name as models and here I'll create user do let's do user.js so this is our user model now first we'll do const mongus will be require mongus now I'll create our user
schema so do const user schema you can give any name in want so this will be new so we're going to create a new schema so do Schema right so here you need to basically specify all the definition so you can see that so now for me for our application we'll be having a name so name will be a string then I'll be having an email of that user so which will be also be a string then I'll be having a password which will also be a string and then I think for now these three
will be more than enough if you want let's say you have a age so you'll Have age and that will be let's say number so you'll pass a number here something like that okay so this is our user schema this will basically tell our database that okay for whenever I store a user I need to store the name of the user email of the user and password of the user now I'll do const user which will be mongos do models so this will give you models do user or we'll do mongus we'll create our model
so we do mongus do model we'll Give the name of the model so you can see this is the name and the schema so do user and what will be schema schema is this user schema so we do user schema that's it and now I'll do export sorry we'll do module do exports and I'll do user so so this will be our first schema that we have created okay now next what we need to do so second uh we need to create our controllers correct but before that I think I think it will be Better
if we start creating our uh uh this front end first uh sorry one more thing we need to do I think we forgot for our Tailwind right we need to go to our client and we need to add this in our a it's Sol added here that's fine I think then in that case I think let me check in okay Tailwind also added I think s CN already added those things so that is the reason we completed those that is fine for now uh what we going to Do right first let's start implementing the routing
first because we'll be having different pages right so we'll start creating so first we'll be having a Pages folder and components folder we are already having now inside Pages what we going to do right we'll be having mainly three pages so one will be our o page correct then we will be having our task page and then we will be having our scrum board Page so let's quickly create all of this so this will be our o page now I'm going to copy this so let's first let's create this we do function so this will
be our o page I'll do this one little slow so that it will be easy right so to save this now let's copy this paste it here and paste it here so I'll do this one as tasks page and then we'll be having this on scram board page Awesome now the first thing what we need to do I think you have already remembered that we need to use our browser router for our routing right so first I'm going to do that so use browser router from vouter Dom and I'm going to use our app component
okay so this is the first step next thing what we're going to do will be going to our app so this is our app.jsx and I'll just close everything else also I need to run our application So I'll run this client so in the client I'll do npm run Dev awesome now what I'll do right I'll remove all of this and let's remove this all also not required okay what this will return so this will return routes and each and every route we will have so have a single route and here what I'll do right
I'll give a path so this will go to the O page and element I'm going to give so This will be our o page now let's save it now I'll show you one very interesting thing that how we are going to create a common layout and what is the concept of Outlet in react rout see what I'm going to do right so first uh let's go here inside components and here I'm going to create one folder and I'll give this name as common layout okay now this will give a very basic idea of how you
are going to Create a outlet logic or Outlet function next routes in react router so I'll create one index. jsx and I'll create the component so let's give this one name as common layout and for now I'll do nothing I'll just return div and let's say this is a common content so I'll do common content so what exactly common content means so that mean this content is same for all the pages and after this what I'm going To do I'm going to import very very important I'm going to import another component from yome which is
called Outlet see here now see how this will work so now this is our common layout page and this Outlet is nothing but all the child components that this common layout will receive okay now we go to app.jsx now see how this will work so now I'll create another route here okay and inside this route first I'll give a path so here I'll give a Path of SL let's say uh this will be our whatever like what you can give like tasks correct and then I'll going to pass the element so in this case the
element will be our common layout page that means I am telling that okay the for in this path this common layout will be rendered all the time and this common layout we are having a common content I'm also going to discuss why we are doing this now inside this right whatever route you will be nesting so Those will be all will be considered as a child of this common layout so here I'll give a path and let's I'll pass a list and I'll do element and here I'm going to pass tasks page and then sorry
what we doing wrong okay here we need to pause and after this I'll take another route and I'll pass here path and I'll do scrum board I'll do a element and I'll pass this on a scrum board Page now if you notice right what we have doing we are doing that go to the task page so let's say I'll go to First o page SL o PA page now see if I go to task page so you're getting a common content notice one thing very very important right so that means this common content is always
getting rendered but what will happen if I go to SL list page now that time the common content is getting rendered and at the same time task page Is also getting rendered the reason is what is happening it's taking the path from here and then it is basically telling that okay whenever I'll go to SL task SL List rer the common layout as well as a task page when I go to/ task SL scrum board render the common layout as well as the scrum board page so I'll go to scrum board right here I'll go
and see now this is getting rendered now why this is beneficial let's say you you are having a na NAB bar sorry header and Then sidebar now normally in website the NAB bar and the sidebar headers those are all common components so in that case what you going do WR all of this logic can keep here so that you don't need to use that or import import all of these or use all of these in each and every individual component multiple time so that is the reason this is extremely helpful correct so now we have
created our basic route page and everything first what we are going to do Right we start creating our o page or basically our login page and the sign up sign up page so let's start working on that part all right so now let's start creating our uh o page so let's go to our o component and here let's return a div and what we'll do right we'll take a class name we'll do Flex we'll do Flex Auto we'll do Flex column mean height we'll keep screen and we'll do height of [Music] full now after this
we'll take another div we'll take a class name we'll do Flex height of full Flex column we'll do justify center items Center and we'll do background we'll keep this one as white so after this let's take A3 and we'll do welcome again we'll try to keep Everything very minimal okay this is fine and we'll take a class name so I'm going to do this one as uh let's keep the text as 3 Exel and we'll keep the font as bold Also let's go to our app.css right and we're going to change some other things not
app. CSS index.css okay I think it's not the let me see okay it's fine so I think this is fine let's see we're getting welcome now After this uh we will simply render right so let's render a div one more time we'll take a class name and we'll do Mt which is margin top as let's keep this one as four now here uh I'm going to take a state so I'll do const so let's do this one as e login View and we'll do set is login view so we'll keep this one as US state
of false all right so what we'll do write simply uh we'll go to our components once again And here I'm going to create o and then I'm going to create two uh folder here so one will be our uh let's give this one as sign in page and then we will be having another one which will be our sign up page so in this signin page we'll create index. jsx and let's give this one as function we'll do sign in so here I'm and sign in save this and I'll copy this and Paste it in
sign up so I'll do this one as sign up awesome now let's go to ro so here we'll check if this is login view so I'm going to render the signin page signin component what else I'll do sign up component okay so getting sign up so we'll keep this one as true only loging view first time so you're getting sign in awesome now after this I will take a Button and I'll do again here if this is login view so we are going to so uh switch to sign up or we'll do switch to sign
in okay now now let's give a class name here also so do margin top of six we do BG black text white font extra Bol P of Five okay and then we'll do border as none and we'll do round sorry but I think let's do one thing right so we'll do PX we do PX of three and we'll do py of two uh let's make this one four and this one [Music] three awesome okay also now we need to give on click so we'll simply switch so We do set is sign in is not equal
to is login page so we are getting switch to sign in now currently it is sign up page so click here it will go to the sign in now we will be able to switch to sign up page awesome now because we have done the basic thing now we need to start working on creating our sign up and sign in page but before that we need to create a couple of things so the first thing is that we will be creating a Common form component all right so I think this concept also have discussed multiple
times previously so that we no need to create the input select those things multiple times correct so that is the reason we will be creating couple of things so first thing will be we'll be creating a common form component and for this one we need to install some of the things from our set CM so first we'll just do one thing let's copy this so we install this Button so I'll just open another terminal so we'll do CD client because again don't do this mistake whenever you will install any client side packages you need to
go to the client folder and here I'll paste this now we need input we need select we need label we need form uh what else we need uh we need dialogue anything else let me see I think we need button lbel input uh what else I think we can also add Some I think let me see what is the name so we have this toast so this will basically show this in notification so we add this also so we do toast anything else also we need a progress all right let's install all of this all
right so all of this is done and also I think I forgot one more thing we need to install and that is card so let's install this also so copy This okay now let's start working on the common so before that I'm going to create some more things so I'll create another component and that will be my common button component okay and I'll create one more which will be my common form component you can give any name you want it's up to you all right so now in this button component button will receive some of
the props right so it will receive a text it will receive on click it will Receive the type of the button so let's create our index. jsx in the common button and now we create our component so as I already told you that this will receive you on click from parent components it will receive a text let's give this some name as button text and also it will receive a type and also it will receive a disabled property like if you want to make the button disabled so it will do the same now here I'll
return sorry return button so this is from our uh this is the set CN UI button that we have installed now here what we will pass we pass this button text now this is mandatory that you need to pass then we have on click right so on click will be if the on click is present so we'll do on click or else this will be null and also we'll be having disable property so disable will either it will be disabled or it will be False and I think let's do like this okay and what else
also you need to pass a type so type of the button will be either type is present so this type you are passing or else it will be always submit okay and then at the end we are going to pass a class name so let's do Flex height of 11 justify center items Center we'll do PX of five BG will do Black okay font will do bold text white we'll do border none rounded for hover hover also will keep the same only right we'll keep BG black and on Hover we're going to keep text as
white only and let's do one more thing we'll do this one extra bold oh sorry extra bold extra B awesome now let's go to this uh O page and see remember we use this button here now instead of this button right we can use our common button and so this will receive on click you no need to pass the class name anymore but we need to pass the uh text right so we do sorry we need to pass the button text so do button text and here we are going to pass this so if login
view is true we'll pass this and I think we can s close this one and For this one we're going to pass a type so type will keep this one as button uh and disable will be false now let's say let's see so you're getting this one and one more thing is that because we don't have margin right so we'll do we'll do one more thing we'll do div and we'll take class name margin top of five and then inside this will paste so now we'll get in this and this will work work as it
is awesome right so now common button is Done now we're going to create our common form uh common form uh component okay so let's go there and then I'll create another index. jsx all right now again you remember that previous section we have completed that we will pass the form controls and based on the controls that will be passing it will automatically generate the form and same logic we're going to do so look common form now what are the Things it will receive so it will receive a form controls right so it will receive form
controls it will receive a handle submit method it will receive a form data or form whatever we'll keep this one as form and also it will receive a button text so we'll keep this one as button text now what this will uh return see this will return the form from our set CI now in this Form after so the logic we're going to do later but first let's quickly create the structure first so we will be having a form inside of this and now what we are going to do right we'll simply check that if
this form controls do length if this is greater than zero then only we are going to render or else this will be null we not render anything so we'll do form controls do map so we'll do control Item and now here what we are going to do right inside this we will be returning a form field okay so this is what we are going to return let's s close this now inside this form field we will be having some other the things so we'll pass a control which will be our form. control or basically this
form that we'll be Passing form. control and then we will be having a name in this form field so this name will be this control item. name so we'll be having control item do name or ID whatever so this we are going to explain once again that what exactly we are doing and then this will give you render method so we going to render the field okay so here what we'll do simply we'll get a field property and after this we are going to Return so here we are going to return so we'll return return
a form item so return return form item okay and inside this form item we will be having form label and form control so do form label and here we will be having form form level will be nothing but control item. lbel okay so after this after this form lbel we are going to render now we are going to basically render the form Control now here come the comes the trick now the form control can be input it can be a select it can be text area it can be anything so what we going to do
right we'll check that if this control item dot component type so this we are going to pass component type if this is equal equal to input so we are going to render a input if this is a select we going to render a select something like that so here I'm going to uh call a form Control and inside of this I'm going to render our input okay now after this what we're going to do simply we will check that if this control item do component type this is equal toal to select so I'm going to
render a select correct or else I'm going to render null so here I'm going to render a select now in the select component again what we going to do uh we are going to import the select Component from set CM so import select now this select component will take some value so those things we're going to do later but first uh we will return here form control again and inside this form control we will be having a select trigger sorry we will be having a select trigger trigger okay now this select trigger uh we were
going to give a class name so let's take a class name Here so we'll do W [Music] full and we'll do rounded uh we'll do height of uh let's keep this one 50px we'll do border none text Will keep black we do BG gray 200 text will keep 16 PX we'll do outline none we'll do drop sadow ASM then we're going to do a Transition okay let's do Transition all we'll do a deration of 200 or let's give one 300 we'll do easy SE out for Focus uh we are going to do BG gr of
100 and what else we can do we can also give for Focus we'll give some uh this drop set also so we'll give drops at large then for Focus visible uh we'll give outline none also you need to do Focus Visible we'll do ring as zero so this will come as a so if we don't give this one there should be some kind of Border or outline outside of this okay so this is what we are doing Focus uh visible and then for Focus visible we are also going to do ring uh we there is
a property I think ring offset or some ring offset zero that's it so so many things now what we can do right the same thing we can use so let Me just copy this class name from here so we'll copy this and the same class name I'll use in this input also okay now in the select trigger right so let's go here so in the select trigger we are going to render something and that will be either select or the selected value for now I'll keep this one as select so once this is done so
after this select trigger so we are going to render our Select content so after this form control we will render select content okay and here what I'm going to do so here I'm I'll take a class name I'll do bgs white so in the select content I'm going to render so we'll be having control item do options so I'm going to pass options do map this will be option item and here I'm going to render select item so individual select item and I'm going to render option item do Label okay for the select item also
I'll give a class name so here I'm going to give text black and I'll give curser pointer and also give Focus we give text black that's it and after all of these right we are going to render so after this form I'm going to render common button so here I'm going to pass a type which will be submit and also you're going to pass the button text which will be the button text so this button text Is nothing but this will be receiving also in this input we need to pass couple of properties so the
first thing is that in this input we need to pass a placeholder so this will be control item. placeholder also you need to pass a type which which will be our input type which will be control item. type and then we are also going to pass a value but value we going to do later and now after this we are also going to Destructure all of this field that we are having this field okay so I think that is fine so for now let's see what is happening and what exactly we have done till now
I think some of you will not understand this but we are going to see with a example so now I'm what I'm going to do right so let's go to our source and here I'm going to to create a config folder and I'll do index.js now what will happen right in This config folder we are going to do all of this configuration that we needed so for example for uh register or sign up functionality and for signin functionality we'll be having some kind of input right so let's create so we look export const and I'll
do sign up form controls okay and now here what this will be array now see what are the things we'll pass we'll pass ID now this will be very clear we'll pass a label so This will be name we are going to pass a placeholder so this will be like enter your name we are also going to pass a uh what else we need to pass a component type so this will be input that's it and then ID also you need to pass a type which is the type of the input so which will be
text I'll copy this and then let's paste it one more time and one more time so this will be Our email enter your email component type will be input but type will be email and this will be a password so we do password this will be password and type will be also password now I notice what happen so this sign up form controls will come here this form controls we are mapping this and then based on that whatever we are doing we are basically passing all of this logic to do to check this one what
we can do Right simply go to our o page let's go to our sign up and here right I'm going to import the common form and then I'm going to pass uh let's do pass the form controls which will be sign up form controls also you're going to pass a button text which will be let's say sign [Music] up okay now one more thing what we need To do right so let's see here what else we need to pass also need to handle submit form but that is fine let's refresh this okay there are some
error we are getting I think it's not getting some Valu so that part we need to check cannot read property of control form. control because form we are not passing right so what I can do right for now I will comment out this part still I think we'll get error because it will not get That names also okay so let's complete the functionality also because it we need to pass the form values also for that so let's go to our sign up page and then I'll just Comm and remove this command so I'm going to
also create the form values so here first thing I will do right so I'll create form data and this will be use form from react hook form and here what we need to pass we need to pass the Default values correct so here I'm going to pass so let's pass a name which will be empty first time we also need a email which will be empty and also we need a password which will be empty correct so this will be our form now this form we are going to pass here and also you need to
create another method which will be handle submit so I'll create this method for now so do function uh handle submit and these two also we going to pass it here so we going to pass form so Which will be our form data and also you're going to pass form will be our form data and also you're going to pass handle submit which will be handle submit okay still we are getting some error so this part we need to check what exactly error is gate field is not a function form 68 okay it's coming from here
so what exactly we are missing that part we need to check oh sorry we need to destructure The form value here that is the reason and also we going to pass this on submit here and this will be our form this do handle submit right and this will be our handle submit so this is our form this form is nothing but this use from this form data that we are passing here right now let's save it now see we are getting right so we getting name email and password but the fields are not coming so
this part we need to Check what is happening here let's refresh this again still we are getting some error no no error is coming but here it is not rendering so you're having label email but it's not rendering but so we need to check so first we having form then we are having form field we passing the control name we are passing render we are rendering the field which is returning the form item then form Label see component type component type that is the okay now let's this will be component type awesome now we got
our email right sorry the form that name email and password we are getting we need to give some uh styling here but that is fine let's give this one so you take a div we'll do class name we'll do Flex justify Center margin top of four and also do item Center so getting name email and Password awesome so now okay this sign up I think we can remove so this is how we need to do now see how it will be very simple so let's say you need to create for uh sorry you need to
create for sign in so what you'll do just create this config here this config and then you just need to pass it so let's quickly do that so I'll do export const and I'll do sign in form controls and we need only email and password right for login so copy Both sorry we'll just paste it here save it now let's go to our signin page so here again I'll do form data which will be use form and I'm going to pass a default values and here I'm going to pass the email which will be empty
and password which will be empty also we need to create another method which will be handle submit so we do handle submit and here what we'll do simply Return the common form again so we return common form so this will receive a uh this will receive a button text which will be sign in Sor not say sign in then we'll be having uh handle submit which will be handle submit then we'll be having form controls which will be sign in form controls and anything else also we need to pass the form which is our form
data save it got it simple as that so now switch this is Working awesome right so now we created a common form and we created common button we created our sign in and sign up page now what is the next step so next step is whatever value we be typing we need to somehow store this information in our mongodb database correct so that is what we need to do so for that we need to create some controllers from our backend side or server side we need to create API routes we need to connect both front
End and back end and then only you'll be able to do that so lot of things to learn here and very very important you should be very careful if you're doing it for the first time I highly suggest please try to do or basically please code it along with and it will be very very beneficial okay so let's start implementing the backend side of our login functionality all right everyone so now we will start working on the backend part of our login and Registration functionality so first we'll start with our sign up page so now
uh first thing what we need to to do so we need to create controllers and also we need to create route for each and every request that we are going to do okay so inside the server I'm going to create another folder and that will be name as controllers and let's create another folder and that will be you will give this one name as Routes so inside controllers I will be creating my first controller which will be my user controller.js okay oh sorry uh this will be the folder name so it will be user controller
and uh not folder I think let's do this one file we'll do this on file let me sorry I'll delete this one so we'll do user controller.js similarly in the routes we will be having user Routes.js so first thing in the controllers what we are going to do we will be creating different controllers so first controller will be to register a user then we have to do to login and user so then we'll be having for log out right and what else so we have register login and then log out I think these three okay
so each and every for this each and every request we need to create Our controller so first we'll start with our register user so we'll do this will be function so we do register user so this will be again a sync method and here this will give you three property one will be our request response and there will be next now here inside this what we are going to do first we need to basically get the data from our front end so basically now see this part from this Point it will be very very important
so whatever I'll be typing here and then click on this sign up I need to get this information let's say the name the user typed the email and the password and that information I need to get in this request object okay so here what I'm going to do right so we receive the following things we'll receive a name we'll receive a email and also we receive a password correct these three things and from Where we'll be receiving so we'll be receiving from AIT we'll do request. body okay so this is the first thing that we
are going to receive then after this what we'll do right we need to validate the schema that means whether let's say we need to do some validation like if this is a email field and user is not giving any email let's say at the rate so this email is invalid email right and also let's say we have a requirement like the password has to be At least six characters but the if user is giving less than six so we need to give some kind of validation so here what we going to do we are going
to use a schema and we'll create our register schema this will be remember we uh use this Joy package right so let me just first use this so we do joy and this will be liare and we're going to get it from Joy so do Joy do object and here we are going to give different different Validation that we need so for name so what we going to do this will be Joy do string sorry again if you're getting any noise so that's my friends actually they're chatting outside so that is the reason we probably
getting some noise and this will be a string and then I this has to be liquid so that means this is a mandatory property this user has to give similarly for email so do email and then I'll do joy and this has to be a string again correct and then I I'll Give a validation like this has to be email property right so here it will automatically validate email and also this has to be required property next we need a password so we'll do password and here I'll do Joy do string again this will be
a string and also let's give here a minimum of so we need minimum six characters or six letters of password and this also has to be required okay so now this is our schema now based on this schema we'll be Validating that with whatever name email and password we are receiving from this form whether that is matching with this schema or not if it is yes then it's a valid valid schema or we going to show some kind of eror so how you're going to do that right so first we'll do this register schema and
this will give you a validate property okay this is a method and here what you're going to do you'll be passing this Name email and the password so I'll pass your name email and the password now this automatically validate whether it is matching all this criteria or not and if that is the case if not then it will give you this error property okay that means if there is a error so we'll do if there is error property so what we going to do right we'll simply return a response and we'll do a status so
response status will be 400 because this is error something like that and then Here I'm going to pass a Json and here I will give success so success will be what success will be false and then I'm going to pass a message message will be this error this error that whatever you're getting this error will give you this details okay and in this details you will be getting I believe in the first uh object you'll be getting a message so if there is a error it will automatically return this error that for example if the
user is typing only one Character in the password and try to click in sign up so it will give you password has to be at least six character something like that so from here you'll be getting this if there is no error so what we're going to do we'll do a Tri block and we'll do a catch block right and in the tri block the first thing what we need to do see now it's very very important you need to understand all this logic see when user will Register for the first time what are the
things that we need to check first thing we need to check if the email that user is typing if that email is already exist in our database or not if this email is already exist so you can't register with the same email correct you need to give a different email so that is the what we going to check so first we'll check here like check if is user email uh we'll do already exist something like that so we do already Exist right so we do a it this will be now we need the model so
from where we'll be getting so we created a model remember we have a user model see this one so from this model we'll be able to check it so do const we'll do this on reord so we'll go to our model and we'll go to SL the user sorry let's give this one name as user so we'll do here that user Dot and we'll do find one and here What we're going to do right we pass email this email is nothing but uh this email that user is typing or decimal correct and then we will
be able to check that if this user is user email already exist right so in that case we are going to return another error because you can't uh use the same email right we'll do status of 400. Json and here what we'll return we'll return something like success will be again false and then we'll return a Message so return that user email already exists please try with different email got it now next thing if this is not the case so that means the user email is a new email so we are going to do couple
of things so first thing we need to Hash the password so let's say I'm typing 1 2 3 4 5 6 we can't store the same we need to Hash it or uh for That one I think you remember we already installed this bpjs so that we're going to use we do has has password we'll use and also for this we need bcrypt so let me just use that con c r ypt and we'll do Rec and here we need the bcpt JS okay now we will has this m so how we are going to
do that right so we'll use as sync sorry Aid we'll use this bcrypt and this will basically give us this has method that we going to use and here I'm Going to pass this password this password is what is the password that user is typing here and this password we going to has with 12 so it will basically take a salt or a number to generate the hasing all right now this will create a hash password and now we'll create our users we'll do newly created user so newly created user will be a and here
I'll do user user is our model Mongo's model and this will give you this create method and here I'm going to pass our email our name also you're going to pass our password now what will be password password will not be the user password it will be the hash password and then I think these three that's it okay so now this will create our new user and if this user is created that means this now is successful so if this is true then what I will do right We need to create a token correct so
these will be our user tokens we create our token and this will be generate token so this will be a method and here what I'm going to pass this newly created user will give you a ID property and from where this ID property will coming right this ID Mongo's sorry mongod will provide this ID and this is unique ID for each and every user so this based on this ID we will be basically creating a token so this newly Created user do ID so this we are going to pass we are going to create this
method and once we create the token rate then what we going to do right we will do race ons that we are having and here we are going to use this cookie and here I'm going to use all right so once we'll create that the token now we are going to store this token in our cookie so we do response do cookie so here I'll give a token and I'll store this token so this token that will be generated here and after this we're going to to pass some more properties so I'll pass with credentials
uh credentials so this will be true and also we going to pass HTTP only as false okay so this will store our cookie and after this what will happen we'll send a success response back to our front end so we'll do R do status we'll Give 2011. Json so here we to pass success will be true message will do like user registration successful and also we going to pass our user data so we'll pass user data so here we'll pass the name which will be our newly created user correct so this will be do name
and we also return the email which will be newly created user do email that's it now what we going to do right Uh if there are any error let's return some error so first I log error here so look console do console do blog error also you're going to return race. status 500 and we'll do dot Json so success will be false and then we return a message like something went wrong WR please try again now let's create our method so we Also need to create this generate token method right so for this one uh
we'll do const here let's do it so we do const generate token okay so here we'll get the ID so get ID now here what you're going to do this will return so first I'll import our JSM web tokens look on JWT and this will be a re we need Json web token and we going to return JWT do sign and here you need to pass this gate ID that you'll be Getting all right so this is the first option then you need to pass a key which is your secret key so here I'll pass
a default secret key you can give any key you want and then we'll give some expires property oh sorry so here we'll give expires in we'll do 3 into 24 into 60 into 60 so this will create our uh token so now let's recap everything whatever we have done so far so first we're getting our information Whatever I'll be user will be typing in this form then we validating using this schema here and then we are checking that if there is any error simply return the error with error message if not then check if the
user is typing the email if that email is already exist or not if that is the case that means user email already exist so you can't register with the same email you need to try with a different email then we are coming here we are Hing the password and based on That we creating our new user once we'll create this new user if this is successful we are going to create our token we are storing our token in our cookie and then we are returning a response with our user information correct so once all of
this is done next thing what we'll do simply we'll do module. exports right and here we are going to pass this register user save it so now this is all about Our first controller that we have created now we need to go to our oh my God man see what you have done I'm doing all of this in user routes sorry my bad okay anyway not an issue I haven't noticed only so I think we need to paste it here in this user controller file so I'll cut it all of these and paste it here
that is fine because it's the same same place not an issue so now we have created our user controller okay now what we need to do we need to go to user Routes and we need to basically tell say for example I'll click on the sign up so I need to call some AP endpoint right so AP endpoint is nothing but that will be a route right and in that route I need to call this method I hope you're getting so that means I need to create our router so we use express for that we'll
do Express we'll do reare and we need Express first and after this we'll create our router so we'll create user router so User router will be this Express will give you this router interface okay and now what I'm going to do I'll destructure so we'll do reare then we'll go to controller user controller and what we need we need register user and then I'll do that because whenever user will be registering this will be a post method correct so you need to tell Express that okay when once I'll do user out do post so this
all the Methods that you'll be getting right get post put then you have delete something like that so you do post so here we will be having a register so this is your route or path you can see this is the path and here you need to pass the Handler Handler is nothing but this register user so that means you're telling that whenever I'll be calling this endpoint register endpoint I need to trigger this Handler which is register user all right and then at the End we'll do export sorry we'll do module. exports we'll do
module. exports and this will be our user router that's it so now will this work it will not work because once we created this router we need to use this in our index.js file this is our main server so how we are going to do that so first you need to import it so first I'll import right so we'll import uh we'll import the user router so we do user router and we going to Import it from our router file so require and let's go to routes SL user RS now apart from this we need
couple of things we need qus so that we I think this will give us Sometimes some course so we need to check that so we do require so we need course also we need our cookie Purser so we need cookie Purser Soal we need our cookie Purser okay now once this is done we once we created the app what we going to do we do app. use and here what we going to use right we use this quads and here we are going to basically tell the options that we need to so first we have
a origin so this will be our origin now in this origin I'm going to pass our Local Host so we'll go here let's copy this so here you need to basically pass this Local Host URL so this is your Origin then you need to pass the methods so so here I need to do something with gate method also you need to do with post method also you need to do with something with put method and also you need to do something with delete method so these all the methods and also you're going to pass grals
credential will be true okay so this is first step and at the end also we need to use app. use we need to use this cookie Pur okay and at The end also we need to use express so Express we already have we need to use the Json of that okay so this things need now what we're going to do we have this base API route so this is our base API route right so you're going to tell that okay for this user route for this register I need to call this register user so what
we're going to do right I will do another here we'll do app.use and I'll call call here/ Api SL User so that means whenever I'll go to this API route so go to/ API SL user I need to call this user router okay so user router is nothing but this user router so now how this logic will work so you have a base API inter base API which is/ API then SL user you'll call this user router and then inside this you have a SL register so that means whenever we'll go to/ API slash user
SL register that means in that time we will Be calling this method okay so this is exactly what we have done so now we have almost completed all of these let's see if there are any error or anything in the server no I think no error okay so now what we're going to do right we need to start working on the front end side so now we will be getting all of this data and we'll try to call this uh we'll try to save this data in our uh database and let's see if this is
Working or not okay okay so now let's go to our sign up page and here now what we going to do right uh we already have the form data and once user will submit we also need to make couple of changes here I think we are already passing the form and we need to also pass the value so in this input we we have a value property that we need to pass correct so here we'll pass a value property this input and this will be this individual field that You're having this field do value okay
so this is one thing and then next for the select content also need to do one thing so inside the select trigger so here I'm going to check also in this select we need to pass the value so here the value will be field do value and also we need to pass here on change so we do on value change right so here you need to pass field dot on change that's it and now here in this select trigger what I'll do right so I'll check here if this field do value is present so in
that case I'm going to render a select value so do select value and here ORS this will be always select so in this select value uh we'll pass a placeholder and this placeholder will be the control item sorry this will be control item do placeholder and also let's pass the class name here so do text Black and for Focus also we'll keep this one text black so now now if I go here right in this handle submit now let's say I need to get the values so how we are going to get the value so
this ra handle submit will give you this gate data this argument and now let's log here and let's see what is happening so log this gate data so I'll type something here let say my name this is the email and let's say 1 2 3 4 5 6 you're getting the value right so you're getting name email and the password so react hooks form is already doing all of this and you you are getting the data here now what we need to do basically we need to call our API to call Api what we going
to do we'll be creating another folder inside source and I'll be calling that one as services and this will be index.js okay so the reason why I'm Doing so that we'll be able to keep all of these logic in one place so now here uh what we're going to do we'll do export const call register user API and this will be so we'll keep this one as sync so it will receive a form data as argument and here I'm going to Simply do const response so we already have installed AOS AIT AOS and this will
be a post now here What you're going to do right we will be calling so let me just call this from here so this will be 5,000 now I'll show you the reason why this will be 5,000 because if we go to index.js we have our quote listening as 5,000 so now we'll go to SL 5000 SL API SL user user correct so this will be slash API SL user and then slash we need to call register user API so for register user we are having register see how this is actually changed so you have
register so if you Do this then you are calling that controller okay so you're doing local L 5,000 now for production you need to change this with the production URL so we have registered and now here what we going to do right we need to pass our form data and also you'll pass our here with credentials with credentials will be true that's it and now this will we can simply return our response. data that's it all right now let's go to Our sign up and we'll simply call this right so what we can do simply
we'll do con data equal to also need to do this on async so we do AIT call register user API and here what you need to pass we need to pass this get data so this is the data is nothing but your form data and let's log here first we'll see I think there might be some issue can be coming and we'll see like what is happening so we'll do data let's log here Data save it I'll give my name it's refreshing okay so I'll go to sign up page I'll give my name I'll give
email and I'll passord 1 2 3 4 5 6 let's click on sign up oh wow it's successful awesome so now you can see that it's actually successful so we getting the data and then if you go here we getting success true message is user registration Successful and you're getting a user data here correct now what we can do simply we can do couple of things so we'll see here if this data do success if this is true that means it is successful so we going to store the information in know session storage so we'll
do session storage and then what we are going to do right uh we'll store I think this is not rec we we are already storing in token I think There should be something stor in the token if I go to cookies right oh see we already stored right in the token so this is your token now correct so it's stored already so I think no need to store again s not required so I think this is not required so if this is successful what you're going to do show some kind of toast so to do
this one first thing is that uh we need to go to our main uh main. jsx and after this app I'm going to Import toaster okay and then we'll go to our sign up and in this sign up I'm going to use toaster so lons something from we have a use use toast or something from our component okay and this will give you this toast now here what we going to do if this is successful we will be basically showing toast and here we are going to pass like something like title Uh what we can
do user registration successful and then what we can do here also you can pass a description that will show something like welcome so this is done and after this what we're going to do basically we will navigate that user to a Au page because once the user is authenticated then he will uh that user will will navigate back to the task page Correct so what we are going to do right here first I'll do const navigate and this will be use navigate and then this user will navigate to the sorry this user will navigate to
the task page let me see the route so tasks okay or or let's do one thing I think we'll go to the task list page so SL list this is fine else what we'll do simply else we do Toast and here I'm going to give title as error and we'll give a description as something wrong uh something wrong or error some error record do some error record that's it I think now let's see what is happening okay so first I will go to sign up page I'll give a different user suum 1 suum
[email protected] keep
the password s 1 2 3 4 5 6 click on Sign up going to the task list page awesome we are also getting the tost correct now here it's going to this page now see there are quite a few things we need to do okay a lot of things so what are the things that we need to do I I'll give you all the thing but before that we are going to create our context okay so let's go to and create our context because we need context if you want you can also use Redux toolkit
you can also use just and I think all of these we Already discussed okay so you can't tell me later like you you are doing using context if you want you can easily use Redux for this purposes also so we have source and inside this I'll create a context I actually like context more I don't know why but it's not like that I don't like Redux and uh so here we'll do index. jsx and let's quickly create our context so export const and we'll give this on our what we going do right task context Let's
give a different name every time I'll give Global context like that task manager context and this will be create context of null and we'll do here function uh task manager provider so here this will receive a children and here what we're going to do right this will return return task manager context. provider and we'll pass the Children and then uh we'll do export default I hope by this point you should be able to do all of this by your own right so now let's go to our main. jsx and we need to what we need
to wrap it so I will wrap this task manager provider inside this and now what I'll do right let's go to a context and in the context we need to do quite a few things so now what I'm going to do right the first thing uh I think let me just Do one more thing like uh we'll do some modification and the modification is that that this uh sign up that we have done right this sign up this form whatever we are having I think I'm thinking to move this one out we will keep it
here only I think let's keep it here that is fine so here what I'm going to do we need to do a couple of things see first thing is that now user is already authenticated and user In this page if the user is refreshing then we need to basically check that if the user is authenticated or not if not then they should be go to the O page and also if I let's say try to go to O page see it's going to the off page but this is completely wrong right because if you're already
authenticated you should not be in this page it should redirect to the task page and that is exactly what we are going to do so how We are going to do that so for this one the first thing we will take one state and that will be our current user so be user set user and this will be US state and here we are going to pass null now we need to create a kind of middleware and that middleware basically store all the information that is required correct so for before that let's do one thing
I think this part we Are going to do little later before that we should try to complete the sign in functionality also and after that it will be easy so for Implement sign in again what we are going to do right we will be basically creating an another controller inside that so let's go there so we'll go to our controller inside this I'll close everything else and I'll create another method here and this will be const login user asnc also another thing we need to I think I forgot to do once we'll send this information
back right so here we are going to call this next method so in this login I'll do assn this will give me request response next and here also again what we going to do we'll first get name and email I'm not going to explain all of this again from request. body and then I'm going to create let me just minimize this another schema Here so this will be login schema and then I'll copy the same and I only don't need this name all right and here let's copy from here also the same thing instead of
rewriting so I'll copy this part and I'll paste it here so this will be login schema and it will validate the email and password if this there is anything wrong so we'll be returning this see we will be getting the error right if I go Right let's say I'll go to forgot to show you this thing also go to the sign sign up page and I'll give Raj I'll give Raj gmail.com and I'll give only password with one letter 1 2 3 and I'll click on sign up see we getting this error that there are
some bad request and here we will be able to basically get all of this so we can basically check like what are the things that we required I think this part also we are going to do and those things we'll be Able to render here okay so this is a bad request that we are getting so now uh before that let's first try to complete this login one so we'll be returning this now after this what we're going to do right we are going to also check uh first we'll get the user so we do
const get user the reason is I'll tell you why we need to get it so let's say if the user is typing a wrong email and that email Is not at all exist in our database so that means this is a wrong email that user doesn't exist so that only you need to check so here I'll do Aid right so we do user and we'll do find one and we'll pass the email and here if we don't get this user sorry get user so that means this user doesn't exist so what we going to do
return uh let's return array. status of uh what we'll do return a 400. Json and here I'm going to return like message incorrect email or password whatever incorrect email I think that will be better and also you're going to pass it success as false awesome now after this what you're going to do now we need to check the password whether the user is entering the correct password or not this is very important so we'll check o something Like that and here I'll do aate and we'll do bcrypt so this will give you this compare method
and using this you'll be able to do it so now you need to basically check if this password that user is typing and oh sorry this will be password the user is typing so I'm talking about sorry why we are taking name here this will be password so this password with the user password so G user. password G user do Password okay and then here we are going to again check if this check or if this is false that means the user information is wrong so what we will do simply return I think let's return
only this raise. Json only so return r. Json and now this time I'll return incorrect password because your password is wrong that means whatever you are typing here but the one that is stored in your database that both are not Matching okay and after this what we going to do again we will be creating our token so do const token and I'll do generate token and I'll get the gate user do ID correct this will give us ID and now oh one more thing very very important very very important when we are returning this data
back we also need to pass the ID I completely forgot that so this ID will be newly created user do ID so this is your user ID this We need to pass very very important so this ID we are passing so and then this will create the token and then again we we will basically do the same thing so let's go here and let's copy this part okay that's it and then if this is successful then we are going to return R do status of 2011 uh and then do Json and we'll return success as
true and we'll do a message of logged in uh user Log D and then after this we're going to call the next but before that we need to do one more thing that we haven't done and that is we need to put all of these inside Tri block so we'll cut all of these and then we'll take a try catch and insert this Tri I'll paste this one and inside catch again not Rewriting again so I'll use the same that's it so now this will be a login user controller or Handler and this one we
going to pass it here again so this will be your login user right save it now next step will be first controller then we need to go to routes now we get the login user and we'll create another post request so we'll do user router. poost now instead of register we'll do SL login and instead of login user we need to call Sorry register user we need to call login user this is done see how simple this is and after this all of this now we'll go to our services and here we are going to
basically create another method which will be for login correct so let's quickly create that so we do const call login user API asnc so this will also receive form data and here we're going to do const response and here what we going to do We'll be calling the same thing only there will be a couple of changes so we do have it now instead of register now we need to call the login because this is the route that we have given and again this we need to pass the form data and also with creden Sals
will be true all right now this is done and at the end we're going to return again response. data save this also you need to export it so now login functionality is done Now let's go to our signin page so again in this handle submit we will receive get data just like we have done for register and let's log it log this one first so look get data so here let's I'll go to signin page see if I click on sign in we getting this information correct so this is the thing that I need to
call so what I can do simply so we'll do const data now I'll do AIT call login user API Also let's Convert this on to async and here we going to pass we will be passing our gate data see this is exactly same to what we' have done here so we're calling this and then I'm going to log this one again save this so now let's see what is happening so if I go here right so let's I try to sign in first we need to see whether the API call is happening or not so
200 we are getting we getting incorrect email Aome awesome now I'll give correct email right I'll give suum at gmail.com but I'll give some wrong password I'll sign in you're getting incorrect password awesome I'll give correct one 1 2 3 4 5 6 click on sign in Success Through user logged in good job now what we can do simply again we can navigate the user to the uh this task page all right so now what we are going to do basically so if the loging is successful so we'll navigate the user to the same task
list Page so here we'll do if so we do data dot success if this is true so let's import navigate so do const navigate and this will be use navigate and we'll simply navigate the user to task list page so let's see if this is working or not so I'll give a proper email I'll give the password click on sign in it's going to the task list page all right so now login and sign up Functionality is done so now we are going to create our middle we so what middle we will do right so
every time we refresh this page or let's say we are going from one page to another page we are going to call one API which will be basically check whether the user is authenticated or not and if the user is authenticated so that user will be in that page ORS user will be redirect back to the O page okay so let's go to uh we'll go what we can do right We'll create one folder inside our s uh server so I'll create one folder and let's give this name as middleware and here I'm going to
create uh let's do o middleware dogs so now here what we'll do we do const user o verification so this will be as sync and here we'll be getting request and response and now what we going to do Right so first we're going to get the token so from where we'll be getting the token so we'll be getting from request because we already have stored in our cookies right so we'll do request. cookies. token and then first we'll check if this token is doesn't exist so we'll return so we'll return race. Json and you'll simply
return a success of false okay and then also you can return like User not authenticated okay and if the user sorry if the token is present so in that case what we are going to do we will be verified that token so for that we need JWT so we are going to do reare and we'll do Json Json web token and also we need our user model so we do user and this will be reir so this will be we'll go to our models SL User now we'll do if this token is present so we'll
do a try if there are any error error so we simply return the error so do return race do status so we'll do 401 and we'll do adjacent we'll do success false and again we'll use the same like user not authenticated here we can do like token is not available Or invalid token okay now if the token is available then we are going to decode that token so we'll do decoded and how we are going to do right we do JWT do verify and here we going to pass token and you remember we have passed
this secret key public key and that was our default secret key so this will automatically verify and if this de uh is successful so what we're going to do const user and Here we'll do AIT and here this decode will give you this ID and this ID what will be this ID the reason is because if I go to user controller and you can see that if I go there right we are using this gate ID okay and because of this using this gate ID we are creating the token so that is the reason here
we'll do user doind sorry I think we'll look user info so we'll do user. Find by ID and here we are going to basically pass this decoded dog ID okay and then what we're going to do if user info is present so we are going to return uh let's return do status we'll do 200. Json and we'll do success is true and here we are going to pass this user info that's it so this will be our o middleware now next thing what we going to do right we need to basically create A route so
that every time we'll do a page refresh or anything we will be basically calling this user verification and also let let's export this we export or no we'll do I think what we can do right do module do exports and we'll pass this user Au verification save this now what we going to do we go to our user controller you can create another controller for that or uh o controller or something that is fine but I I will do the same here only So now what we going to do not controller in the routes sorry
in the user routes and here what I'm going to do right we'll do user router and Dot what we going to do right so here you need to basically do post and what we can do we give SL o so because we will be checking the O and for this one we also need to import it so we'll do const and we'll do reer and we'll go to our Middleware and Au middleware and we need our user Au verification so when you go to O and we are going to do user o verification that's it
okay so now this uh endpoint we need to call now what we going to do we will be going to our uh Services okay where is our services here now what we going to do right we will be creating another service here and that service will basically do the authentication or check the authentication so we'll do Export const call user o API so this will be async and here what we going to do simply we'll do const response so this will be xos poost and here we will copy this and instead of login we are
going to pass o correct and we don't need to pass anything but we are going to pass uh here with credentials will be true and after this we're going to Simply return response dot data sorry Response dot data that's it all right now what we need to do right every time the page will be getting refreshed we need to do the functionality so for this one we'll go to our context so let's go to our context I think we already created the context so now what we'll do right so first uh let's take a use
effect okay so do a use effect and here uh we will basically Need to keep some dependencies so first we need to have the navigate so use navigate because every time you do the page change that dependency you need to keep and also you need to have the path name okay or basically the location so const location which will be use location also you're going to give this location also as a dependency okay now what you're going to do right so this location will give you this path name Now here we are going to create
or verify the cookie so Lon verify user cookie okay so this will be as sync method and here what you're going to do is simply do const data equal to Aid and this will be called user o API right this is just now we have created and here what we are returning from the middle way right if I go there so you can see that we returning this uh user info so we're going to check that If data do user info if this is present that means the user is authenticated right so we going to
do set user will be data. userinfo that's it and here what we going to do so first we'll save this and then we need to check that if the data. status so here we are having this success or not status the success if this is true that means the user is authenticated so in that case whenever I'll try to go to the Au page that time I need to navigate the user to the task list page correct so the same thing we are going to do so do return if this data do success if this
is true so we'll simply do navigate and we'll navigate to the slask SL least page right or else what we'll do we'll simply navigate the user to the oth page and now we need to call this verify cookie so we'll trigger this method here so we do verify user cookie let's save it now let's see what is happening First okay so let's first I log in okay with the correct at the gmail.com and let's try to sign in okay something is going on wrong here so you're getting success true but it's navigating to the let
me let me log this data here and let's see what we getting so we'll do data and we'll keep some identified so verify user cookie and let's see so you're getting undefined okay This is weird so now we'll go to this one access. poost API SL user SL I think the same we are doing here also let me check so this is what we are getting and if I go here let's see whether it is calling here or not first let's log this token here so it's coming here right it's getting the token and after
this what is happening we need to check so if token Is available we are doing the decoding and here we we should be getting let's see what we getting here in the decoded I something is wrong here only or not not sure so let's refresh this see we are getting gate ID this is correct only so we getting gate ID and then we should be also getting the user information so we log your user info refresh this H okay I think everything is fine Something is wrong in this uh I think the services we need
to check let's log this response here oh my God okay we have to give a here that's why see now it's navig getting awesome so that is the reason so it's it was returning the promise so now I see if what will happen every time we try to go to the Au page if the user is authenticated it's going to the task list page correct and if you refresh this page Also it will be in this page only so this is working fine let's go to the off page okay now this is the basic functionality
of this authentication is done now what we going to do right first we'll start creating the header and everything and logout functionality and after that we we start working on the task page all right so now let's start working on the uh layout and the header component first so we already created This common content right so we'll go there common layout and then I'm going to remove everything so here we're going to write everything so we'll take a div and I'll take a class name let's give this on Flex Flex Auto and I'll do Flex
column inside this we're going to take another div so we'll do a class name we'll do Flex Flex Auto and here I'm going to take a Main let's take a class name so we'll do fakes flakes column uh then we'll do mean height screen and then uh what else we'll do we'll do mean with zero and we'll do W as full we'll do BG white and what else we'll do I think we'll do border gray let's do 300 and after this we are going to use our header component all Right so here we'll be having
header and after this we'll be having our main content so here this will be class name and here we do Flex Flex Auto we'll do Flex column justify between and uh first what we going to do right I think for now this will be fine inside this we will take another main or let's take a div and here after this so here uh we will give this header height is fixed so Let's keep this on like 64 or 65 first let's quickly create the header component only I think it will be easier to manage so
we create a component header let's do index. jsx so this will be header now header will be having simple uh some menus okay so here we will be returning a header so here I'll be having a class name so we'll do bard border bottom we do border gray 200 inside this we'll take another div we'll do class name we'll do container MX Auto and height of 16 we'll take another div we'll take a class name we'll do Flex item center with full and to justify between okay inside this we will be having our logo or
text whatever for now I'll give class name we'll do with Auto and here I'm going to give H1 and we'll give like task Manager if you want you can give a logo or anything whatever you like and after this okay let's do after this so here we are going to take another div we'll take a class name we'll do Flex gap of four and I'm going to import the link component from D router Dom and I'll give this on name as tasks and this will go to so we'll have a two and this will go
to task SL list okay and then I'll copy this one and this will be our scrum Board so here will be having scrum board so here we'll be having a class name uh so here what we going to do we take this one as text black and then text Excel and we'll do font bold all right now let's save it and after this what we're going to do right we will basically take a log out so I'm going to install a package that we called Lucid react so that is a icons package so do CD
client and npm install Lucid react okay so this is a really nice uh react icons package so here what I'm going to do after this I'm going to take another div and I'm going to import log out from Lucid react we'll pass a color property which I'll keep this one as black okay and for this one I'm going to take a cursor name sorry class name not cursor name I do cursor pointer and there will be another on click that will be for log out but that we do later now we have created our header
now let's Imput this header component here so let's see what you're getting okay something is breaking here so this part we need to fix so I think uh I think there is some mismatch with the so we have taken Flex then we have one more div something we have done wrong that part we need to check I think this one here yes okay so now this is fine so we have a task manager then we have a to uh like link and then we have a log out Button so we click here it will go
to the okay so this part also you need to fix because every time you go there it is going to the task list page so this we can fix it very easily and this is happening because this logic is written in our context so here we need to do some Chang so what we are going to do right so let's go here in the context and this is very important I think so let's go to context so you can see that we are Always redirecting the user to the task list page but here what we
can do right simply we can simply check that if this uh location path name if this is equal toal to/ path all right or location. path name if this is equal toal to slash in that case we are going to navigate to the task SL list page or else whatever page we are currently at in that page only we need to we need to be there so how we going To do that so in this case we'll take a template literals and we'll use this location dot path name so let's save it now let's see
if I go to the scrum board it's going to the scrum board page and I'm going to to the task going to the list page but if I try to go to the O that time it will be going to the task list page correct awesome so this is done now next we'll go to the common layout page now here what we going to do right we Need to do a couple of uh changes more so now let's do one thing let's inspect I think we are getting some a in route we are having this
padding I think this we need to remove so we'll remove this padding from here okay and this header I think here right somewhere I think item Center we already doing okay here I think we can give For this one also we'll give height as 64 so let's go to header we are having container and I'll give height as 64 here also so now it will be in the middle and now because this is already 64 so the main body will be 100% minus 64 correct so that calculation we need to do so we go here
and what we'll do right so here I'll do height will be calculate 100% Min - 64 now here I look height as [Music] full I'll do a div we'll do a class name inside this and we'll do for this one also we give height full we'll do Flex Flex Auto do Flex column PX of 4 for SM we do PX of 6 for MD also do PX of 6 and then we'll do py of four and for ASM we'll do py of 6 inside this we will take another div we'll take a class name and
here we are Going to use ax Auto we'll do container and we'll do height full and we'll do p of zero and here we are going to render our Outlet so if I change it's changing and everything is fine so now we need to start working on the log out functionality but before that first let's create our log out controller so we go to our controller and here I'm going to create Another method so I'll do const log out this will be async so we do request response simply we'll set race do cookie we'll make
this one token and we'll keep this one as empty and here we'll pass the with cring cs is true and we'll do https only as false that's it and then we are going to return. status of 200. Json and we'll do success as true And we'll do message we like log out successful sorry everyone if you're are getting noise I can't do anything like I'm already afraid of like editing their noises because these guys will be talking every time so we pass this log out here and then now what we're going to do right I
think this is the same process again so we'll go to our routes and then we'll create another one and this time I'll give this one as log Out and we're going to import the log out here see I'm not explaining all of this step by step because this same thing we are doing every time okay so this is log out now what we going to do right now we can basically on click of that header button we are going to call that log out but before that we also need to create our service so we
go here and let's create another method so L export const a call log out API so this will be ask sync request response and here we'll simply do const response will be AIT and we'll do AOS dopost so I'm going to copy this from here and in this Au I'm going to pass this one as log out because that is the name and after this we going to again pass this empty and then we are going to pass with trading cells will be true all right and same thing return response do data And this is
done so now in our header component what we going to do right so let's go to header so in this log out button we'll take a one click and this will be handle log out so now let's create is so we'll do asnc sorry asnc function handle log [Music] out and here I'm going to do const response will be a it so I'm going to Call log out API and now if this response is successful so if response dot success this is true so first thing what we're going to do right so if you go
here in the context we have this user information so this user information we need to make it null so in our context I'm pass a value and I'll pass user and set user both so I'll call the set user and then I'm going to get it so Lo const get set user from use context of task Manager context and I'll make this set user as null and then what you need to do simply need to navigate this user back to the O page so do cons navigate this will be use navigate and then just navigate
to off page that's it now let's save it and let's see if this is working or not first I'll go to the O I'll click on log out it's going to the O page now try to access the task list page see even if you go to the Back it's not working right awesome so now if I go to the task scram board page then also it will go to the log o and now I'll do I log in with suam one because this is another user 1 2 3 1 2 3 4 5 6
click on sign in go to the this page click on log out going to the auth page again if you go back this is not work awesome job now I think we have completed our authentication now we'll start working uh on the task page all so first we will create our Back end for our task page and then we will be integrating with the front end so first I'll close everything because we have quite a few things to do so first we'll start with creating the model see always remember that you have to first create
your model so here I'll give task. JS okay so now the task will be having a title of the task description of the task status and then priority okay status will be either it will be in to-do in Progress blocked review or done and priority will be low medium and high something like that and there we need to pass another thing and that is the user ID user ID is nothing but means this T task is created by which user okay so let's say I am suum one and then there is another suum 2 so
now if I'm using the task so only I will be able to see my own task not other user task okay so that is the reason so I'll create const task Schema so here we'll be having new mongus so let me just do mongus we also need to import mongus so this will be require so this will be mongus so this will be mongus do schema and here we are going to pass title which will be string we are also going to pass description which will be string we will be having a status which will
be a String we also going to pass user ID me which user is adding that task that is also will be a string and then also will be having a priority which will be a string okay so now we'll create const task this will be mongus do models. task or mongus do model task and then we are going to pass our task schema and then we'll do module. Exports and we going to export the task so this is all about our model now we need to start creating our control okay so let's go here and
let's now in this part I'm going to give you give you guys some of the uh homework that you can do okay I'm not going to do everything so I'll give a placeholder it's your turn whatever Concepts that you have learned so far so you need to basically apply those and then and by that only you'll be able to understand Whether you are learning those things or not because watching this video is not going to help you okay you need to practice it so inside controllers I'm going to create a task controller JS and here
I'm going to create our controller so we need how many so first we need to add a new add a new task correct then we will be having to delete a task then we'll be having get all task by user ID by user ID correct and then We'll be having to edit a task so these four things we need to do okay so first we'll start with add a new task so const add new task this will be asnc we'll be getting request response and here the first thing you will be receiving all of these
so we will be receiving from Front End we'll be receiving a title we will be receiving a description we will be receiving a Status we will be receiving user ID mean which user is adding we also will be receiving a priority okay and this will be receiving from AIT request. body all right so after this now what you're going to do right so here you need to validate the schema so this will be your homework so you remember we have done in the user controller that we use Joy uh package to validate the schema so
the same you need to do so once we'll do that after this We'll take a try and then then we'll take a c catch and here what we are going to do simply we do console.log the error and then we are going to return response do status will be 500. Json so we'll do success will be false and message will be some error occurred please try again all right and In this try we are going to create our new task so we'll do newly created task and this will be so we need to import our
model for task so we'll do const task will be require so we'll go to our models then we'll need our task so here what you're going to do we'll do here a it so do task do create and here we're going to pass all of These I think let me check we have 2 3 4 5 yeah that is correct so all property we are going to pass we'll do if this newly created task is correct or means it is saved successfully y so we going to return race. status so we do 200 do Json
so we'll do success will be true and message we are going to display that task added successfully right else if there are any problem so we going to return this error okay and let's do a for 100 that's it so this will be to adding a new task now we need to do to we need to also get all the task so four total four we need to do so next we're going to create three more so one will be get all tasks as sync request response then I'm going to copy this and so this
will be update task and this will be delete task right solve for now here to get all the task what we going To do so first we need to get our ID now what will be the ID the ID will be the user ID I'm currently logged in so for example let say I'm user and I have I have five task created so I need to and total there are 100 task all right so I need to only get those five task because I am the one I am the owner of those task so we
need to get that ID so how we going to get it so we'll be getting this from so we'll do request do pams okay so from request params we'll be getting the ID and now here we'll do const get or we'll do extract all tasks by user ID so this is the user ID so we'll do a it and here we're going to do task do find and here we are going to pass the user ID see you noticed here we are passing user ID while saving a task so we will be having the user
ID which will be nothing but this ID here all right and then if we are getting this extract all Task then we are going to return return race. status 200. Jason so we'll do success will be true and we're going to pass the tasks tasks list which will be our extract all task by user ID okay if there are any problem we are going to return the same thing instead of rewriting let's copy this I think already the video is very long so I'm trying to do little fast okay that's It and I think we
need to take also the try block so what we going to do right we'll keep this one inside try and then we'll take a catch and for catch also I'm going to use the same this one okay now next for this update task uh what you're going to do so let's uh here also we need to basically get all the information and by the task ID we are going to implement but let's do this On these two later okay so for now we will do module do exports and we'll do here add new tasks and
also we'll do get all tasks these two okay this is done now let's go to our routes now I'll go to routes I'll create one more and this will be my tasks routes do JS now let's go to this uh here we are going to copy both and Then instead of task user router I'll do task router and now we need to get this so first I'll do const get all of this from require so we'll go to controller slask controller so here here we need our get all tasks and add new task now I'll
do task router. poost correct so this will be add so this is to add a new task and I'm going to pass add new task so this will be add new Task then I'll copy this and paste it here now to get this will be get because we need to get all tasks get all tasks by user ID okay so here we'll do get all tasks this is done now next thing what we need to do we need to go to our index.js and here just like we have imported this user router we need to
import our task router so this will be from routes slash task routes and then I'm going to use this so you're going to do App.use so this will be SL API slask and we're going to pass this task router and I think this is done all right so now we have created main two API routes now we need to start working on the front end part so front end also you're going to keep very simple we will be having a button on click of this we're going to open a dialogue and there we will be
basically having the form and then and based on that we will be saving The task all right so let's start working on that particular section all right everyone so now let's start working on our task page so first thing what we going to do right so we will be creating another component here and that will be common dialogue component because we are going to open the add new task form as a form of a dialogue and here let's create index. jsx so we'll do common dialogue all right and here we are going to Return dialogue
okay now this will take a property open uh property of prop which will basically will uh whenever let's say we have a button and on click of this we want to open the dialogue so this is the prop that we need to pass so we'll give this one as so dialogue right and then this will also take on open change so whenever we will click on Cross button or click outside of the uh dialogue it will automatically close That okay so here what we're going to do right we do set so dialogue will be false
now these two we are going to receive from props as a props we do so dialog and set so dialogue inside this uh we will be having a dialogue content okay and here let's take a class name so we are going to use ASM we do Max W screen height we are going to do let's do 450px and we'll do overflow Auto okay inside this we'll take dialogue title and we're going to render the title that's it and after this we're going to take a div and here we will give this one I think for
now this is fine let's return our common form because we need to render our form here so common form so here we are going to receive Form controls which will be form controls that we'll be receiving as a prop then we are going to receive our form data so this will be form which will be our form data so do form data also you're going to receive a handle submit which will be handle submit also you're going to receive a button text which will be button text okay now here what we're going to do let's
do one thing let's pass a Static value for now so we do add here okay or let's let's keep button text only so now here receive button text we receive handle submit we receive form data that's it so this will be our simple common dialogue now what we going to do right in the task page so let's go to our task page okay I'll close everything else now here we will be basically creating a very simple structure so let's remove This let's take a fragment and here I'm going to to take a div uh let's
take a class name margin bottom of five inside this I'm going to render our common button component okay so here uh before this because we will be having a button and on click of this we need to open the dialogue so I'm going to take a state so Lon so dialogue s so Dialogue this will be used state of false and we'll do on click and on click of this we are going to do set so dialogue will be true okay and also you're going to pass a button text which will be add new task
okay we are getting so after this we will take another div we'll take class name we'll do margin top as let's do five we'll do flex and flex column inside this I'm going to take Another div we do a class name and here we are going to render our list of tasks okay for now I'll keep uh this one like this now I'm going to basically render another component okay so now let's do one thing let's go to components and there I'm going to create one more component let me just go there so go to
components and here I'm going to create tasks and I'll create another folder and this will be add new Task and here I'm going to create index. jsx so this will be function add new tasks and what we are going to do right here so we can do one thing we can simply return the dialogue here right the common dialogue that we have created so we'll simply return common dialogue now this will receive some of the form controls and quite a few things correct so for that uh we will go to First our uh Config so
here what I'll do right I already created some form control so that I'm going to paste it and also I'll explain what exactly I have done so you can see that I have a scrum board options and there I am having ID and the label corresponding so we have the following things we have the to-do we have in progress blocked review and done and then we having to add new task form controls so task will be having a title it will have a description it will have A status which will be nothing but the scrumb
options so this is the options then it will have a priority priority will be low medium and high let's save it now let's go here so here first I'm going to pass the form controls which will be add new tasks form controls so what else we need to pass we also need to pass so so dialogue set so dialogue title uh so let's copy this three so s dialog we will be receiving from Props the same for set so dialogue and title I'm going to give this one as uh let's give post new task so
dialog will be receiving from the parent component and set so dialog will be receiving from the parent component now next thing what also we need to pass we need to pass a button text handle submit and form data so button text uh we will do or let's say Add handle submit uh we will do handle submit so we are going to create this method here and also we need to pass the form data so form data what we are going to do right so let's go to context and I'm going to create another uh so
we'll do const task form data and this will be use form and I'm going to pass here default values and we'll do title as empty we'll pass a description which Will be empty we will pass a status which also will be empty and also pass a priority which will be empty okay now this task uh form data we will pass in our context that's it now this one I'm going to receive from our context so we do form task form data from use context of task manager context and this task form data I'm going to
pass here now add new task is done so we will Go to main task component and I'm going to call this add new task and we need to pass the following things so first we'll pass the so dialogue which will be so dialogue also you're going to pass set so dialogue which will be set so dialogue I think only these two now let's save it now let's see what is happening if I click here so okay something is going on wrong we have on click let's see we're getting some Error is it okay I think
it was not updated okay now it's coming yes so we getting title description status we are getting for and also you're getting a priority awesome right and also you're getting a add here so now what we need to do whatever I'll be typing this value I need to pass to our database to store this task information okay so let's start working on that so let's go to our uh this add New task so we are already having this handle submit so now I'm going to do couple of things so first I'll go to our services
and I'm going to create some more service here so I'm going to create four so we'll do export const we be add new task API so you're having request response then I'm going to copy this oh sorry not request response we'll be receiving the form data so this will be the form data then I'll copy this I'll paste it four times so this will be get all task API we don't need any data here then we have update task API then we have delete task API four things we need now for add new task what
we're going to do do const response and here what we'll do right we'll simply copy this from here paste it now for this one we need to go to so if I go to our server right Go to index.js we have this uh API SL task so we copy this and then if I go to task route so we have add new task so this will be API SL task API SL task and then we are having add new task correct then we are going to remove this and we are going to pass the form
data here if you notice I'm not explaining everything because I already multiple times I explained all of these concept now this will become very repetitive so You need to practice by your own so this will be response. data now let's go here so this will be our API now when I'll do handle submit what I need to do I need to call that API correct so I'll convert this one to Asing and then I'll just do here const response will be have it add new task askk API and here what we're going to do right
so we will be basically passing the data so what data we need to Pass we need to pass the task form data correct so this is the data that we need not task form data sorry my bad this handle submit will give us the data so we'll do here get data and let's do one thing let me just comment it out and we'll see what we getting so we log here get data save it now let's go to inspect console now add new task so I'll give Title Here title description I'll give title then I'll
give status as let's a Todo and This one will give low now click on ADD we are getting all of this but status we are getting undefined okay this part we need to check okay this is not getting selected I got it so the reason is I think in the common form right we need to pass the value property I think value property we haven't passed so let's go to common form and here let's see what EX L we are doing so in the select content we are passing I think everything is correct Only so
we have a select field. value field. on change then we going form control select trigger select content so I think we haven't passed the value here correct in the select item we need to pass a value property also so value property will be nothing but option item. ID so this is coming from so if I go to our config right so in the config we we are having this ID for each and every option so this ID we need now I think this should work so let's try to select H it's now selecting so now
let's add this one so we getting in progress priority is medium awesome so now I need to I'm getting the data now remember one more thing what else we need to pass so if I go to model to the task. JS we having title description status and also you need to pass the user ID so how we are going to get the user ID see user ID will be getting very simply so we already saving this user information in Our context so this user I'm going to pass in our context I think we are already
passing so now let's go to our add new task I'll close everything else I'll get our user information and let's log this here so if I do title and everything add here see we are getting user information and here I'll be getting this ID correct so what I can do simply now I'm going to call this sorry I'm going to call this and Then I'm going to pass gate data and then I'm going to pass user ID which will be our user. ID correct now we are going to do so let's log this response okay
now let's cut it now let's see what is happening so I'll do this on too L I'll keep blow title title and then I'm going to do add task added successfully awesome right and if you go here we're getting add new task payload we are passing all Of these description title priority status and user ID right now what we going to do once we get this information we need to reset this form we need to close this dialogue and also we need to get the list of updated task so that is what we need to
do right so first let's start first what we'll do we'll reset this form and then we'll close this dialogue so let's do that so what we going do simply we can check if this response is True so we'll do set di set so dialogue as false and also I'm going to do this task from data. reset property so now let's refresh this page so we'll do second task added and then in status I'm going to do in progress priority I'll do medium let's add it's closing but now we need to face the list of task
and this is very very very simple what we need to do right first we'll go to our services so let's Go to our services and here in this gate all task API we are going to call the task uh fetching the list of task API so and that is nothing but this gate or all task by user ID correct so here what we can do right so let's go to our controllers so you can see that we are getting this gate all task from params now here we can do couple of things so because we
will be fetching this one From param so what we can do right we can do couple of things so first thing is that we'll go to our routes and here we'll do get all task by user ID and then we'll tell that okay I need to pass a dynamic ID here so I'll give this colon and give this ID so that means this value will be dynamic okay now what I'll do go to our service and then I'm going to copy this from here so here I'm going to get the current I user ID so
to get current user ID and here I'm going to do I'll paste this it will go to API so I'll do template literals so I'll do go to task and then it will will go to get all task by user ID right and then I'm going to pass the ID so ID is nothing but this get current user ID that's it and we don't need to pass anything else and also this will be uh we need to make this one as gate so this will be access dog okay and then I'm going to return Response.
data now so that means we are basically telling that I'll get ID property and this ID property I'm receiving in my controllers from this request. par. ID and this ID I'm going to pass and based on that it will give me the list of task so this is done now what we're going to do right so let's go to our task page now the first thing I will do let's go to our context one more time and I'll create To more State here so I'll do const loading then I'll do set loading and we'll do
US state of false and I'll do const tasks list set tasks list and this will be US state of array and this I'm going to pass so I'll do tasks list set task list set loading and also loading so all for you need we'll copy this now let's go to a task page I'm going to get all of this from my context So this will be the first step so now here this will be use context of task manager context now because we need to face the list of task on page load so what we
need to do so we take a use effect correct and here I'm going to call Api so we do Fage list of tasks correct and this will be a method so we'll do as sync function f list of tasks and here I'll do const response This will be AIT and then what I need to call we need to call the services this get all task API right so call get all task API and here it will receive a current user ID so from where we'll be getting the user ID we'll be getting from user from
Context right so here we need to pass user. ID that's it and now I'm going to log this response here and let's see what you're getting so do tasks list so let's go to console we're getting Some error is it no we are getting object here we are getting two task list awesome right and here each and every task will have a ID unique ID title and everything we are getting awesome so now what we can do simply we can give here set loading as true and then once we'll get the response so if response
is true say response. success is true so we are going to do set task list will be response. data not data or what we Having task list we are having so copy this and then we'll do set loading as false so now if I log this task list and let's see what you're getting so log this we're getting two data refresh this okay this is not on refresh it's not [Music] working okay something is happening we are getting undefined okay so it's not getting the I Got it okay so what we need to do basically
we need to give this user as a dependency so that means until orless we uh this user is present then only we need to basically call this and this is very very important so what we can do right so here we'll give this user as a dependency and then we'll check if this user is not equal toal to null then only will call this so now let's see so now let's refresh this so we getting two data awesome so Now this is done so now what we're going to do right we are going to render
all of this but one more thing we need to do whenever I'll add a new one that time also I need to get updated list of us updated list of task so how we are going to do that right so let's do one thing so here what I'll do uh let's go to our add new task I think we have done one little Improvement we need to do and that is instead of doing this handle submit here right we can keep this handle submit in the pent component and I think this will be better so
we cut all of this okay and then uh I'm going to paste it here in this task page so I'll paste it this here so I'm going to import this first and then I'm going to pass this handle submit so let's pass this also handle submit as a Prof here and then I'll receive this one Here okay and then I'm going to pass this one here already passing and also let's don't keep any use context only we are going to also move this one in that file only task form data so task form data also
I'm going to get from the context and then I'm going to pass it here and then I'm going to receive this on here and I'm going to remove so these all things are not required awesome so now what we'll do Right because the reason why we move to handle submit once the adding is successful then only we need to again call this fet list of task API okay so that is is the reason so now once we'll submit this one we'll call this Fage list of task again save it now see what will happen if
I go to inspect and then I'll go to console see we are getting two I'll add one more right so we do third third Task and then I'm going to add one more so we do to do priority low now see if I add this one so we getting now three so we're getting updated okay so now we need to render all of these and to render we are going to create a common card component so that it will be easy so that it will be reusable we can use that the same in the scrum
board component also so let's start rendering all the task here all right so now let's render the list of task so for now first We'll go to our components and I'll create another component here and I'll give this one name as common card and I'll create index. jsx so let's give common card so this will return the card component that we already installed from s CN and then um here we are going to use some class name so let's give a flex we'll give BG gray 100 Flex column gap of six we'll do rounded 2
XEL Padding of eight we'll do Transition we'll do a duration of 300 on Hover we are going to do background as white hover we'll do Shadow 2 XEL and for hover we are going to do Shadow gray and we'll do 600 ided by 10 and also we going to do cursor as pointer inside this we going to use card header and here I'm going to give a Class name so for this one we'll do padding of zero now here I'm going to use a div and this will be a class name I'll give flex and
we'll do justify as between and here I'm going to render the title of the card so you see the title is present in the props then only I render card title and here I'm going to pass title or else uh what we're going to do right We'll simply render null now here I'll use a class name so we'll do template literals and here I'll do text 2 Xcel we'll do Max w250 PX we'll do text ellipses we'll do overflow hidden we'll do wh space noap we'll do font semi bold and we'll do text Gray 950
now here what also we going to do we'll see like if we want to add any extra Styles extra text Styles so we are Going to add those okay or else this will be empty this is all about the card title now after this what we're going to do so here we're going to render that if there is a right content or not on the right side so if there is a right content we are going to render the right content or this will be null okay so after this we will check if there is
any description for that card if there is a description we are going To render card description and we'll Ender the description or else this will be null so we'll do class name so here we'll do margin top of three and we'll do text gr 600 all right and after this we are going to render our content so check if there is a Content so render the card content and we'll render the content or else this will be null for this one also let's keep the padding As zero and after this we are going to also
render a card footer and we going to render a footer content and we also take the padding as zero for this one so now all of this we need to get from the props so first we'll get the title we'll get description we'll get extra text stle we'll get footer content we'll get main content content what else we are having header right content and Also receive if there is any header right content or not that's it so now this is done now what we're going to do so let's go to our task page and here
we are already getting the list of tasks so what we'll do simply first we'll render here that if the loading is true so we are going to return skeleton I think we need to install skeleton from San okay let's do that all right so we going to copy This let's open one more terminal go to client folder and paste this one so before this we are going to renter the list of tasks here right so I'll give this one as grid for MD we're going to sorry for MD we're going to do GD Columns of
two for large we'll do grid Columns of three and for Excel we are going to do grid Columns of of four and we'll do gap of four okay so now we I think this is done so we'll Import this skeleton and here we're going to give some style so we'll give a class name so I'm going to give W as full we do height as let's do 550 PX we'll do rounded 6px we'll do bgs black and we'll do oppacity as 50 okay and here inside this we're going to render the list of tasks so
we'll do if this task list do length if this is Greater than zero so I'm going to render the task or else I'll render nothing or let's render H1 and we'll do no tasks added please add one so here I'm going to log this sorry map this so do task list. map so do task item and here what we going to do right so we can basically create one more item where we'll be add uh sorry we'll be rendering the single task item right so what we'll do right we'll go to our components folder and
there we are Having a task folder inside this I'll create one more and I'll give this one name as task item so these two to render the single task item so do index. jsx and this will be task item okay and what this will return return so this will simply return return in the common card component that you have created correct and also it will receive the item uh okay so now I'm going to call this task item and I'll pass the item which will Be task item and here in this item now we need
to pass couple of things so first we need to pass the i title which will be item. title we need to was the uh content also you need to was the description so description will be first I'll do item dot status then we're going to change this I'll show you what exactly we are doing and I think what else we can do uh we can also pass a footer content right So we do footer content and here I'll take a div so we need to have two button one will be edit button and one will
be delete button so we'll do Flex W full we'll do justify between and item Center and here I'm going to call sorry we're going to call common button and we'll do button text so this will be edit and I'm going to copy one more time and this will be delete let's save it let's See what is happening awesome so okay this one we are getting item do status in the mid so let's go to the common card so let's see why this is happening okay so yeah we are having this one so we'll do let's
do one thing I think we can do uh text align left I think this will not work let's do one thing I'll take one more div and we'll cut it from here paste it and I'll do a class name and do flex and We'll do Flex start so you need to do justify start okay now we are getting here so we have all of these now let's I'll try to add one more task so new task added so here I'll do to do this will be low let's add new task added refresh this so you're
getting right all right so now the fetching is done so let's start working on the delete functionality so first I'm going to Write the API side code so what we're going to do right every time we click on this delete I'm going to pass this uh ID of this task so so what we'll do we'll copy this the same logic that we need the ID and I'll pass here and then we'll do try catch and here what we'll do simply return the same thing okay and here I'll do if this ID is not Present so
we will return another error so I'll copy this and we'll do anything think 400 and we'll do like ID task ID is required so if this is done after this we're going to delete so do const delete task and this will be a it so this will be task. find by ID and delete and here we're going to pass the ID okay so here we'll do if this delete task is true that means we are going to return race. status 200. Json and we'll Do success is true and we'll do messages like task deleted successfully
okay else what we'll do we simply return the error so we copy this and we'll paste it here okay and I think this this is fine now let's do one thing let's pass it here this delete task so we created our controller now I'm going to go to our routes and then I'm going to first Import it delete task and I will create one more so here I'll do const this will be delete and here I'll be having delete task and I'll be passing the id id is nothing but the each and every task ID
save it now next step we have to go to our services so go to services and here what we going to do right I'll copy the same thing again instead of Rewriting for the delete task we will be receiving the get current task ID not user ID so we'll be getting get current task ID all right now what we're going to do right here we are having get all task by user ID so let me see the name so we'll copy this and we'll pass it here and this will be get current task ID and
this will be axis. delete and everything is fine now let's Save it now what we're going to do right so let's go to our app side so here in this task item uh what we going to do we will be basically having this delete button right so uh let's go to our task page and I'm going to create one more method here okay so I'll create a sync function do handle delete we'll get the ID get Task ID okay and this handle delete I'm going to pass as a prop to this task item component okay
save it now go to task item we'll receive this one and now on this delete button what we'll do right we'll do one click so this will call this handle delete and we are going to pass this item. ID right so this is the ID that we need so if I now go here right and let's say log this G task ID and let's see What is happening so do log get task ID save it okay let's log this now let's see what we are getting so go here let's go to console and let's say
delete this one so we getting ID delete we are getting ID okay so now what we can do simply we'll do const response and we'll do AIT delete task API and we are going to pass this get task ID right and if this response do success if this is true so what we'll do We will will simply call the fet list of task API the reason is because if this is deleted we are having currently four if I delete this one there should be only three right so let's save it and let's see what is
happening so now I'll try to delete this one okay we are getting some error sorry let's see what is happening so we'll click here delete we are getting 200 but it's not getting Getting response what you're getting success true okay we are getting delete task Success Through task list I think something is going on wrong here so this we need to check oh okay okay I I got it in the services I think we are doing something wrong is it so we having API delete task okay but this is correct only let's see so we
go to our task Routes see here we need to pass delete task that is the reason okay now let's see so now I think that uh first I'll refresh I think that should be four now I'll try to delete deleted delete deleted we are getting only two deleted and let's delete this one also we are getting no task added so now I'll add new one some random value add add it awesome so now delete is done so now let's start working on the edit now for edit we need to do a couple of Things first
when I'll edit I think now I don't need to explain because we have done multiple these kind of apps in the previous video so first we need to store this current edited ID all right so which item we are editing then we need to open this form with the prepopulated values correct very very important also you need to change this to edit and then once I'll submit I need to edit the respective task so first we'll complete the uh server side code so let's go to Our uh controller first and then here what I'm going
to do right so let's go to our update so here we having update so here what we'll do right we'll be receiving all of these so we'll be receiving title uh description we're also going to receive status priority we also receive user ID and also the ID of the task and this will be receiving from AIT request. Body okay and now what we are going to do right first I'll simply do let's do a try catch and I'll just return the same thing here and here I'm going to do const update task so this will
be AIT task do find by ID and update okay so here what we going to do we will be basically passing the ID So based on this ID I want to update then I'm going to pass the title the Description sorry description also you're going to pass the status priority and also the user ID okay and then we'll pass another property and that will be new is true so this will update the task okay so if this is done so that means if this is true so we'll do update task and then we're going to
return a response success response so we'll do 200 so we'll do 200 and here I'll do a Message that task updated successfully okay else I'm going to return a error that's it so now I'm going to pass this so we'll do update task so now let's go to task routes and then we'll do update task and here I'm going to do this one as put okay so this will be update task now Here what we going to do right because we will be basically passing all of these so we don't need to pass any value
here and here we'll do update task and this is done so now let's go to our services and we will I'll just copy this and here we are going to do update task we don't need to pass any extra params here right and this will be access. put also you need to pass the form Data and then we are going to return the response. data so this is all about the services are done now we need to start working on the client side so if I click on edit I need to open the model also
I need to prepopulate the values okay so let's say how we are going to do that so first thing is that uh in this task I'm going to create another method or not method is required first we need to do a couple of things let let's go to uh this task item and here we are going to pass It uh prop I'll close everything let's go to this item task item and I'm going to receive this set so item set so dialogue as a prop in this component and I show you why so we are
going to pass this set so item in this task item as a prop and then once I'll click on this edit button so I'll take on click here and here I'll do set so dialogue will be true let's save it now see what will happen that means if I click here I'm opening This now once I'll click on this edit one more thing what we need to do we need to basically store the current edited uh item sorry the ID and that is very important so what we're going to do right so let's go to
our context and we'll take one more State here so we'll do const current edited ID Set current edited ID will be U state of null and these both we are going to pass in our Context now let's go to our task now these both we will be receiving from our context and then I'm going to pass the Set current edited ID as a prop to this task item component I'll pass this one as a prop and I'll go to task item I'll receive this as a prop and then I'm going to do one more thing
that Set current edited ID will be item. ID that means every time I'll click on this edit button I'm going to store this ID that Which item or which task I'm currently editing okay and one more thing what we need to do we also need to pass that task form data so pass task form data will be task form data so get this because once I click on edit I also need to prepopulate all the values so this I'll be getting here task form data and now what we can do right simply we can do
task form data do set value and here we need to give title so title will be item do Title okay so copy and past four times you can also do some forage or something but I'll keep it like this description and then I'll do status and I'll do priority so this will be item do priority this will be item do status and this will be item. description okay now let's see what is happening if I click on edit see we are getting all the prepopulated values right so this is in progress this is the values
and this is low now once I do Okay one more thing once this current edited ID is present we need to make this one from add I think add we can keep we need to do edit task instead of post new task how we are going to do that so that is pretty simple so let's do one thing let's go to our task so we're passing this add new task right so here we can do if this current edited ID is not equal to equal to null so in that case we'll do edit task or
we'll do add new task So now we are getting okay sorry sorry not here I think this we have done in the button so I'll undo this one and we'll make this one where we need to do it in this dialogue so we are having title post new task here so here I'm going to pass this current edited ID as a prop right and and then we'll receive this one as a prop and then I'll do if this current Edited ID is is then I'll do edit task or I'll do Post new task now this
will work so I'll do edit here so you're getting edit task and all the data is getting populated let's I'll add one more new task okay and once I'll close this one that time also need to reset this and this is very important so that we can do very easily so what we can do right uh in the this we are having this on open change this on open change right in this common dialogue so here I'm Going to pass this on open change and this is very important so this I'm going to pass instead
of this set so dialogue okay now from where we are calling this from this add new task so I I will do on open change so I'll do two things here so first I'll do set so dialogue will be uh this will be false and also we need to do one more thing and that is we need to check if This current edited ID is not null so if current edited ID is true so in that case what we'll do right we need to also reset this form data so we'll do task form data. reset
or else we'll do nothing so now let's see what is happening so if I click on site add new task it's getting reseted if I click on edit this time it's coming now if I click on close and open one more time you can see it's getting reseted but this this also we need to do so this Edit task is not getting changed the reason is because we need to make this Set current edited ideas so this also you need to pass so we'll pass this Set current editor ID here as a prop in this
add new task save it and now we'll be receiving this one also and then I also going to do Set current edited ID as null save it now let's see if I click on edit we are getting edit task click outside and click on here we are now getting Post new task awesome so now everything is done so what we going to do right in this handle submit where we are adding a new task so instead of calling add new API task API when we will be doing edit we need to call the edit API
but how we are going to do that and this logic also have done we'll be able to easily check it using this current edited ID so if this is not null so so in that case what we're going to do we will be calling the edit call Api uh so we'll do what is the Name of that service that we have given so we go to services update task API not editor so do update task API so update task API and here we need to pass the form data so what we'll do right so here
we are going to oh sorry so here we need to pass the data so data will be your get data right we also need to pass the ID so ID will be current edited ID and also you need to pass the user ID which will be nothing but your user. ID okay these Three things we need to do and if this is successful that time again what we'll do we'll do Set current edited ID as null that means the edit is successful so that time we will again make this one as null so let's see
what is happening so try to edit this one and let's I'll give my name and let's I'll do add getting changed to this one right now I'll do new one added new added so I'll add let's do this one to do and priority low add we're getting New added click on edit so I'll do edited and I'll do this one also edited and let's add so it's now edited refres this we are getting only two all right log out and now see I'll go to I log in with this do sign in we're getting two
but if I sign in with a different account let's I do suum one so this user don't have any task added so if I go do sign in I think this is a wrong user so I'll give this one so do sign in so you can see we Are getting no task added because this user don't have any task added but I will add this one so task added by suum one paste it status will give too this one add so you're getting only one task now I'll log out and I'll add suum I'll sign
in so getting only two but if I now sign in with suum one that time we'll be getting only one okay and this is working fine so now the task page is done so now let's start Working on the scram board page so scrum board will be pretty simple what you're going to do right whatever task I'll will be adding there so those task I will be able to see in my board or scum board and then I'll be able to move it from to-do to uh in progress in progress to blocked from block to
review and review to done and we will be able to drag and drop but one very interesting is that we are not going to use any third party Library package so we going To use normal HTML 5 drag and drop API and let's see how we going to do that because I think that will be very helpful for your interview purposes also so sometime you'll get this kind of questions that Implement drag and drop without using any third party Library package okay so that is the reason I decided not to use any other Library packages
for that so let's start working on that part all right everyone so let's start working on the scrum board page so The first thing what we going to do right in the in this page we will be basically rendering the list of uh task that is you added by the user okay so that is the first thing what we are going to do so let's go to this page and then here first uh we will take a use effect and and here what we going to do we will be fetching the list of tasks so
to fetch list of tasks here and for this one I think I'm not going to write I Think we already have now again here everyone I'm repeating see please don't think like uh if you are actually in this point or you almost complete a lot of things that Ive showed you multiple ways you can do that so let's say instead of rewriting this logic in both the components what you can do you can create a custom hook and then you can use the same logic right those Concepts also I've discussed so it's not like I'm
not doing like that so this is the best Approach again you can also use some custom Hooks and also you can use hooks like aswr okay but here I'm going to do the same so I'm going to copy this and I'll use the same here so I'll paste it so F list of tasks and I'm going to get so we'll get our user and also do set task list from our context these both okay okay and this will be from use context of task manager context so this is the first step so now we need
to also keep the User as a dependency and we'll do if user not equal to equal to null that time we'll be fetching the least of tasks so now here we'll be getting the least of task now what we going to do right we need to have different different section so we'll be having a to-do section then we'll be having in progress section then we will be having a blocked section for example or review then we'll be having review or blocked section and at the end we'll be having a Done section each and every will
be a block so first I'm going to create this block so first I'll cut it from here and let's take a fragment and here what we're going to do right we'll take a div and we'll take a class name and we'll do grid grid Columns of five and we'll do gap of two and we'll do height as full inside this see remember we already Have this scrum board options so this we are going to map all right and this will give me I'm item and here what we're going to do right we'll WR a div
so we'll keep key as item dot ID and inside this div right I'm going to take another div and we'll take a class name so what we going to do right here we'll do PX of one py of three we'll do text Center we'll do bgs black we'll do border none and you'll do MB of three For this main div here we are going to also take a class name so we'll do border we'll do border this color okay and then also you're going to do rounded and we'll do overflow overflow Auto so you can
see that we are getting five section now for each and every section we are going to render our label so we'll take a H3 and we'll do item. Lael okay and also you need to give some class name so here we'll do text to Xcel font extra bold and we'll do text as white so we getting too in progress blocked review and done now what we need to do right now we need to render the to-do item so we'll take a div and what we're going to do right we'll create a function so we'll do
render to-do by status now here we need to basically do step by step And now we are going to render it based on what based on ID so ID is nothing but for this one the ID is too for this one it is in progress for this one it is blocked so for each and every too and how we are going to get that we'll be getting this one from this uh this uh too from this uh to-do status or basically task status that we'll be having from here okay so here we will be basically
filtering based on the ID so which will Be item. ID okay all right so now what we going to do right for each and every category we are going to basically render the task so if uh there are let's say 10 task correct and then five of them are in to-do state so we will be having five here something like that so to do this one what we're going to do right we'll take another div here and I'm going to create a method and this will be render task by task Status and we need to
filter it based on the ID so do item. ID off okay we're we are going to see what exactly we do we'll give a class name of padding of three so now let's create this function so do function this now here the first thing what we'll do right we will take that uh all the status we'll do um task status status and here uh we will take all the ID so we are having too as a status and first Time we'll be having empty then we'll take in progress which will be having empty then we'll
be having a blocked empty then we'll be having review which will be also empty and then we'll be having done which will be also empty for the first time now these all are nothing but if I go to the scrum board options you'll see these all are the keys or sorry the so to do in progress blocked review and done so now we have this task statuses so now what We'll do right so we already have a task list so here what I'll do I'll simply do task list right dot for each so we do
task item now here uh what we are going to do simply so we'll take this task statuses all right now this task item will be having a status now what status is that basically this status is nothing but this status that we are having right so we do task statuses of task item. status so task items of status if it is to-do So task statuses of to-do will be this part where we will be pushing that task if it is in progress it will be coming here then we'll be posing in this array if it
is blocked we'll be posing here review and then done okay this is exactly what we are doing now here we are going to do dot OST and what exactly we are going to post we'll be posing a div element and here we will be rendering our common card first we're going to Implement the structures we'll do common card and here we need to pass our title so what will be title so title will be our task item dot title then we'll be having description so we do task item dot status all right and I think
that's it so now let's save it and let's see what we are getting so if I save here okay we getting some error let's see task list. oh my God this will for each still we are getting error okay Let's see what is the error cannot read property of too of undefined okay item do idid okay so here it is G giving some error I think we are not returning our task uh task statuses uh so here we need to also return it so we return this so now we getting this but we are not
getting any data here so let's log this task statuses and Let's see what we getting save it we are getting set loading is not defined okay here we are getting okay let me just remove this for now okay we also need to import this and what else we getting we are getting one I think we should be getting one yeah so here we are getting one to do okay this is when first now we'll go to a task and I'll add one more so we'll do new Task and for this one I'll be keeping this
one status as in progress and keeping medium let's add this added now if I go to scrum board we are having one in in progress okay now you're getting so now what we need to do right we need to start working on the drag and drop now to implement drag and drop first what we need to do we need to basically use in the main wrapper so this is our main individual to-do item this is the div so here I'm going to take on Drop okay so here what you're going to do so this will
give me a event and I'm going to create create an on drop method and I'm going to pass the event and also the item. id item. id is nothing but the status ID so if it is too it will be too in progress block something like that okay and then one there will be one more that will be on drag over okay so here also what we'll do simply we'll do we'll take a event and we'll do event. prevent default So now let's create this onrop method so we'll create here so do function onrop okay
now for this on drop what we're going to do first we'll be getting our event and also we'll be getting get current status right and now for this individual item sorry for this individual task item that we are having here for this one also we need to add one more property and that is draggable so if we don't add the drag draggable Property you will not be able to drag these items so to add that one what we can do right so we are having this uh where is that render to-do items here so in
this where we are posing this item so in this div I'm going to add a dragable so what I'm going to do right I'm going to check that if for this done once you move any task to done State you will not be able to drag that so that condition I'm going to add so for draggable what I do I'll check this task Item do status if this is not equal to equal to done then only will be able to do it so then I'll make this one true ORS this will be false so this
will be dragable and then I'll do on drag start so once I'll start this then what we're going to do again I will do if this is Task item do status if this is not equal to equal to done then only I will do event and then I'm going to just do on drag start one more method and I'm going to pass The event and the task item. ID that which item I'm basically dragging and if this is if it is in already done then we are not going to do that so I'm going to
create on drag start okay so when I will do on drag start this will be pretty simple so I'll create this method here so we do function on drag start this will get the event and it will get the get task ID okay and now what I'll do simply let me move this on drop on drop also on Top so here when I will just do drag start so this will basically give me one property data transfer so if I log this here right event so if I do drag start see there is a event
that we right so this will give me event dot data item sorry data transfer and then we are we will be basically able to set data so we'll just do event. data transfer and here we are going to do set Data and I'm going to pass here the ID which will be the G task ID okay so on drag start we are going to set this property attribute and once drag over then that time what we're going to do first we're going to get this ID from this data transfer so how we are going to
get that so do con get uh draggable uh dragged task ID that which we are currently dragging so in that case what we'll do we'll do event do data Transfer do get data and here we'll be getting based on this ID so this is the ID so here we'll be getting the ID of the task and then what we need to do we need to find the current task let's say in this part we are having 10 task right so we need to get the current task which task we currently dragging something like that so
we'll do let find current task and this will be so we having task list. find so this will be item and how We are going to check that so item. ID sorry item. ID do2 string so this will be equal to equal to this get draggable task ID correct and here now what we're going to do we do find current task and here we'll do like so we'll destructure the find current task and then we'll update the status so status will be get current status now I'm going to again explain what we have done so
for example let's say first I'm dragging Start dragging this item from to do to in progress so once I'll do on drop that means when I'm dropping this one into in progress I'll be getting this gate current status correct so what I'm trying to do so I'm finding this task and then I'm changing this status to the current status so for example let's say the previous one was in too and I'm moving this one to in progress I'm changing the Status from too to in progress okay and then what we're going To do we'll do
update task by status so we going to call this method and we're going to pass this find current task okay and then what we going to do we'll simply so here we'll create this method so we do as sync function and here I will do this update task by status so this will get the task and then I'll do simply so here what we can do right we can simply call the update task so we do AIT update task API and here we'll be getting G uh task and Also we are going to basically call
the list of products or list of task so means when I'll be moving this one from Todo to in progress that time I need to update this one as well as I need to show this too in the inog so this both the API call we need to do now let's save it now let's see what is happening so try to move this one here it's moving right here now we are having only two in in progress refresh this page so we getting two let's move this On to blocked it's going to the blocked and
if I go to network and if you see that what is happening so I'll move this one from block to review and that time you notice we first calling the update task and there we are updating this status as review and then again we are calling the list of task this is exactly what we are doing so move this one and now once I'll do to done right now you see not be able to drag it Correct and also Let's do let's close uh do some styling so that user will be able to understand that
this is now in done state so how you we can do that so we remember we have passed this extra style text Styles so here we'll do if this isn't [Music] done so if this is in done state right so what we can do we'll pass a underline or else this will be empty save it uh not underline I think that Will be line through see fine right so now I'll move this one directly to done so it's in done State now and also let's give some uh this what we can do right we'll give
some class here so let's give a margin bottom margin bottom of let's say four or two so be getting some now this is done now one more thing let's go to tasks also notice this is also getting changed now one more thing we need to do we need to Change this one to label not the ID so to do that we'll go to our add new tasks sorry task item so we'll go to task and then task item and here we are rendering this description right this description will be so what we can do right
simply so this will be uh scrum board we are having this scrum board options right so here what we can do simply we can first find so we do do findind item sorry we'll do board Option so board option do ID if this is equal to equal to this item do status then we are going to render the label here so means we are basically checking that which is that so based on that we are updating these two done so I'll do add a new one Task 1 2 3 and we'll do too priority low
add so so now this will be in to-do go to scrum board there is a to-do let's move this onto blocked go to task now this is getting change to blocked right same Thing we can do here also so let's go to scrum board and then here we're passing this right this uh description so we can do the same logic here also copy this and in this we'll pass that and instead of this item this will be task item it's getting changed so you'll be a able to move all of this right and even if
you refresh this page you'll be getting the same data all right now I'll do log out let's say I'll go To some go this so now we getting this go to scrum board we'll be getting one in progress one is in too and you'll be able to move all of these and this will work let's log out try to access the task page it's going to the this page try to access the scrum board page it's going to the same page awesome and also now let's say if I do suum One it's coming let's go
to sign up I'll do suum 2 I'll add a new user do suum 2 at the gmail.com 1 2 3 4 5 6 sign up so you don't have any t here also you don't have any task and I think everything is working fine let's log out and now let's go back so it's not going it's going still in the off page all right everyone so with this we have completed the almost the video and I hope that you learn a Lot of things we covered a lot of points although I know that we haven't
discussed in details each and every topic but these video is just to created I created in such way that it will be helpful for beginners like you but I will definitely create some more advanced courses also on react coming uh in coming videos and also I will be definitely create another video using react where I will be creating all the projects using typescript so if you like This particular video please give a like comment down and please subscribe to my channel I'll see you in my next video till then good luck and peace