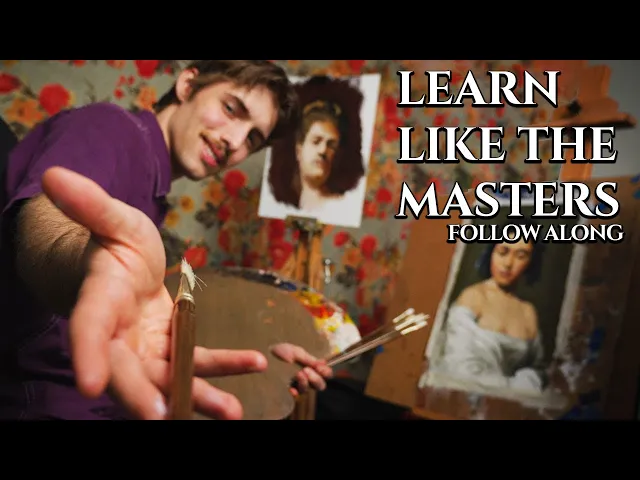
People always talk about oil painting like it's one of the most expensive and complicated ways that you could possibly learn how to paint and I understand why they think that way I mean look at all this stuff but it doesn't have to be so complicated and I'm going to show you that today I think oil painting is one of the most forgiving and flexible painting mediums out there so today I'm going to show you everything you need to Learn how to paint and then we're going to make a painting let's get started now I just
want to say painting is about understanding and I think people tend to care the most about what matters the least and the first one of those is materials and I'm going to talk to you about materials I'm going to tell you everything you need don't worry but a lot of people seem to think that better materials equals better painting but it couldn't be further apart the Only thing that will make you a better painter is practice and understanding so study the Masters for long enough and you'll become one I made a free pdf in the
description that goes over all the material as I talked about in this video in more detail first you're going to need something to paint on this is called canvas board it's a piece of cardboard that's the board part with a piece of canvas glued to it they're pretty cheap you can pick up a five pack At any art store and they're easy you can paint right on top of them I'm going to recommend you get about 9 by 12 that's inches sorry Europeans I don't know about your fairy tale units you guys can figure it
out I'm sure uh maybe a little bit smaller we're going to want to paint about 3/4 life size so for a portrait that's going to be a little bit bigger than my hand give or take and that's a nice size to paint at you might think you're conserving Resources by Painting smaller so you can paint cheaper but remember painting smaller is much harder and we want to make things easy and simple for ourselves if you don't feel like doing that you can also get gesso this is acrylic gesso it dries fast it's easy and basically
you can put this on any surface and then paint on it like cardboard or wood or or whatever scraps you have lying around when you're just studying it doesn't matter so this is a little bit cheaper but you got to Do a little bit of prep work yourself so you can make that decision I like like to use bristol board that's just a tough thick smooth paper and you can put this one coat two coats on it whatever and paint right on it and and that's a really easy way to go about that so the
choice is yours basically oil paint kind of just eats whatever surface is on it's very acidic or something like that and you need to seal the surface off before you paint on top of it or else it's not Going to last a long time now it doesn't really matter if it lasts forever because again you're just studying uh you also don't want the oil paints absorb into like the cardboard that you might be painting on for example it's going to make the paint look really weird so let's just make it easy for ourselves and pick
up something that's moderate quality and get going next you're going to need some brushes I just went to the discount store and I picked Up a pack of six brushes for $6 maybe these will suck I don't know we'll see but I have high hopes for them they're bristle brushes so hog bristle or a synthetic bristle the synthetic ones are softer and you really kind of want nice thick bristle brush for when you start painting because oil paint's really thick and it's really heavy and goopy and if you have a really weak soft brush it's
going to be hard to pick up and move around and that's what we want to Do we want to move around paint over time you'll probably become a bit of a hoarder like me and you'll start to accumulate brushes but honestly most of these I picked up off the clearance shelf for under a few dollars a piece normally two three four maybe $5 a piece I own very few expensive brushes each brush kind of does its own thing it has its own properties but we're just trying to make things simple and fun here you don't
have to worry about all that and Yeah you might become a hoarder if you like this stuff but you know you know just let's just take it one step at a time before you get crazy all right this is a cheap weak synthetic brush and it's very soft it's not going to pick up oil paint very well it's not strong enough if we go to a our Chad bristle brush it's going to be a lot more resistance and that's a good thing and even the synthetics included in this kit are actually a little bit tougher
than uh Some of these really cheap ones like this that might be better for acrylic or waterbased painting these ones they're not bad so that's actually pretty good maybe you can look for a set that looks like this I wouldn't pay more than $15 for it yeah it'll it just serve you well all right now for paint I'm going to do some black magic we're only going to use four well actually it's really two colors where did that go it's only really two colors so I have white these These are at least you know that
I actually painting I'm not making all this up this is titanium white uh this is Ivory black this is yellow ochre and this is cadmium red cadmium red Hue it's kind of like a a mixed up labade variant of cadmium red cuz cadan red is questionable on its safety and it's just I recommend this stuff it's nice and easy for Brands I recommend something like Windsor Newton Hine Rembrandt anything That's kind of that mid tier you want to avoid words like craft or artist paint and make sure it says oil paint on it too you
want to make sure you're getting the right one the thing with oil paint is is that it's a bunch of crust up rocks Bound in oil if it was bound in gum then it would be watercolor if it was bound in acrylic plastic whatever it would be acrylic so when it's bound in oil if you're buying cheaper paint normally that means that they're just Putting less crushed up rocks in and more oil you're probably not getting a better deal you're probably just paying for more oil you actually might be getting a worse deal by buying
cheaper paint so just get a mid-quality artist grade brand like Windsor and Newton and these four colors that's all we need to make a great portrait actually it's it's kind of incredible we don't even have a blue one here but I'll show you so mediums are kind of your Alchemy and Potions and elixir and you can mix them into all of your Paints in order to get them to do different stuff but you don't even know what oil paint does so you probably shouldn't be mixing a whole bunch of crap into it I'm only going
to recommend to you linseed oil you can clean with it you can thin your paint with it you can do pretty much everything you need to do with a little bit of wind linseed oil this is actually walnut oil I'm actually out of linseed Oil right now it's going to work pretty much the same and you're going to need something to put your paint on too I I almost forgot this is a nice fancy artist palette it's like $50 or so um but really you can paint on anything you can use some paper plates or
whatever generally you want the surface to be non-absorbent but for like5 or $10 you can normally get a medium-size wood palette at the art store and that's going to work just fine so just use just Use whatever guys you know this is your first painting and you can slowly get materials as you go and as you enjoy and want to experiment with new things we're just about making this fun and approachable and easy that's that's why we're here way Skelly what do we paint now let's go do it now I'm going to choose this painting
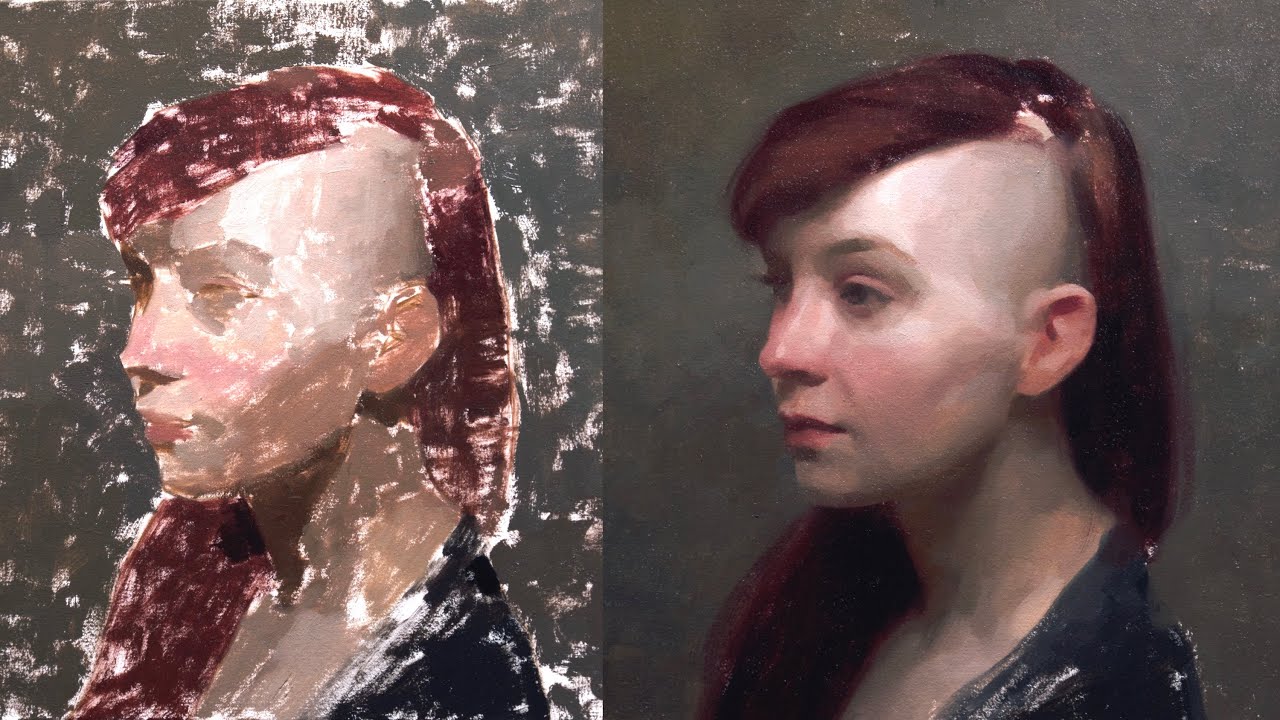
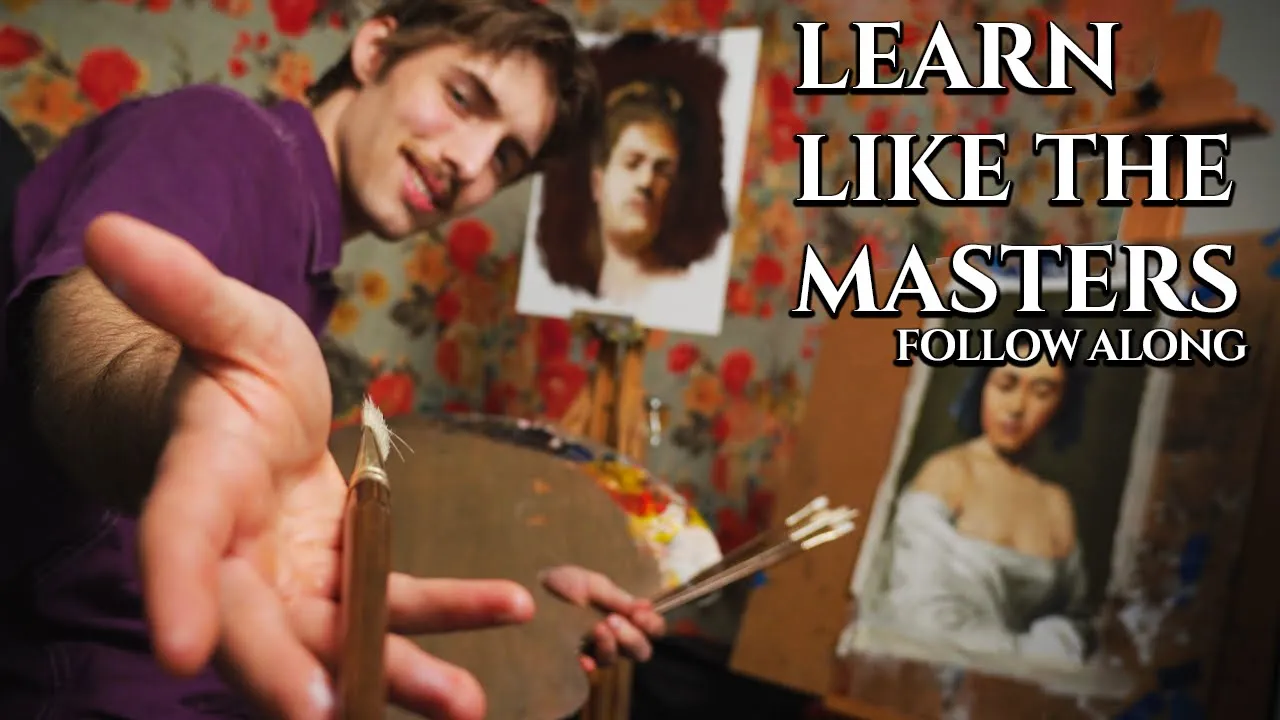
to make a study or a copy of I think copying is one of the best ways don't let don't let all these these fake art Teachers tell you that that copying is is soulless and horrible copying is a free education a free master class and as soon as you have some basic drawing skills underneath you so you can get good at those proportions do your best you know it's always a constant uh Improvement as far as proportions go just do the best you can today but as soon as you have some base level of drawing
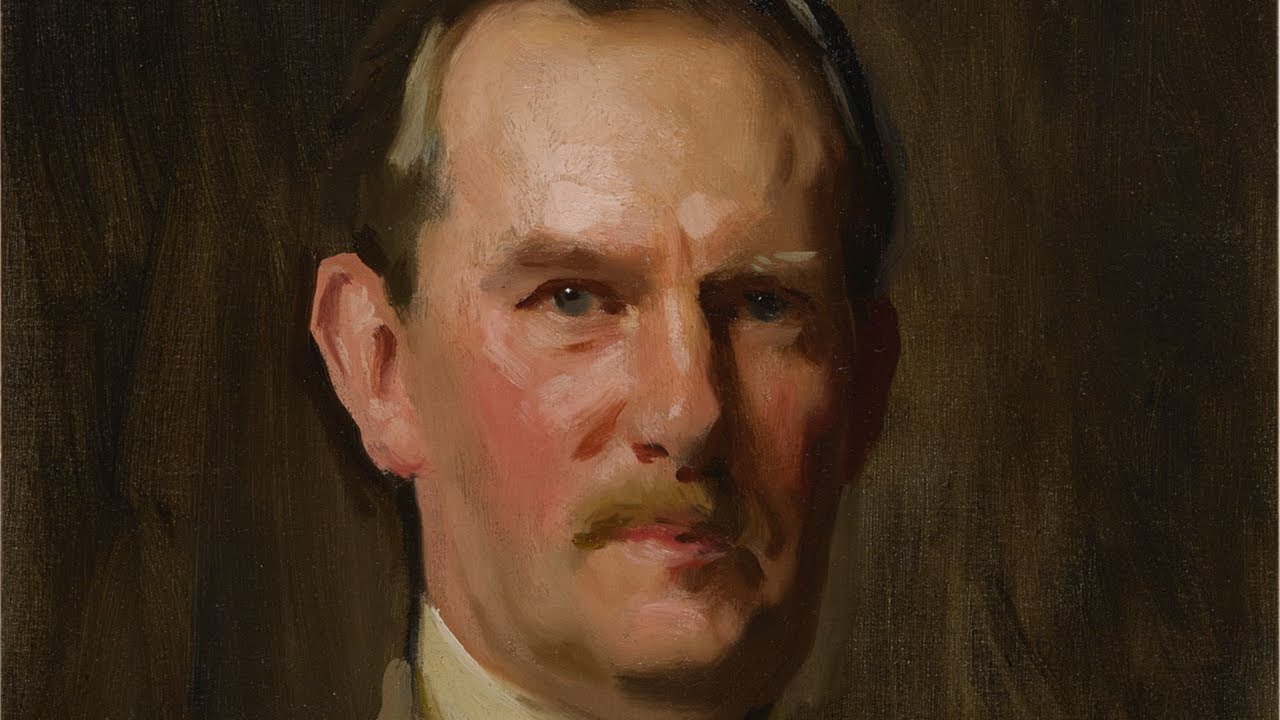
skill copying is one of the best ways that you can learn for free and Improve and just learn so much and this is a academic painting by John Singer Sergeant who would later this is early in his career right academic means he's still in his studying time later in his career he would go on to become one of the greatest or or most well-known painters of all time this guy gets talked about nowadays more than a lot of other great 19th century painters and I think it's really important to look at old paintings when we
look at them not To look at all these surface level details we need to go back and study the way that Masters became Masters cuz they weren't born that way that's that's entirely a rumor it's totally made up nobody was born good at painting all these great painters in the 19th century they didn't just pop out of nowhere there's a great school going on there's great education great teachers and and they had such a a an incredible understanding of of of painting and the Human figure and and these skills they just don't come from nowhere
so let's study exactly how they painted and how they looked at the world because that's just what painting is you don't get a whole lot of time to sit down and just look at the world and study something uh without any judgments or without any preconceived notions in your head that's the beautiful thing about painting we just get to look at something and think about it and understand it and there's Not a lot of time in our lives that we do that nowadays so a lot of people will tell you that old painting is all
built in layers or they'll even throw all these complicated terms like uh gai or or underpainting or or Verdo or or or whatever way you want to say this don't listen to all this stuff all right old painting there's a variety of different techniques that it was made in I'm talking about the 19th centur and I talk you don't got to worry about all this History stuff if you don't want to but when we look at these paintings we actually see and if you zoom in on this stuff it's very clear look how direct this
paint is and by direct I mean just taking a bunch of paint on your paintbrush and you just put it on the canvas it's not that complicated all you got to do is put the right color in the right spot you don't got to worry about oh I need to build this up in layers I need to use glazes and washes and all This complicated system no we're just going to focus on mixing the right color and putting it in the right spot it's all about being simple and there's no wonder why all these great
artists in the 19th century became so good and were so prolific made so many paintings because they were so efficient they weren't worried about all these different systems they weren't teaching this stuff they weren't teaching this gai or or layered painting approach in The late 19th century or really for the most of the 19th century they weren't even bothering with that they were just like hey we don't really care exactly how you put the paint on the canvas as long as it looks good as long as you're accomplishing your goal then that's fine and that
leaves you room to go go express yourself go make the art that you want and that's why we study right we don't want to study just a study we don't want to get caught up in in in the The iconography of of of painting we understand what it's for so let's zoom in here and we can really see some just great thick brush Strokes that's what I love especially about Sergeant but this is early Sergeant remember that this is an academic painting the style is not revolutionary every single person in the academy is painting pretty
much like this in order to be allowed to paint had to have a few years of drawing experience so sergeant if you know the Name it's actually really not as unique as you think pretty much everyone at the time was painting very similar to this just like this and I love you can see these hard carve outs here for these Shadows we have light coming from one side the left side and coming down and casting a shadow on the right side of the face so everything in our face that faces the right here gets a
shadow that's that's something that's important to know I think these paintings are Honest and I know honest is a weird word to used with painting but especially the academic paintings they're not trying to be this kind of grandiose portrait they're not trying to upsell the person's features or idealize them or turn them into Greek gods no they're they're just looking at someone and jotting down notes about them that's all it is and it's a beautiful study of observation of looking at people of understanding what you're seeing that's What painting is and and I think that
there's just so much that we can learn from looking at older paintings zooming in on them I think people don't do it enough people would much rather read an article that is not well researched than than look at the painting themselves and actually see how they're painted and think about how can I mimic that how can I recreate that so let's let's move over to the drawing board and and really do a good study of this I think we can make This pretty simple this is titanium white my cadmium red my yellow ochre and my
Ivory black I know there's a little bit of other color on here like blue that's just that's just kind of scrapings and I got my my cheap brushes right here I also have a a little pallet cup and this has linseed oil on it you can just put it in a little bit of Tupperware you guys didn't see that and I know we're really excited to get painting but we got to hold on I'm Really sorry to do this to you but it's really important to understand that drawing and painting are not two different things
they're the exact same thing it's like uh maybe maybe singing and poetry like they're they they're both using your voice and they come from the same set of logic so we need to probably do a good drawing here first and that's going to help us be in a much better place for our painting so we don't have to get all worried about Losing our proportions and no having no idea where stuff goes when we paint we just want to focus on our colors putting it in the right spot and our drawing is going to make
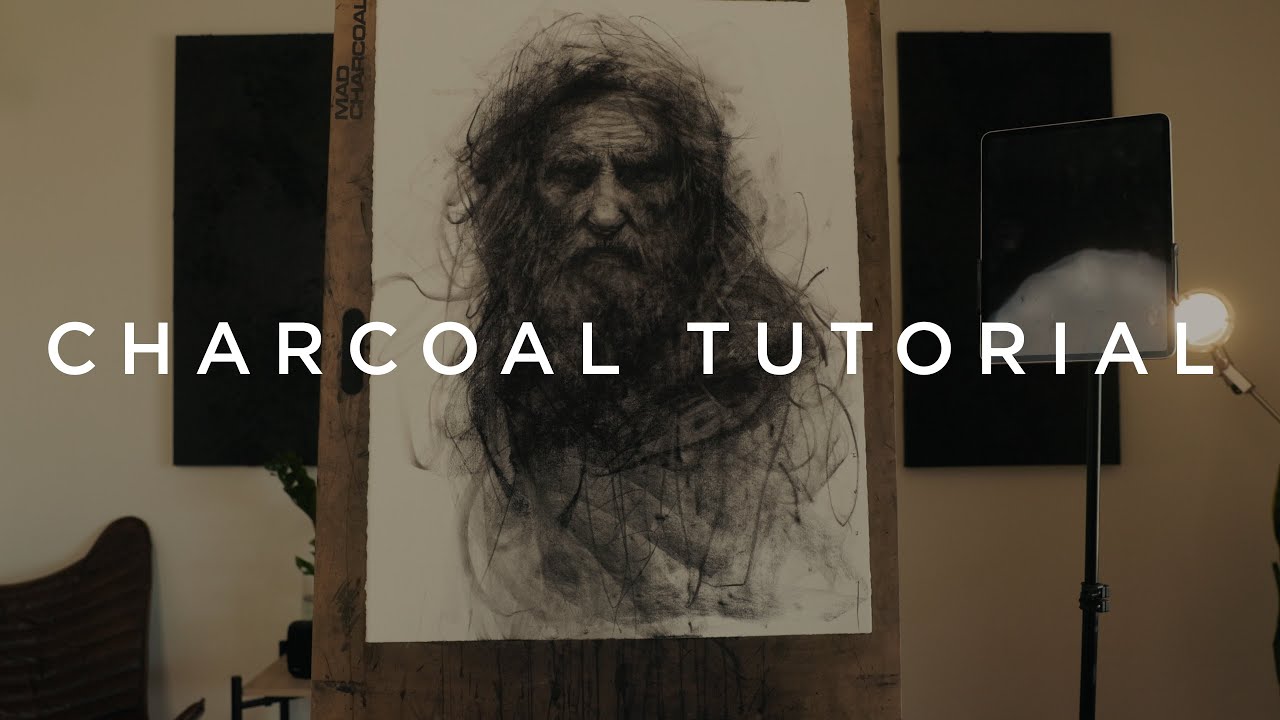
us be able to do that put my brushes down and I have a little piece of charcoal right here this is Vine charcoal uh you can also use uh just a 8B or 6B or 2B or whatever type of of piece of graph you have little pencil you have first I'll mark the top and the bottom of where I want my my Head to be on here that's the top of the hair here's kind of the bottom of the chin I'm thinking this is going to fit nice and and and centered on my my canvas
it's going to use up a good amount of it I'm not super small or super big the neck kind of Curves in just like this under here I want to use kind of big Strokes from the arm in order to to get a good drawing down and I think just the general character like character artist or the general big Shape is kind of like an oval so from our chin here this is where our chin is we have kind of a tilt to the head like this this angle make sure you get those tilts right
it's very important there's the right side of my face coming up to the hair here going use big straight lines to kind of just block in those perimeters we don't want to get caught up in any details or anything like that we're just kind of trying to get a big Perimeter outline of what we're looking at without any detail we we want to forget what we know about the face and just think about things in the order that they're meant to be built so we need to build our house from the foundation upwards we can't
just put floating windows in the house uh we're pouring that Foundation pouring the conrete here bump this chin up a little bit just since we see so much the underside of the chin here because we're Looking kind of upwards at our figure so we see the undersides of things and we have a center line that's tilting up from from left or from right to left we kind of have this Center tilt to the face and that Center Line is cutting through and we want to make sure we get the angle of that Center Line uh
really working well that's super important take your time look your reference photo hold your pencil up to it get that angle and put it right on there that's really Important to get right so we want make sure we get that use my needed eraser here's why I like Vine charcoal it cleans up so easily uh you just hit it with the Eraser and it's going to go up right away and that makes these drawing stage really easy and stressfree don't have to care about all these details I just want to make sure I get get
that big shape on there correctly that's the only thing that's Important I keep correcting the angle that Center Line until I think it's right and when I look at this kind of big shape here I'm looking at my reference and I'm like okay what are the big differences to Me Maybe mine feels a little bit wide um yeah maybe a little bit wide I think you know I think I might have been wrong with that Center Line too first I think it is it's right to left so you're Going to make mistakes too doing this
and that's okay the nice thing about oil and the nice thing about charcoal is that you can always erase it and just fix it you're going to see stuff wrong and and you need to understand that art is not a process where you just go in and do everything right on the first try uh no it's it's even the the greatest painters of all time made mistakes and it's a process of making adjustments and Sticking with it and trusting in your technique and your understanding in order to to push further here's my neck connecting up
to that head and I'm not going to focus on the the neck and shoulders here cuz we're just making a quick painting just to get comfortable but that should be I think a decent outline bring it in just a little bit taper those sides in a little bit and then we're going to want to put our thirds of the face on so that's going to Be our brow down to our nose and our nose down to our chin right so our face sits into thirds I'm not sure mine is even actually but I have the
bottom of my nose to the bottom of my chin bottom of my nose to my brow line and my brow line to the top of my forehead boom boom boom thirds of the face and that's really important to get and just Mark and then you can make sure that they're thirds by going like this one 1 two three hey I Got it right in my first try that's a nice guess now here's the thing we're looking kind of upwards at this person so that top third is probably going to get diminished a little bit cuz
it's leaning back and the bottom third might be a little bit bigger I could check it on my reference photo the same way I checked it on my drawing and it looks like on her they're actually really even so okay great I know that you guys can do this you just got to be patient that ear kind of Curves down from that brow line and the nose the same that looks pretty decent so I think our ear is going to fit right in here and likewise on the other side but we kind of only see
a small sliver over there now we're just going to want to Mark out a few features on here before we proceed I know that this is really kind of scary and and we're in mky water here but just hang in there And do the best you can and if you get it wrong nobody's watching all right I promise you and people don't even know the reference photo you're using so just try to make it look vaguely human I guess it's your first time you can't focus on drawing and painting and and all these different things
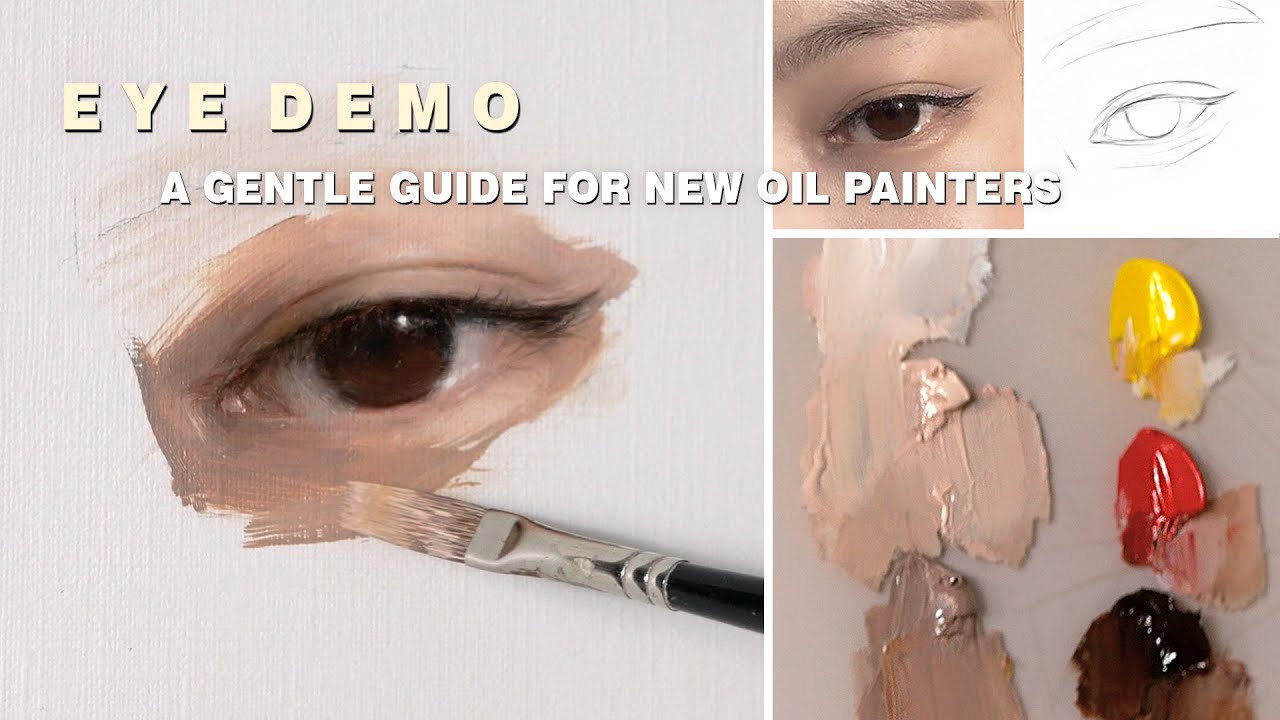
at the same time anytime you learn something new you're going to get a lot worse before you get better and that's normal right as you get better your bandwidth of what You can think about is going to increase here's that little shape I'm just looking at the shadows and thinking about them as individual shapes here's that little shape of that shadow under the left or our left eye eyebrow and I'll do oh my God so I'm thinking about all these little shadows as shapes just kind of easy simple shapes and this shape under the eyebrow
here comes over and then it comes down then it comes over and it kind of Curves out and Around there's our shadow shapes for the eye and we get a little shadow that kind of projects off of the right side of the eyeball over there as well so why don't we put that in and we get a shadow on the underside of the nose too that kind of shows us where the top and the bottom plane of the nose is if we were to think about it like a box we're not trying to draw features
or our ideas of what a nose is here though That's really important we're just thinking about everything in the simple simple simple easy to communicate way kind of like boxes or whatever so there's the bottom side of our nose and look at how much we're able to communicate about the person without thinking about them at all like we're not thinking about what an eye is or what a nose is and getting caught up and all that stuff but it looks more like them because when you see your friend Walking down the street all the way
down there you don't see the color of their eyes and go oh that's that's Ben my friend no you see you see their General proportions the way that they walk their style their character you see these big Ideas first these abstract ideas and that's what defines people that's how you get likeness so don't get caught up in the details cuz that's actually only going to pull you further away from likeness I know it's hard as artists we Have to think about things backwards and that really really hurts that your your brain is to totally relearn
the way that you look at the world but it's more powerful in the end and you won't be a little human photog copier that's why people think art like this is some sort of photocopying uh and Endeavor or that 19th century or old art is is about photocopying well first off they didn't really have the photo for for most of that time but it's a really common Misund understanding they were looking for a realism greater than life because they were looking for understanding and now when people do kind of this photo realism stuff they're not
understanding anything at all they are literally just photocopying so we're trying to go back to the old realism where people are using this as as a Mindful and thoughtful way to look at the world and don't put Shadow under the nose and that kind of just there's a Different a couple different values how light or how dark something is worth of Shadows that are going around the M here and in areas like that it's pretty confusing right but I'm just going to simplify them all together so kind of come around the chin there come around
the [Music] mouth and there's that shadow that I'll group it in with just this kind of I don't even know if it's hair or if it's A shadow of hair what does it matter group that all in and now we have a really nice set of shapes that describes what we're looking at here so we're on a good we're you know we're on a good track here okay let's just start painting I think we're in a good spot here and it might not be perfect but we're not looking for perfect today we're looking for paint
so we want to just block in these biggest color masses possible first this is a painting by Sergeant I know Sergeant just from my reading and research he used to put the background in uh pretty early on and just work for the biggest shapes possible so why don't we mix that background color first and I'll use a nice big brush for it I'll use my biggest one I'm probably not going to use this one in the face I know that these brushes look quite oversized for how big this portrait is but you want to use
the biggest brush possible cuz again We're we're shooting for Simplicity uh we're shooting for understanding we don't want to get caught up in all these tiny little details this is spray fixative uh normally I do this one outside but um you might get a more interesting commentary if I H some of these fumes oh yeah I'm feeling it I'm feeling it right off the bat I love that smell so that's going to just keep this from smudging now it's a little wet so it's Still going to smudge a little bit uh but but Vine charcoal
is going to lift right off or it's going to make your your paint a little bit darker or or grayer or muddier so fixing it down is nice if you don't have any of that I recommend you get some it's a really great tool as an artist if you're just doing your first painting though and you've done a little sketch uh i' do it either in like a colored pencil is a really good one to do it cuz it's a Little bit waxy and it won't lift off or you could just take a rag and
dust this thing off until it's a really faint drawing and and that works just as well so that's fine woo I'm feeling it I'm feeling it it is that is really strong color theory is its own thing but but people over complicate this stuff way too much you guys so what is this background let me look uh well it's it's dark right so let's think about value how light or how dark it is it's dark I'd say out of 10 if if black is is zero or or one rather and 10 is white I'd say
out of 10 that's probably a three maybe a four probably three out of 10 so um yeah let's why don't we just throw some black on here and also what else is it well it's red it's kind of red maybe a little bit orangey I guess but mostly red so let me grab some this is kind of older oh that that's a lot of red maybe a little bit too much let's get it down to that value let's get it to that three Out of 10 area I think we're pretty close right there but let's
get a little bit darker and you really want to use lots of paint guys don't you know I know that you just spent a bunch of money on it you don't want to use it all but great things happen with thicker paint uh and and and you really you can look at how thick that paint was and the photos that I was showing all sorts of great paintings that are really thick even Though they're very delicate so don't get don't get uh you know caught up in this idea that everything has to be thin I
think I might have went a little a little bit too dark there but that's okay because this is not we can put some down to test it but one yeah definitely looks too dark but also I think that it needs to be a little bit more kind of orangey so I'm going to put orange into it and and maybe now I see it's graying out a little bit so put a little bit More red in there not bad maybe a little bit more red I'm just going to keep comparing back to my reference that's pretty
good I'm going to throw a little bit more red in it's just about making those adjustments until it's in the right spot and uh yeah I think that's fine a little bit of yellow and I will this is probably the one time I will use linseed oil it's helpful for the background so I'm just dipping and let me grab it and show you guys just dipping my brush in just a little bit not too much you can always go back for more and working into my paint there now it's a little bit runny and and
want to make sure we don't mess up our drawing too bad here in the background I'm just scrubbing it in getting into the getting into the texture of that canvas a little bit more on there maybe a little softer touch around The side here cuz I kind of see how this Blends in there so it might be useful to have some overlap without ruining my drawing too much scrub that in a little bit scoop up this just like a shovel careful here because it's light on this side so I don't want the dark to touch
my light areas too much might create some trouble for me later there is a darker tone down here like a the hair in the background I just Kind of put it in light over there so I should be able to go right over the top with the oil paint you really can if as long as your paint that you're going in on top of something else with is is thicker uh you know you have more paint on your paintbrush and it's not too oily uh then you can really just kind of go right on top
of another color and just totally overpower it and that's really nice cuz that means you don't got to be super scared of your mistakes well we do Kind of have that shadow on the whole side of her face if we think about this whole head like a big egg we got light coming from the top left we got shadow on the right so we could put in that shadow on our face I think maybe we just want to put in like a general hair color too yeah let's put in a big hair color I I'm
sitting and I'm thinking more than I'm painting if you try to paint think at the same time you're going to be in a bad spot you're make a lot of Mistakes so yeah let's get that hair color in and we can kind of use this pile of paint anyways cuz it's pretty close and I probably could use the same paintbrush too but each new paintbrush gets its own color so it's time for for a new color you know especially when I'm going from lights to darks I want to have paint brushes that are for my
darks and paint brushes for my lights I don't want to be going back and forth between those two Because that gets real murky real fast you get some muddy colors things get real gray and weird so the hair color it's more Brown it's more black so I'm going to put some more Brown into it some more of this orangey yellow ochre and some more black into it you know we're not we're not doing crazy color theory here guys you don't need to be a genius you know I'm putting this down I'm looking at this really
the top of the hair up Here is is quite quite dark it's maybe a two out of 10 or a one out of 10 so I want to keep pushing this color pile down that's good I'll push it down a little bit further let's keep our dark's darks and our lights light and I'm going to pay attention here to the shape of the hair again we don't got to get it perfect we always come in with our background color and cut into It and there is some areas where we kind of have those highlights or
whatever so maybe I won't I'll leave some white of the canvas on there for but I can always come back in and carve them out later that's the beauty of oil paint you really can come back in and do whatever don't got to be scared about making mistakes you can always come back and fix them so there are some areas of the hair that get significantly lighter mostly right In here right in here so I won't put too much paint down there I won't put I won't put it down too thick and where the background
and the and the the hair meat I can kind of just push them together I might want my hair to go down a little bit darker especially around the edges so I'm going to just push some some pretty darn pretty darn black into there doesn't got to be perfect there we go okay I think we're good there we got our our hair kind of Mostly blocked in uh we could you know choose to to block in the rest of this lighter hair color too we could mix that now um and maybe that would be a
good idea what I do want to do is kind of get this General Shadow tone for the whole right side of the face that seems like the next biggest block of color so let me think you know I think the shadow tone is pretty close to the background and that makes sense because the light from the background is Probably reflecting back up into her face so let me take I'm going to use the same brush here and I'm going to dip it I'm going to dip it into my linseed oil not even really scrubbing it
or anything and I got a paper towel in my lap here and I'm just going to wipe it off just like this it doesn't going to be perfect I wouldn't go from a really black color to a really light color because then you're going to no Matter what you're not going to get all this black off just cleaning briefly like this so you're going to taint those lights and we want to keep our lights nice and pure that's why we have our own brushes for them it's got a lot of this red this Red's running
pretty thin in my palette already so let's just mix up some more uh what was the recipe again I don't remember well it was red that's for sure I just put a whole bunch of that down so we're going to need a good Amount of black to counter that that's pretty good but we're a little too red so let's put some more of that orange in there and I think the shadow tone on the face it it moves in and out so it's more a little bit lighter here it's a little bit lighter here it's
darker in here let's just try to get a nice average of those in there I'd say that's a three three and a half out of 10 if we want to get real specific about it h what we got here's not bad it's not Bad I think I'll put a little bit more orange yellow ochre in there that's probably pretty good right there let's put that in along the hair yeah I think that looks pretty good I always kind of check it after I put it down on the canvas cuz once you put it down next
to all these colors it's going to look way different that's why having a big Pet's nice too you know if you're think about upgrading in the future bigger the Pallet the better you can hold it in your hand I just got it up here vertical so you guys can see it or you can put it on a table next to you lots of room to mix colors so it comes down the side of the face here it also kind of hits the inside of the eye socket here as well I want to make sure I
got a good amount on there on each brush stroke I'm not soing it on there so it's so thick I Can't move it around but enough to fill in the Grain and the canvas I know that's kind of scary but and I'll kind of there's some reflected light in here that's making this look really orange and light let's just make it easy group it together that's our motto here nice big simple understandable groups kind of comes down from the eyeball here comes to the cheek and it connects up to the shadow casting from The nose
and it comes down here to the hole little side of the mouth the whole the thing is is this gets kind a lot more orange here and normally I would group them together but it's a pretty significant change so maybe for that part we're going to put just a little bit of orange into it and I hope you guys are able to follow along with this color mixing stuff I know I do it real quick and real Fluid I'm going to be painting you know two three four five times faster than you just trust me
no good paintings are made in in 20 minutes or an hour or whatever great work especially realist work especially this this older style of thinking it's slow it takes time it's not so slow we're building everything up in a million layers taking a month to do a portrait that's ridiculous it's about efficiency but you're probably if you're painting doing a drawing making sure Those proportions are good you're looking at five six 8 10 20 hours you know for a really great finish one and and as you get better you're going to be able to spend
more time and know what to do uh you know at first you're going to be a little bit more limited and you're going to hit a point and you're like well I don't really know how to how to improve anymore I don't know how to keep pushing this and that's okay you're just kind of hitting the natural limit of Your skill level and as you learn more you're going to be able to keep pushing that further and further so where else can I use this color I'm always just looking around thinking like right where else
can I use my colors a little bit up here the hairline um that looks pretty good there kind of run it down the side of the face here and it comes in and around this part gets a little darker but I can I Can paint that in too later and uh well it comes into the corner of the eye over here and as long as we get these big value relationships right so I'm I use try not to use too many art terms but I will use some just cuz I don't want things to be
confusing we do have a language that we speak in as artists and those that language is really important we use it to communicate but sometimes it gets people you know make this stuff Real pretentious I think it's it's pretty pretty frustrating value is how light or how dark something is irregardless of its color so we don't care about if this is red or brown or this different type of red this different shade of red we just care about whether it is dark red light red black we care about just like we have dog Vision you
know we're on Gray scale and we're just seeing how light or how dark something is on that that's What I'm talking about when I say from scale of 1 to 10 so if as long we nail the Big Value relationships of the head things are going to look really good without any details just like how we nailed uh the proportions of the drawing without any details and even kind of just softly push it over the eye here because what I'm noticing is that eye really doesn't get a whole lot of light there's a little patch
of light here on top of the lid but the rest of it you Know hold up a piece of white paper next to that reference and you'll see that it's it's not very dark at all so let's mix a little bit of yellow in here little bit yellow ochre and that's going to lighten it up and make it more yellow crazy I know haven't even touched our white yet kind of interesting and now we're going to put that on this Underside and these reflected light areas man they're confusing they're really really tricky they want to
trick your eyes everything about painting everything about art wants to trick your eyes you got to be careful think about it compare to the darkest point on the painting and the lightest point of the painting your brain is going to see that reflected light and go oh that's so bright let's add a bunch of white to it don't do that Remember it's in its shadow the Shadows are one group the lights are another group those Shadow groups they never mix with the light groups so Shadow can't be as light as the light because that doesn't
really make any sense right so compare it this underside of the chin is it as light as the white of my canvas here no is it as light as anywhere on the skin tones no really doesn't even come all that close I squint my eyes all the time To check relationships how two things compare so I'm just going to group it in with those Shadows that's pretty good where else can I use this lighter yellow brown that I have oh definitely under the under the mouth this is probably about where the mouth line would be
maybe a little bit lower the lip line and then the bottom lip would come out pretty thin bottom lips s to do you like that lady you know I think thin lips were Actually the the style in in the 19th century I think actually full lips that's kind of a a more more modern contemporary thing I think there there's definitely been times in the world where we're having thin lips was the beauty standard just like having that pulled back hair really big forehead was in the Renaissance here's the corner of the [Music] mouth and maybe
this little wedge that comes down I think this needs to be a Little bit lighter here I'm going to I'm going to add a little bit of white here and when I add white to stuff it's going to make it gray because you know what is gray it's just it's white and black so I'm adding a little bit of extra color just to compensate for that gray so it doesn't get super gray really quick maybe I'll mix this color later cuz it's kind of getting a little too close to our shadows here I'm not sure
how to treat it yet so if I'm confused About an area I leave I go somewhere else and I come back it's like a puzzle you got to click in your border pieces your easy ones first come back later and do the difficult ones don't spend your whole time you know you never solve a puzzle by finding one really complicated piece and then one by one checking every single one no let's be efficient here that's the whole goal there's a few ways that we can do this it's an organic Process so no right or wrong
here and how you approach it but there's definitely best practices I'm not going to you can screw your proportions up and I'm not going to go well there's no right or wrongs in art no you can get some stuff wrong trust me I'm not going to baby you guys uh this is a skill that you got to learn and you got to practice and over time you'll get better at that's just the truth Truth uh and and and that's how I think you get to these Great really high beautiful levels of skill where you can
execute so much is you do accept that there are some rules and you can bend them and be really creative about them but you still got to you still got to understand them and learn them first before you go about twisting them so there's no right or wrong way to go about the order of these steps but there are some best practices and I have an option here I'm at a crossroad I could put in a general light Skin tone for everything and get those contast grass locked in or I could keep stepping my way
up from light to dark and put a transition tone from my dark shadow to my light at the edge of the Shadows I think it'd be best in Simplicity and everything let's take this brush here still working pretty big brushes and let's lay in all of our general light skin tones so let's mix that up now I'm running out of room that you guys can see here so let's do this And let's get quite a bit of white on there and the skin tone it's a little pink it's a little grayish maybe um and maybe
a little orange so pink we can do that I'm just really carefully dabbing my brush in the edge here and a little orange got to be when you're mixing these lights you got to be really subtle about the amount of stuff you put into them let me look at what I got here I Think that looks pretty good compared to my reference so yeah I like that I like that I think that's pretty good want to make sure you don't get it too dirty too [Music] mudy there is a whole lot going on underneath what
I'm doing here I hate to break it to you but painting is hard it's complicated but that means there's lots and lots to learn and keep keep pushing forever even the direction that I pull my brush Strokes in I'm pulling along the feeling of the face I'm pulling over the bones across the muscles I study this stuff and I study it through drawing and my drawings my master copies like we're doing right now all this stuff really helps you improve that's why we started with a drawing you can't use your your your lousy drawing skills
to uh you can't use painting as a way to run away from your lousy drawing skills not at All sorry to break that to you but you're doing the same thing with paint as you are with drawing but now you got to do it with this awful brush instead of a nice precise pencil or charcoal definitely get a lot more gray here along the bottom side and and even the the the edges in here um so we'll want to mix kind of a grayer value we're losing some of these bristles from this cheap brush in
here but that's all right Yeah maybe we need to mix that grayer value so I'd really try to recommend dedicating one brush just to your super bright lights that way it doesn't get muddy um but uh maybe that won't be this brush maybe it will be no whatever so let's we just want to gray it out so how do we make gray well first let's just bolster up this paint pile we're ripping through this stuff I told you guys okay and now we need it to be grayer well we we already have some kind of
Grayish brown stuff over here so hey look at that it's pretty gray uh maybe a little bit darker wait and look yeah that looks pretty good the nice thing about so the thing about this Ivory black here is is Ivory black is really blue it has a lot of blue tint in it and this palette of only four paints doesn't have blue but that bluish tint comes from our Ivory black and you can see just how bluish green that's going down just like The painting it's almost like we're using many of the same colors that
Sergeant was using and of course you can put whatever colors you need on your uh on your on your palette uh this is just a limited one to get you started it's a whole world to explore out there but to be honest you really just need kind of the basic primary colors in their more warm or more cool variants and then you can kind of mix everything in between so I Would you don't really need for most cases or almost all cases a pallette full of like 20 different colors and all these fancy um different
skin tone mixes like PRI skin skin tone mix paletts that that stuff is ridiculous don't need that at all you just need the simple stuff there's this gray just going in and and because this is a little bit thicker and I'm on such a nice thick uh bristle brush we cut right over right Over that saturated skin and put the gray on top of it that's pretty nice [Music] [Music] generally if I wanted to get a really great drawing done and and have those proportions locked in I'd spend three hours on the drawing I really
would it's not ridiculous at all that's not a waste of time that's going to help you out a lot so don't think that just because you see me doing something in 20 Minutes well I'm trying to make a show here you know you're going to have to move a lot slower and and that's that's plenty fine I would have to move slower if I were to do this properly but this is a great start and a great way to to get comfortable with the materials and we're just really developing a nice strong contrast here so
let's finish filling in this B Um we need kind of these hair tones up here um we need maybe some uh some a little more orange kind of like darker tone in here and I think we'll have all that base tone laid in and covering up the face I got a little bit muddy there that's okay just cover her up hair color it's it's lighter than uh the Shadows uh so it's on the light side and it's kind of brown it's lighter it's on that brown area let's get a bunch of brown over here and
It's kind of grayish Brown so I'll put some black in there and then I'll put some white in there maybe a little bit more black can pull from different parts of our paint piles keep graying it out until I feel like it's at that nice greenish gray level which I think we're getting to right now that looks pretty good I think let's test it out I feel like I'm on point today maybe a little bit lighter Feel like I'm hitting these feels good I think it's the it's the spray fixative doing some numbers on me
I still smell that I would really advise going outside or maybe having a fan even [Music] now we need a midtone orange and it's a pretty bright orange too so we got some red here yellow ochre and you'll note that I'm not you know premixing skin tones or anything Like that I'm just I just see a color and I try to match it and for the most part I'm really not even thinking about like complex color theory stuff either I'm just like all right is it red Yeah it's red does it need to be lighter
uh yeah probably needs to be lighter that type of thought and and we're all capable of doing that all right so now we got a that's a pretty rich Orange right there that might be pretty good let's put it on the Corner here and see it's looking too red so let's keep putting more yellow into it until it's not so red [Music] um I think maybe slightly lighter and it really still needs to be more more yellowy orange that's not bad yeah I think that's pretty good let's go with [Music] that and if you spend
two three hours on A good painting then you come back the next day you do two three more hours and then you know see where you're at put a couple sessions into a painting that's going to give your eyes time to rest and you can come back see mistakes guys look then think and then put your brush mark down and then you do it all over again don't do all three at the same time you can't handle it I can't handle it no one can handle it so don't make Painting an impossible task and then
go well why can't I do it well you made it an impossible task you were the person who made it impossible for [Music] you just wiping off my brush here while I think probably put in some pupils we can put some of that black in for the pupils why not we'll just going to block out nice big black pupils you can paint out those details later it's Okay make sure you take your time and try to figure out where it is though we're not making a perfect replica or Masterpiece here uh you can go watch
my other videos I I do have videos right I am trying to go for a lot closer of a Master Copy um and and that's just not the goal here we're just trying to get comfortable with this stuff and and learn a thing or two about paint there's so much to learn from house Sergeant paints and we can learn That through uh just just just copying just like this so you know we're not trying to to get Perfection here and if you if you try to you're only going to hurt yourself already got some red
over here so we can just use uh this kind of dark red area put some more red in there the the the top lip it's it's it's dark it's in Shadow it's a lot closer to our brownish red than like a pure red so maybe something like that I think we need to get a little Darker so there's a little bit of a swoop in the middle a little bit of like a diamond or triangle shape in the middle of our lips and when I'm working like this where I'm cutting into other paint I'm coming
in and I'm getting fresh paint on my on my brush every single time so it doesn't get muddy and this comes out from the middle of the nose and then it comes over and it swoops down [Music] okay so I'm I'm thinking about what is going to make the biggest bang for my buck here I still think there's a darker gray kind of skin Tony color that's a transition in areas like in here so I want to get that darker gray color so we already have the gray of the hair here so why don't I
just add a little bit of white to it and and see where that takes us this is probably the darker bit of it here put a little bit of black into it To make it darker oh I put a little bit too much black into it I wonder what's going to happen uh yeah I think it needs to be a little bit lighter than that and I'm just barely dipping into the edge of the pile and if I need more pain I'll come back and pull over I try not to go too [Music] hard that's
not bad for [Music] still using you know this big brush is all I got for my dark darks at this point so I'm still going to use it for that and that's [Music] fine using it on its Edge and it's working just fine I'm coming through now and just kind of piece by piece working on the transitions between things I have all those color blocked in and if I back up A little bit here you're going to start to see from a distance it it reads all right you know it's not perfect by any means
but we're getting there and we can start to work on these transitions to make things softer and a transition isn't just blending an edge with a brush and making it really soft no a transition is mixing a value that's going to fit in between those edges and it's going to just add an extra plane it's going to turn the form there so let Me show you I'll mix another kind of Gray value in between here here's my grayish value I'm going to mix in between here that's going to go in between this orange and it's
going to help that orange turn in a little bit faster and not look so abrupt and out of nowhere and it's naturally going to get softer as I keep adding more of these values and I get them right and I make adjustments that's what this stuff is And this is the only time you'll see me take out a little brush and I could probably do this with a slightly bigger one too I'm just working with what I got here but we don't take out this small brush until we're deep into the process and we're making
refinements we already have the big color relationships down and we've decided that they're strong enough now we're allowed to delve into the details just a little bit but let's never lose sight of the Hole and certainly some areas where I'm disunified so my light lights need to be nice and close together that's what makes a great painting is your lights and your shadows stay close together but far apart from each other so everything in my lights is nice and close together everything in my Shadows is nice and close together but those two groups are far
away so I'm losing some unity in areas like this where I've come in with that gray a bit too Hard we need to make that light put a little bit of color into that light oh way too much red see made a mistake here a mistake and I used I got my light brush a little bit too muddy and then I went to paint back into my lights and uh got all messed up so I'm just using my pallet knife here rpe down all that paint now let's make sure this is nice and clean and
we just go right back over and hey We're back already got most of the meat of this baning in so we just got to make sure we get those proportions dialed in and uh we're going to be in a good spot really quick not the most accurate painting but it was not our goal today as long as we set our goals properly then we can make great progress you got to know where to put your [Music] Energy all right washed hands hour 47 let's close this bad boy get more light into my skin tones and
I think I want a little bit more orange in there too let's keep jamming more white in there though really push the Luminosity or the the amount of brightness in these lights we're just trying to get like the big General read here we don't care About uh the the subtleties we don't got time for that and if you kind of hit that level proportion you get into a nice area like this take a take a knight off let it let it sit for a little bit then you can come back and think about that and
you can push into that territory your second third fourth session is going to get really really really good but uh you know we're just making our way through these things one one step at a time and that's okay hit Some of the reflected light under the chin too I suppose I'll take my my shadow brush my this one which is just so muddy i' used it for everything at this point so many blacks I normally paint with more than five brushes generally I'll have about 10 in my hand really five's probably a good idea so
it's always better to kind of boil things down simplify them than to just keep expanding until sa have 20 brushes now you if if you need that many brushes Uh really if you need 10 even I'm probably a little bit on the maximalist side here uh you you probably have some inefficiency in your values and your colors and you can think out you can think out your colors a little bit better so you don't need to be swapping back and forth so often that's pretty good I just put some yellow in here cuz it needed
to be more yellow I hope you guys are really understanding my the advanced theory of My color here so intimidating so confusing I think from a distance here our read is pretty good we're A Little Bit Stronger not quite as soft and as beautiful and and delicate I think as the original a little bit more angular but it's also the first session and this original painting took you know probably 10 hours or so so um and I'm not Sergeant also you know we all have something to learn and I'm you know Always still trying to
improve there's so much to learn with all this stuff so let's use that same kind of yellowy color here I'll put a little bit of red and maybe a little bit of white in here to brighten it up and some more yellow we're going to go up to that hair let's see how that looks yeah since this is next to all those real dark colors it doesn't need to be that bright those dark colors around it make it look brighter than it really Is and I think we can go a little bit brighter here but
yeah that should be fine you can tell that it's just put in in these vertical Strokes just like this a little bit smaller than mine [Music] [Music] [Music] [Music] for [Music] [Music] [Music] [Music] [Music] [Music] and here we are after 2 hours and is it perfect no I mean 3 hours or 2 hours is incredibly fast I would probably spend 3 hours on a quick painting sketch painting just takes a lot of time especially to get accuracy and likeness but none of those things were our goals today we're just getting comfortable and Feeling good about
using a new medium which can be really scary but I hope I've shown you how simple this can be and how flexible it is we can paint over our mistakes and if worse comes to worse we can just scrape the paint right off and try again or let it dry and paint right over the top it's the world is your oyster we'll go clean up our brushes here in a second but I just want to say that there's no secrets this technique looks kind of cruel or or Crude and primitive but there's no secret technique
that's going to make you any better at painting the only thing that's going to make you better at painting is improving your drawing skill improving your proportions your Anatomy understanding your all these smaller fundamental skills painting is just a reflection of that so keep working on your skills and the only difference between you and a master is time we got a dirty palette and some dirty brushes So now we got to clean them every single person in my Discord or that I talk to always talks about using turpentine which which is this really toxic nasty
smelly stuff that's that's just terrible for you to clean their brushes and their pette but that stuff is horrible for everything I mean it's very corrosive so those brushes those bristles on your brushes those are going to really lose their shape and they're going to fall out because of that turpentine exposure And we don't really even have to use that stuff I got no idea why people are buying that so let's back up here first we'll do the pallet so I got some paper tow here the unfortunate thing about painting is it just does seem
to be quite wasteful as far as paper towels go I'll use my pallet knife here or whatever you got and just scrape off as much paint as I Can and I can leave my piles along the edges just make sure they don't creep in too much and take up your pallet and those will stay wet for since they're really thick they'll stay wet for a while they might get a little bit of a like a skin over the top of them uh but you can just kind of pull that skin off or dig under it
with your brush and keep using [Music] it and I'll take some of my linseed oil Or whatever oil you got just put a little bit on don't need too much that's maybe a little bit on the excess side I'll take my paper towel here and the oil do the paint so we don't got to use stuff like Toren time or gamsa or or anything this stuff is much safer does just as good of a job I could put a little bit on my paper towel too but I I pretty much have enough Here and that's
all clean all you need to do and we got to do our brushes too uh you could dip these in a little bit of oil to make this part easier we're going to have to go to the sink in a second here but before we go to the sink just let's get as much of this off as we can that's going to make the washing process a lot easier I'm thinking about getting a Small brush washing tank and filling it with some linseed oil just so I can get these a little bit cleaner before I
go to the sink but it doesn't really matter that much you don't even really have to do this it's probably just better for your sink for your pipes okay so you got some dirty brushes now and what I use is this stuff right here now any dish soap will work just fine so it doesn't really matter and all you're going to do is take your dirty Brush get some water going here I'll put a little bit of dish soap and some water in my hand and then as I swirl that brush in my hand all
that dish soap is going to pick up that paint and it's going to run right off I also will just kind of put it on the side of the sink here and just swirl it in there just like this and we're going to do this Over and over and over again until the water runs clear this is a pretty timec consuming process which is why it's nice to get off as much as you can before you come in here but you really want to make sure you don't got anything left on that brush at the
end so make sure that water is running clear when you rinse it out see that brush is right back to normal we didn't have to use any any toxic Solvents this one's got a lot of dark pigment in there so it's going to take quite a bit of work your skin is kind of uh it's it's a textured surface but it's soft and so it's going to be really good to help clean that brush and scrub it without hurting the bristles too much and it's not staining my skin or rubbing into anything at all because
the the soap forms a barrier now sometimes When you're painting a lot you'll get some you'll get some paint stuck up all the way at the top here and you got to get that out so what you do is you saturate it in soap just like that then you want to grab the end bristles and move it wiggle it just like this and you see there's some colored that's not white so we're getting some nice pigment out of there and that water is not clear and I try to shape my brush tip Too when I'm
done just so it's doesn't get super frayed there are some uh stuff you can buy at the art store too if it does get frayed that you can use to reshape it but just try to make sure the bristles are laying down nice and even and when you're done cleaning all your brushes set them down flat or like this at an angle without the tip smushing of course you want to make sure that that's that's nice and steady not Hitting the ground but I just set them down flat on the ground with some paper towels
underneath them because if it's sitting upright like this what's going to happen is all the water that's stuck in here comes back and it it deactivates the glue inside of inside of your brush and it can uh it can hurt the brush over time and you got to clean your brushes pretty much at the end of every day that you paint sometimes if my palette becomes a Mess and all my brushes get muddy in the middle of a long painting day I will just clean everything and just start from fresh and remix all my colors
it's the only way you can get rid of that muddiness and we'll just wipe all this paint down so that our mom or girlfriend or whatever doesn't get mad at us hopefully those aren't the same person that would be weird