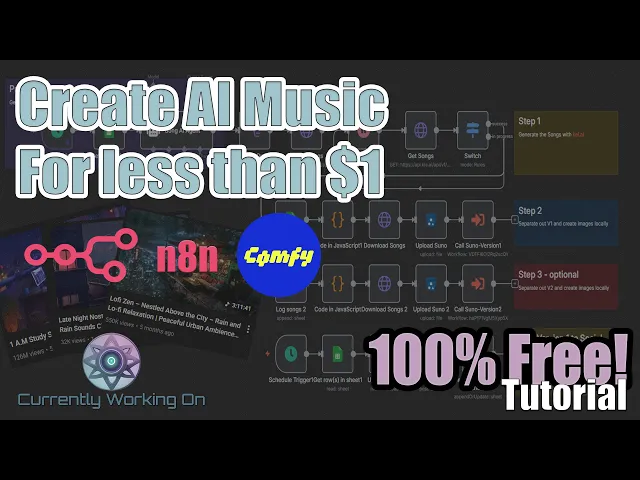
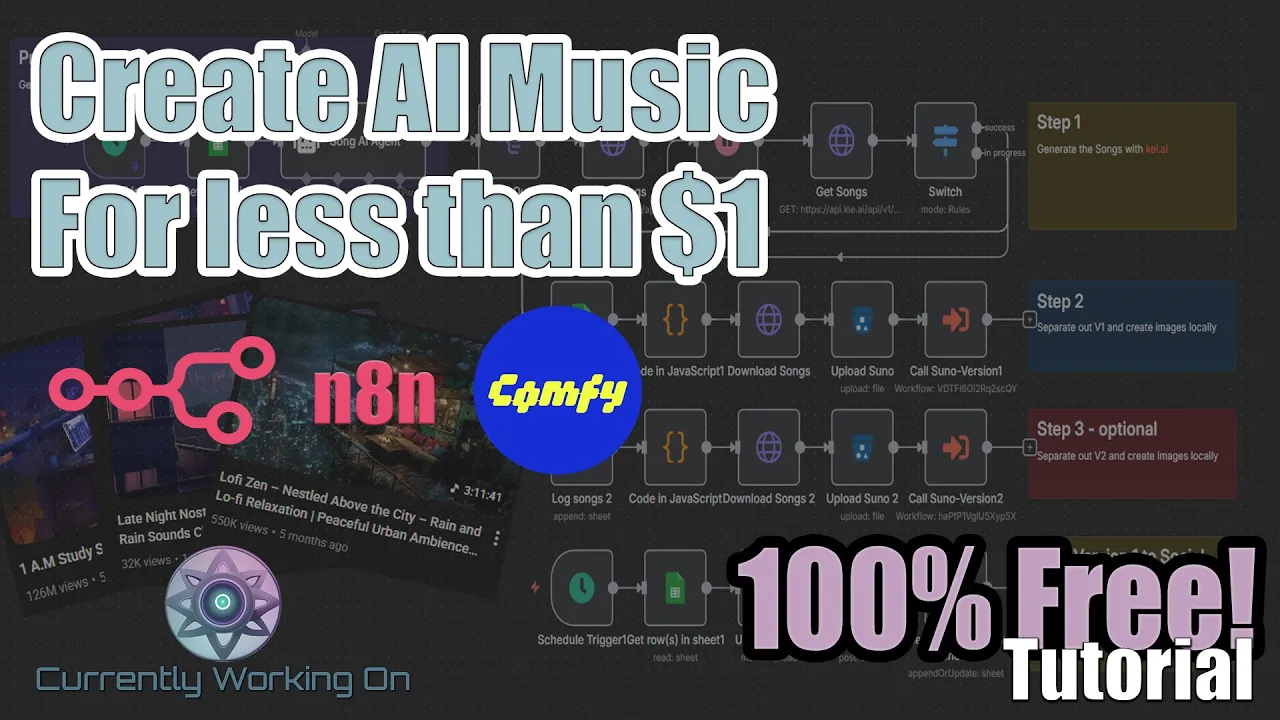
You know, 27,000 views, 32,000 views, 7.4 million views, 125 million views, averaging around 1 to $3,000 a month. The Japanese town, $2 to $6,000 a month, $30 to $86,000 per month making lowfi music on YouTube. We're going to go ahead and create something today. We're going to create this here is going to be our Lofi music generator. It's going to create some images and at the end, it'll also post them to your social media Accounts on a regular basis. So, if this is something you're interested in, go ahead and grab some coffee, come on back,
and we're going to go ahead and get started. How's it going everybody? Today, we're going to create this AI agent that's going to automatically create lowfi music for us, create some images, and if we want to, we can post them automatically to our social media. We're going to use key.ai. We're going to use Their API to connect in with Sunno in order to create the music for us. If you don't know what Key AI is, it's basically a website that uses a lot of AI models. You can use an API to get all the information
that you need in order to generate videos. And in this case, we're going to be using their Puno API in order to create music for us. It's really simple. You just need to go in, create an account, and then add like $5. That's really all you need. It's a,000 Credits for $5 and 1,000 credits is going to last you quite a long time considering that if you're going to create 10 songs per execution, you're only going to be spending 60. However, if you're only going to make one or two songs or even three songs, which
is what we do here, it's going to be a lot cheaper for you and you'll be able to do a lot more on a monthly basis. So, let's go and get started. Let's go ahead and actually run it through first and we'll See what it looks like. So, we're going to go ahead and click on execute and we'll be back when it's done. All right, looks like that is finished. I know it has a red X here, but that's fine because we fixed that already. So, let's take a look and see what it created. We're
going to go into our Google sheet here. This is the first one it created. So, let's take a look at this. We're going to download it, save it, And let's play it. Okay, that was pretty good, I would say. So, as you can see, it goes through and it creates three images, uh, one for each of the songs because we did suggest that we want to do three songs here. And we got that from our Google sheet here. Let's take a look at that Google sheet. So, the Google sheet, the way it's set up, we
have uh some columns here. The first column is to describe the kind of music that you want. And Then there's a theme, which would be the theme of all the songs in general. There is how many songs you want to create, whether or not this should be an instrumental, and then of course it'll have the link. It has, in our case, it has link one, link two, a status, and then a date complete, and whether or not that's been posted to your social media accounts. Now, the link one and link two is Because when Sunno
makes arrangements, it creates two at a time. we've separated those two out and so you have the ability to have possibly two songs. Now sometimes they sound very similar so you won't need both of them and so in our workflow you can actually turn off you know version two for instance. Uh you can disable all those if you need to and then that way um it only runs on the first one and then you'll get a link only in your first column here for the First link here. So, what we're going to do is we're
going to go ahead and walk through and create this. Now, this is probably going to be a very long video. Um, however, stay with me and if you want to create this lowfi music, definitely going to be worth it. All right, so let's go ahead and dive right in by creating a new workflow. All right, now that we have our workflow started, the first thing that we want to go ahead and create is our schedule Trigger. We're going to keep everything at the default here to begin with. We're going to go ahead and just click
on execute step on this one. And as you can see, it brings in all of the output. We're going to move that over here. We need to add a Google sheet node that we can use to connect to our Google Sheets. And on the Google sheet node, what we want to do is we want to get rows in sheet. We're going to choose from the documents from within our list. And this is our auto music generator creator. Have a bunch of different sheets here. So the one that we want to choose is our inspiration. We
want to filter this out a specific way. So we're going to choose add filter. And the column that we're looking for is status. And under status, we want to make sure that we choose pending. And we want to Make sure that we're only returning the first row, the first matching row. So click here where it says return only the first matching row. And make sure to toggle this here. If we click on execute, it'll bring in row number 11 or sorry, row number 12 with an ID of 11. And as you can see, it has
the description of the music, the theme, how many songs, and whether or not it's going to be instrumental. All right. Next, we're going to need a AI agent. This is going to click on define below and we're going to add a prompt in here as an expression. Let's walk through this together. We can click on this icon here. So, this prompt is going to be theme. And we're going to grab our theme from this left-hand side here. And then we're going to say prompt and style for music. That's going to grab this one here. and
put that over here. We're going to have Number of songs. We'll grab the number of songs from this side and drag it and drop it right here. And then finally, should it be instrumental? And we are doing some lowfi instrumentals. So, we're going to make sure that this is going to be set to true. Grab the instrumental from here and click that. And that's all we need for the prompt. We are going to require a specific output format. So, we're going to click This here. And under the options, we're going to choose system message. And
I'll have this system message here for you in our Google doc, so don't worry. We're going to paste that in here. And what this does is it goes through and it's a basically saying that you're a music prompt generator agent. We're going to ask it for some information. generate end music prompts using an onuser input which is what we've given It from the Google doc here and each prompt should include a prompt style and title and the number of prompts is included or provided in the user's instructions for instance the number of songs is going
to be three and this goes down and it gives the system prompt some information about what it's going to do as far as creating the output for the music generation. It's going to give it some good examples of what it's going to supposed to look like and it's also Going to give it some bad examples so it knows how to reference which one to choose. And at the end here, we're going to tell it how we want the output to be. And in this case, it's going to be a JSON output in this exact format.
And at the end here, it's indicating the tools, the think tool. It's to reflect the mood, vibe, and context of the prompt generated on each query. So, let's go and add these tools here. The first tool that we're going to Choose is the think tool. We're not going to change anything here, but it also needs a brain. So, we're going to go ahead and connect it to our chat GPT. So, we're going to use our open AI account. So, make sure that you choose your open AI credentials from in here. And then of course you
can go ahead and choose from the model list. And in our case we're just going to use chat GPT4.1 mini. That one seems to work just fine for us. And The last thing we're going to need is a output parser. So we're going to click this icon here and we're going to choose structured output parser. And just like we had in the system prompt, we're going to create that same output parser here so that it knows exactly what to do. Let's give this a run and see what happens. And as you can see, it has
listed a prompt, a style, and a title for each one. The title is going to be the title or the name of the song. The Prompt is going to be how the song should be generated and in what style. Now, as you can see, this has uh put it all into one format, and we need to separate that out. So what we need is a split node and we're going to go ahead and split out the output of the songs. So it's output do songs that we add in here. We don't need any other fields.
And if we could click on execute, you can see that it says three items and it's separated Them into three different items. And if you click on table, you can see that there's one, two, and three all separated out exactly how we need it. Next, we need an HTTP request node. And this is where we're going to connect to key.ai. Go ahead and go to key AI and create an account. And then after you create an account, you can come over here to where it says API key. And you can go ahead and grab your
API key. Just go ahead and copy that here. Back in the HTTP request, we're going to change this to post. The URL that we're posting to is the key AI generate. For the authentication, we're going to choose generic credential type. And for the generic off type, we're going to go ahead and choose where it just says header off. And under the header authentications is where you're going to choose your authentication for key AI. And if you don't have one, simply just click on create new credential. Under Name, you're going to choose authorization with a capital
A. And in value, you're going to put bearer and then your API key as listed in the API docs here. As you can see, the authent authorization with a capital A and then bearer and then your API key. That's what you're going to put in the value right here. And then save that. And then your header off will be listed right here. Toggle where it says send body. This is going to be JSON. using JSON right here. Let's grab the information that we need. As you can see, we have some green items listed in here.
That means that everything was properly configured. And then we have a red item over here. So, let's go ahead and change that and get that taken care of. This is basically letting us know whether or not it's supposed to be instrumental. So, we're just going to delete this. We'll grab this from here. Put that back in there. And now you can see it's been green. This is going to go out to key AI and let it know what the prompt is, what style it's going to be in, the title, whether or not it's going to
be instrumental, and what model to use. Now, this will take some time. So, we will need to set up a wait. And what we'll do is we will ping out to see whether or not it's been successful. And If it has, we'll continue on. So, we'll just leave this here right now. And let's rename this to create songs. We're going to create a wait. And I'd say we probably want to wait about 15 minutes cuz it can be get pretty busy. And depending on how many songs you're creating, it can take some time to create
those. So 15 minutes is a good round number. You can adjust that based on your experience and based on The request that you get back whether or not they're done. We're going to get another HTTP request here. This is going to be a get request so that we can get the information on whether or not the uh songs are complete. So this is going to be the record info. Authentication is going to be generic. We're going to choose header authentication. Go ahead and choose your key AI authentication that you just created Earlier. We're going to
send query parameters using the fields below. And what do we need in order to get that information? Let's take a look. So, as you can see here, after it has gone through and gathered all the data and information, you can see that we have a code of 200 and we have a success and then we have a task ID. So, what we're looking for here is the task ID. So, we're going to grab the task ID and we're going to put that in here. And the value is going to be the task ID from on
this side here. So we would just grab that and put it in here. But since it's not available yet, let's just copy from this one and we'll put that in here. Now, as you can see here, this message says success. And there will be different messages that you'll get whether or not it's complete or not. So we want to go ahead and ping this and check it. And if it doesn't have a Success, we're going to loop back and wait and check for it again. Let's rename this to get songs. And we're going to add
a switch in place that basically says if it's in progress, we're going to wait longer. And if it's a success, we're going to continue on to the next step. And in the switch, we're going to have a couple values listed in here. So, like we had mentioned, we're looking for the status. So on that status if the Status is equal to success then that's going to be the true basically go around and continue on. If it doesn't equal success then we're going to go back and search again. So we're going to rename this output to
a lowercase. We're going to add another routing rule. Now, there could be times where the success is not exactly only success, but other things as well. So, we're going to go ahead and choose matches reg x And the value is going to be an ingore success. We can rename that output and the output is going to say in progress. So if we see in progress, we know what we need to do. So now when we go ahead and click out, you'll see the two different successions. You'll see a success, what happens if it's successful, and
then you'll see if it's still in progress. And if it's still in progress, we're going to loop that Around, and we're going to wait a little bit longer. So in the meantime, let's click on create songs. So we're going to go ahead and execute this one here, and we're going to wait. As we see, we have a a 200 and we have a success and we have a task ID already. So now we're going to choose wait and we're going to wait the amount of time allocated in order for that to be done. Let's indicate
here we're going to just choose 1 minute And we're going to execute that and we'll see whether or not it's complete. And if it isn't complete, we'll go back and wait again and you'll see that it'll loop through. And in the meantime, let's add our next step here. And you can head over to key AI and you can take a look at the logs under Sunno. And you can see whether or not your latest is complete. And as you can see, this one says it is still running. So, we're going to wait just a few
moments. And if you take a look, if we go back here and we click on get songs, you'll see that it was able to get three songs. Maybe it just finished. Looks like we got a success. If we go back into the table, you can see we have a success on one. We have a success on the second one. And we have a success on the third one. And it gives us all the information that we need here into our next step. We click on switch. It's been successful. So, let's go ahead and log The
information to our Google Sheets. And in this case, we're going to append a row. We're going to choose our list here and then we're going to choose uh the first one's going to be under songs. So we click songs. We're going to map each one manually. And if you take a look at our Google sheet here under songs, you'll see that our song list will have a theme, a title, a duration, and a song URL and the prompt. And it'll list it in The next one below cuz we're appending it. For the theme, we grab
the theme and put the theme in. We're going to grab a title. And the title is going to be here from the switch. And it's going to be here under the pseudo data. And let's look for where it says title. You can see the title right here. So we're going to grab that title. The duration is going to give us how long that song is going to be. It's going to be needed for later on When we're creating the videos. So grab the duration. And then we have a song URL. So we'll grab the song
URL also. Right here we have the prompt. If you want the prompt as well, that's going to be under tags. Now, I did mention earlier that it creates two different versions. Now, we have the Sunna data zero, which is version one, and then we have Pseudo data 1, which is version two. We can output this to our Google sheet, but We're going to do that one at a time. So, the first one is version one. Later on, we'll be able to go ahead and output version two if you want to do that. We click on
execute step. should automatically append. Looks like it did. We can go back to our Google sheet and you can see quiet strings has been added with the three songs. It has the URL of where the songs are located and the prompt for that also. Now, sometimes there's apostrophes In your image prompts or there's apostrophe in your song titles. And in order to process that into the next steps, we're going to have to clean all that information out. We're going to make it readable for our JSON formatting later on. So in that, we need a code
node and we're going to write some JavaScript in here. This should be very similar to a lot of the other ones that we've done in the past. So you no need to figure Out what exactly is going on in here. Just know that when this code processes, if we click on execute, it's going to take the information that we have from our Google sheet and it's saying it's going to be the title in this case. So reading this here, this is saying the file name is going to be the title. So, we're going to take
the title. We're going to make it all lowercase letters. We're going to replace any apostrophes. We're also going to replace any um Spaces or underscores. And then we're also going to replace any special characters in this. And then we're going to output that with a something called clean file name. We've taken the title and since the title has a space in it, we're going to take that space out and put an underscore cuz that's needed for later on. Same thing with the second one and a third one. So, it makes it nice and clean for
our future nodes that we're going to be using. Now that we Have everything listed nice and clean in here, uh let's rename this one real quick to log songs. Log version one songs so that we know what it's doing. And we don't need to re really rename this one. You can if you'd like. Now, let's get the songs. So, we need another HTTP request. And although we got the songs earlier, we got the songs and we put them into our Google sheet. So now let's get the songs one more time. And we're going to Get
those songs from the URL listed right here. We don't need any authentication or anything like that because the song is already available for us with this ID and that's unique to our song. So no one else is going to have that. And if you click on execute step should download three songs. One, two, and three. Now, we need a place to store these and I've chosen to store them locally by using our minio and that would be our S3 Storage. So, in this case, we're going to choose S3 and what we want to do in
the S3 is an upload a file. So, the file upload and the bucket name. Now, you should have that information already. And if you don't log in, this is going to be the username and password that you created when you created this instance. And on the left hand side is going to be where our buckets are created. Now, if you don't already have a bucket, I do suggest create one. So here you can go To buckets and you can choose create bucket. And in my case, what we've done is we created a bucket called Sununo.
And then we've created a bucket called Sununo 2. So version one and version two and all the songs will be listed in there. So the bucket name is Sunseo in our case. The file name is going to be here. Let's go back here. And we have this cleaned file name. This is exactly what we need because we don't want any spaces in our file names. So We're going to grab that, place it here, and at the end make sure you putmpp3 because it is an MP3 file. binary data because it's going to grab all the
information that we have right here. And then let's click on execute. And you should see a success of true three times. That lets us know that that input is properly configured. And those files, those songs, excuse me, are now listed in our pseudo directory in our bucket. So let's Take a look. Whispering strings. If we go into here and we go into sunno and we say last modified and you can see whispering strings is now listed in there. Next, we're going to be creating this. This will create all the images for you and it'll stitch
them together. It'll add the text on the screen of the name of the song and it'll log it to your Google sheet. So that way you can go in and you can take a listen to it before it gets posted to your social Media because sometimes as we know AI doesn't create the best of songs and sometimes they can be not so likable or there's something wrong with it. So in this case it's called a man-in-the-middle where we can go through and we can approve those songs to be posted. So, under songs, you can see
here we have all of our songs here and we have our inspiration. Now, our inspiration is where we have our man in the middle. So, You can take a look at these and you can download each one of these and you can view it and if you don't like it, you can delete it. Um, and then basically when you run your command to post them automatically, it'll take a look for the next pending and then it'll post that song. So, if you don't like them, you can go through delete the ones you don't like. So
that way the ones that you do like will remain here and you'll be able to post them. Let's go ahead and get Into creating this guy right here. So what we'll want to do is we're going to start with a create image. So we need another AI agent here. So we're going to start this in this guy right here. So AI agent. Let's hook this guy up so we know we have some information here. Let's go into this AI agent. Now we have all of our information here. We're going to change this to defined below.
And all That this guy is responsible for doing is creating an image prompt for all of our music. We're going to make this an expression. Extend this out a little bit. We're going to give it a prompt and style for music. And in order to get that information, it needs that information. So let's get the prompt. And we'll put the prompt in right here. And how many images? Number of images is going to be one. We're going to require a specific output Format. And then we're going to choose add option and system message. And we're
going to make this an expression and paste in our system message. This is basically saying here is the information. You're an AI image generator. Um call following our agent framework. You'll want to go through, you can read through this. You can adjust it how you'd like for the different styles of music that you might Be choosing. I would definitely go through and make sure that you look at everything in here, but this works best for this workflow. So, we're going to keep everything exactly the way it is. In this case, we need the prompt. So,
we're going to change this to where it says the prompt again. And we're going to make sure that the number of images to create is only one per song. So if you have 10 songs, it'll create 10 images. If you have two songs, It'll create two images. So on and so on. So now that we have that created, there's nothing else to do in this one. We need to add a couple of things. So we need to connect it to a brain. So let's give it a chat GBT model. Go ahead and use Open AI.
Again, make sure to select your open AI account in the credentials and the GPT4.1 Mini seems to work just fine. We'll keep that one there. We will need a structured output as it's listed down here. You can See a structured output like this. So, we want to click on where it says add an output parser at the bottom. And we're going to choose structured output parser. And we're just going to go ahead and drop in our output parser right here. And that's what it's going to output for us. We're going to go ahead and change
the name of this guy here so we know what it does. This one is creating the image. Now, if you have three songs, It'll probably put everything in one. So, let's run this real quick and let's take a look and see what it does. Now, I'll show you the output again. As you can see, it puts it into a nice little table here. So, we want to split those out into individual ones. So, we'll do a split one, a split node, and this is going to be the output. No other fields are needed. And if
we click on execute, it puts them into three separate items, Which is exactly how we need it. Next, we have a set node, edit fields. We're going to choose manual mapping for this one. And we need to add a field. The first one is going to be called prompt and we're going to grab the prompt and we'll put it over here. We need another field called file name. We're going to grab the file name listed here. And the file name, we need to make sure that we add PNG at the end here. And the last
one we're going to need is the duration. So we need to grab the duration and drag that over here as well. So we should have all green on the right hand side with all the information that's needed to go forward in creating our images. Let's click on execute. It adds that into those fields. Next, we're going to go ahead and create those images locally. Before we do that, let's rename this get prompt URL. All right, so we're going to go ahead and get our images created Locally. And there's a couple ways that you can do
it depending on your system. I have pretty good systems. So I create all my all of my images locally here and I use flux one dev for mine. You can definitely use something smaller like the Chanel version which uh will create your images in four steps instead of the 20 steps that create or you can use something even smaller than that as well too depending on your system. So in our Case in this instance today we're going to go ahead and create everything locally. And in order to do that, we need to set up a
couple of nodes here. First, we're going to go ahead and set up a loop node. So, we're going to loop over all of these items. We're just going to the batch size is just going to be one. And let's go ahead and delete this guy here. And we're going to delete this one. And we're going to go ahead and choose an HTTP request. And we're going to connect locally here. So, this is going to be a post request. It's going to connect to my local Comfy UI that we're going to use to create the images.
We're going to click on send headers using fields below. Content type application JSON. Make sure to toggle where it says send body. This is going to say JSON. This is going To say using JSON. and we're going to put our information in right here. I'll have this in the Google Docs, so don't worry. And like I said, you can edit it on your own and you can make it pretty much however you want. So, make sure you take a look at this and edit any of the fields that you need to in order to make
sure that the images are grading creating properly for you. So, in my case, again, we have the C that's Automatically generated. And if you scroll down, you can see that I have I'm using Flux OneDev. If I keep scrolling down, I have the diff. If you wanted different styles like we've discussed before, you can go ahead and choose the different styles for your images. I've put 4K and high resolution in front of my positive prompt. Uh you'll want to make sure that you grab the prompt from right here and grab and drop it in right
here. So, let's do that. If you keep Scrolling down, you'll see anything else that you might need. And it looks like we're good. Now, those images do take a minute to run and create. So, we're going to create a weight node. And you're going to want to adjust this weight node based on your system. In mine, it only takes about a minute to create those or less. So, I'm just going to use 1 minute as my reference in this instance here. But, please make sure that you're adjusting This based on your systems. Sometimes it can
take 1 to 5 minutes, sometimes 10 minutes. So, make sure this gets adjusted for your images. Once it's done generating an image, we want to get those images. So, we need another HTTP request. And in order to get that image, we're going to go ahead and ping our Comfy UI instance that we have hosted here locally. And we need the prompt ID. And we'll get that on this side here. We Don't need any other information. So we'll go ahead and wait for that. We'll rename this to get image. Now if you watched previous videos, you
know that we need to have code node here so that we can scrape out all of the outputs from the image creation. So we're going to do that here on this. This takes a look at all the information from your input and it goes through and looks for the output for the file names and it takes them and it renames them into a Nice little output for us. Once we've done that, let's get that image. We need another HTTP request. This is going to be get and we're going to grab that image URL that was
just created in the previous node. Let's rename this to get generated images. Now, once we got those images, we need a place to store them. This is going to go into our S3 bucket. We want to make sure that we put that in a different bucket, or you can put it in The same, but we're going to give it a name first. So in our case, we created one called image pseudo and image pseudo 2. I would suggest that just going to create a bucket for each one if you're doing both if you're going to
grab both of those. If not, you can just create one bucket. So in our case, we created image pseudo. So we're going to choose S3. We're going to upload a file. File upload. Our bucket name is img- su n o. And we're going to grab that file Name from the previous field. Set prompt and URL. So we want to make sure that that's the exact one. We renamed it. This one it says get prompt and URL. So let's just rename this to get. And as you can see it turned gray. We're good on that. We're
going to make sure binary file is checked and data. And then we are complete. Now, this is going to loop through because you're more than likely going to Have more than one image. So, since this is going to create one image at a time, it needs to loop through them all so that we can grab them all and store them and then go to the next one. Grab them all, store them, grab the next one until it's done with all three images. Now, before we go continue, let's go ahead and build down the rest. This
is going to come out from here. We're going to use another HTTP request. And since we have our NCA toolkit as one Of our installed buckets on our system, we're going to use the FFmpeg that's stored locally on our computers in order to process these videos. Now, you can also use an API from different sources like Rendy, for instance, that uh will do the API processing for you. But again, and it's it's not too expensive, but if you can do it locally, I suggest to do it locally. I'm going to have the information on how
to process this in the Google Docs. This is going to be a Post request, and we're going to compose our FFmpeg here. The header off is going to be a generic credential type. This is going to be header off listed here. And you're going to choose your NCA toolkit authentication that you have. If you don't already have this, you'll need to probably just go back and watch some of our earlier videos. It's going to give you some information how to set up the NCA toolkit uh in a Docker instance. And during that Docker instance, it's
you're Going to set up a username and a password, which is what you're going to use here. You're going to have your X API key and your value that you're going to set in that. Moving on, we're going to click on where it says send body. This is going to be JSON using JSON. This is where it's going to get fun. It's going to be expression. Click on this little guy right here. We're going to paste in our information that we're going to need for our FFmpeg in order to Get everything done and taken care
of. The file URL is going to be where it's located in your S3 drive in your minio console. So the image, the first one here is going to be your image. That's going to be in your image bucket. So make sure you grab that from there. And then we have a file name which we uh we've we've set here. And that file name ended in.png if I remember correctly. We can go back and check that. And we forgot to put it in Here actually. So back into where it says get prompt and URL. This guy
right here. Let's go back in here. And the file name, we need to make sure that we add.png at the end here. So it knows how to store that file and what to store it as. So that way now when we come all the way over here to their let's rename this guy real quick. This is going to be create video clips. So now we don't need to add The.png right here because we just can grab that information. Let's rerun this real quick first because we changed something. So we have to rerun it. So we'll
execute it again and I'm going to pin all of these. See if that works. so it doesn't try to rerun it one more time. Now that we ran this one here, you'll see that it ends inpng. And if we get our create video, we can just grab this here from the file name And put that here and it'll automatically add the PNG here. So if you take a look at our toolkit here and we go into image, you'll see that that image it's not there yet simply because we haven't ran through the creating the images.
So that's fine. Okay. Once the images are created, this will be located in our image studio directory. We have going down more, we're going to add our duration in here so we know how long That image is going to loop through the song. We have the where the song is located. So in this case, we're going to have the file name here. We're going to grab this file name here. We're going to put that here. The title of the song we're going to grab from right here and we're going to put that in here. Make
sure that you have the quotation marks around them. And then everything else can stay the same. This is the draw text command that Puts the title of the song on the screen in a specific location. We also want to add a font to this. So let's see here. All right, that should work for the font file. Basically, we've want a specific font that we want to use. So, we can add that in here. Actually, the one thing that we want to put in here is an option for a timeout because sometimes it can take quite
a bit of time. So, we're just going to put a large number in here. All right. Our Next node here is going to be an aggregate. We want to combine all the fields that we're going to get and we're going to go ahead and put them into one field. So this is going to be a response. We don't need anything else. We need a code node here. We need to get the video URLs and put them into an array so that we can put them all together here in a minute with a concatenate. So we
need to do that by this little JavaScript here. Basically saying take the responses and put them into a nice formatted URL for us. This is going to be video URL to array. And then after we do that, we're going to go ahead and create the video. So we need an HTTP request. We're going to use post and we're going to use again our locally installed ffmpeg through our NCA toolkit and we're going to use the concatenate In this case. We're going to use generic credentials. We're going to use a header off and make sure you
choose your NCA toolkit authentication. toggle the send body JSON using JSON and one quick simple little command here. Video URLs an ID of job generate the video. So create video be a good name for this one. One more HTTP request. After we've created it, we want to get it. So get video. So get version one. And this is going to be a quick JSON response. Go ahead and choose a option to have uh let's see this is going to be a response and we want the output to be a file in data format. All right,
let's take a look and see what we can run here. Get some images created and then the video created from there. We have all of this pinned up here, so it should work. We already have our images generated and we have our prompt. So let's see if it'll Go through and create the images. Right, looks like image one is complete. So now it's working on image two. Right, looks like image two is complete. Now it's working on image three. All right, now that all three images are created, let's see if it creates this video clip
here. All right, looks like it went through and created everything for us. Let's take a look in here. And there it is. Now, let's put it somewhere. And let's Put that on our Google Drive for right now. So, we're going to need to here, drive, and we're going to upload a file. Make sure you choose your Google account listed in here. That's going to be file upload data, which is what is represented right here. All right. So, file name. Let's go ahead and choose the file name. It's going to be here, right? I believe this
this one we have the clean to file name. So we'll put that here And it doesn't know which one to use. So we'll change item to first so that way it knows which to use. And then at the end we're going just going to go ahead and tag that with a v1mpp4 since it's an mp4 file. And we're going to store it on our Google drive. And we're going to choose by ID. And then we're going to put the ID in here of your Google Drive of where you want to store it. So I'm going
to store mine here and we're going to execute That. And it should upload with no problem. Now the last thing that we want to do in this work instance is update our Google sheet. And you want to append or update a row. And in this case, we're going to choose our Google sheet that we've been using, the auto music creator. Use the inspiration and we're going to match it by the ID, which is of course the ID that we had down here. So here's the ID. We grab that ID. And the only thing we need
in here, we don't need this. We don't need the theme. We don't need have any songs. We want the version one link. We'll close that. We do need the status and the date complete. And we don't need this one, this one, or this one. All right. So, the version one link is going to be your Google link here under the web content link. We'll grab that. Put that in here. The status is going to be complete. And the date that it's been completed is now. And we'll take a look under the inspiration. and we'll see.
We should have a new column show up under here. Execute. And let's take a look. There it is. Let's take a look at it. Save it in here and we'll launch it. As you can see, it has the text on the screen and it fades away. There's the next song. Automatically puts on the text as well. And the third song. Very nice. That completes that. Now, there's a couple things that we can do to make this look a lot nicer. Now, we can easily just keep this working as it is, and it'll work just fine.
However, if you want it to be a little bit more clean, we can take all of this here, and we can make that into its own subnode. Let me show you how to do that. So, now that we've highlighted all of these nodes that we just created, we're going to go ahead and rightclick and choose convert 19 nodes into a subworkflow. And then we're going to ahead and give it a name. In this case, let's I'm just going to call it the tutorial B1. Confirm. And then that puts all of those nodes into this nice
little subnode here for You. And it looks a lot cleaner. Now, we need to change a couple things to make sure that everything is going to work properly now that we have the sub node. And if you click on this here, if you double click that, it's going to open up this window. It's going to give you a bunch of information of what it thinks is needed to go forth into the next section. So, how do we how do we update this list here? If you rightclick on this and go into go to subnode workflow,
this is our workflow that we just created. Now, in order to get those variables, let's double click this guy here. And these are the variables listed on the left hand side. So, let's start at the top. We do need a name. So, we need a prompt. Keep that in lowercase here. We're just going to keep everything the way that it is. Uh, allow any type. The next one down, let's just Change this to duration. Uh, allow any type. We need a theme, allow any type. We have file name, allow any type. We need an ID
again, allow any type. And then we have title, and that's going to be an allow any type. When you click the drop down, you see that you can choose different objects here. Um, so allow any type would allow us to use any one of these At any given time. We're going to save this and we're going to go back out here and we're going to double click this and we're going to click on the refresh icon so that we can refresh what we just changed in the note. And as you can see, it's updated. And
we want to make sure that we have the right information listed here to pass through into that sub node so it knows all the Information. We have the title. We have an ID that we're going to get from down here. This is the ID. We need to bring that through. We have the theme. Let's see. We have grab the theme from right here. We have the prompt. grab the prompt to put it in right here. And then we have the file name, which is going to be this guy right here. And as I had mentioned,
we're going to need that later on. So now that we have all of these available, We're going to click play on this guy. Okay, as you can see, it errored out, which is fine. In order to get into that, you double click it, go into where it says view subexecution. So click on that. Yes, an expected outlook here. So, let's grab and make sure we have everything properly configured. So, we're going to click on debug and editor. Let's get back to here. Let's double click this guy and let's see that we have all of Our
output, which we do. Let's go into our AI and verify everything is correct in here, which it wasn't. So, let's click on this. And we're going to need to get the prompt. Let's delete that. And this is the prompt. We'll make sure that prompt is in there. You can see it's green. Now, down here, we also make sure we have the right information. So, we'll grab this and pull it over here. Again, now it turned green. So, everything is good There. We'll click on this one. We don't need any update anything in here. We do
need to update something in here, which is the file name. So, click over here next to start. Grab the file name. We'll put that in there. So, it has the right file name. Everything else is good in green. So, we don't need to update anything else. Now, when we loop over, we're going to go into our HTTP request. So, this is the Create image one. We scroll down. We'll make sure that we have the right prompt in here. And it looks like we do. and it's green listed over here. Also, if you wanted to put
a style, we could put a style in here. I'm going to go ahead and update this. Let's put a style in here that we have used before. Illustration anime so they all turn out proper. Let's see if that works. We have our weight node. We don't need to update that one. I don't think we need to Update anything in here. We won't need to update anything in our code. We won't need to update anything in here. probably need to update this. What is the name of the file? We can grab that here from start. We
have the file name. We can grab it from here. Or actually, let's look where we have the git prompt and URL. And still this one has file name. But if we rerun this one here, It's going to want to create new images, which is fine. But at least we'll get the right information. So that way we can update here now. Looks like that's going to grab the correct information now. And let's take a look down here. There we are. So we have the file name, which is correct. We have the duration, which is correct. This
is where we need to update the file name. So we'll go to start. We'll grab The file name from here. We'll put that in right there. That should have the right file name. We have the right draw text. We're good there. Save that. We don't need to update anything in here. We don't need to update anything in here. We don't need to update in there. We don't need to update this. The upload video. We need to make sure that we have the correct information here. And we're going to grab the file name under the start.
There's the file name here. So instead of the file name, let's say file name. There we are. And then the last, let's double check here to make sure everything is correct, which it looks like it is. We can save it. And if we go back, we can try running this again. Okay, now we have the green check mark. Lets us know that everything is working properly now. And we can easily run this on a V1 with no issue. However, if you do want to add a V2 so that you can grab the second song that
it creates in order to decide which one you want to use for your videos. Let's create that real quick. Simply, let's copy these three. Paste those. And then let's duplicate this guy. And let's connect the success to this one. Let's unpin these. And let's pin all of These. It's not letting me pin that one. That's okay. So, let's update. So, this is going to be for version two. So, we're going to update this one to version two. So, we're two. And we want to change a couple things in here. We need to make sure that
from the list we choose songs 2 for our second versions. And then we'll need to update everything. Okay. So for our theme, grab that from here. We're going to grab the title listed in Here. We're going to grab the duration listed in here also and the song URL and the prompt. That should execute properly now. And if we go back into our sheet under songs 2, you can see now that it's been added properly. Right. Next, we're going to go ahead into this one. I don't think we need to change anything in here. We're going
to rename this to V2. Execute. It adds the Cleaned file name. This one we're going to rename to V2. We're going to grab the right songs. Execute. It grabbed the songs for us. This one we're going to rename to B2. And we're going to make sure that we correctly put it in the right bucket. And this is going to be our Puno2 bucket. And we don't need to change anything else. Execute. And it has put those in the Puno bucket for us. Let's make some changes in here. In the version two under the workflow, We
want to make sure that we choose the workflow pseudo version two. If we don't change this, anything that we change here is going to reflect in the V1, and we don't want that. So, make sure that you update this to V2. And then we're going to go through and change all of these. This is going to be version two. This is going to be version two. We'll update all these down the road. Save our changes. Now, before we execute This, let's go ahead and go into it. Rightclick, go to sub workflow. We want to make
sure that we've updated everything in here first. Okay. So, all this information is pretty much going to be the same. Where we put our images needs to change. So, we got to make sure that this is in pseudo 2. And then we need to update our ffmpeg to make sure that we're correctly gathering the information from the right folders. Image suno2 and these 2 folder For the music. We have the same title information. We don't need to change anything there. Save the changes. The only thing we need to do is update. We need to make
sure that this says version two so we know which version it is. And then when we append, we need to make sure that we're updating the correct version here. So let's add a column. We're going to choose version two link. And we're just going to copy and paste that in here and delete the version one link. And make sure that this is on expression. There we are. And then everything else looks the same. So we're going to save that. We're going to go back to our main workflow and we're going to cross our fingers and
make sure everything works. Looks like that finished and we got the green check mark indicating that everything was posted properly. Let's Take a look. And we can see under the inspiration that there is another link listed here. You can download that one. This is going to be the version two. As you can see, it says version two. Now that we have all of that complete, that gives you the opportunity to go through and take a look and see which ones you want to keep and which ones you don't. If you don't like them, simply delete
that line. The cost to create the music over at Key AI is very minimal. 12 credits per run. And so when you're creating three songs, that's only 36 credits. And for $5, you're getting a,000 credits. So, you can create quite a bit of songs for your $5 that you want to spend. Use it wisely, but also it's a good way to get some good generated music going. The last thing that you want is to post it to social media. So, this can run on a schedule. All you have to do is update the schedule here,
and you can say you want it to run every day At midnight or whatever time, and it'll automatically run for you. and it'll output all of that information to your Google sheet. And then when you get up in the morning, you'll have a new song, two new songs to review. And if you like it, keep them. And if you don't, delete them. Then what will happen is you'll need to post them to your social media. So let's get that settled. We'll create another trigger here, And we're going to keep that the way it is. We'll
execute that. We're going to grab the information from our Google sheet. So, this will be for let's say version one. Grab sheets. We want to get all the rows from a sheet. Make sure you have your Google Docs selected up here. We're going to choose our document and it's in the inspiration that we want to look. We're going to add a filter. The column that we're going to look for is the post status and that's going to be Pending. And we only want to return the first matching row. So under options, return only first matching
row and toggle this guy here. And if you click on execute, it should only bring in one item. And that's going to be the next one in our list. So if you take a look here, it's going to be row number six or ID number five. Row number six, ID number five. And if you look here, this is the first one says pending. So it's going to grab all Of this information from this row. See how it grabs both links. Now I use potato in order to upload my information. So we're going to grab a
node here and it's going to be upload media. Make sure that you have your potato credentials listed in here. And if you don't, click on create new credential. Put in your API key and you'll be good to go. In this we're going to for the resource we're going to choose media. And we're going to choose upload and we're going to click on the media URL and we're going to grab that from the version link that we've chose whether it's going to be version one or version two in this instance that we're creating we're going to
choose version one so we're going to grab version one link and grab it and put it over here and then we can click on execute step and that's going to go ahead and put everything where we need it on the Potato servers the next we're going to choose plot again and in this we're going to choose Create post. Choose your Plot account. Choose post. Create. Choose your correct platform that you want to post to. And then choose your account that you want to post to as well. After you choose the account that you want to
post to, you're going to fill in the text. This is going to be for the body of the uh YouTube video that you want to post to. The media URL, we're going to grab that from here. The video title we can get from here. Privacy, whether or not when you post it, it's going to be public or private. My suggestion is put it on private. That way you can go in and edit it and make it pretty and put in your table of contents, including all of your timestamps and everything else. Whether or not it's
made for kids, whether or not you want to notify subscribers, and If it contains any synthetic media such as AI images. might want to check that if it's because it's all going to be created with AI. If you need to add any other options, you can click on this for a scheduled time that you want to post it. If all looks good, all you have to do is click on execute step and you'll see that it was posted successfully. This right here will now then allow you to post these created LOI videos on a Daily
basis or however often you've set your schedule timer. Now that everything has been posted, what you'll want to do is update your Google sheet, letting yourself know that it's been posted properly. So, we'll go ahead and choose sheets, and we're going to append or update a row in a sheet. We're going to choose our Google sheet that we've been using. We're going to choose the inspiration uh sheet that we've been using all Along. We're going to select the ID to match, which we can get from here. Grab that ID and put it in here. That
way we know we're selecting the right row. And then we're going to the only thing that we need is the version one posted down here. And we're also going to need post status. So make sure that you include post status. so that when you post this, it will change pending to complete. So that way it Doesn't grab the same one the next time it tries to run. And in here, we're just going to go ahead and type in complete. And for the version one posted, we're going to go ahead and put in this little command
now, which will automatically input the correct date and time. You can duplicate this again to do version two if you want and then post it on a different day or you can keep it The way it is and have a good time with that. And if you guys have any questions, comments, or concerns, be sure to go ahead and leave them down in the comments below and let us know what you're currently working on. We'll catch you next