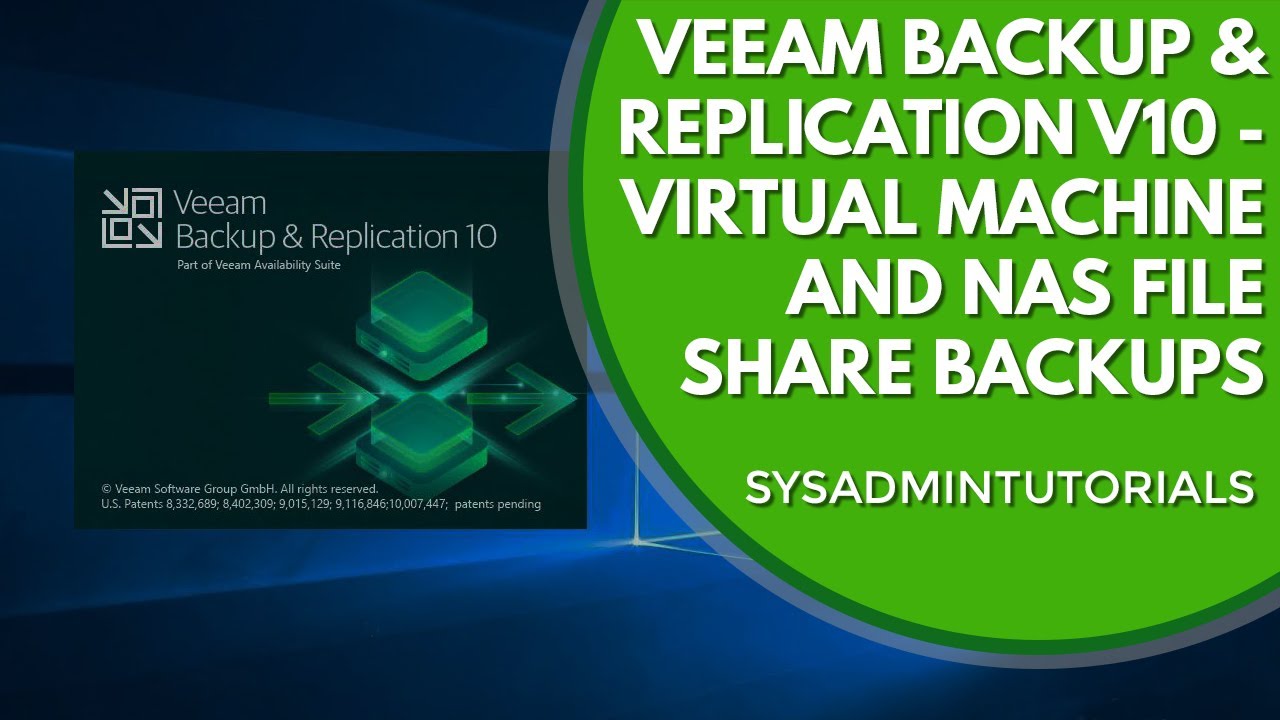
[Music] well hello folks today i'm going to make a video about free functionality of beam backup and replication it's a product which can be used to backup vmware hyper-v machines and a few other things and we'll focus on virtual machine backup i'm going to look only at the free community edition functionality you can request a trial key for 30 days but that will expire and i'm more interested in explaining a long term backup strategy and setup specifics i will focus on quite a few technical things to make sure the setup is well explained one thing i will ask of you do not consider this video an official statement from bim company the whole content is based purely on my experience let's get on with it we will start by going to the website https www. vim. com and then you would want to go to the download section if you try to download something you must make an account in the top right but it's free you just need to provide your email address and out of the whole list i'm going to focus today on the free community edition of veeam backup and replication so we will not be looking at monitoring products only at the backup products click on the download button and in the next page you can select the latest build available at this time it's version 11 version 837 and by clicking on download button will proceed once the download is ready double click the file which will mount the image to your virtual cd-rom and now you can run the setup in this window you have quite a few things to install we'll start with veeam backup and replication itself the setup window is followed by mandatory end user agreement which you have to accept to proceed and the next step can be skipped because we do not plan to use a paid license of the product that will only limit us to community edition so i am going to install vmware cup replication itself this is the product the next product the backup catalog is useful if you would like to connect this machine to a server with enterprise manager it exists by default it doesn't do much by itself and finally the console is an extra installation which basically allows you to connect to even backup server so starting with version 809 i think we got this console so you don't have to remote desktop into vm backup server you can connect to the remote console application which is a standalone installation you can select the path where you want to install in my case i'm going to go with my c drive i still have plenty of space there and i can expand it but you may want to pick a different option if you don't have enough space the next step will provide you with the list of requirements which you are likely missing and you have an option to install them straight away at this point you could have some problem if you would have let's say trouble with installations of specific components and that's something that can be investigated by checking the event viewer information all of these can be installed separately as well so if they are not installable through this window you can look up these names online on google and download them separately and also if it fails in this window uh the failure may be not clear to vm installer but if you try to download and install the product itself let's say microsoft universal c runtime you could see the exact error and fix it let's proceed this is a bit of a boring step you just need to wait for everything to go through there is not much user input involved so i'm going to skip through this all right it looks like everything is in order now i don't plan to recheck everything is green so let's go the next step allows us to setup custom settings you can leave them as is but you could also specify what you need depending on your situation so i am going to walk through all of them at first you select which account will be used to run the main service by default its local system but you could pick any account which satisfies the permission requirements which i think like local administrator and a bunch of other options so let's go with local system account for now at the next stage you select where to put the backend sql database by default it will create an instance on this computer called vmsql 2016 and the instance will be an expressed edition of microsoft sql server if you already have a sql server running you could specify your instance here and you could also name your database if you would like to the problem with the default instance is that because it's express edition it will allow the database to be at 10 gigabytes maximum it shouldn't be a problem if it's a test setup a lab setup or a small environment but if you go for a bigger environment you can run out of the base space so you would have to upgrade your sql server and here you can also type which account will be used for authentication it could be the windows account in this case local system of your computer or the user you specified before or it could be a specific sql user because i want to be able to run maintenance tasks using signal user and i prefer to have a dedicated account i'll have an account assay with a password veeam123 alright this step allows you to define some of the ports normally i wouldn't recommend to touch them these are tcp ports used for server communication and you will also not use most of them for example the catalog and rest api will be only useful if you do use enterprise manager somewhere else and also if you change them you can by mistake pick a port which is normally used by a different program you have so make sure you know what you're doing if you do have to set up custom port settings the next step shows you where does the computer put the cache for recovery i would recommend to put on a drive which has more capacity that's the temporary folder which can be used for specific types of restore such as instant recovery and the catalog is only useful if you are going to again use it further with enterprise manager and this where you'll save the indexing data of your vms i'll put it on e-volume but i'm not going to use indexing because it's going to be a free community edition standalone server so this is just for the configuration only and now we are ready to install [Music] ok and we are done here the installation has succeeded it took approximately 20 minutes because it also tries to install all the extra components which you will not need in the free edition as well as the latest patch let's see what we have on the desktop we should have a new icon which is a console if you start up the console it will decide to connect the local computer because this is a computer installed on and it will use your default password and account you could set up a different user and specified here but right now it's the first start it goes to default port 9392 so it should be this port unless you change it in the installation and now we can connect [Music] you are greeted with a primary interface of the console where nothing is installed or setup yet you have these pricing options which taunt you to buy something so let's start by adding my vcenter before i can backup any virtual machines i have to add this server it will be my vmware with sphere server and now i need to type the name for the description i can name it test lab primary with center i always prefer to leave descriptive descriptions if not for me then for anybody else who would pick it up after me and the next step is to manage your accounts right now you have none so i'll have to create an account i'll use administrative level permissions this should let me connect the levy center and collect the necessary information about virtual machines and it will use the default port for for free for web swap operations soap is a protocol which you use to communicate with the vicenter by clicking apply you should be welcomed with an information about the certificate which you can trust which will in turn start the procedure of gathering the information from the center let's wait for this to finish now that the server is saved successfully let's click next and finish and now we have access to the vsphere infrastructure it shows me the virtual machines which i have access to running on dc center so you might have remembered that i used a specific user to connect to the center if you would need to modify the user right click and go to the properties and on credentials tab you can choose a different user here you can add the user and if you want to manage all the users you have in this console in the global scale for example delete the user you would want to go to the main menu manage credentials and this is where you can create and remove the users there are three default route level users which are used for temporary appliances deployed by vm and then there are users which you create yourself in the same window you can modify the password it will tell you which job we have practiced and which server will be affected if you do that this way you can change the password if it changes in your infrastructure there is no automatic password changing you have to do it manually the first thing i want to do is to change the location of my backups i will not have enough space on the c drive where it points by default so i'm going to go to the backup infrastructure backup repositories and add a new repository which will be attached to the same computer just on a different volume fill my main backup repository on vbr server here we go the path will be on this computer and i will put it on the e volume where i'll make a folder specifically for the backups called backups you can limit the speed of the disk write operations if you don't want to overwhelm the disk activity and you have a number of tasks to configure something that i will review separately let's keep it at four and the rest of the options are not very important for now we'll just click through them i'm just basically changing my default repository to that location okay we are good to go now we are going to change the configuration backup location to the new repository the configuration backup is basically vim saving its own settings if you clicked no and forgot to change it or if you want to change it later the setting is in the main menu configuration backup this is where you can change the repository if it is enabled as a backup i would recommend to keep it because you can use this configuration backup to restore all the information about the settings and backups if your vmco database becomes corrupt now we can get rid of the old repository we don't need it anymore and i don't plan to backup anything on the c drive and we are good to go so let's back up one of the machines for example this server called teeny vm because i know it's very small it will be very easy to backup so you have a few ways to do that at first you can go to home jobs and here on the right click you can make backup jobs you have the same option in the ribbon in the top left and you could also do it from the inventory here that's where your initially you could select the machine from your inventory right click it and select add to backup job and a new job if you would have more jobs you could dynamically add it to other jobs you already have so let's create a new job at first you'll specify the name it will be the test vm first backup top and then you can create a proper description for example in my case it's video for youtube there is a special check mark in the recent version called high priority and if you enable this for some of your critical jobs they will take higher priority in the list of other jobs what i mean is that technically if you run multiple jobs some of them will wait for others and you can start multiple jobs at the same time the high priority jobs will be picked first and the rest will be picked last you could achieve the same result if you carefully balance your settings for the infrastructure but this is like an easy mode to make the job run a bit sooner so now i already have the machine added because i have selected the option to make a job for this machine but you could always add more by clicking the add button and then specifying your infrastructure you don't have to pick every machine you could go to let's say specific folder view on the top right there are different filters and you could select the whole folder you are trying to backup you could also go to data stores and select the whole specific data store you can go to tags and if your machines had tags you'd be able to select them and besides that is a tag combination which allows you to select multiple tags if you need to and then only the machines with two or three tags that they selected be picked you can also pick a specific host as well and if you do that it would basically add the whole container of all the objects and when the job would start the veeam backup and replication would dynamically log into this host and check which machines are there if you don't want all machines from that host to be present but you want to process as a container you have the button exclusions where you can also go and add the machines from the host which you do not want to backup by going to vm list and show full hierarchy this one would allow you to go through the specific machine and let's say stop backing up this vbr 10 machine in the same way you could exclude disks of the specific machines just be very careful with this option because you may exclude the critical disk but otherwise it's possible to let's say remove a disk which you don't plan to pick up at all or to backup system disks only and finally when you remove the disks make sure you select this checkbox remove excluded disks from configuration the most common problem is that you would want to restore this machine later and power it on as soon as possible and if this is not selected the machine will be restored while missing a disk which means that vmware will be unable to start you'll have to manually go in the settings and detach the missing disks and this way vim basically cleans up the vmx file of the machine from the disks we should do exclude and finally you can enable or disable the exclusion of team plates because your a6 host could have different templates on it and those definitely don't change over time unless you do constant changing of the templates which doesn't usually happen so by default they exclude it from processing and if you do have to back them up you can make a separate quick job just for the templates all right but right now we do not need to backup this host so let's remove it and we'll work only with this machine on the storage state you can select a different proxy right now we are only using the backup server as a proxy if you would like to connect to the sphere with a different computer maybe because this computer with vmware capture application doesn't have all the necessary ports open in that case you could select a different windows machine add it here unfortunately right now you don't have this option because it's not added but you can do that in the same way you edit this enter and you also can select repository right now the repository which is a server where you save data is on this computer itself if you want to put backups on a different computer you would want to create a custom repository for proxies and repository selection i want to make a separate video right now let's make the most basic setup the next step is the retention policy for how many days do you want to keep the backups for if you mouse over the i it will explain to you how it works you can also switch from days to restore points this is a more common thing for me because you may not run the backup every day and then it will say keep the history of last seven runs so you can restore seven runs back not necessarily seven days because maybe you haven't backed up in the last three days i will go with register points there are also some advanced options which you are going to skip for now but i will be sure to return to them later and on the guest processing step right now we are also going to skip but this is something that enables vss guest integration basically it will prepare the windows machine for freeze so if you have applications like sql exchange domain controller or other type of services which require preparation for the backup this will freeze the system and avoid corruption right now my machine is even shut down so i do not care about that the second option guest system indexing is completely irrelevant to us because it is only useful if you do plan to use the paid edition within the price manager the next step is schedule you can keep the job as is and then that's it or you can enable the schedule to run every day or on specific days let's say only on saturdays by i'm checking other days this way you can plan the job and walk away from the computer and then you have an option to do it rise for example if there was some kind of a problem like interruption the job would retry and you could say usually i say free retries every 30 minutes because it's unlikely that you are going to fix the trouble in 10 minutes and finally if you do these backups only at night and you don't want them to affect your production machine with performance issues because we do make it snapshot we do download data it does create some load on the production you could enable the backup window and then deny specific hours let's say from 8am to 6pm if you do that in this white interval no backups will run at the moment i'm going to uncheck it so on the summary step you'll be able to see your settings and as you can see by the way even though i do not backup the specific esxi host my exclusion settings remained it's better to clean up the exclusions i can tell you why because maybe in the future you would like to remove that asxi host from demonstration in that case your exclusions will also count as something keeping it locked so you'll be unable to remove it from the interface until you modify the job and clear out this description i should probably make a separate video on possible issues but right now just make sure you have the clean summary for specific machine and it will also give you a specific command line which will trigger normally this job on the server it could be useful so now if you go to the home and backup view you have your first job congratulations let's run it right click and start will trigger the first run of the job which will make a full backup let's wait for it to finish i walked away from the computer and when i came back i can see that the backup is done it took only a couple of minutes because it's a very small machine it has almost nothing on it if your backups take longer it's normal and if you're curious why they taken longer pay attention to the bottleneck field it can say source proxy network or target and if it's source it means it takes time to read from data store if it says network it's time to transfer from your proxy to repository if it's target it's your target repository and the proxy is very rare but it can happen maybe your proxy doesn't have enough ram cpu most of the time it's usually target because the speed of the backup is very dependent on the disk speed on the repositories itself so if your hard drives are not the fastest they're going to slow down the whole process if the bottleneck is source in some cases you can improve it by selecting a different proxy in a different transport mode you can talk about this in a dedicated video about proxies but what's the point of the backup if we don't restore it so let's try that we are going to click on backups disk i'm going to select the backup i want to restore and my machine and on the right click option i have quite a few of different restore possibilities i'm going to go through all of them in separate videos if it's something that picks your interest but right now we are just going to restore the machine itself so we are interested in the option restore entire vm in the restore mode i don't want to override my original machine i'm going to make a different machine and if you would have multiple proxies you could pick the best proxy on this step by clicking pick proxy to use you could go to the list of your proxies and select a different one at the moment it's only one server i'm going to put it back the same host where it used to be but you could click the host button and select a different host from your infrastructure you could also put it on a different resource pool and on a different data store on the host step also you have a choice to even go to completely different infrastructure you are not forced to go to the same host or the same this entry picked up from you yes you i'm sorry for calling out when you select a different location for the machine make sure you pick a different name and different folders for your disks and files because even if you select to put the machine in a different location if there is a target file with the same name it will be overwritten so please be very careful where do you restore to so you don't delete your production data but let's not jump around so after selecting data store where you can also select different locations for different disks if you had to as well as disk type you could switch it from thin to thick and back but right now i keep the disk the same as source on the folder step i can name my machine the new name will have restored suffix i could type it here or i could just check the default checkbox so there is a predefined suffix and i'll put it in the same folder but i could pick a different folder if i wanted to on the network step you have a choice to connect to a different virtual network because if you are restoring to a different host you may not have the same network available but you will still want the machine to be connected to the internet so this where you could click network step and select a different port group you could also click disconnect to completely disconnect the machine from network after it is restored there is an option for security store which only makes sense if you want to test for viruses it is also something new and calls for a different video i am not going to do that and on the recent step i'll say youtube video on 14th of april this is a very good idea to leave reasons of restore operations because it does help other team members to understand what you did i do not like that there is a check box do not show this page again because it takes a while to bring it back if you disable this reason i think it's important and on the summary you can glance at everything we have set up we can also force the machine to power on if we wanted to and now we are clicking finish so this will start the restore process so there is no process finished you can see the statistics if you want to the log in my case is green because there is nothing to break actually and at this point if you go to the inventory and check the center now we see that we have a copy of the machine restored that was the most basic type of restore and sometimes you may want to restore specific files or applications that's something that i can help you with if you ask me for that kind of content otherwise i'll just come back to that eventually once i go through the options congratulations we have managed to set up everything from scratch and at the viscenter create the user for the center make a new repository add the machine to the backup job back it up and restore it that should be more than enough to do the most basic tasks and the rest you can research by yourself or if you like this type of content feel free to subscribe like my videos and i'll keep making more just for your viewing pleasure you can find the product guides if in the systems on help center vim.
com there's a whole reddit community which you can refer to if you have any troubleshooting or advanced questions and of course there are community forums on the site forums. vm.



![[Virtual Course] VMware vSphere Basics: Part I](https://img.youtube.com/vi/HUtXmsGnDuE/maxresdefault.jpg)